Unstructured Data Ingestion
The C3 Generative AI Application supports ingestion of unstructured data from documents, text files, and images. The application uses this data to answer user questions.
The application supports a wide range of unstructured content such as product manuals, scanned documents, meeting notes, and chat logs, in various file formats:
.c3doc.md.c3doc.md.ipynb.pdf.c3typ.doc.docx.html.pptx.txt.rtf.png.jpeg
See the Genai.SourceFileTypes Type for supported formats and extension options.
You can add unstructured data in two ways:
The application chunks and indexes documents automatically after upload.
Upload documents from local machine
You can upload unstructured files directly into the application for immediate indexing.
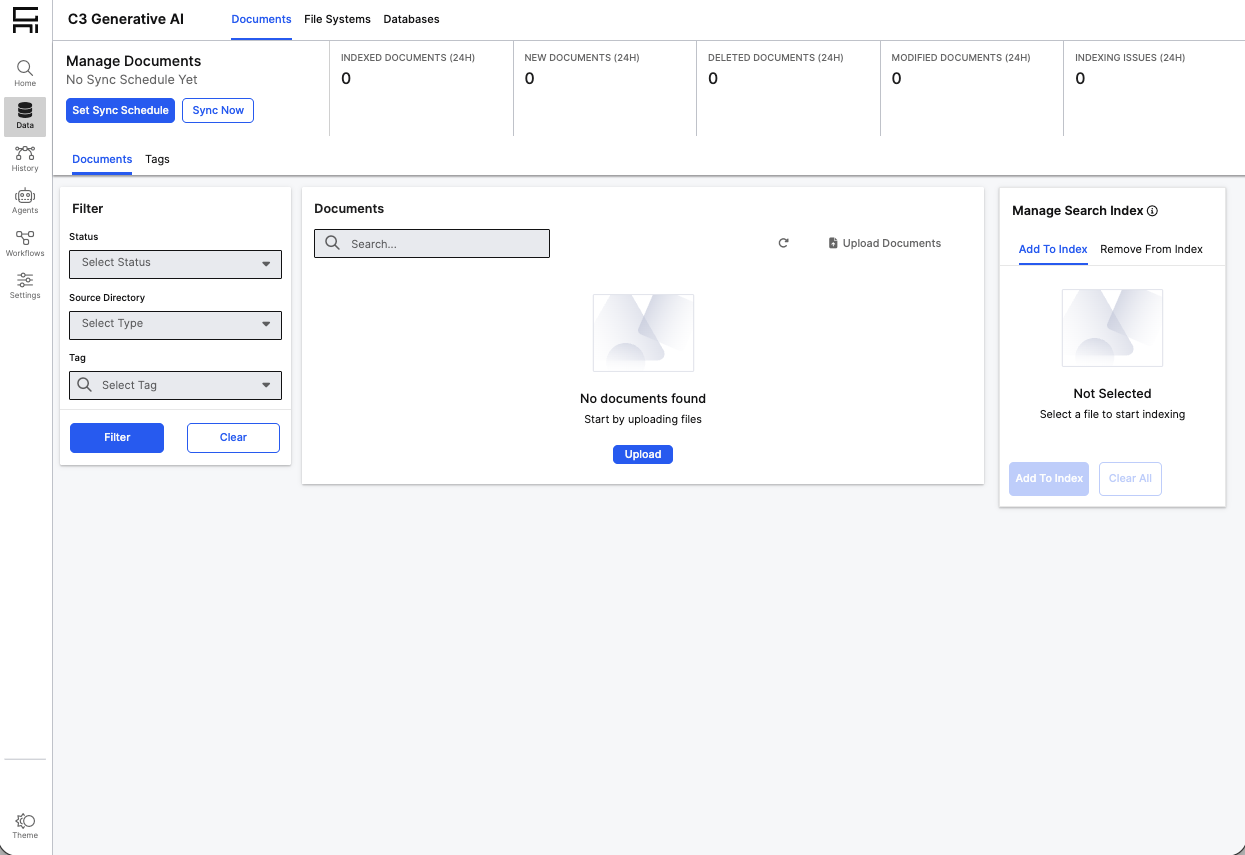
Open the documents tab
- In the C3 Generative AI Application, select the Data icon.
- Select the Documents tab.
- Select Upload, then choose Upload files manually.
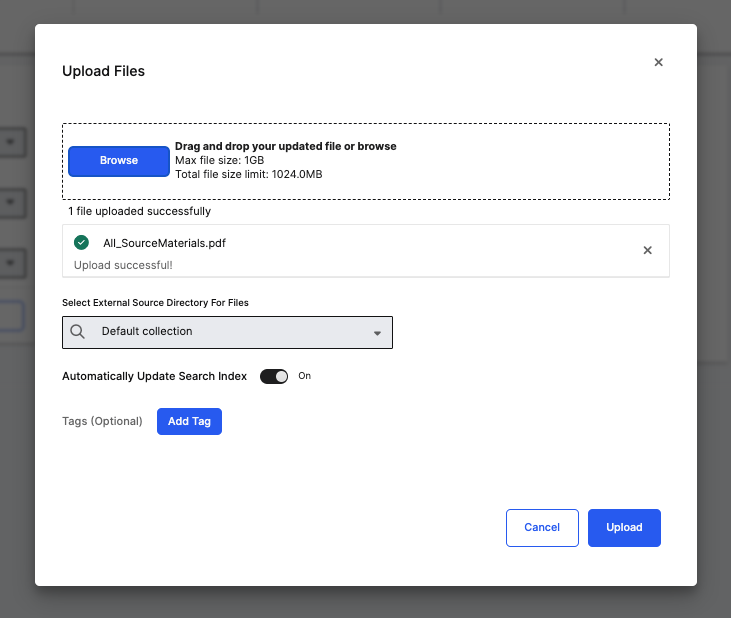
Upload your files
Select the files from your local machine. Example files include:
product_manual.pdf.compliance_policy.docx.customer_notes.txt.support_chat_transcript.txt.setup_guide.pdf.
Review upload settings
Before you confirm the upload:
- Leave Automatically update search index enabled to ensure the application immediately chunks, embeds, and indexes your documents.
- Use the default Directory unless you created a custom data source.
If you don't enable automatic indexing, you can manually start the indexing process by selecting the uploaded files and selecting Add to index.
Select Upload to start processing.
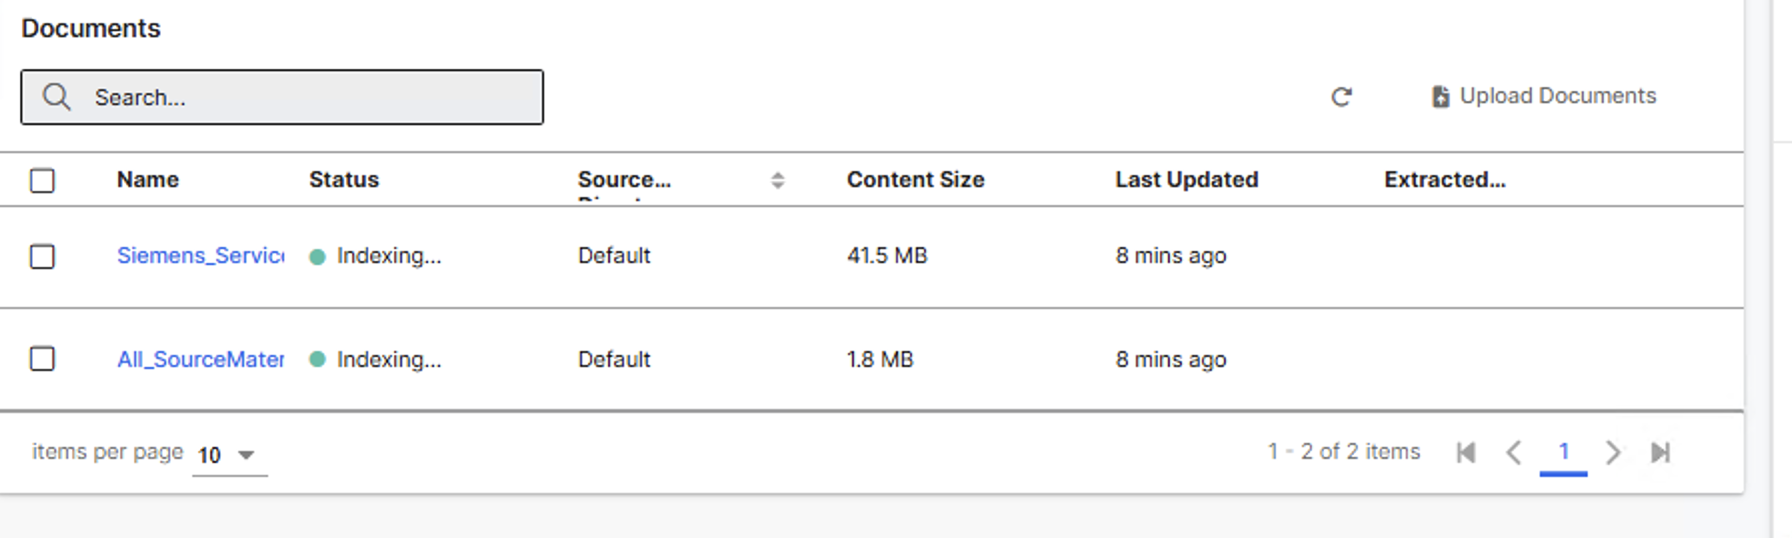
Monitor chunking and indexing
Each uploaded document corresponds to a Genai.SourceFile instance within a Genai.SourceCollection. This object tracks the file's ingestion status, including Chunked, Indexed, and Needs Reindexing states.
To delete a document, select the file and then select the Trash icon. This action removes the document from the index and prevents future syncing or reindexing.
After you complete the upload:
- The application chunks the documents into smaller passages.
- It then indexes these passages into the vector store.
- The application marks documents as Indexed when it finishes processing them.
If a document is modified after it's indexed, it enters a Needs Reindexing state. You must reindex the document to update the vector store.
Processing time varies based on file size and compute resources.
You can track progress in the Documents tab.
If documents fail to index or get stuck in processing, see Troubleshoot Common Issues for resolution steps.
Connect an external blob store
Use a cloud storage connection to ingest unstructured data at scale. Currently, C3 AI supports Amazon S3 as a storage provider.
Open the source directories tab
- In the C3 Generative AI Application, select the Data icon.
- Select the Source Directories tab.
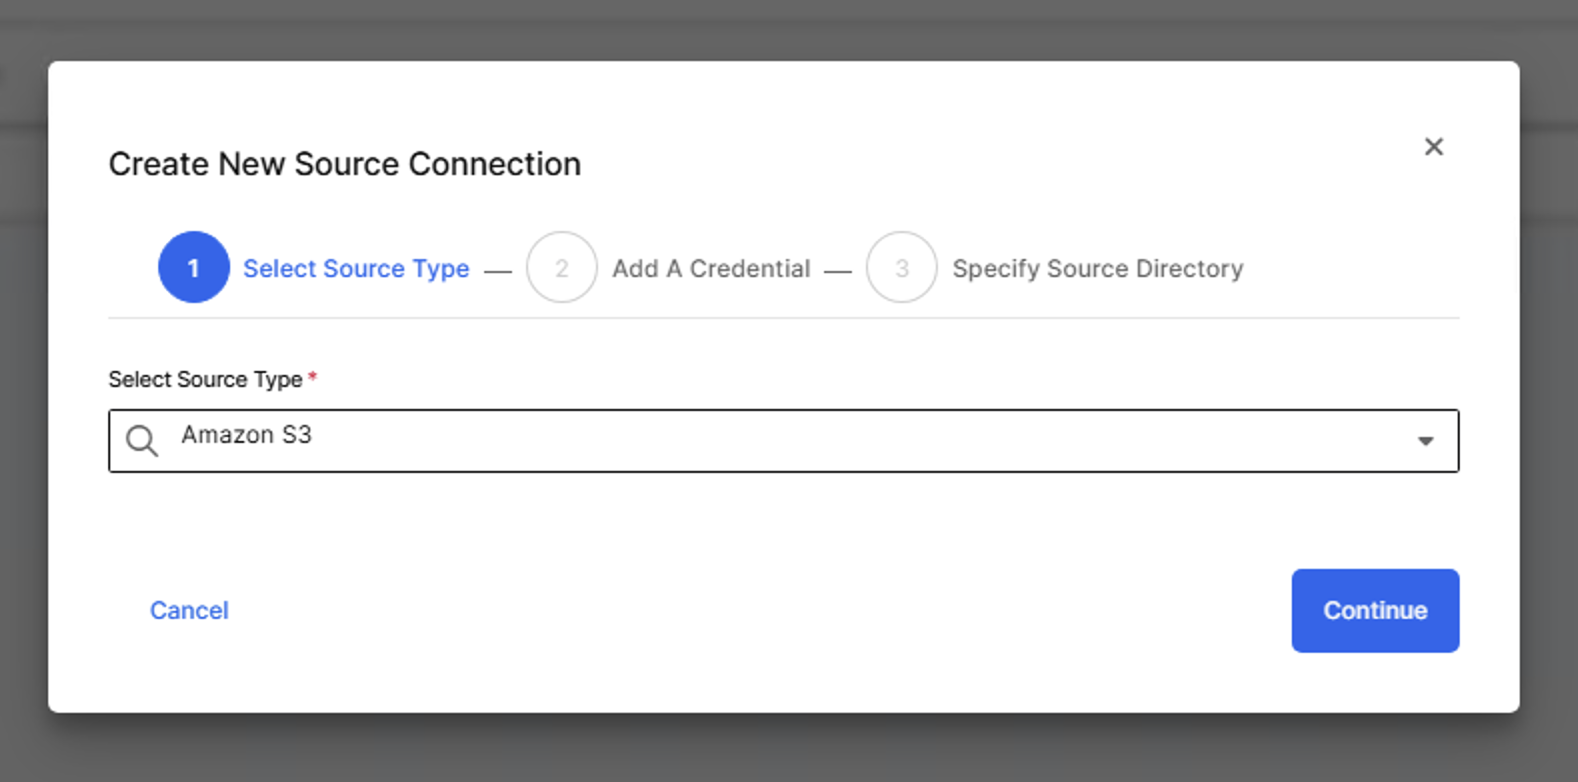
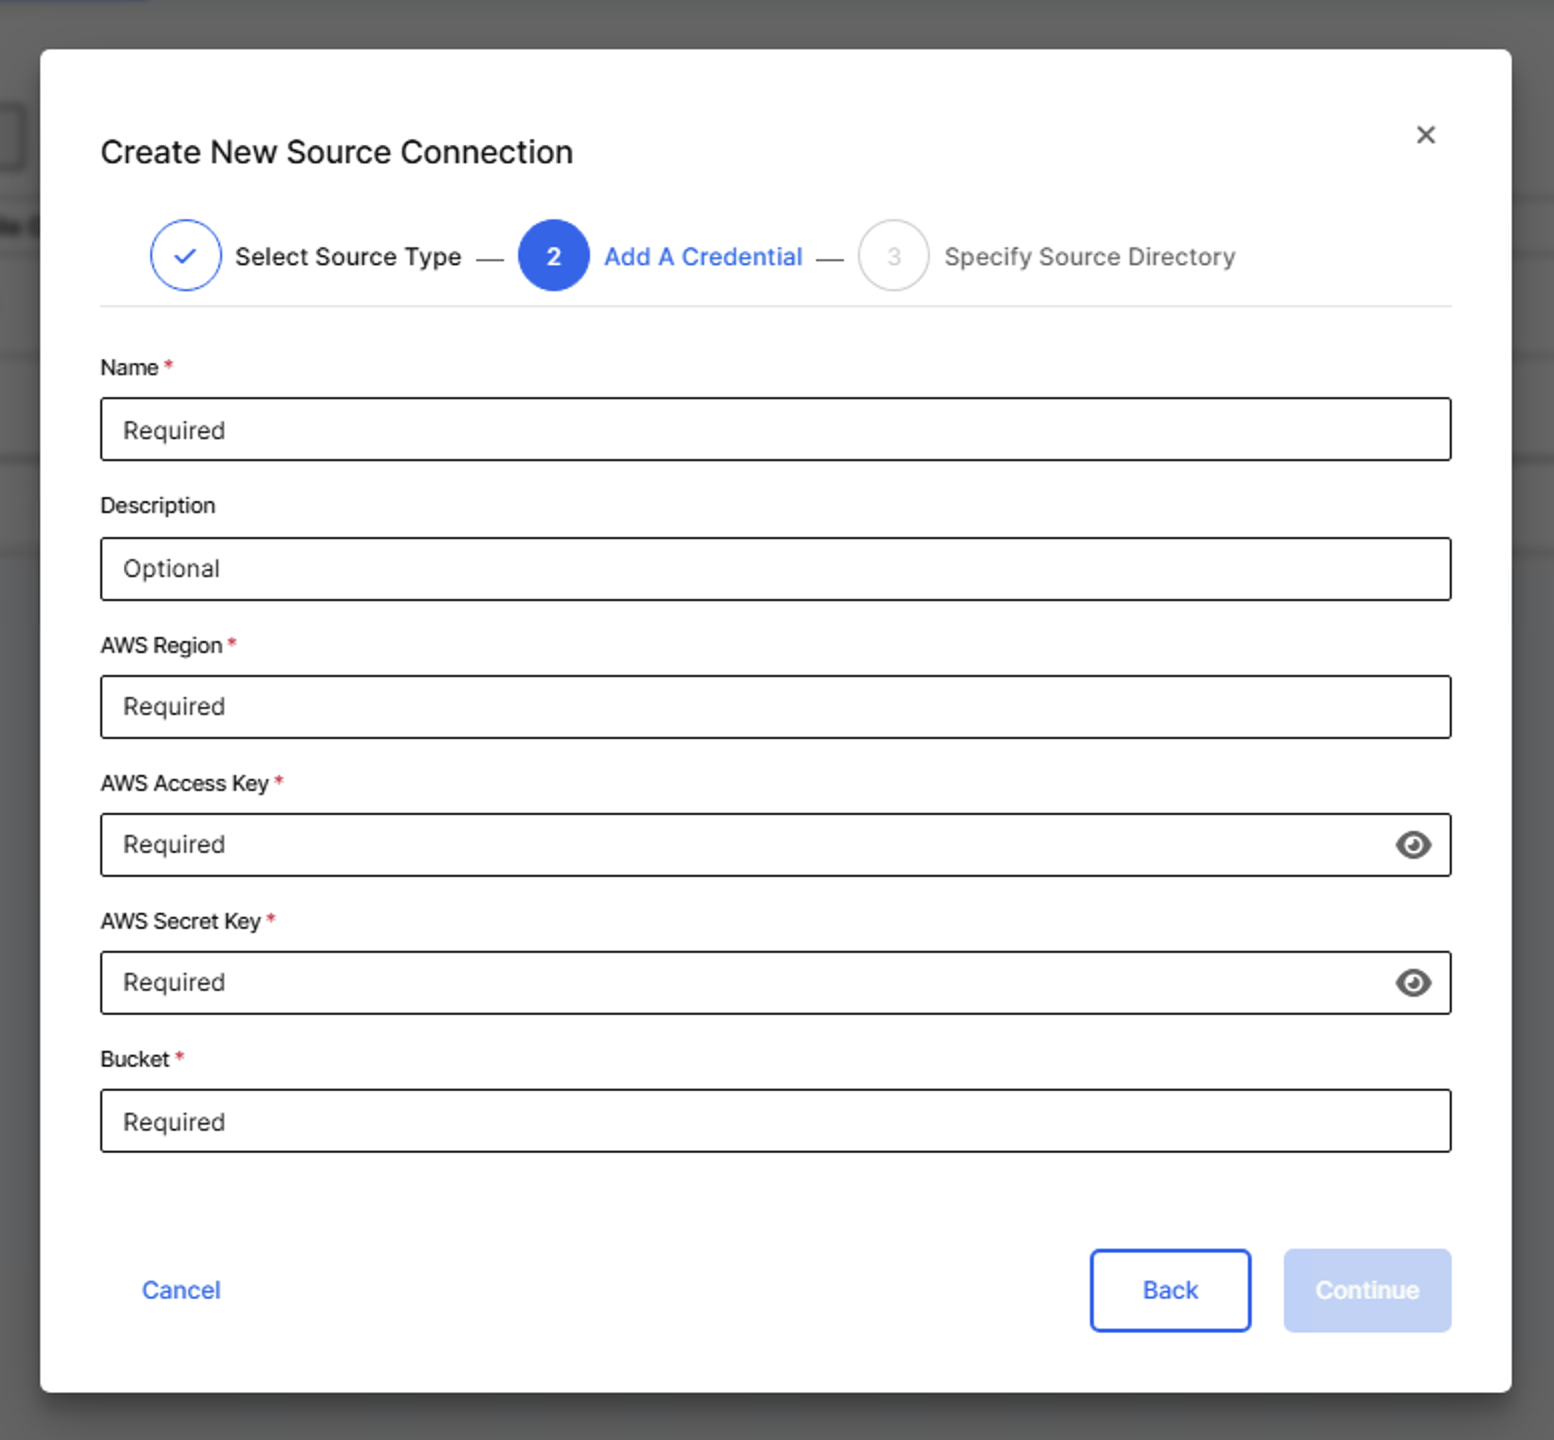
Add a new source and provide connection details
- Select the + icon in the Source Directories tab.
- Choose Amazon S3 as your storage provider.
- Enter the following details:
- Name (required)
- Description (optional)
- Region
- Access key and Secret key
- Bucket name
- Select Continue.
Specify the source directory
- Select the directory path in your bucket.
- Confirm and save the source.
The connected files appear automatically under the Documents tab.
The application chunks and indexes the documents in the background.
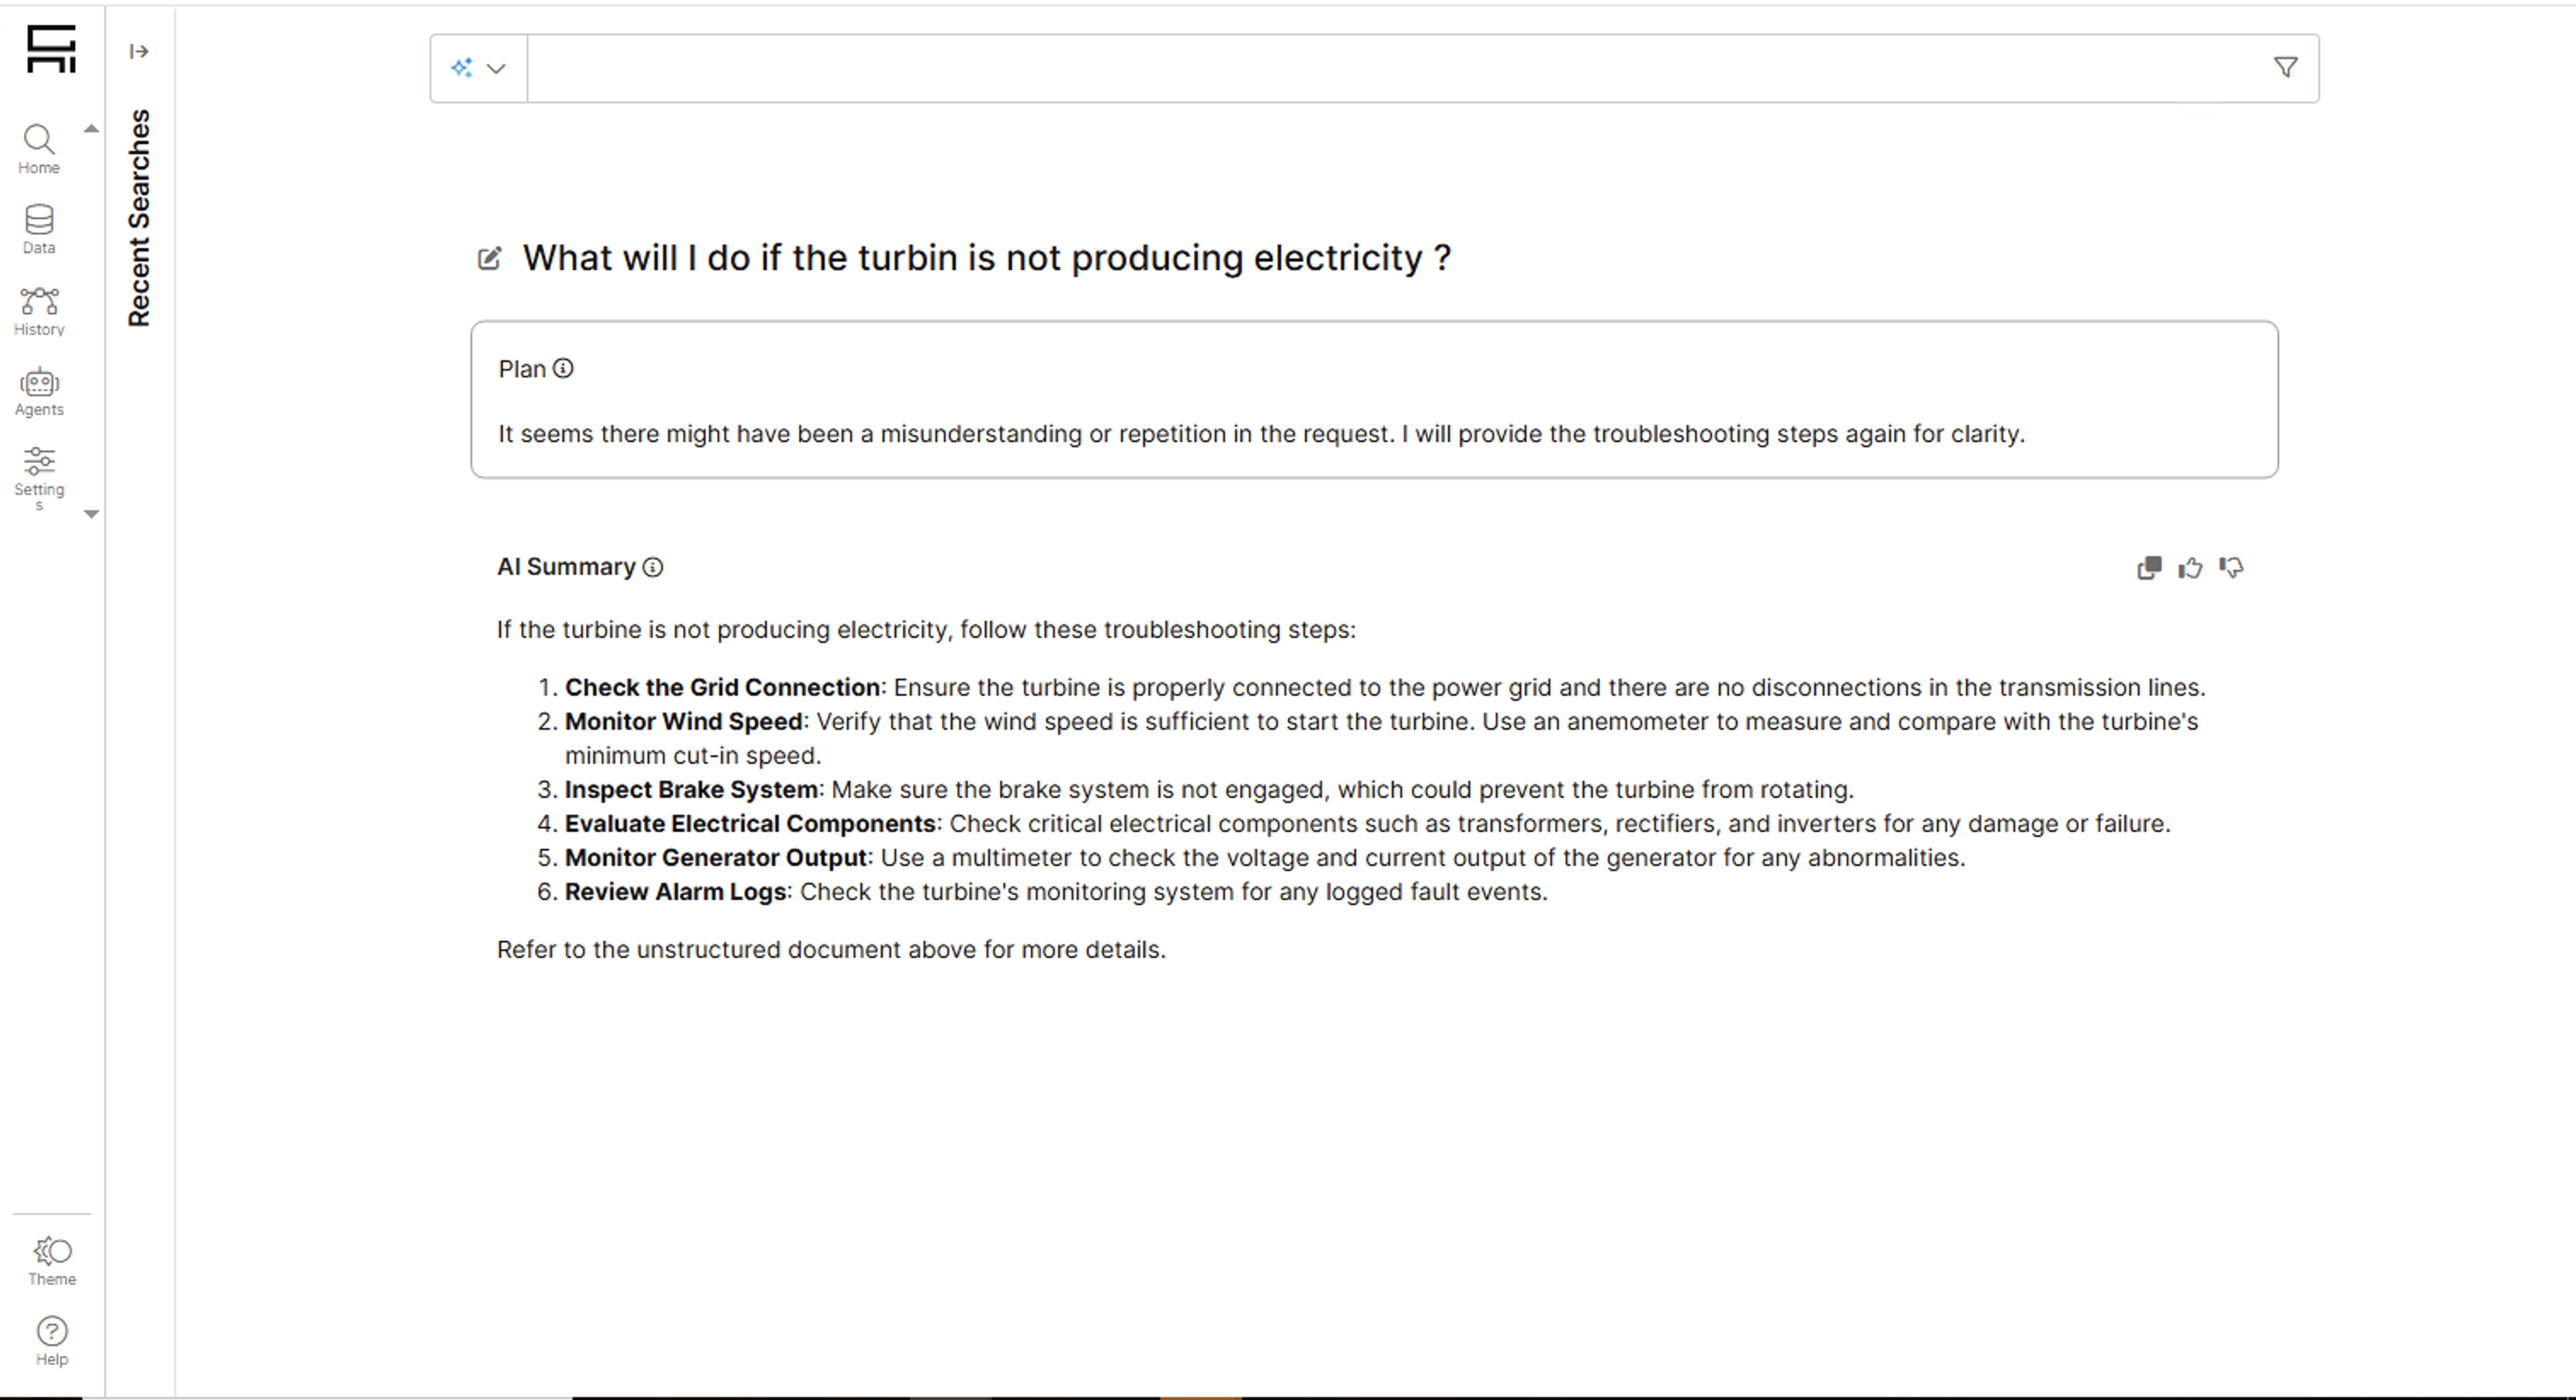
After indexing completes, users can search using natural language. For example, you can ask about maintenance steps or key points from a compliance guide.
Set sync schedules
Use a sync schedule to automatically ingest new or updated files.
In the Documents tab, select Set Sync Schedule.

In the dialog box:
- Turn Sync on.
- Set a frequency (for example, Daily).
- Choose an hour and specify AM or PM.
Enable Automatically update search index to index files after each sync.
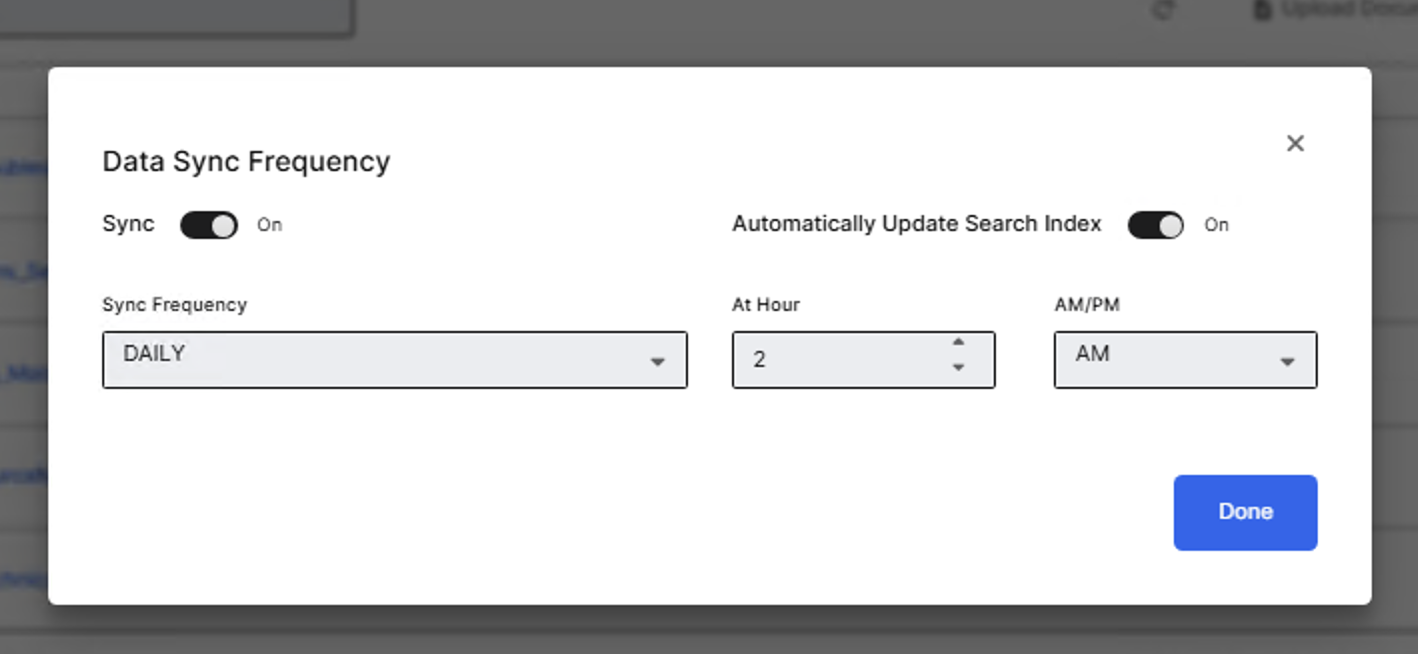
Select Done.
The application runs syncs as scheduled. New files become searchable after indexing.