Configure Workflows through the UI
C3 AI Workflows allow you to build workflows that handle complex business processes by breaking them into smaller, manageable steps. In this guide, you will build an email agent workflow and a supply chain agent workflow and combine them to do a multi-step business process.
Workflow Introduction
Workflows are useful for a defined and automatable process. You should understand the triggers, schedules, and tasks that must be performed as part of the workflow. Each task is contained in a node. The connections between nodes are specified through edges. The edges define execution flow, and a global state maintains all information coming through your workflow.
Create your own workflow
On the Workflows page, select Create new.
In the Workflows chat, enter a prompt into the C3 AI Workflow Agent. Structure the prompt explicitly so each node is associated with a task. A prompt example is: "Ask for the user's name and return 'how are you today' as a greeting."
Each designed workflow requires confirmation of output formats and which template to use. Node templates include:
C3 Type InputCode AgentLLM CallerUpdate StateUser Input
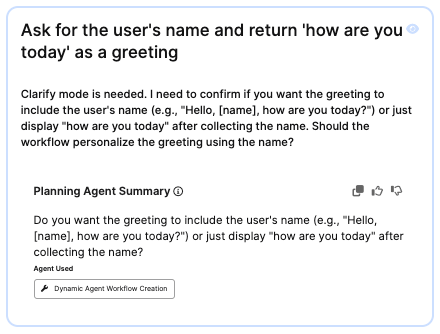
In this instance, the Workflow Agent asks a follow-up question on whether the name should be included. You use the get_user_input_node_template to get the user's name, the llm_node_template to generate the greeting, and another template to show the greeting. The llm_node_template node template passes instructions to an LLM to generate structured outputs.
After you clarify the node behavior through prompting, the agent will state,
Build mode is appropriate.It will confirm the data flow and the connections. In this example, it is:graph TD get_name[get_name] generate_greeting[generate_greeting] show_greeting[show_greeting] get_name --> generate_greeting --> show_greeting
In this workflow, get_name, generate_greeting, and show_greeting are the nodes, and the connections between them are the inputs and outputs. You can inspect each node to see a description, inputs, outputs, and instructions to the LLM.
Select Run on the upper-right corner to test this workflow and view its execution flow.
To extend this use case, create another workflow based on the previous example. Return to the Workflows page.
Select Create new to open the Workflows Canvas.
Use a more complex prompt to chain nodes together. If you have structured data in your application, you can create a workflow called
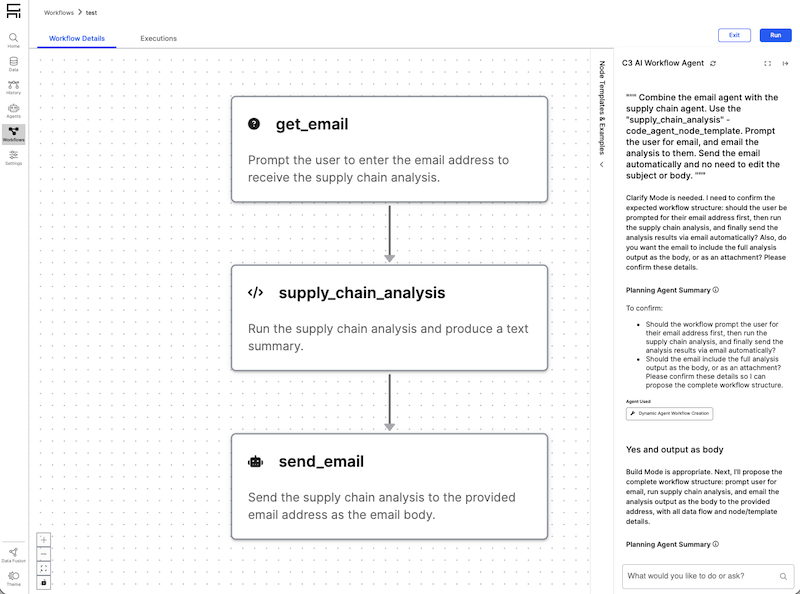
supply_chain_analysis.Use this prompt to build a supply chain analysis workflow: "Combine the email agent with the supply chain agent. Use the "supply_chain_analysis" - code_agent_node_template. Prompt the user for email, and email the analysis to them. Send the email automatically and no need to edit the subject or body."
Once you have completed the prompts, you should see a workflow that gets the user's email address, runs a supply chain analysis, drafts an email, and sends it automatically.