Manage Agent Skills in Studio
This tutorial walks through the in-Studio lifecycle for an agent skill. You upload a skill packaged as a .zip archive, inspect it in the Skill Workbench, publish it to the package, and delete it. The Studio path is the recommended way to manage skills in 8.11 and later.
For an introduction to what a skill is and how it works with an agent, see Agent Skills Overview.
For the underlying authoring rules for SKILL.md format, ZIP packaging, and validation, see Create and Add Skills.
Before you begin
- Confirm the target agent type supports skills through
GenaiCore.Agent.WithSkills. - Package your skill as a
.ziparchive following the rules in Create and Add Skills. - To publish a skill, your environment must be in dev mode and you must be an App admin or higher, or hold the
GenaiCore.AgentAdminrole. Viewing and uploading do not require these conditions.
Open the Skills gallery
- Open Studio for your application.
- In the left navigation, select Agents.
- Select Gallery.
- Select the Skills tab.
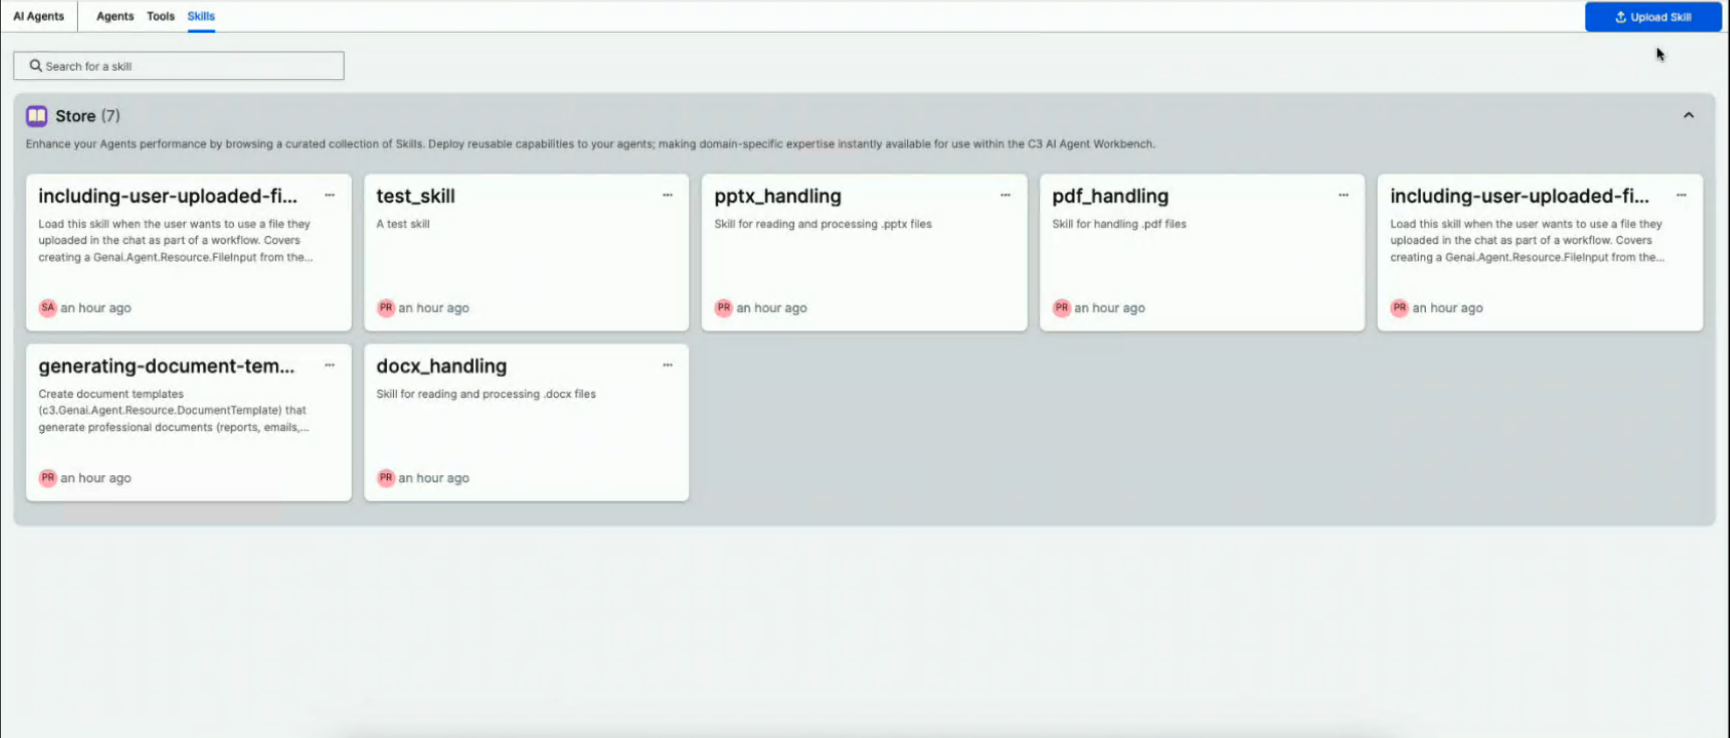
In the Skills gallery, each skill registered in the current environment appears as a card. Each card shows the skill's name and description.
Use the search bar at the top of the gallery to filter cards by name or description.
Upload a skill
- In the Skills gallery, select + Upload Skill.
- In the Upload Skill modal, select the
.zipfile you packaged. - On the Review step, confirm the parsed Name and Description. The platform reads these from the
SKILL.mdfrontmatter inside the archive. - Select Confirm.
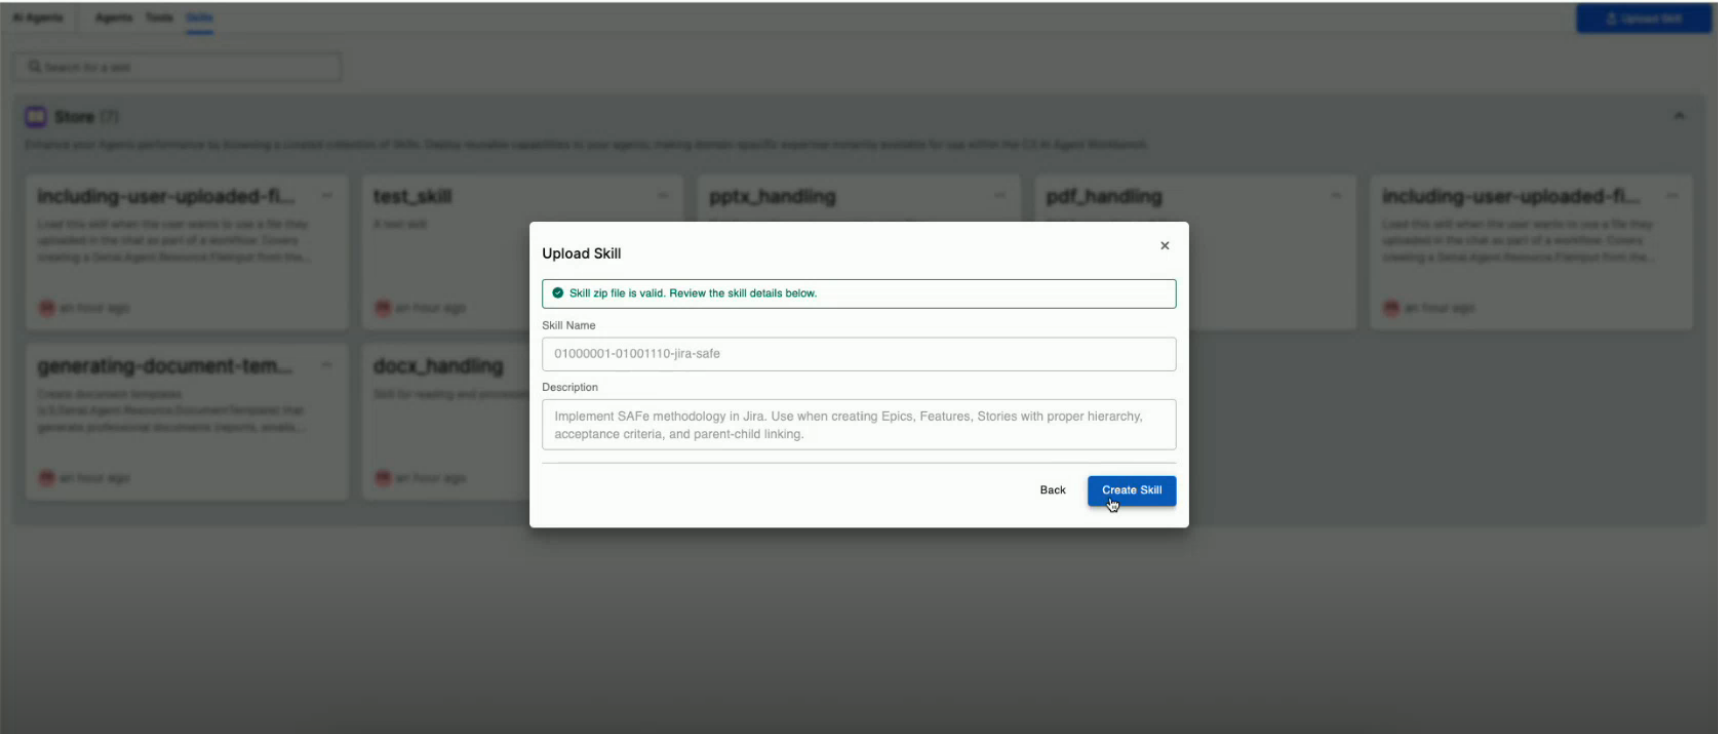
If validation fails, the modal shows the error. Common errors:
- The ZIP filename does not match the
namefield inSKILL.md. The filename without extension must match the frontmatter name exactly. - The frontmatter
nameis not lowercase kebab case, starts or ends with a hyphen, or contains consecutive hyphens. - A skill with the same name already exists in the current environment.
After a successful upload, the Skill Workbench opens for the new skill.
Inspect a skill in the Skill Workbench
The Skill Workbench opens when you select a skill from the gallery or upload a new one. Use it to review the skill's files and run platform actions on the skill.
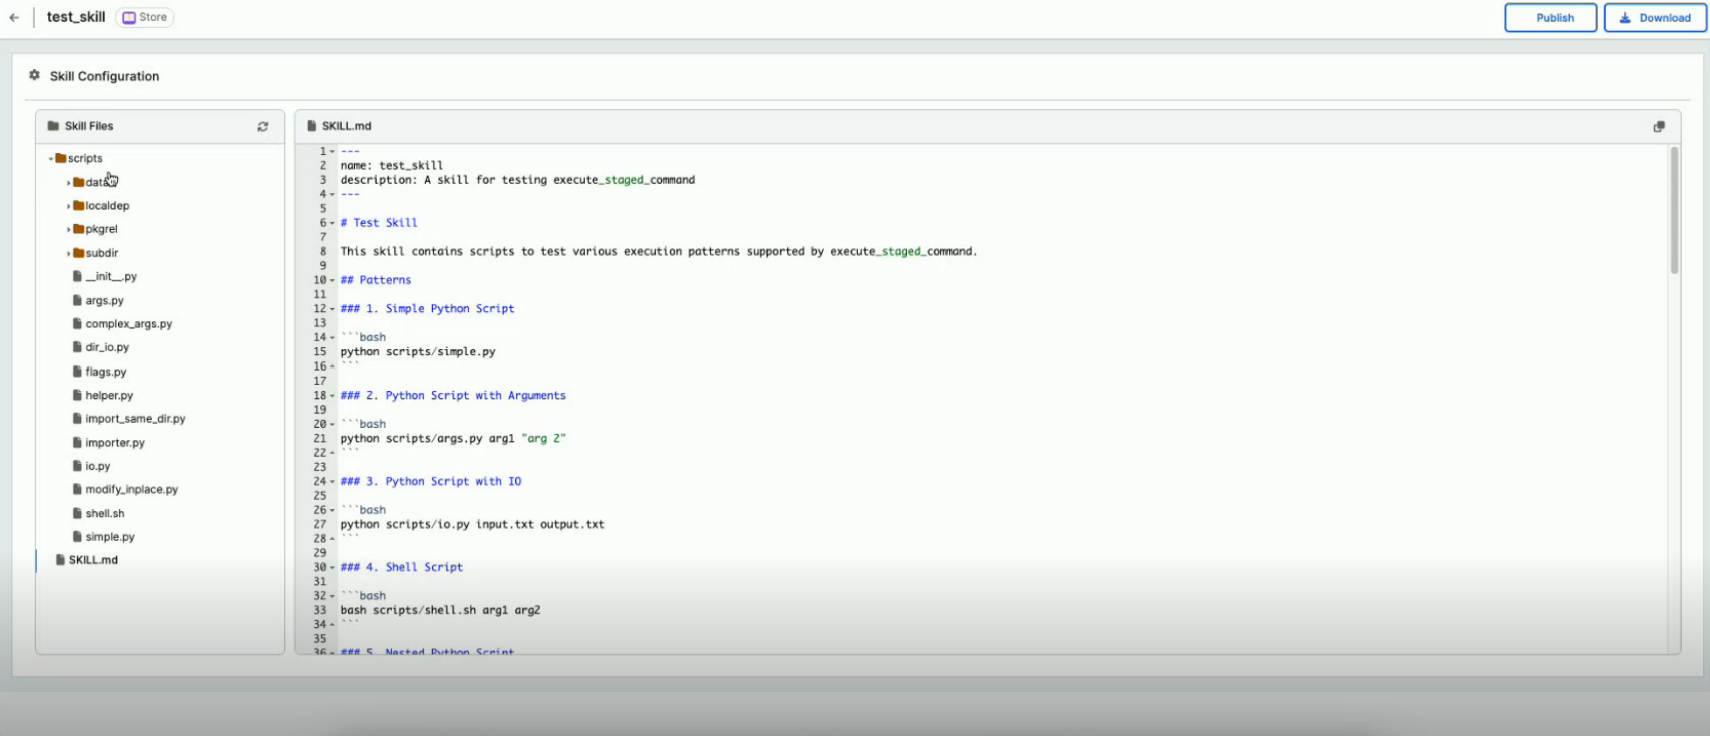
The header of the Skill Workbench shows:
- The skill's name.
- A Download action that exports the skill as a
.zip. - A Publish action that publishes the skill to the package. See Publish a skill to the package.
The body of the Skill Workbench contains the Skill Configuration panel:
- Skill Configuration: A file tree paired with a read-only code editor. Select a file in the tree to preview its contents. The editor applies syntax highlighting for common file types, including
.py,.js,.ts,.json,.yaml,.md,.sh,.css, and.html.
Download a skill
To export a skill as a .zip archive from the Skill Workbench:
- Open the skill in the Skill Workbench.
- In the header, select Download.
The browser downloads a .zip archive that mirrors the skill's folder layout. You can use the archive as a starting point for editing the skill offline, sharing it, or registering it on another environment.
Publish a skill to the package
Publishing adds the skill's SKILL.md and supporting files to the package metadata so the package includes them in every environment that uses the package.
To publish a skill:
- Open the skill in the Skill Workbench.
- In the header, select Publish.
- In the confirmation modal, review the warning that the skill is available across all environments that use the package.
- Select Confirm.
After publish, the Publish action is disabled with the tooltip This skill is already published to the package.
You can also publish a skill from a gallery card without opening the Skill Workbench. The confirmation modal and result are the same.
To publish a skill, your environment must be in dev mode and you must be an App admin or higher, or hold the GenaiCore.AgentAdmin role. If the action is missing or disabled in your environment, check both conditions.
Delete a skill
To delete a skill from the gallery:
- In the Skills gallery, locate the skill's card.
- On the card, select the trash icon.
- In the confirmation modal, review the warning that deletion is permanent for the current environment, then select Confirm.
The skill disappears from the Skills gallery.
The platform preserves the underlying files in these cases:
- The skill has been published to the package. The skill's files remain in the package metadata.
- The skill belongs to a read-only package.
In both cases, delete removes the skill from the current environment without modifying the source files.
You cannot delete a skill while any agent configuration still references it. Remove the skill from any agent configurations that reference it before you delete the skill.