Manage ERD Node Groups
Use node grouping in the ERD canvas to organize related entities, simplify complex diagrams, and manage layout more effectively. This section walks through common grouping tasks, including creating and modifying groups, managing node membership, and controlling group behavior such as collapsing, resizing, and persistence.
Create a group from selected nodes
- Select two or more nodes on the ERD canvas (use CMD + click on macOS or Ctrl + click on Windows/Linux to multi-select). You can also select the multi-select toggle from the toolbar to left click and select multiple nodes.
- Look for the snackbar that appears on the canvas. It shows the selection count (for example,
2 nodes selected). - Select Create Group in the snackbar to create a new group containing the selected nodes.
- Verify the group appears as a visually distinct container around the nodes, with a title at the top-left.
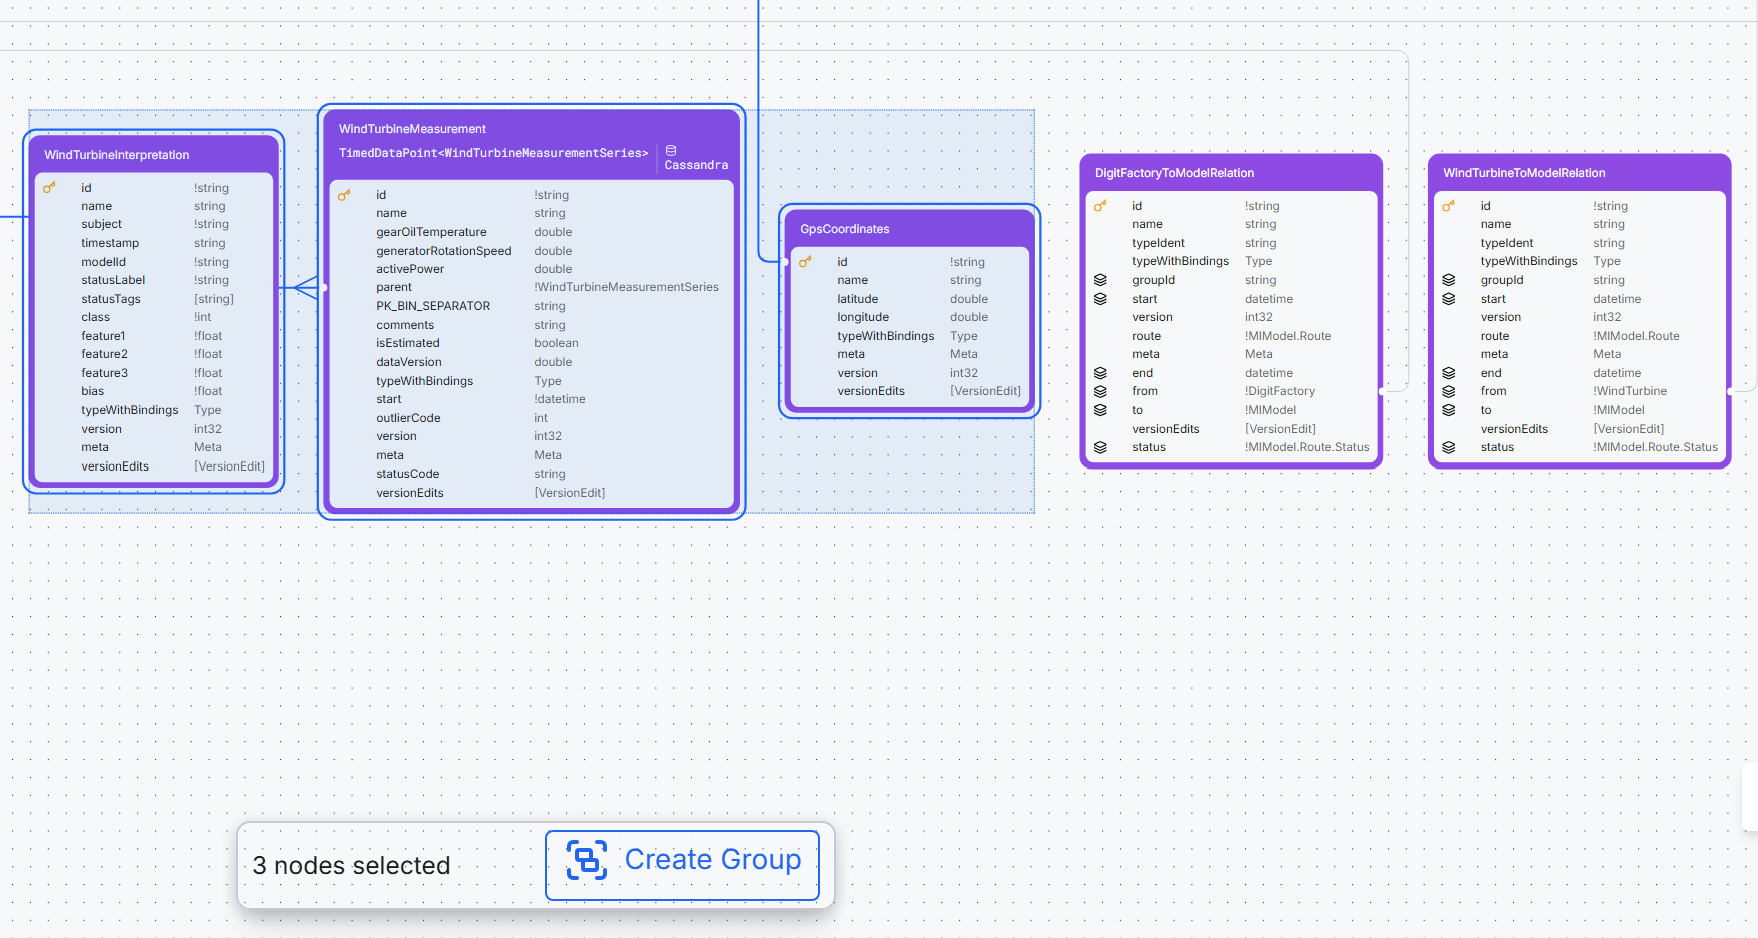
After the user clicks Create Group, the name tag is automatically focused to be named. If the user clicks Enter without naming it, the new group is named with an auto-generated id such as GROUP_bd1b6c. Rename it immediately by double-clicking the title.
Rename a group
- Locate the group's title/tab at the top-left of the group.
- Double-click the title.
- Type the new name.
- Press Enter (or click away) to save.
Title is always displayed at the top-left of the group.
Move a whole group (with its contents)
- Select the group container.
- Drag the group to a new location.
- Release to drop. All child nodes move together.
Move a node inside a group
- Select a child node inside the group (not the group container).
- Drag the node to reposition it within the group.
- Release to drop.
Node repositioning within groups has known limitations. Complex layouts may require ungrouping and regrouping to achieve desired arrangements.
Resize a group
Select a node inside the group.
Drag the node toward or beyond the group boundary.
The group automatically expands or contracts to fit its contents.
What to expect
- The group boundary adjusts dynamically as you move nodes.
- You should see visual feedback while resizing.
Add a node to a group (drag in)
- Select the target group first.
- Drag a node from outside the group toward the group container.
- When the node is over the group, look for a highlight/visual indicator showing it can be dropped into the group.
- Drop the node inside the group to add it.
What to expect
The group boundary may adjust as the node is added to accommodate the new child node.
Remove a node from a group (drag out)
- Select the node inside the group.
- Right-click the node to open the context menu.
- Select Remove from Group.
What to expect
- The node is removed from the group container.
- The node remains on the canvas as an independent entity.
- The group boundary may automatically adjust to reflect the updated contents.
Collapse or expand a group
- Select (or hover on) the group.
- Use the group's expand/collapse control (by clicking the control or using the group toolbar, depending on the UI).
- Toggle:
- Expanded: shows all child nodes inside the group.
- Collapsed: shows the group as a single node, summarizing its contents by displaying child nodes as pills within the group.
Use the group toolbar (collapse, ungroup, color)
Select a group to reveal the toolbar above its top-right corner. The toolbar shows three controls, left to right:
- Collapse / Expand: Toggle between showing all child nodes and hiding them in a summary view. The icon changes between an inward-arrow (collapse) and an outward-arrow (expand) state.
- Ungroup: Dissolve the group and release all child nodes back to the canvas.
- Color circle: Open the color picker to choose a new background color for the group. The picker shows a vertical column of color swatches.
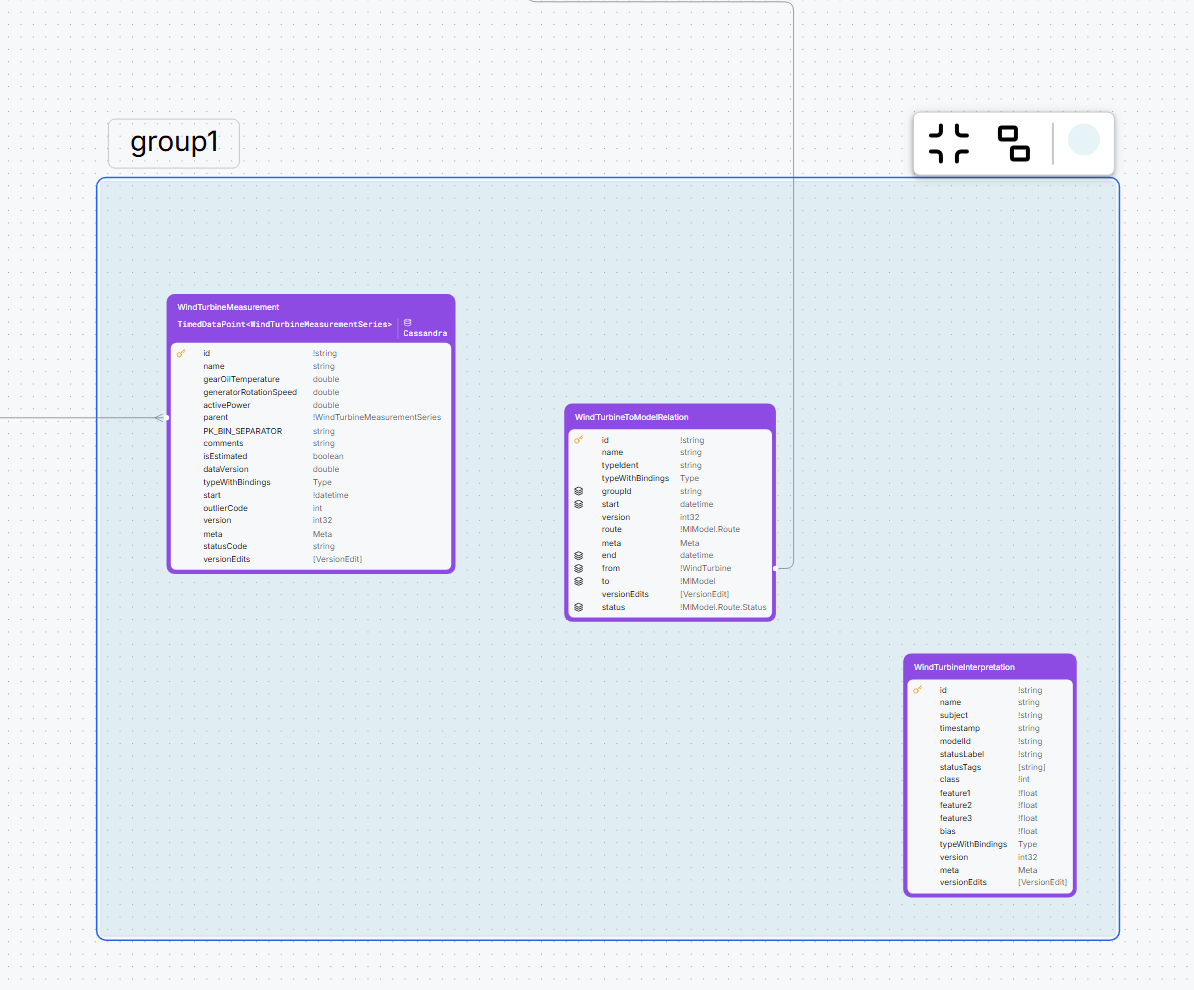
Ungroup
- Select the group.
- From the group toolbar, select Ungroup.
- Confirm the group container is removed and the nodes remain on the canvas.
Persistence (saving your ERD view)
Group membership, titles, and collapsed or expanded state are saved as part of the ERD view. When you reload the diagram, the grouping is restored exactly as configured.
Known limitations
Group nesting is not supported; you cannot create groups within groups.
Best practices
- Use groups to organize related nodes for cleaner diagrams, especially in complex models.
- Name groups meaningfully to help team members understand the logical relationships.
- Leverage collapse to simplify view when presenting or exporting diagrams.
- Save frequently to ensure your group organization and collapsed states are persisted.