Configure Change Data Capture (CDC) in Data Fusion
Data Fusion is in Beta. Please contact your C3 AI representative to enable this feature.
The Change Data Capture (CDC) feature in Data Fusion enables incremental data integration by automatically detecting and propagating changes from the source system to the Lakehouse.
Follow these steps to configure CDC for a data source in C3 AI Studio:
Step 1: Select Tables for CDC
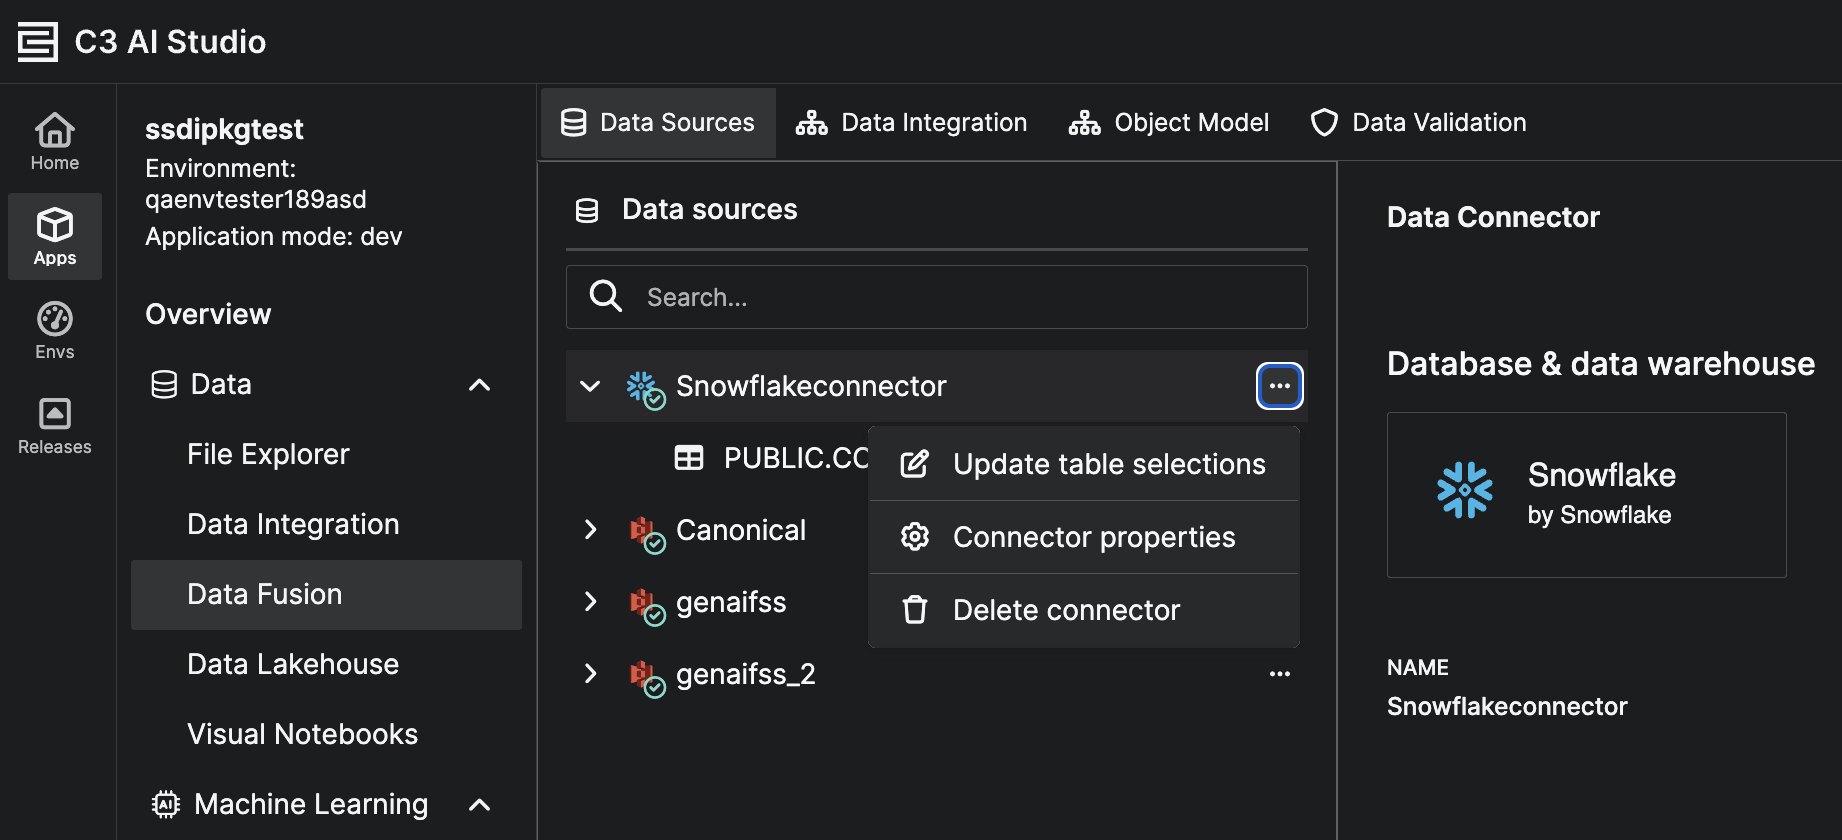
In C3 AI Studio, navigate to Data Fusion › Data Sources.
- Locate the data connector (for example, a Snowflake or S3 source) from the list of available sources.
- Click the ellipsis (⋯) next to the connector name to open the options menu.
- Select Update table selections to open the Add data source dialog.
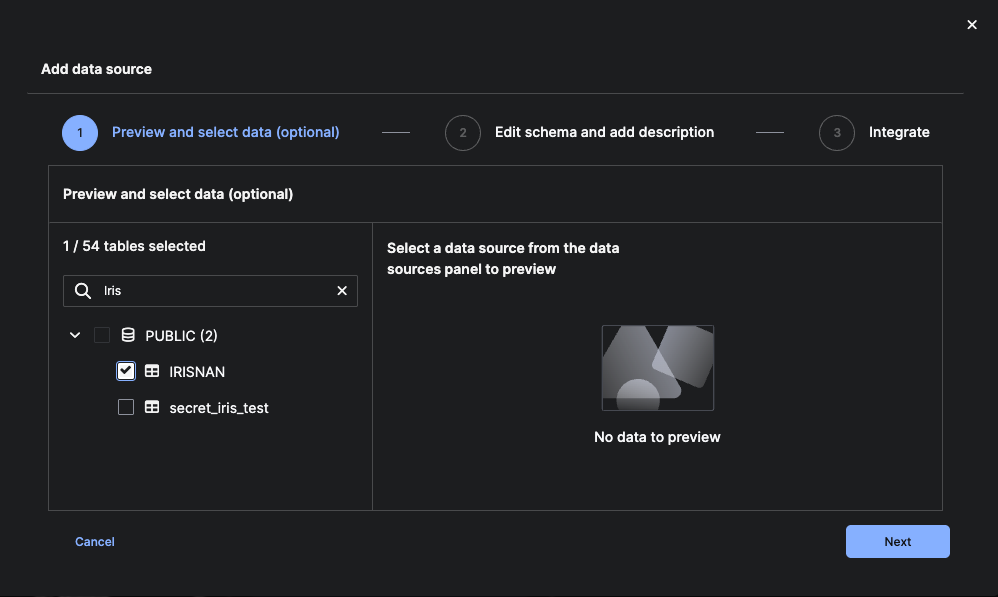
In the Add data source dialog, under Preview and select data, choose the tables to include for CDC:
- Use the search bar to filter specific tables or schemas.
- Select the checkboxes for one or more tables you want to track changes for.
- Click Next to continue.
Step 2: Edit Schema and Add Description
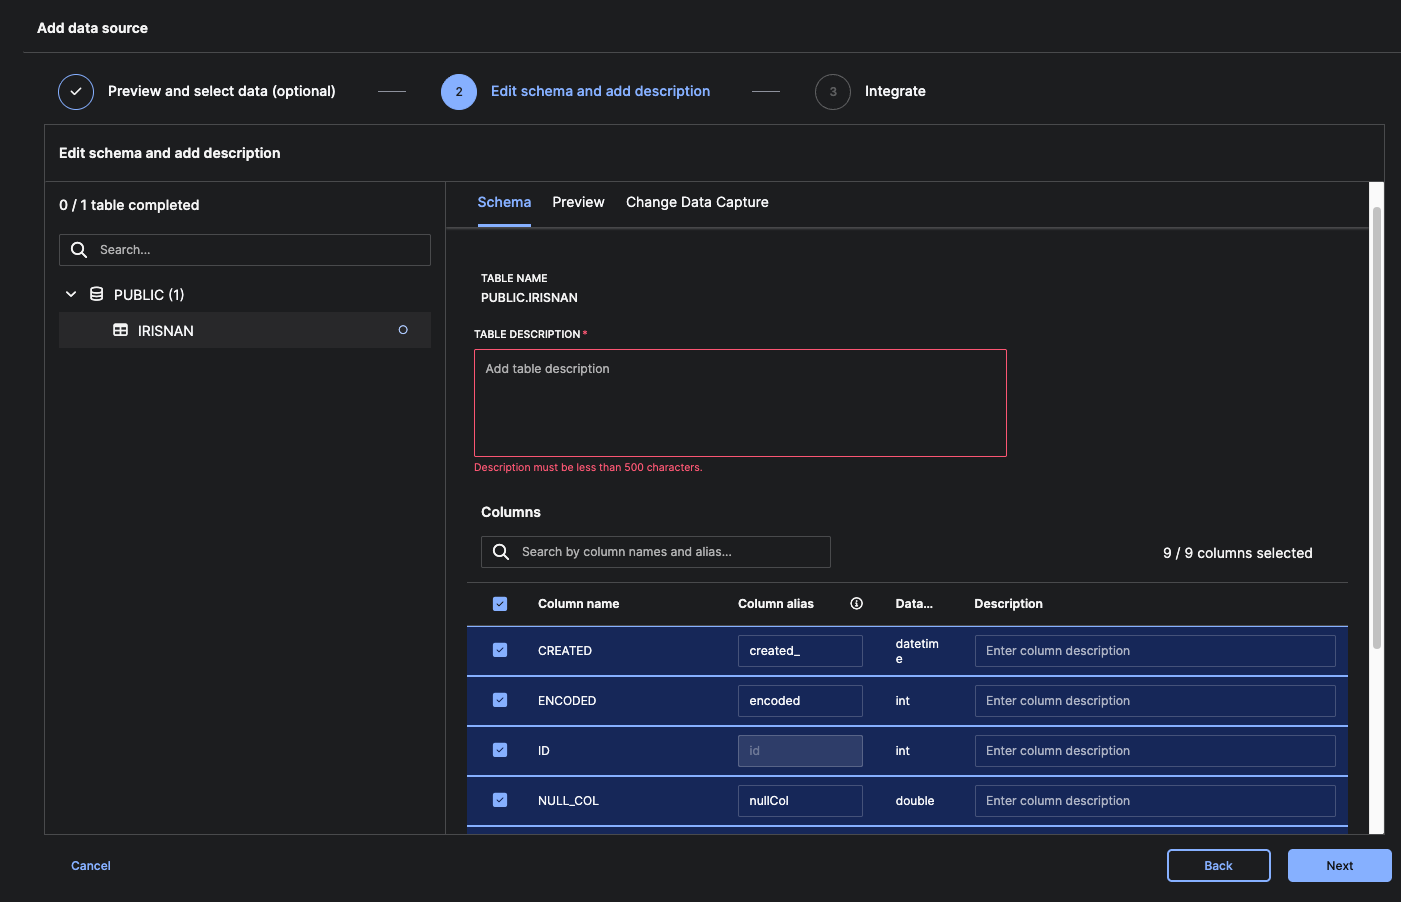
After selecting a source table, the Edit schema and add description step allows you to review the table structure, document its purpose, and prepare it for CDC configuration.
1. Select the Table
- On the left panel, select the table you want to configure.
- The selected table appears with its schema details on the right side.
2. Add a Table Description (Required)
In the Table Description field, enter a short summary of what the table represents (under 500 characters).
Example:
“Table storing raw IRIS measurements, including sepal and petal dimensions.”
3. Review and Adjust Column Metadata
Under the Columns section, review each column:
- Column name — Original name from the source system
- Column alias — Auto-generated alias; editable
- Data type — Detected based on source schema
- Description — Optional context
All selected columns will be included in the ingestion process.
4. Select or Deselect Columns (Optional)
You may deselect any columns you do not want to ingest.
The top-right corner shows the count (e.g., “9 / 9 columns selected”).
5. Proceed to Change Data Capture Settings
Click the Preview tab to view the first 20 rows of data to verify:
- The table is correctly connected
- The change-tracking column (timestamp or monotonic ID) has valid values
This ensures CDC can be enabled in the next step.
Step 3: Configure CDC Parameters
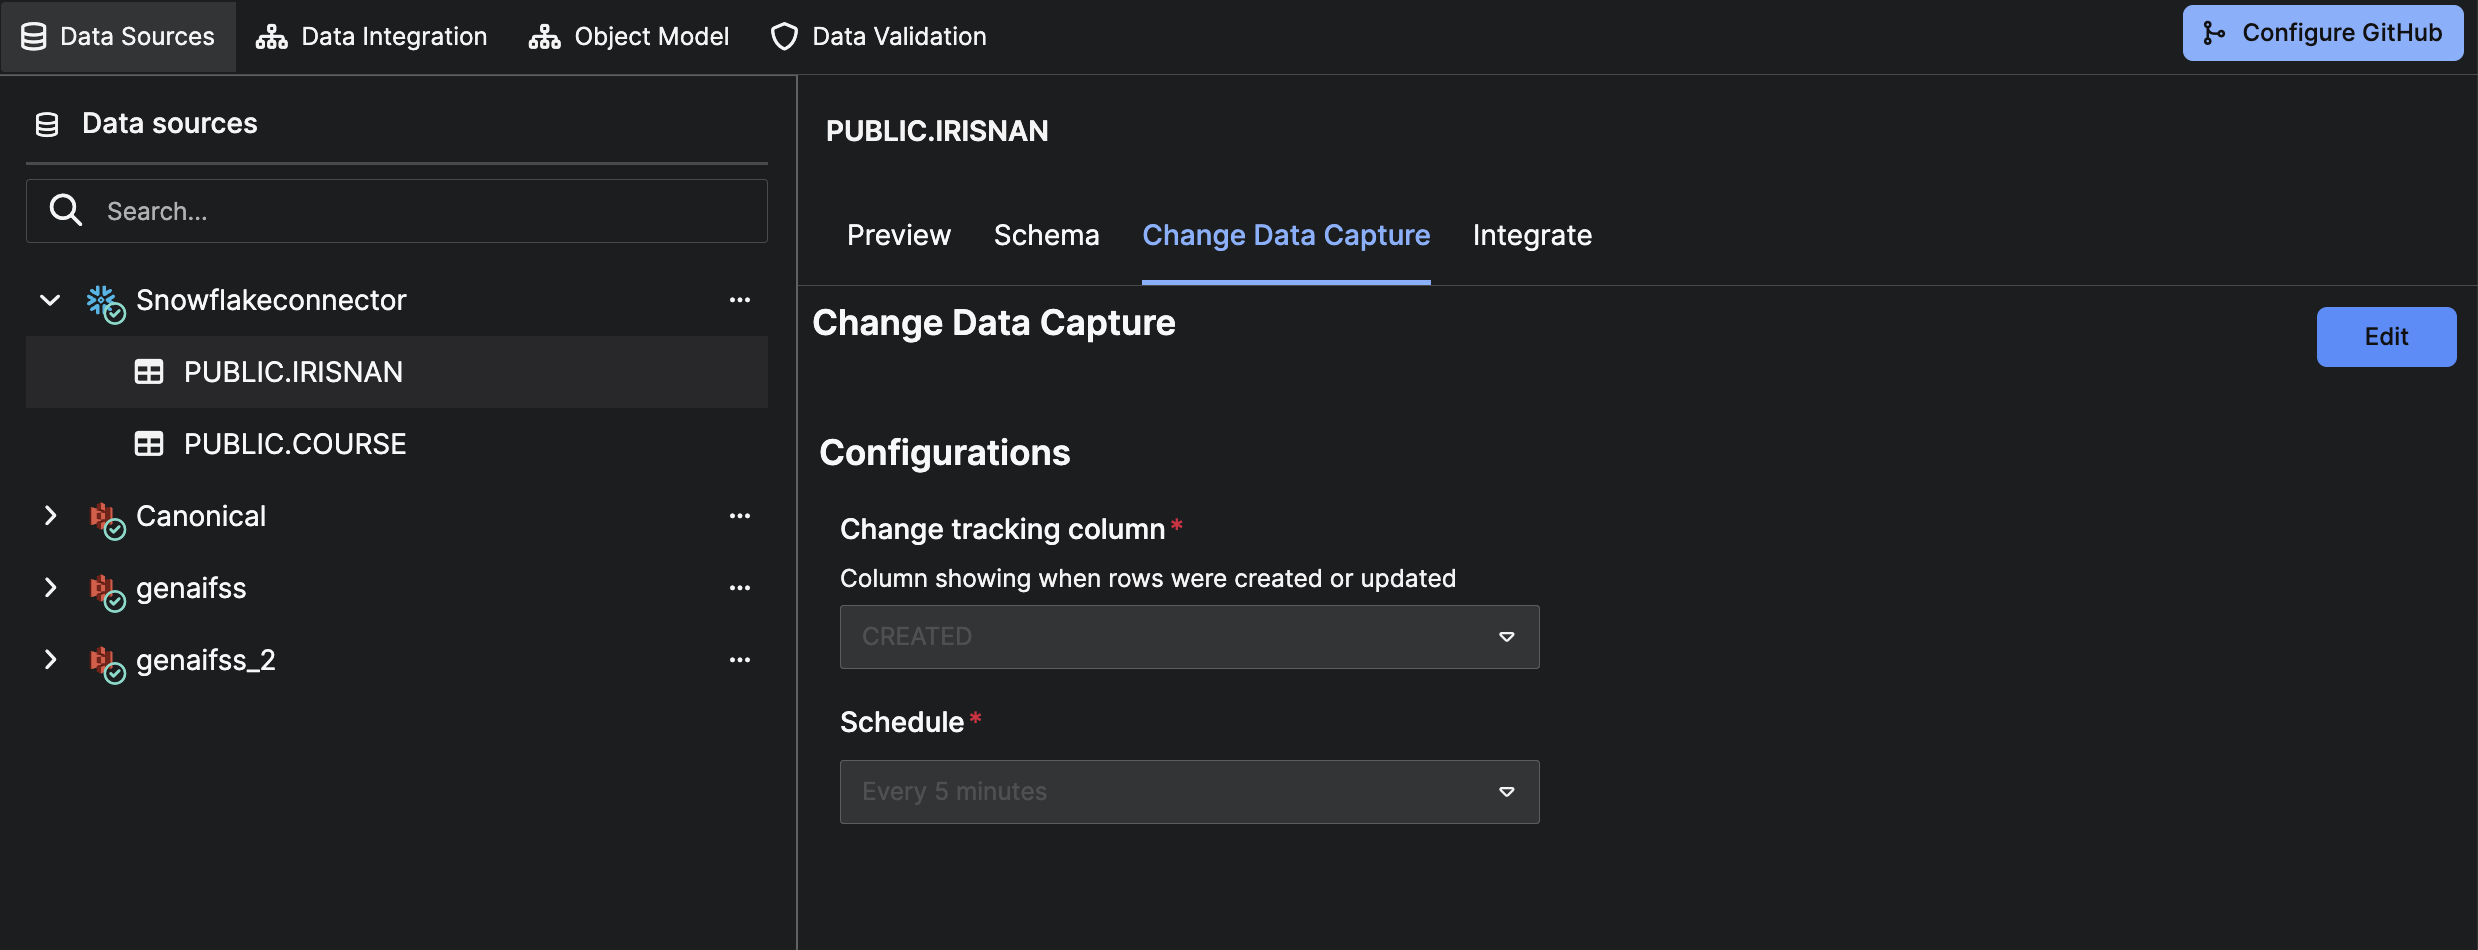
Once you have verified the sample data, switch to the Change Data Capture tab to configure incremental sync options.

- Toggle Change Data Capture to On to enable incremental synchronization.
- In the Configurations section, specify:
Change tracking column — Select a timestamp/datetime column used to detect new or updated rows
Schedule — Define how frequently CDC should run (For example, Every 5 minutes)
- Click Next to initiate CDC setup.
Note:
Only timestamp/datetime columns appear in the Change tracking column dropdown.
If the table lacks such a column, CDC cannot be enabled; only full-reload ingestion is supported.
Step 4: Add a Target Entity to Complete the Integration
After schema edits and preview, configure the integration flow and define where CDC-enabled data will be written.
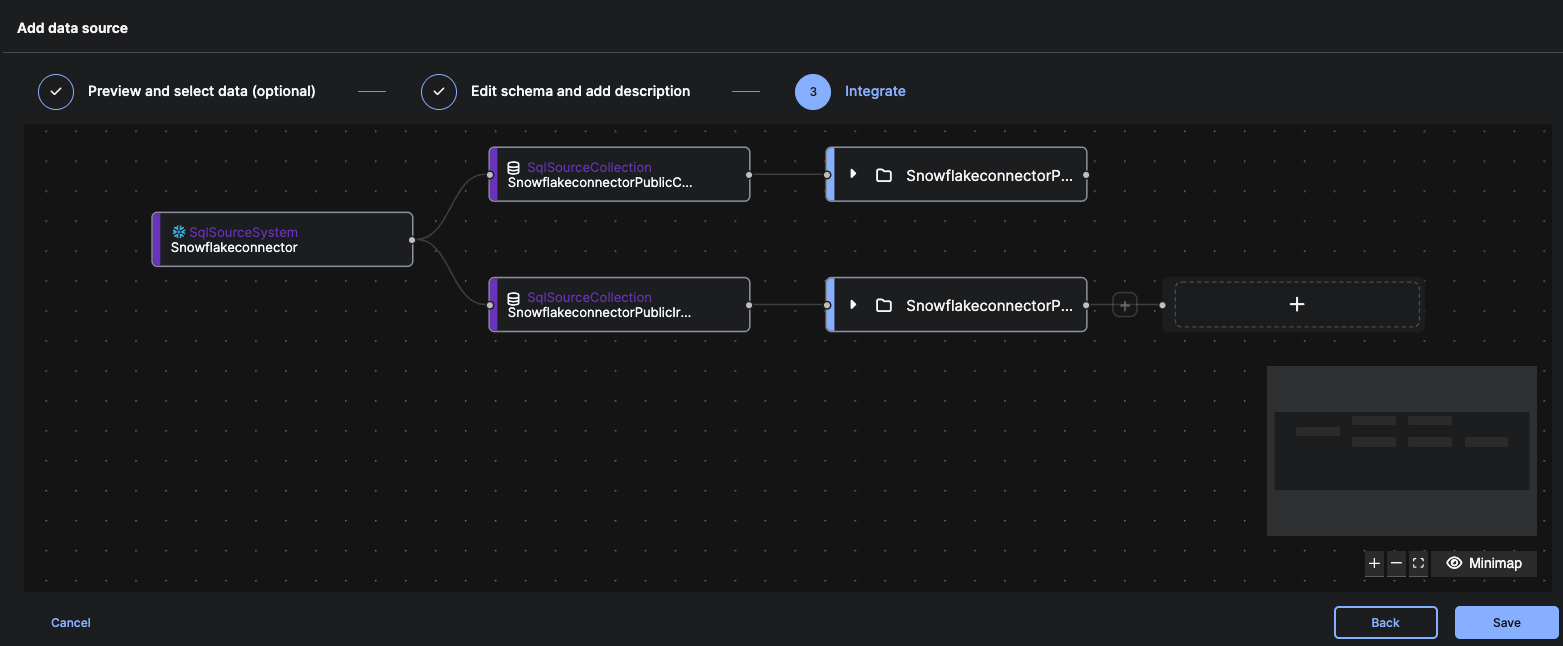
1. Review the Auto-Generated Pipeline Layout
The Integrate step displays a pipeline with:
- SQLSourceSystem – Your configured connector
- SQLSourceCollection – Each selected table
- File System node – Default landing zone
Each selected table appears as its own branch.
2. Add a Target Entity
- On the canvas, click the + icon to the right of the File System node.
- In the Select Target panel, search for and select an Entity or Canonical type where CDC data will be written.
- Click Select.
This target defines the C3 database entity that stores the incremental CDC data.
Step 5: Confirm the Mapping
Once a target entity is selected:
- It appears at the end of the pipeline.
- The platform automatically builds default mappings based on the selected schema.
If transformations are required, mappings can be edited after saving.
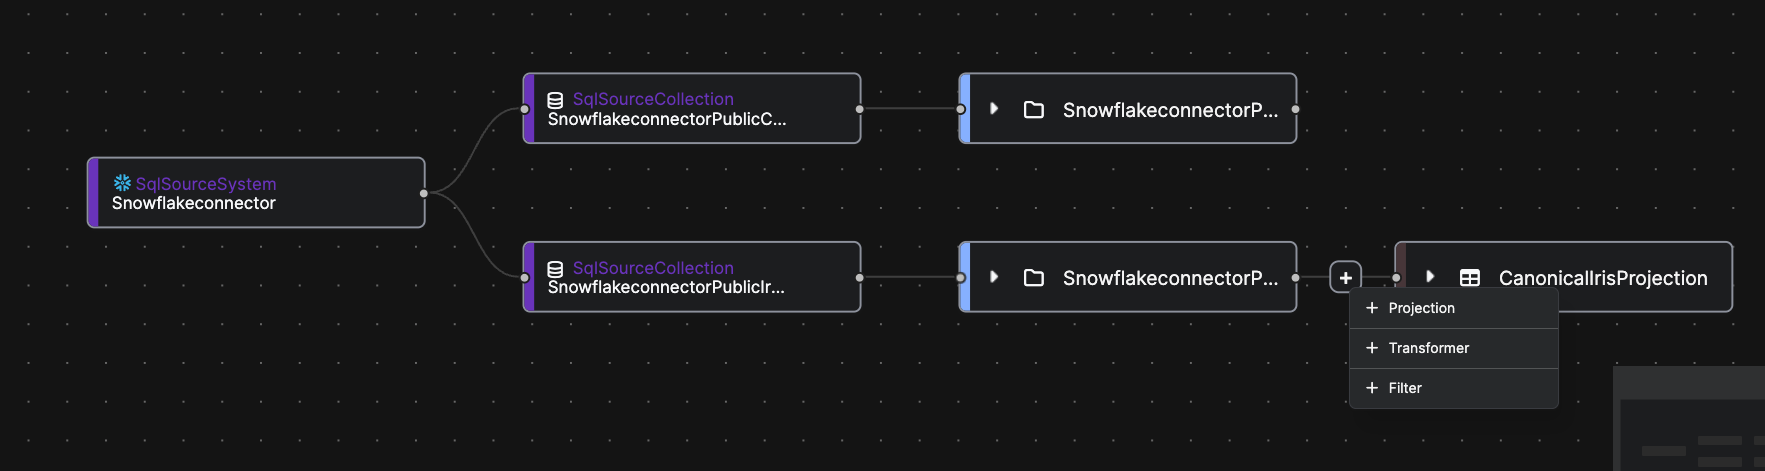
Transformation Options (Optional)
During the CDC configuration flow, you can optionally add lightweight transformations before writing data into the target entity. These transformations help ensure that the incoming source data is in the correct structure or format for your application.
Projection
Use Projection to select only the required columns or to rename fields so they match the target entity. This is useful when the source table contains extra columns or when field names differ from your entity schema.
Transformer
A Transformer allows you to apply simple field-level transformations, such as formatting timestamps, calculating derived fields, or standardizing values before loading them into the entity.
Filter
Use a Filter to include only the rows that meet certain conditions. For example, you might load only records with a valid status or exclude rows with missing values.
These transformations are optional but can help align your CDC-synced data with the structure and requirements of the target entity.
Step 6 (Optional): Repeat for Additional Tables
If multiple tables were selected, each has its own branch.
Repeat Select Target for each table requiring a C3 entity destination.
Step 7: Save Your Integration
After defining all targets:
- Review the final pipeline
- Click Save
- CDC is now configured for the selected tables
Note:
In this release, only timestamp/datetime columns are eligible for CDC.
Only such columns appear in the “Change tracking column” dropdown.
Result:
Selected tables become part of a CDC-enabled pipeline. Changes will be captured continuously without requiring full reloads.
Verify Configuration
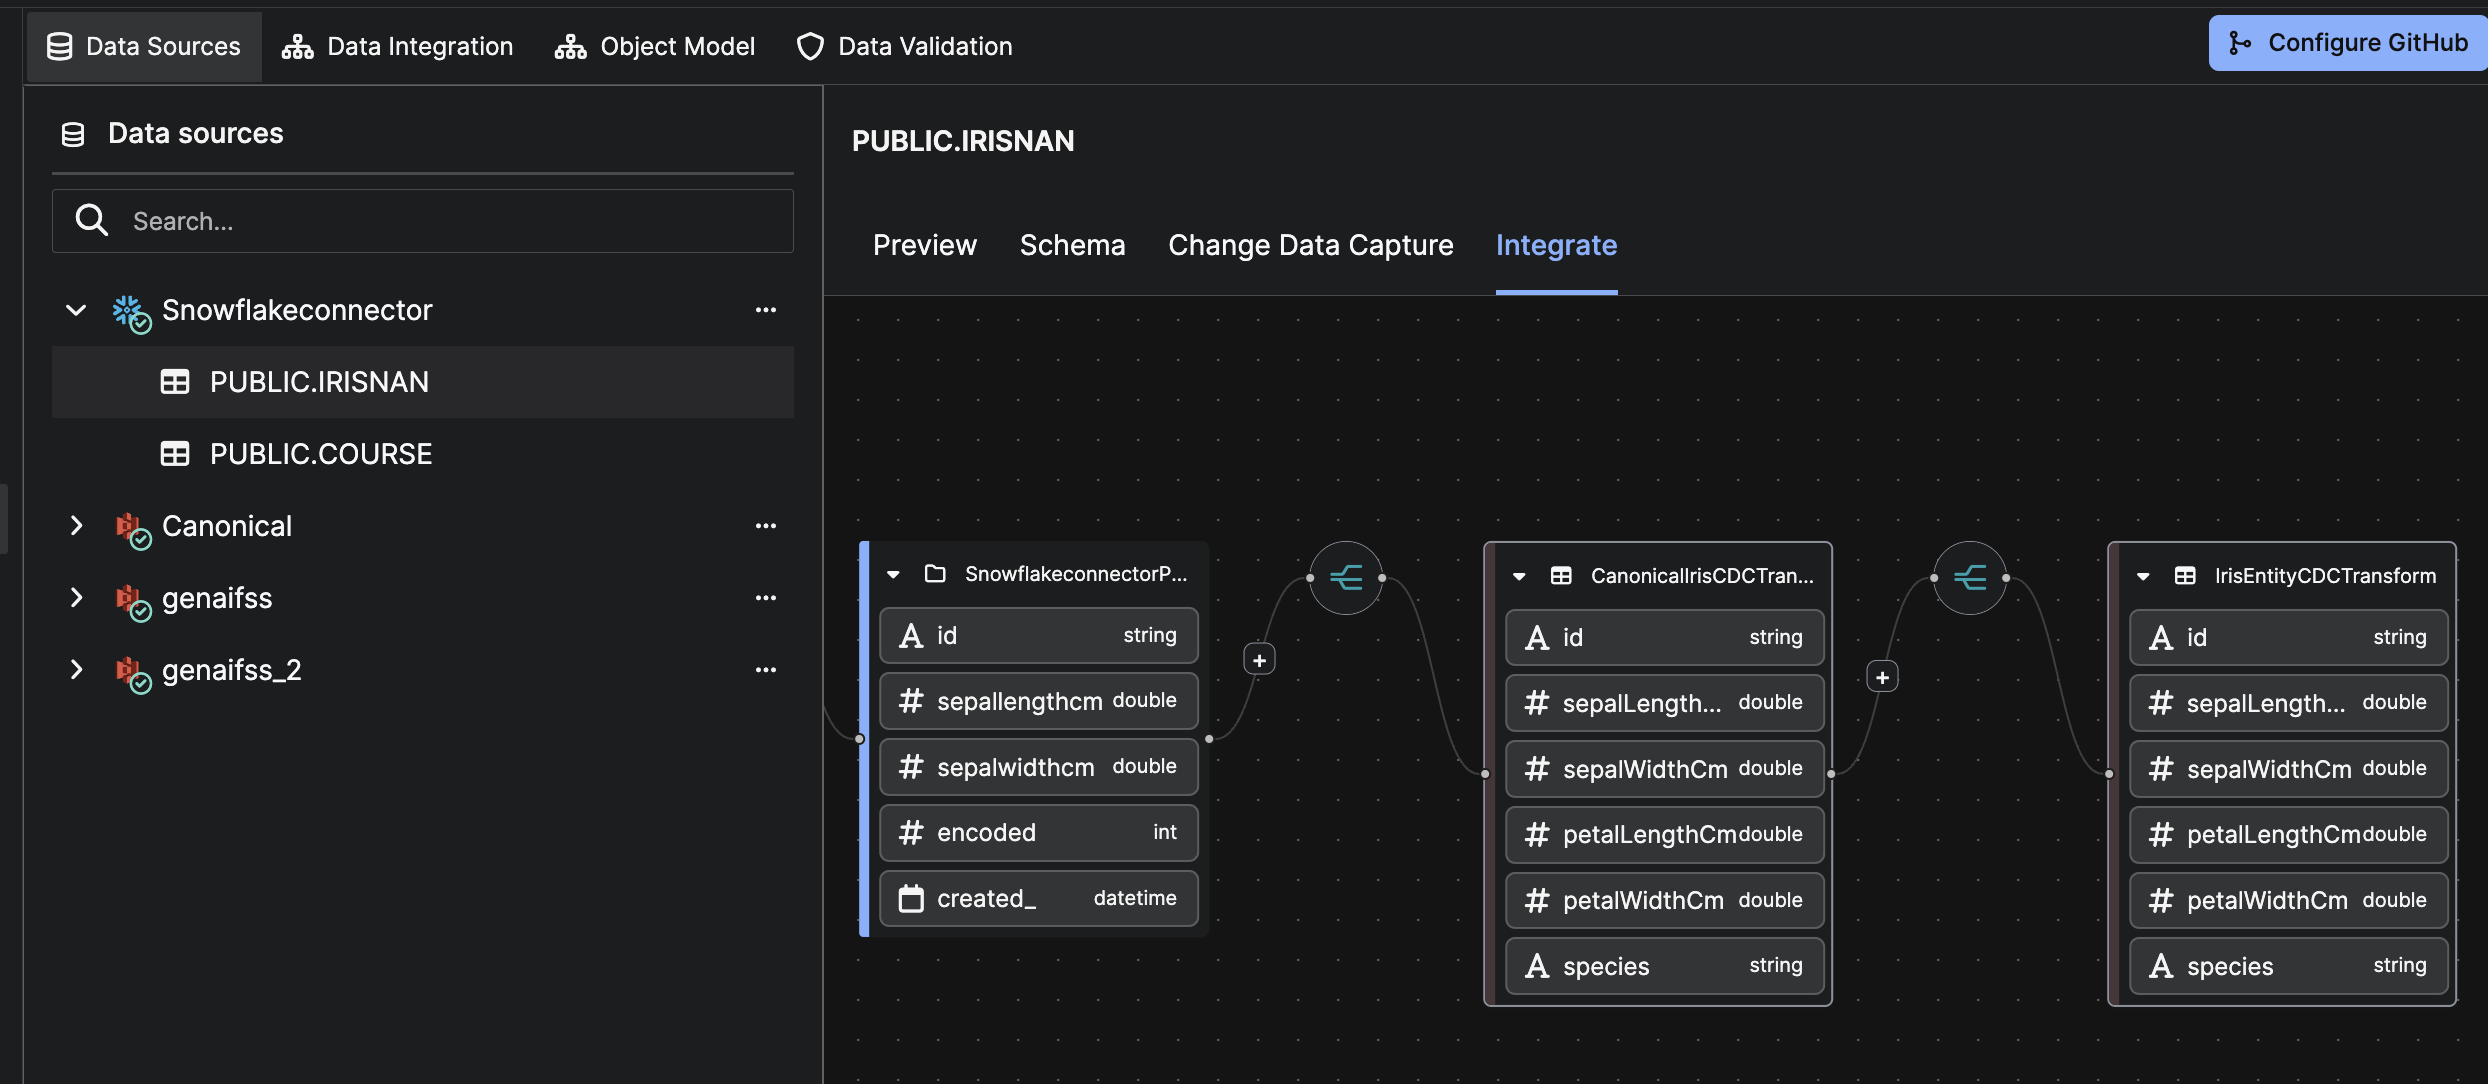
After mapping and transformations, the Integrate tab shows a visual CDC pipeline.
Use this screen to confirm correctness before saving.
In the left panel, the selected table (e.g., PUBLIC.IRISNAN) appears under its parent source system (e.g., SnowflakeConnector), confirming registration as a CDC-enabled dataset.
On this page, you can:
1. Review the Source-to-Target Flow
Ensure this sequence is connected:
- SQL Source System
- Source Collection (table)
- (Optional) Transformations
- Target Entity
This flow represents the data path during each CDC run.
2. Confirm Field Mapping
Verify that:
- All required source columns appear
- Field names/data types map correctly
- Renamed/derived fields match expectations
Correct mapping ensures valid incremental updates.
3. Validate Transformations (Optional)
If added:
- Projection: Only intended fields selected
- Transformer: Derived or modified fields appear correct
- Filter: Only desired rows included
These transformations apply to every CDC batch.
Edit CDC Configuration
Editing CDC on a Source Collection With CDC Enabled
The Change Data Capture tab will display:
- Selected tracking column
- Sync schedule
These are read-only.
To modify the schedule, click Edit.
Note:
The change tracking column cannot be modified once CDC is enabled.
To change it, CDC must be disabled and reconfigured.
Editing a Source Collection Without CDC Enabled
If CDC has not been configured yet:
- The tab shows an unconfigured state
- Click Edit to begin configuration
You must:
- Select a timestamp column that monotonically increases in the source table (required for detecting new or updated rows.
- Define an integration schedule that determines when incremental sync jobs will run.
- Review and confirm the CDC settings to activate incremental ingestion for the selected table.
If no timestamp column exists, CDC cannot be enabled.
Important:
Enabling CDC alone does not complete the pipeline.
You must return to the Integrate tab and configure mappings.
Without this, the pipeline is not fully connected.