Embed documentation in your application
You can easily embed documentation in your application with three steps:
- Write the documentation.
- Add documentation to the UI page.
- Add a button to open the documentation panel.
Write the documentation
Start by creating documentation for your application using c3doc.md format. As an example, if you want to create documentation to guide users on the landing page of the application, you would create a documentation file at {package}/src/doc/overview.c3doc.md.
Add documentation to the UI page
Add the documentation you want to display to the end-user on a specific UI page by updating your route definition to reference the c3doc file you want to present when the end-user is on that specific page.
As an example, in your {package}/metadata/UiSdlRoute/UiSdlRoute.csv file:
targetModuleName,targetPageName,name,urlPath,inAppDoc
examplePackage,Home,home,/home,overview
In this example, the inAppDoc field is set to overview, which corresponds to the overview.c3doc.md document.
Add an image to the document
You can embed images in your documentation using Markdown syntax: 
- The
!at the start tells the engine to render an image. imageNameis the alt text, shown if the image cannot be loaded and used for accessibility.- The
pathshould be a relative URL pointing to the image location.
For example, suppose you want to include three images:
- image1 is a direct child of the document.
- image2 is in the ui/content folder of the same package.
- image3 is in the ui/content folder of a dependency package.
Your project structure might look like:
├── myPackage
│   ├── ui
│   │   └── content
│   │           └── assets
│   │                  └── images
│   │                         └── image2.jpg
│   └── src
│       └── doc
│           ├── dashboard.c3doc.md
│           └── image1.jpg
└── dependencyPackage
│   ├── ui
│   │   └── content
│   │           └── assets
│   │                  └── moreImages
│   │                         └── image3.jpg
To reference these images in your documentation, use:


Note: You do not need to specify the dependent package name for image3. The server will resolve the image path regardless of which package it belongs to, as long as the path is correct and relative to the documentation file.
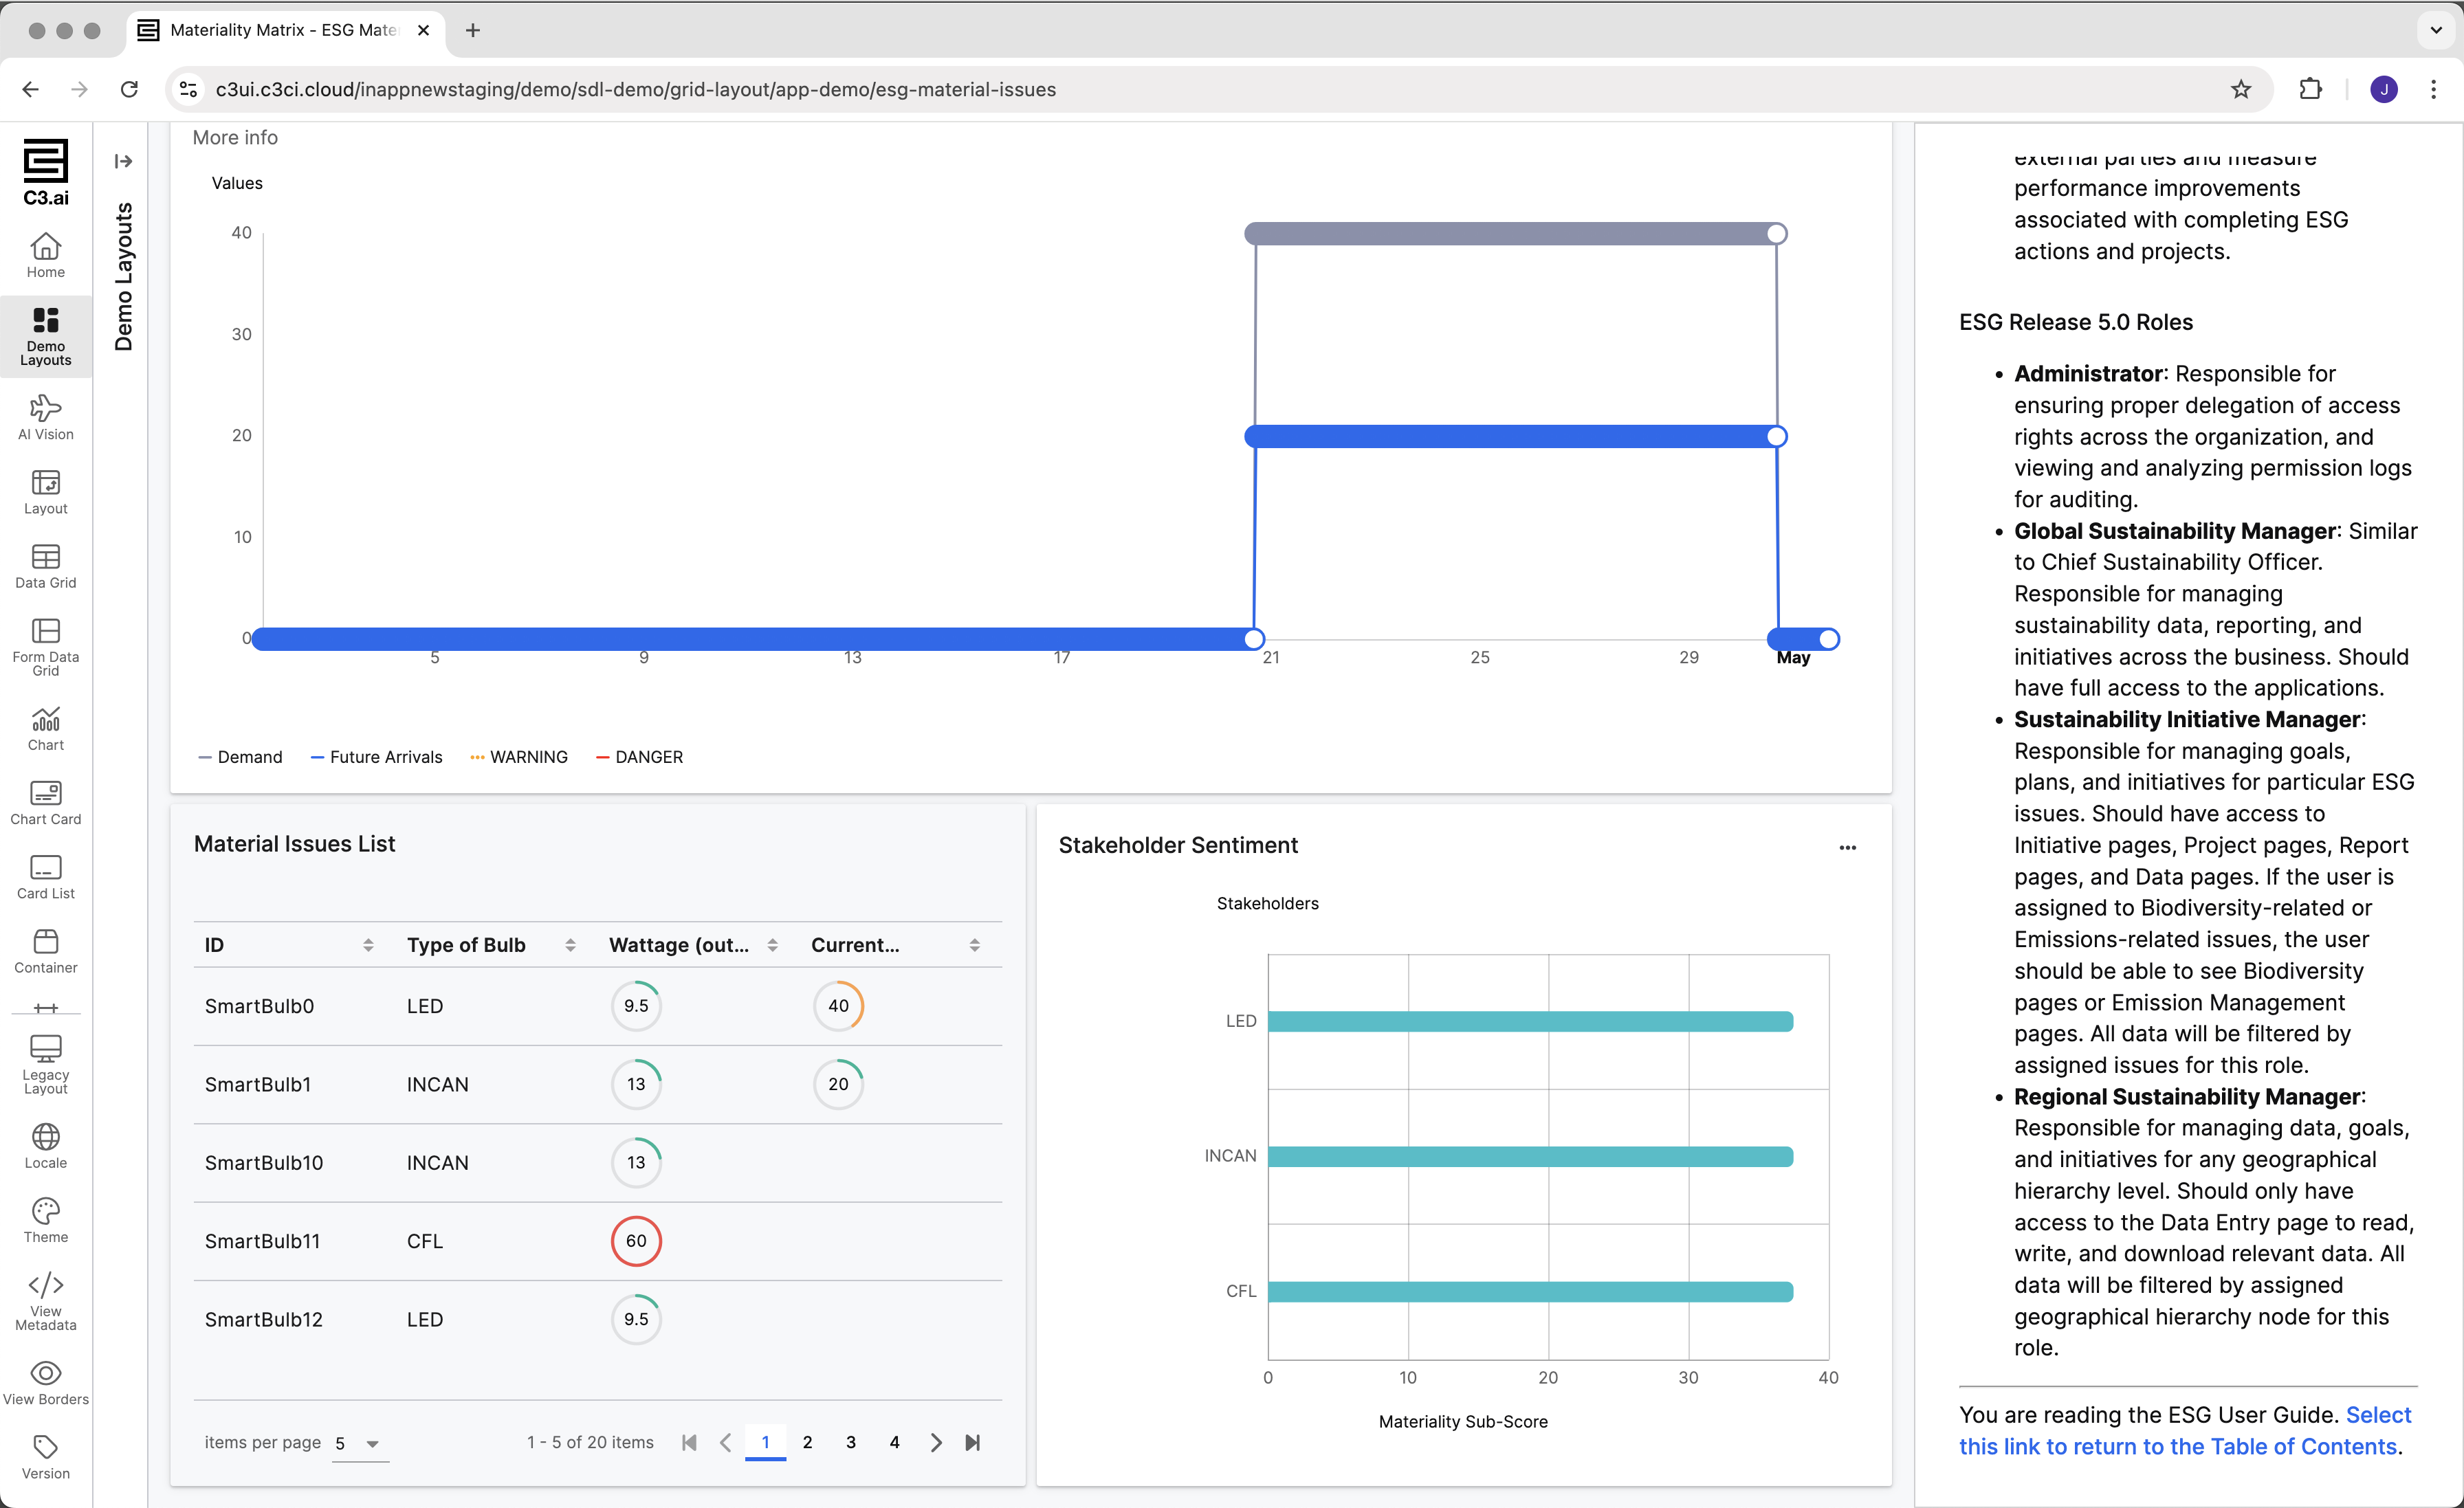
Add a button to open the documentation panel
Once you add the documentation to the UI page, UI Framework takes care of adding a side panel with the documentation. All that is missing is for you to add a button or other UI element to trigger the SDL.DefaultInAppDoc.IN_APP_DOC_SHOW_HIDE action.
Once this action is triggered the documentation panel will open or close.
Limitations
- Each UI page supports only one documentation article. To support more complex documentation, use an article that acts as a table of contents and links to other articles.
- In-app documentation does not support localization. Although the UI Framework supports translations and localization, this feature does not. To support multiple languages, create one package that includes the documentation in the default language, and a second package that depends on the first and overrides the documentation content with translated text for the additional language.
- You can override the
SDL.DefaultInAppDoccomponent in your application package to customize how the side panel behaves.
Workaround for localization
In-app documentation does not support multiple language in a single application deployment. If you need a single application deployment to support multiple languages you can override the SDL.DefaultInAppDoc component in your application to have this or other capabilities that suite your needs.
It's also possible that your use case does not require supporting two languages at the same time and it's acceptable to have separate application deployments for each language. If that is your case you can:
- Create a base package that contains the documentation variants for all languages you want to support.
- The base package defines UI routes so that a UI page is associated with the the documentation in the language you want to have for this deployment.
- Then you can have a second package that depends on the base package and overrides the UI route definitions, associating UI pages with a document translated to another language for that deployment.
Continuing from the example above, you would have something like:
.
├── basePackage
│   ├── basePackage.c3pkg.json
│   ├── metadata
│   │   └── UiSdlRoute
│   │       └── routes.csv
│   └── src
│       └── doc
│           ├── dashboard-en.c3doc.md  # Document to show in dashboard page
│           └── dashboard-es.c3doc.md  # Spanish variant of the document
└── spanishPackage
    ├── metadata
    │   └── UiSdlRoute
    │       └── routes.csv
    └── spanishPackage.c3pkg.json
The base package contains the documentation files for all the locale variants you want to support. The file spanishPackage/metadata/UiSdlRoute/routes.csv overrides the routes so that each UI page is directed to the Spanish documentation variant.
As an example:
targetModuleName,targetPageName,name,urlPath,inAppDoc
basePackage,Dashboard,/dashboard,/dashboard,dashboard-es