Connect Document Source Directories
Source Directories allow administrators to integrate enterprise source data made available to end users to search. You can establish a connection to a file repository, and specify which documents to add to your search index.
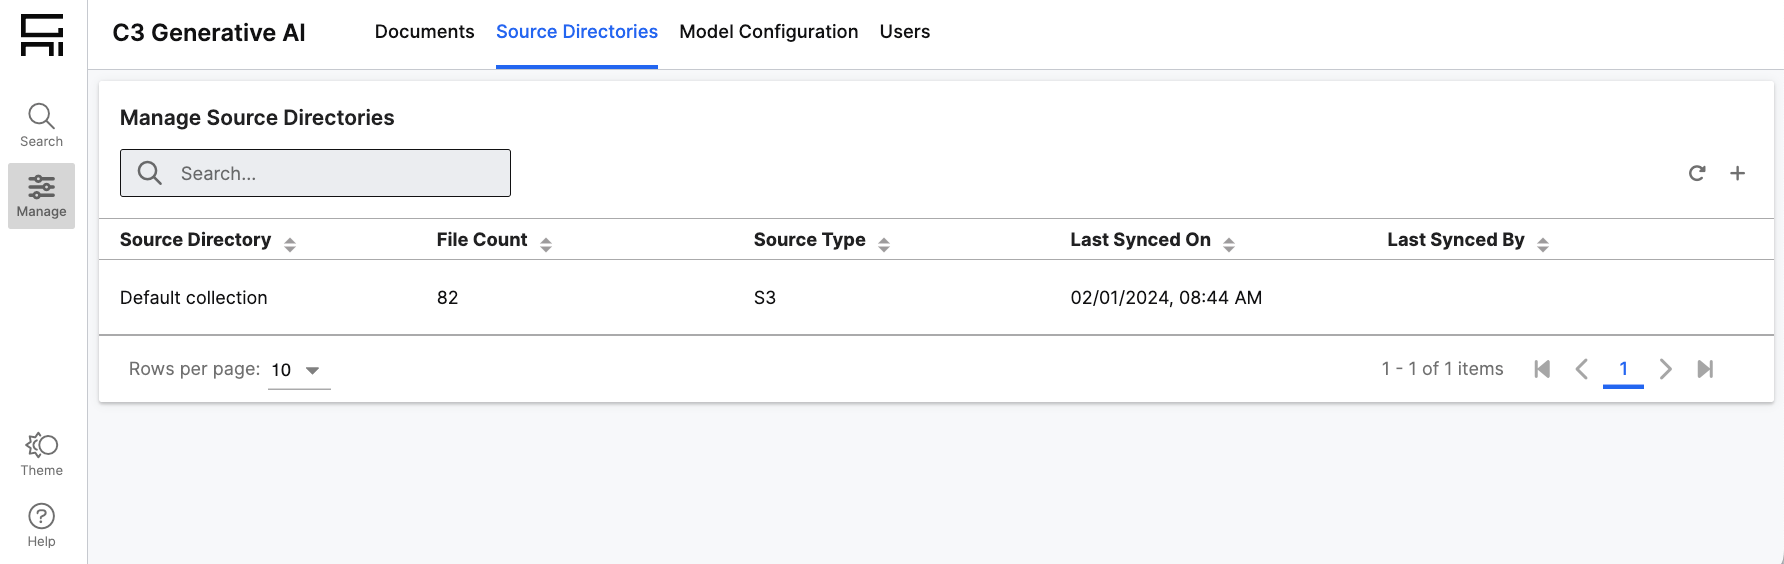
Add a New Source Directory
To get started, complete the following steps:
Add a Source Directory: Navigate to Source Directories and select + on the Manage Source Directories Grid to add a new Source Directory.
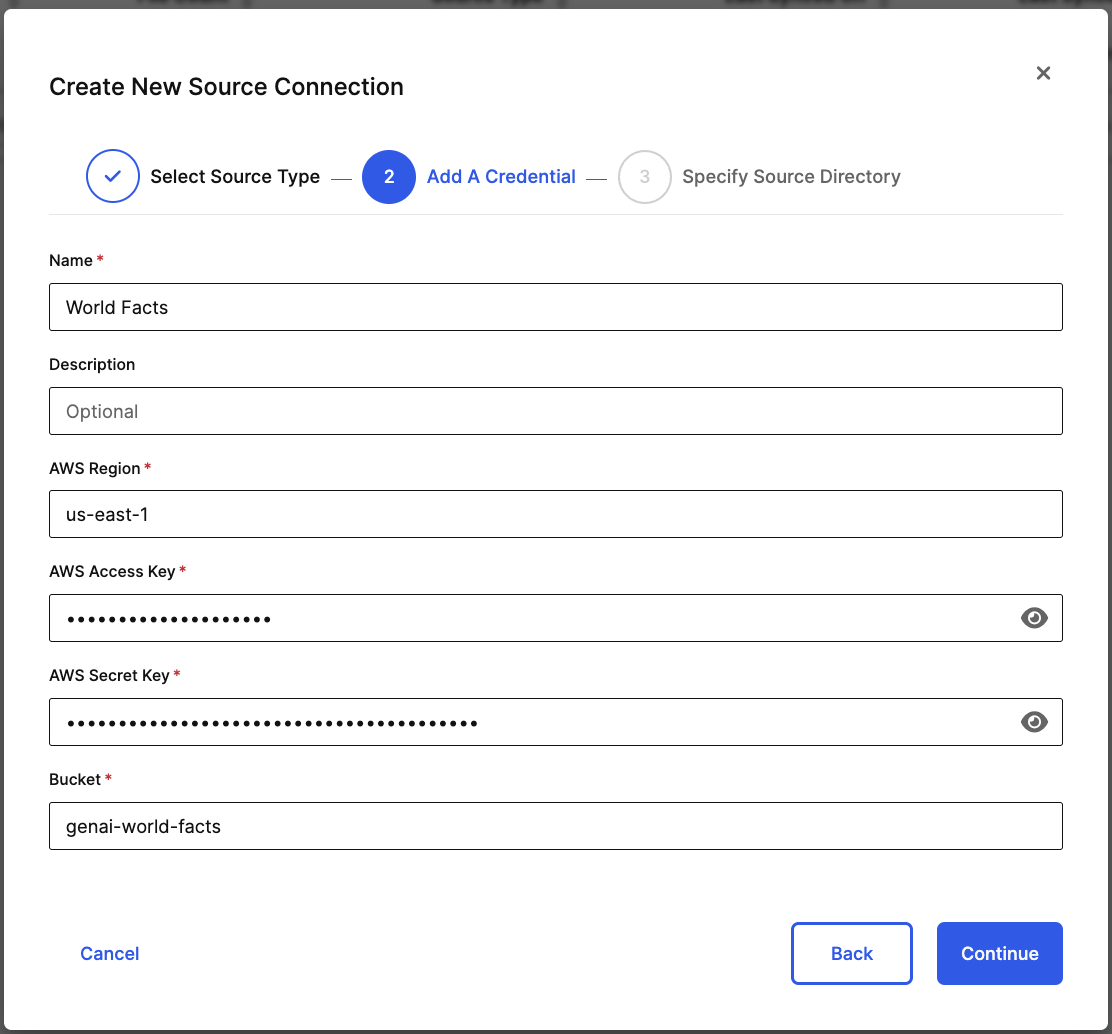
Connect to a File Repository: Select a cloud service and enter your authentication credentials. Amazon S3 is a supported file repository.
Specify Directory: After connecting to the repository, choose Source Directories to import. Select folders at the highest level that you want to establish individual directories for.
Add Files to Index: After connecting to new Source Directories, administrators will need to explicitly add documents to the search index for them to be searchable by end users. See Manage Documents for more instructions.
Remove an Existing Source Directory
Administrators can remove connections to external file repositories they’ve previously established a connection to.
To get started, complete the following steps:
Identify Source Directories to Remove: Navigate to the Source Directories grid and hover over a Source Directory that you want to remove.

Remove Source Directories: Select the trash icon and select Remove Source Directory. This will both remove the connection to the directory, and all of the documents from the search index. If you’re removing all directories you’ve connected to from the cloud account, you will later have to re-enter your authentication credentials if you choose to re-connect.