Publish a Data Validation Rule in Data Fusion
Data Fusion is in Beta. Please contact your C3 AI representative to enable this feature.
After creating and testing a Data Validation rule in C3 AI Studio, you can publish it so that the rule becomes part of your application package and can be version-controlled through Git.
In dev mode, the Publish Rule action writes the generated seed files directly into the application package. In prod mode, publishing is disabled, and rules can only be downloaded as a ZIP for manual integration.
Production Mode
Publishing generates the required seed files, which you can then commit through VS Code.
Follow these steps to publish an existing rule:
Publish the Rule
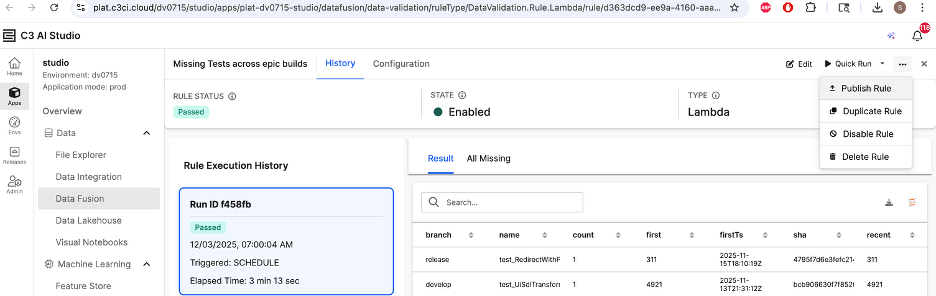
In C3 AI Studio, go to Data Fusion → Data Validation and select the rule you want to publish.
Ensure the rule is deployed. Publishing is only available for deployed rules, not drafts.
Draft rules must be deployed before they can be published.Navigate to the History tab (as shown in the screenshot).
- In the upper-right corner of the rule page, click the ⋯ (More Options) menu.
Select Publish Rule. This opens the Publish Rule dialog.
Download the Seed Package

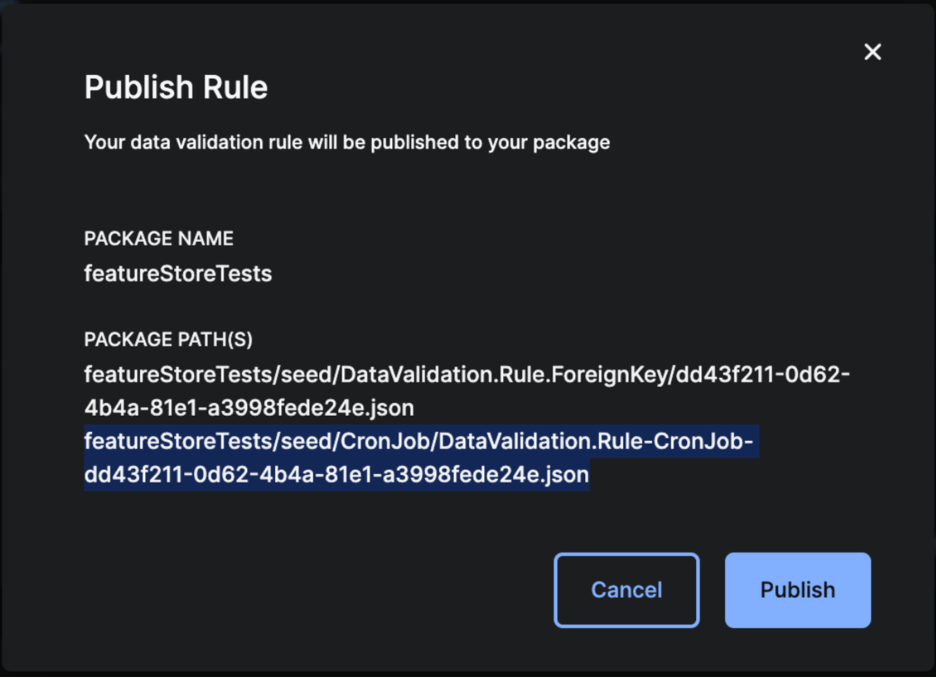
- In the Publish dialog:
You will see the Package Name and the Package Path(s) where the seed files will be placed (inside the application’s
seed/folder).Click Download Zip.
C3 AI Studio will generate a
.zipfile containing:The seed JSON file representing your Data Validation rule.
The corresponding CronJob JSON file required to schedule the rule.
Add the Seed Files to Source Control
Unzip the downloaded file on your machine.
Open your application repository in VS Code.
Place the extracted files in the exact paths shown in the dialog, for example:
studio/seed/DataValidation.Rule.Lambda/<rule-id>.jsonstudio/seed/CronJob/DataValidation.Rule-CronJob-<rule-id>.jsonCommit the changes and push your branch, or create a Pull Request for review.
Note:
- The rule must be Enabled before it can be published.
- The CronJob seed file is required so the rule executes on the schedule defined in Studio.
Developer Mode
In development mode, you can publish a Data Validation rule directly into your application package.
Publishing generates the rule’s seed files and writes them into the app’s seed/ directory.
Open the rule you want to publish in
Data Validation → Rule Details → History tab.In the top-right corner, click the More Options (⋮) menu.
Select Publish Rule.
A dialog appears showing:
- Package Name – The application you are working on
- Package Path(s) – The exact location in the
seed/folder where the rule will be written
This confirms where the rule files will be stored.
Click Publish.
Publishing generates:
- The seed file for the rule
- Any associated CronJob seed file
These are placed automatically in the appropriate
seed/directories.Review and commit the newly created or updated seed files, then push your changes.
Note:
- Publishing in dev mode writes directly into the application package, unlike prod mode where rules must be downloaded as a ZIP.
- If the rule has already been published before, publishing again will overwrite the existing seed files.
- Publishing does not run the rule; it only generates its seed configuration.