Explode to Rows
Disassemble a column of type Array or Object, consisting of multiple entries or key/value pairs, into new rows. All other column values are duplicated for each exploded row.
Configuration
| Field | Description |
|---|---|
Name default=none | Name of the node: A user-specified node name, displayed in the canvas and in the dataframe as a tab. |
| Column Required | Select single column of type Array or Object: Select the input column to be exploded into multiple rows in the output dataframe. |
| Output Column Name Required | Desired output column name for the new column containing Array or Object values: Enter a name for the new column containing the values from the exploded column. |
includeNulls default=On | Toggle indicating whether rows with null values in the exploded column should be dropped from the output: Leave the switch on to include rows where the exploded column value is null. Toggle the switch off to delete these rows (Note: this has no effect when Column is of type Object). |
withPosition default=On | Toggle indicating whether to include an index column for the original Array or Object: Leave the switch on to include a column with name "pos" which maps exploded row values to their index position within their associated input Array or Object. Index position starts at "0". This preserves the original ordering of values. Toggle the switch off to exclude this column. |
Node Inputs/Outputs
| Input | A Visual Notebooks dataframe |
|---|---|
| Output | A dataframe with an exploded Array or Object |
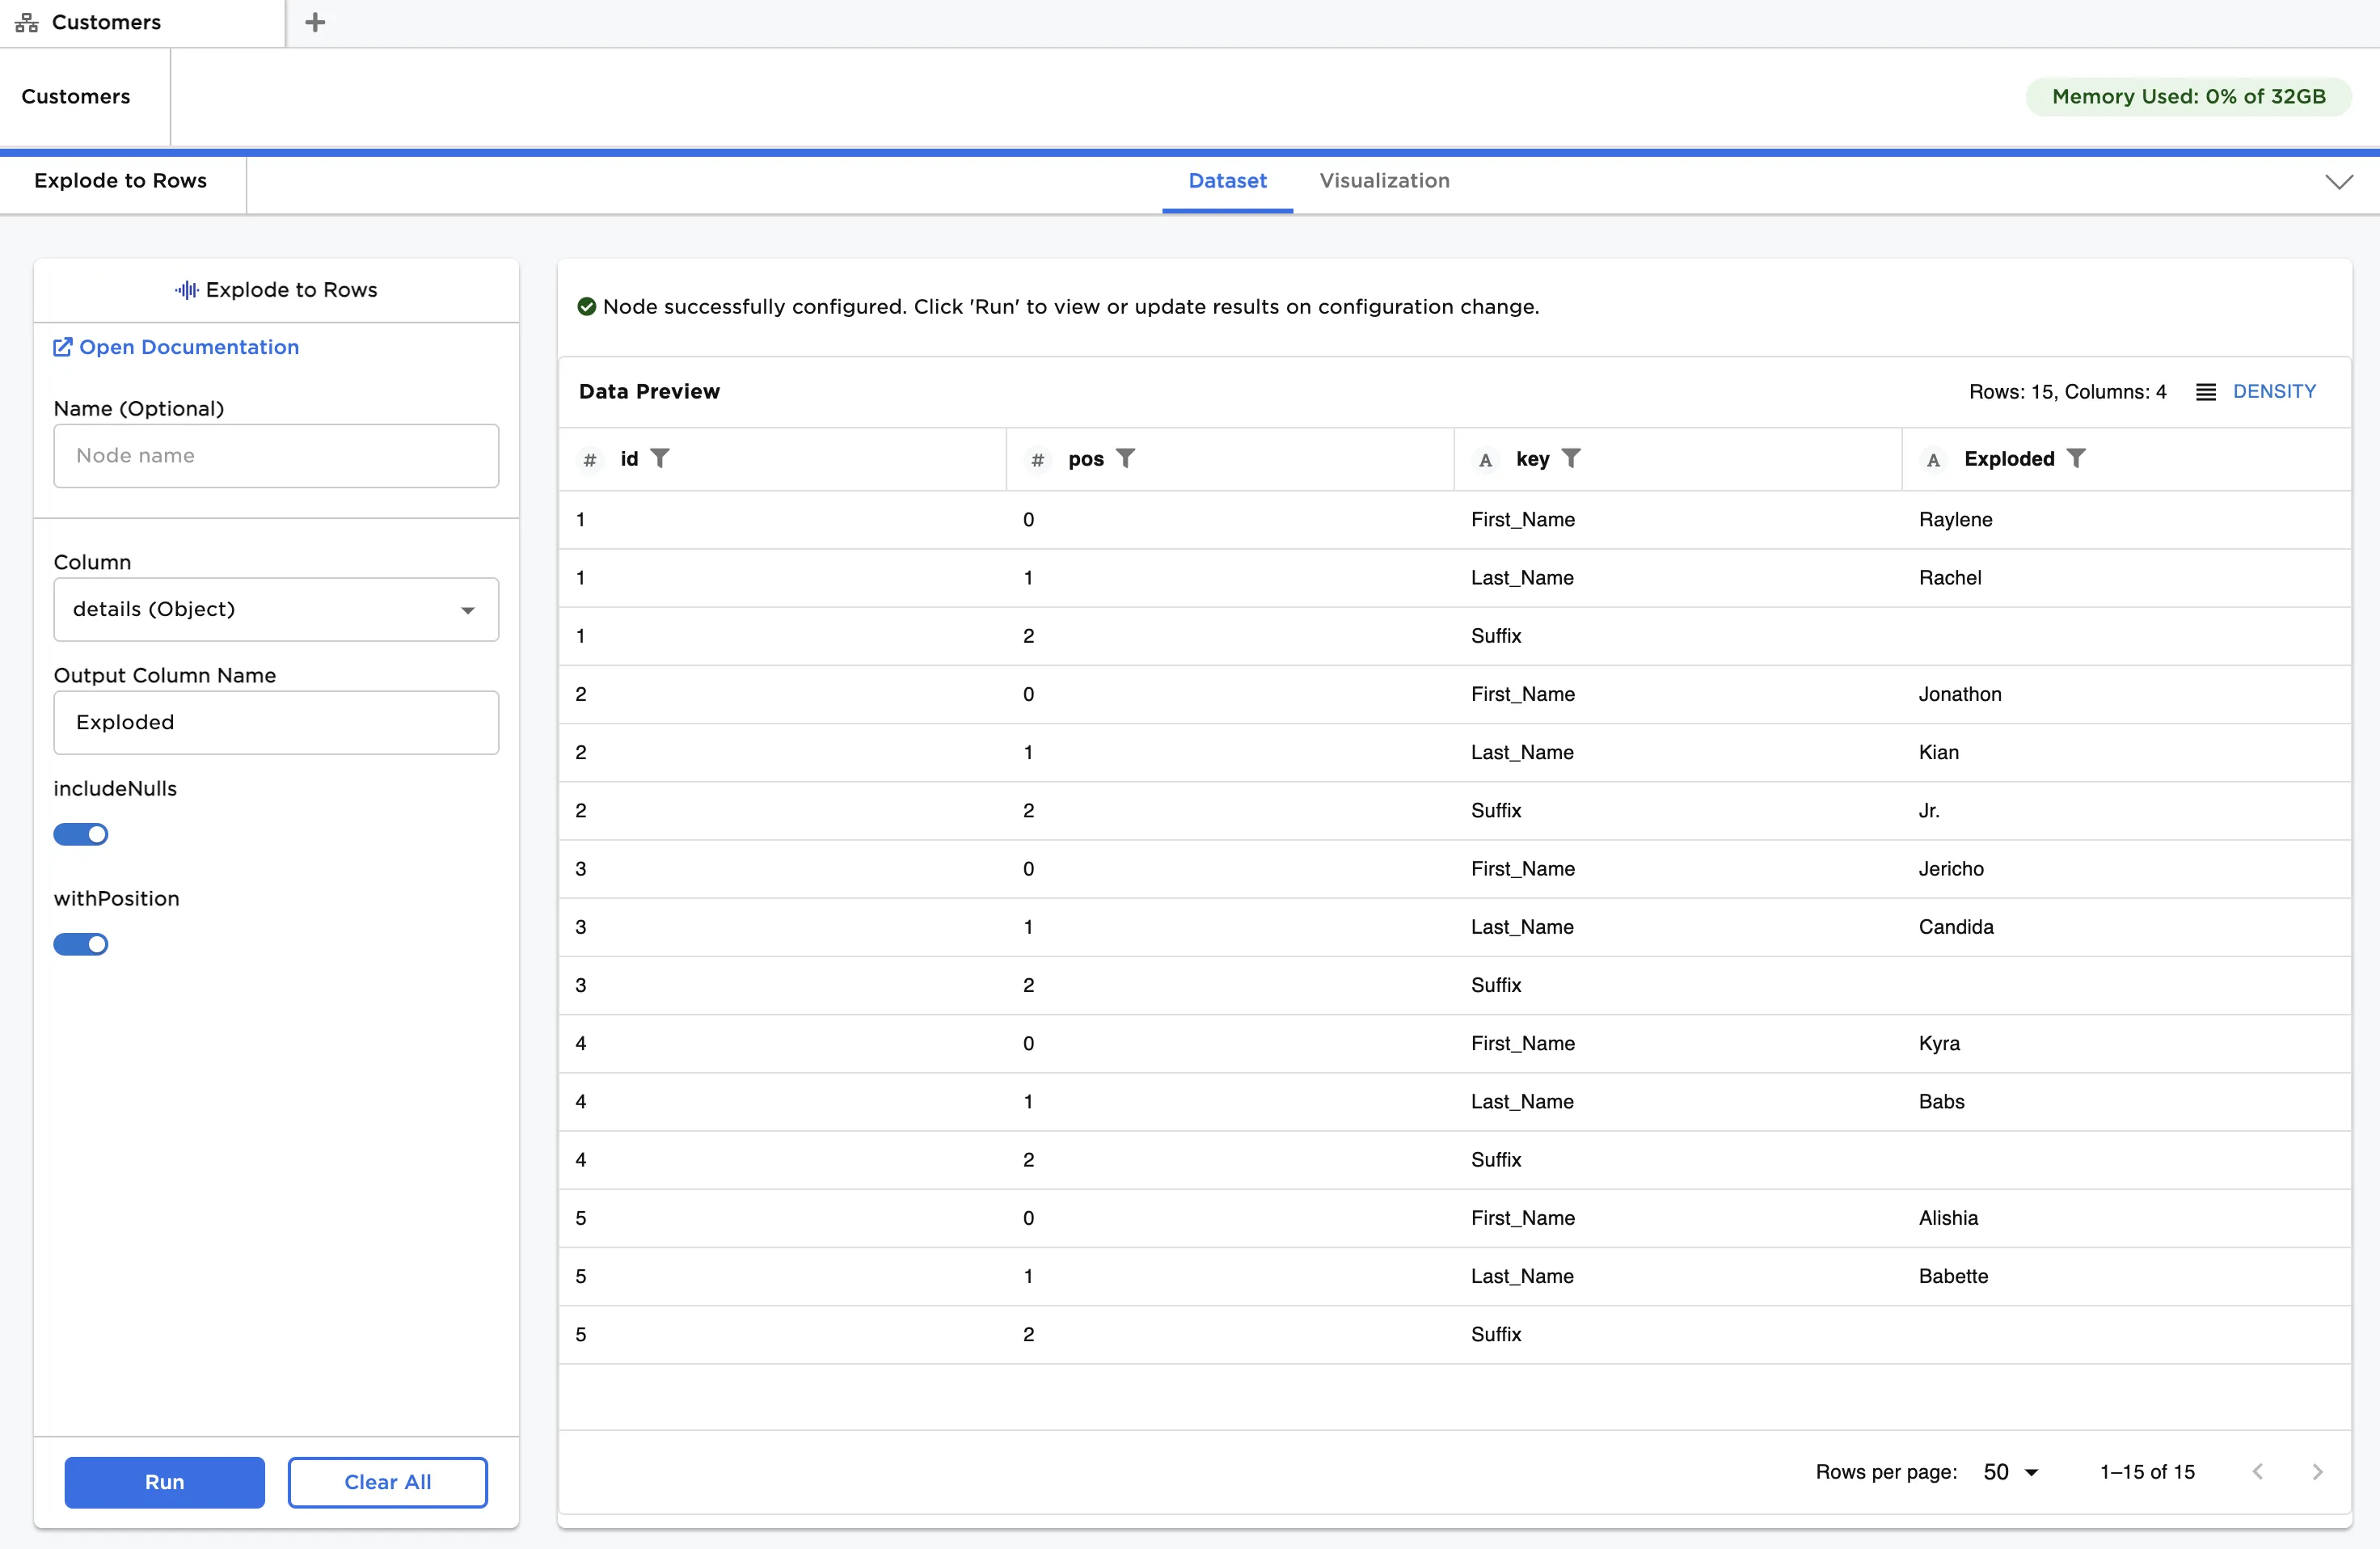
Figure 1: Example dataframe output
Examples
The data shown in Figure 2 is used in the following example. We start with a JSON file comprising a single category, or level, of customer details. The file, when loaded using the JSON input node, creates a single column of Objects corresponding to customer details. There are five rows of Objects, each with three key/value pairs that we wish to explode to rows.
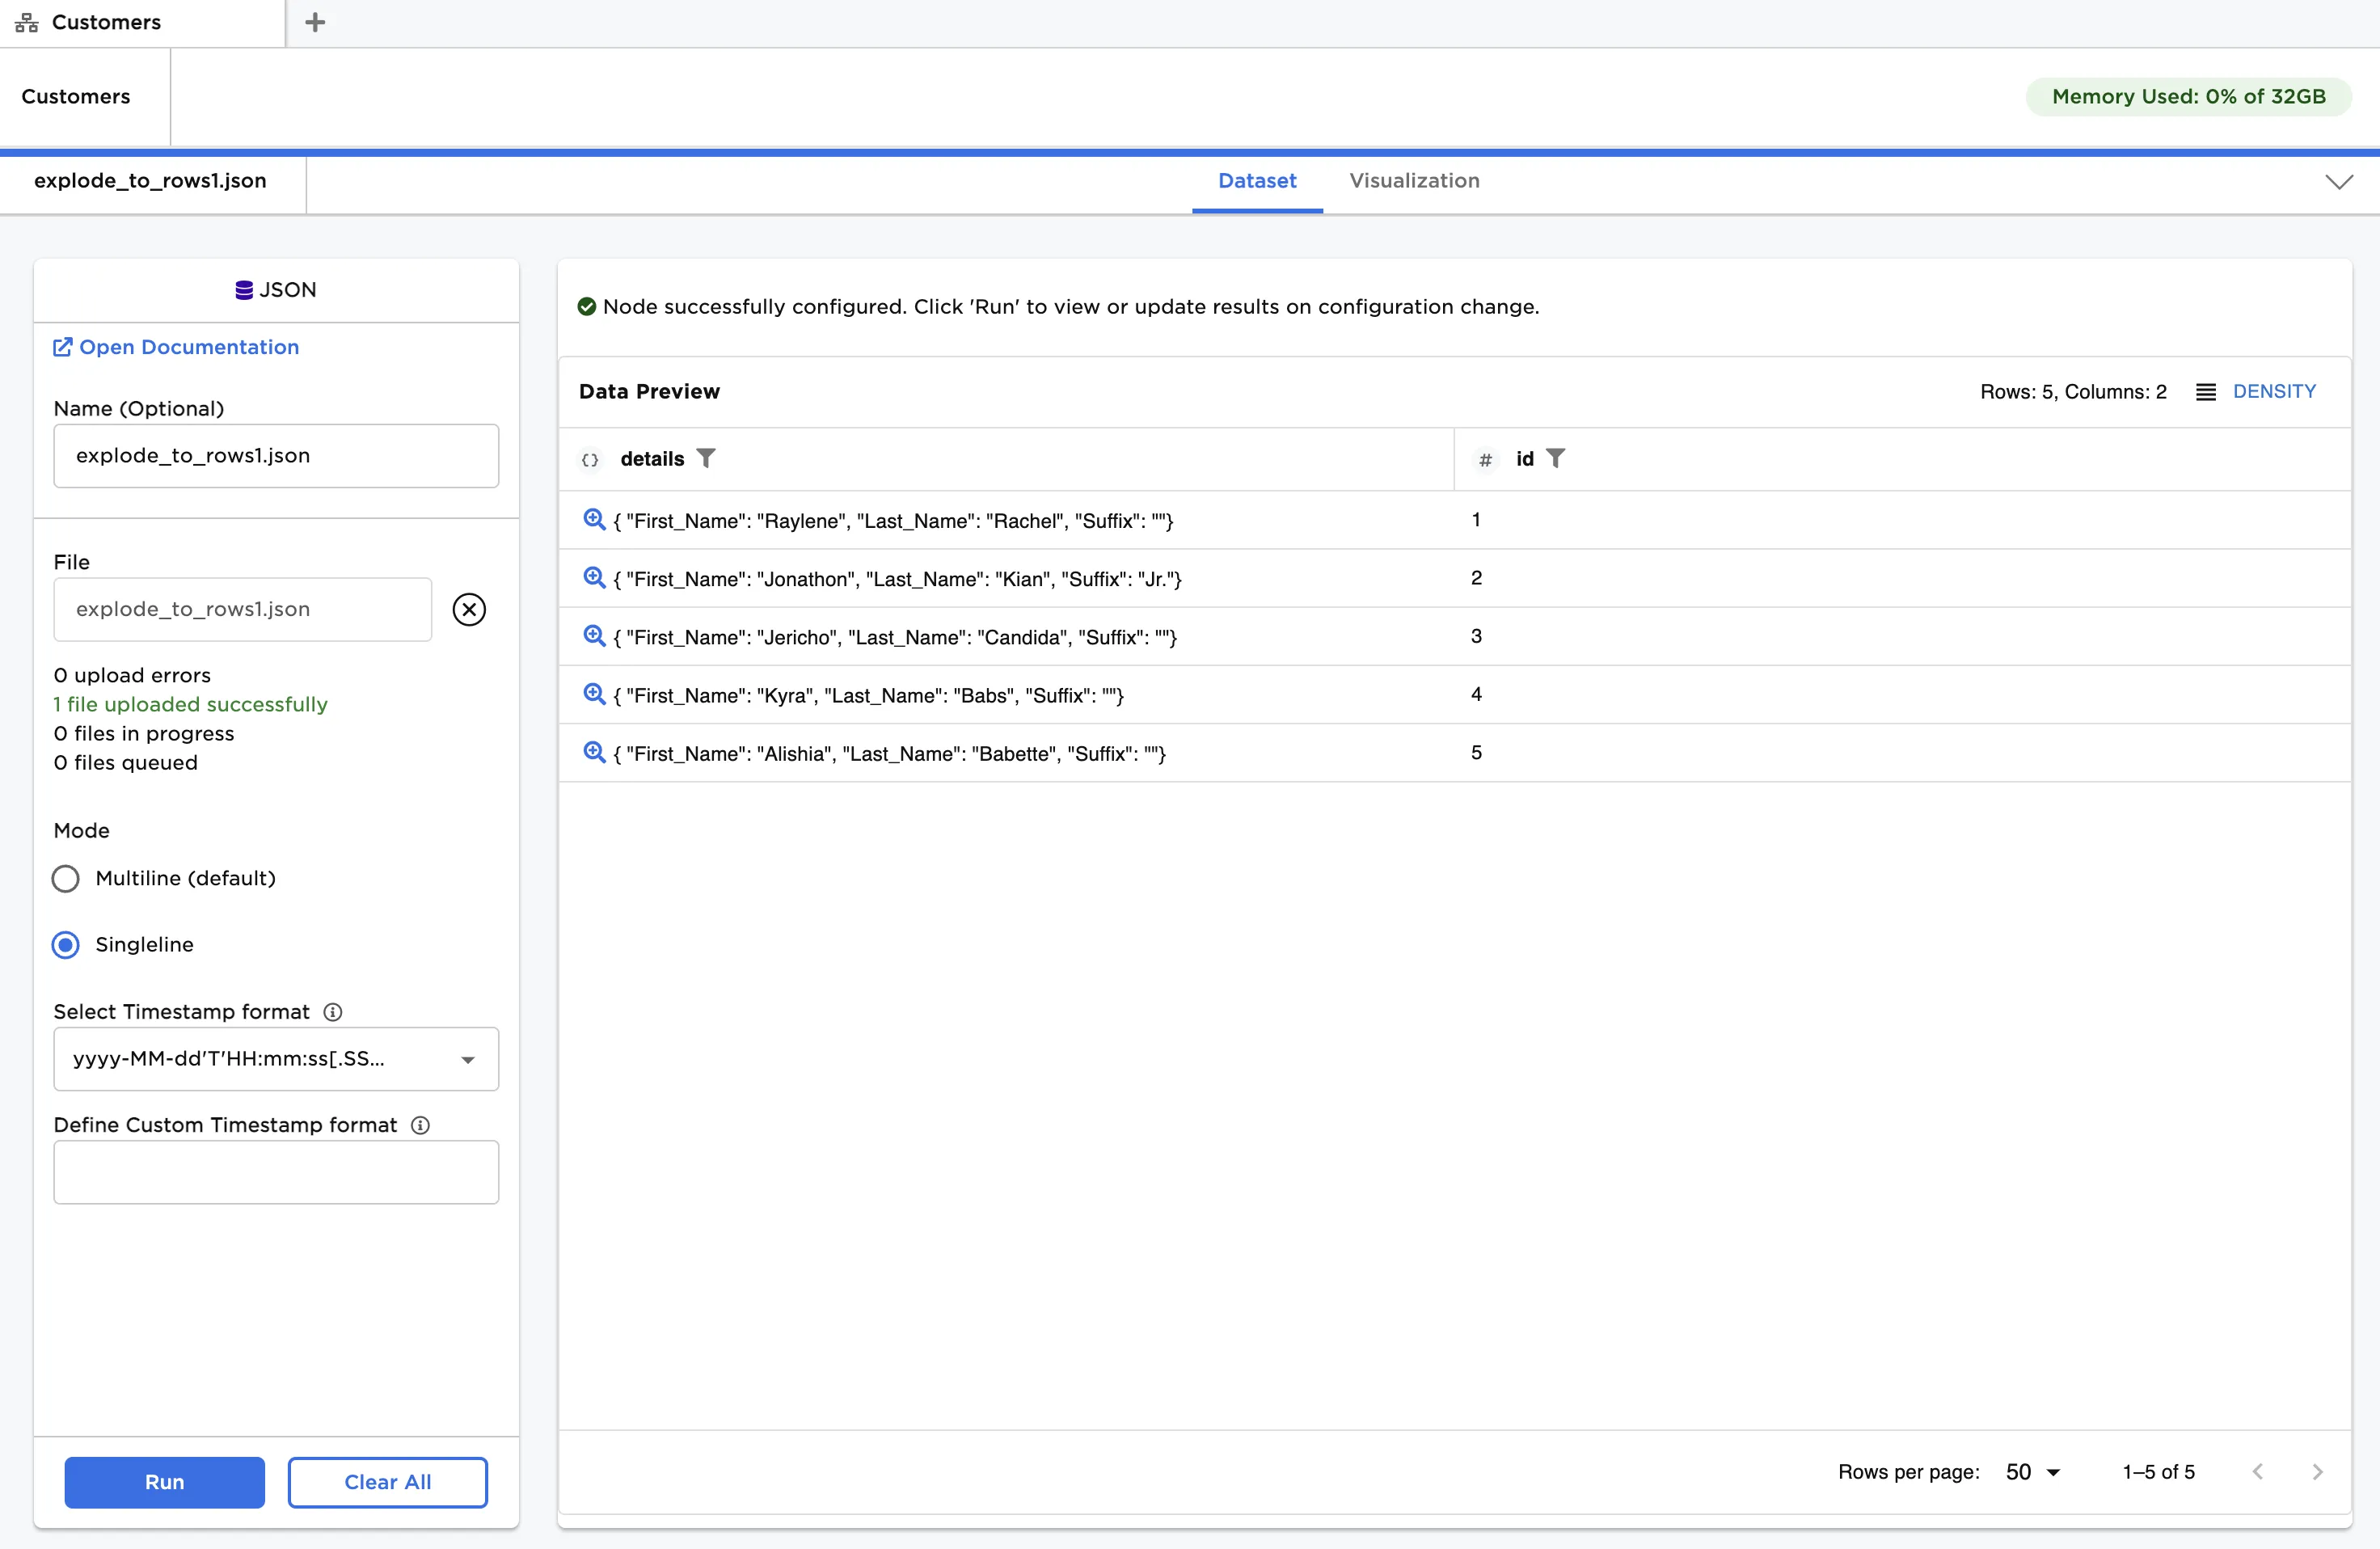
Figure 2: Example input data with a single level Object
- Connect an Explode to Rows node to an existing node. In this case, it is connected to a JSON node with the example data provided, which includes a single level Object.
- In the JSON node under Mode, select "Singleline."
- In the Explode to Rows node, select the "details" column for Column.
- In Output Column Name, enter "Exploded" and then click Run.
After running the node, the values for every key/value pair can be seen in the "Exploded" column as shown in Figure 3. The key is indicated in the "key" column. There are two additional columns that together identify the position of each key/value pair in the original dataframe: "id" and "pos". Note that "id" is part of the original dataframe, whereas "pos" is an output of the Explode to Rows node. The "id" column indicates which row, and correspondingly, which specific Object the pair is extracted from. The "pos" column indicates the pair's index position within the Object. Observe that there are now 15 rows, equivalent to the total number of key/value pairs in the input dataframe.
Figure 3: Exploding a single level Object to rows
Now, let's analyze a JSON comprising multiple categories, or levels, of customer details. The file, when loaded using the JSON input node, creates a single Objects column with nested structure representing the various categories of customer information. This data is shown in Figure 4.
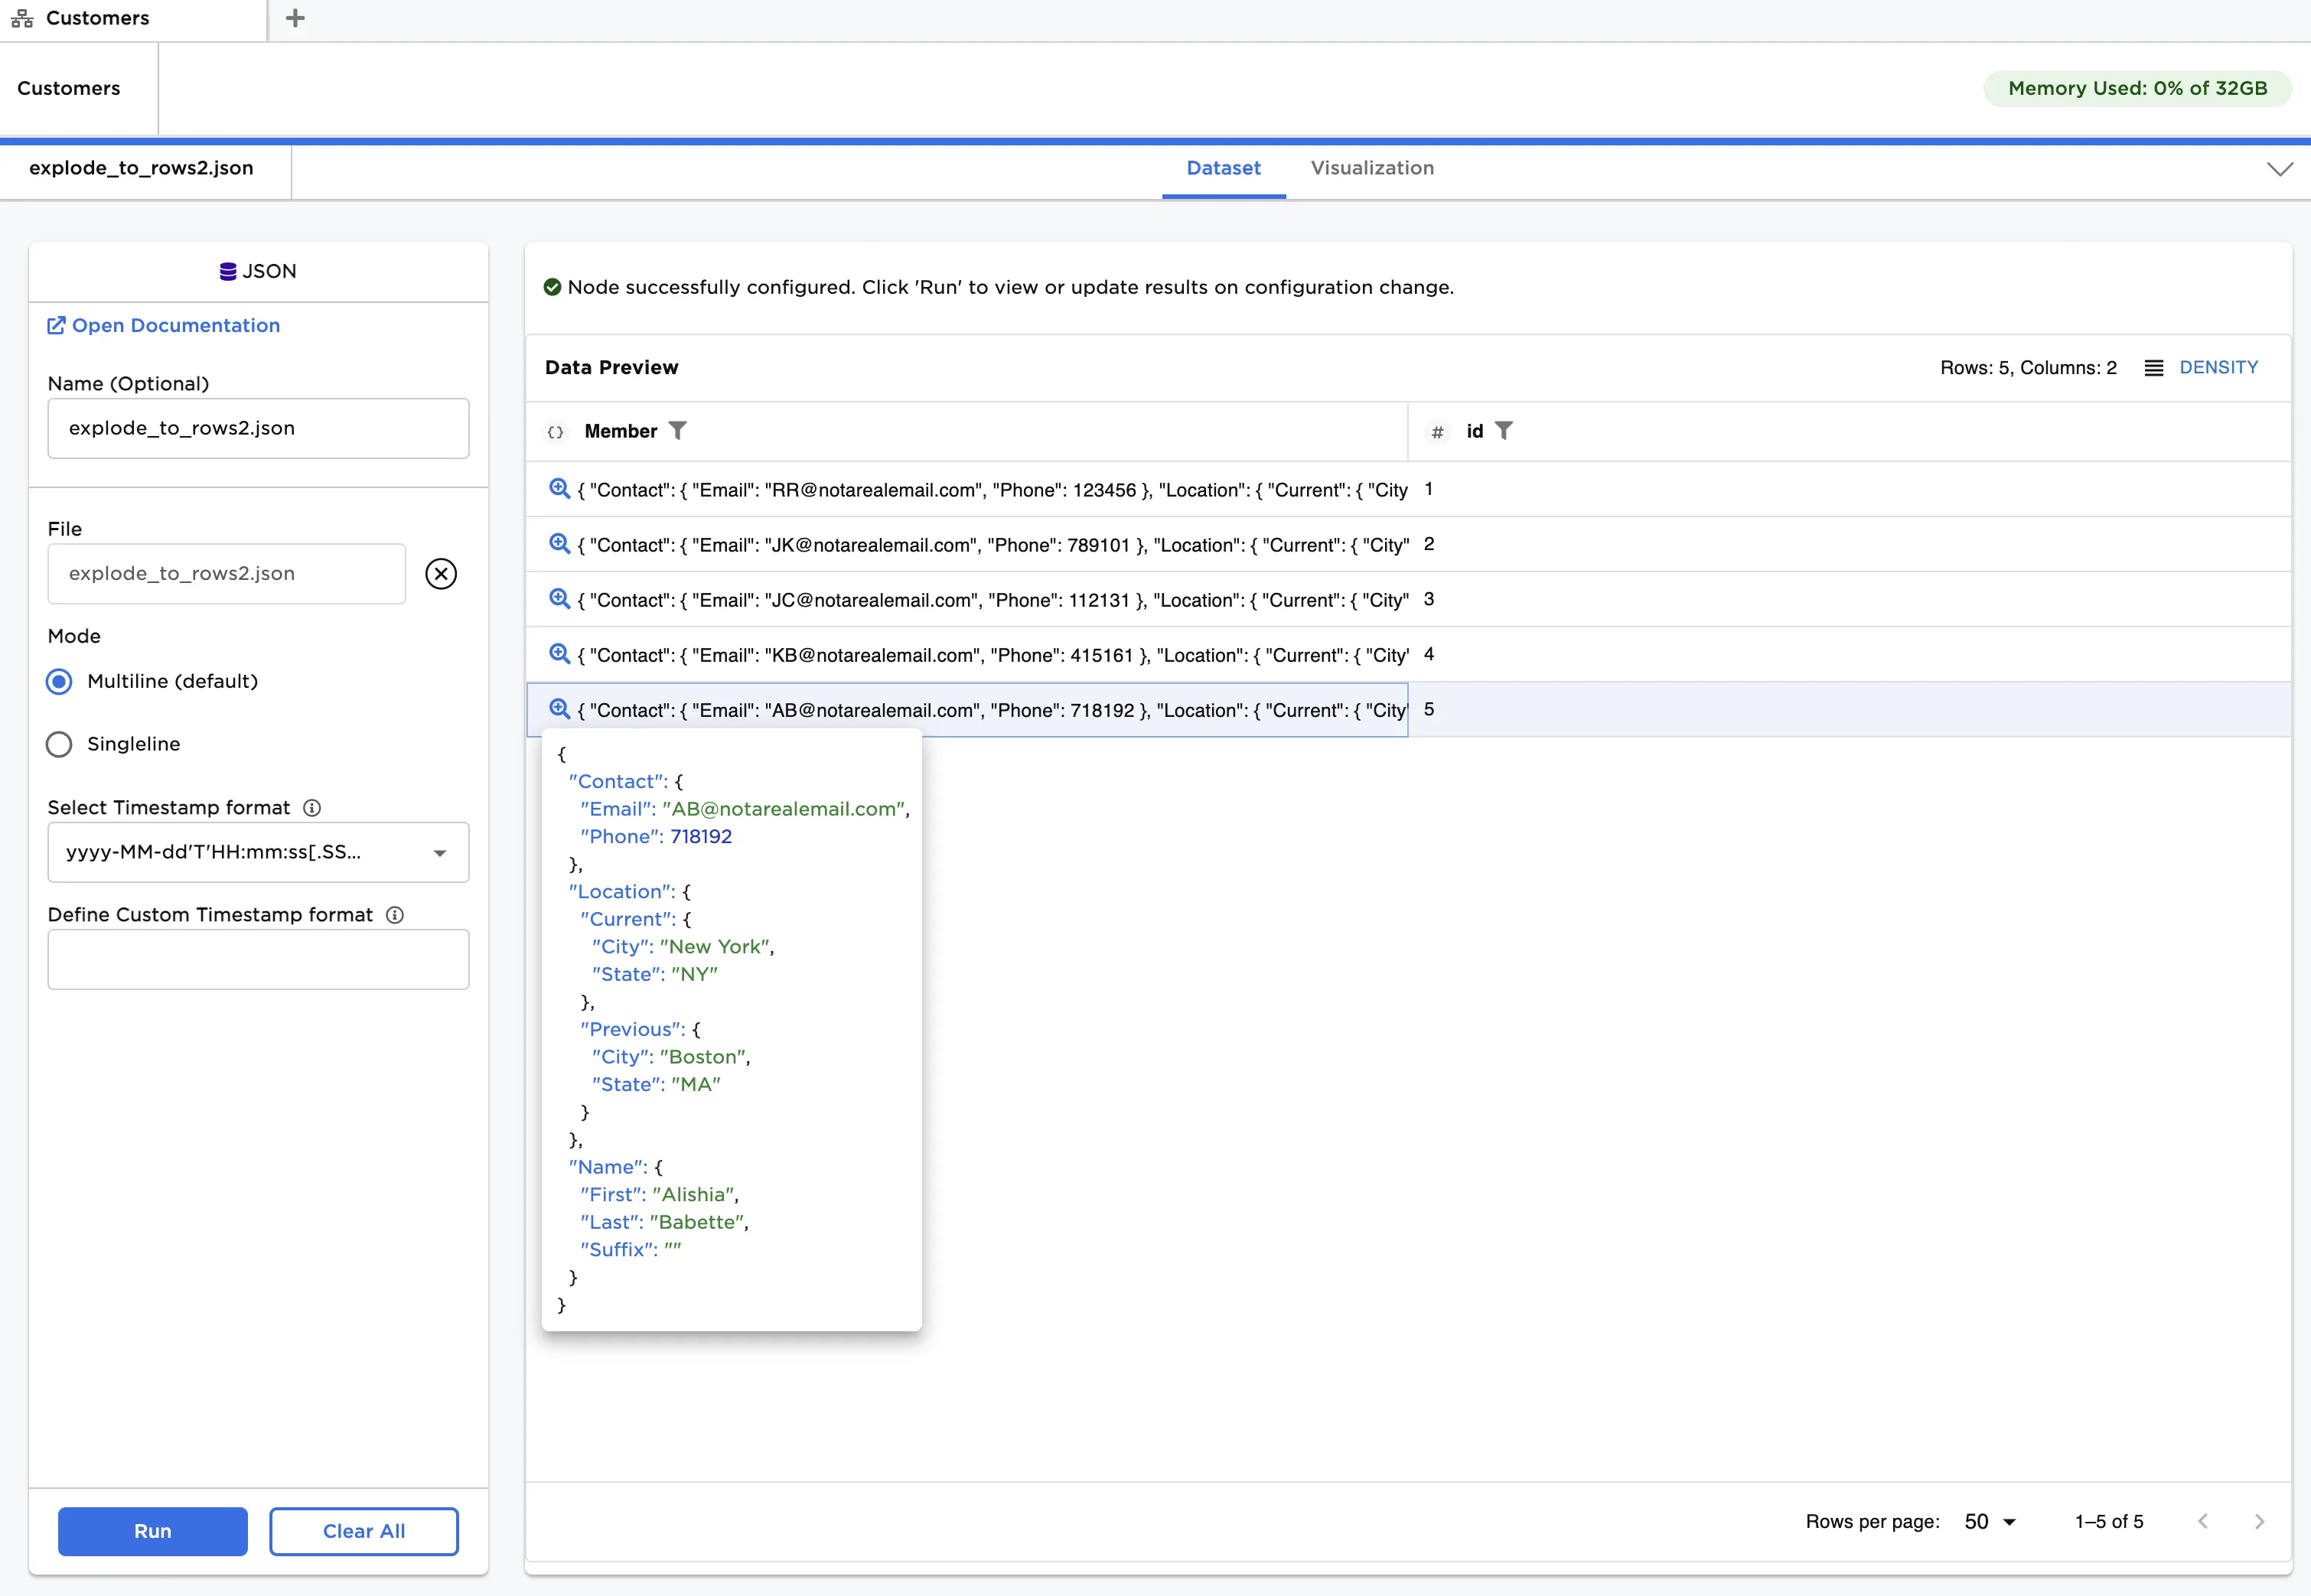
Figure 4: Example input data with a multilevel Object
Once loaded, we can see that there are three "top level" key/value pairs, with each value containing another Object. The top level pairs are:
- Name
- Location
- Contact
Additionally, "Location" has the following intermediate level of key/value pairs:
- Current
- Previous
Let's explode the Object column to rows:
- Connect an Explode to Rows node to a JSON node with the example data provided, which includes a multilevel Object.
- Select the "Member" column for Column.
- In the Output Column Name, enter "Exploded" and then click Run.
Similar to our first example, all of the lowest level values in the Object structure are exploded to rows in the "Exploded" column as shown in Figure 5. The difference lies in the "key" column. Notice how keys are chained together starting with the relevant top level key, and working down to the lowest level key corresponding to the value in the "Exploded" column.
Putting everything together, let's analyze the third row of data. The "id" of "1" indicates the value in "Exploded" is in the first row, or first Object, of the original dataframe. The "pos" of "2" indicates the value occupies the third position in the Object index. The "key" of "Location.Current.City" is the hierarchy of keys corresponding to this index. Finally, we see the value of "San Francisco" in the "Exploded" column.
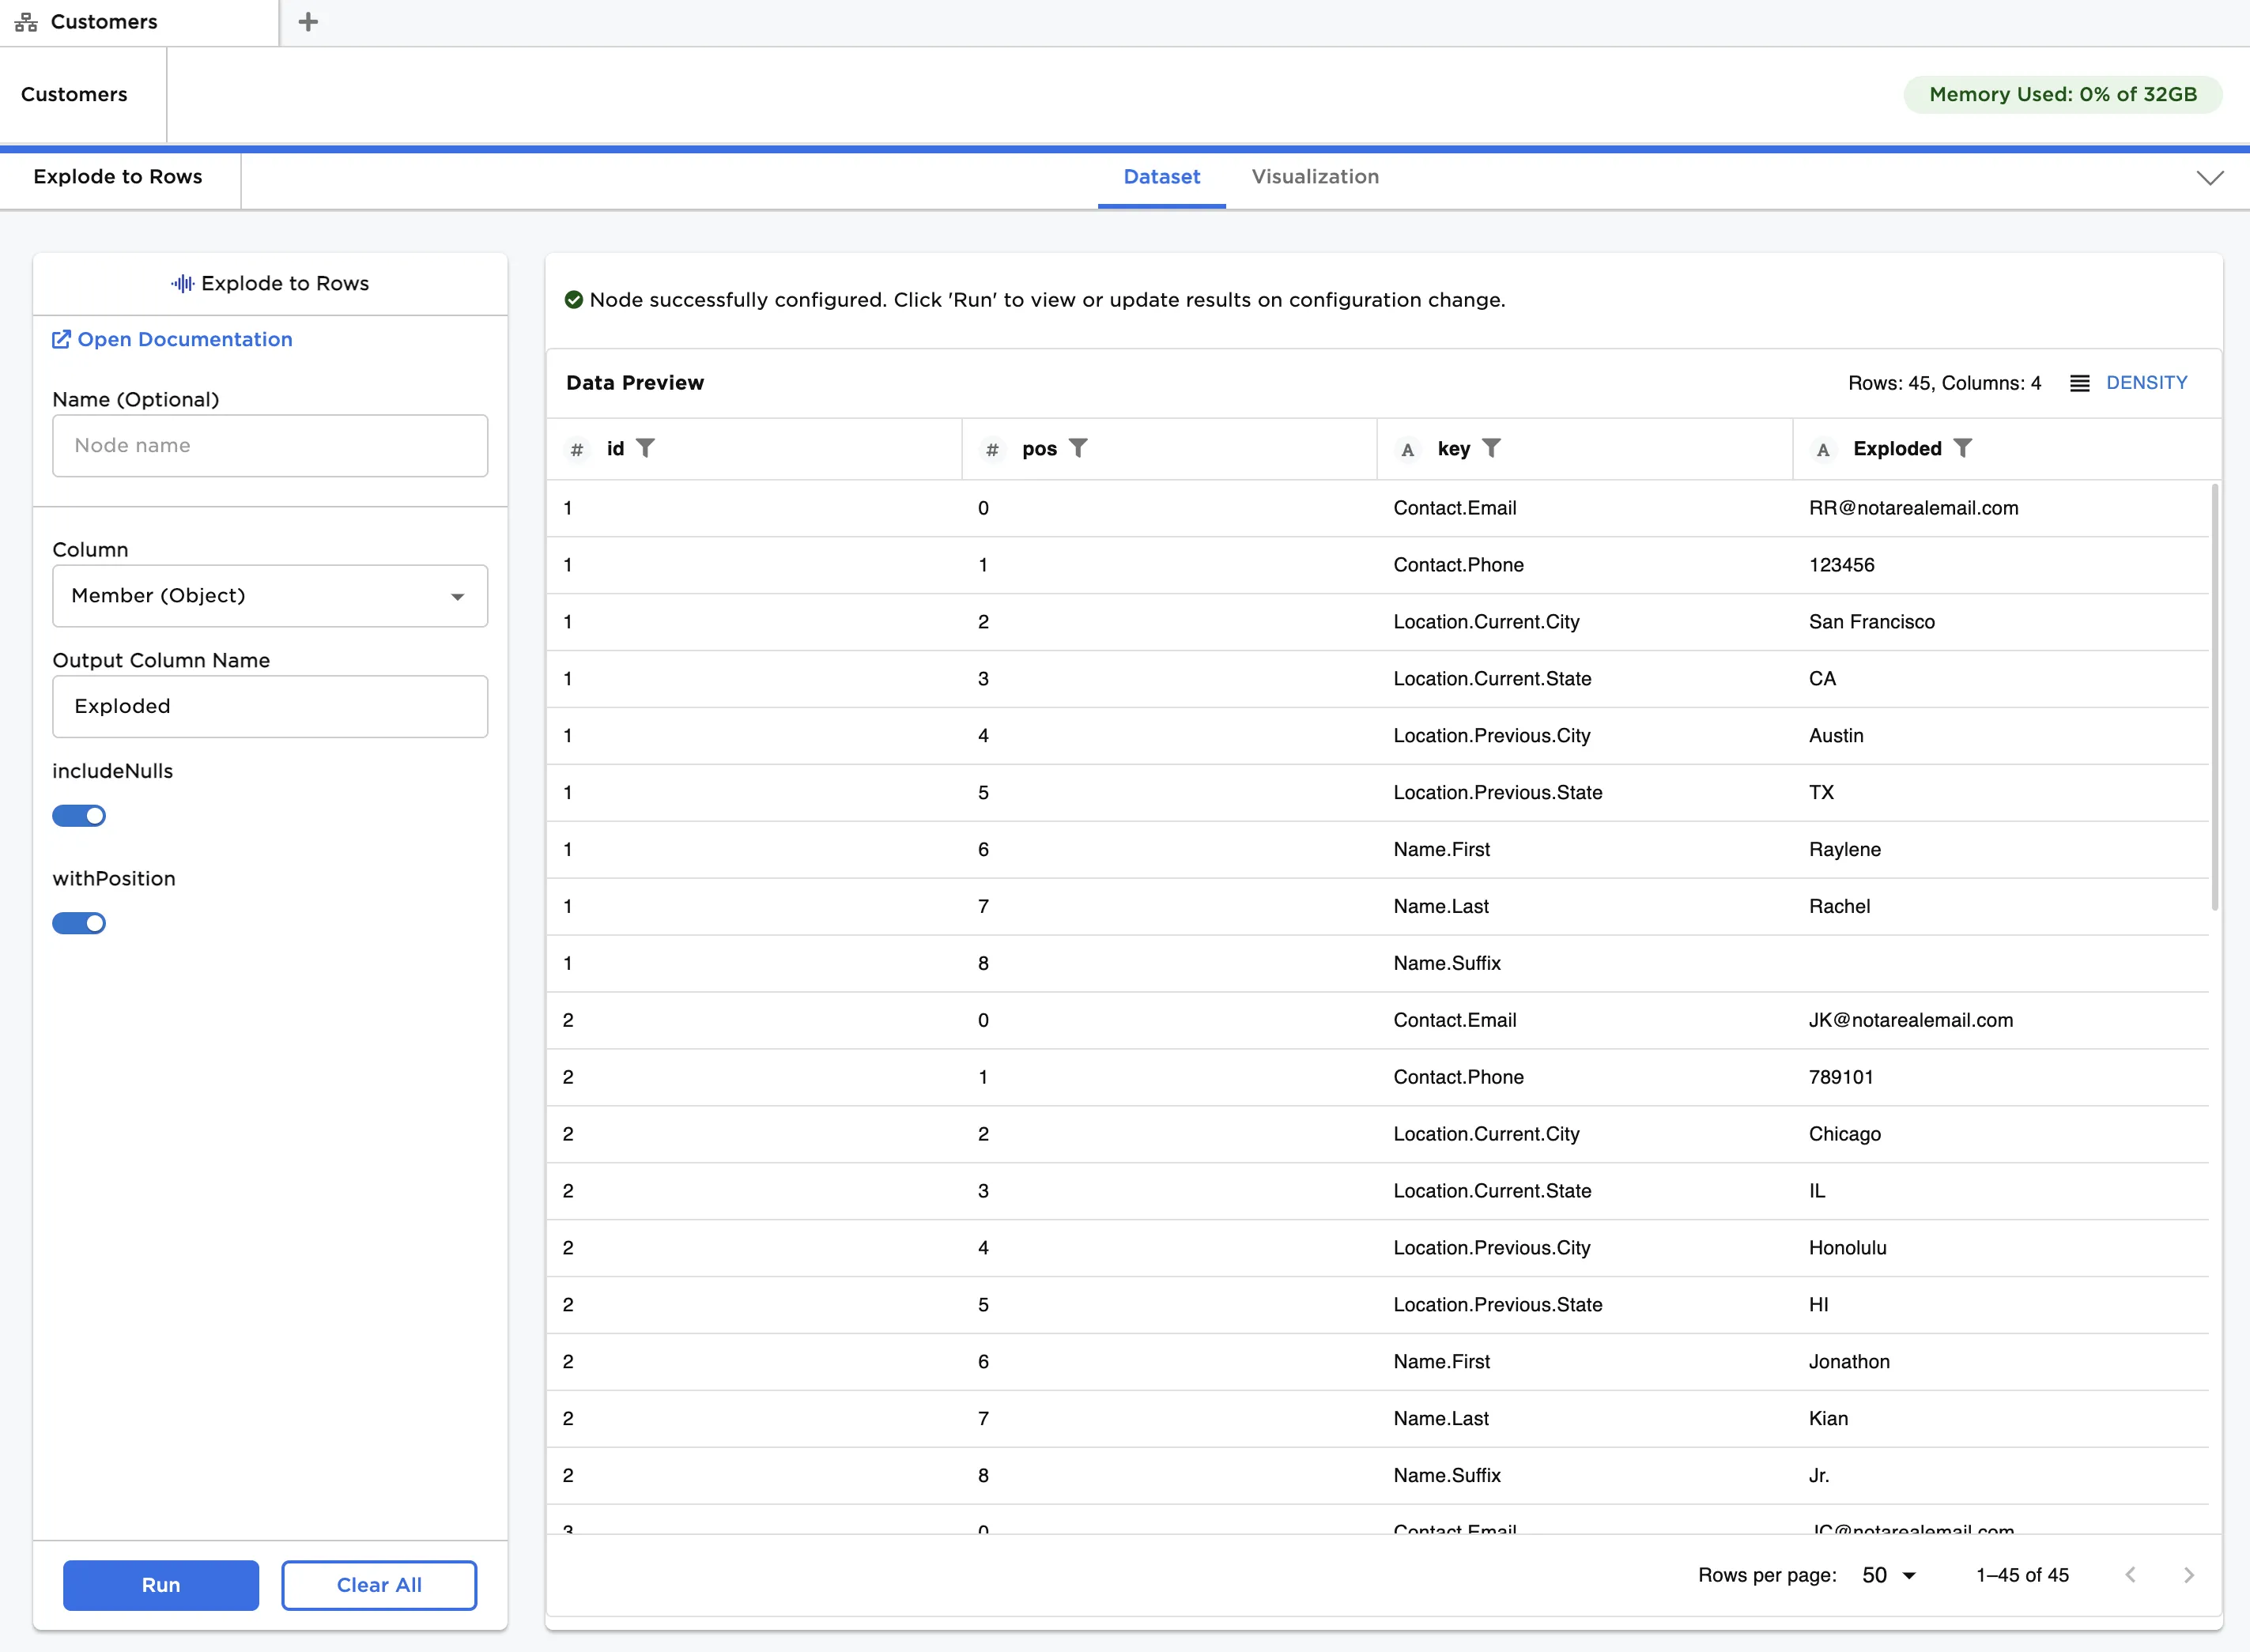
Figure 5: Exploding a multilevel Object to rows
We present one more example, using Arrays instead of Objects, to show how the includeNulls field works.
The file, when loaded using the JSON input node, creates an Array column with hypothetical model and wheel selections for electric vehicle orders, along with the order date. Note that several entries for the wheel are missing (i.e., null), which we deliberately removed when preparing the data.
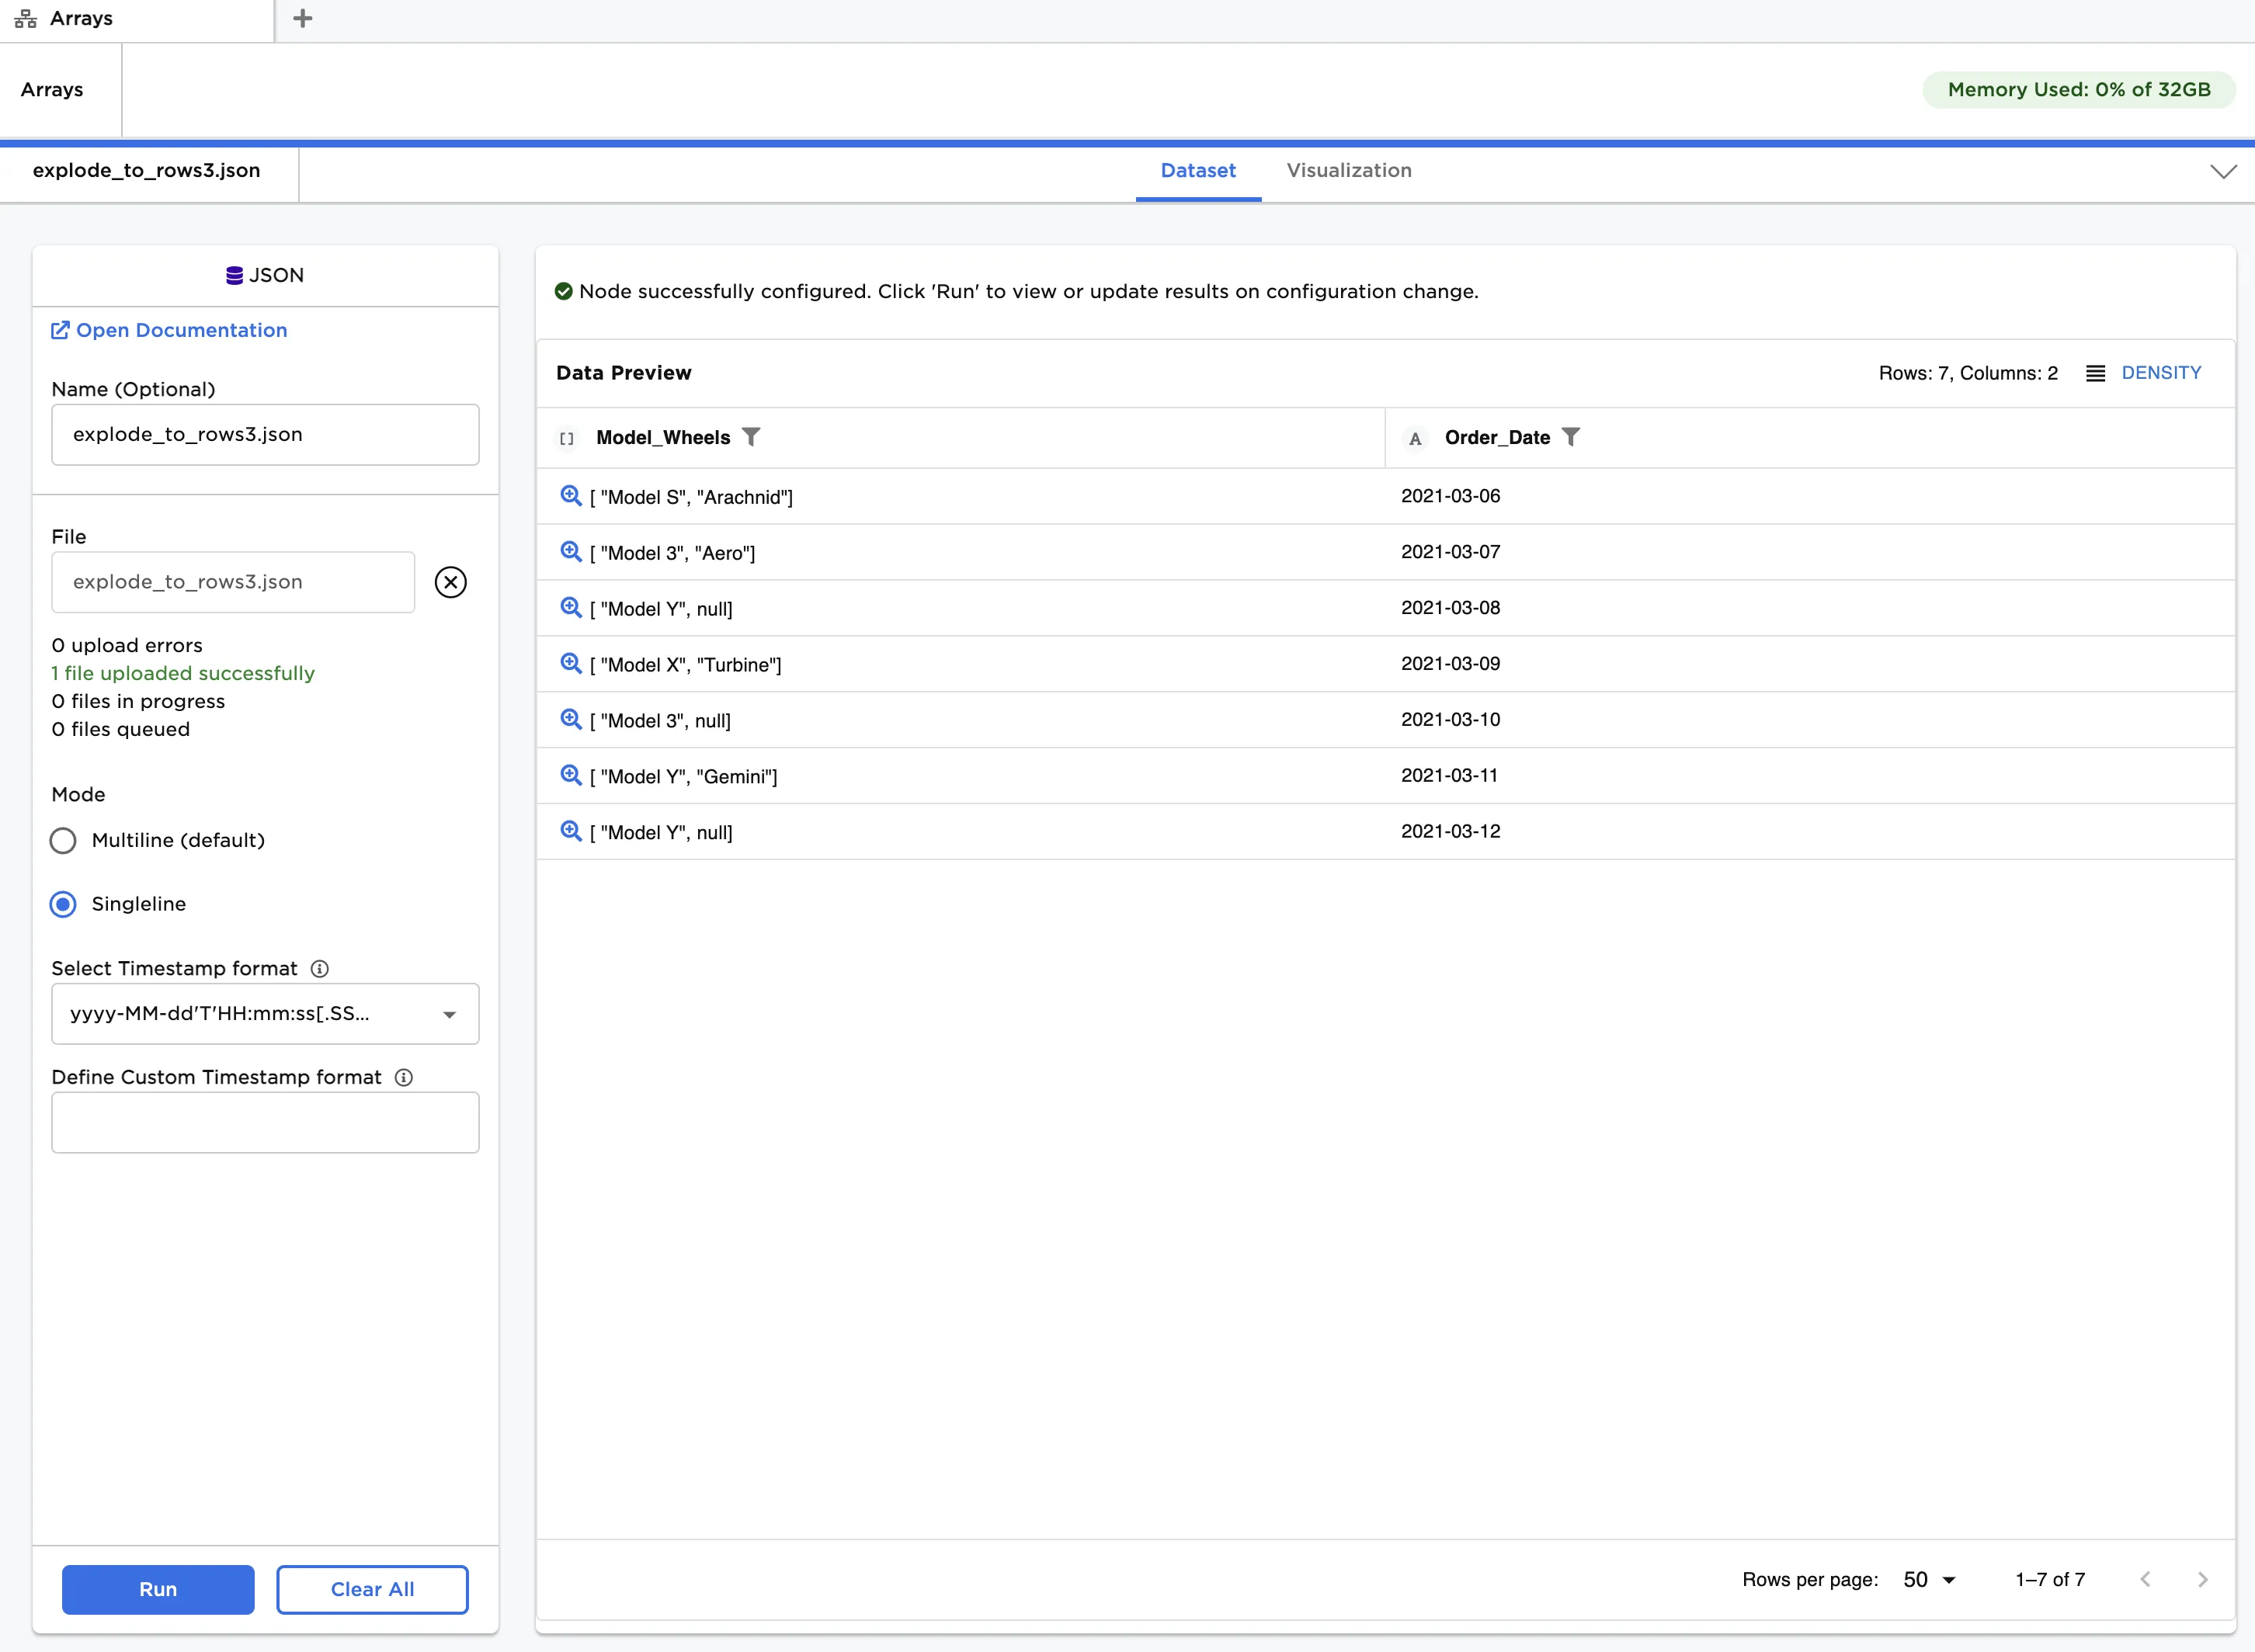
Figure 6: Example input data with an Array
- Connect an Explode to Rows node to a JSON node with the example data provided.
- In the JSON node under Mode, select "Singleline."
- In the Explode to Rows node, select the "Model_Wheels" column for Column.
- In the Output Column Name, enter "Exploded".
- Toggle includeNulls off and click Run.
The output is shown in Figure 7. You will see that there are no null values in the "Exploded" column, since those rows have been removed.
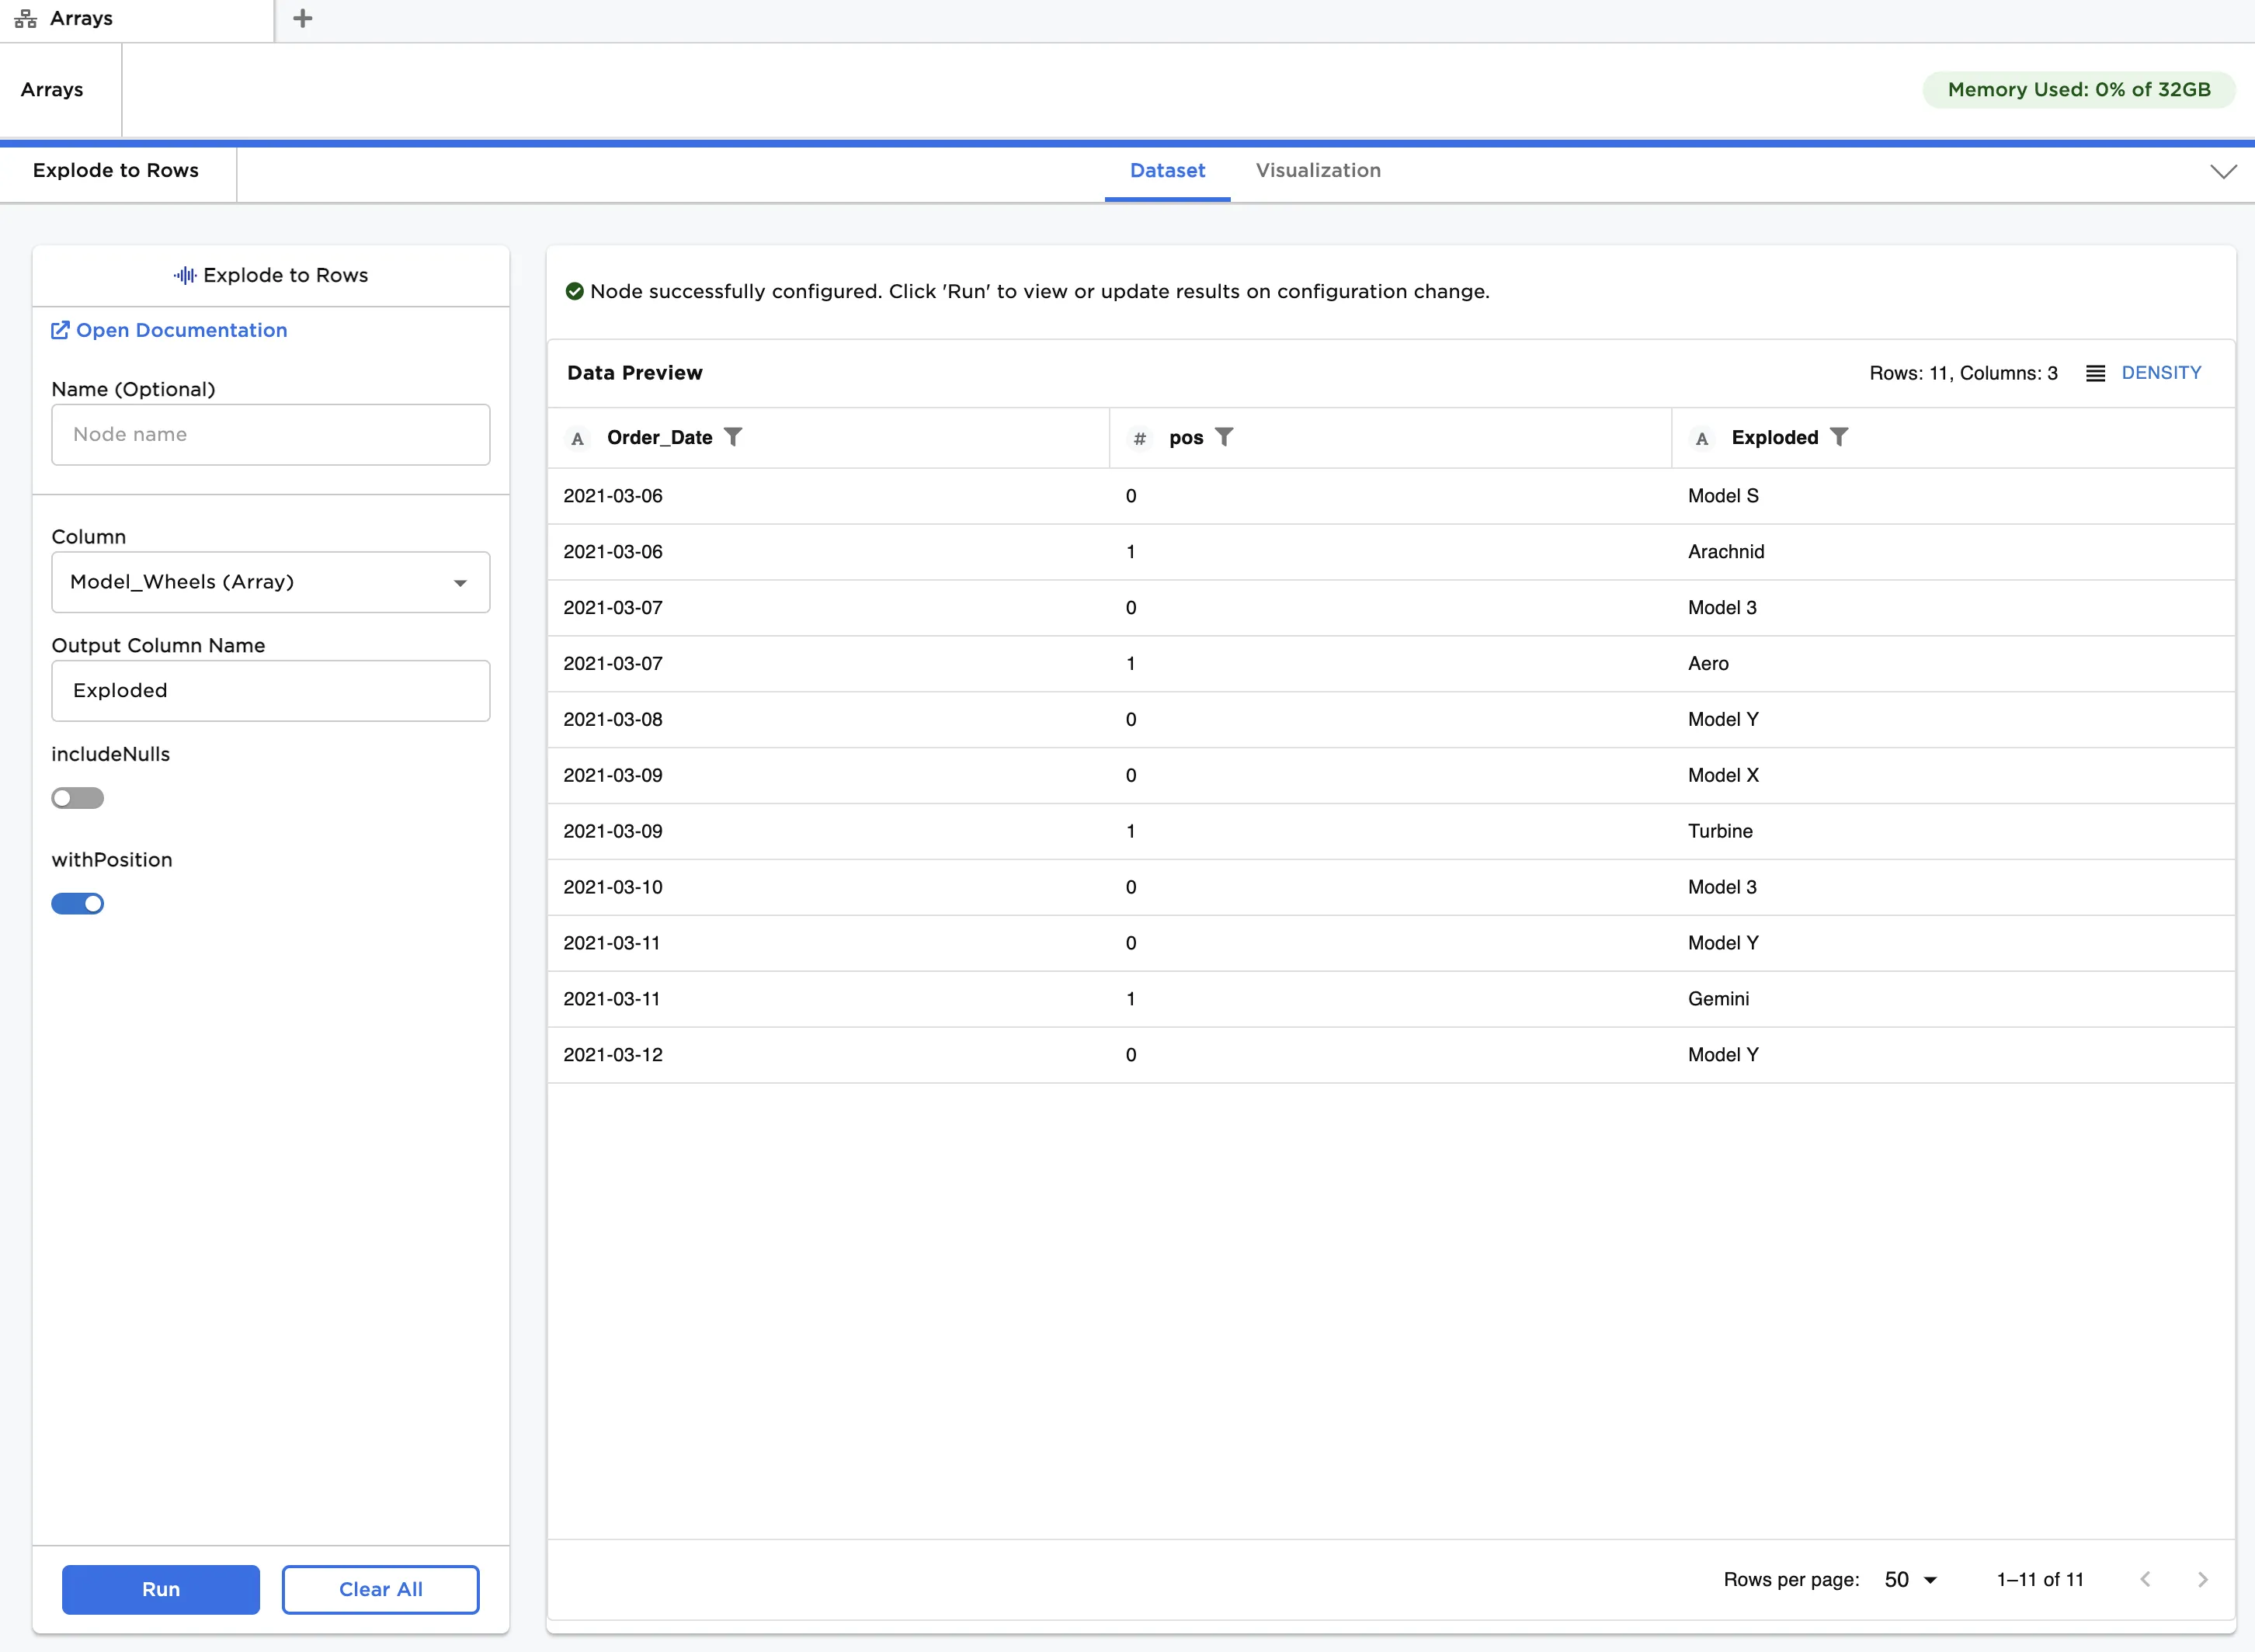
Figure 7: Exploding an Array to rows