Split Array to Columns
Disassemble a column of type Array, consisting of one or more entries, into separate columns. This node performs the opposite role of the Assemble Array node.
Arrays in Visual Notebooks can contain the following combinations of data types:
- Strings, numeric (i.e., double, integer, long), timestamp, and Boolean (Note: all data is converted to string)
- Multiple arrays
If an Array consists entirely of numeric values, it will be labeled as type Vector.
Data analysis often involves a large number of concurrent mathematical operations on structured data (i.e., stored in a database and indexable by row and column). Matrix algebra is most commonly used to perform these operations efficiently. Arrays are equivalent to row vectors, and they complement the efficient column operations built into Visual Notebooks. Several transformations are provided for manipulating Arrays, including creating Arrays, extracting values from Arrays and disassembling Arrays.
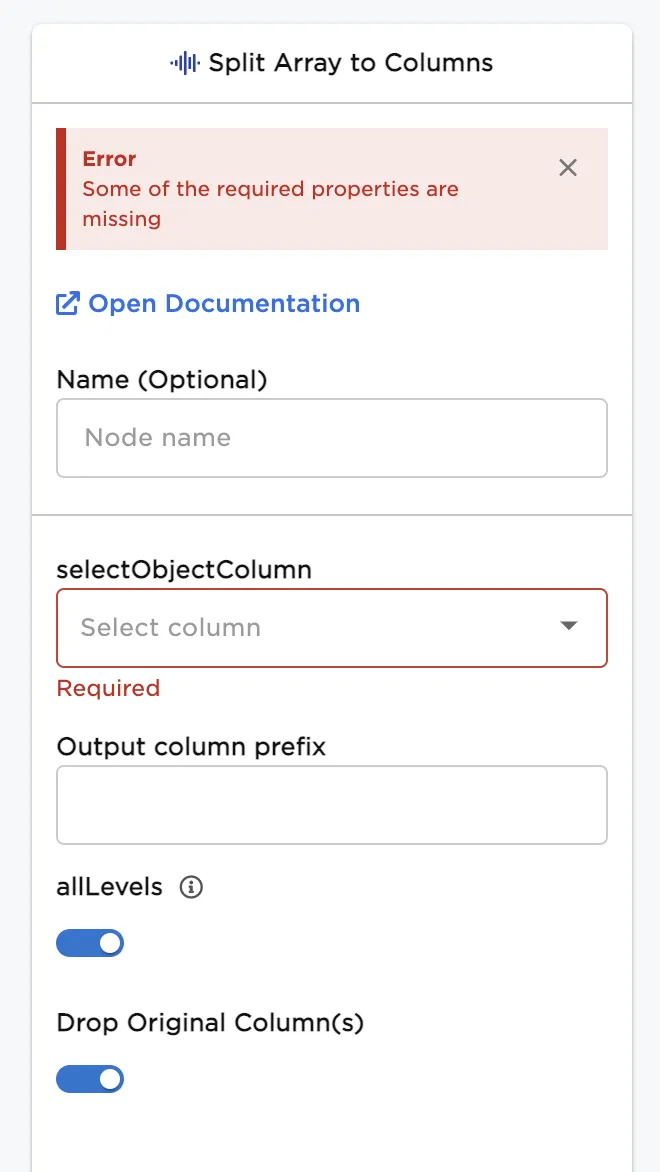
Configuration
| Field | Description |
|---|---|
| Name | Name of the node A user-specified node name, displayed in the canvas and in the dataframe as a tab. |
| Select Object Column | Select single column of type Array Select the input column to be disassembled into multiple columns in the output dataframe. |
| Output column prefix | Desired prefix for output column names Enter a prefix to help identify which columns were generated in the output dataframe. Output columns are named "_" where n ≥ 1 is a whole number that increments by one for each column. |
| allLevels | Degree of disassembly of Array entries Specify whether to disassemble only the first level of Array entries or disassemble all levels recursively. This setting has no effect if the Array schema has only a single level of Array entries. When toggled on, all levels of Arrays are extracted. Output columns will not contain Arrays. When toggled off, only the first level of Array entries are disassembled. Arrays containing nested Arrays as entries create new columns of type Array. |
| Drop Original Column(s) | Toggle to drop/keep original columns Leave the switch on to delete the original Array column from which output columns are extracted. Toggle the switch off to keep the selected column. |
Node Inputs/Outputs
| Input | A Visual Notebooks dataframe, and labels (optional) from the output of an Assemble Array node |
|---|---|
| Output | A dataframe with at least one Array column |
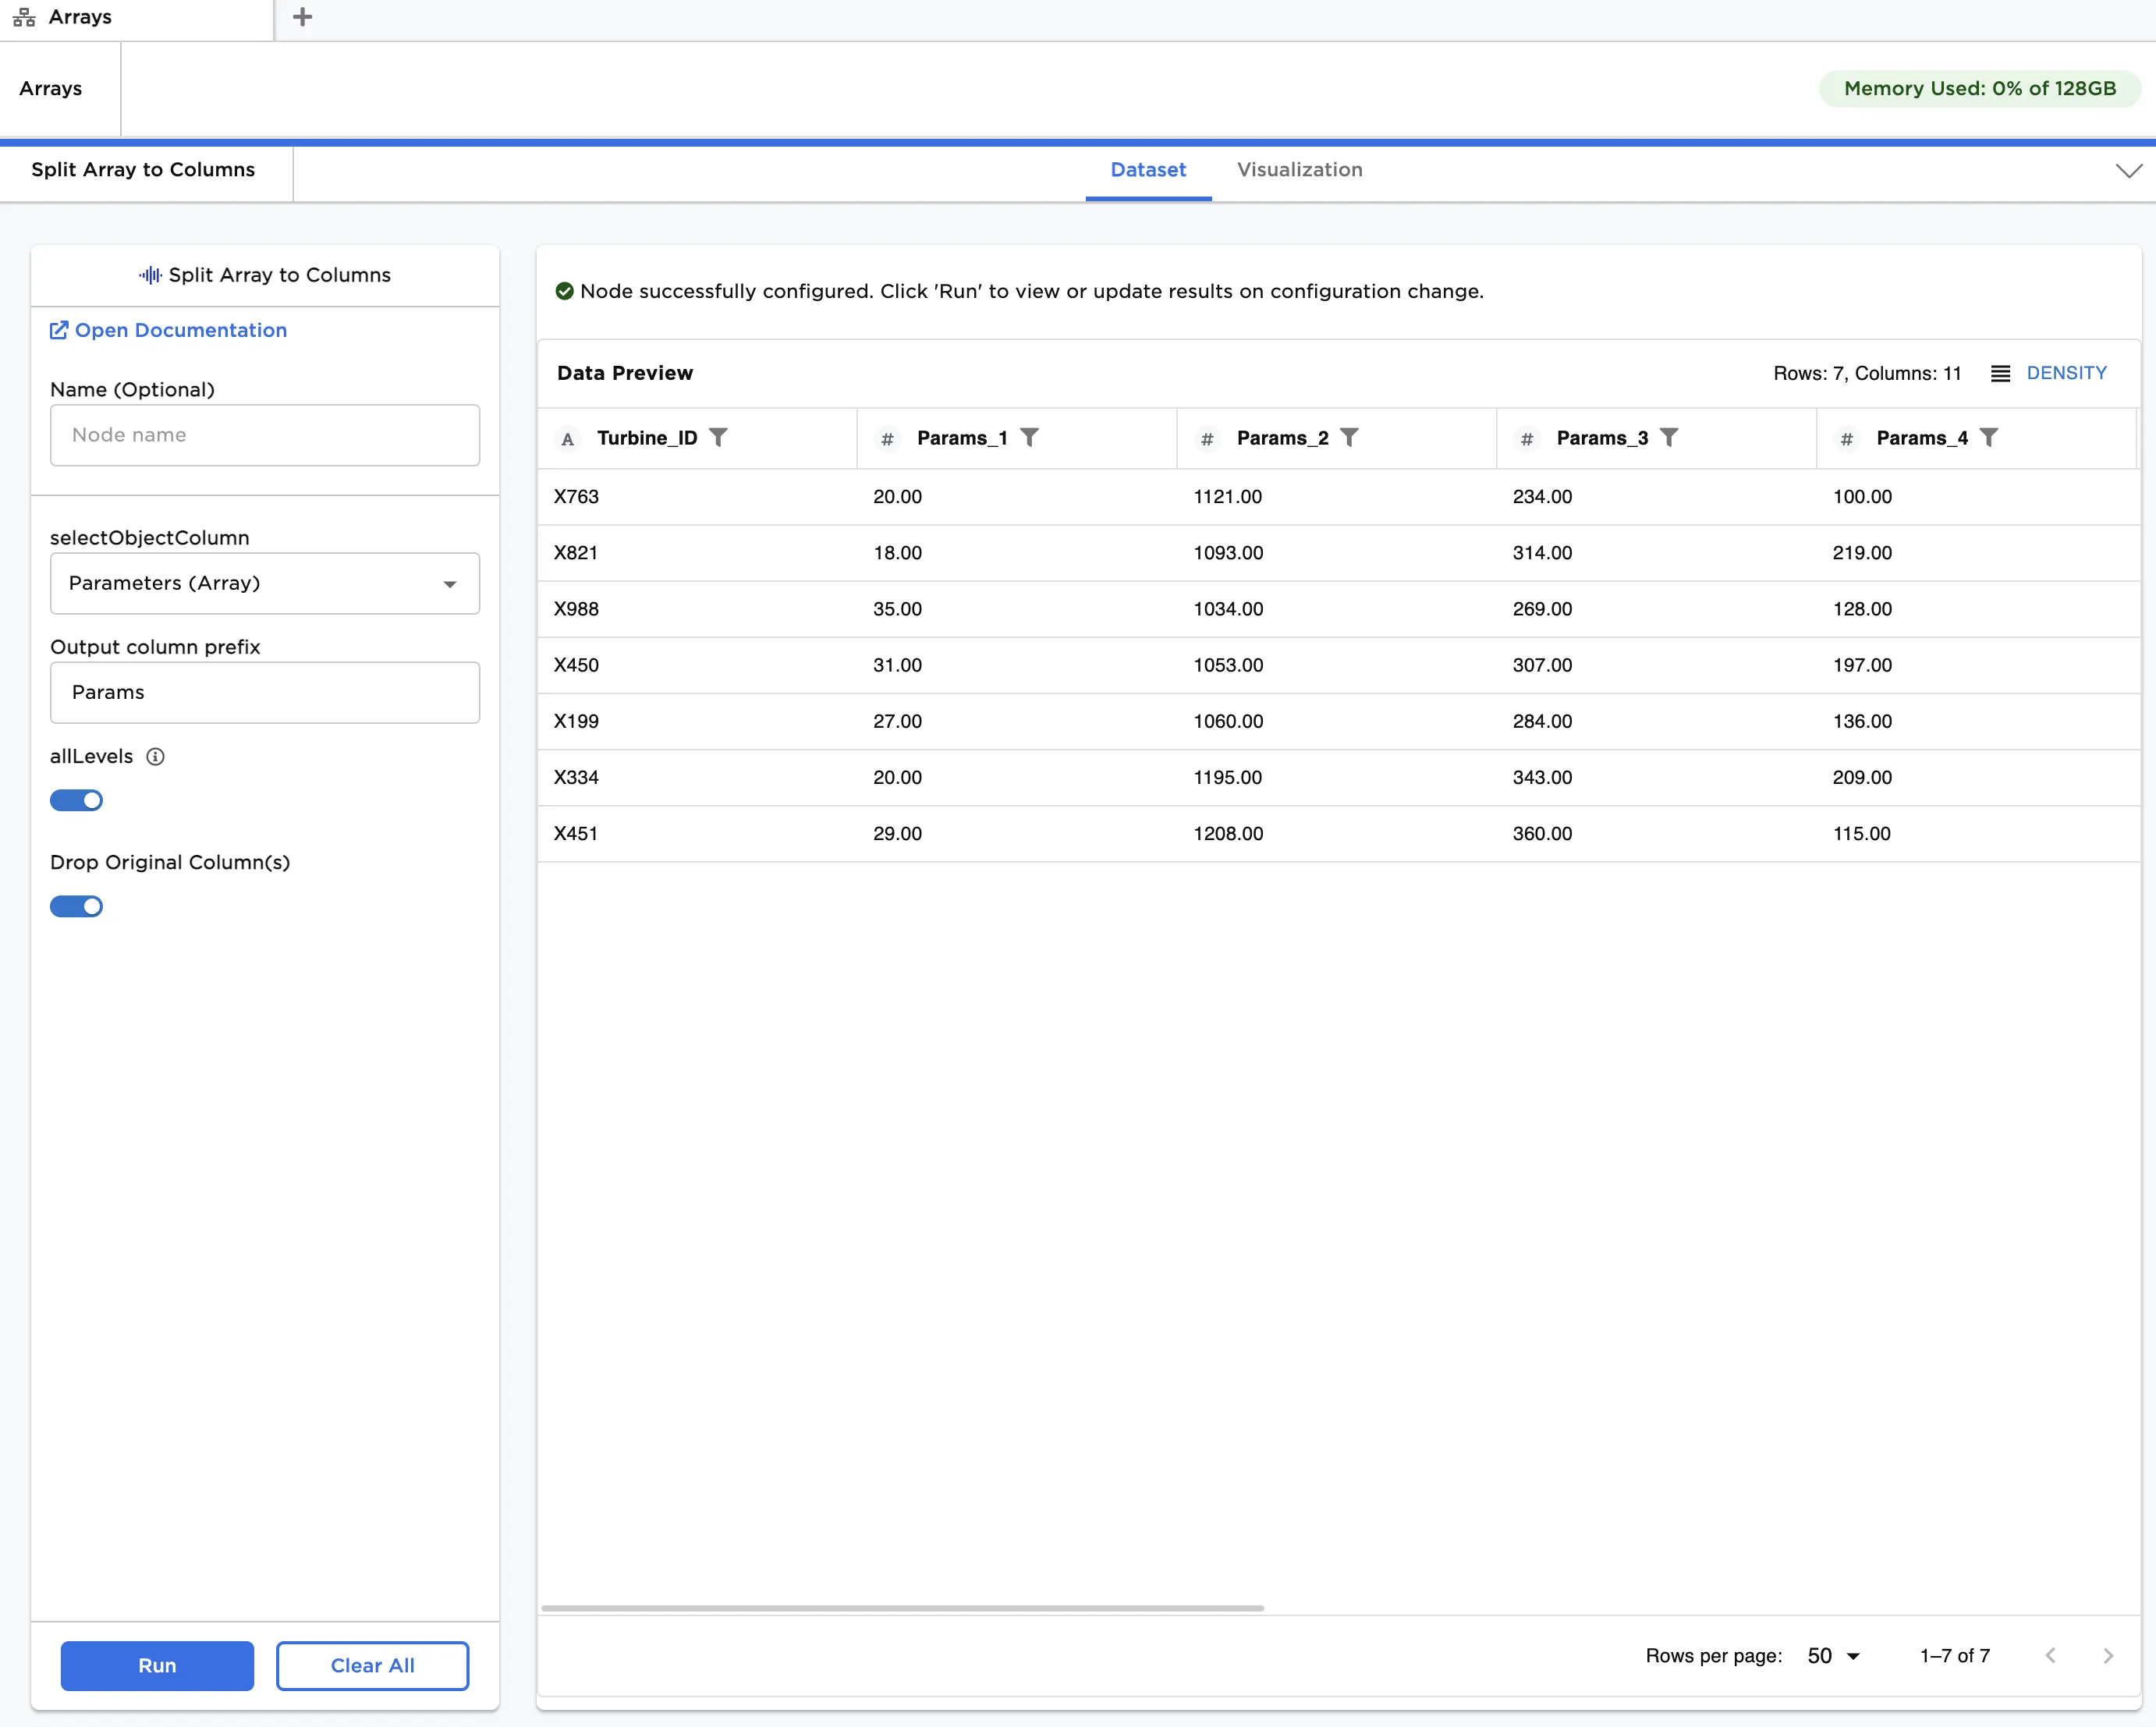
Figure 1: Example dataframe output
Examples
The data shown in Figure 2 is used in the following examples. It contains operating data for a number of gas turbine powered generators, including temperatures, pressures, speed, and output power components. We would like to combine the temperatures into an Array and then disassemble the Array into individual columns.
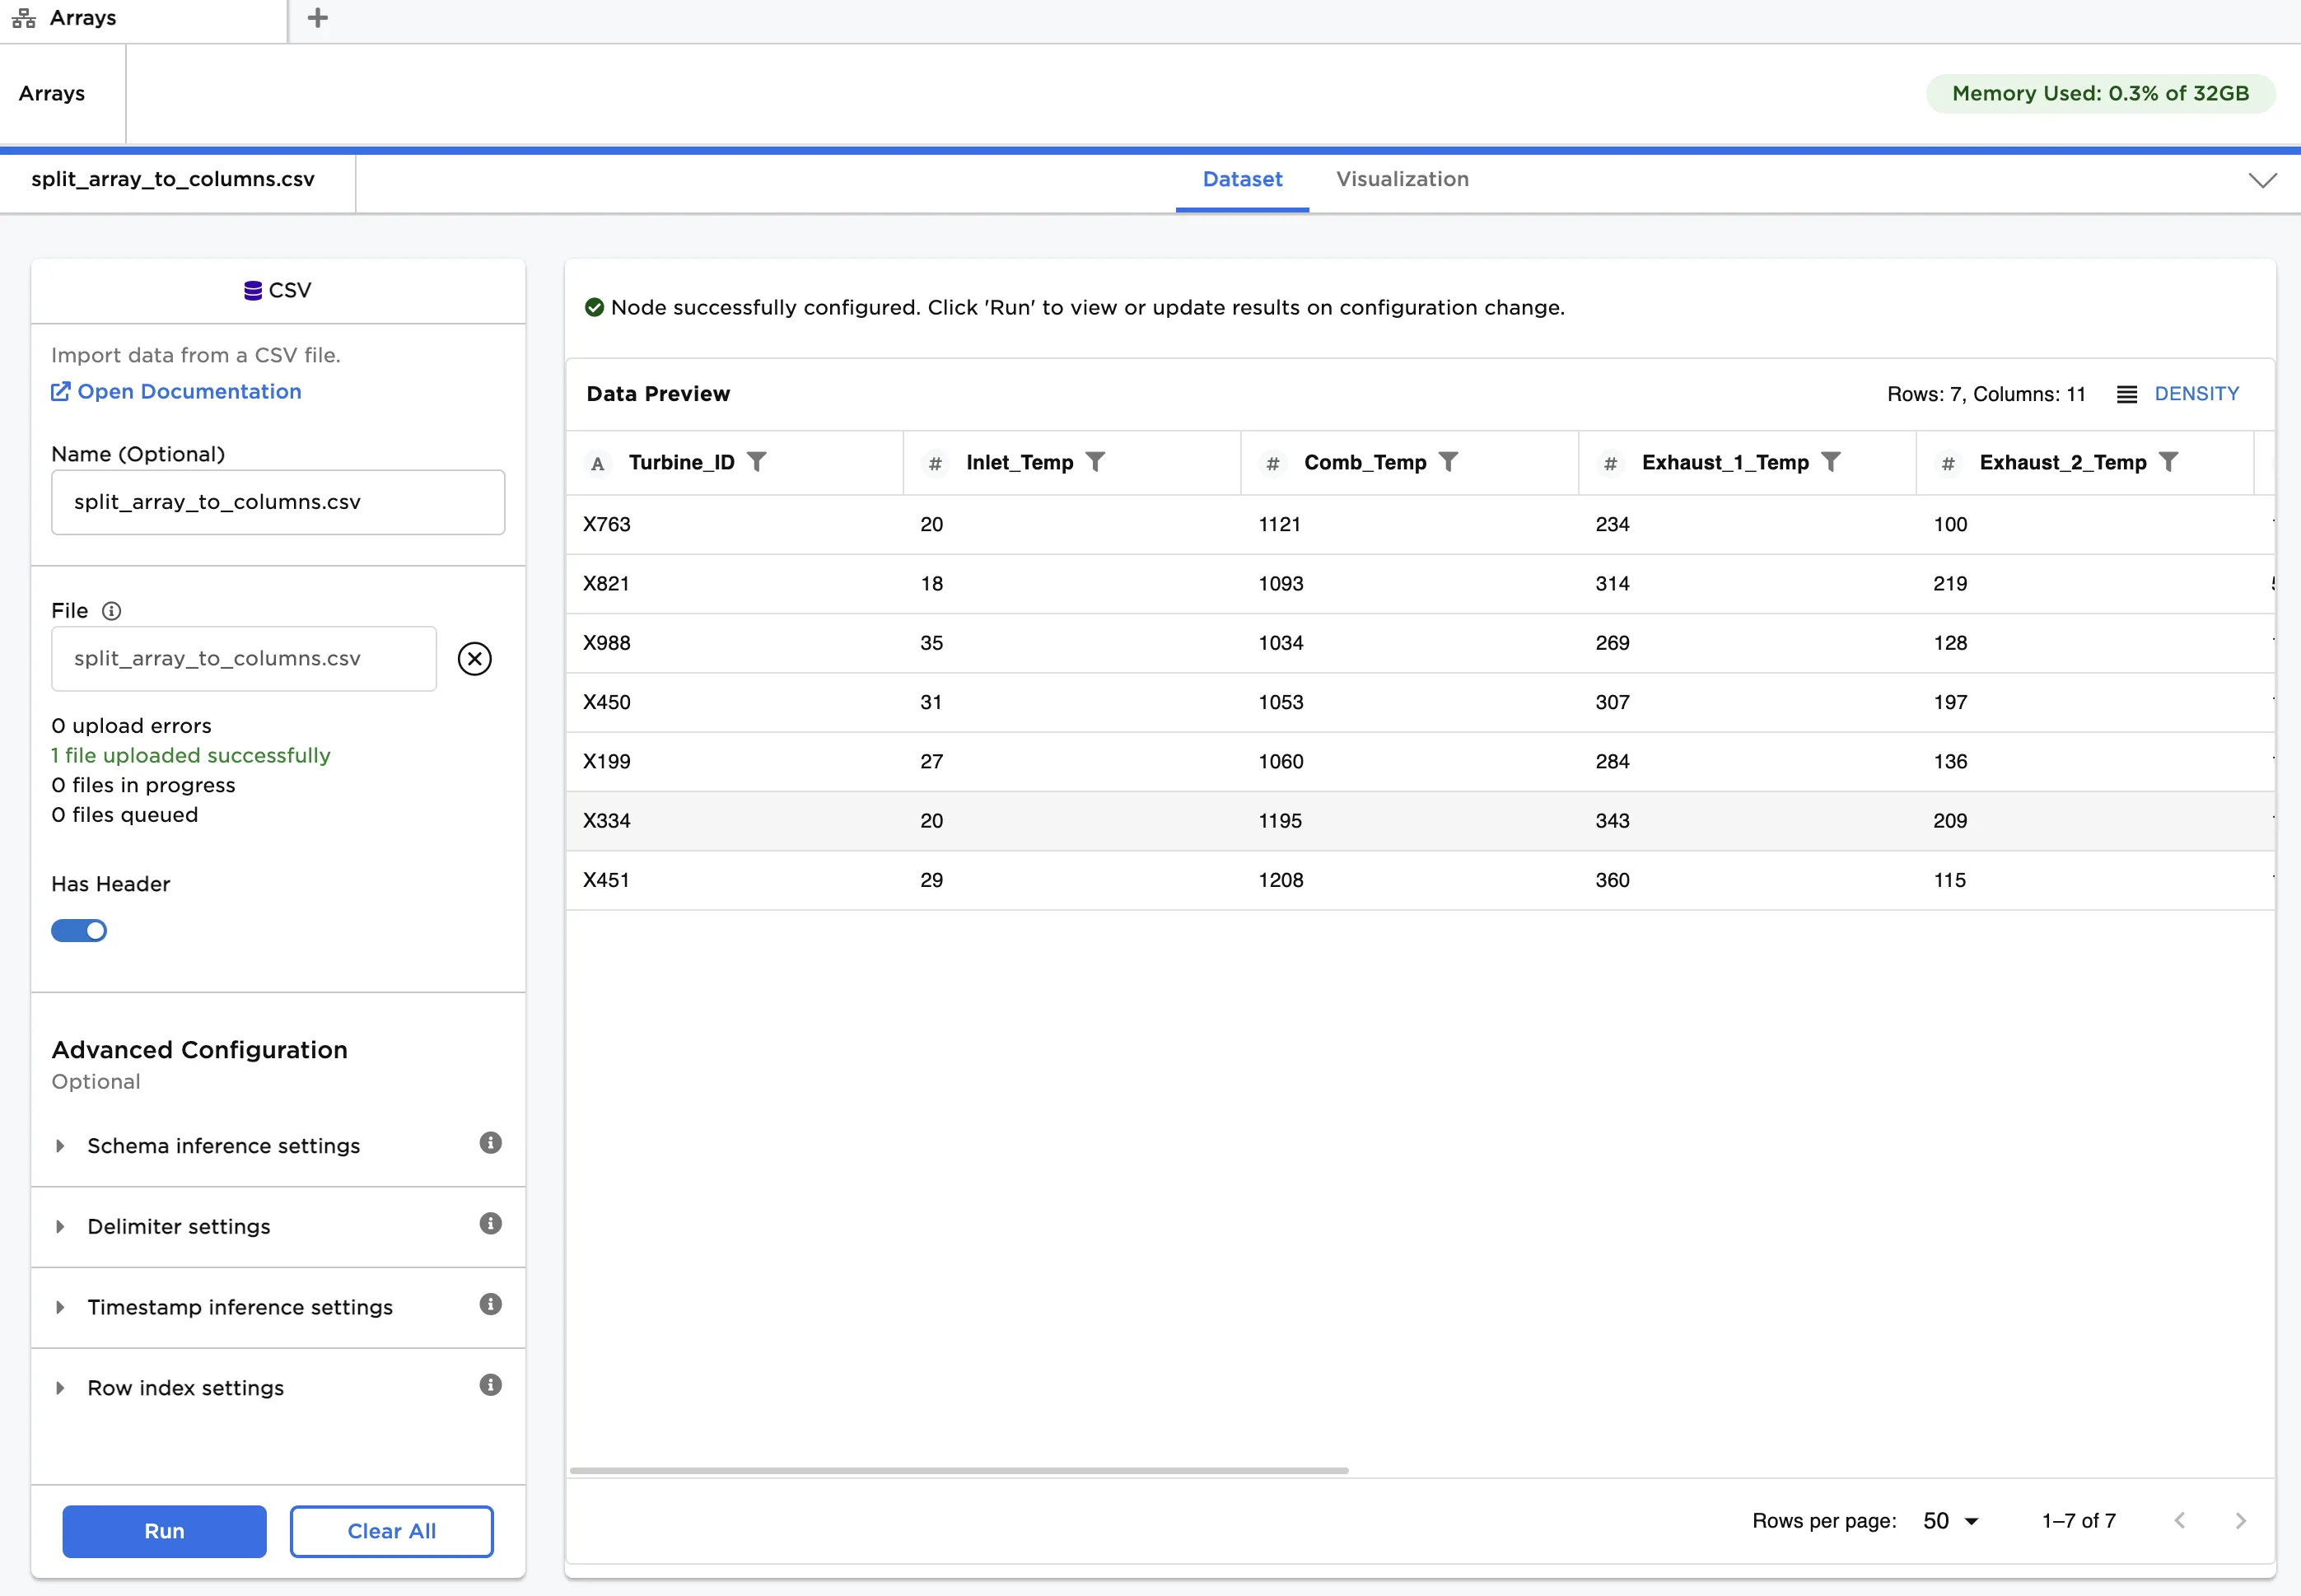
Figure 2: Example input data
- For simplicity, let's first drop all columns except the four temperature columns: Inlet_Temp, Comb_Temp, Exhaust_1_Temp, and Exhaust_2_Temp. Connect a Select or Drop Columns node to an existing node. In this case, it is connected to a CSV node with the example data provided.
- Ensure Select Columns to Keep is selected for Selection Method.
- In Select Columns to Combine check Select specific columns and add the four temperature columns. Click Run.
- Connect an Assemble Array node to the Select or Drop Columns node.
- Enter "Temps" for Output Column Name.
- In Select Columns to Combine check Select specific columns and check Select all. Click Run.
- Connect a Split Array to Columns node to the Assemble Array node. Click Run.
After running the node, the split Array can be seen among the columns, which is shown in Figure 3. Note: The node has two input ports: "Dataset" and "Labels". "Dataset" is the dataframe input, while "Labels" is a list of the column names applied to the split Array. Labels are useful when you need more flexibility in naming each column than providing a prefix can provide.
Try connecting the Labels output of the Assemble Array node to the Labels input of the Split Array to Columns node. You should observe that the original column names are mapped to the split array. We have now completely reversed the assemble Array operation.
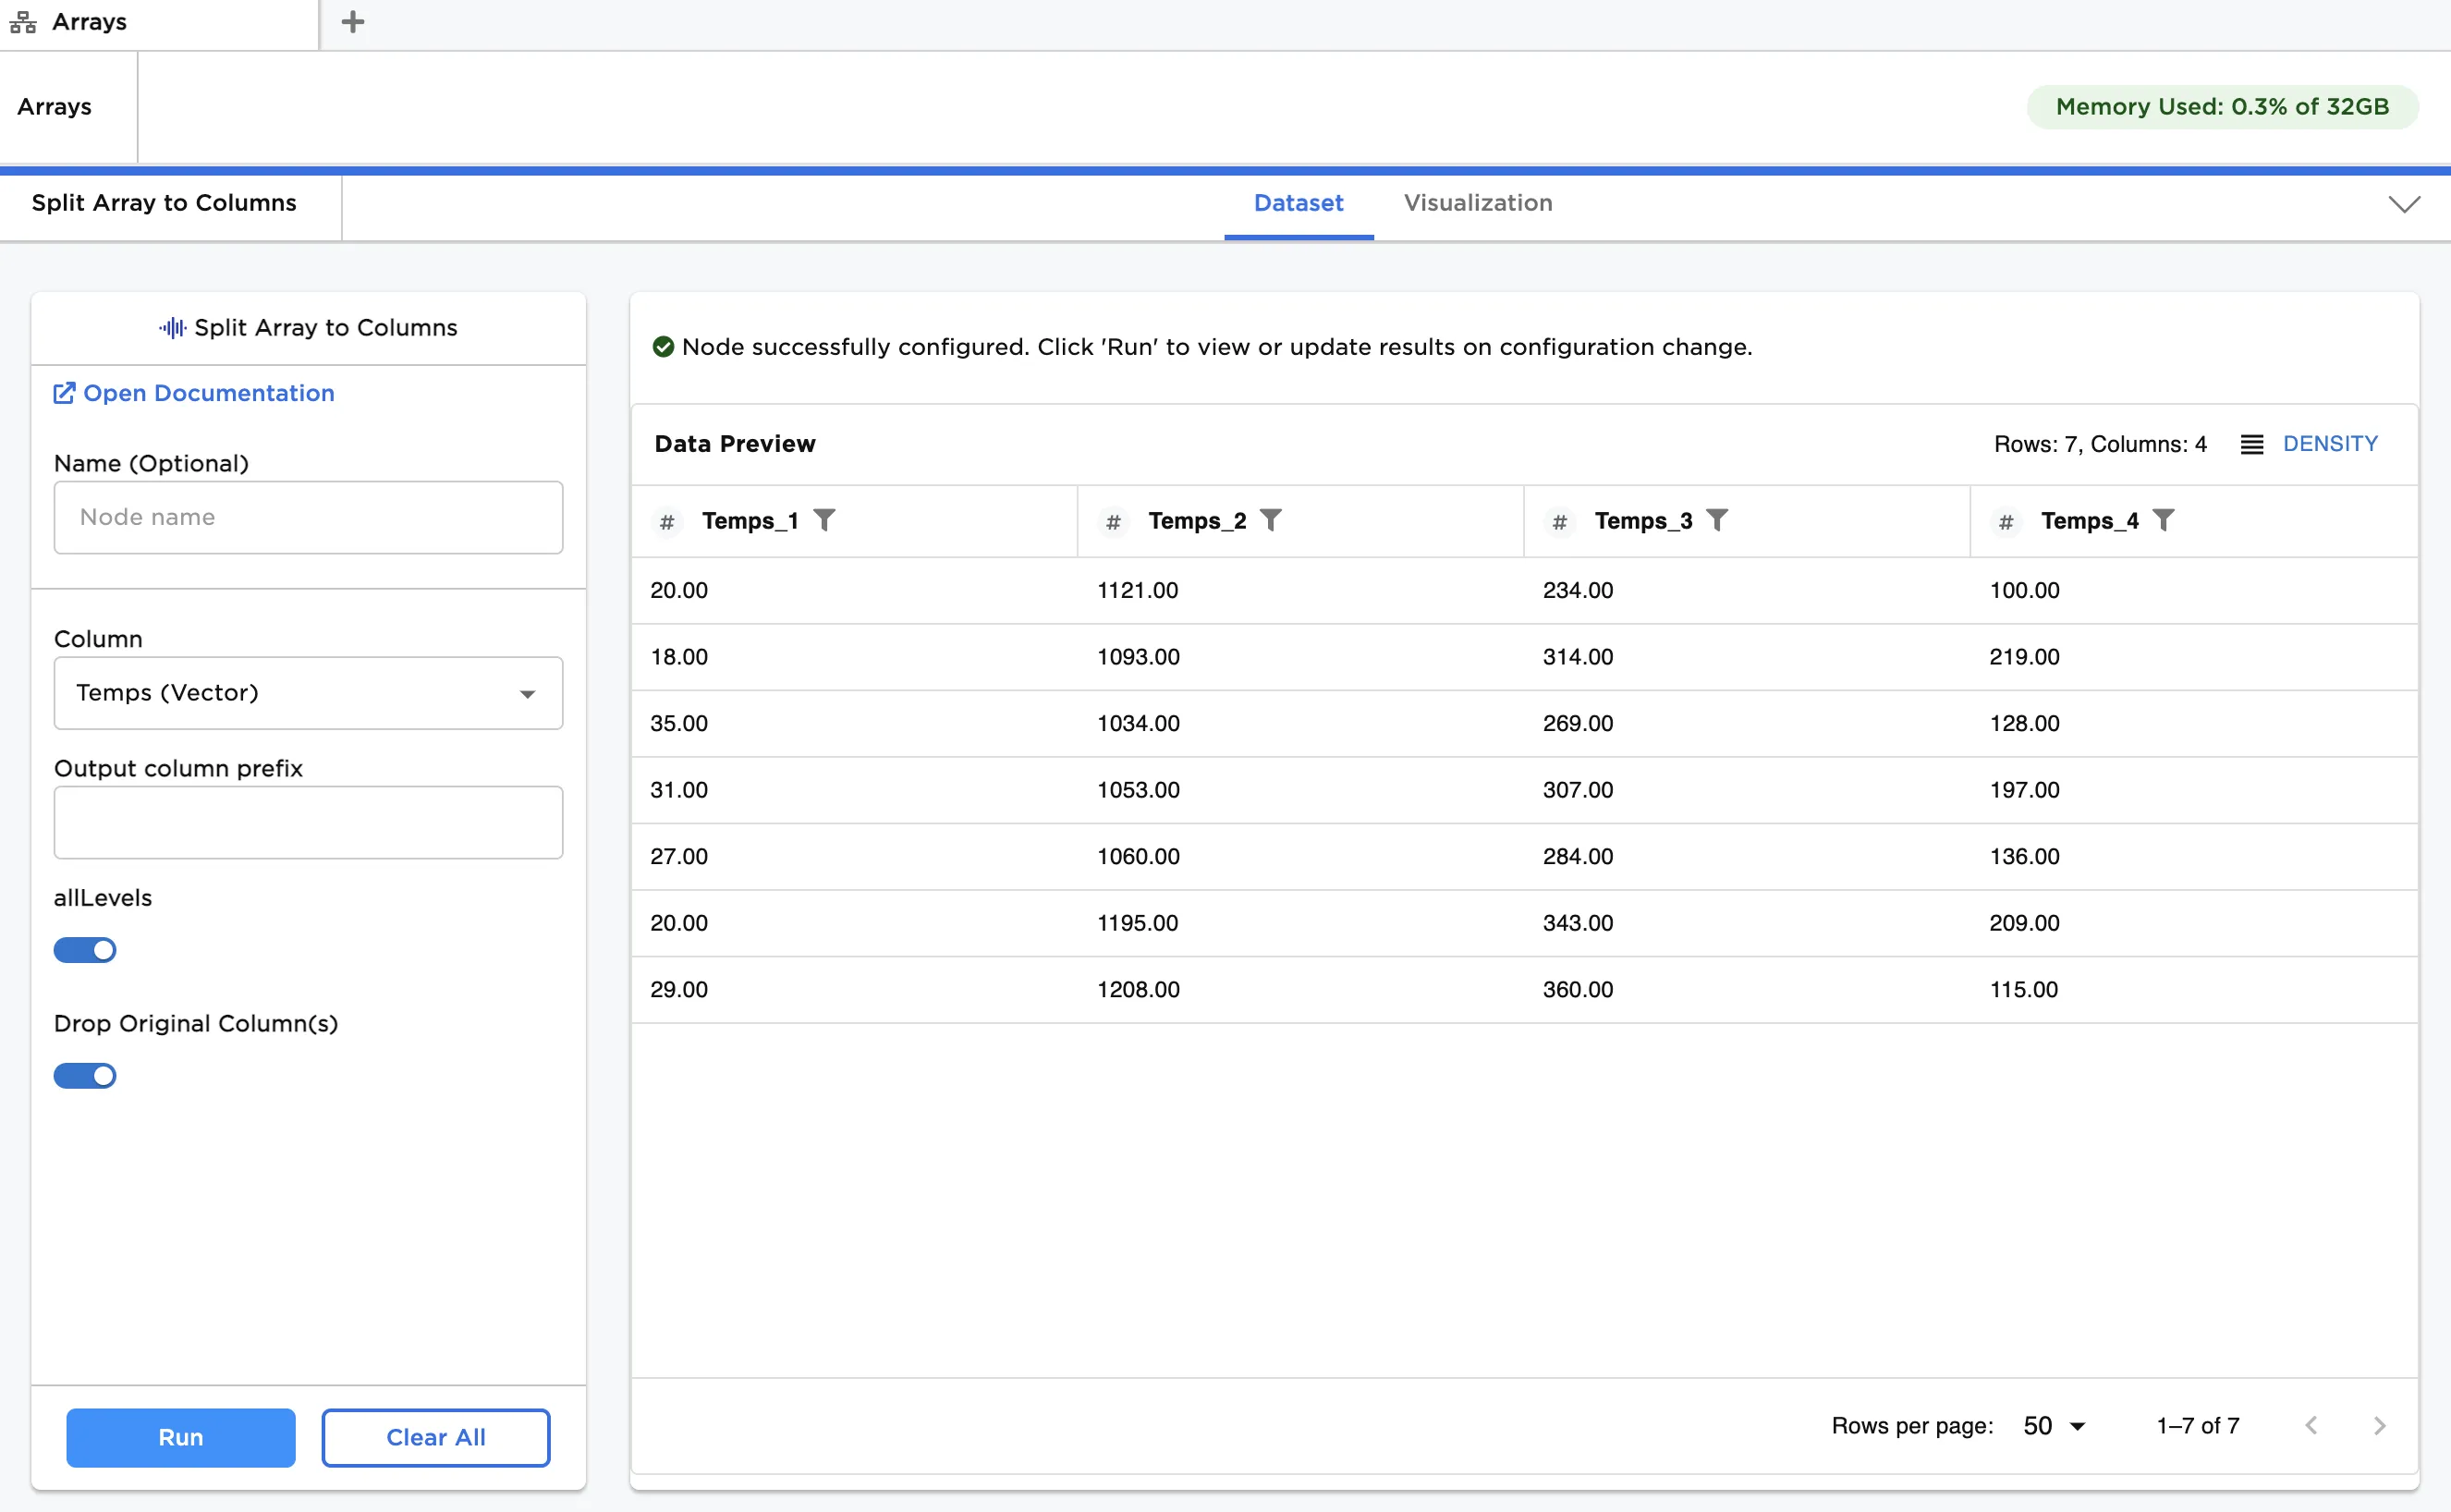
Figure 3: Disaggregating a single level Array
Now, let's analyze a scenario comprising multiple categories, or levels, of operating parameters. We would like to create a single Array with nested structure representing the various categories of parameters, and then disassemble the Array at different levels.
Returning to the original dataset, we first create the four simple Array columns: Temps, Pressures, Speed, and Power_Comp. Column groupings are as follows:
Temps
- Inlet_Temp
- Comb_Temp
- Exhaust_1_Temp
- Exhaust_2_Temp
Pressures
- Inlet_P
- Comb_p
- Interstage_P
Speed
- Input_RPM
Power_Comp
- V_out_kV
- I_out_A
- Connect an Assemble Array node to a CSV node with the example data provided.
- Enter "Temps" for Output Column Name.
- In Select Columns to Combine check Specific columns and add the four temperature columns.
- Connect a new Assemble Array node to the output of the previous Assemble Array node.
- Repeat Steps 2-4, using column groupings and output column names provided in this example. You should have four Assemble Array nodes connected in series.
- Connect a new Assemble Array node to the last node, and combine all columns into a new Array called "Parameters". This nested Array is the input into the Split Array to Columns node, and is shown in Figure 4.
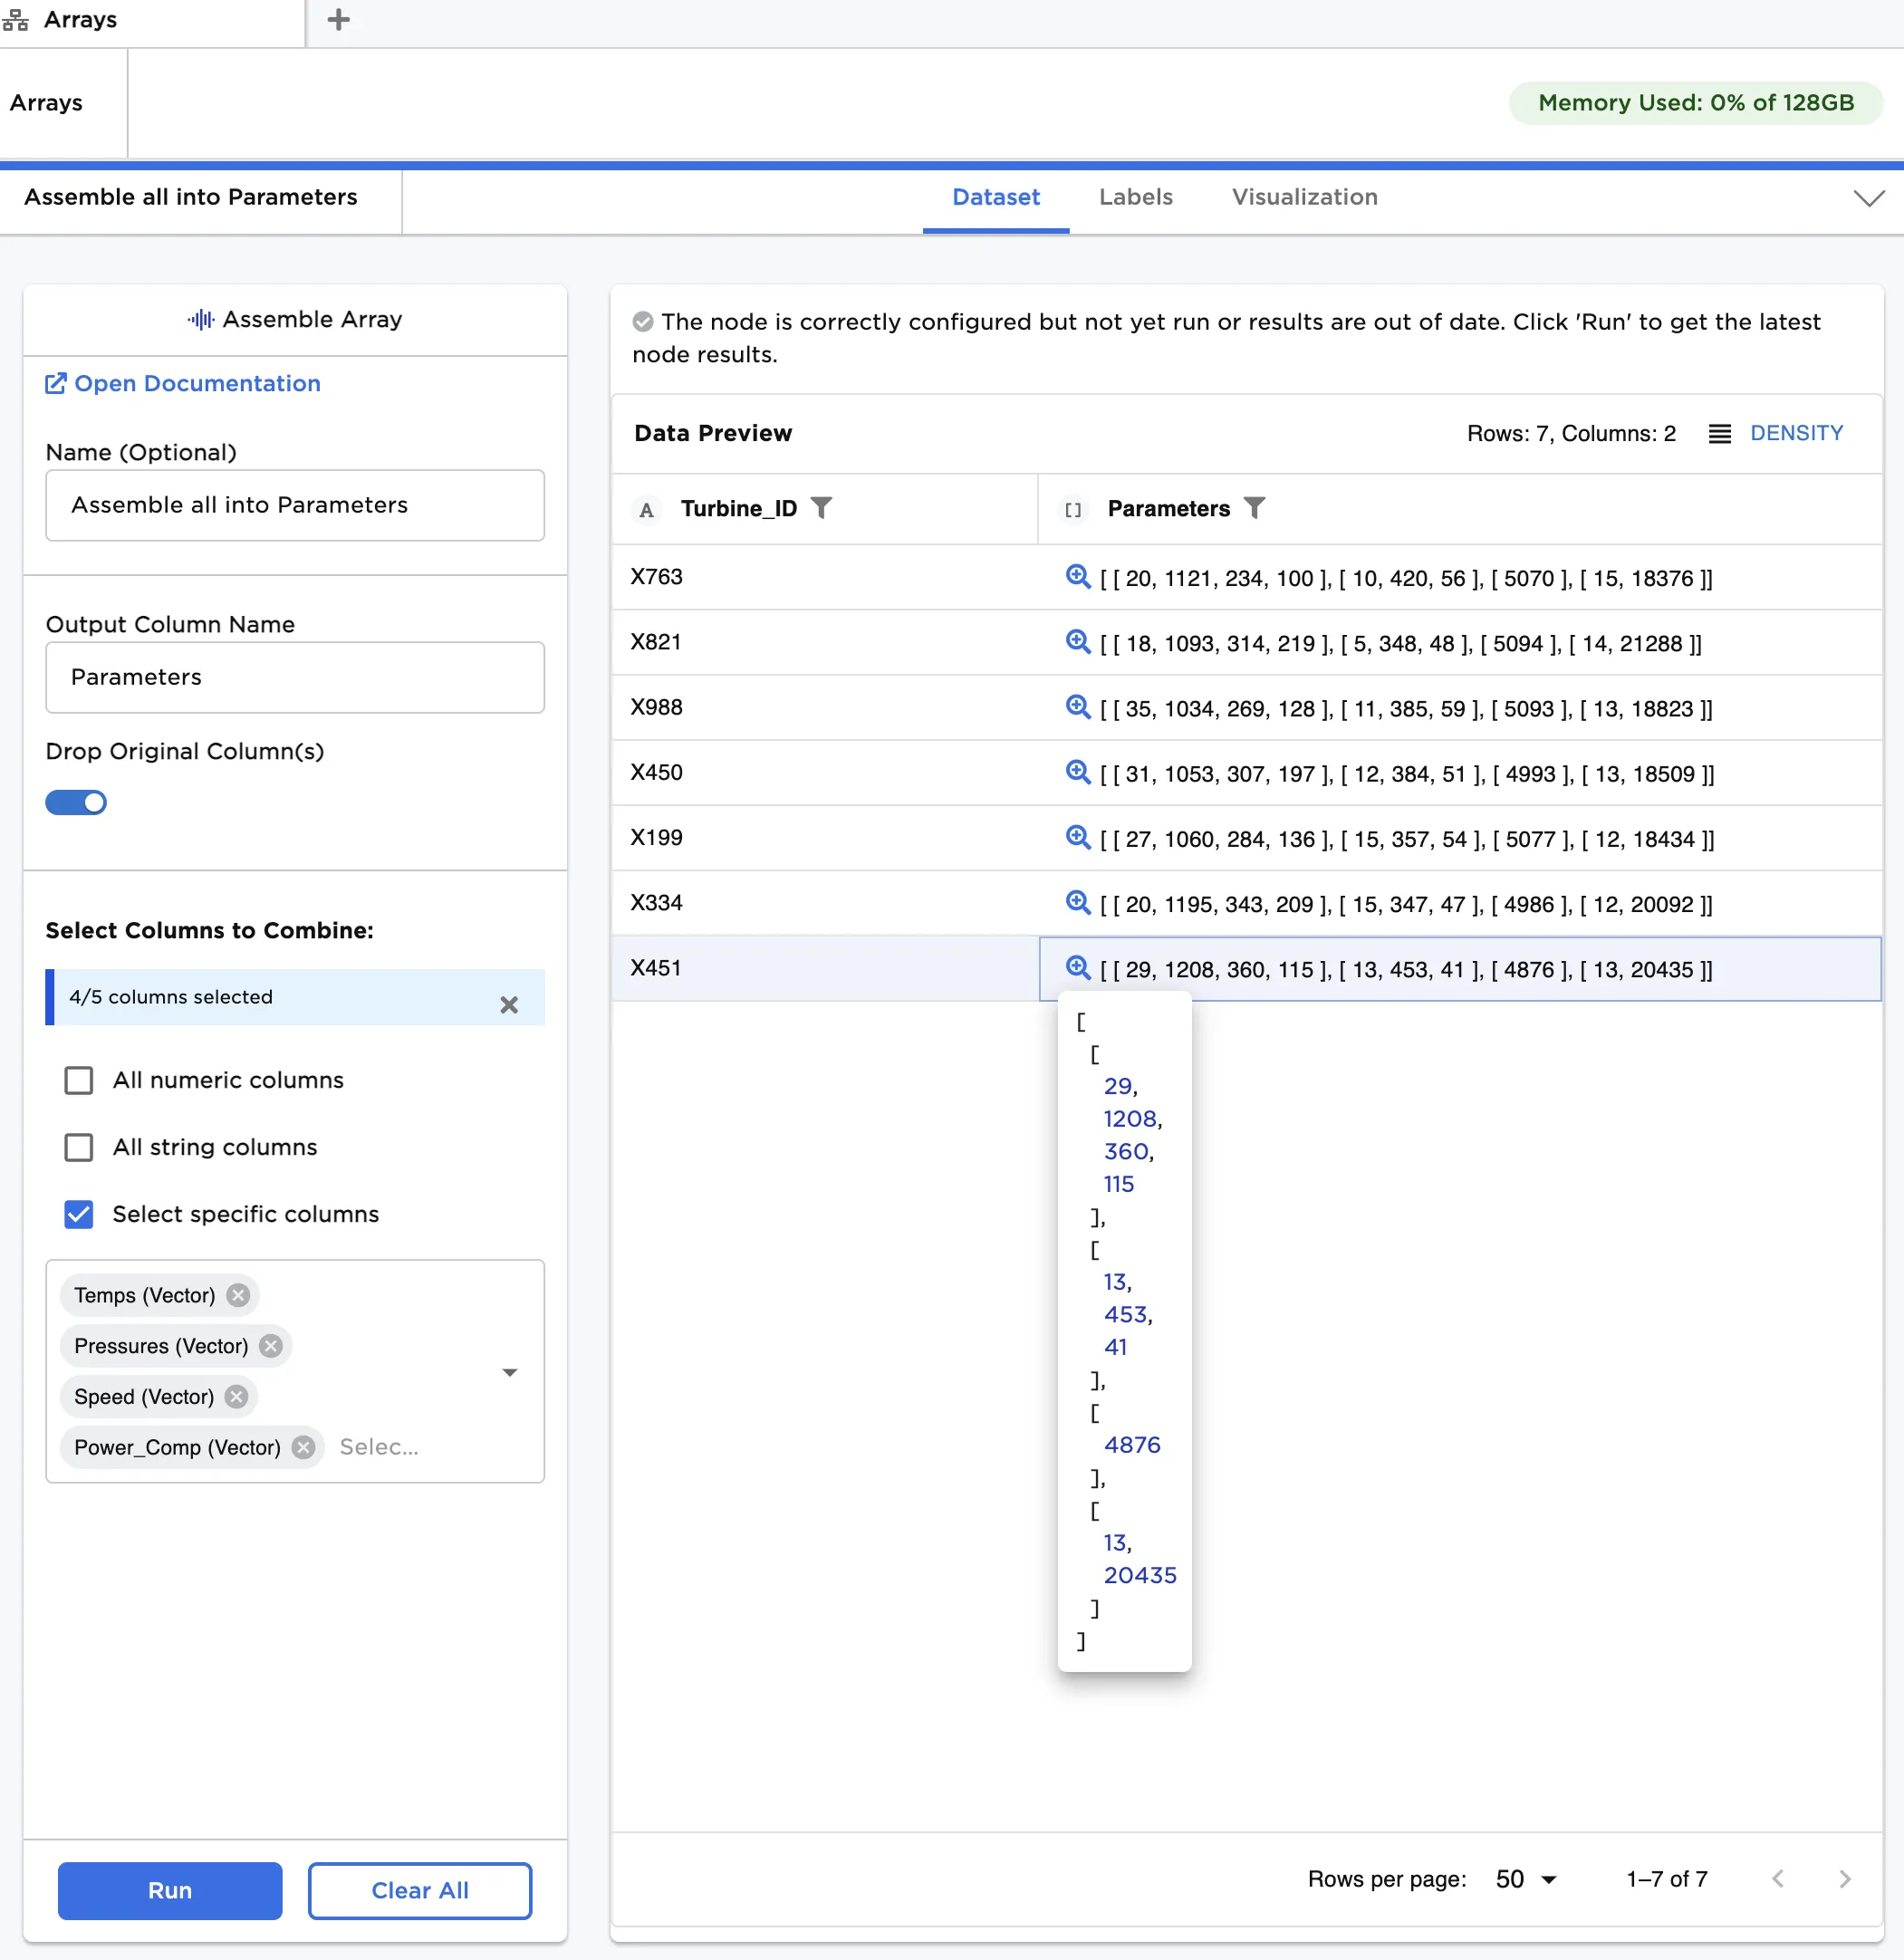
Figure 4: Nested Array of gas turbine operating parameters
We then demonstrate how to split each of these top level Arrays into individual columns.
- Connect a Split Array to Columns node to the Assemble Array node.
- Toggle allLevels off and click Run.
The resulting columns are Arrays as shown in Figure 5.
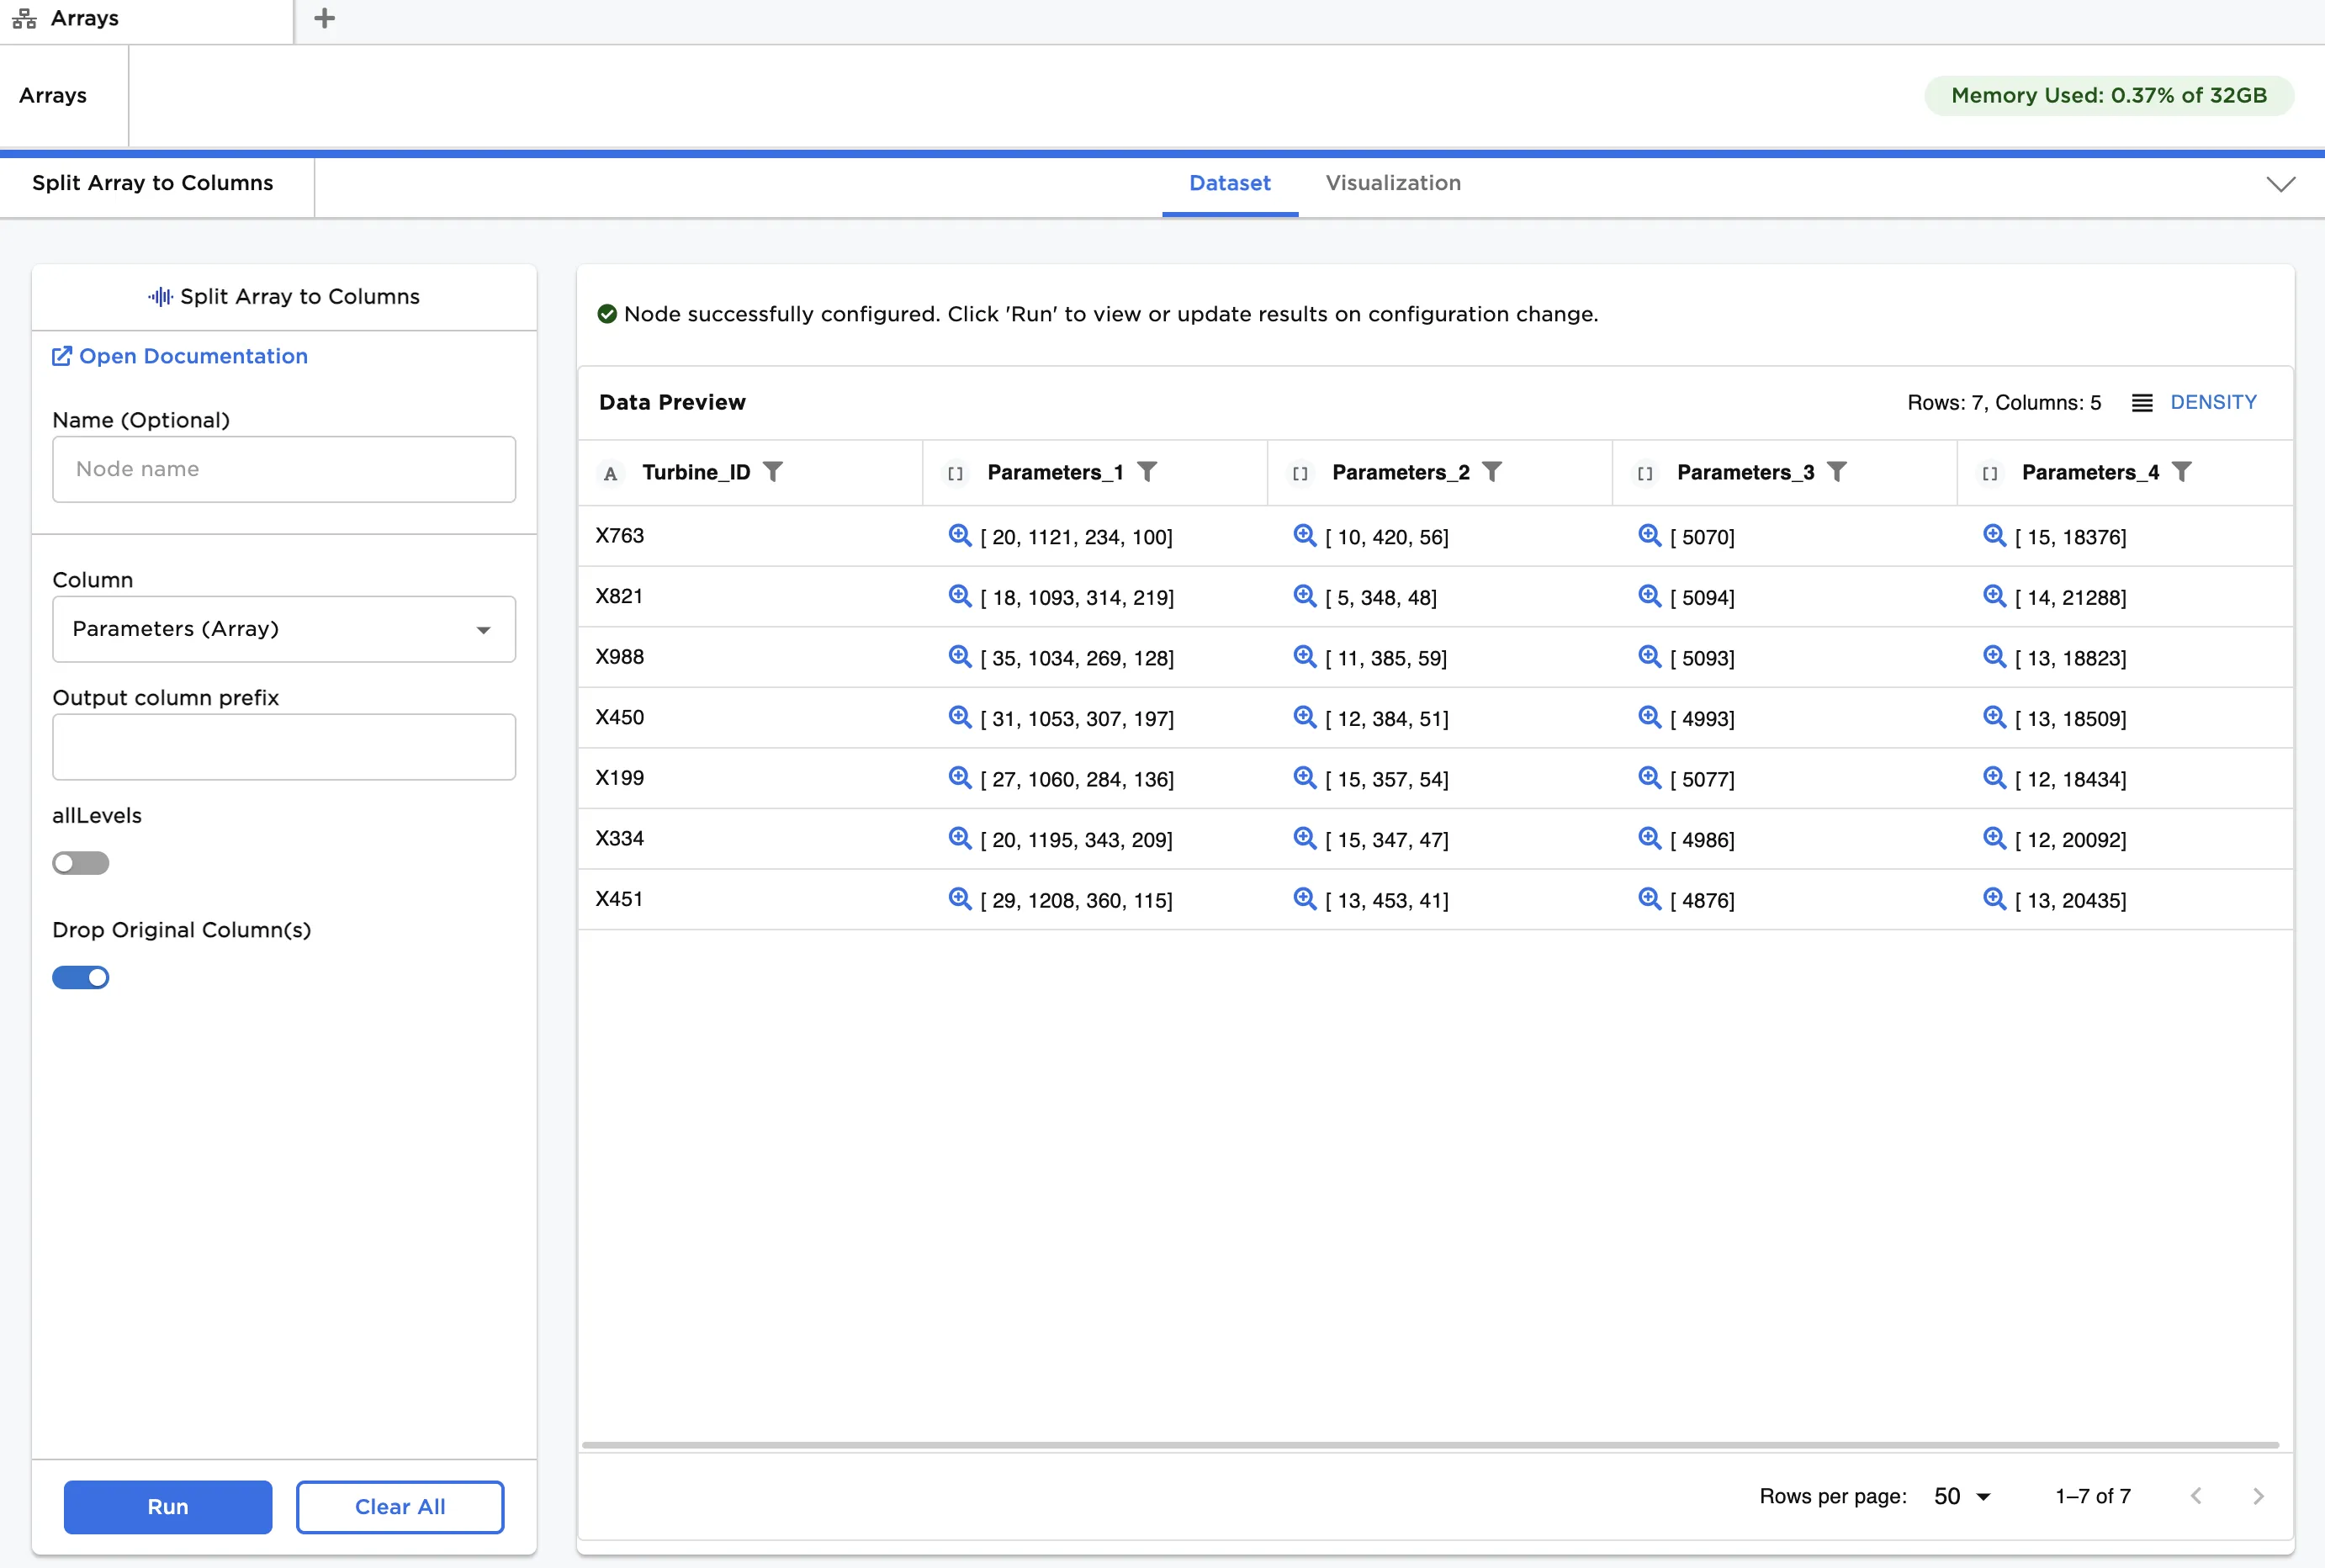
Figure 5: Using "Split Array to Columns" to disassemble one level of a nested Array
Optionally, toggle allLevels on and click Run.
This setting recursively splits all levels of the initial Array structure until all resulting columns are primitives. In this example, ten new columns are generated from the original "Parameters" column as shown in Figure 6.
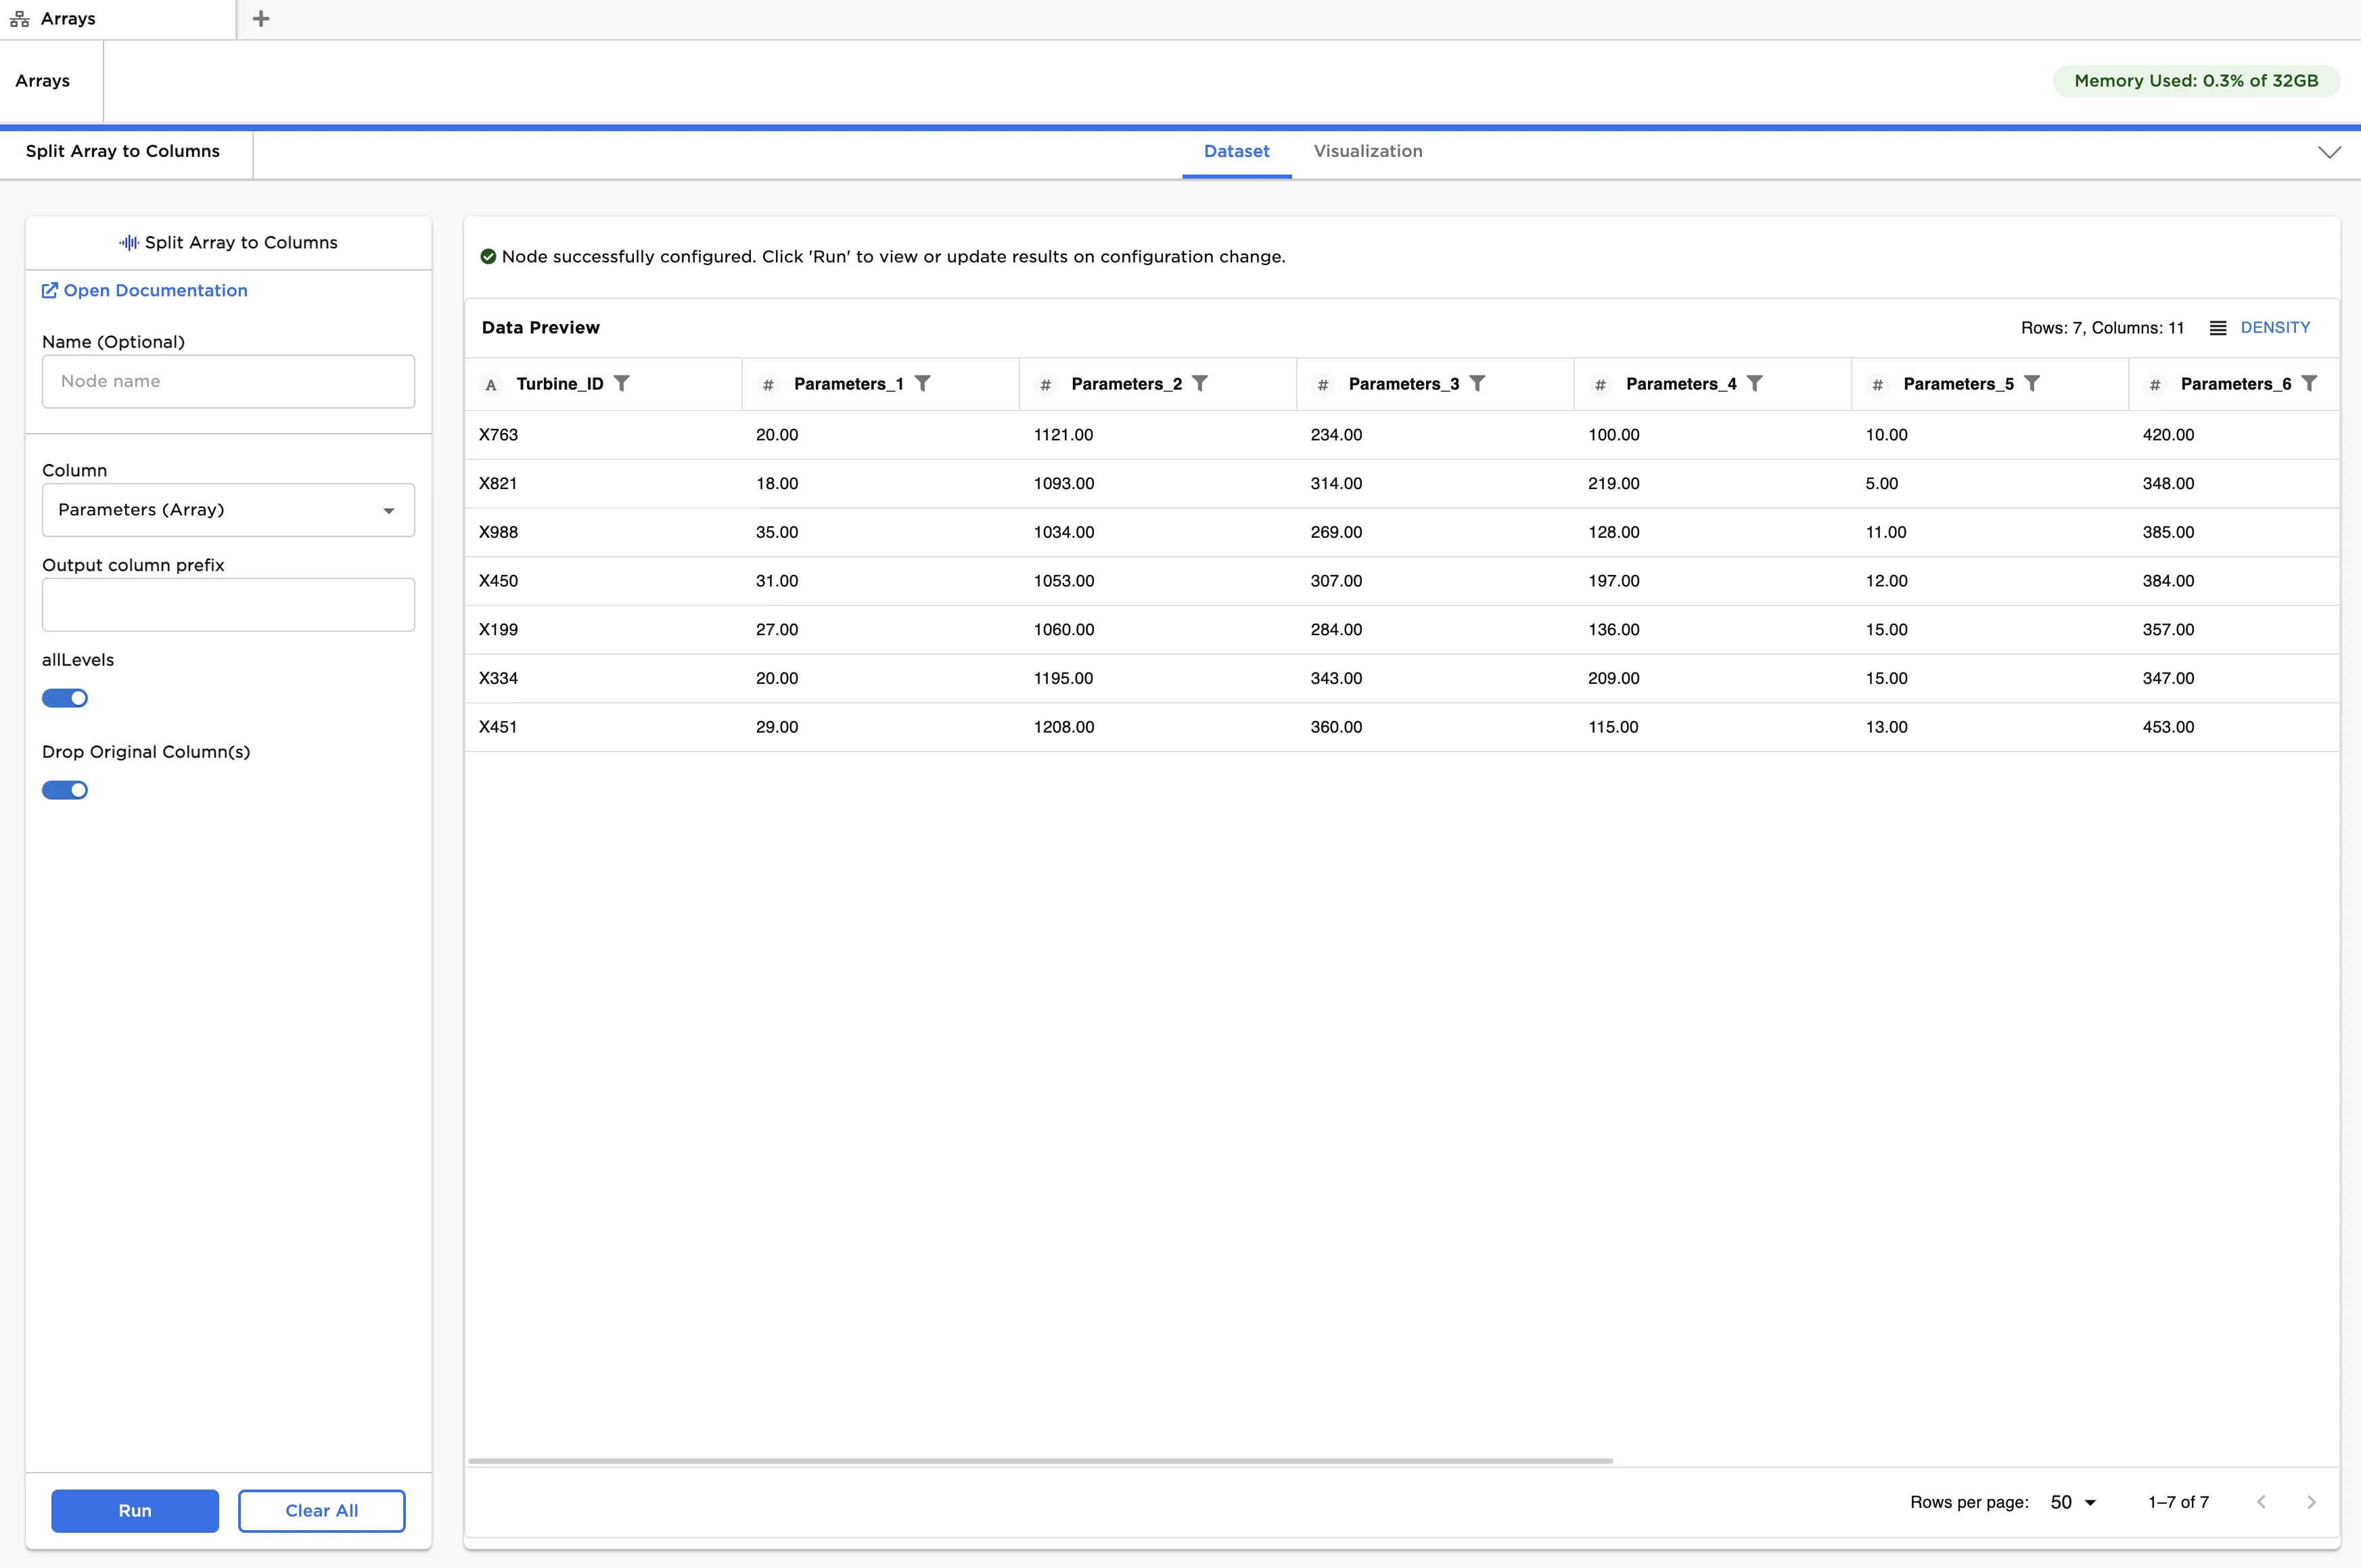
Figure 6: Using "Split Array to Columns" to disassemble all levels of a nested Array
In both cases, column names are autogenerated by appending, as a prefix, the name of the original Array column to an integer starting at 1, and incrementing by one for each column.
On complex and deeply nested Arrays, hundreds if not thousands of columns may be generated using the Split Array to Columns node, and many fields may not be important. Instead, consider using the Extract Value from Array node to extract only the most important fields at any level of the original Array structure.