FileSystem
Import data from files stored in the C3 AI FileSystem. Depending on the C3 AI Deployment, files in the C3 AI FileSystem may be stored in AWS S3, Google Cloud Storage, Azure Blob, or an on-premise file system. The FileSystem APIs enable access to these files and abstract the underlying details.
Prerequisites
The user must be in the appropriate Admin Group and have the correct roles to be authorized to read data from the filesystem to Visual Notebooks. Please speak to the C3 AI Support Team to ensure proper setup.
Configuration
| Field | Description |
|---|---|
| Name default=none | A user-specified node name displayed in the canvas |
| Data Path Required | The url path that points to the file(s) to be read into Visual Notebooks |
| Type in the directory URL where the files are saved. | |
Format default=CSV | The format of the files to be read into Visual Notebooks |
| Set the format to CSV, Parquet, or JSON. All files must be in same format and have the same schema. | |
Has Header default=On | Specify if the file(s) have column header names |
| Toggle this switch on if the files have a header column with names | |
Delimiter default=, Comma | The character that separates values |
| Set the delimiter to Comma, Pipe, Colon, Semicolon, Tab, or Space. Only change this field if the uploaded file uses nonstandard formatting. | |
Quote default=" | The character that surrounds values to ignore |
| Set the quote to any character. Delimiters inside quotes are ignored. Only change this field if the uploaded file uses nonstandard formatting. | |
Select Timestamp Format Option default=Autodetect | Specify the format of timestamps or use autodetection for inference |
| By default, Visual Notebooks autodetects timestamp columns. If needed, specify a custom format to fit data requirements. |
Node Inputs/Outputs
| Input | None |
|---|---|
| Output | Visual Notebooks returns a table, called a dataframe, that contains all uploaded data. Columns are labeled and include a symbol that specifies the data type of that column. |
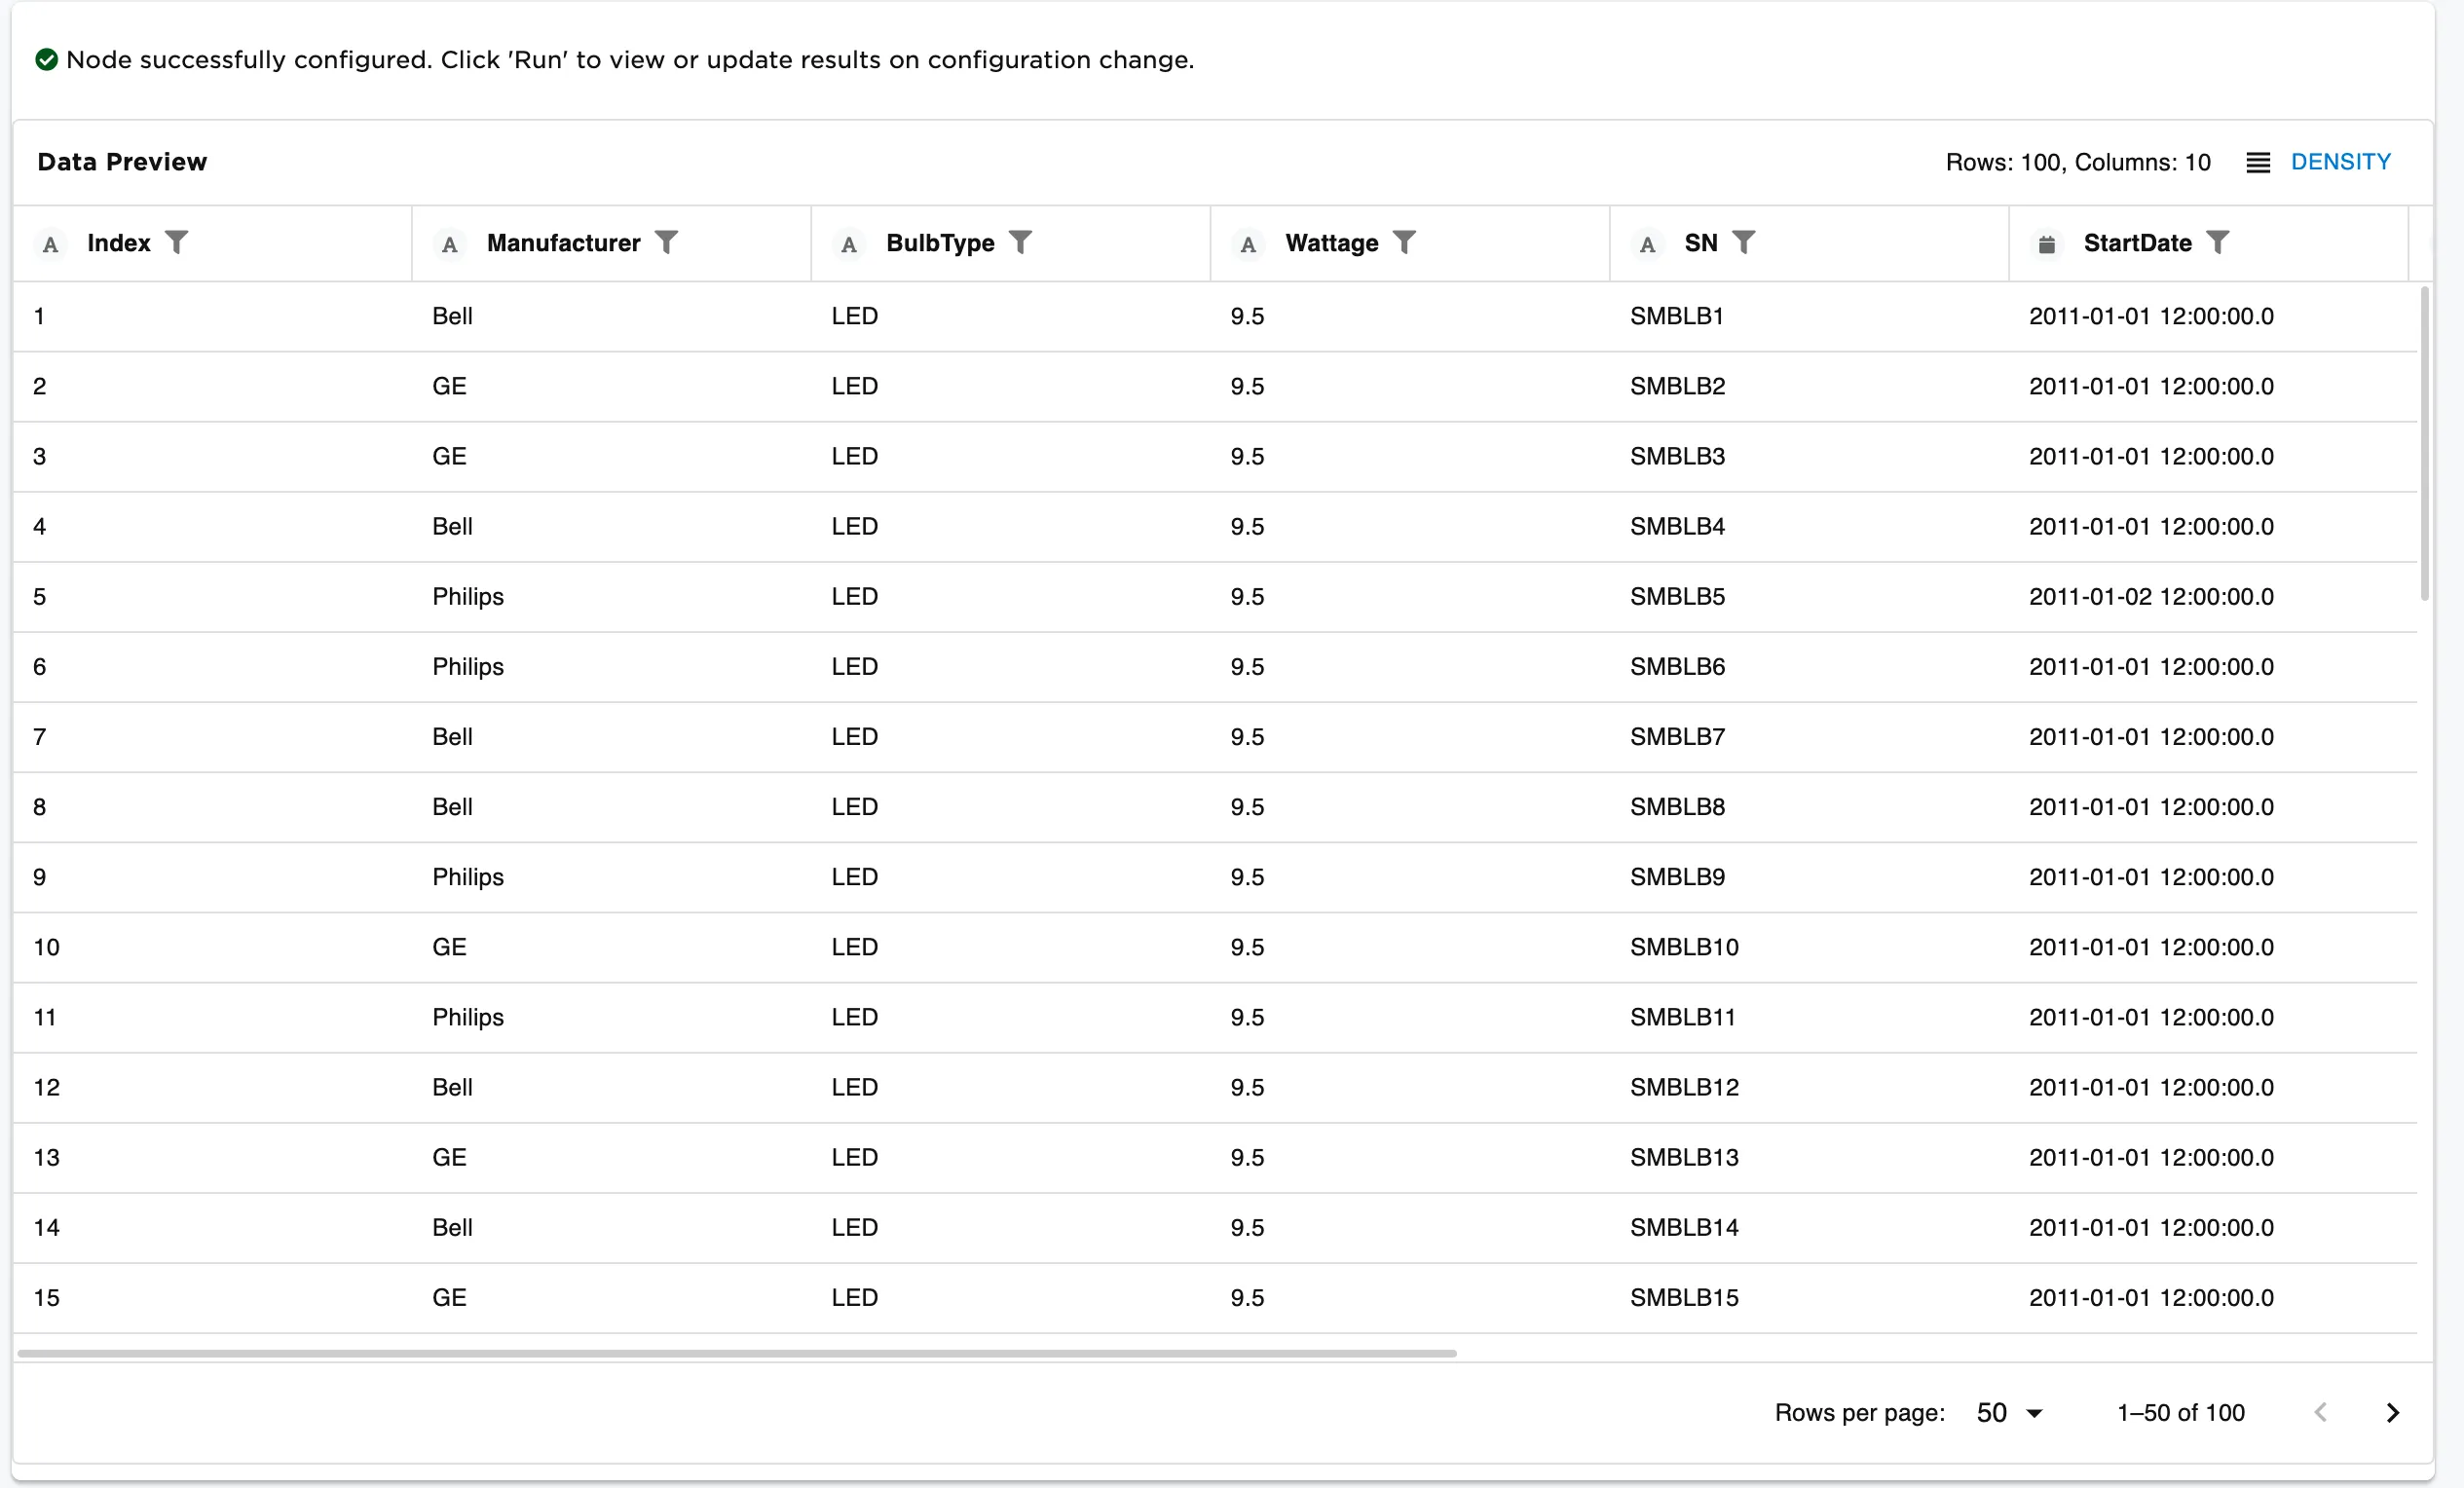
Figure 1: Example dataframe output
Examples
- Specify the path to the file you want to load in the Data Path field.
- Select Run to create a dataframe with the default settings from the file.
Notice that columns are labeled and include a symbol that specifies the data type of that column. Various data types are present in the data and are accurately represented in the dataframe.
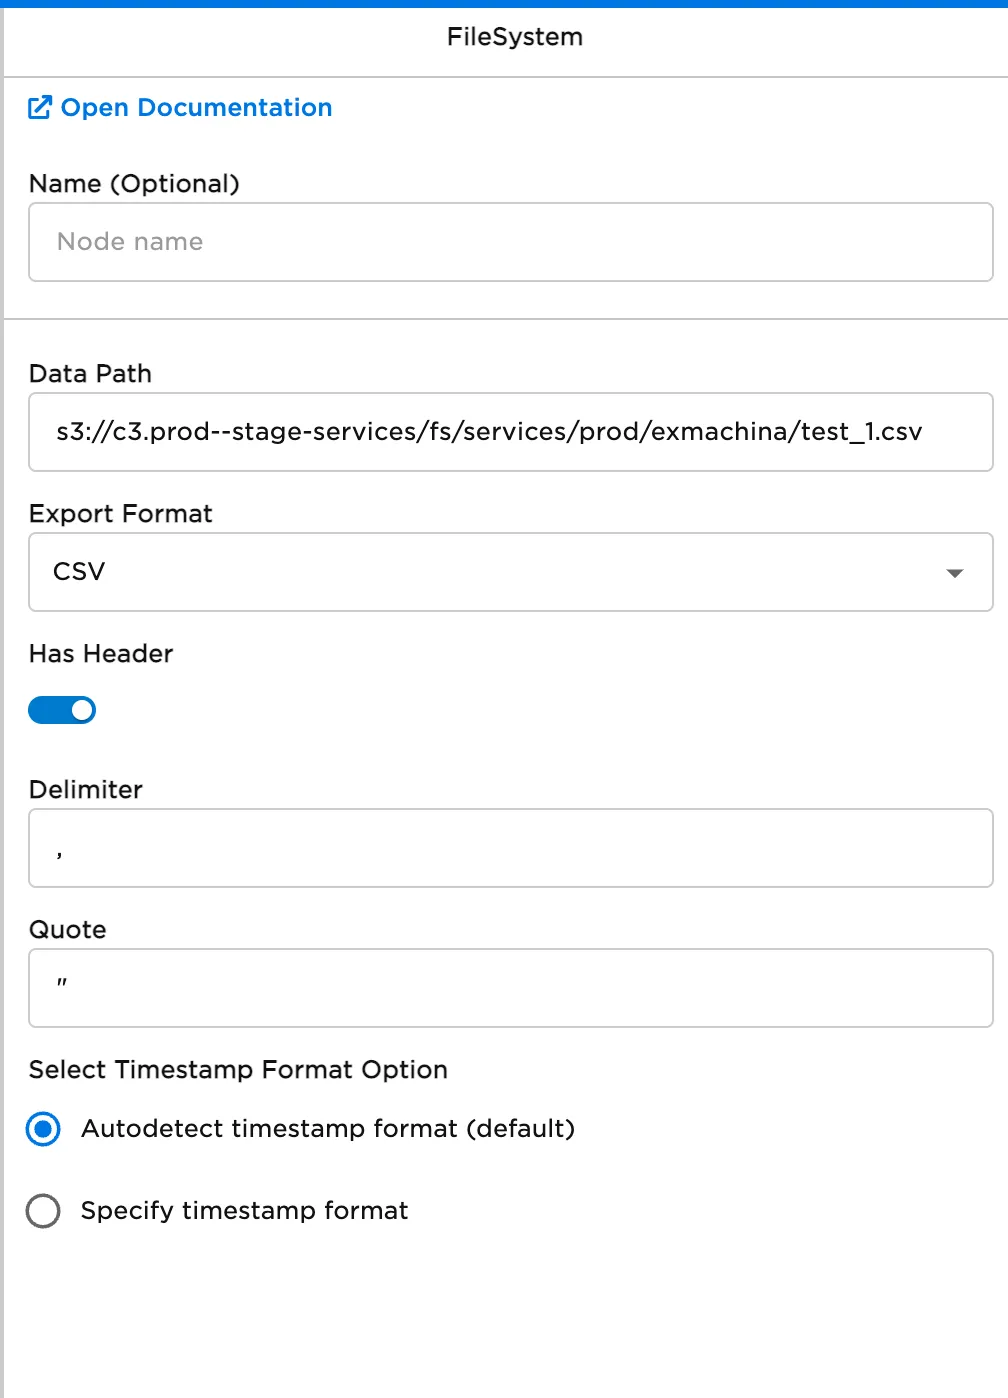
Figure 2: Example FileSystem configuration to read a single CSV file with a header
- Specify the path to a directory with a list of files to be read in the Data Path Field. Note the use of
*as a wildcard to select many files. Files should have the same schema and format. - Select Run to create a dataframe with default settings.
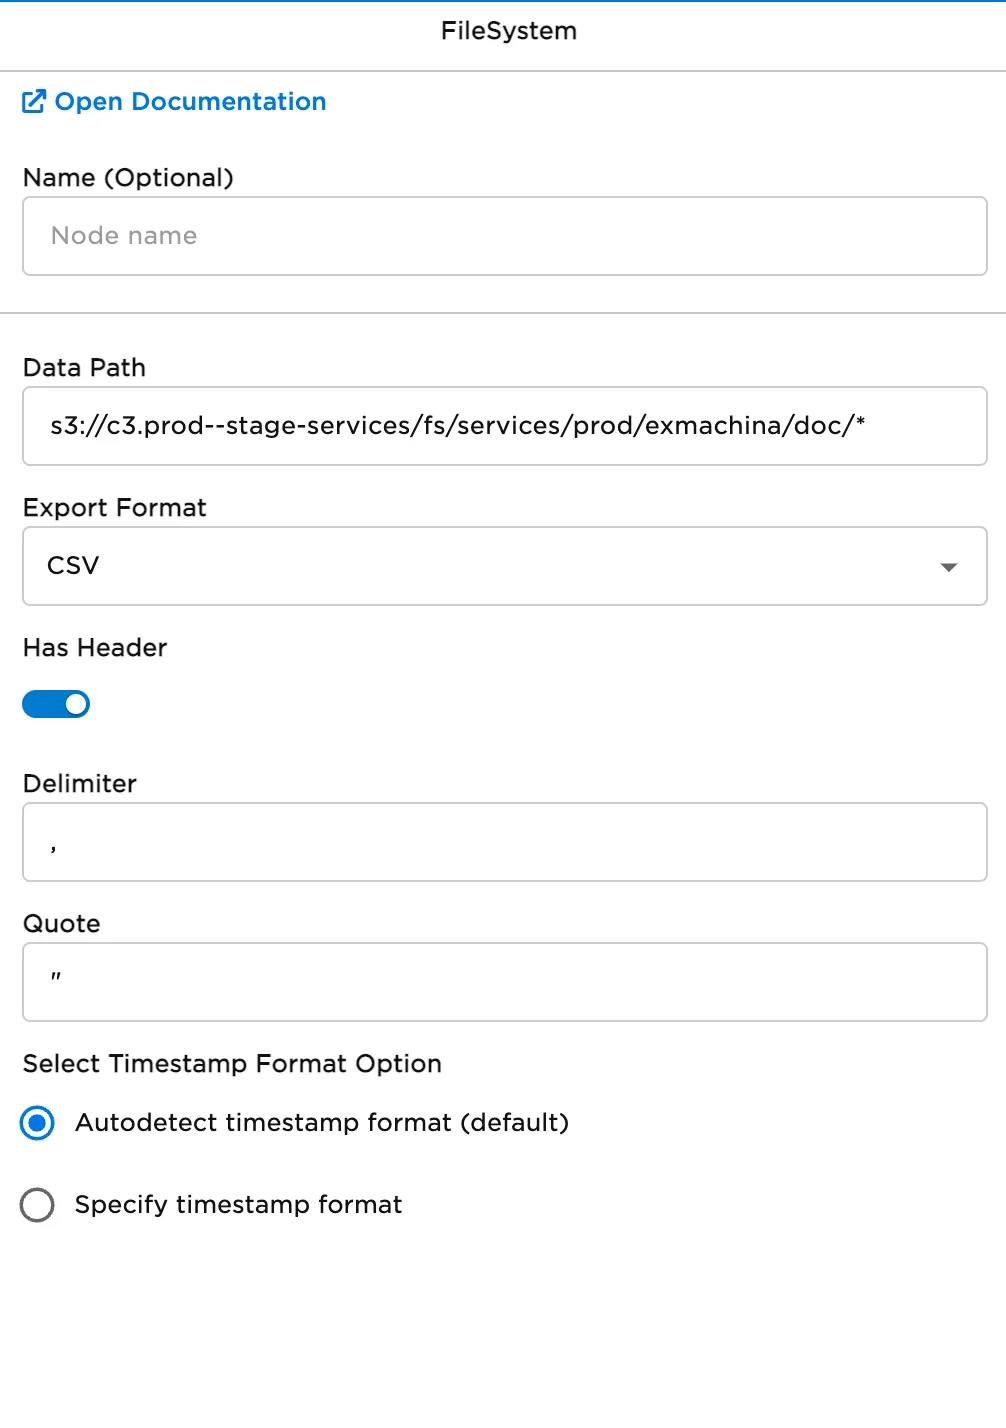
Figure 3: Example FileSystem configuration to read a directory of CSV files with headers
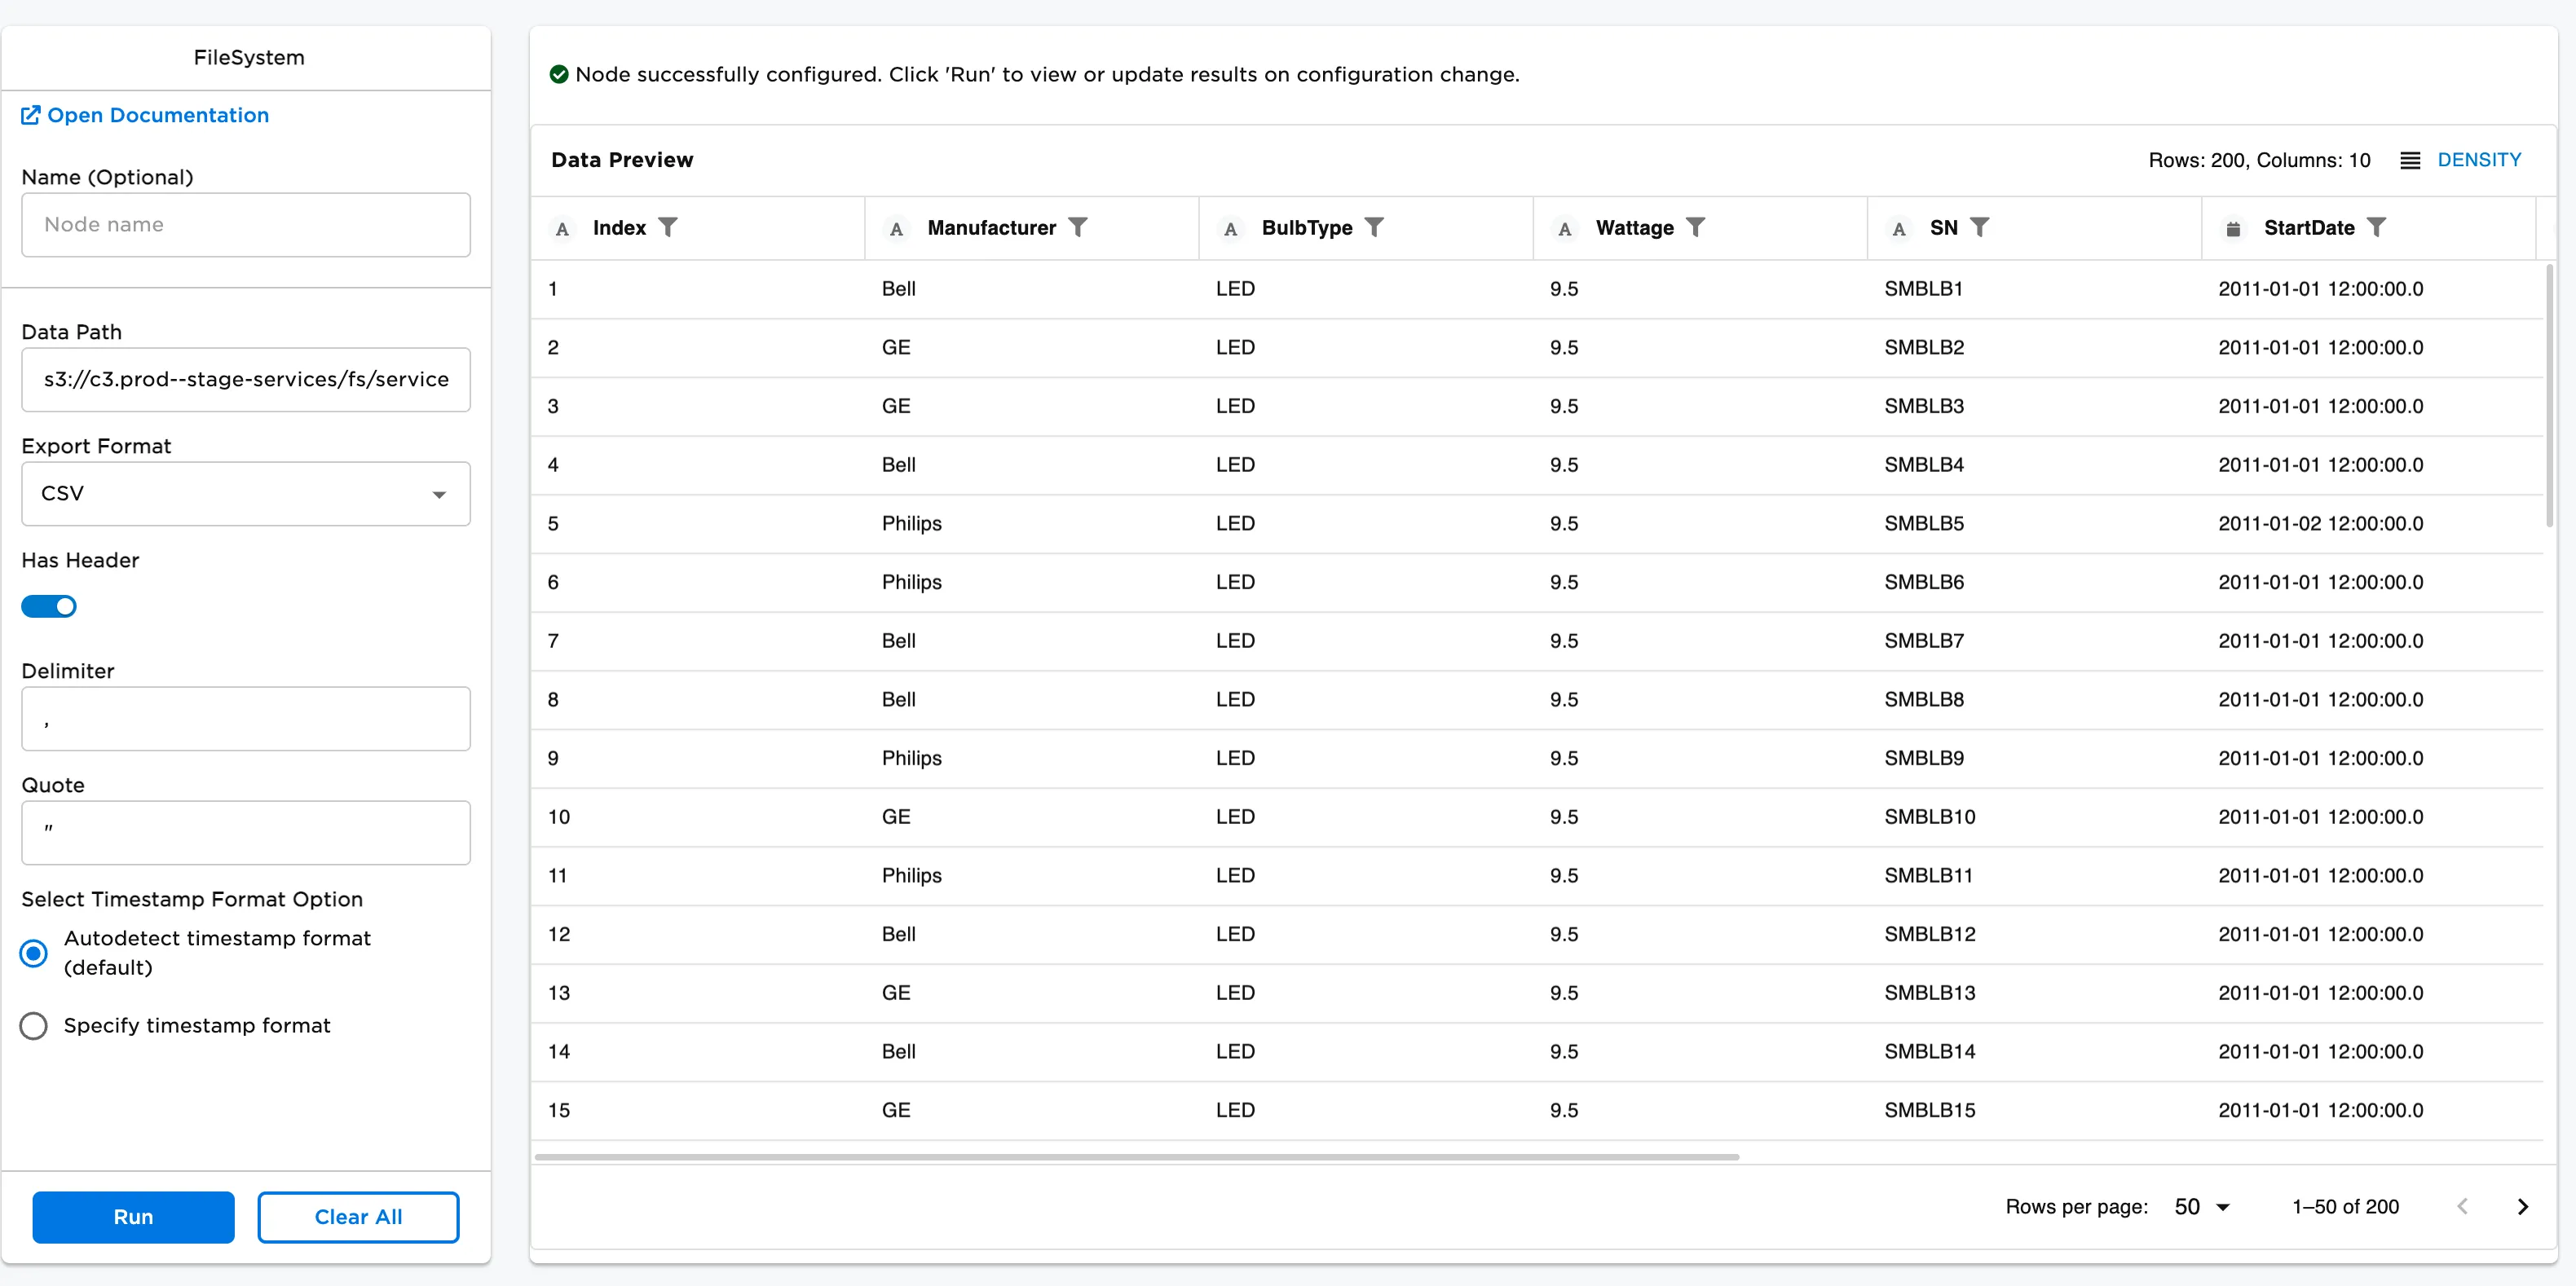
Figure 4: Example dataframe output. Note there are 200 entries