MS SQL Server Node
Load data from MS SQL Server into Visual Notebooks.
Prerequisites
Follow the steps below to add credentials for SQL Server. You must have a valid SQL Server URL, username, and password.
- Drag a MS SQL Server node onto the Visual Notebooks workspace
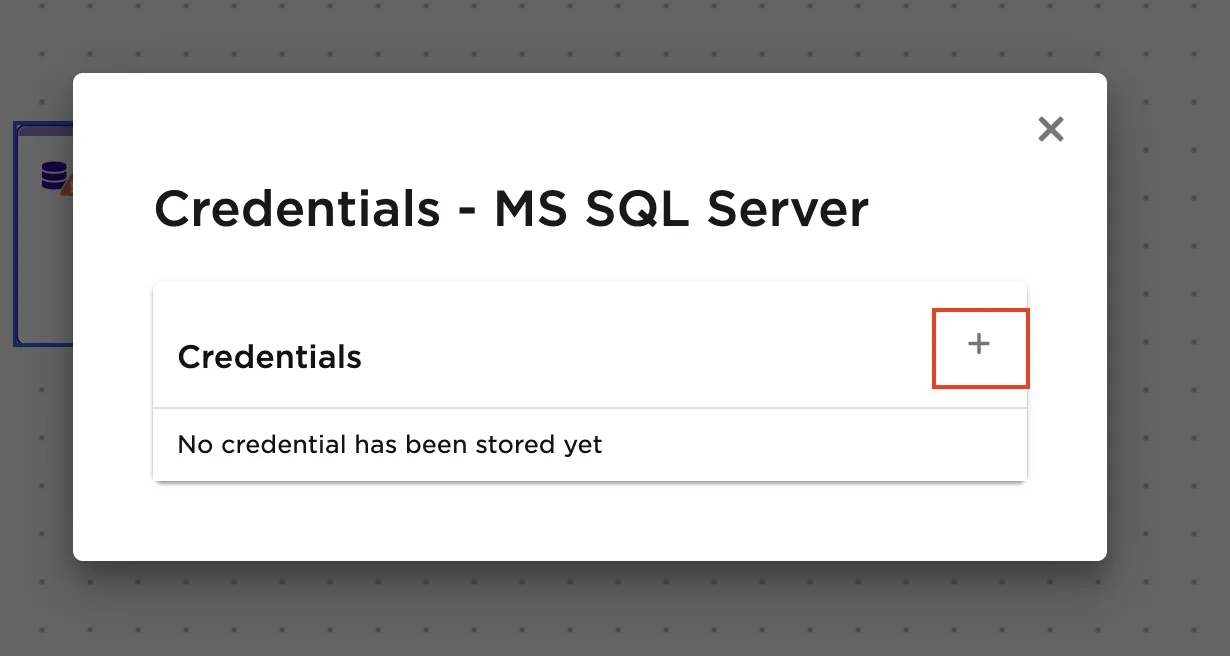
- Select the gear icon beside the Credential field
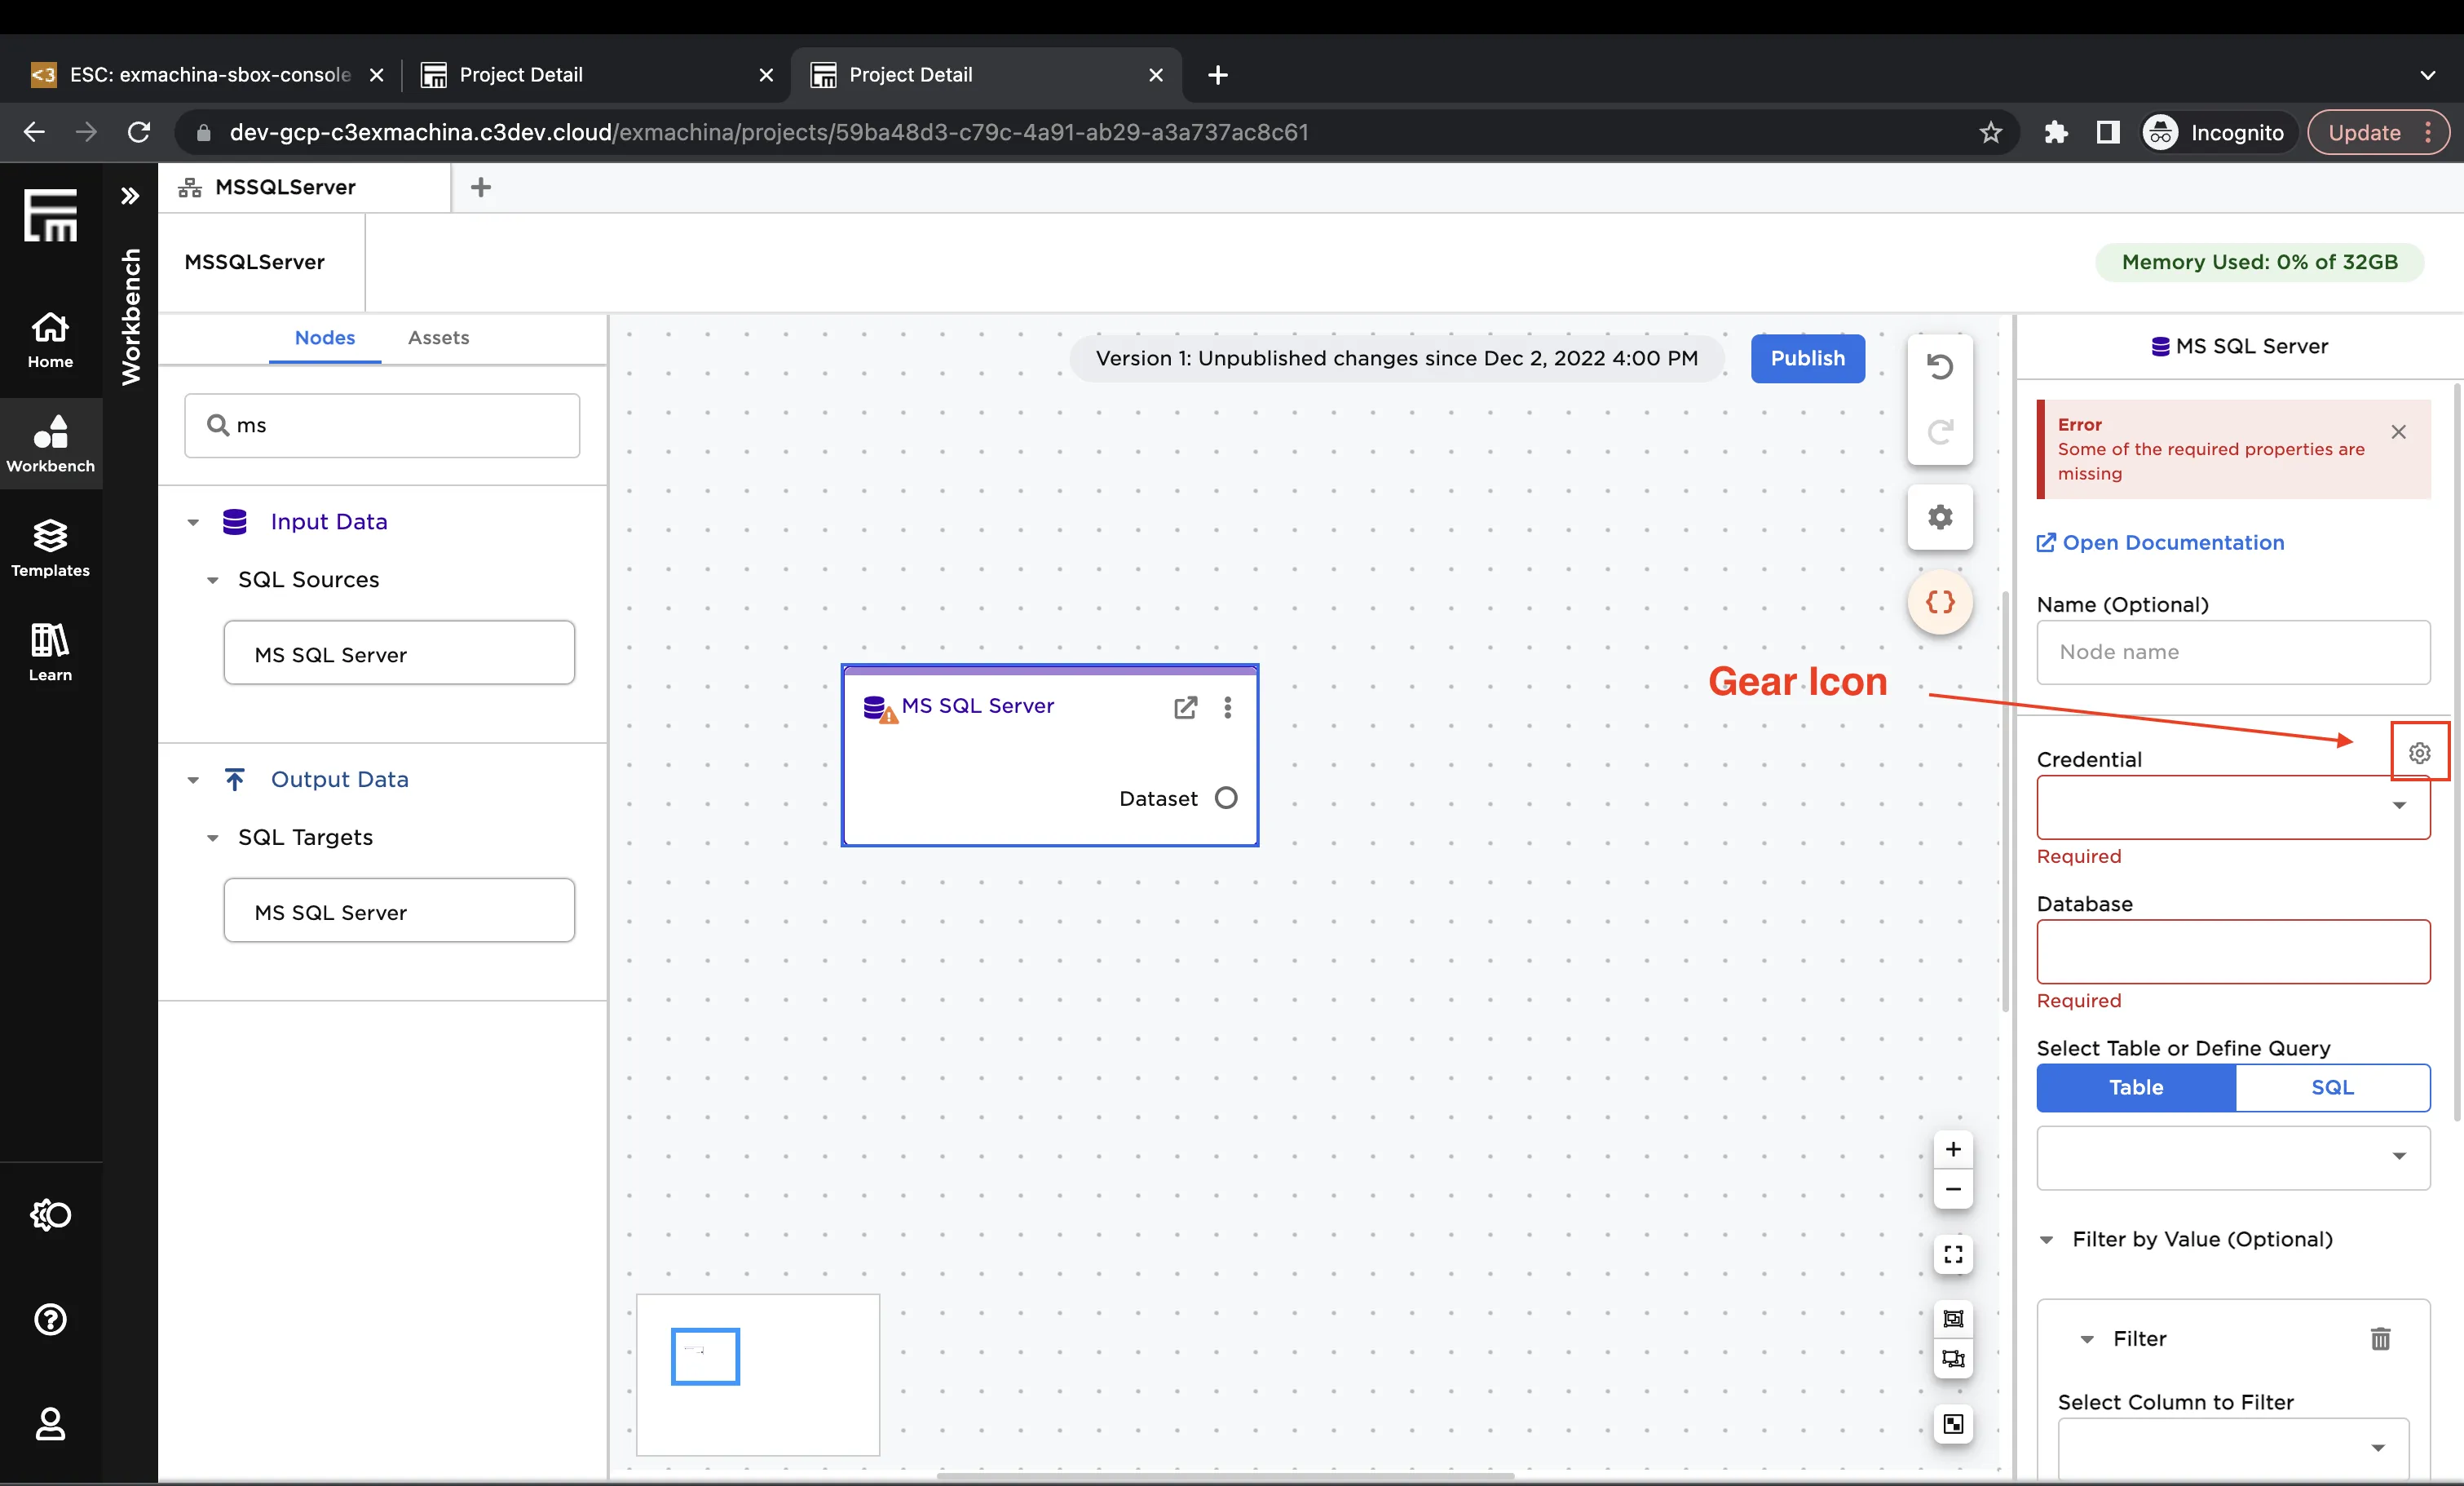
- Select the plus sign in the upper right corner
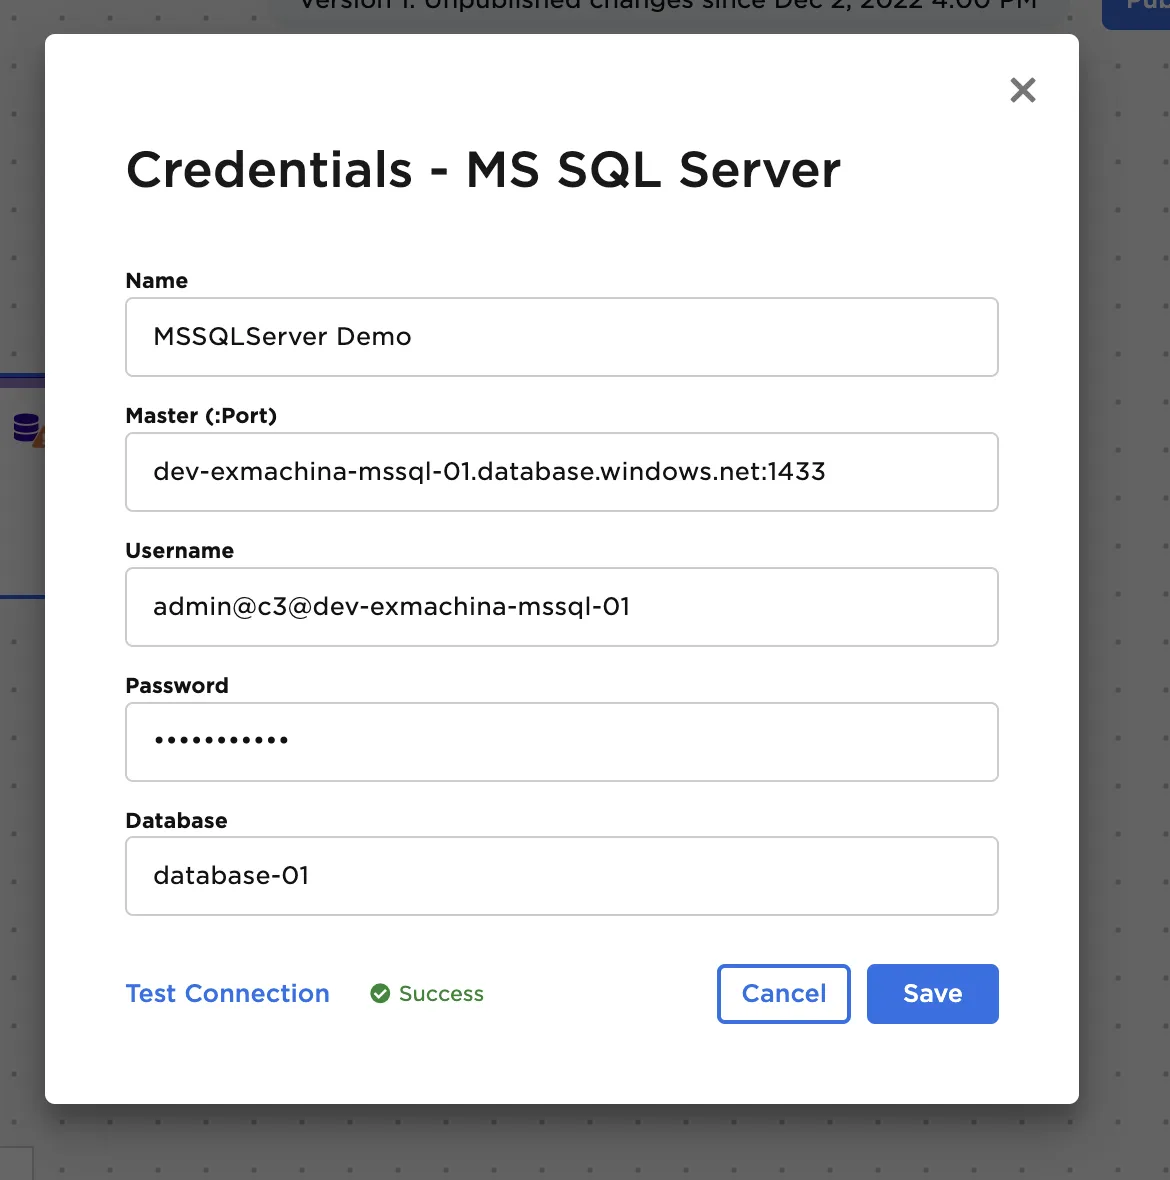
- Enter a name for the credential
- Enter the URL that you use to log into the SQL Server web interface
- Enter the username and password you use to access SQL Server
Configuration
| Field | Description |
|---|---|
| Name Optional | A user-specified node name displayed in the canvas |
| Credential Required | The information needed to access SQL Server data Select a saved credential from the dropdown menu. Select the gear icon to add a new credential or delete existing credentials. |
| Database Required | The name of the desired SQL Server database Specify the database to be used to load data. |
| Select Table or Define Query Required | The data to upload Select the table you want to upload from the auto-populated dropdown menu or enter a SQL query that returns the desired data. |
| Filter by Value Optional | Configure filters to be applied to data Use the dropdown fields to filter results. Filter options include is null, is not null, is equal, is not equal, begins with, ends with, in between, is less than, is less than or equal to, is greater than, and is greater than or equal to. Filters can be applied on any column datatype. Add additional filters to create "And" conditional logic treatment. |
Node Inputs/Outputs
| Input | None |
|---|---|
| Output | Visual Notebooks returns a table, called a dataframe, that contains all uploaded data. Columns are labeled and include a symbol that specifies the data type of that column. |
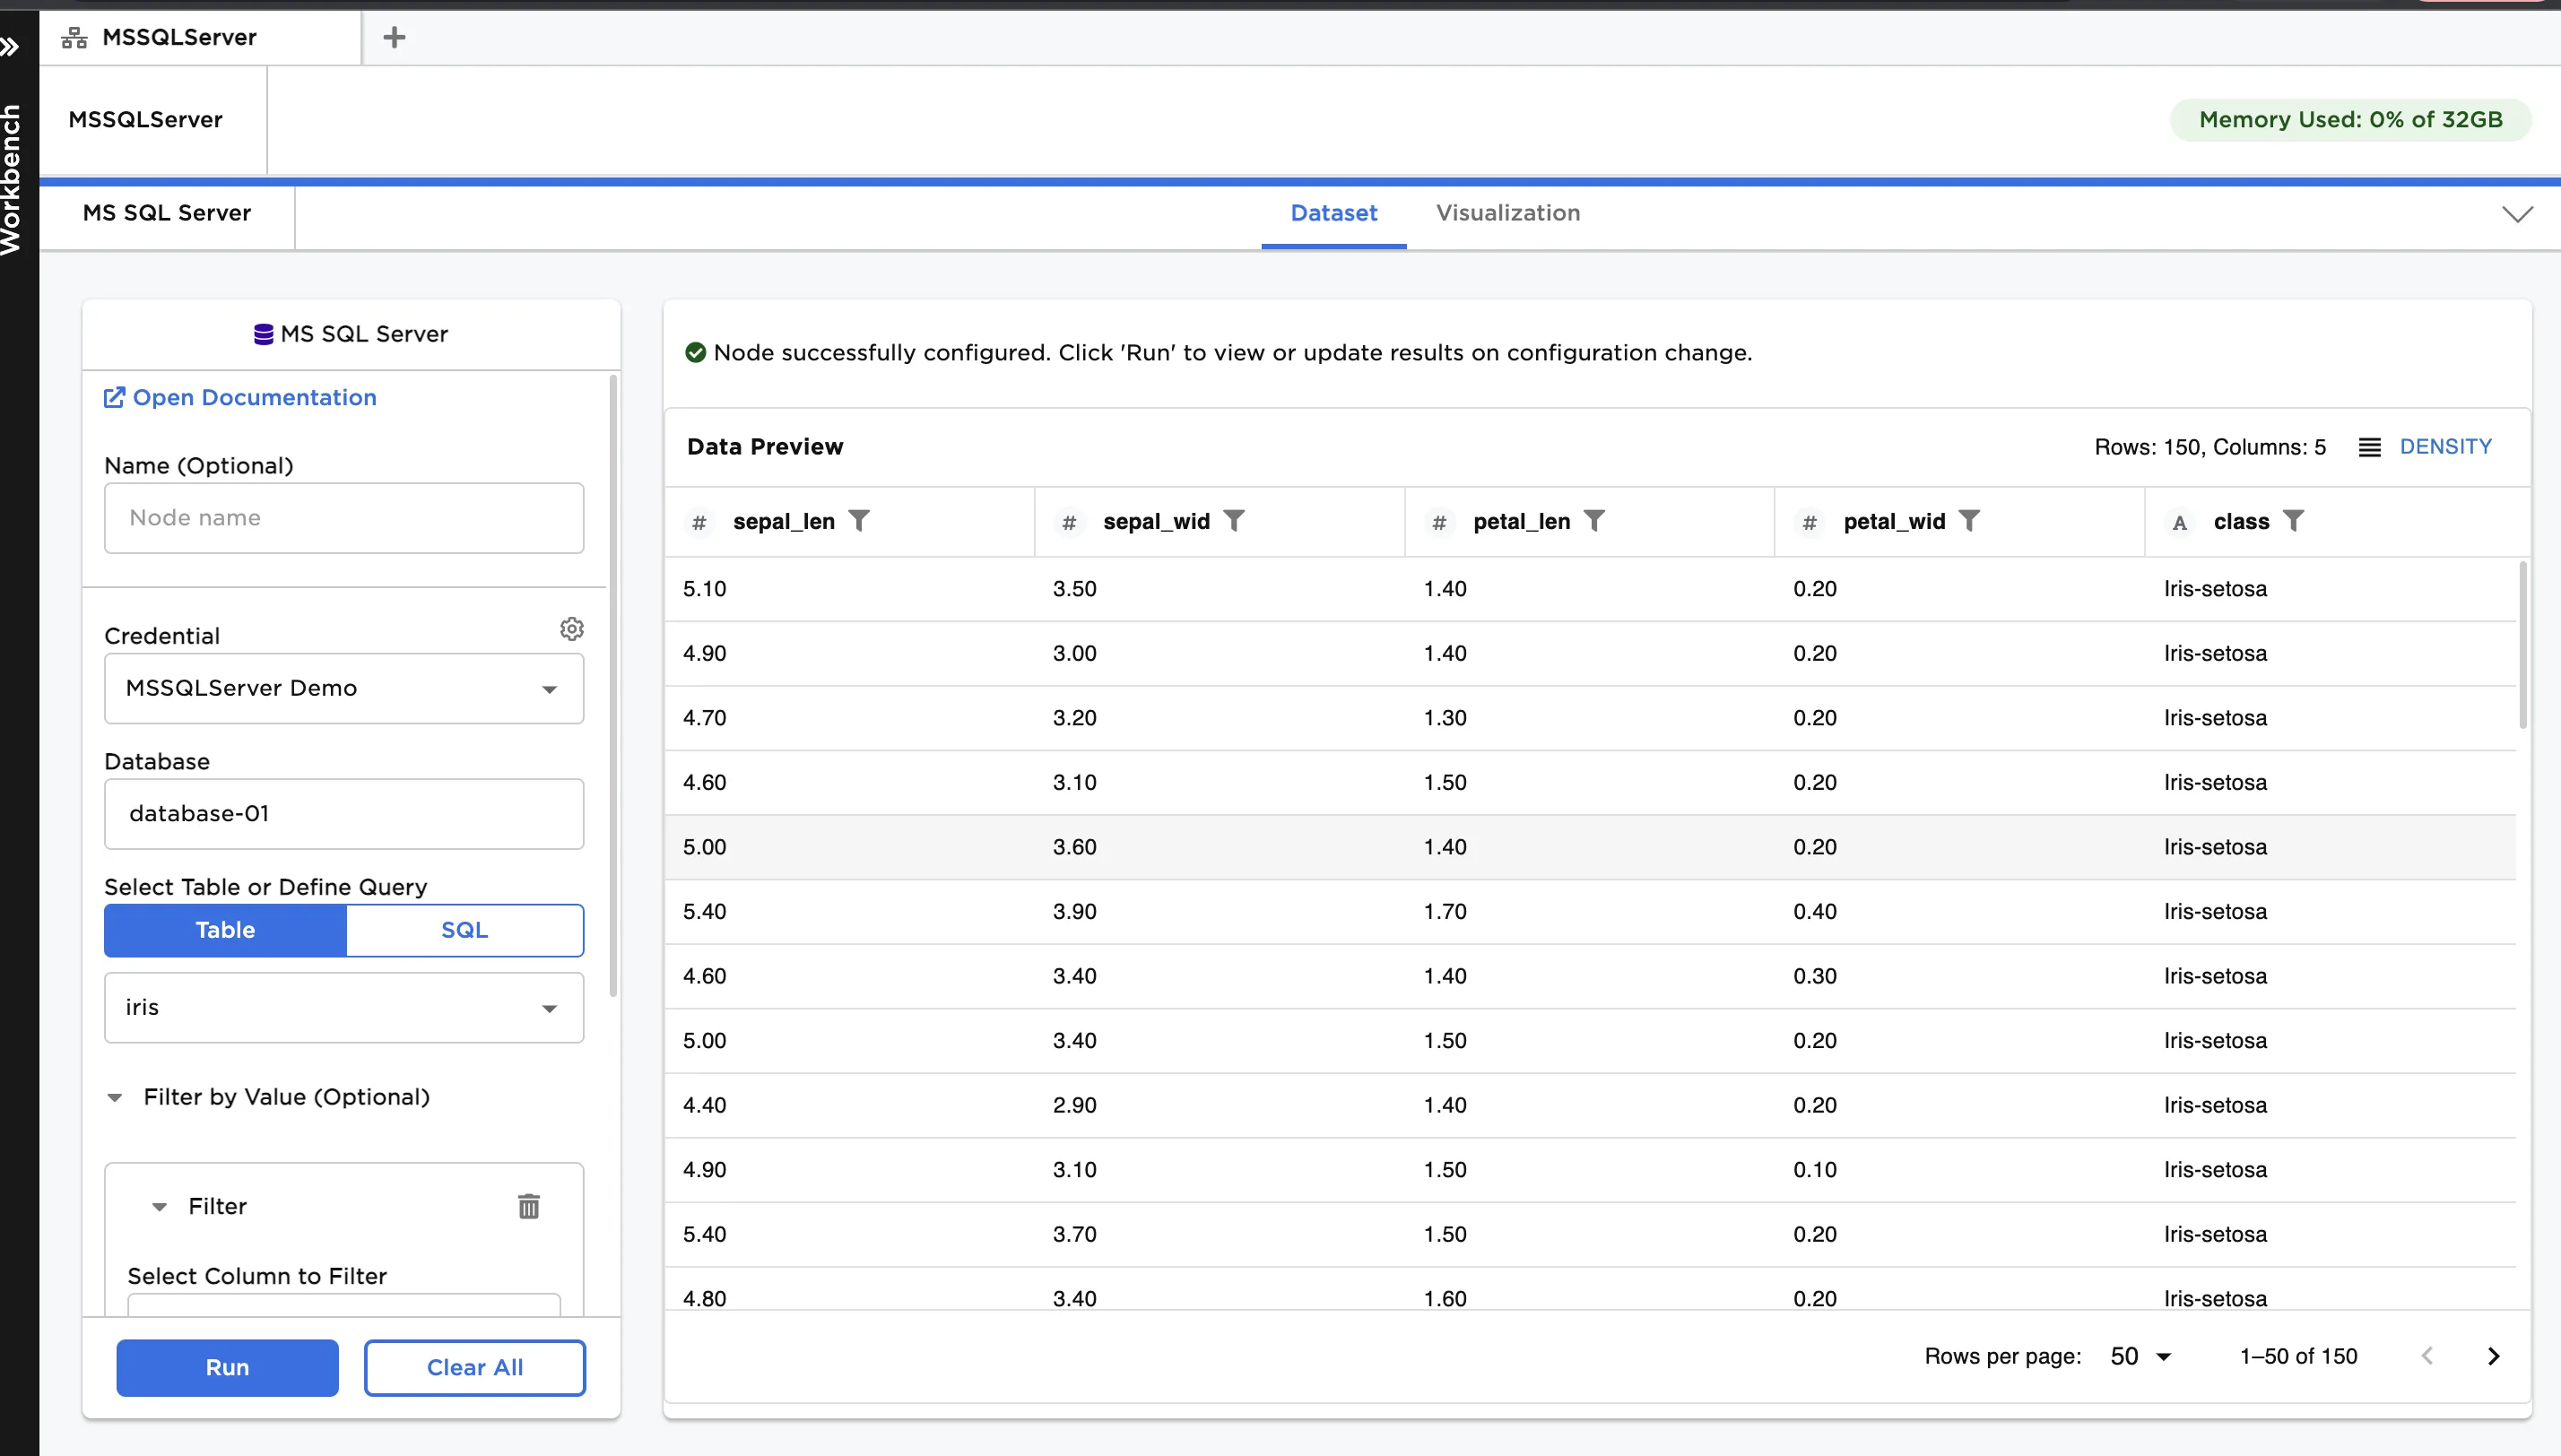
Figure 1: Example dataframe output
Examples
- Select the SQL Server database and table that contains the desired data.
- Select Run to create a dataframe.
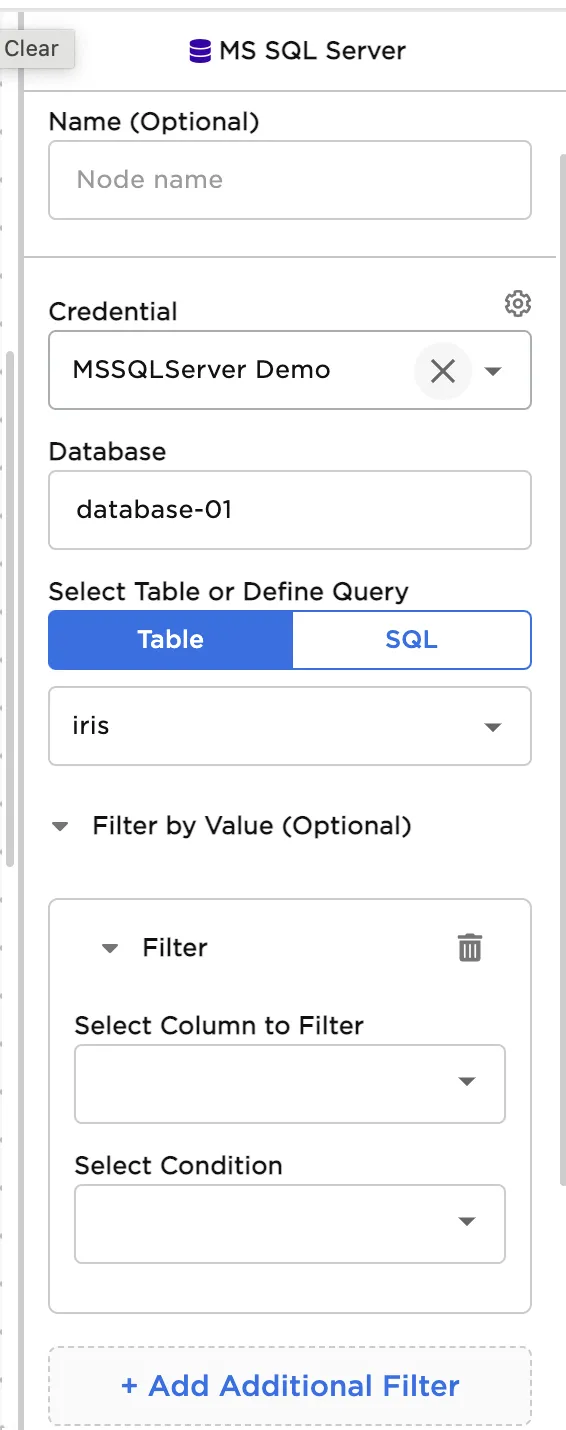
Figure 2: Example MS SQL Server configuration
Figure 3: Example dataframe created from a SQL Server table
- Select a SQL Server database.
- Write a query that returns the desired data. In the example below, the query returns all columns for the first 10 rows of the "iris" table.
- Select Run to create a dataframe.
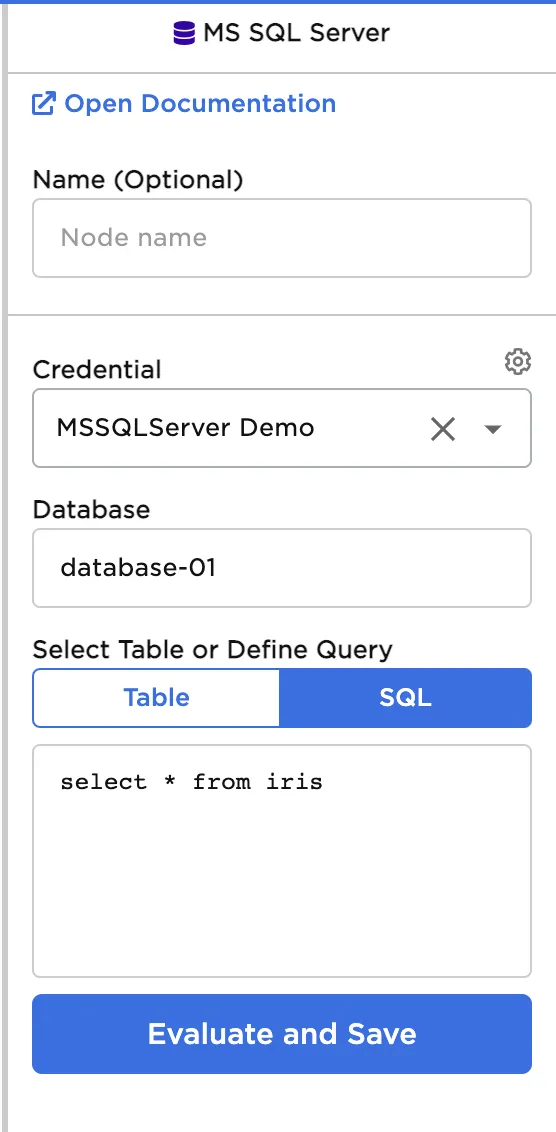
Figure 4: Example configuration using a SQL query
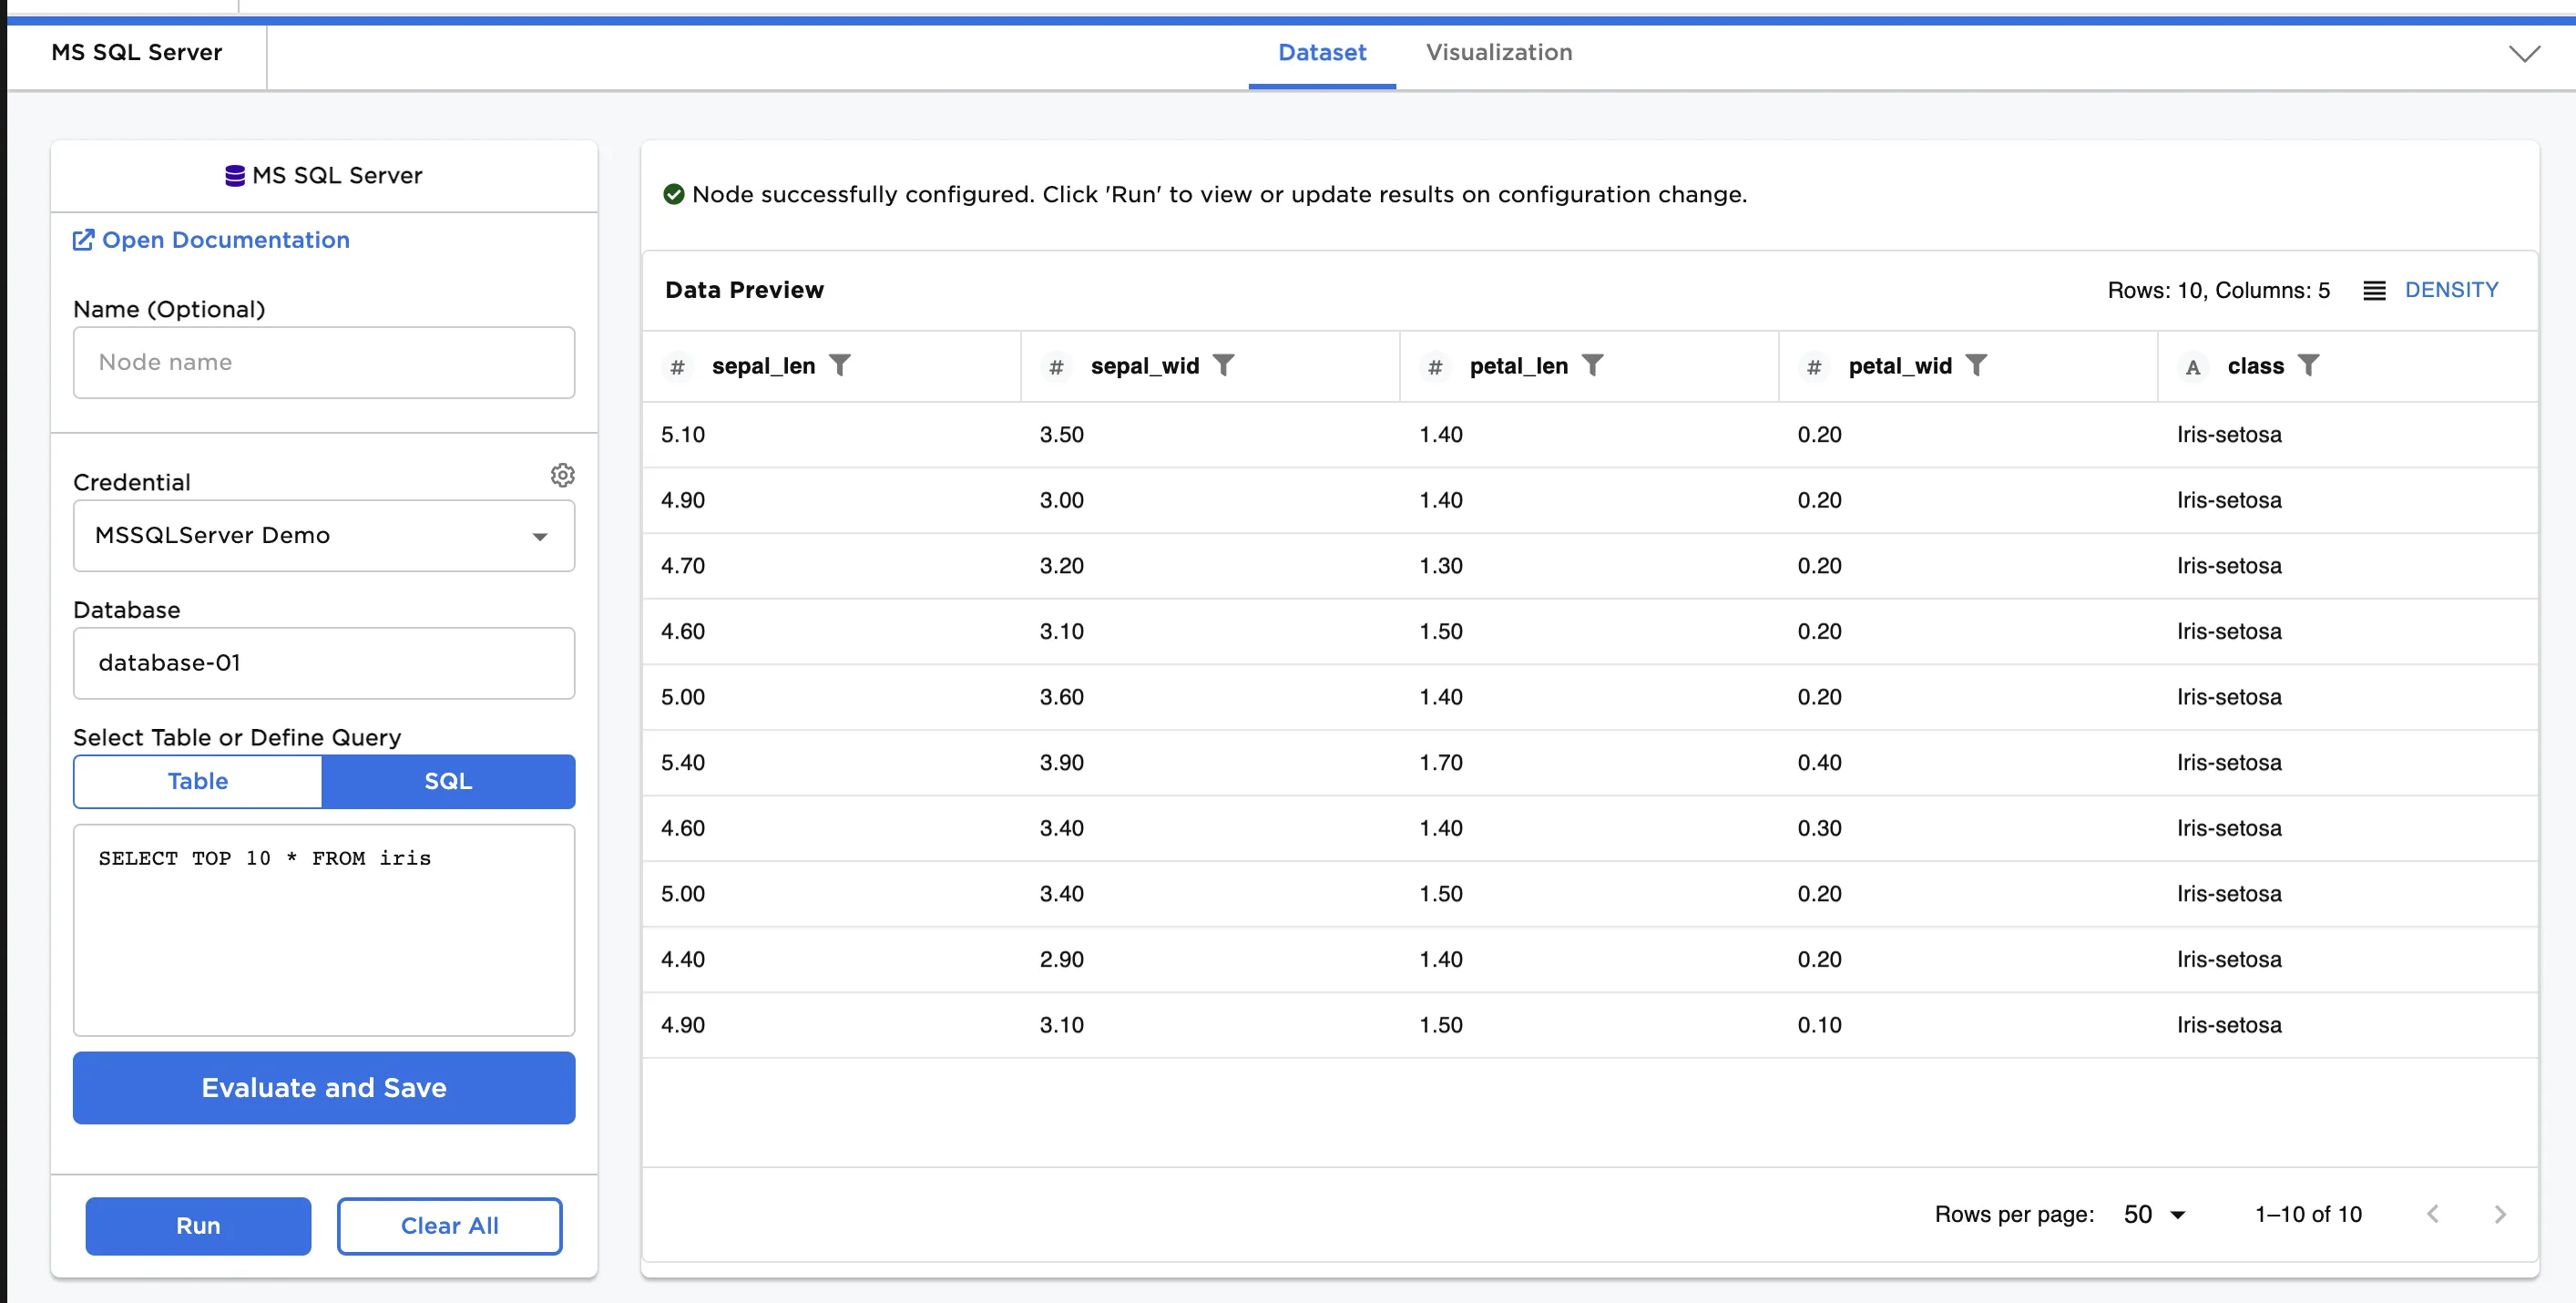
Figure 5: Example dataframe created from a SQL query
- Select the MS SQL Server credential and table ("iris" in this example) that contains the desired data.
- Add a filter using the Filter by Value optional input. The input allows users to easily and visually configure ways to filter--for example by selecting a string column and only selecting rows that begin with a certain letter or selecting a numeric column and only returning results where the value is greater than a user specified input. In this example, filter for rows where the flower class is "iris-setosa."
- Select Run to create a dataframe.
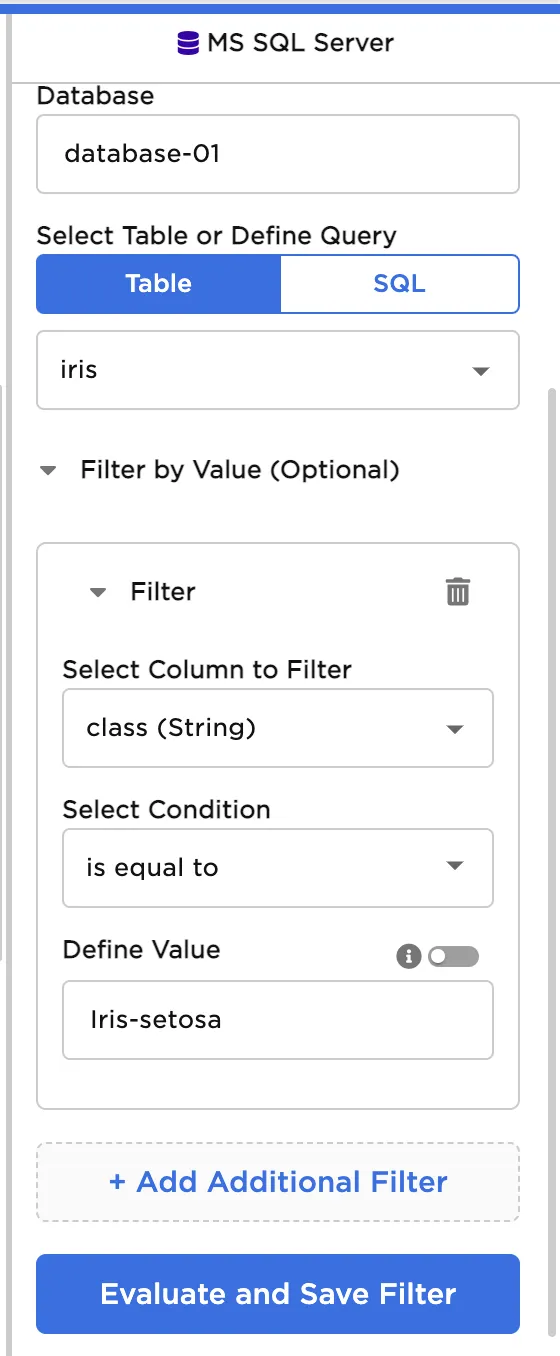
Figure 6: Example configuration using a filter
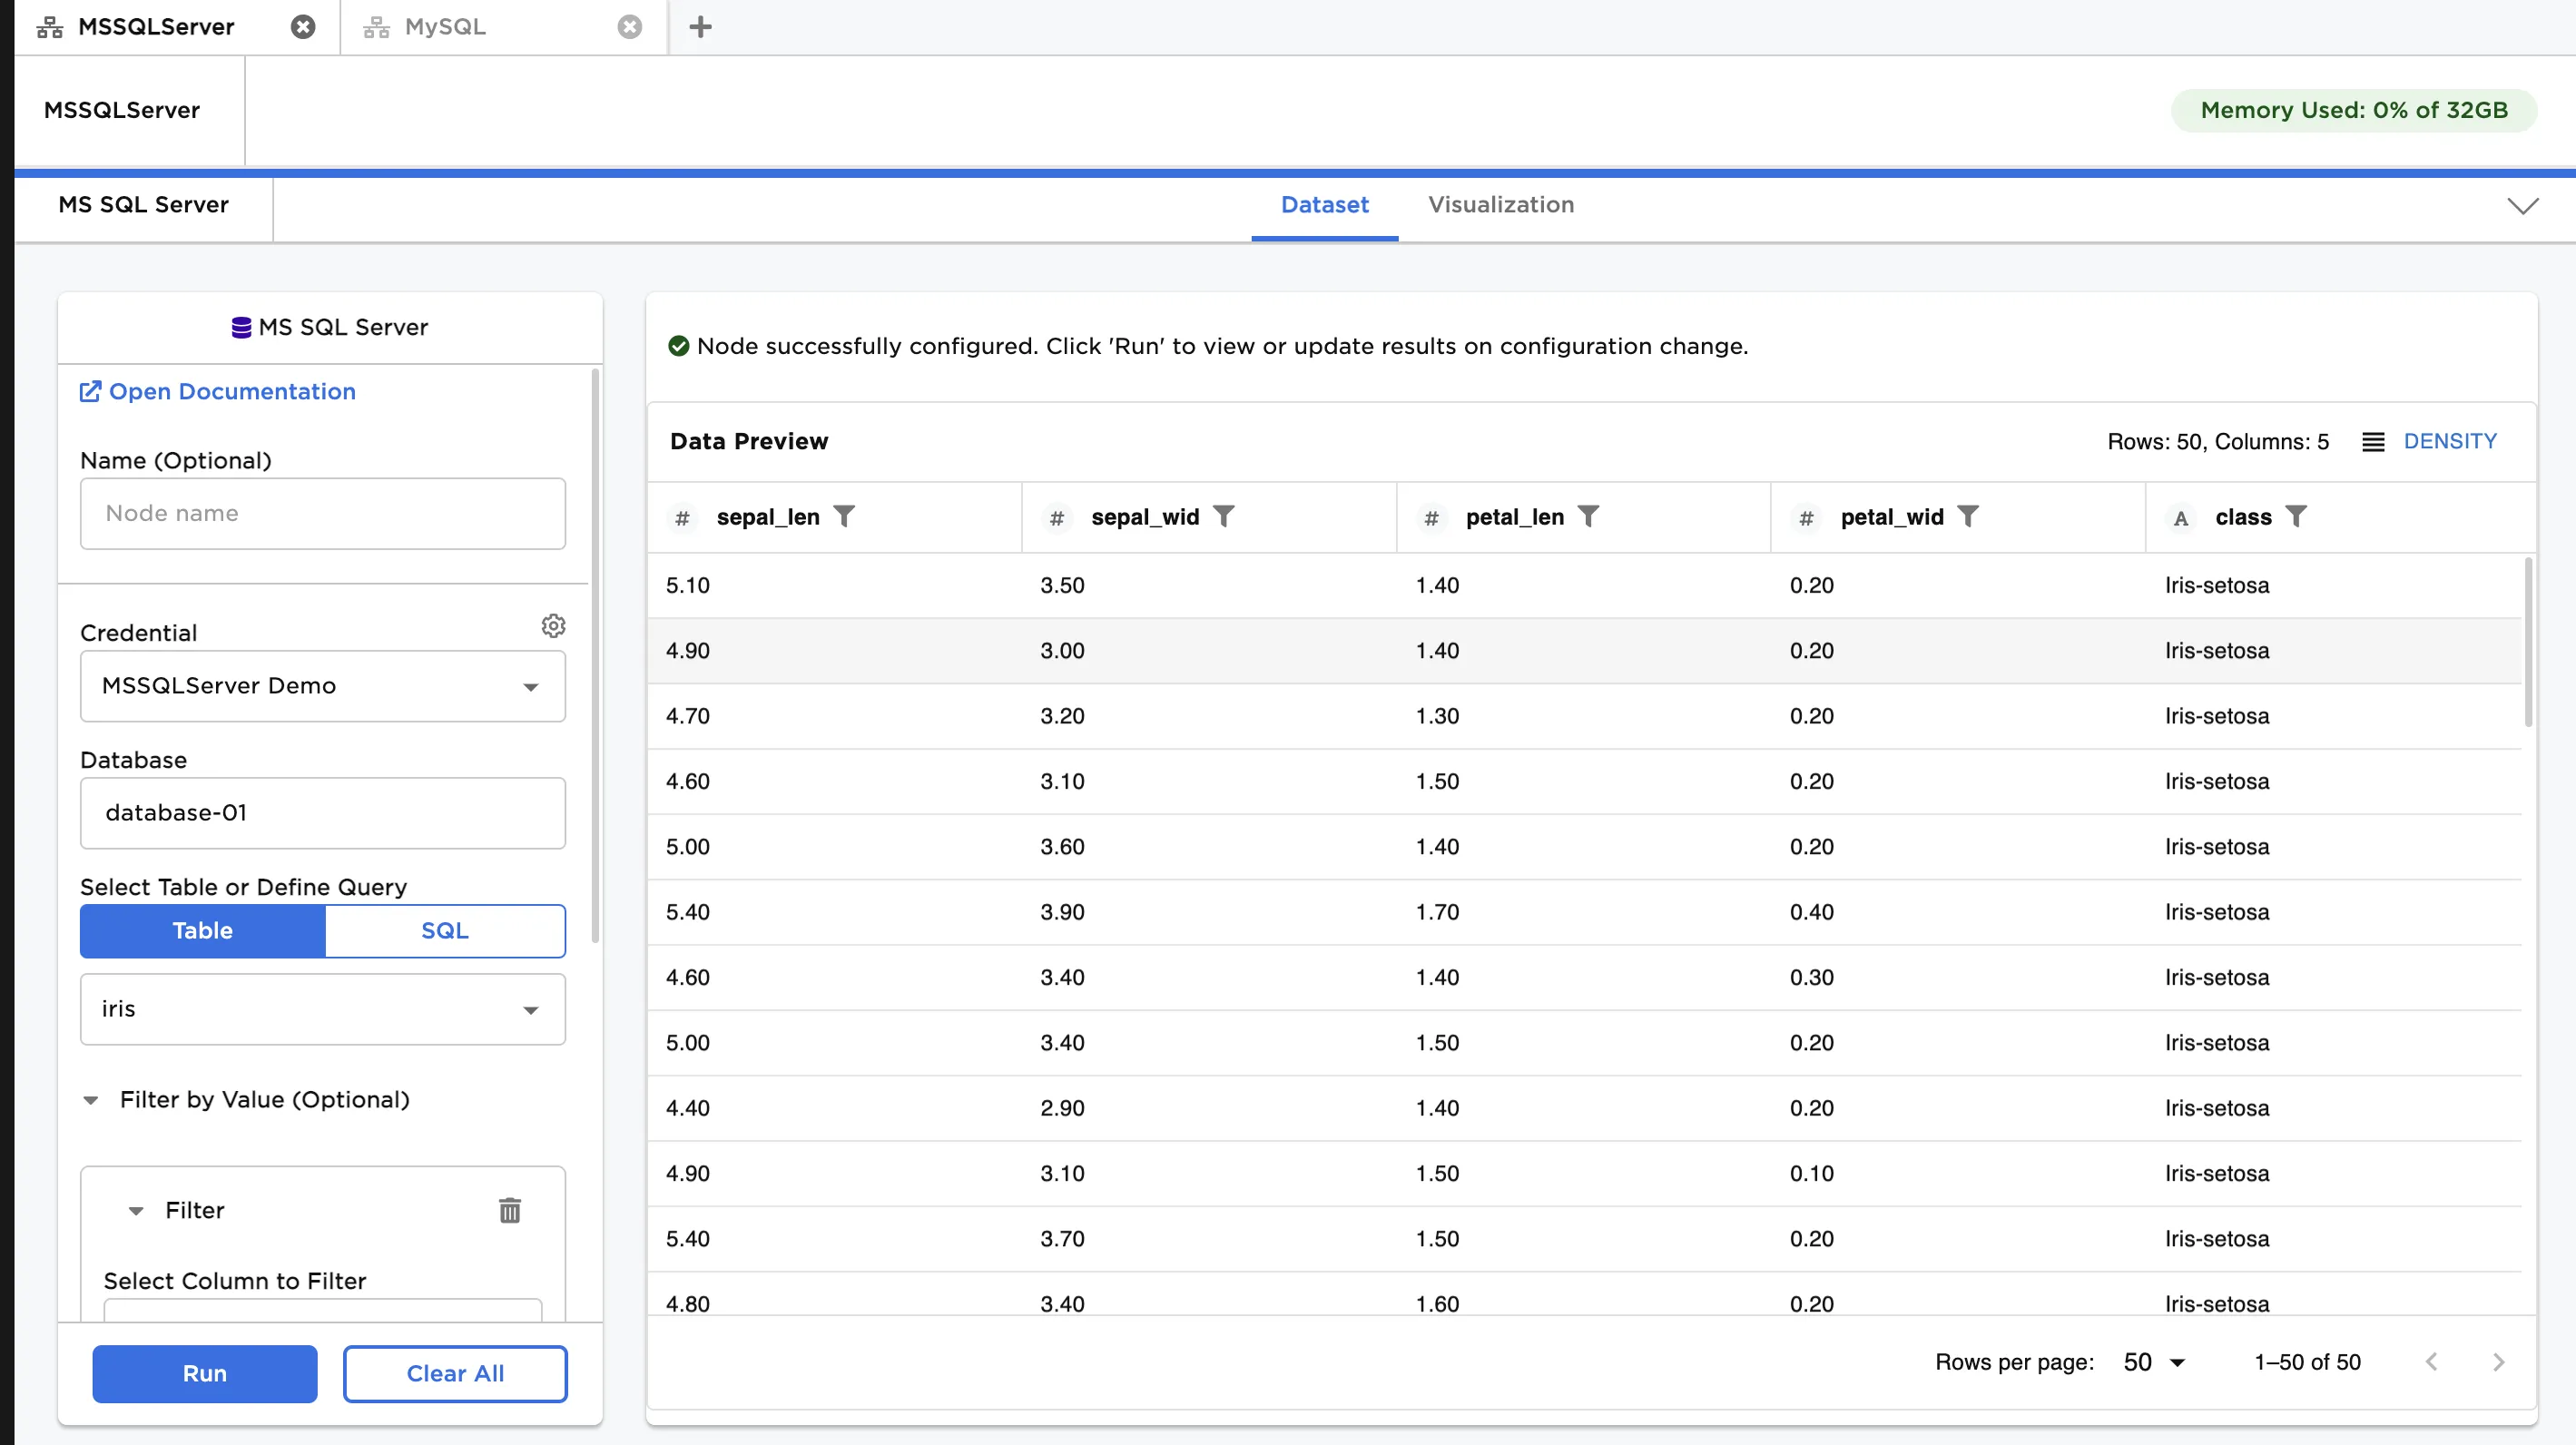
Figure 7: Example dataframe filtered by value