Reverse Categorical Encoding
The Reverse Categorical Encoding node in Visual Notebooks is used to remove encoding from your dataset. If you have encoded columns using Label Encoding or One Hot Encoding in your dataset for preprocessing data for machine learning algorithms, you might need to unencode those columns.
Configuration
| Field | Description |
|---|---|
| Name default=none | Field to name the node An optional user-specified node name displayed in the workspace, both on the node and in the dataframe as a tab. |
| Columns Required | Columns for reverse categorical encoding Select columns where encoding has been applied. |
| Output column suffix Required | Suffix for columns with reversed encoding Create a suffix to add to all columns with reversed categorical encoding. |
Drop Original Column(s) default=on | Original column handling Select whether to drop original column(s) with the toggle on (default) or to keep original column(s) with the toggle off. |
Node Inputs/Outputs
| Input | A Visual Notebooks dataframe with encoded columns and labels from the Label Encoding or One Hot Encoding node |
|---|---|
| Output | A dataframe with categorical encoding reversed |
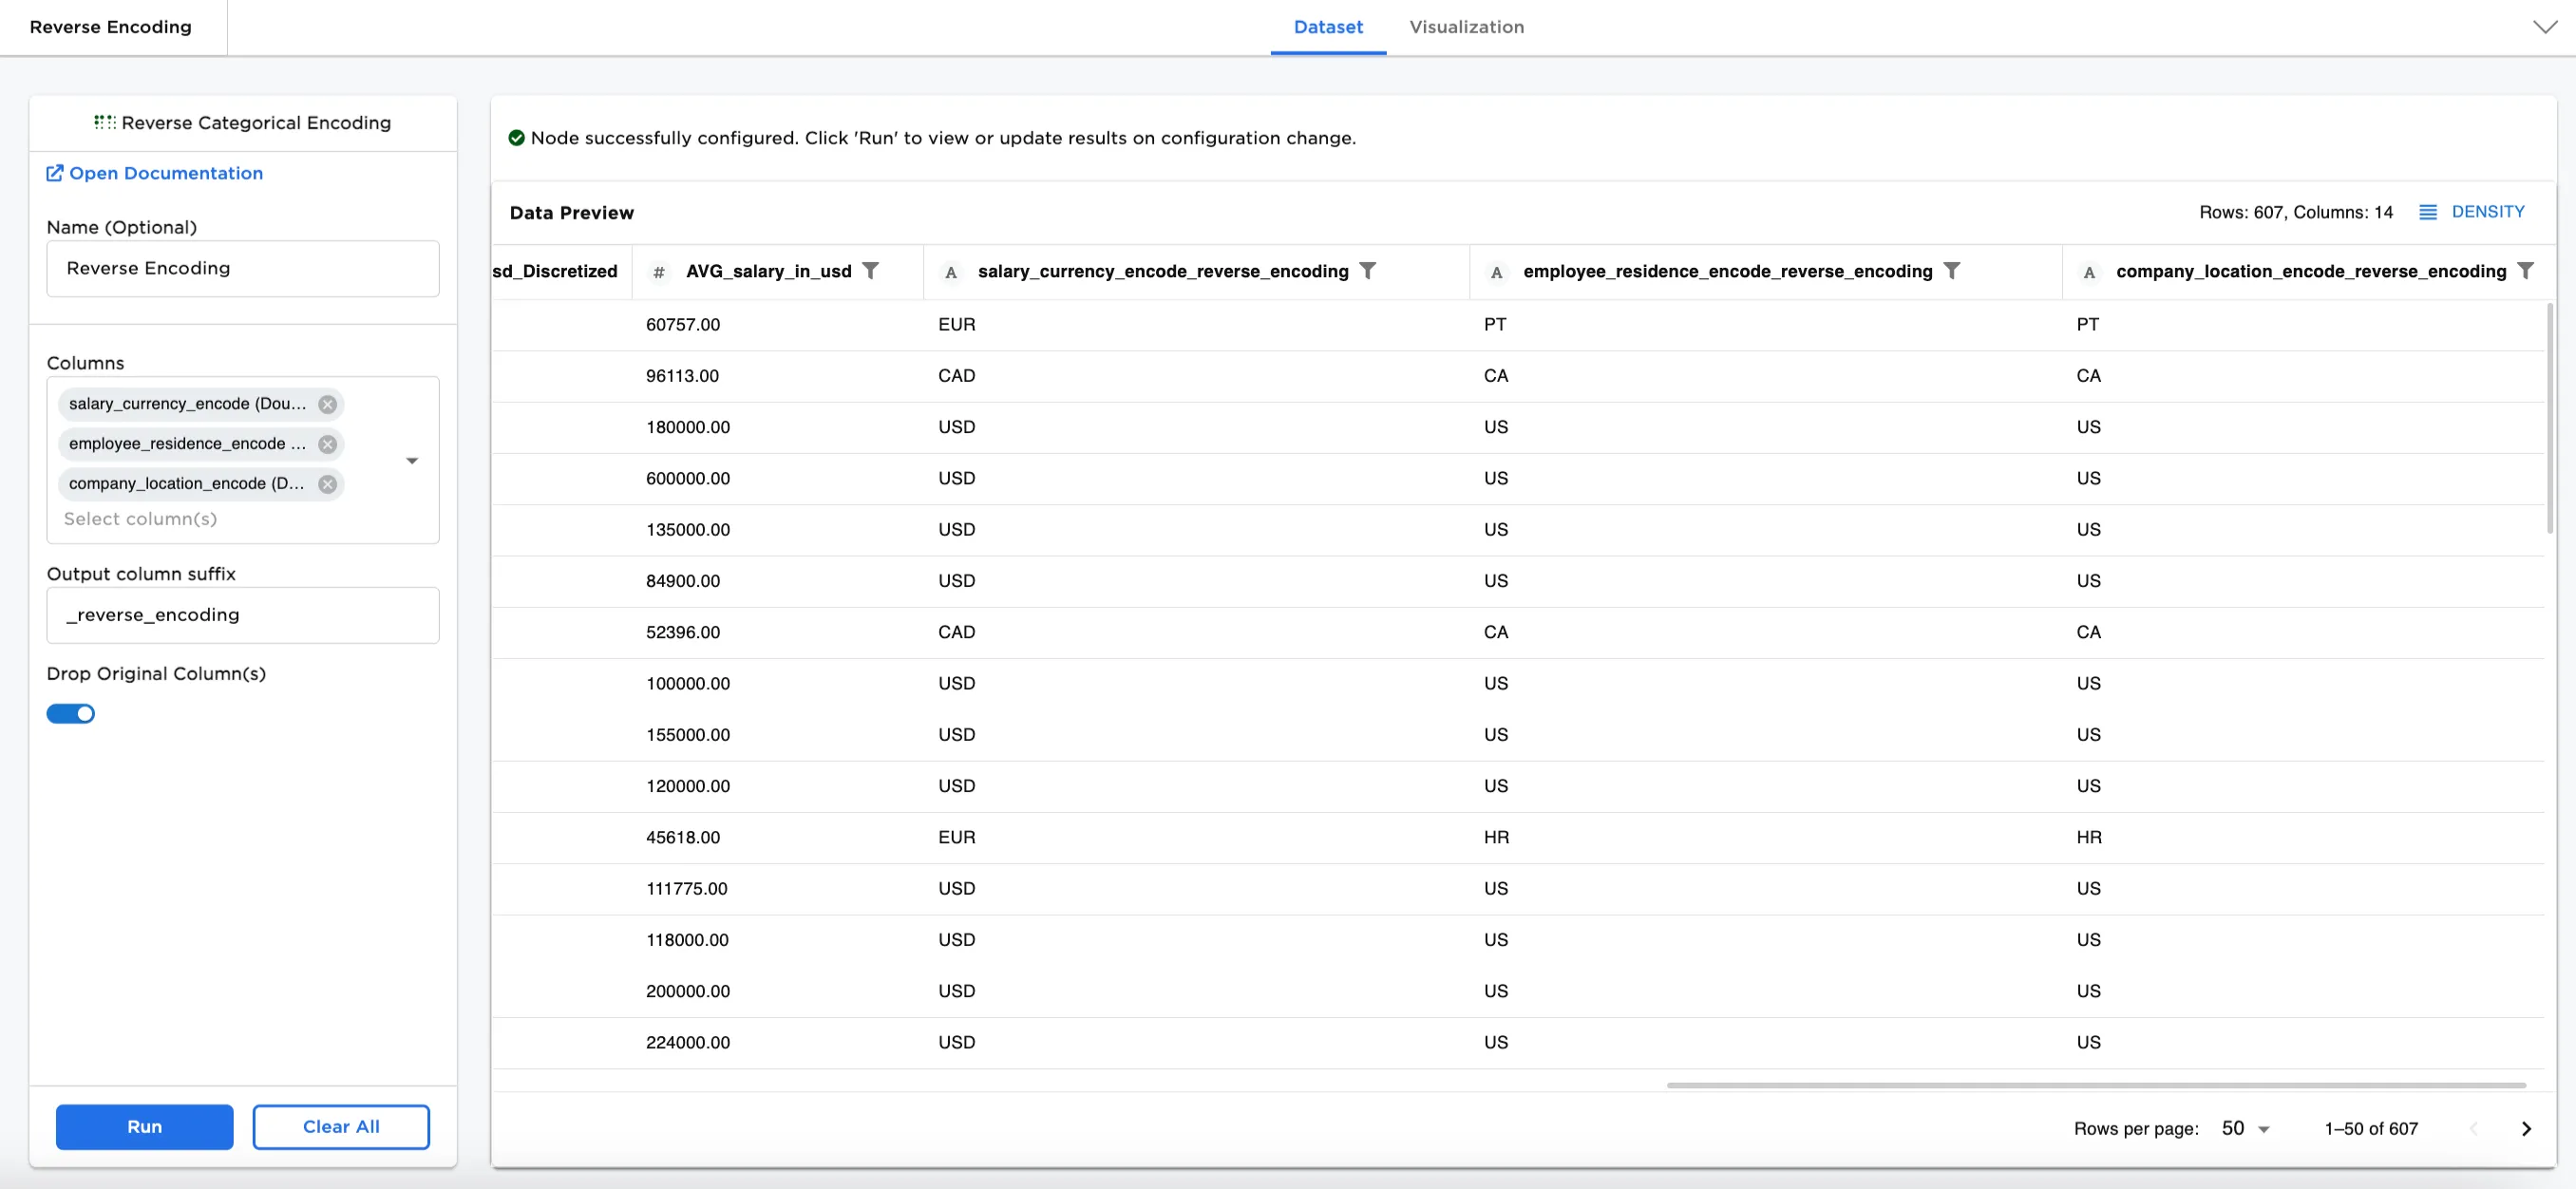
Figure 1. Example output dataframe
Examples
In this example, we have a dataset of data scientist salaries with 607 rows of data. The dataset includes employee residence country codes, salary currency, company location, and salary in USD. Three of those columns in the dataset were encoded to preprocess it for other machine learning nodes (salary_currency (String), employee_residence (String), and company location (String)). Now we have a need to unencode those encoded columns.
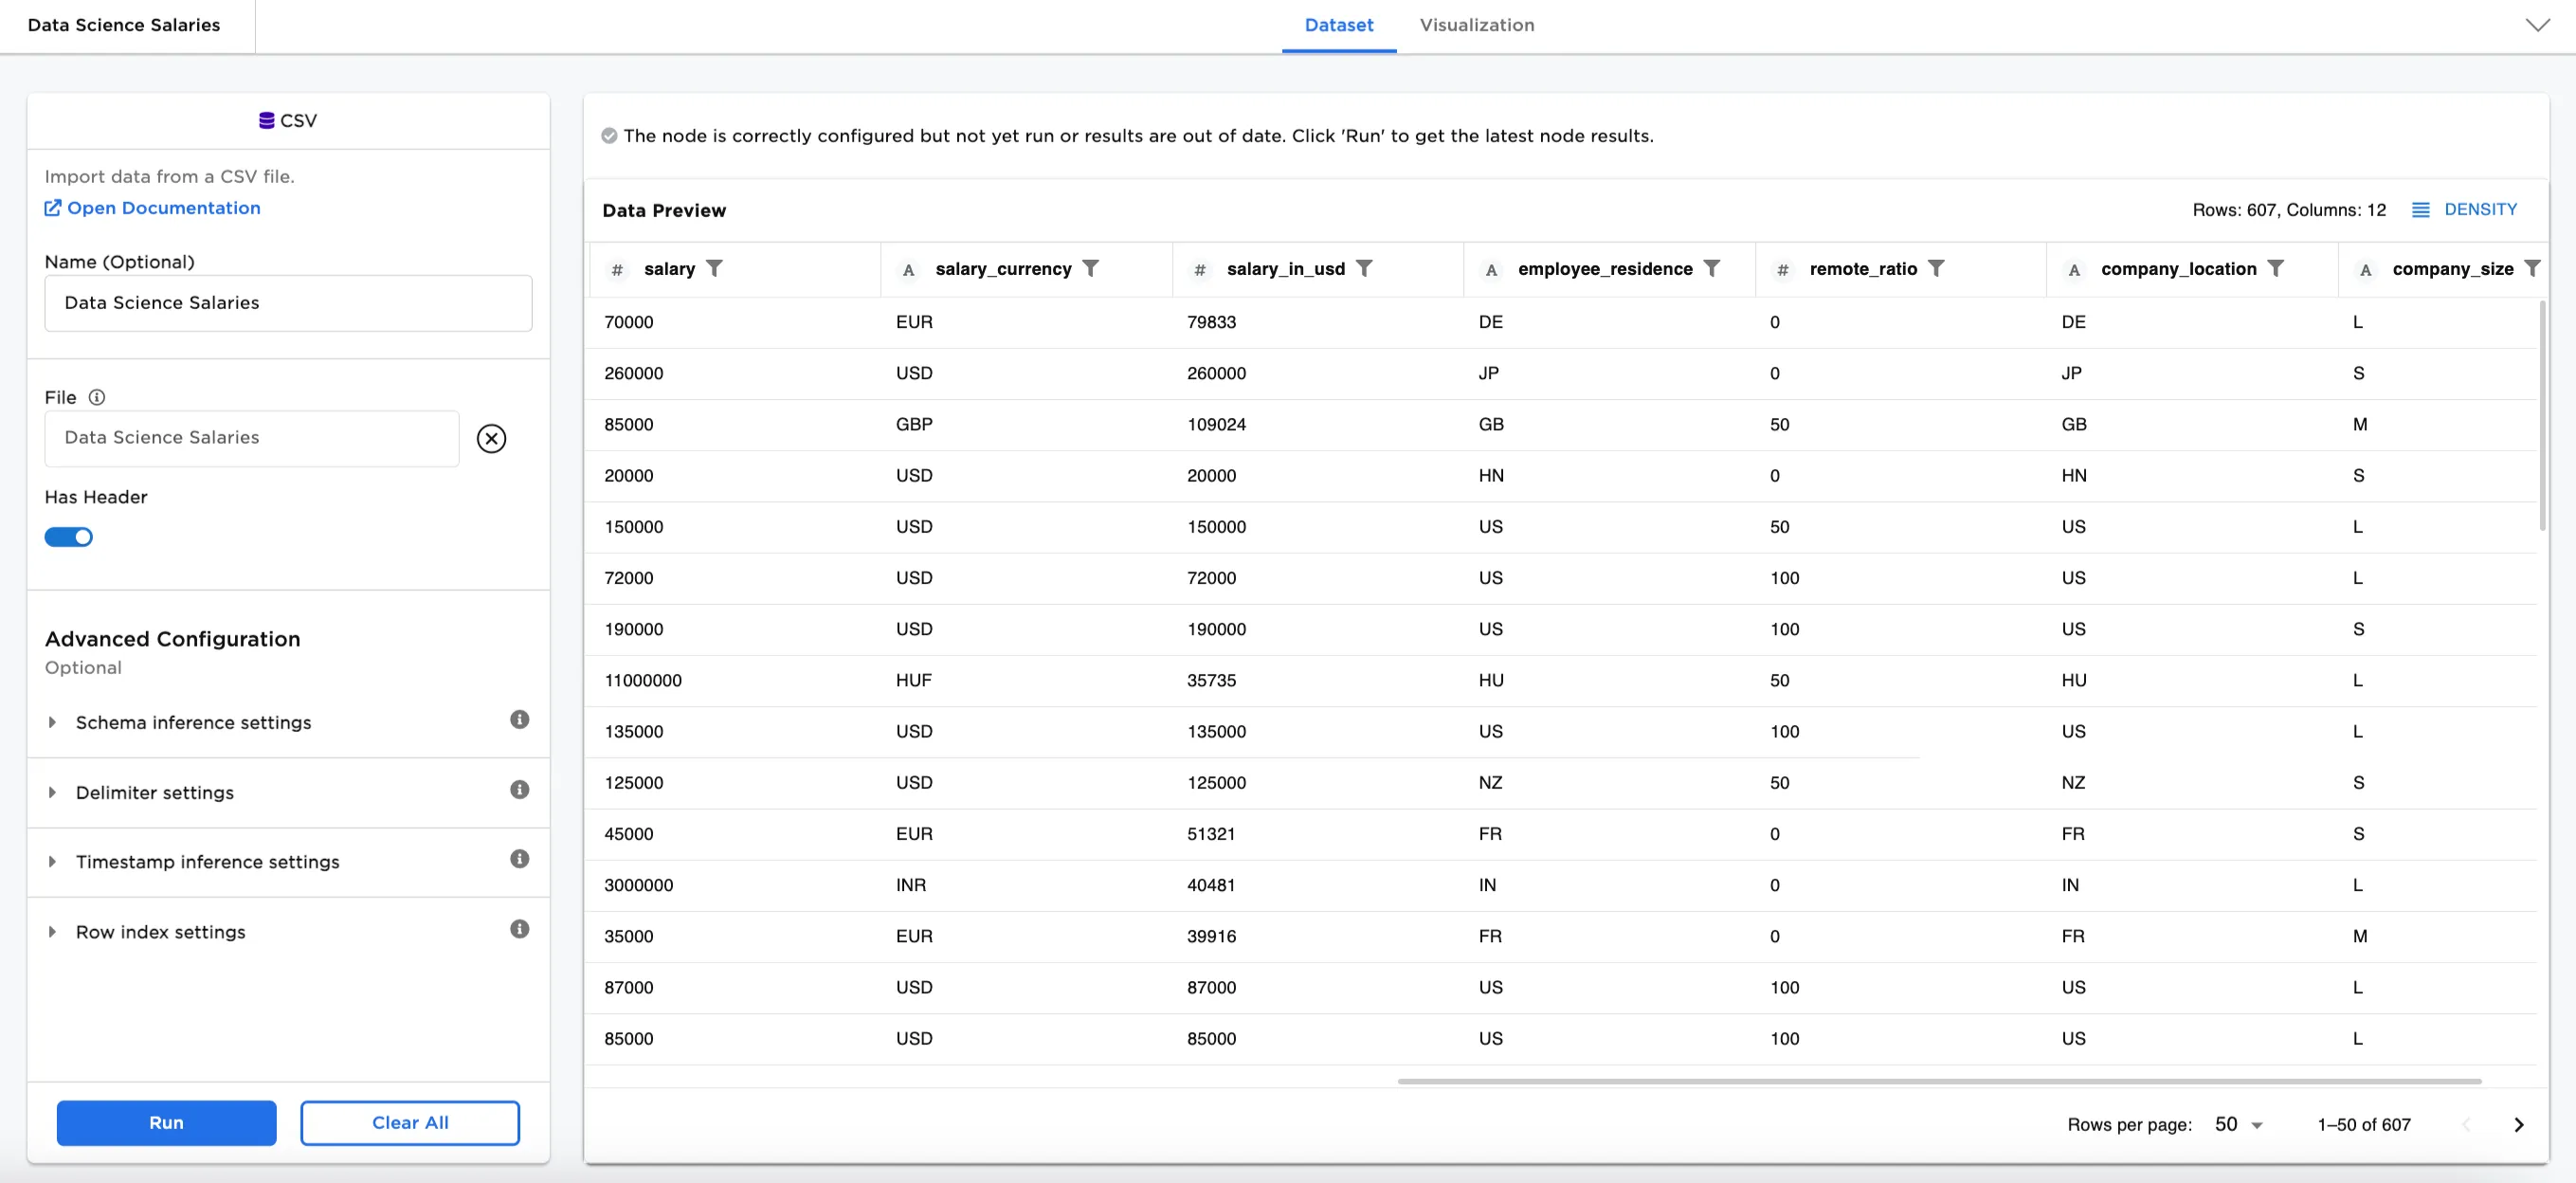
Figure 2: Example input data
Pre-Setup
Add the following nodes to the workspace. See each node for more information.
- CSV node. Add the sample data to the CSV and select Run.
- Label Encoding node (the example gives information for Label Encoding, but the One Hot Encoding node can be substituted)
- Connect the CSV node to the Label Encoding node
- Encode
salary_currency (String),employee_residence (String), andcompany location (String) - Add an
_encodesuffix - Select
skipfor invalid labels - Toggle the Drop Original Column(s) button on
- Select Run
- Discretizer node
- Connect the Label Encoding node to the Discretizer node
- Select
salary_in_usd (Integer)for the column to discretize - Enter
5bins - Select K-means Discretizer for the Discretization Method
- Select Ordinal - Categorical Encoding for the Encoding
- Toggle the Keep Original Columns button on
- Enter
_Discretizedfor the Output column suffix - Select Run
- Group and Aggregate node
- Connect the Discretizer node to the Group and Aggregate node
- Select all columns in the GroupBy Columns node
- Add an aggregation method
- Column:
salary_in_usd - Method:
Average
- Column:
- Select Run

Figure 3: Workspace Setup Example. Input -> Label Encoding (or One Hot Encoding) -> Feature Engineering nodes -> Reverse Encoding -> Feature Engineering
Example steps
- Connect a Reverse Categorical Encoding node to an existing node. In this case, the dataset port is connected to the GroupBy and Aggregate node and the labels port is connected to the Label Encoding node.
- Optionally, name the Reverse Categorical Encoding node. In the example, the node is named,
Reverse Encoding. - Select the column label(s) you'd like to reverse the encoding for. In Figure 4 the following selections are made:
salary_currency_encodeemployee_residence_encodecompany location_encode
- Create a suffix to assign to the new output column(s). In Figure 4,
_reverse_encodingis added as the suffix for each new column. - Toggle on the Drop Original Column(s) to keep the original column.
- Select Run.
Figure 4 shows the dataframe with three new columns of unencoded information. The original encoded columns have been dropped.
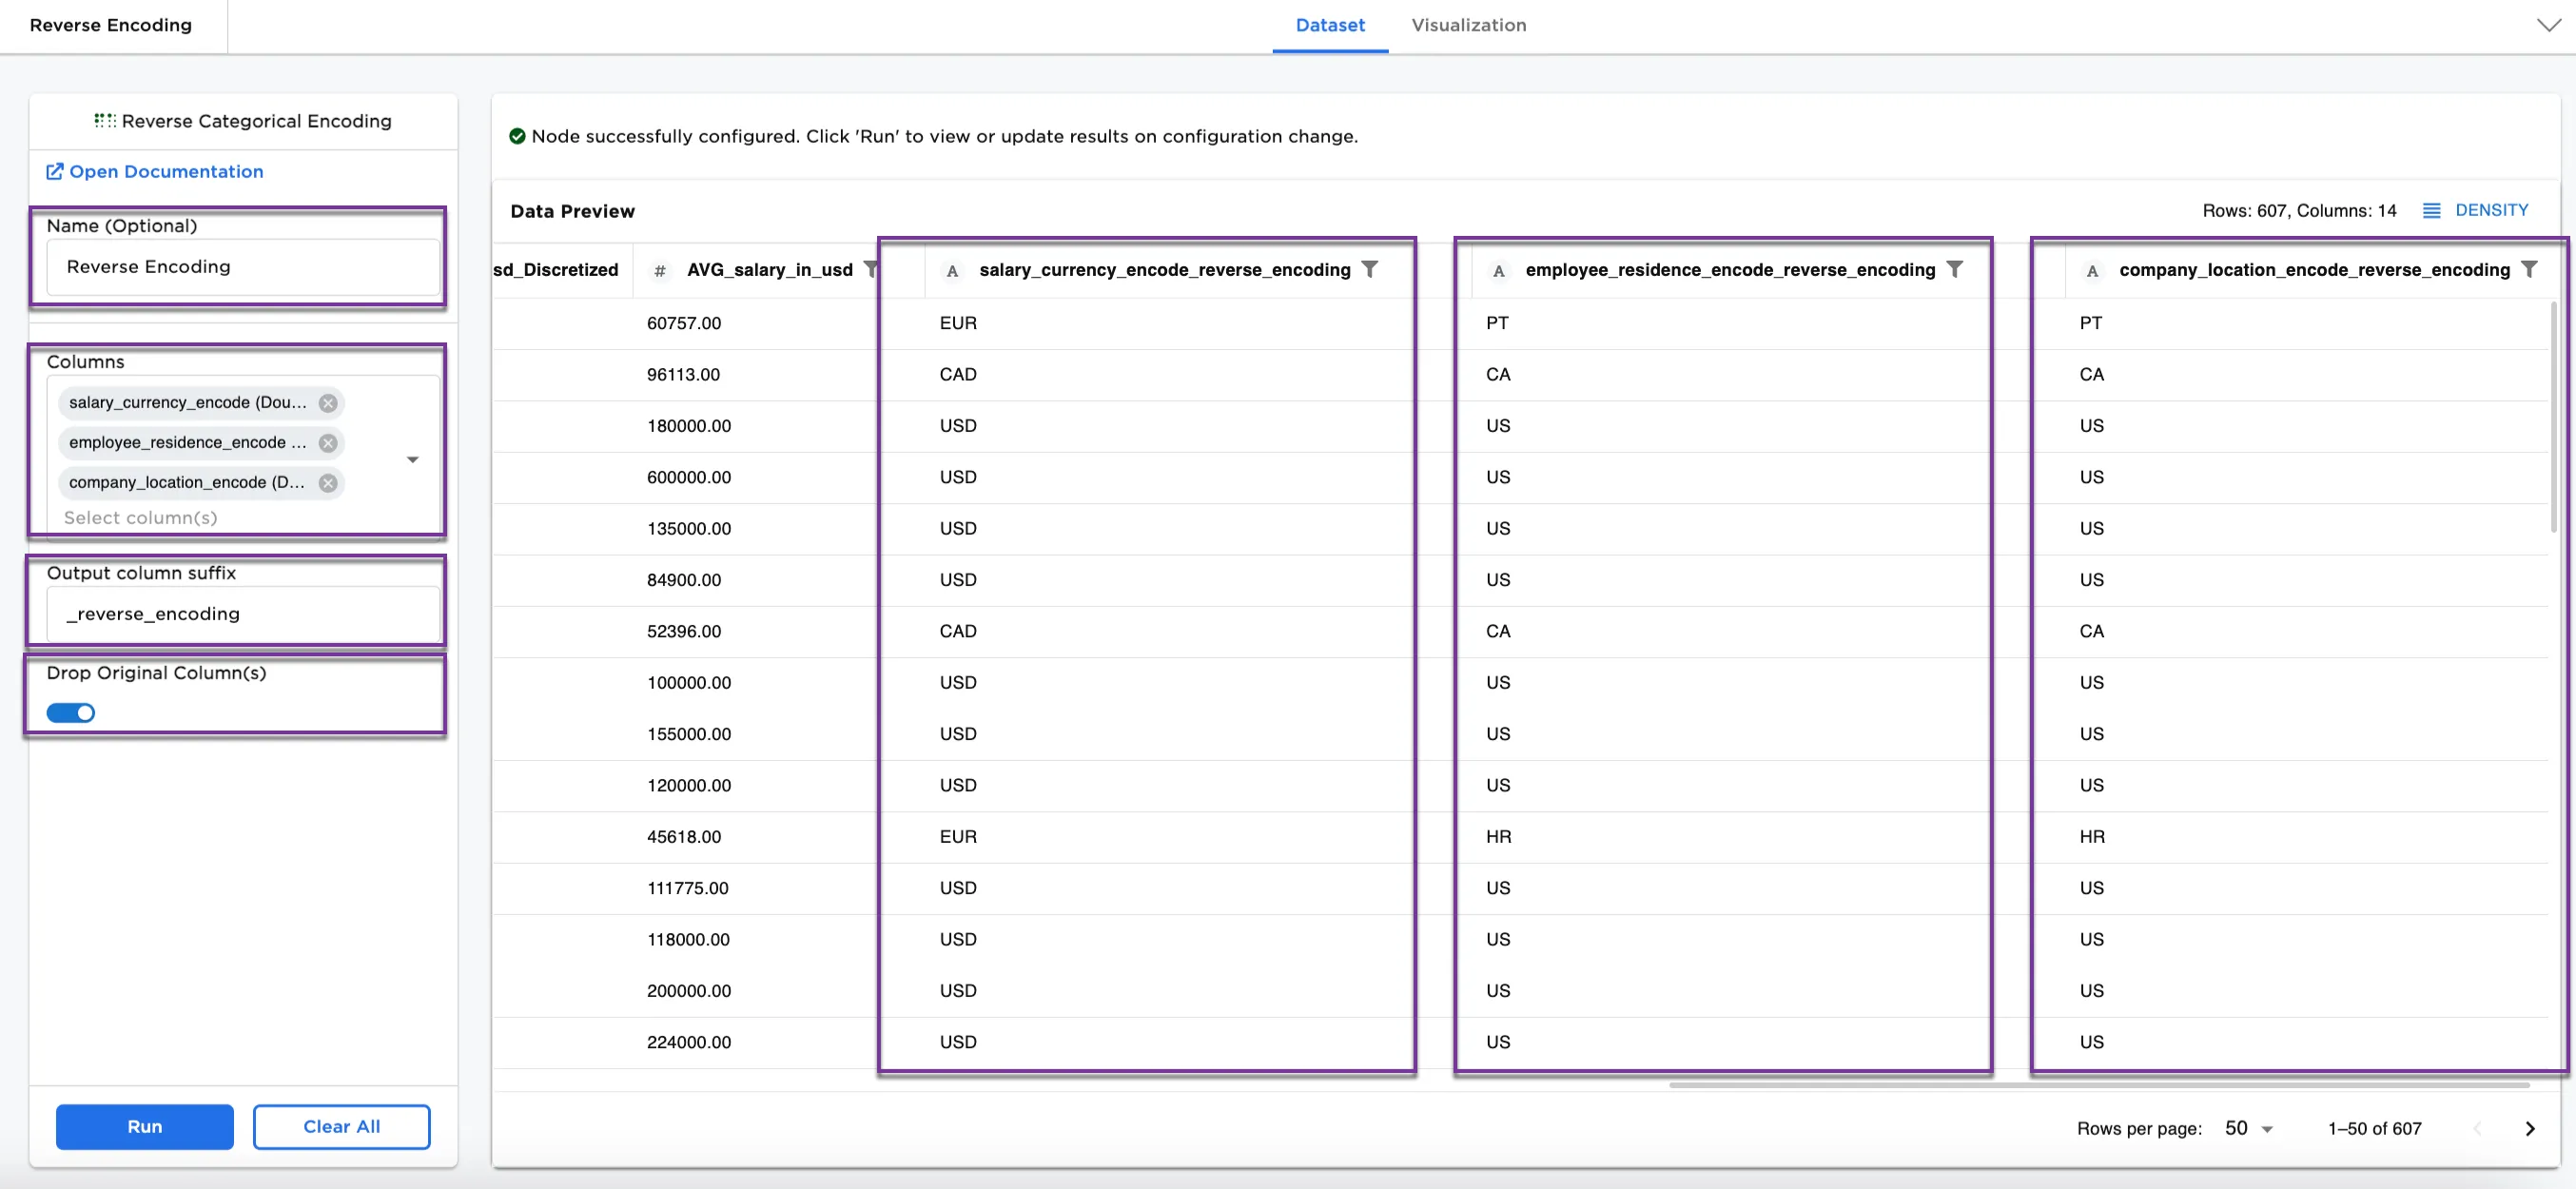
Figure 4: Example dataframe with unencoded columns
Figure 5a, Figure 5b, and Figure 5c compare the dataset before encoding, after encoding, and after reversing the encoding.
Note: The dataframes have columns removed so that relevant columns can be viewed more easily.
Following the second row (the number column is 1), we see:
- Figure 5a: The original dataset shows
Machine Learning Scientistfor the job title and260000for the salary in USD. The currency isUSD, the employee residence isJP, and the company location isJP. - Figure 5b: The encoded dataset shows the same line for
Machine Learning Scientistand260000salary in USD with0.00for the salary currency, and8.00for the employee residence and company location. - Figure 5c: The reverse encoding dataset shows
Machine Learning Scientistand260000for the salary in USD showsUSDfor the salary currency, andJPfor the employee residence and the company location once again.
The unencoded dataset is now ready for more processing.
 Figure 5a: Example from original dataset
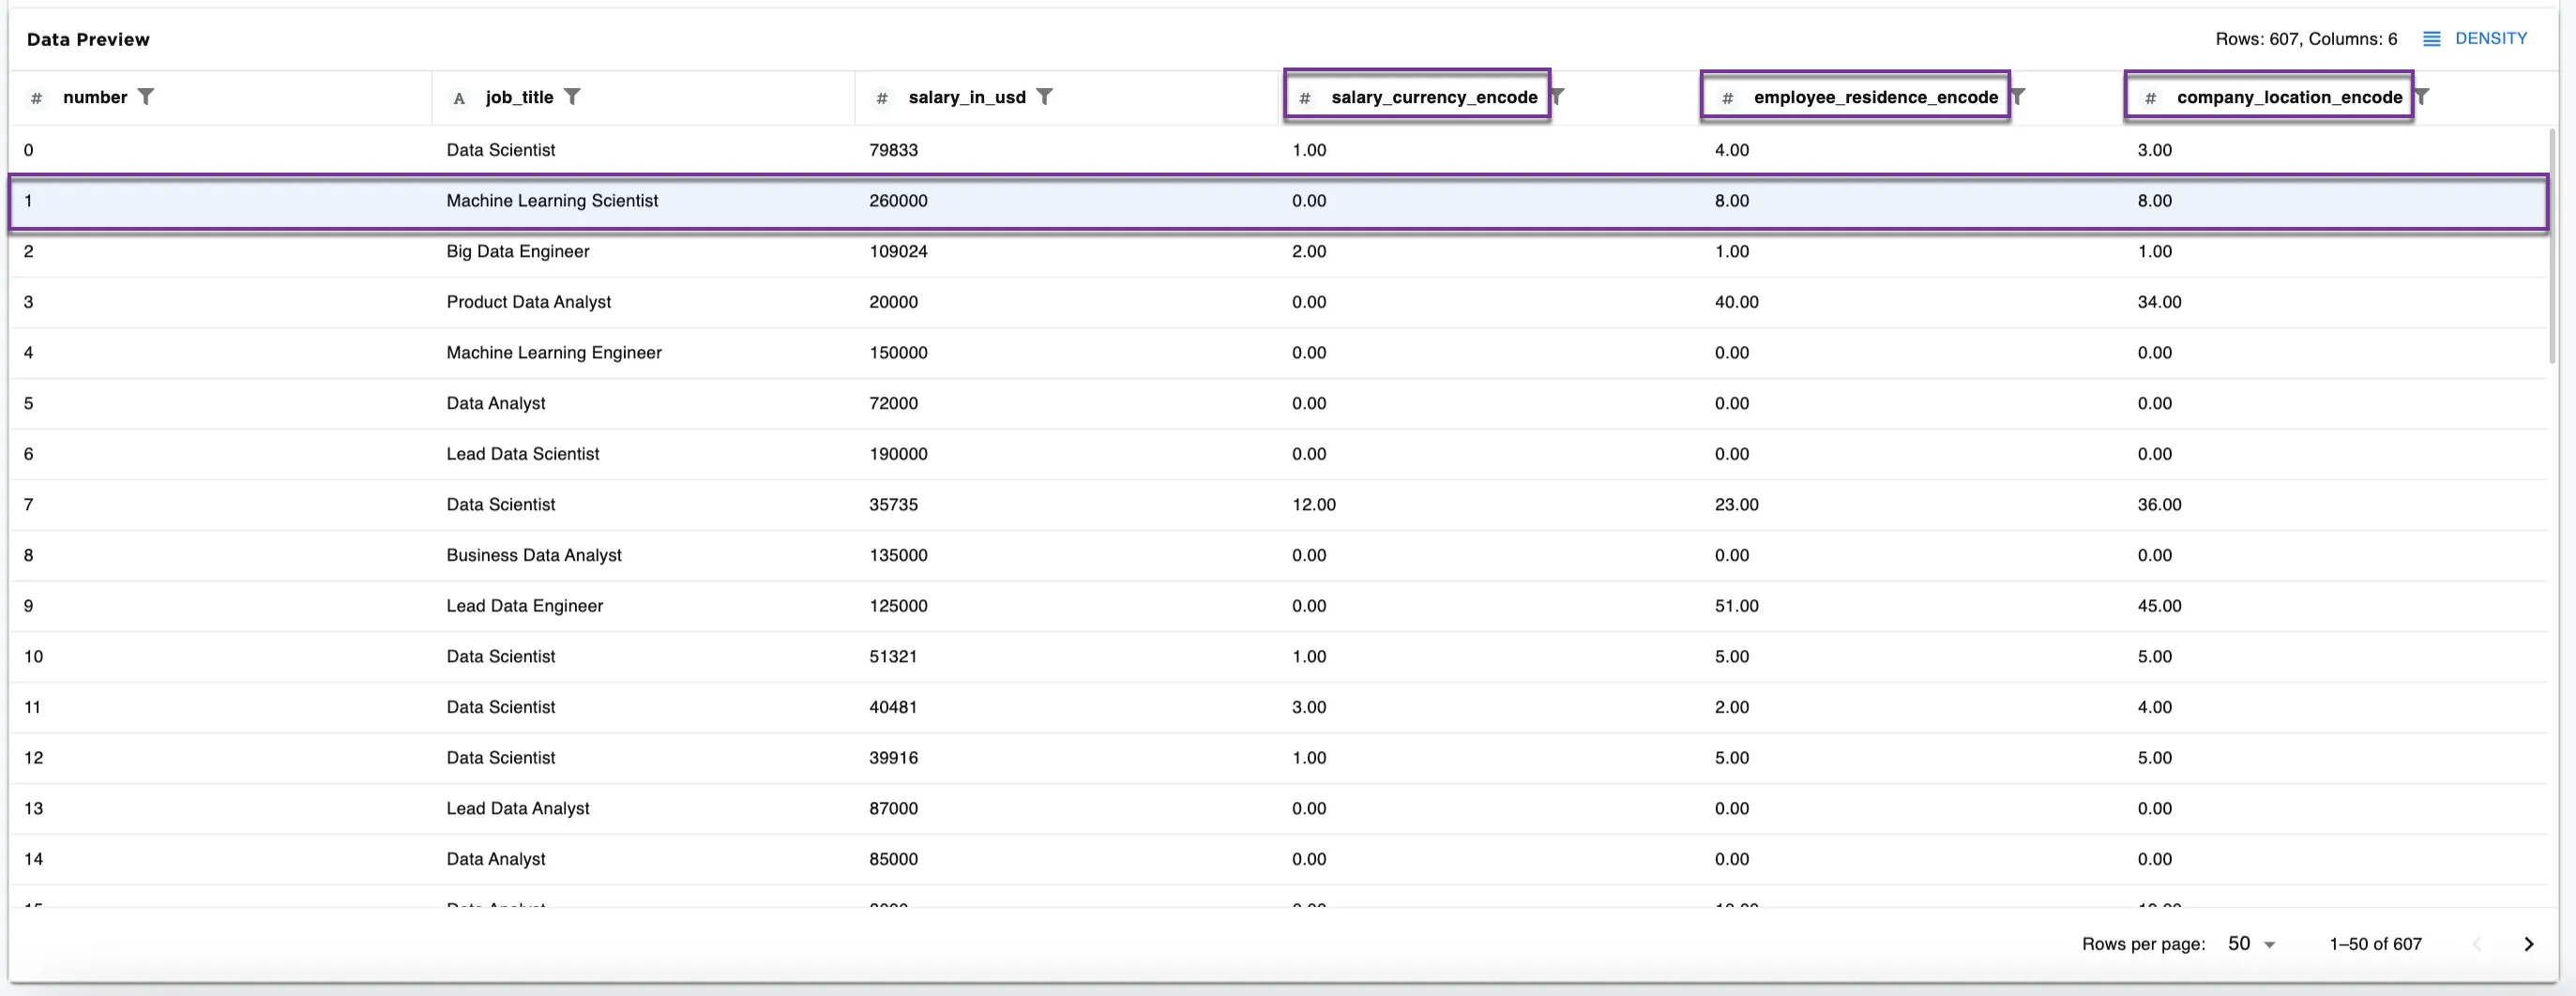 Figure 5b: dataset with 3 columns encoded
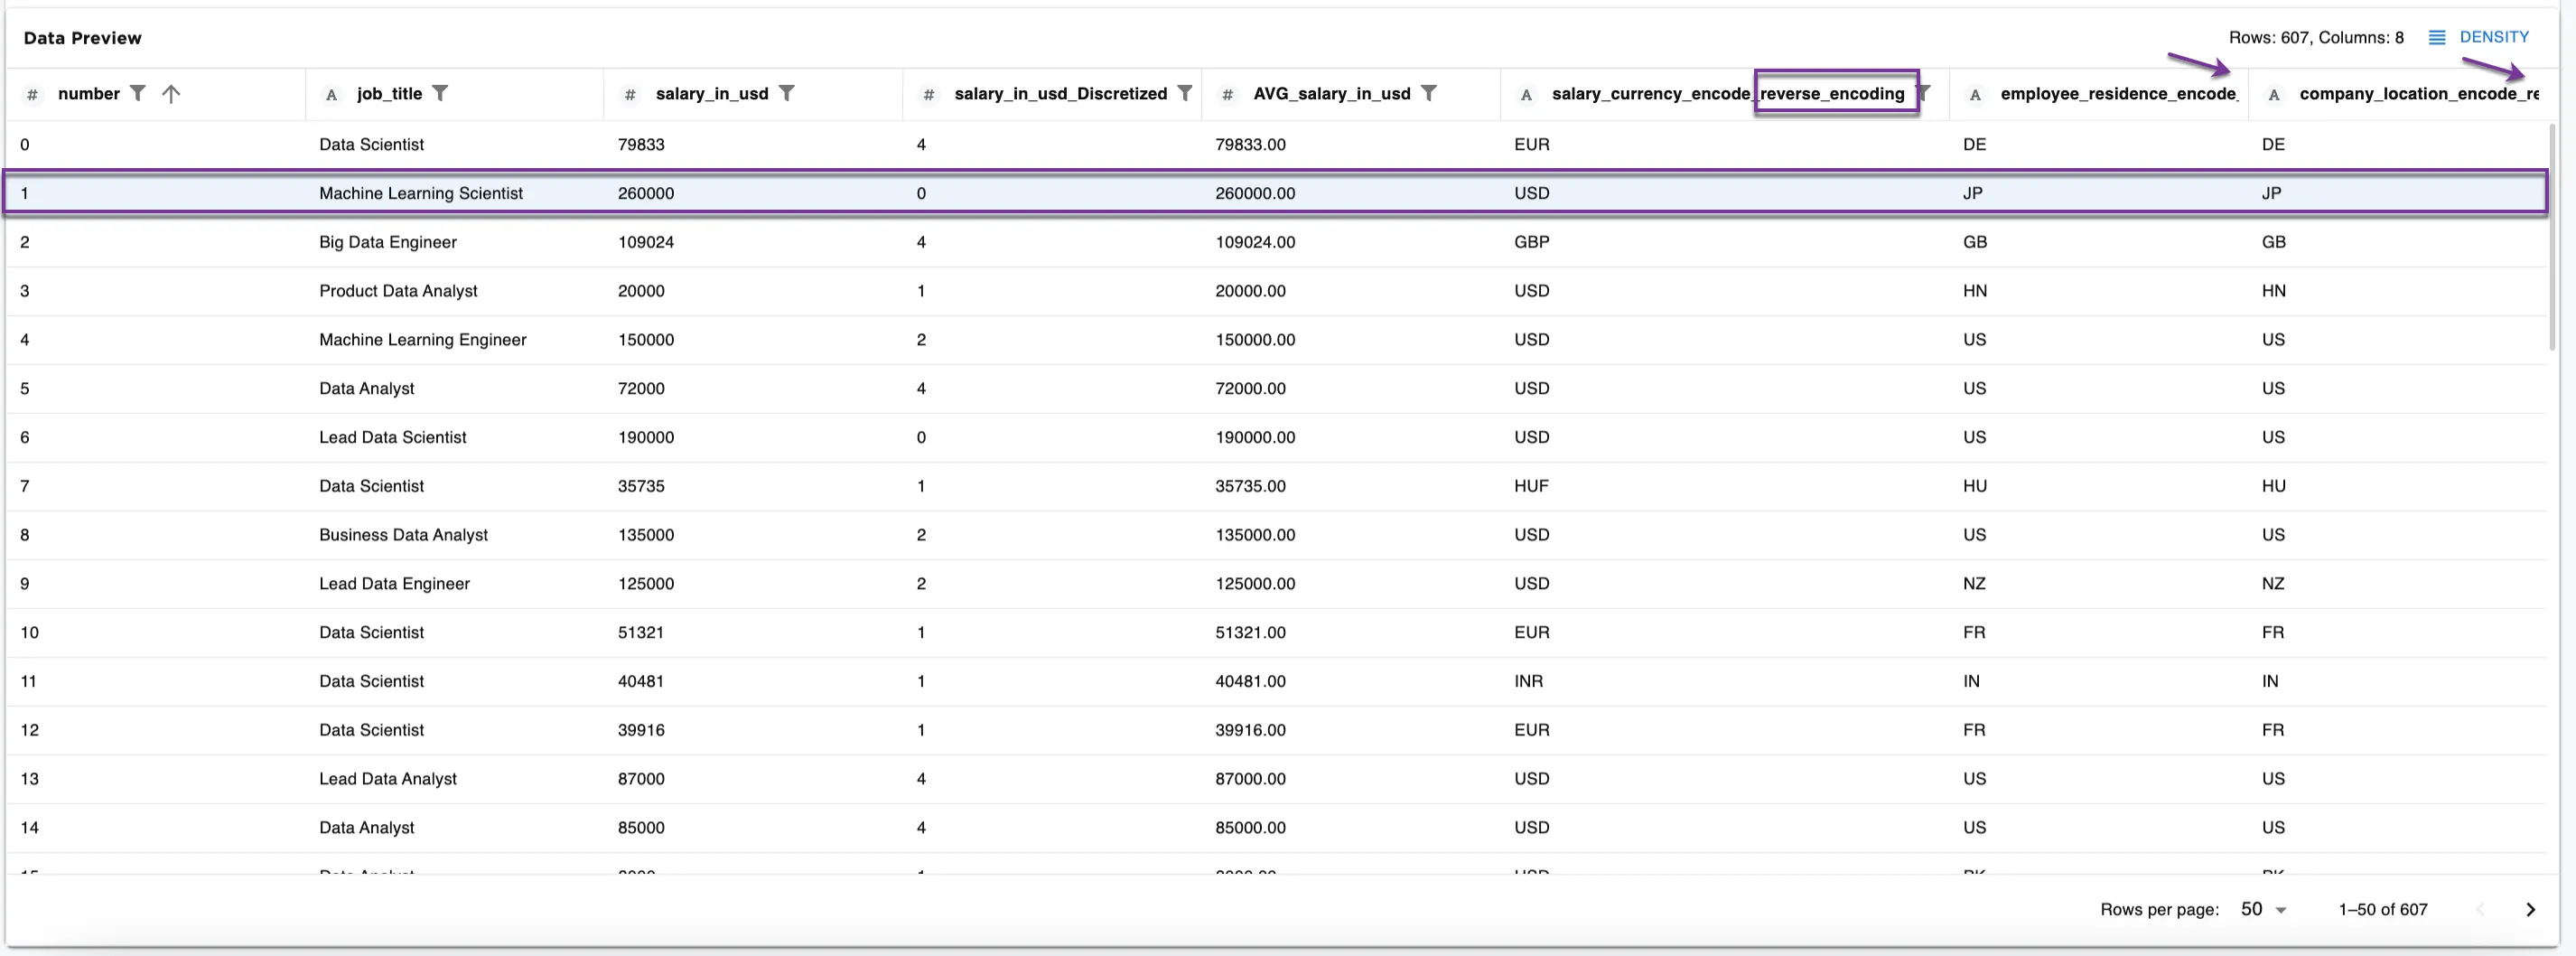 Figure 5c: Example dataframe with encoding reversed