Managing Your Visual Notebooks Workspace
Visual Notebooks offers dedicated cloud resources that you can use to build projects and run analyses. These cloud resources are called the workspace.
The workspace is ephemeral, secure, and dedicated for each individual user. You have significant control over both the size of your workspace and when your workspace is on.
Start your workspace
You have to start your workspace every time you want to use a visual notebook or ML pipeline in Visual Notebooks. There are two ways to start the workspace.
First, you can simply select a notebook or pipeline that you have already created, or select any of the available templates. If your workspace is off, a modal appears asking you to activate the workspace. Select Activate to start the workspace.
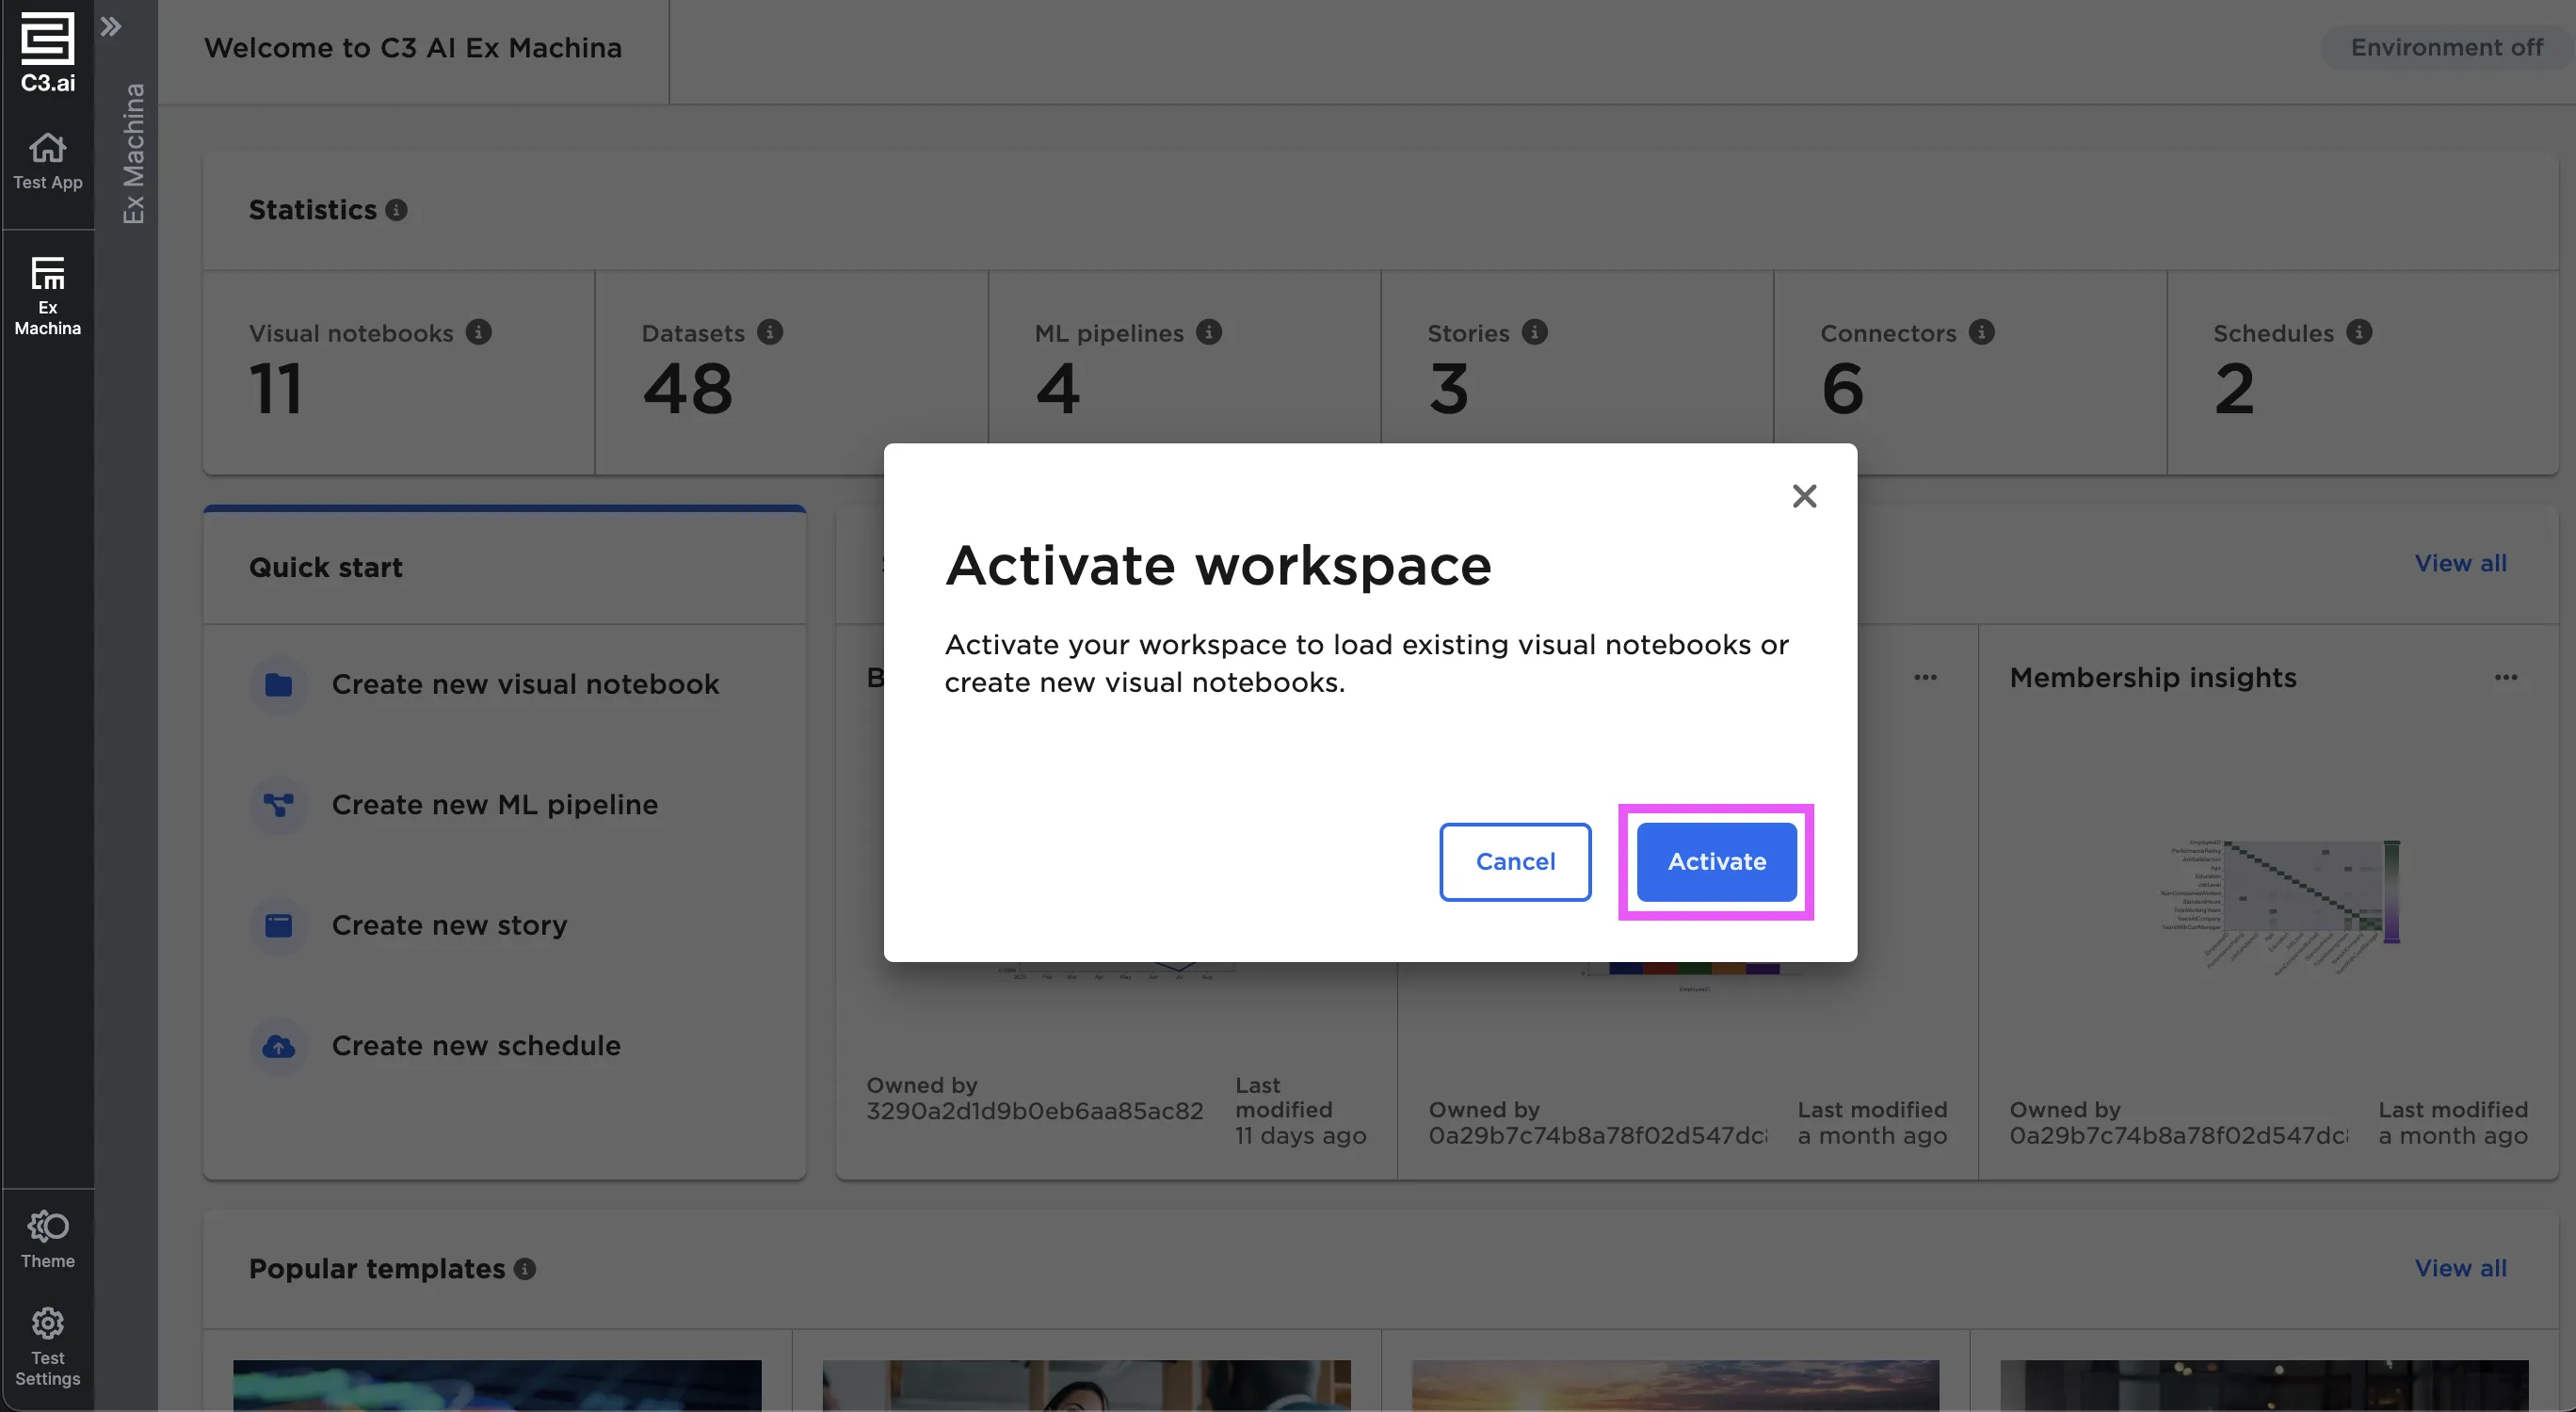
Figure 1: Start the workspace from a template or existing visual notebook
You can also start your workspace by selecting the Environment off pill button in the upper right corner. When the dropdown menu appears, select Start, then Activate.
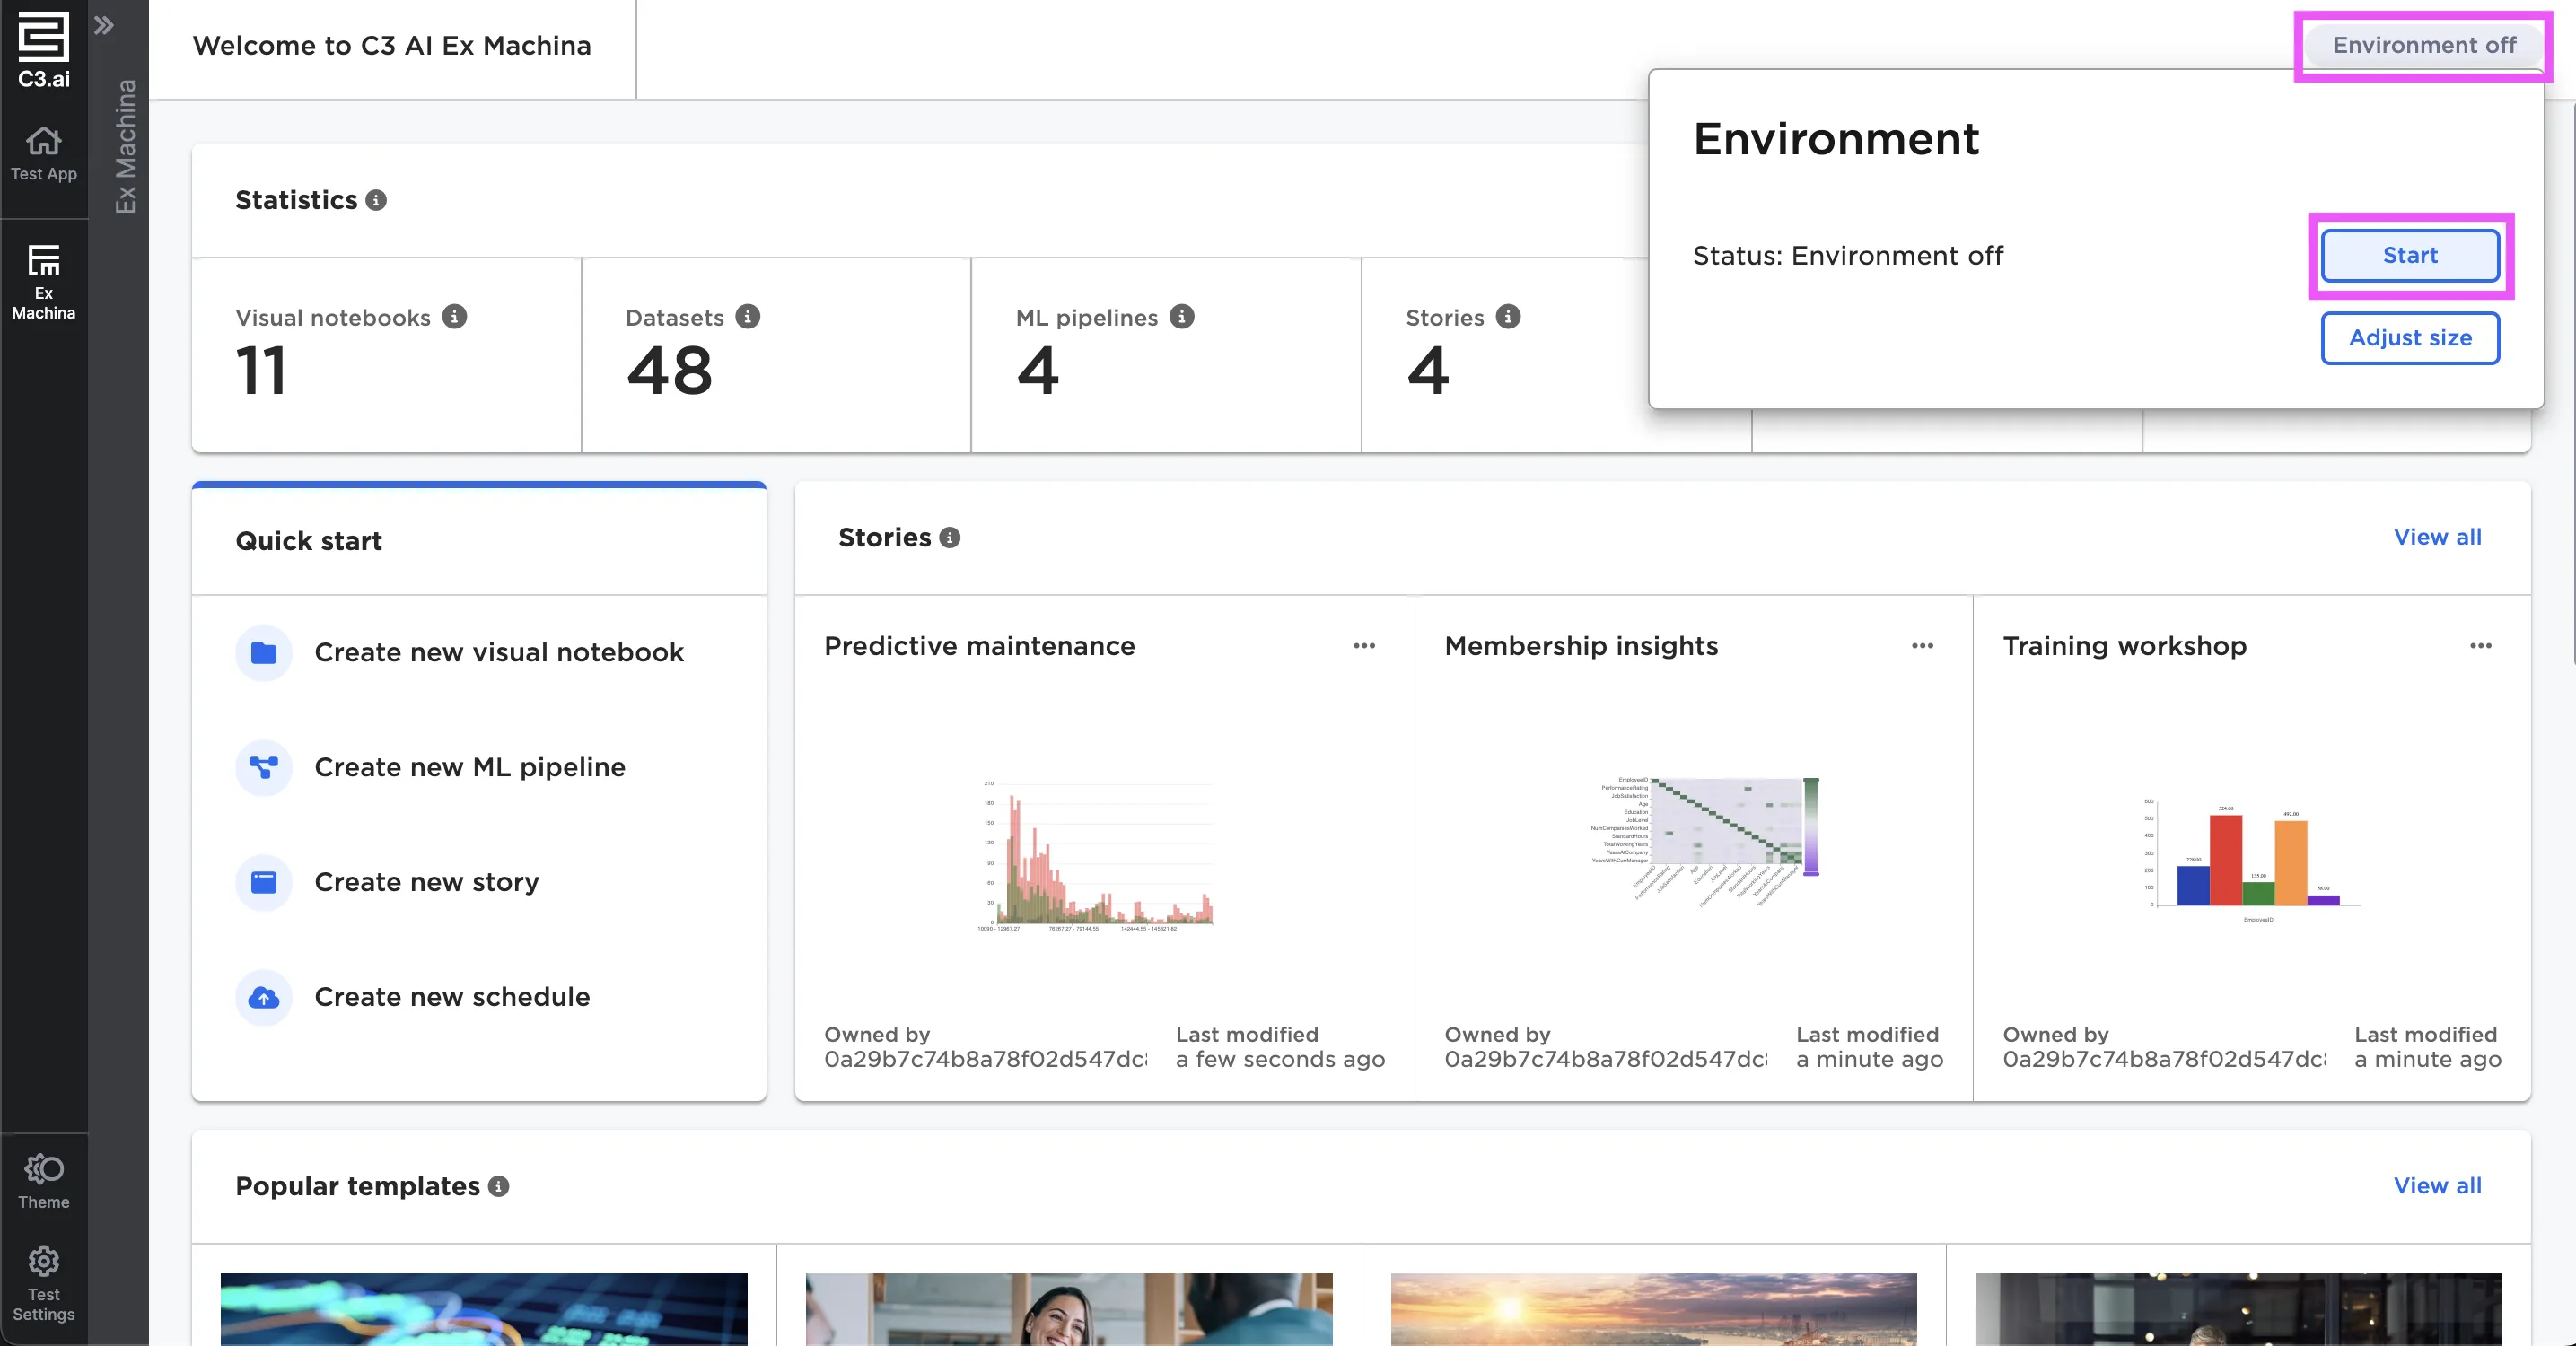
Figure 2: Start the workspace using the pill button
Once activated, the pill button turns green and displays the total size of your workspace as well as how much space in your workspace is being used. Note that it may take a few minutes to start your workspace.
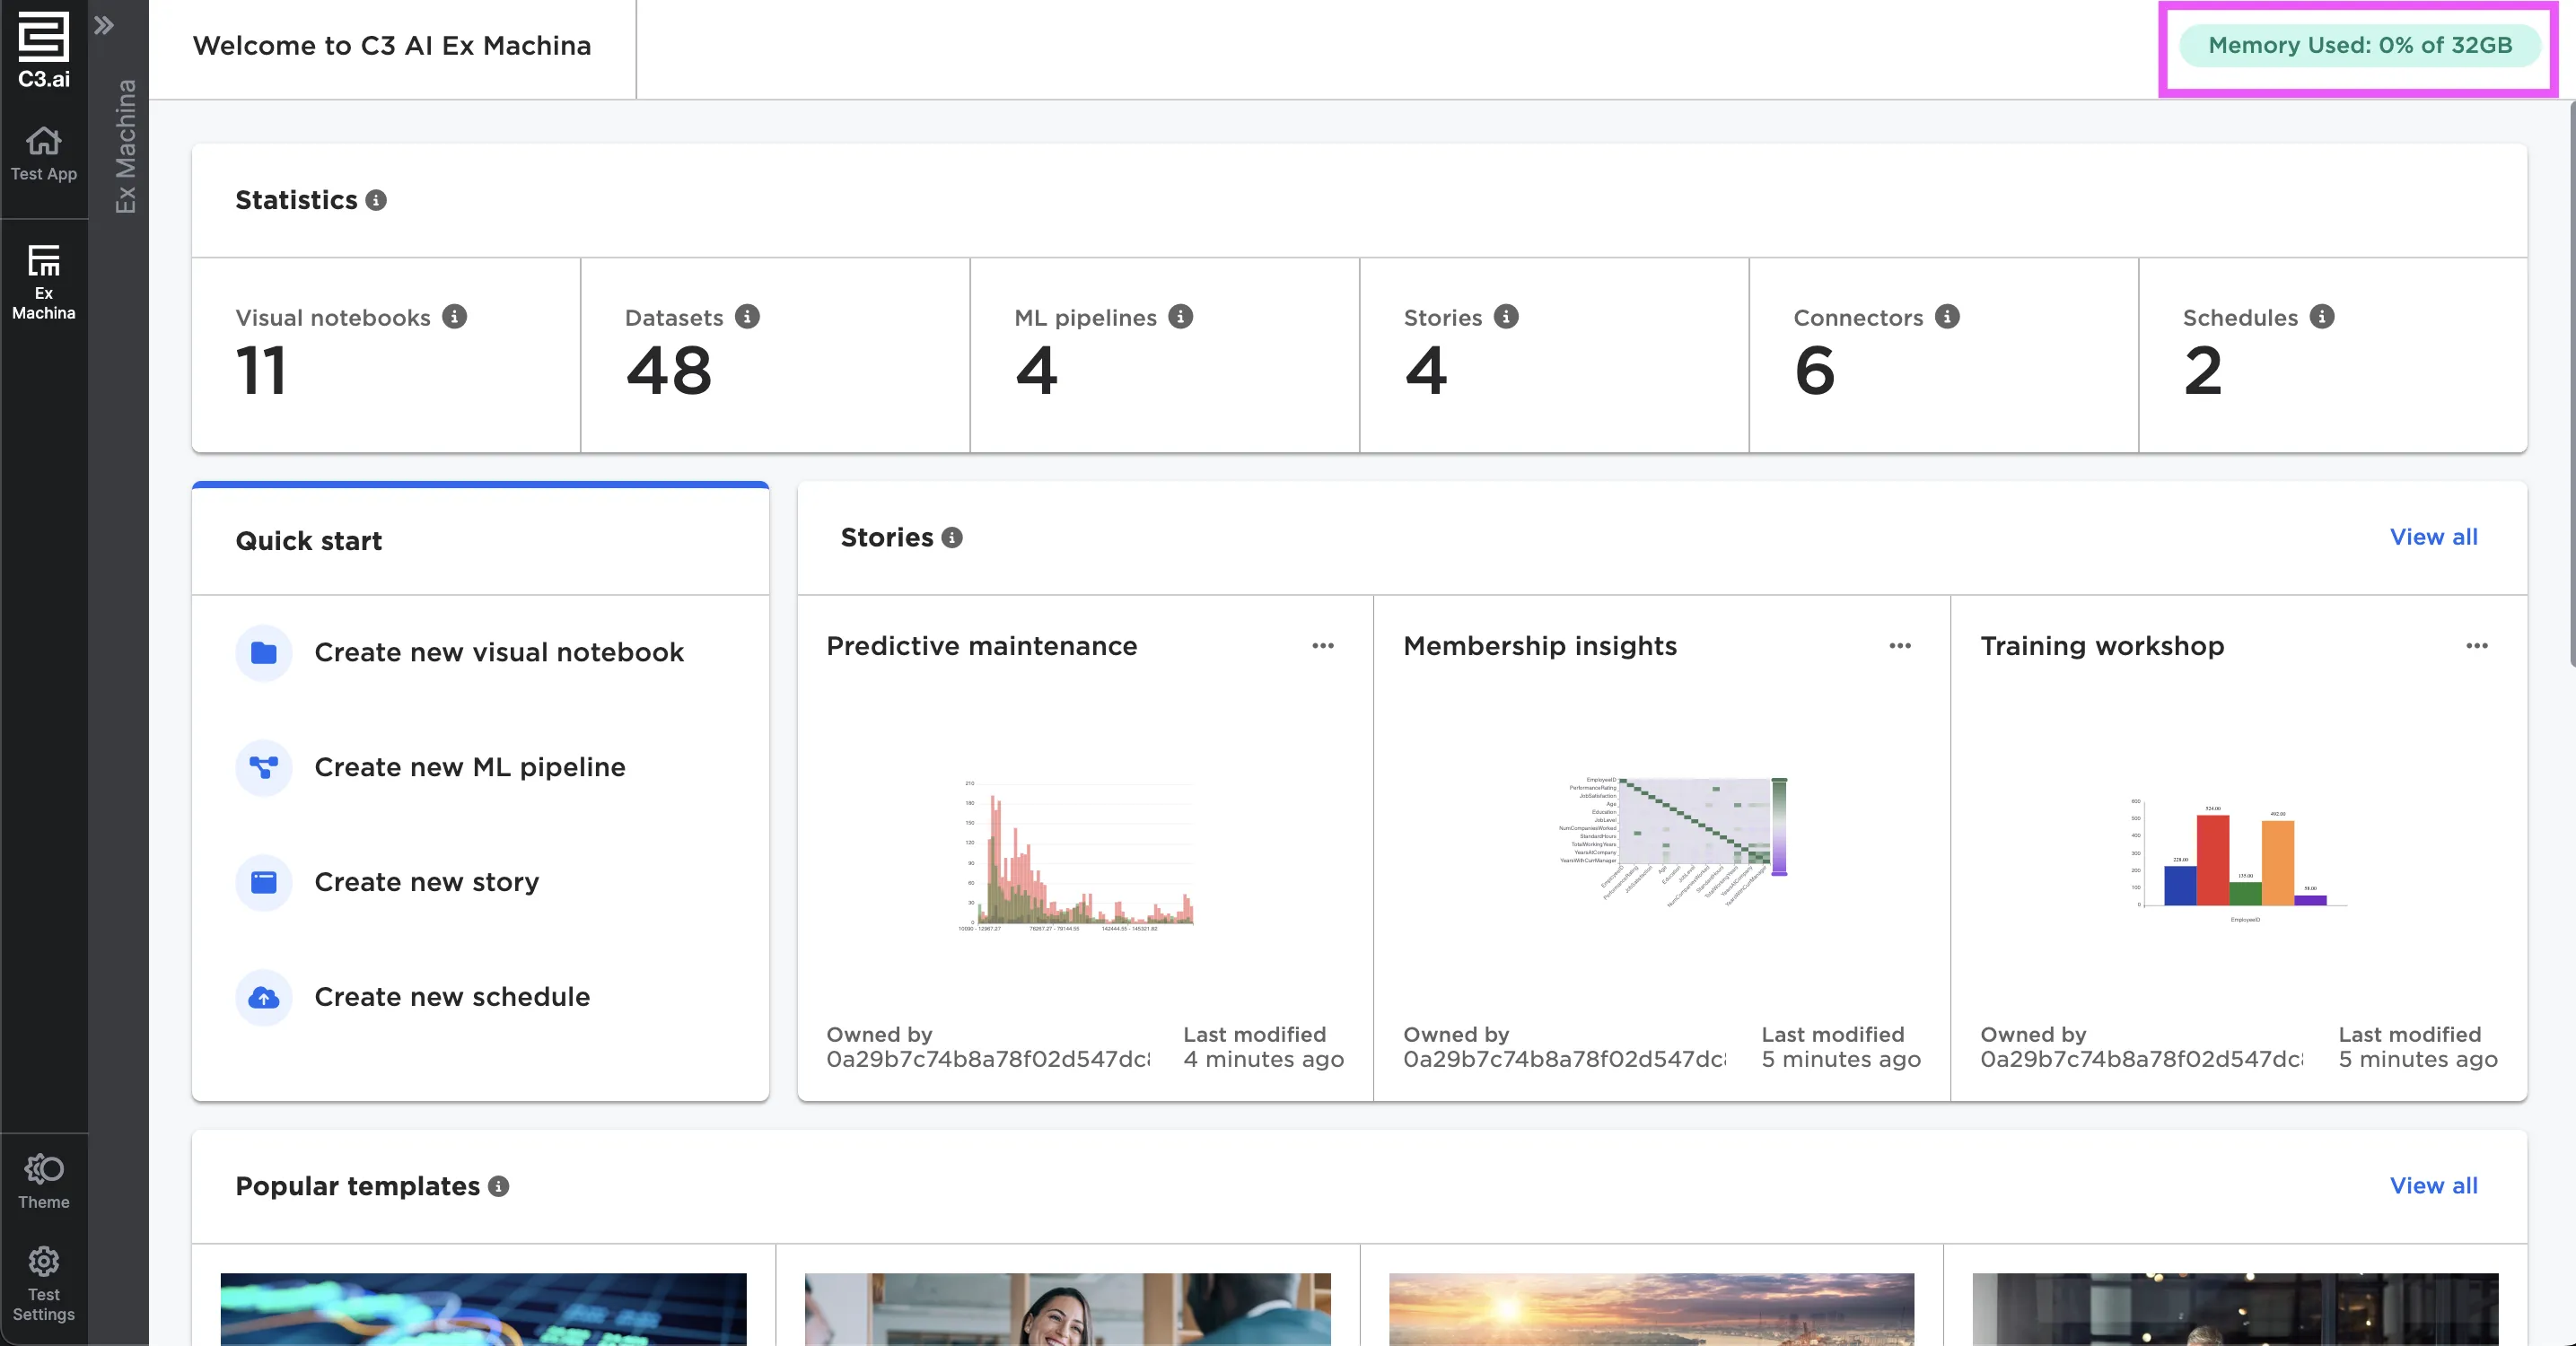
Figure 3: The pill button turns green when the workspace is active
Stop your workspace
To stop the workspace, select the pill button, then select Turn off. Select Deactivate to completely turn off the workspace.
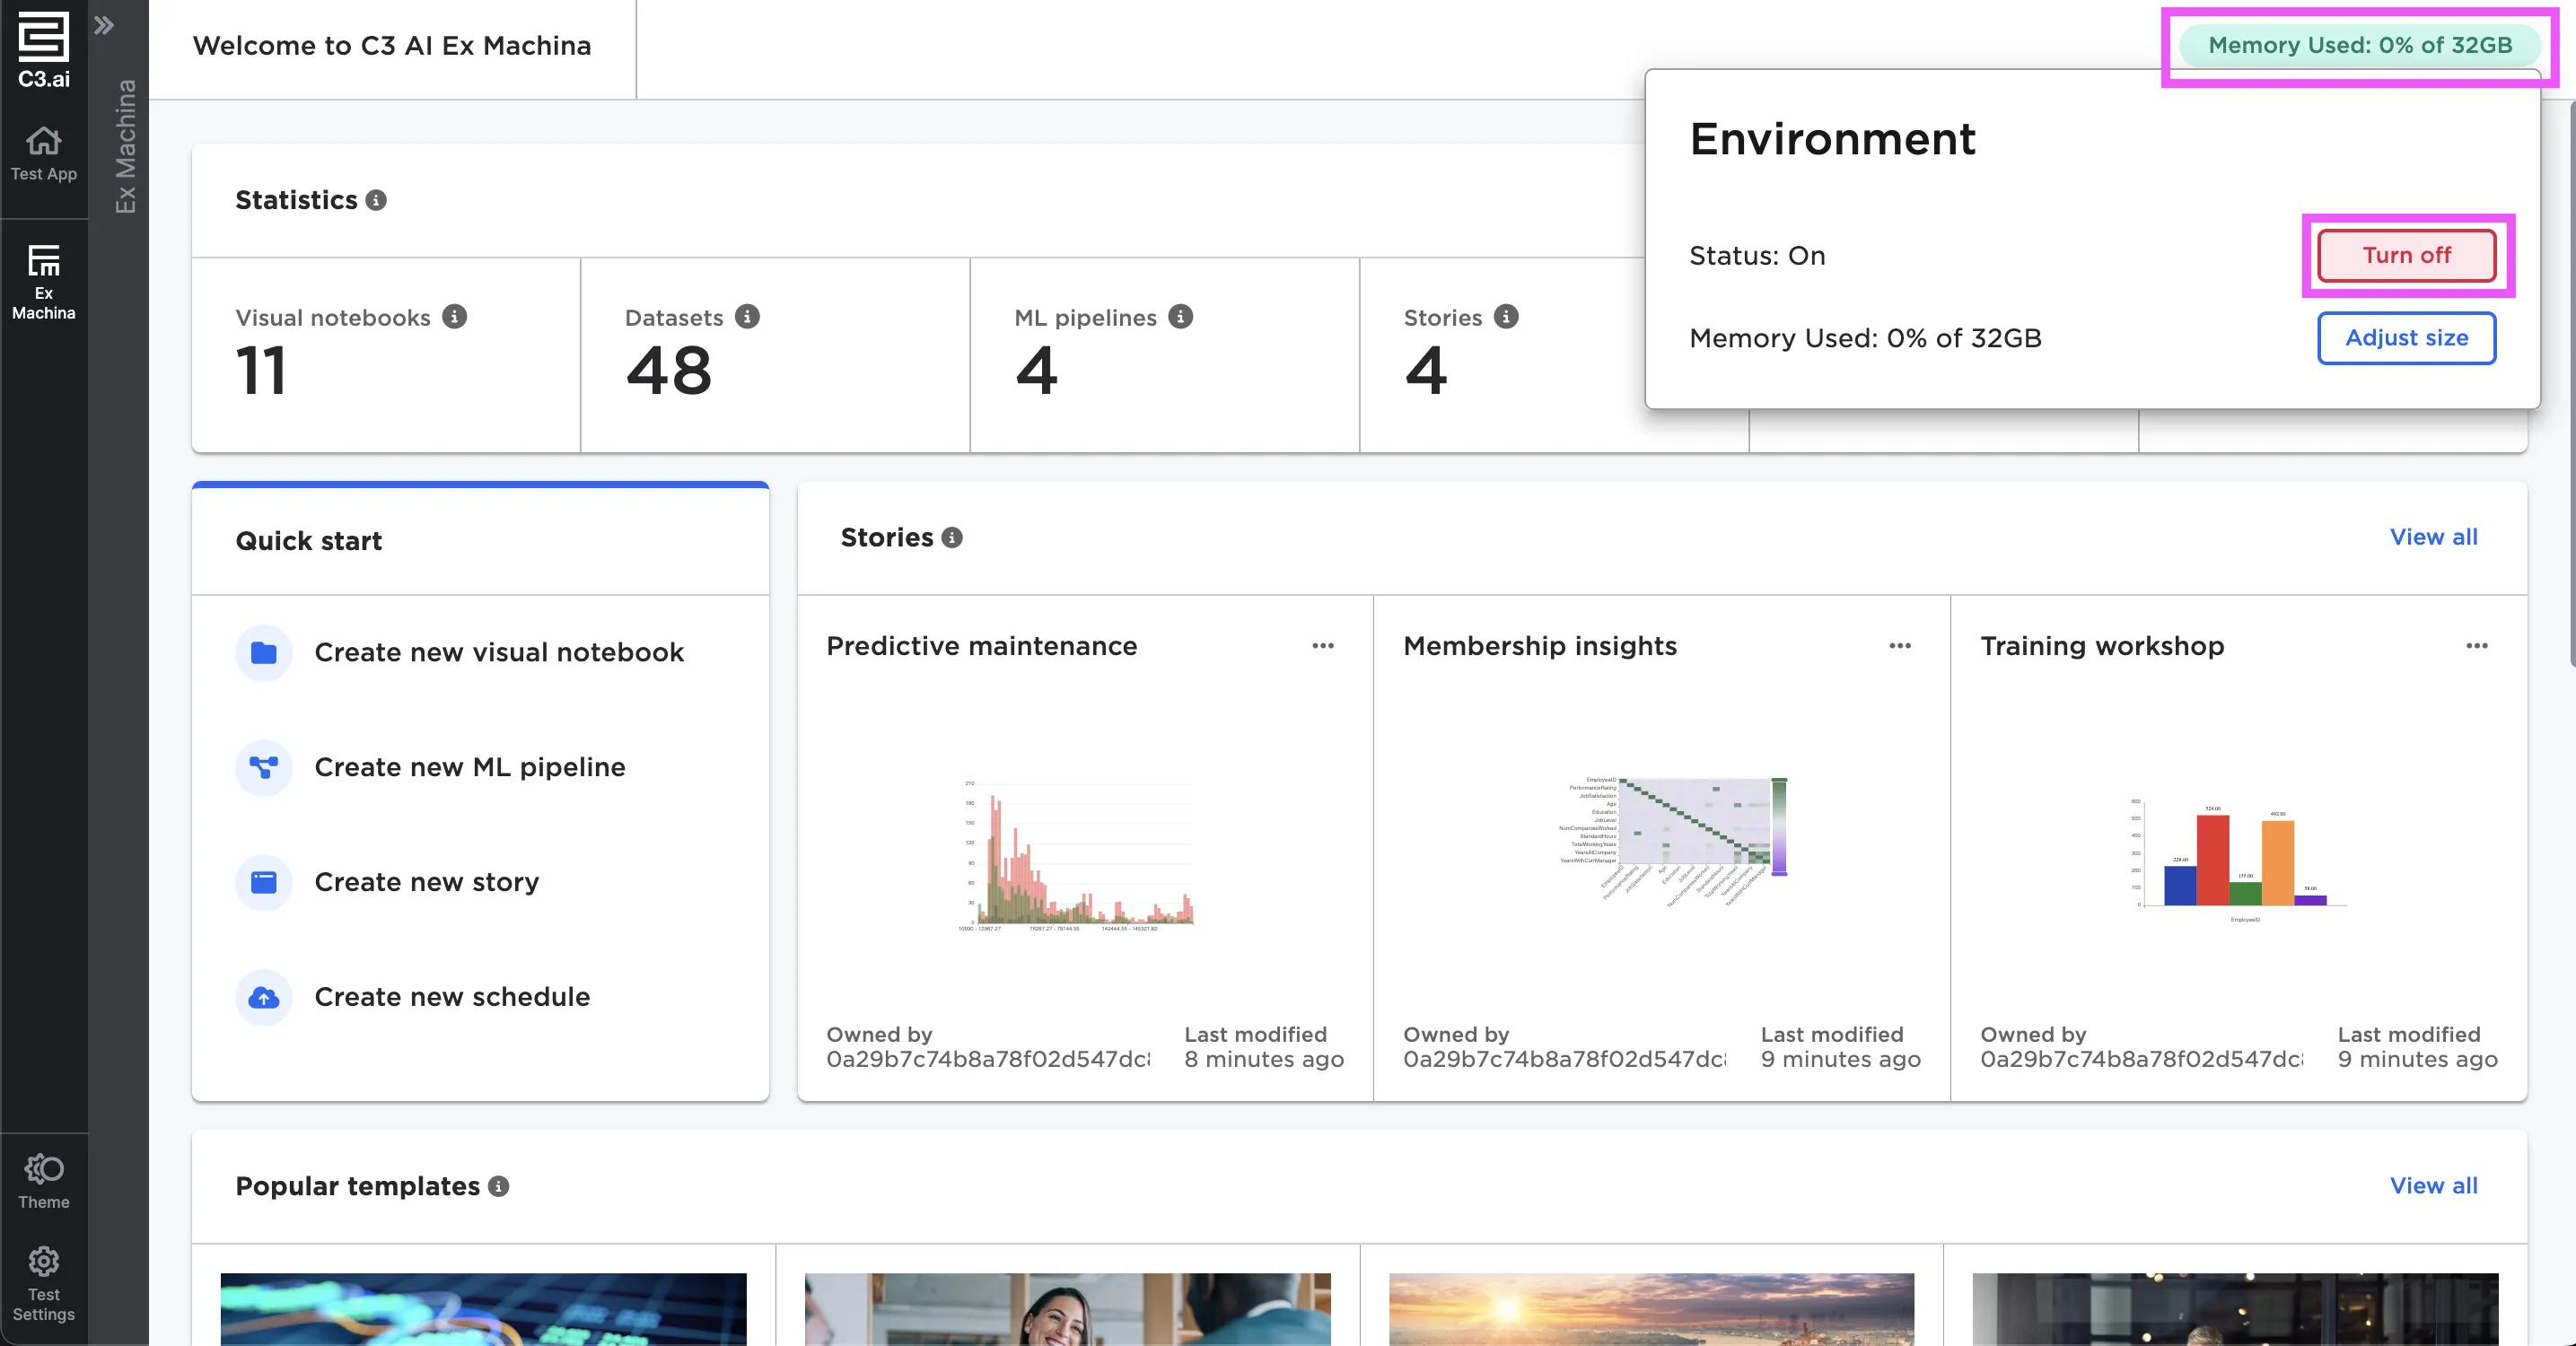
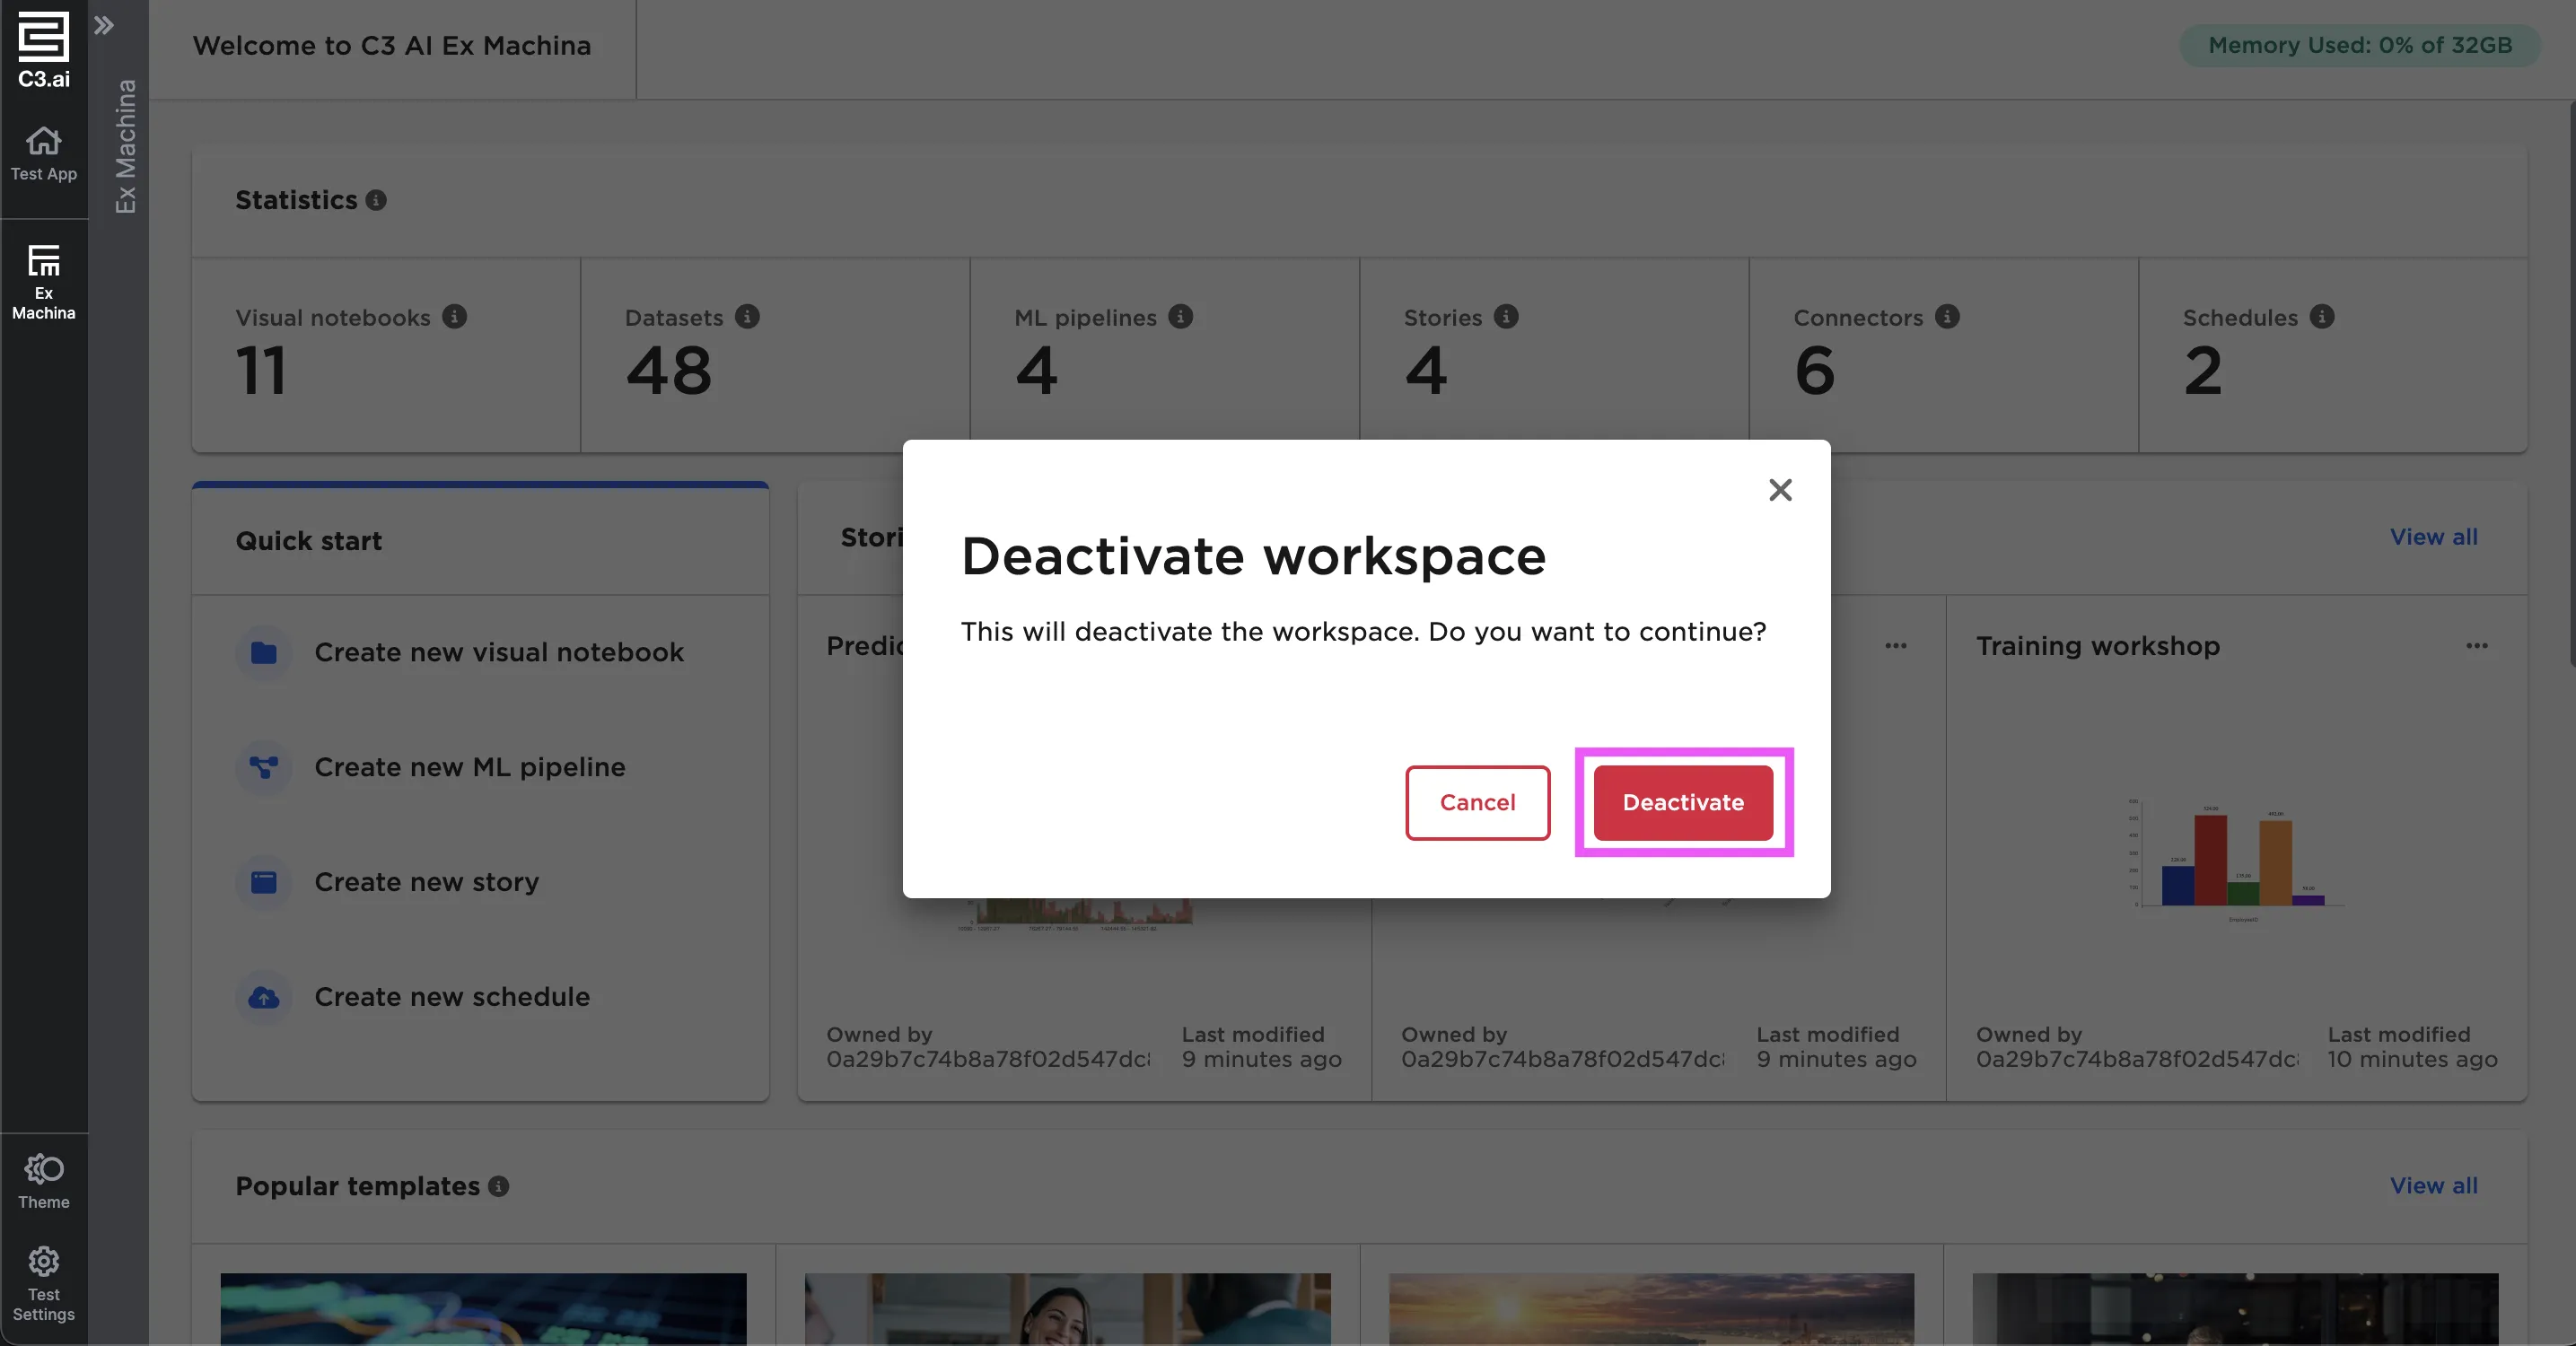
Figure 4: Turn off your workspace
If you don't want to manually turn off your workspace, you can configure the workspace to shut down automatically after a period of inactivity. To set up automatic shutdown rules, navigate to the Settings page using the sidebar. Select Edit, then select the desired amount of time the workspace should remain idle before turning off. Choose to never shut down the workspace, or chose to shut down the workspace after 15, 30, 60, or 120 minutes of inactivity.
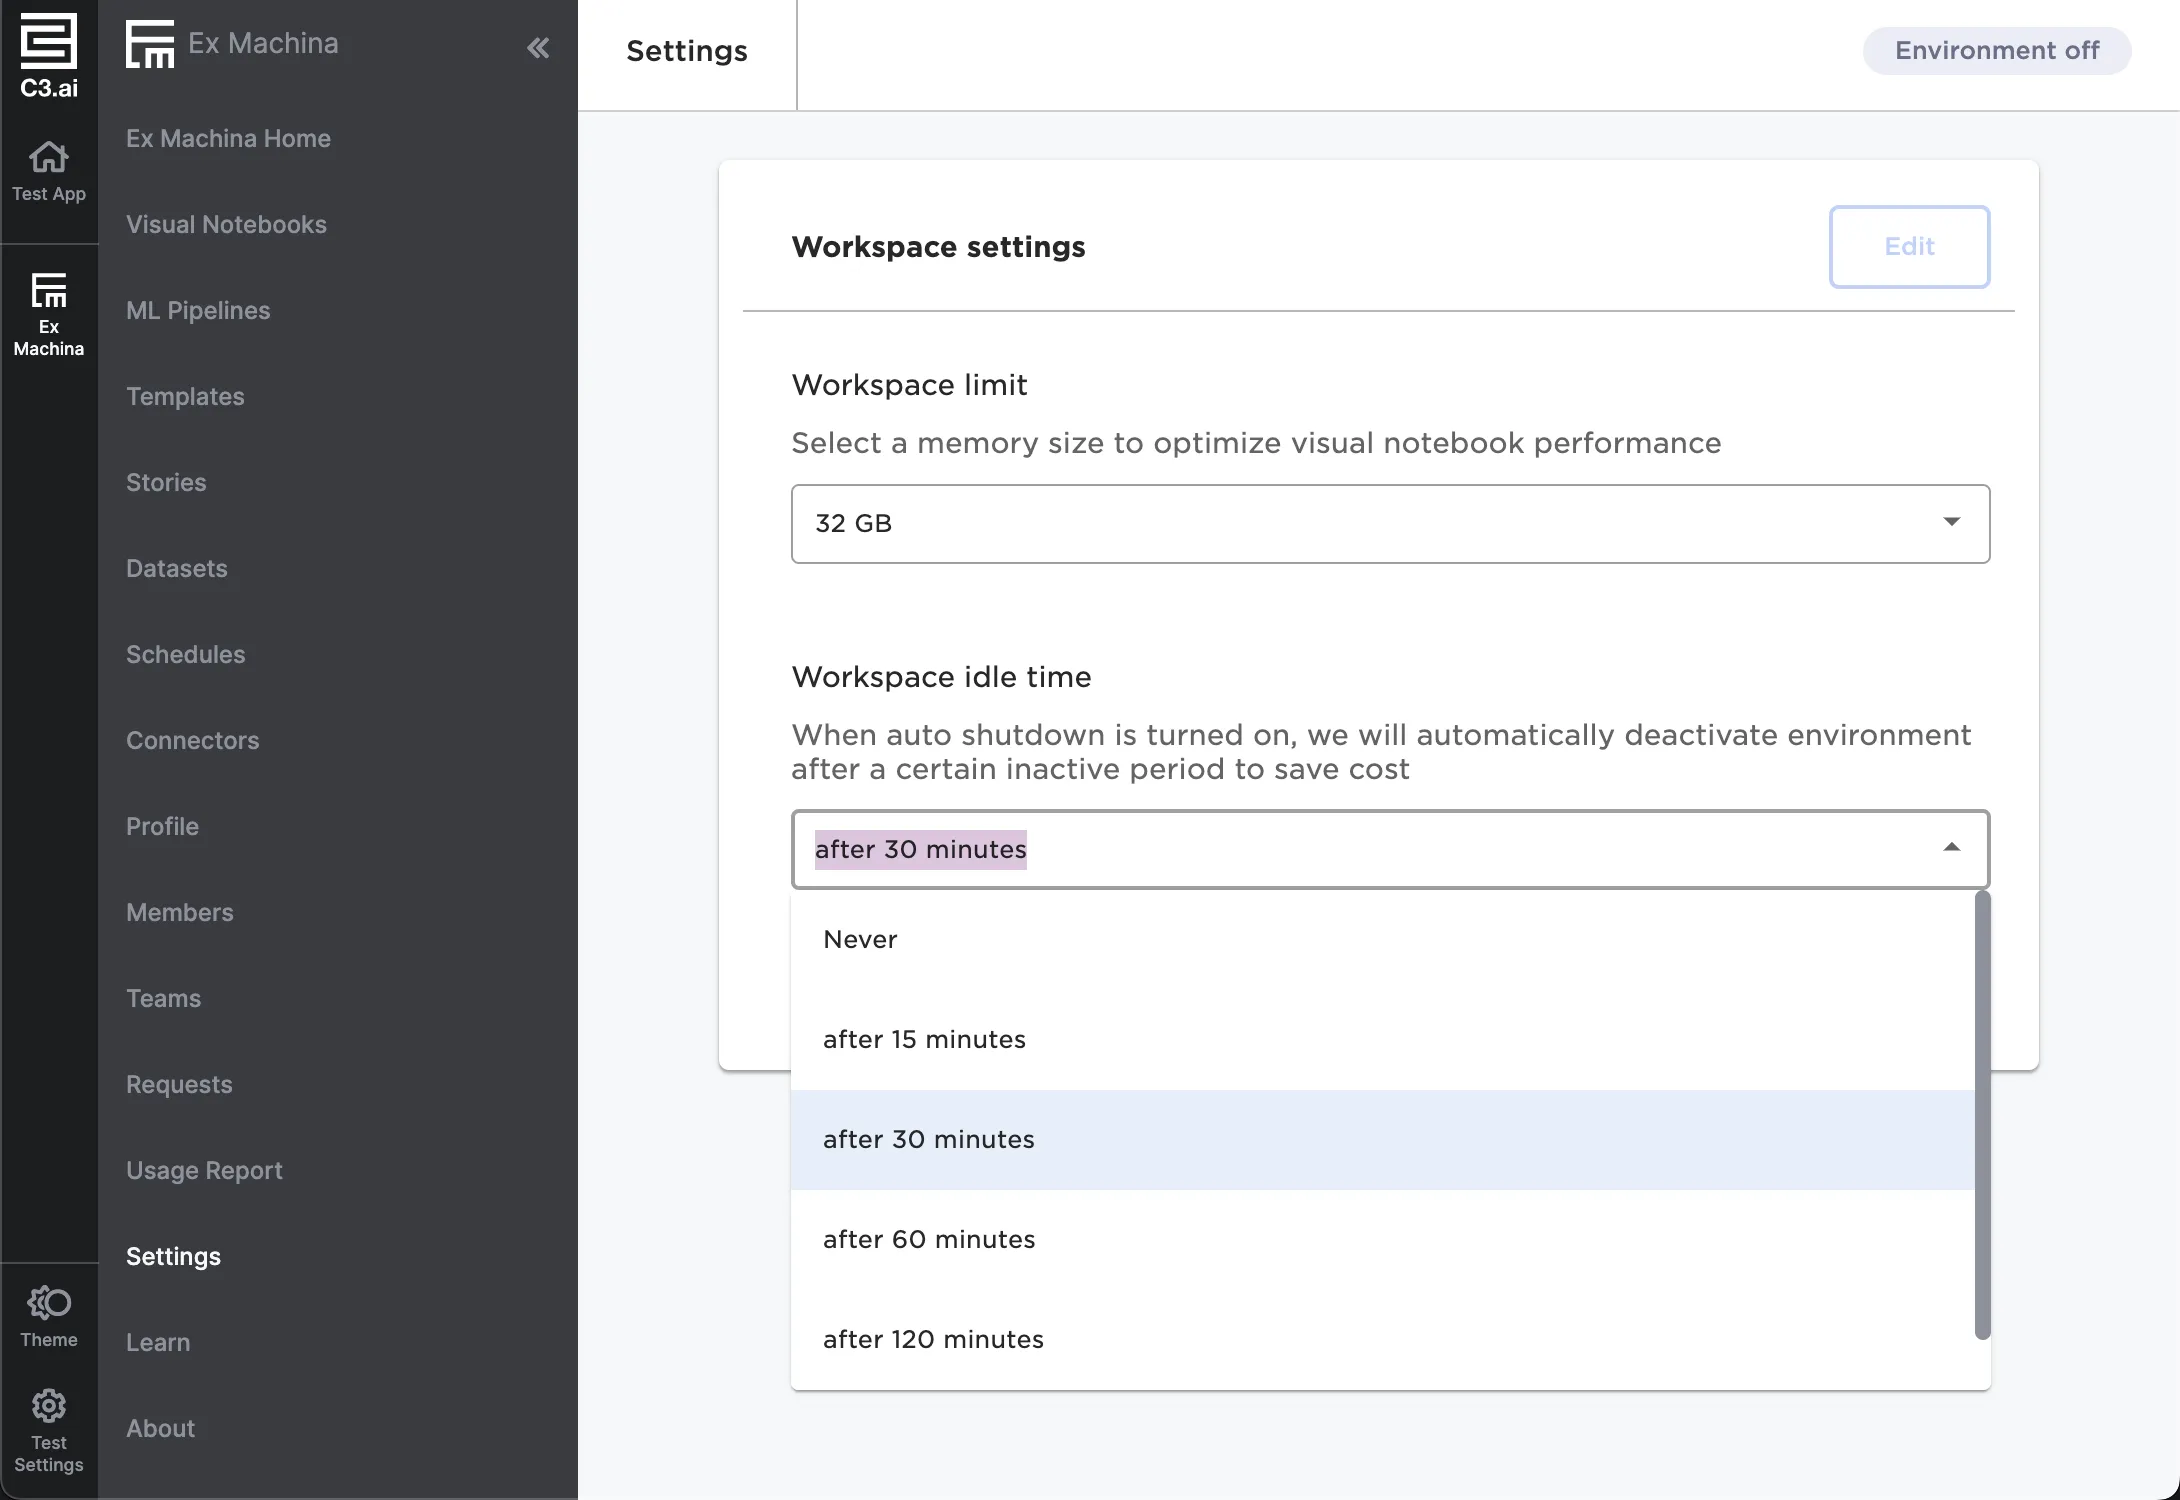
Figure 5: Set up automatic shutdown rules
Note that turning off the workspace does not lose your work. Work you do in Visual Notebooks is auto-saved so you can pick right back where you left off the next time you start your workspace.
Change workspace size
You can control the size of your workspace to meet the needs of your analysis. For example, you may choose a larger workspace size when working on a large project with petabytes of data or instead choose a very small workspace when you are just working on a small file. The default workspace size is typically 32 GB, although your administrator may choose to set a different default size.
You can adjust the size of your workspace from the Settings page. There are two ways to navigate to the Settings page. You can select the workspace pill button in the top right corner, then select Adjust size from the dropdown menu. Alternatively, you can expand the Visual Notebooks sidebar and select Settings.
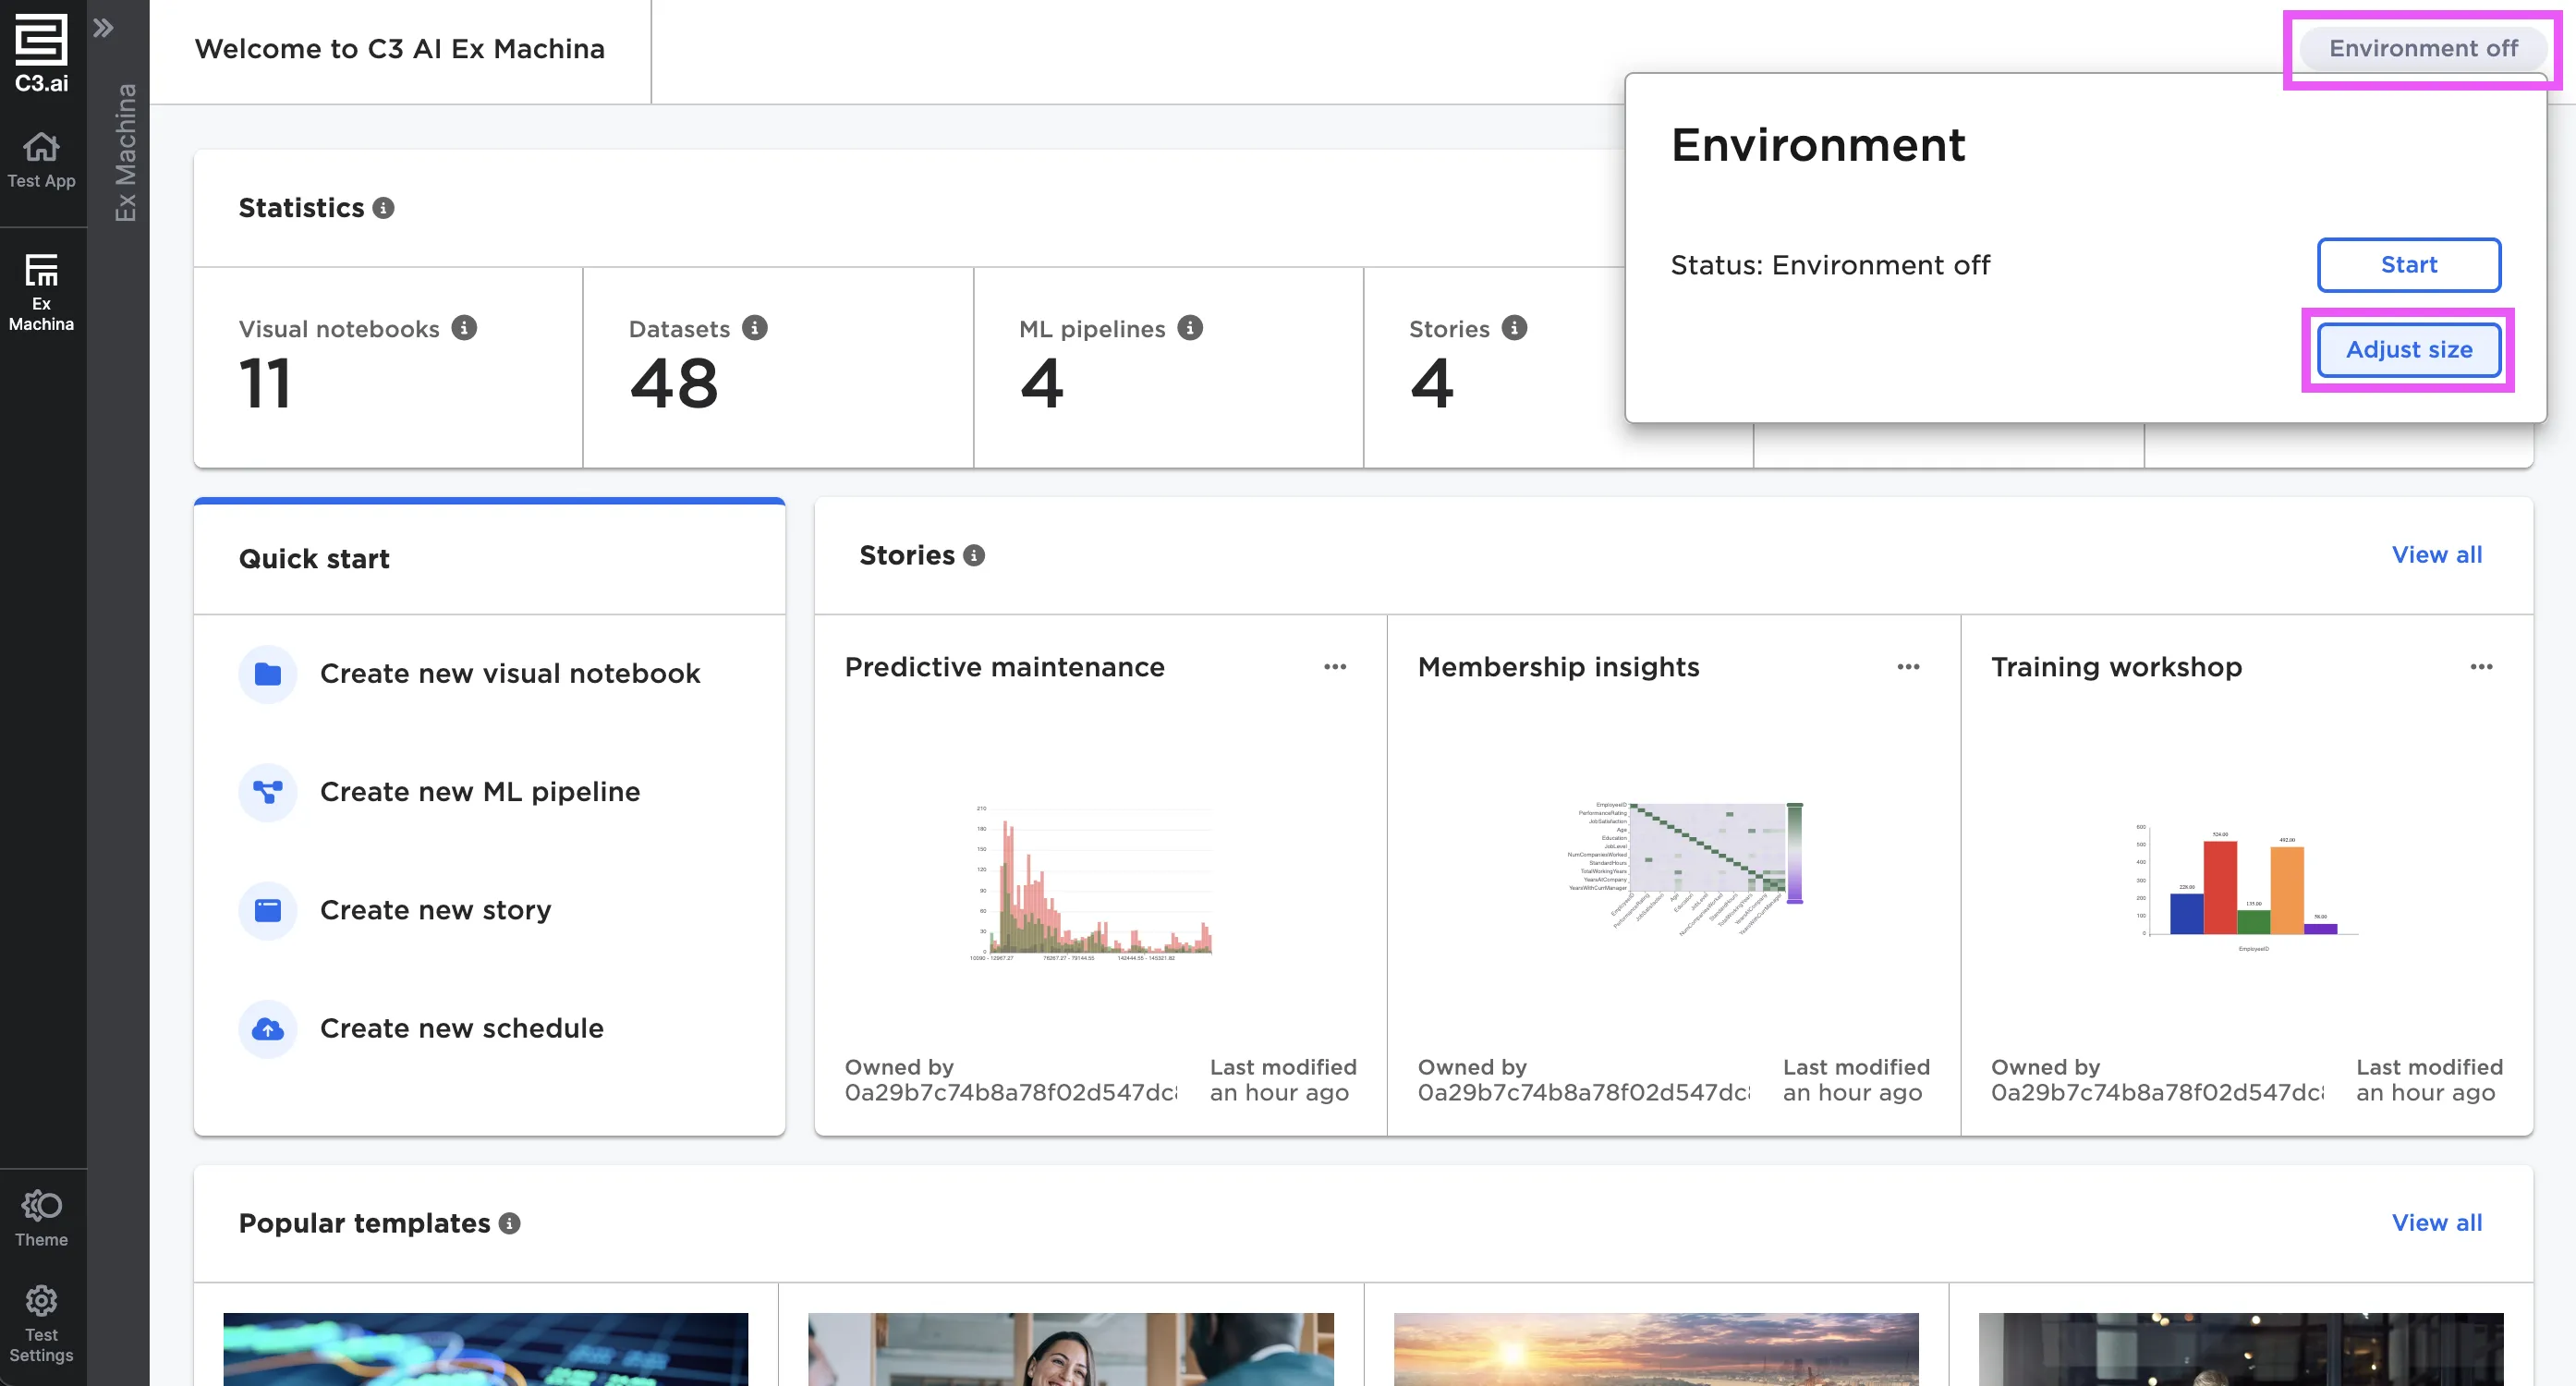
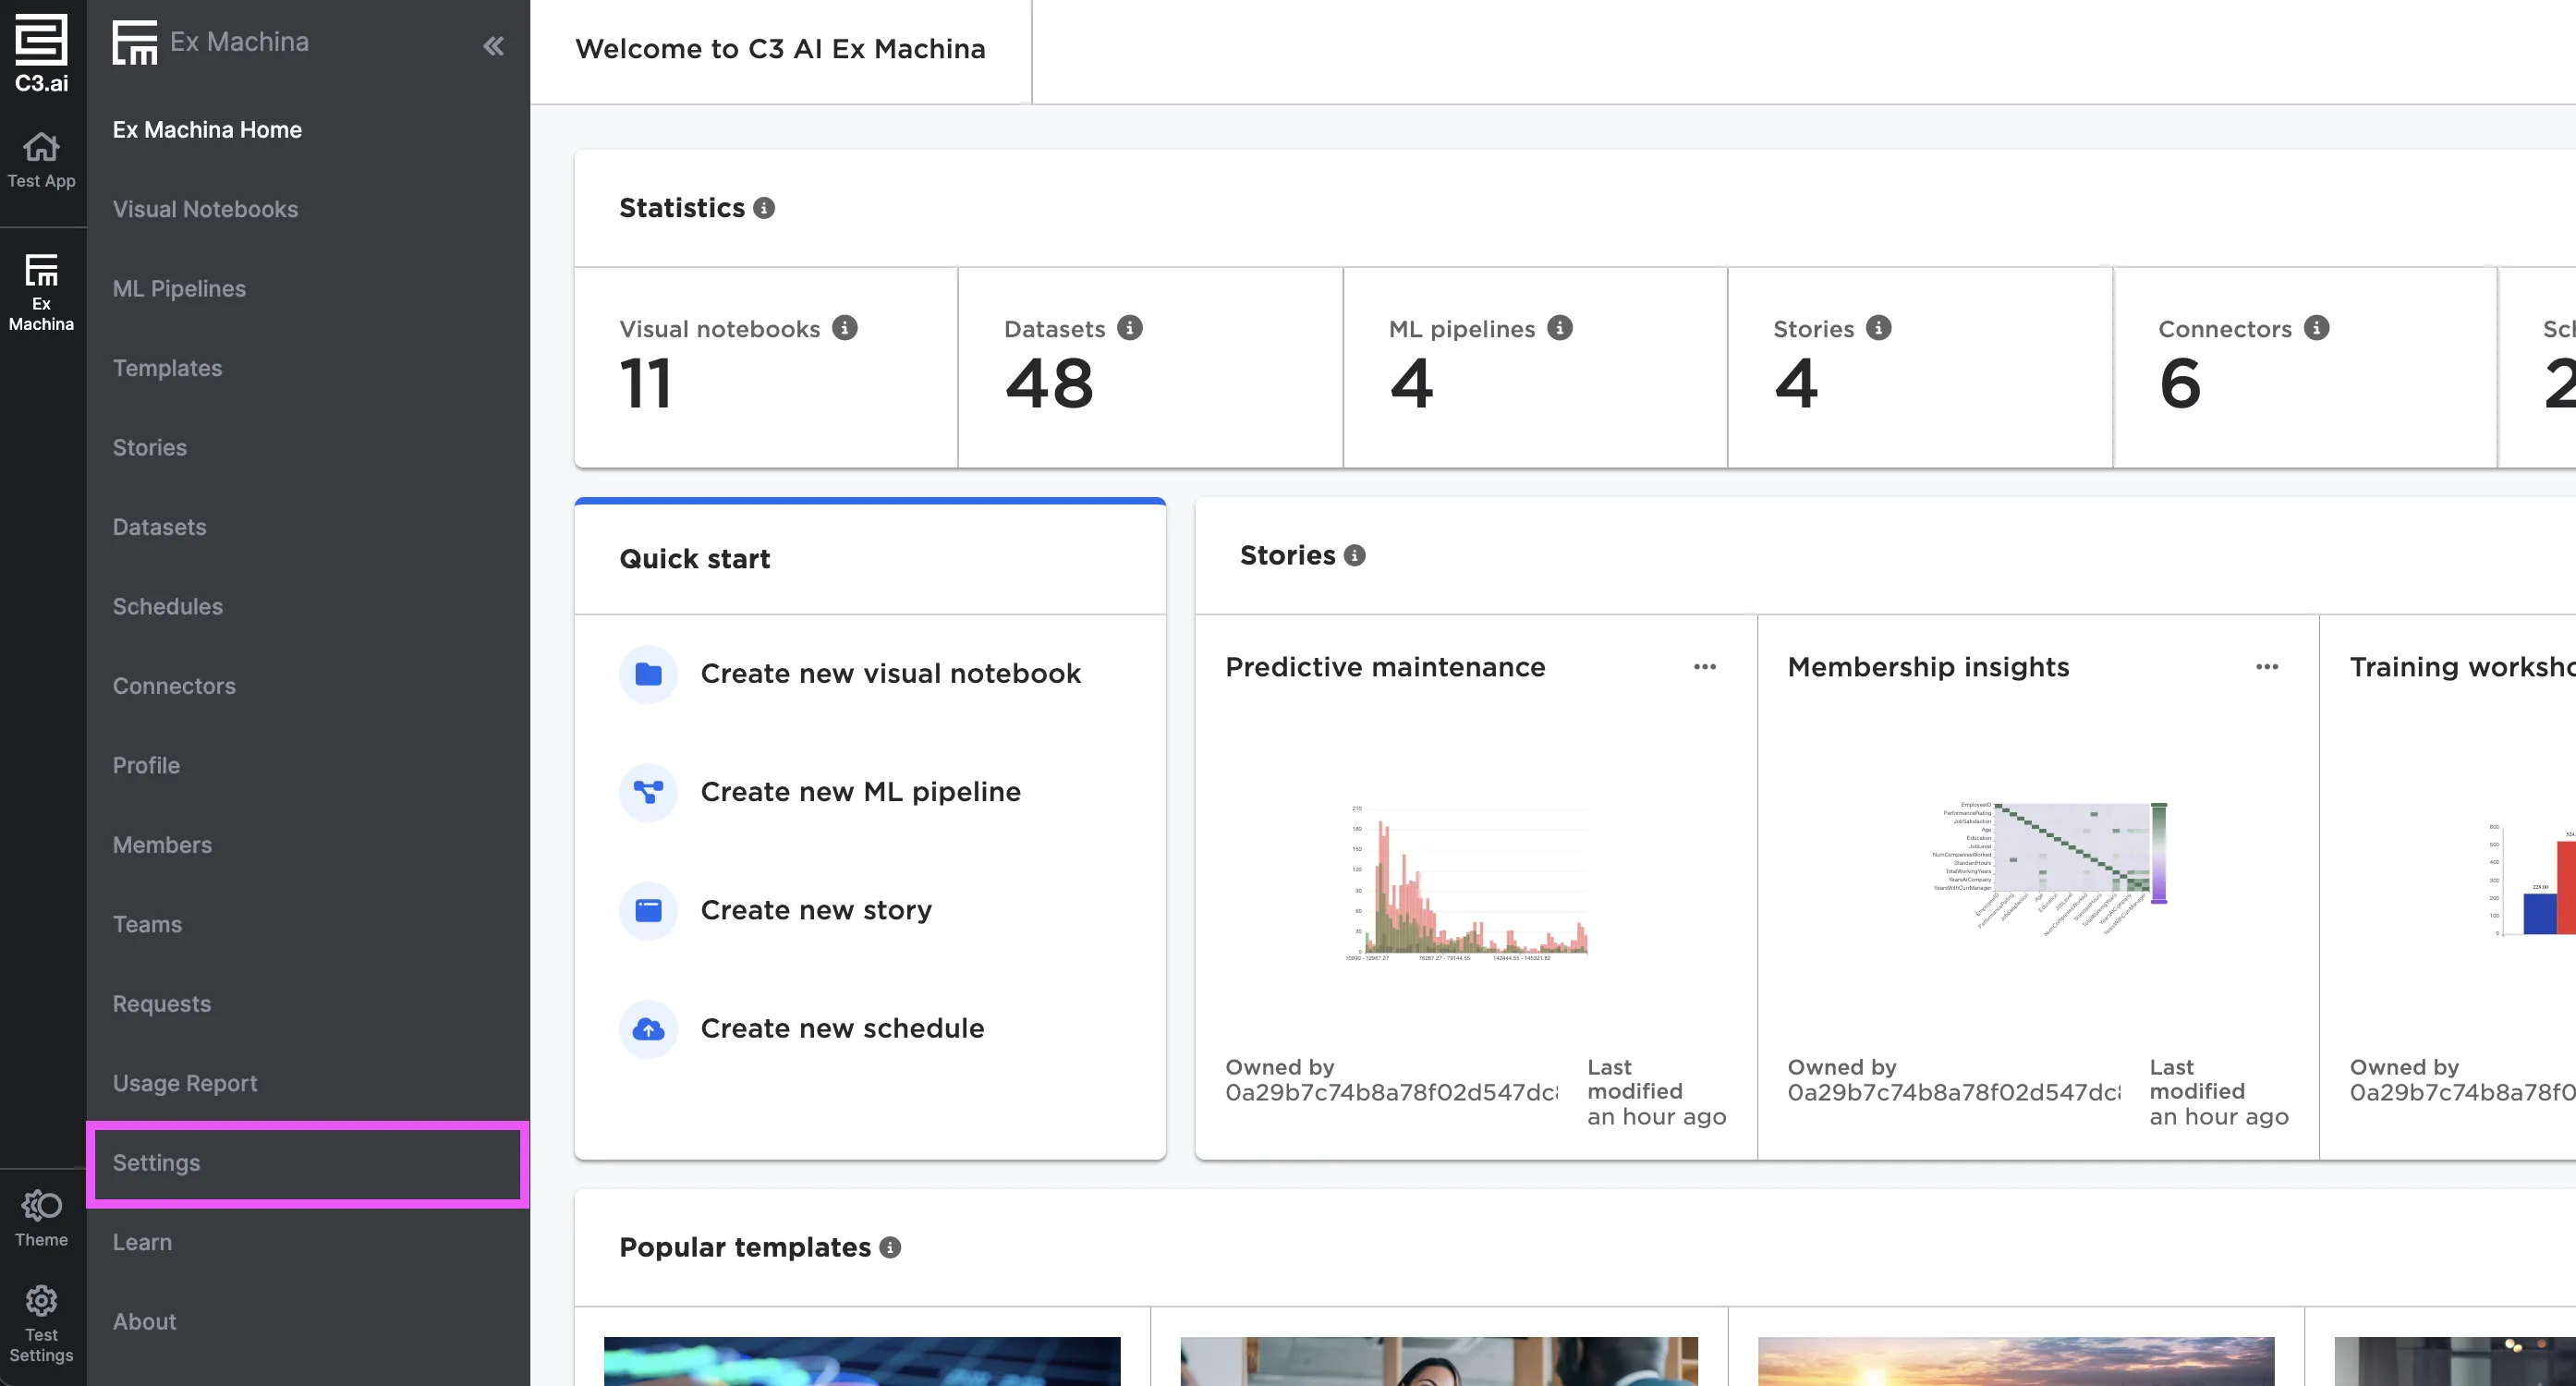
Figure 6: Navigate to the Settings page
Once on the Settings page, select Edit, then select your desired workspace size. Administrators may set limits on users to only allow them to start a workspace up to a certain size. Check with your administrator if you require a larger workspace than the dropdown menu allows.
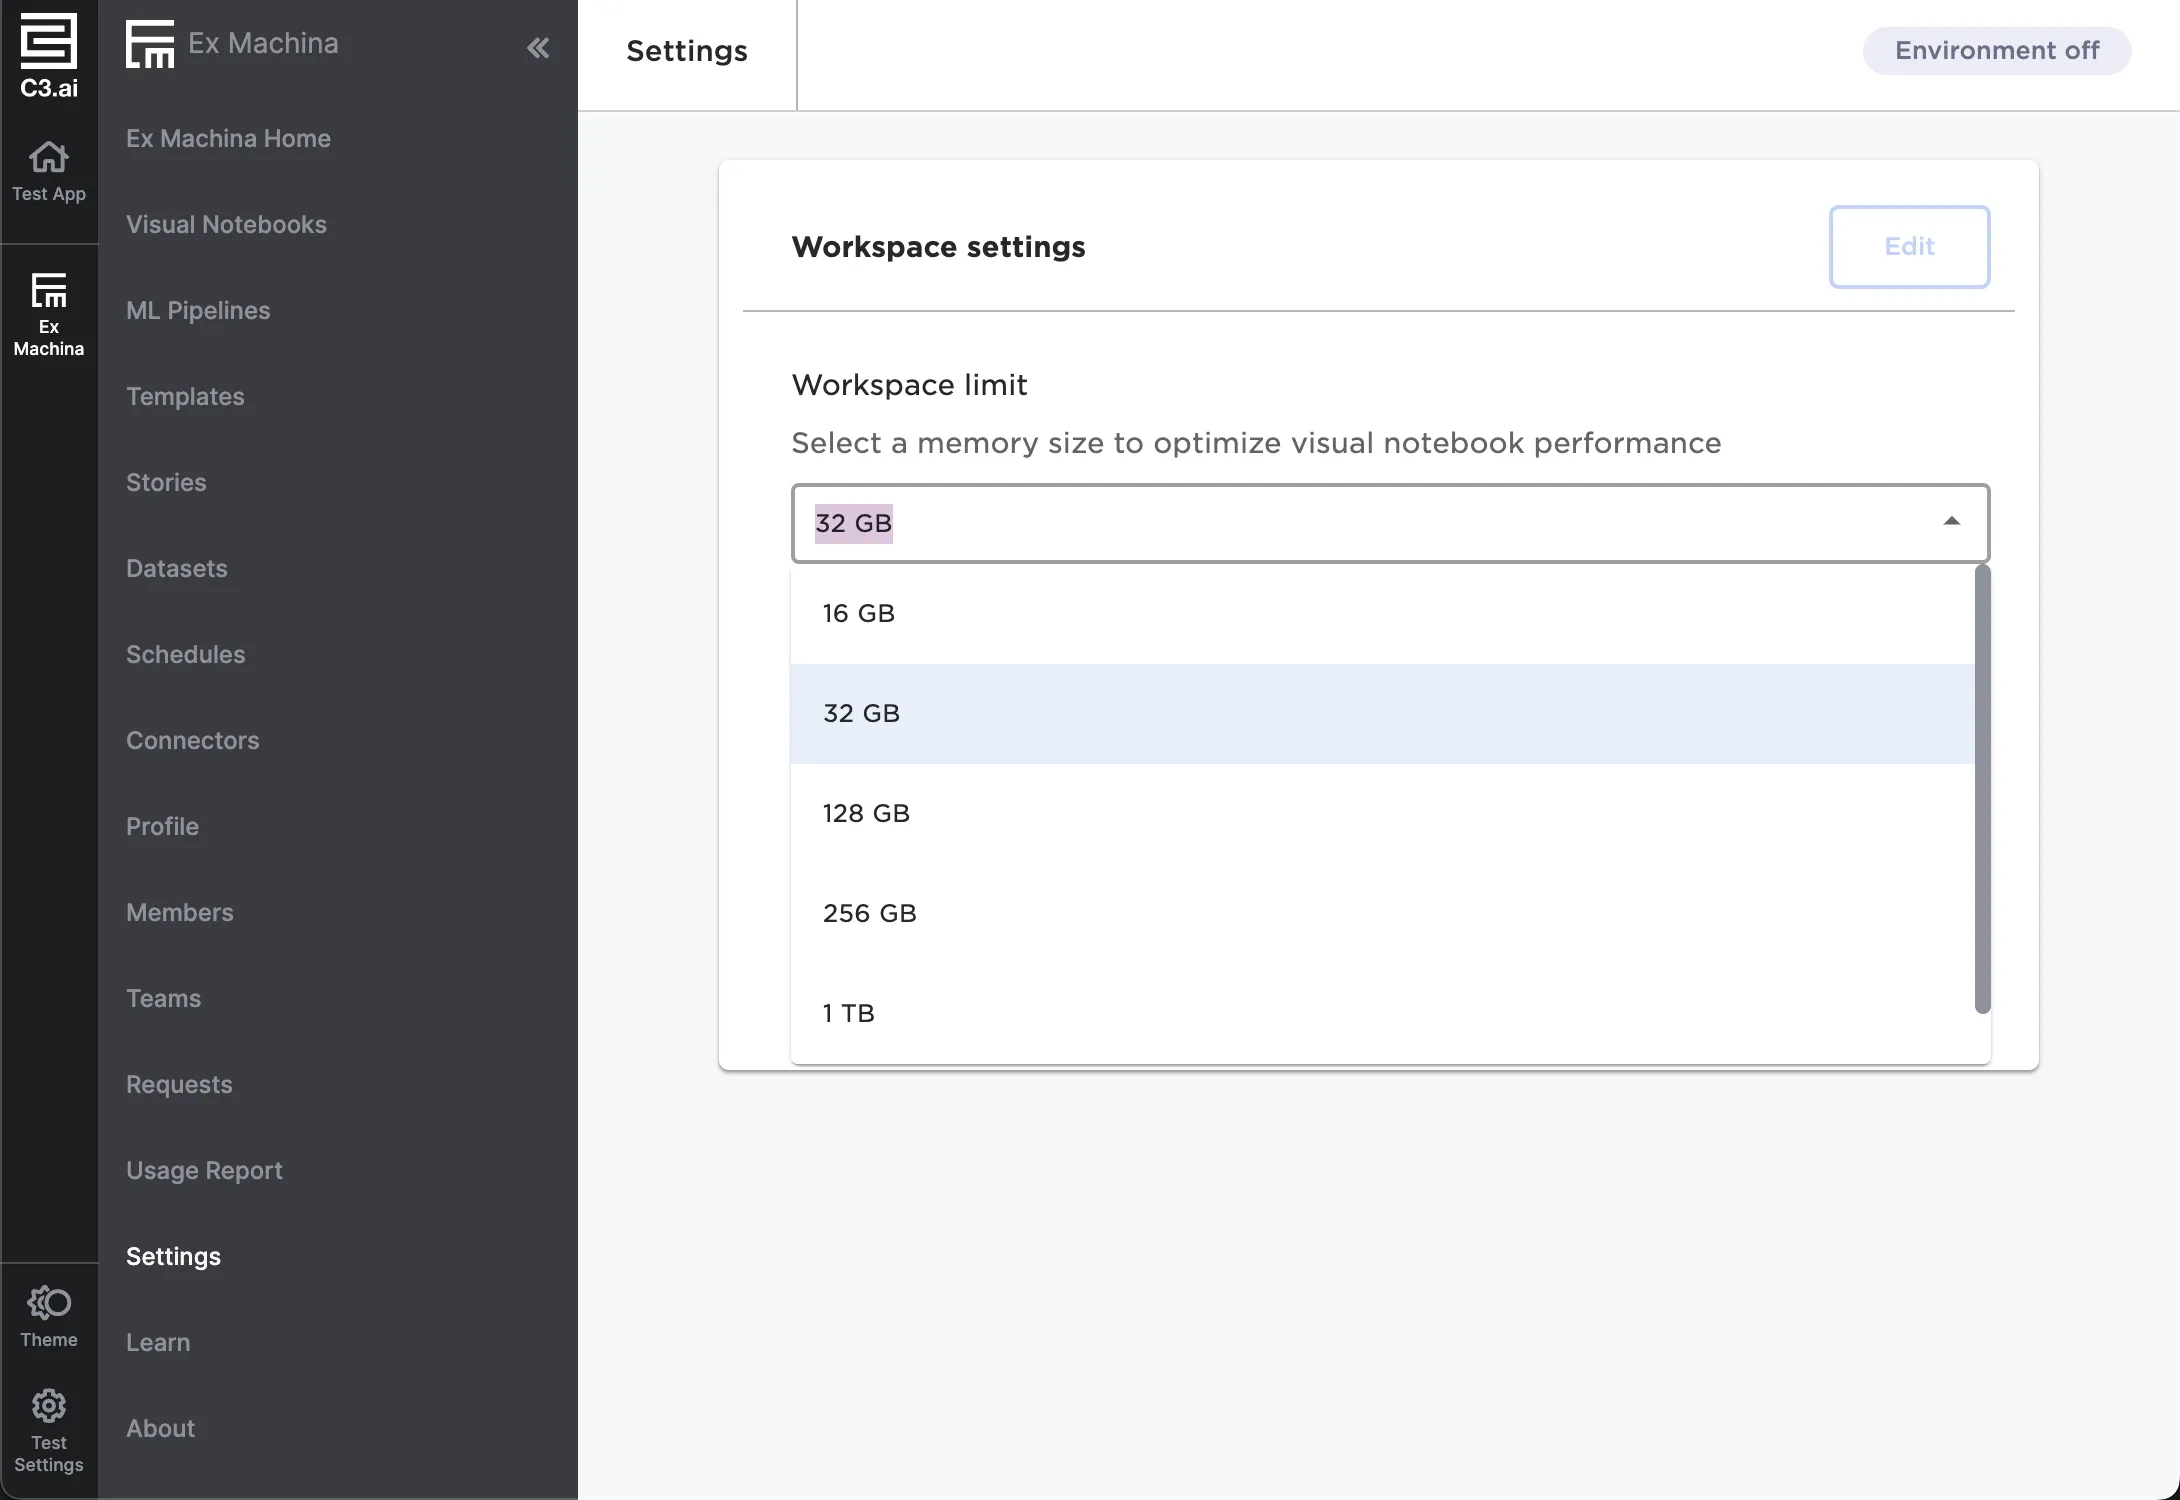
Figure 7: Adjust the workspace size