XML
Load data from an .xml file into Visual Notebooks.
Configuration
| Field | Description |
|---|---|
| Name default=name of the first uploaded file | A user-specified node name displayed in the workspace |
| File Required | The file or files to upload |
| Upload data from an .xml file. If uploading multiple files, make sure all files have the same structure and type of data. Files are stored in a scalable cloud environment with stringent security measures. The total size of all uploaded files must not exceed 50 GB. | |
Schema inference mode default=Auto-detect schema - drop rows containing bad values | Data type inference options |
| Select the "Auto-detect schema - drop rows containing bad values" option to infer the data type (string, integer, decimal, Boolean, etc.) used in each column. Rows with different data types or empty values are not uploaded to the workspace. Select the "Read as strings - no schema inference" option to read all columns as strings and upload all values. | |
Sampling ratio to inference schema (%) default=20 | Percentage of data used to infer schema |
| Set this slider to any percentage. Visual Notebooks examines the percentage of data specified and uses it to determine data types, tags, and timestamps. | |
Define tags default=Auto-detect rowTag and rootTag | Tag inference options |
| Select the "Auto-detect rowTag and rootTag" option to infer the rowTag and rootTag used in the uploaded file. The rootTag brackets the entire file and the rowTag brackets each row. If Visual Notebooks does not correctly infer the tags, select the "Custom define rowTag and rootTag" option to manually enter the rowTag and rootTag used in the uploaded file. | |
Timestamp format option default=Autodetect timestamp format | Timestamp inference options |
| Select the "Autodetect timestamp format" option to infer timestamp formatting. Visual Notebooks examines the percentage of data specified in the "Sampling ratio to inference schema" field and compares those values to a list of known timestamp formats. Select the "Specify timestamp format" option to manually enter the exact timestamp format used in the uploaded file. |
Node Inputs/Outputs
| Input | None |
|---|---|
| Output | Visual Notebooks returns a table, called a dataframe, that contains all uploaded data. Columns are labeled and include a symbol that specifies the data type of that column. |
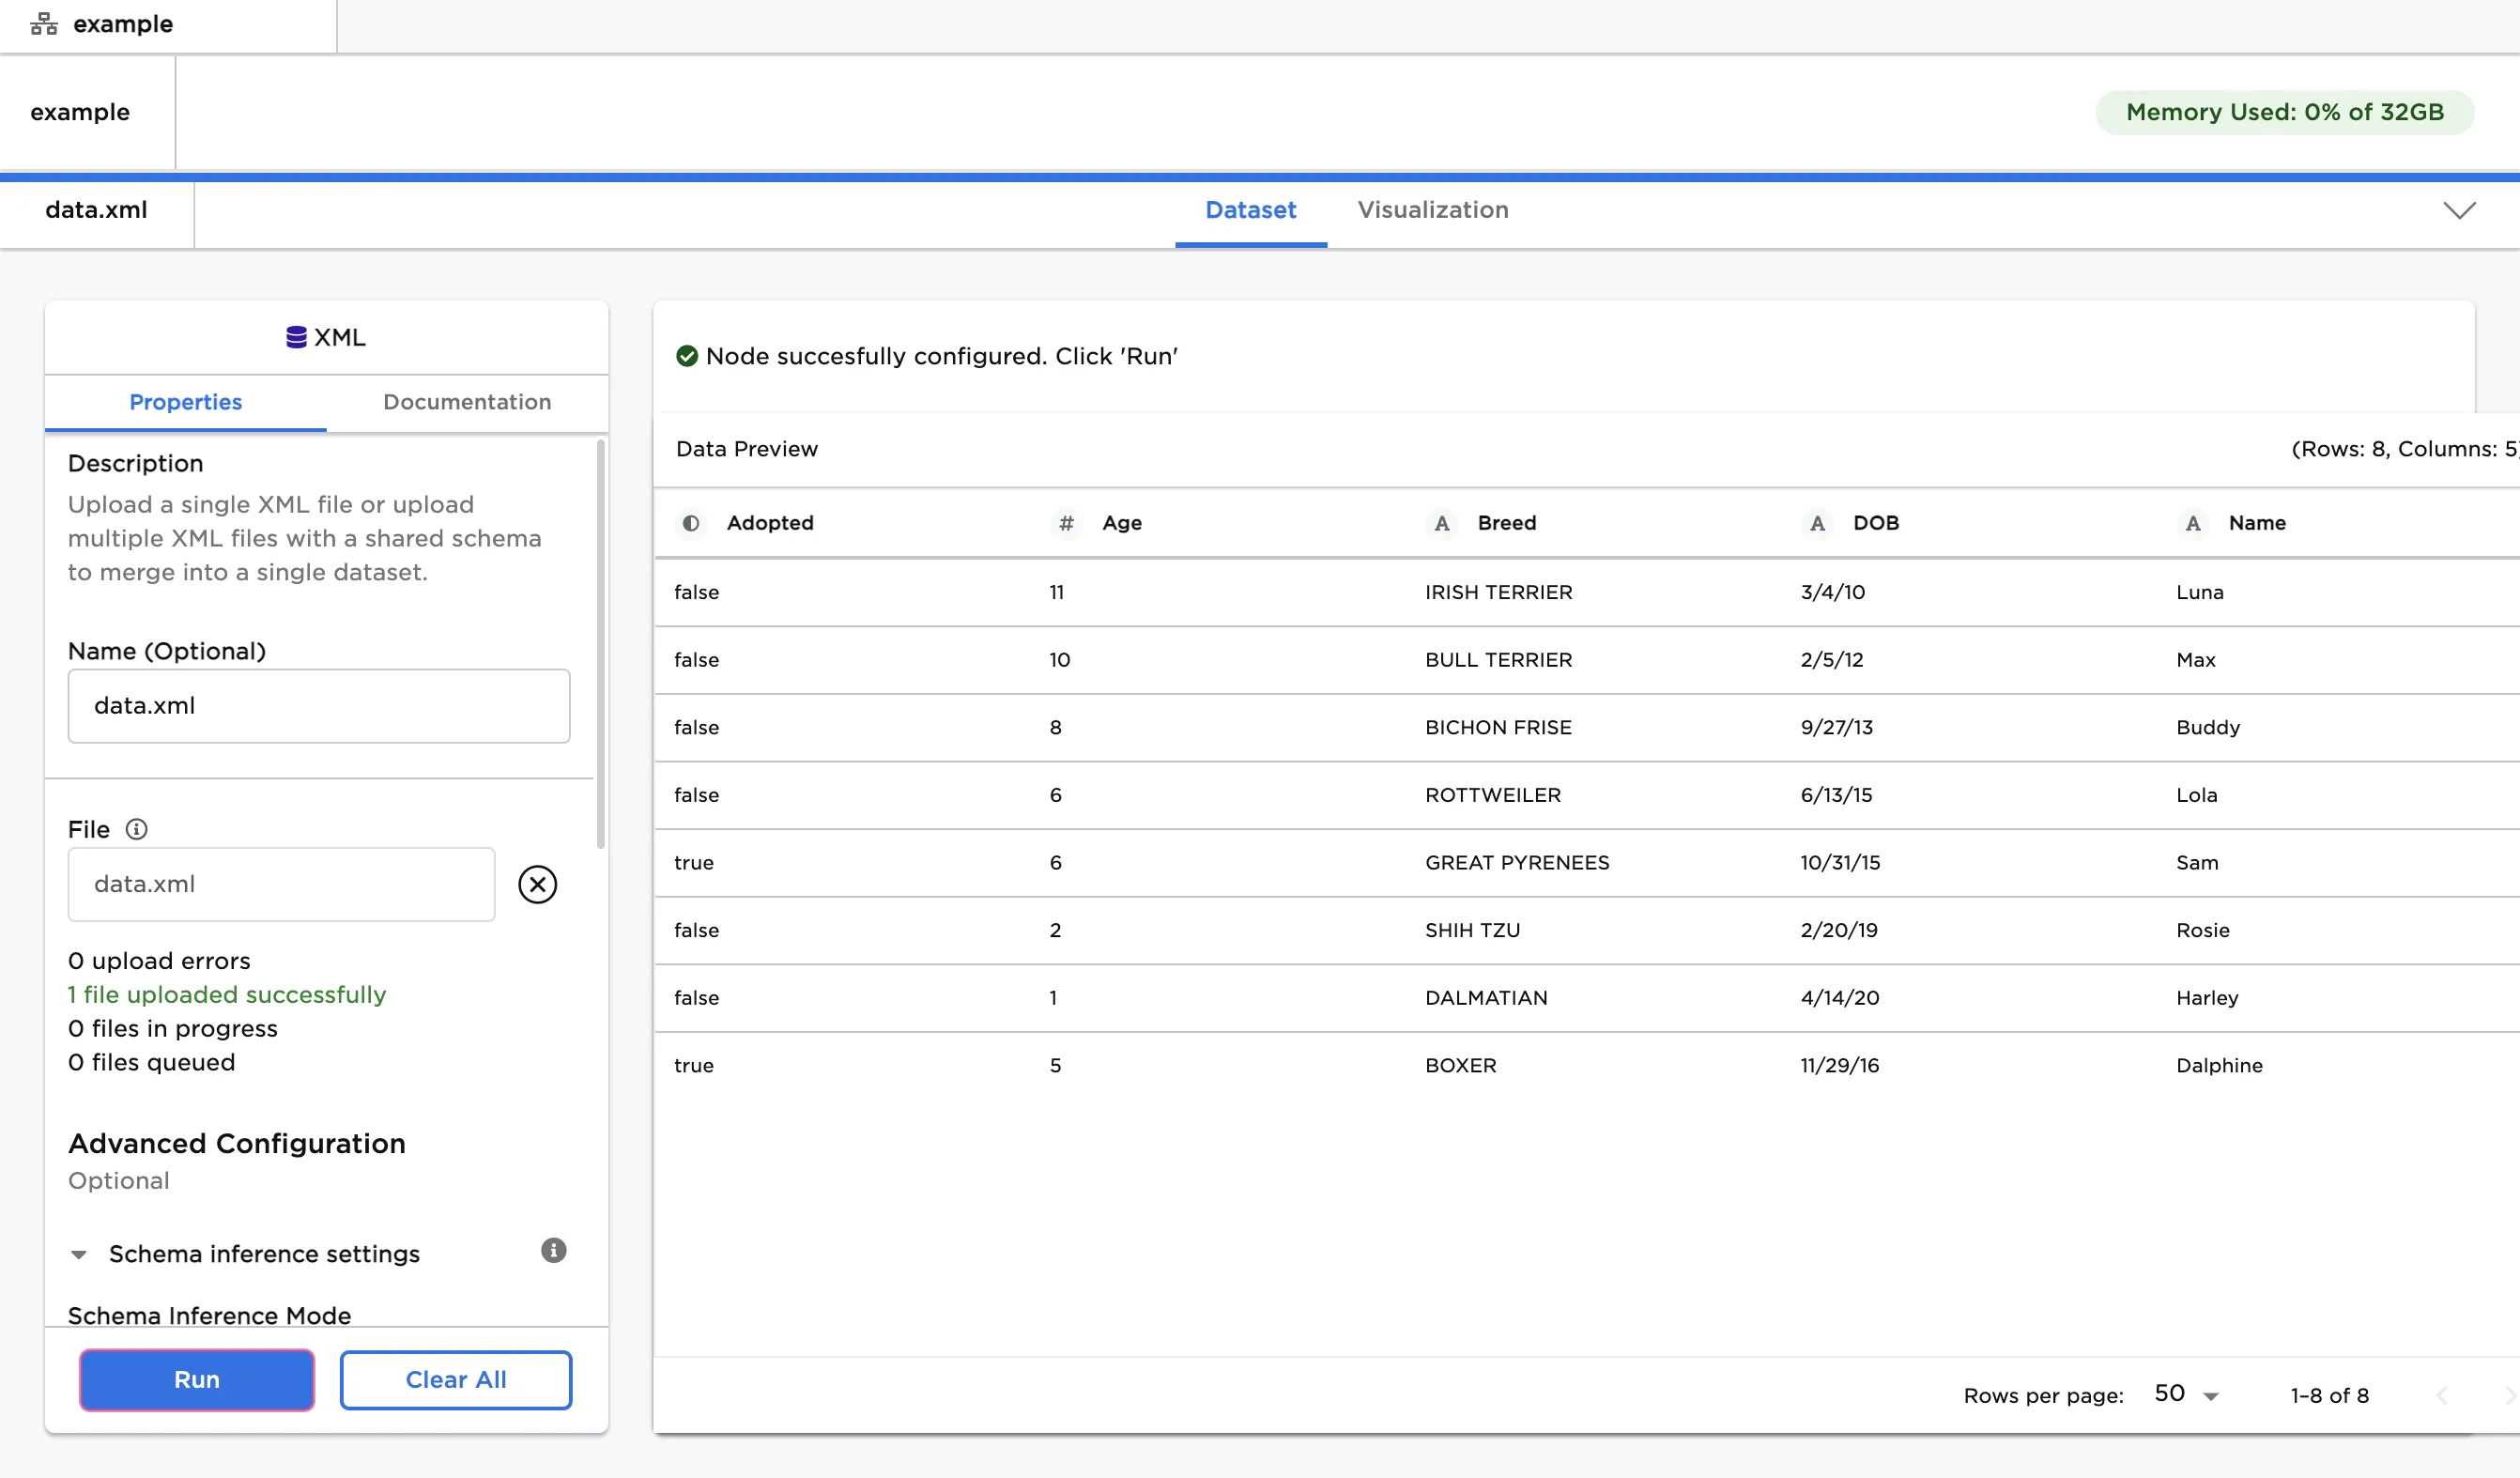
Figure 1: Example dataframe output
Examples
- Drag and drop the .xml file that you want to upload into the outlined space,
or use the "Browse" button to select files from your computer.- The file shown below is used in this example. Notice that there are ten
rows of data. - The rowTag is
and the rootTag is. Visual Notebooks infers these
without user input.
- The file shown below is used in this example. Notice that there are ten
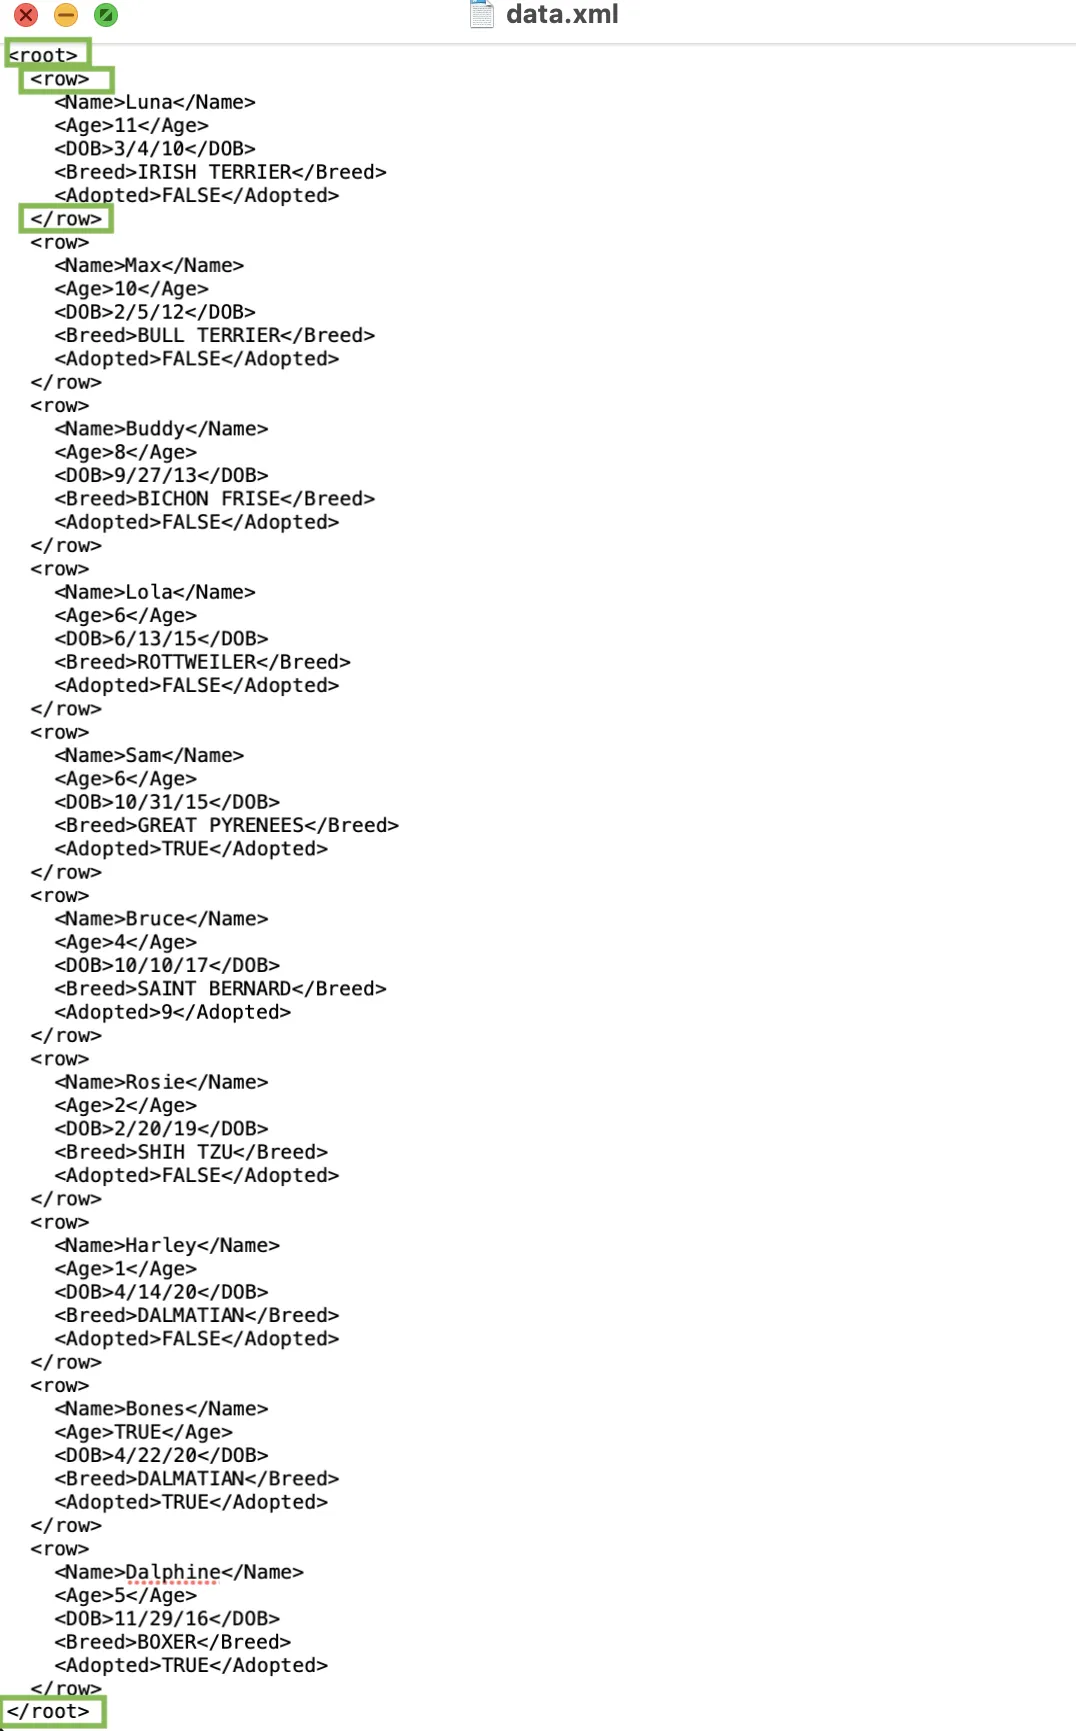
Figure 2: Example source data file
- Upload this file then select "Run" to create a dataframe with the default
settings.- Notice that the columns include an icon that indicates the data type.
- By default, Visual Notebooks drops rows with missing values or mismatched data
types. Since there are only eight rows in the dataframe, two rows have
been dropped.
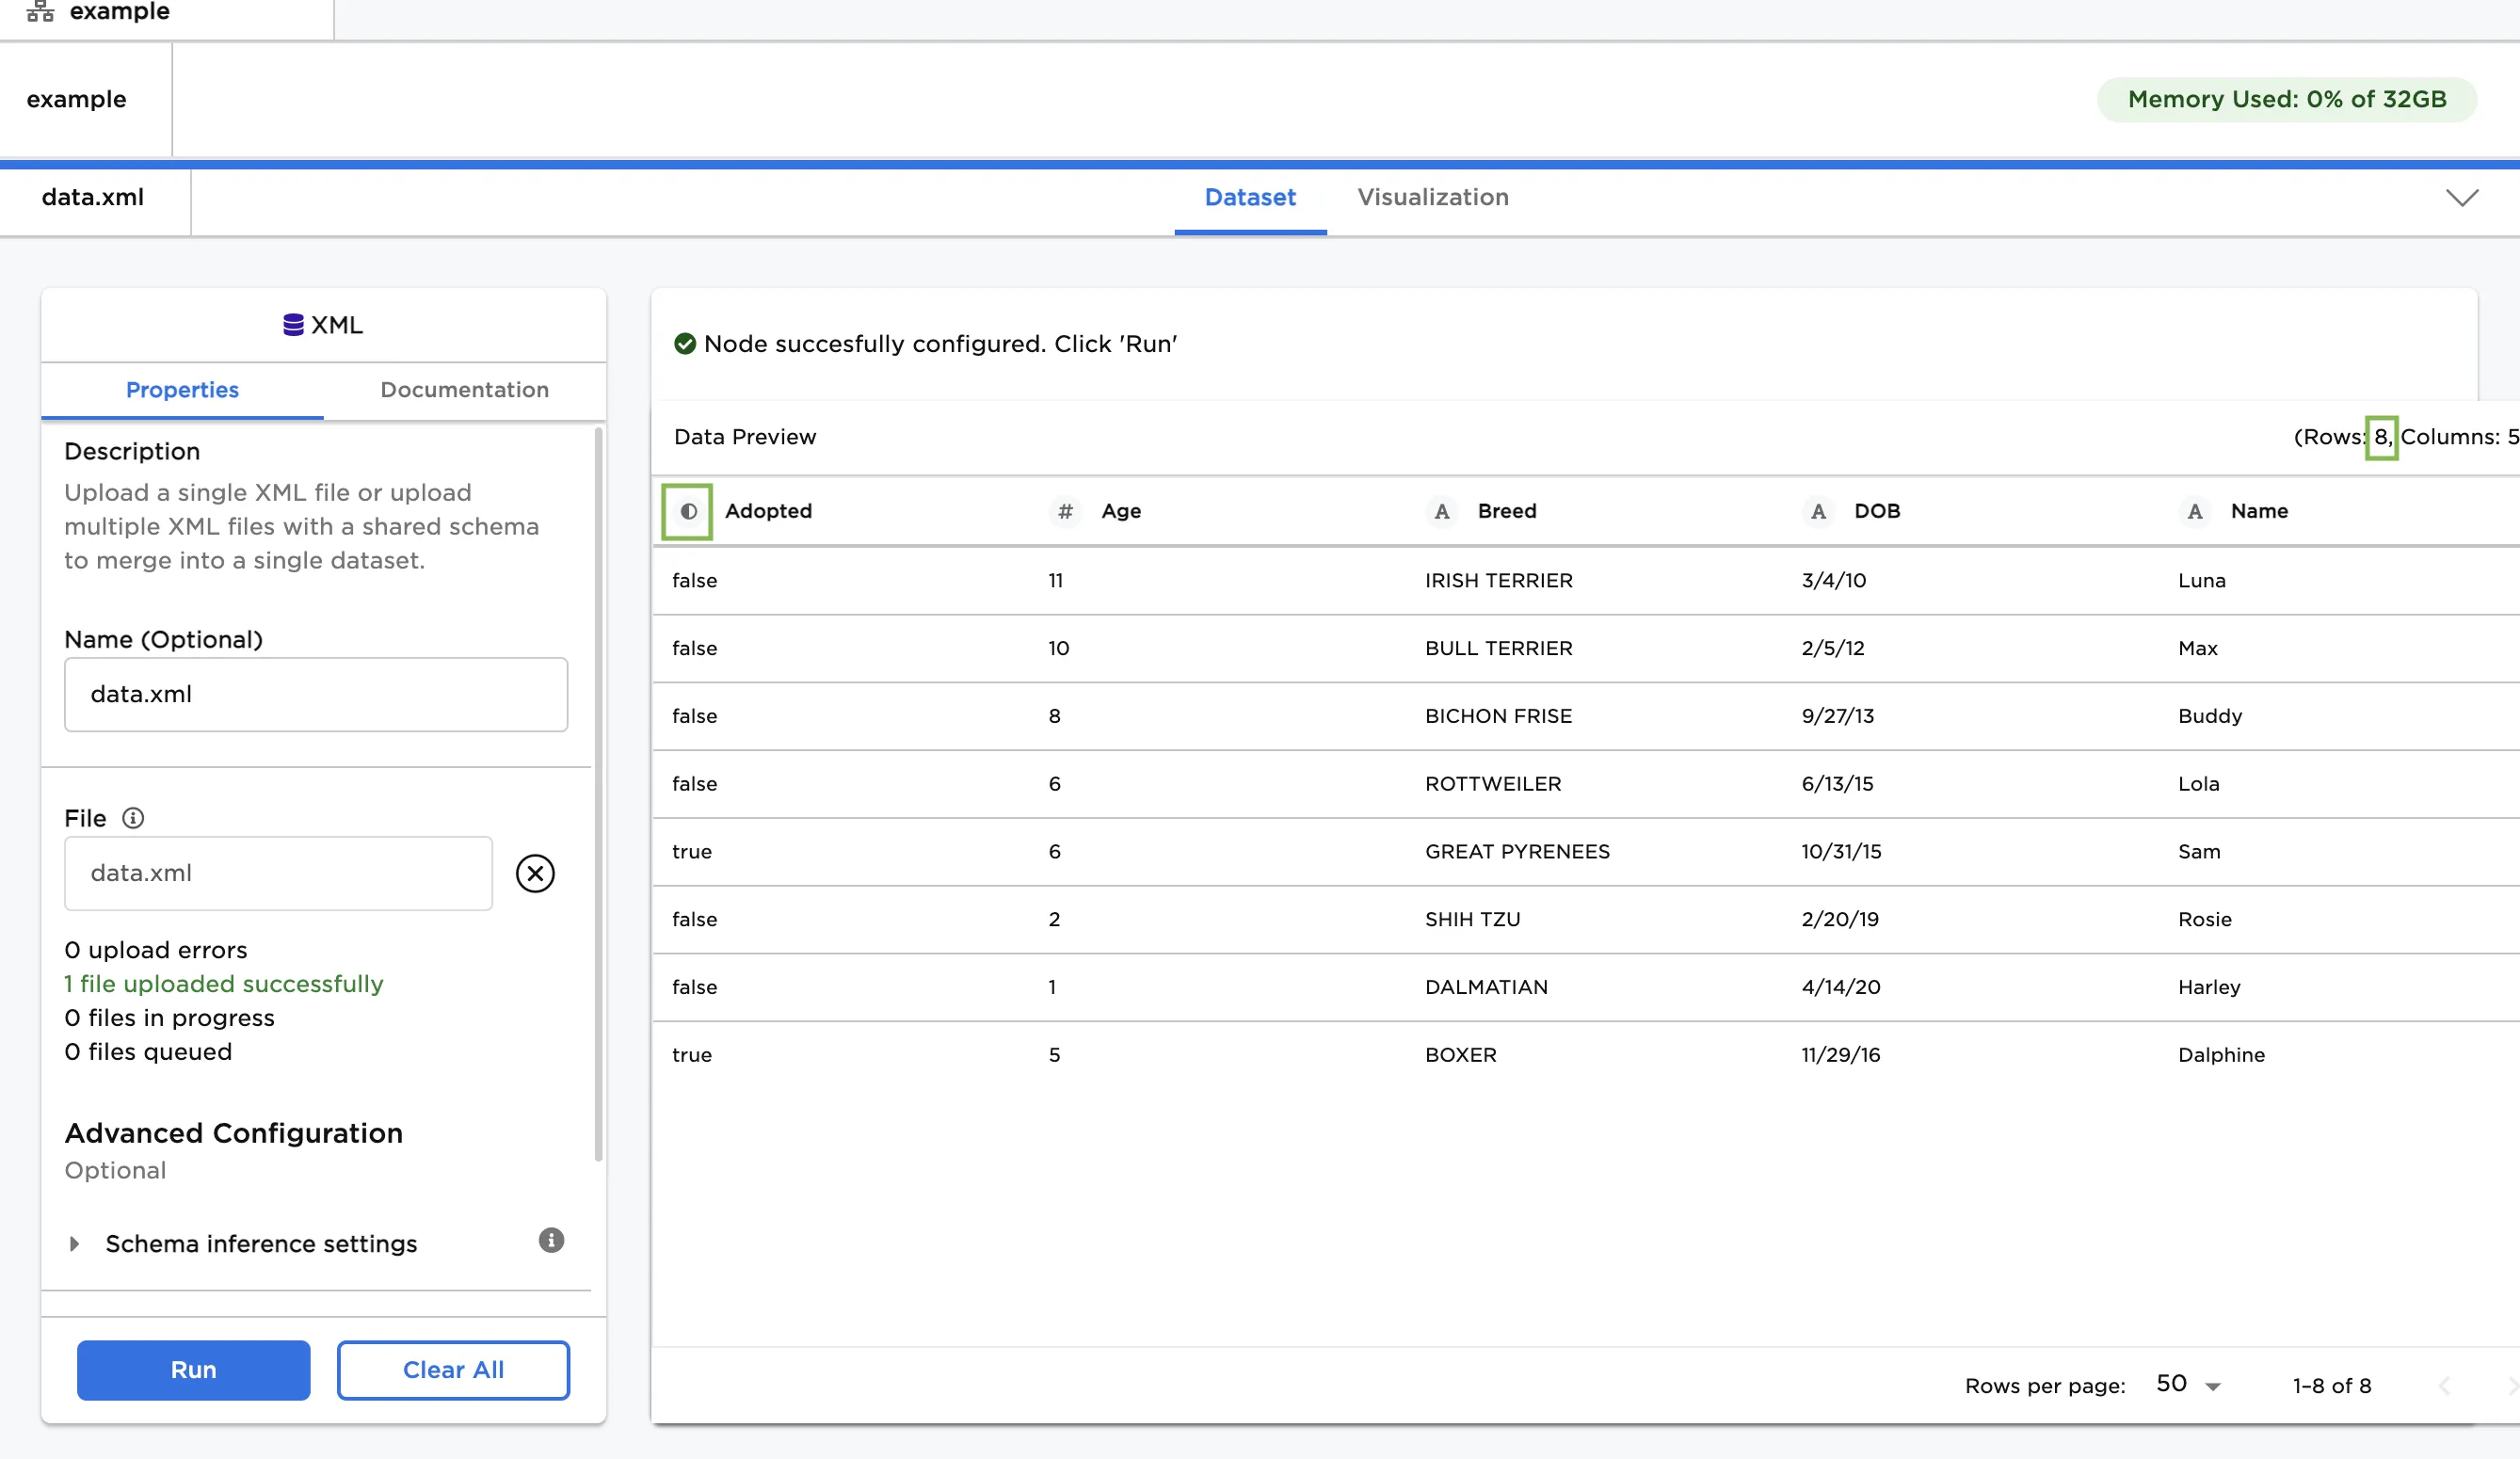
Figure 3: Example dataframe with default settings
- To preserve all rows, select the "Read as strings (no schema inference)"
option.- Notice that all ten rows are imported into the dataframe, including the
two rows with mismatched data types. - The "A" icon next to each column label indicates that all columns are
stored as strings.
- Notice that all ten rows are imported into the dataframe, including the
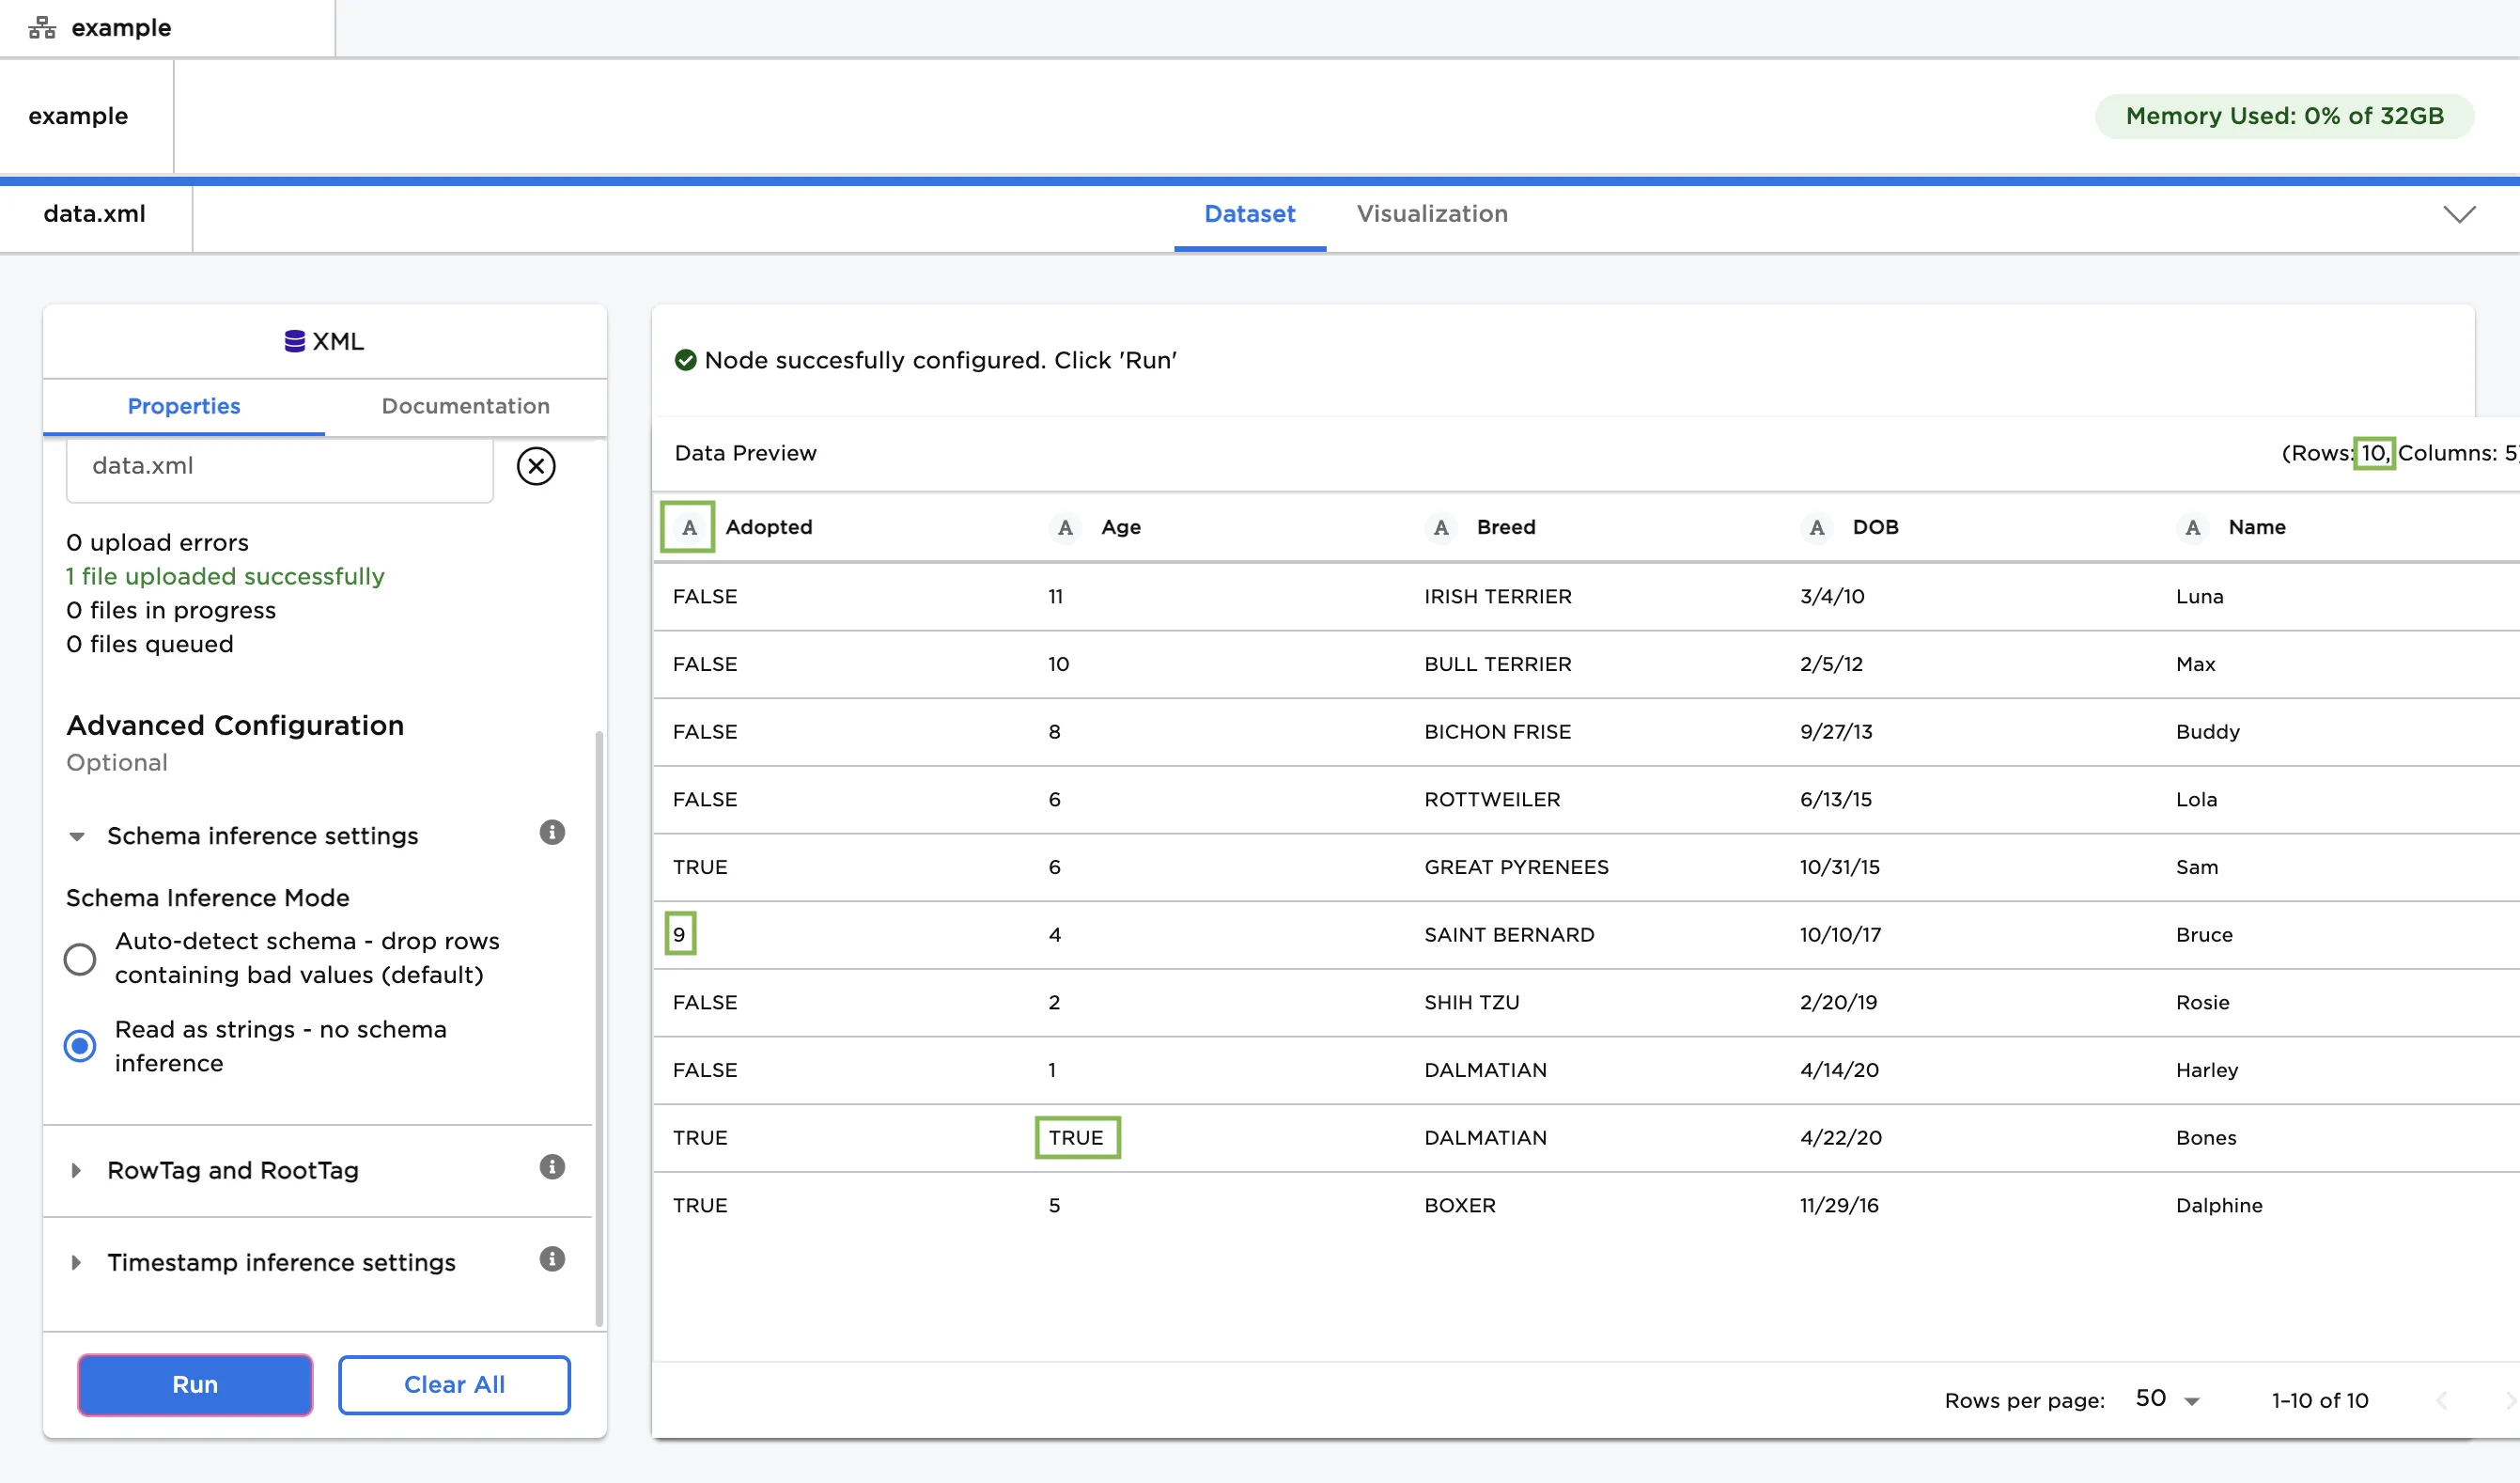
Figure 4: Example dataframe with all data imported as strings
- If you want to convert a column to a date or timestamp type, reference the Spark SQL
guide for an
explanation of the available datetime symbols. The table below shows example timestamp
formats.
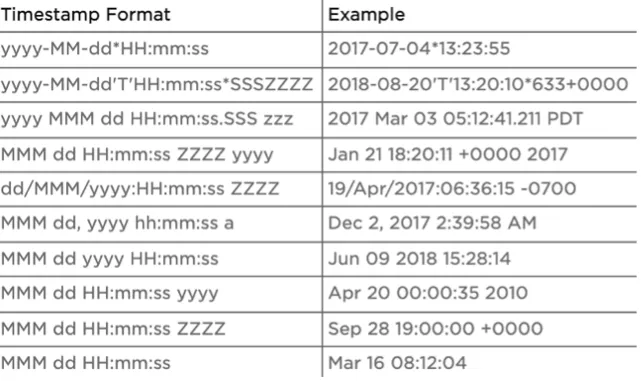
Figure 5: Example timestamp formats