Set Up Your Environment
This page prepares a machine to build a C3 front end. You install the tools, start a single-node environment (SNE) to develop against, and connect the C3 AI VS Code extension to it. When you finish, the extension reaches a running environment, which is the gate for scaffolding a package and deploying it to see real data. This page covers the same setup the Quickstart: Build and Deploy an Alarm Clock runs through in its first three steps, with more depth on the choices behind each one.
Before you begin
Have a machine with at least 32 GB of memory running macOS, Windows, or Linux, and Google Chrome for viewing the running application. Have access to a running C3 environment, or permission to create one, because the backend runs there and the front end has no data of its own.
Step 1: Install the tools
This workflow uses three tools. Install them in order.
Node, which includes npm. Download the current LTS release from nodejs.org and run the installer. Then confirm both are on your path:
Command Linenode -v npm -vBoth commands should print a version number. If either reports "command not found," open a new terminal, or reinstall Node from the installer.
VS Code, which you use as the editor and as the host for the C3 AI extension. Download it from code.visualstudio.com and run the installer.
The C3 AI VS Code extension, which connects your machine to a C3 environment and deploys your package to a single-node environment. In VS Code:
- Open the Extensions view (the square icon in the activity bar, or press
Ctrl+Shift+Xon Windows and Linux,Cmd+Shift+Xon macOS). - Search for C3 AI and select Install.
- If an older C3 extension is already installed, uninstall it first, then close and reopen VS Code so the new extension loads cleanly.
- Open the Extensions view (the square icon in the activity bar, or press
End state: node -v and npm -v print versions, and the C3 AI extension appears in the VS Code Extensions view.
Step 2: Start a single-node environment
Confirm you have a running single-node environment to develop against, because the C3 AI extension connects only to single-node environments. C3 Studio is the web console for a C3 cluster, and your cluster is the C3 address your team gave you, such as https://<cluster>. Open that address in Google Chrome, sign in, and select the Envs tab. The tab lists your environments with a status column.
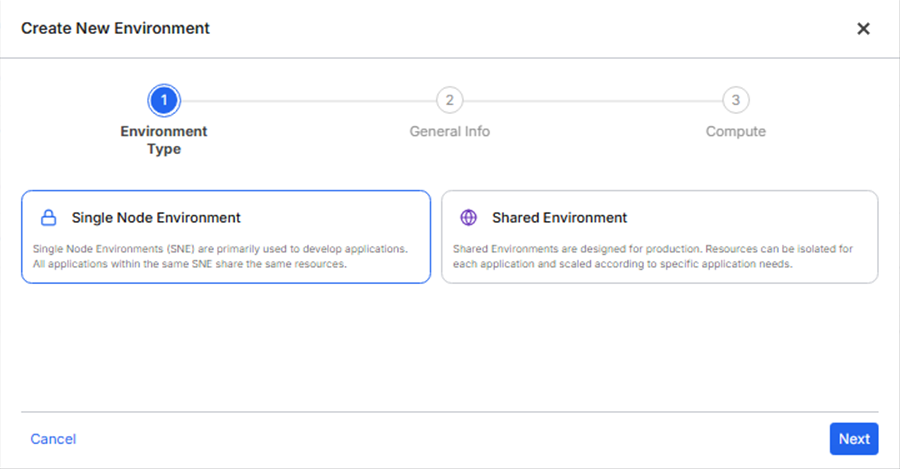
If a single-node environment already shows Running, note its name and use it. If none exists, select New Environment to open the Create New Environment wizard, which has three steps:
In Environment Type, select Single Node Environment, then select Next.
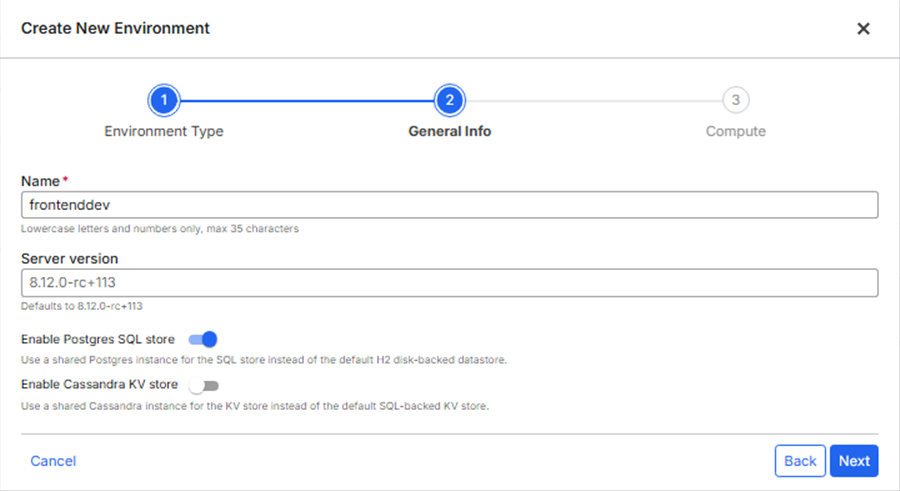
In General Info, enter a Name using lowercase letters and numbers only, up to 35 characters. Leave Server version and the store settings at their defaults, then select Next.
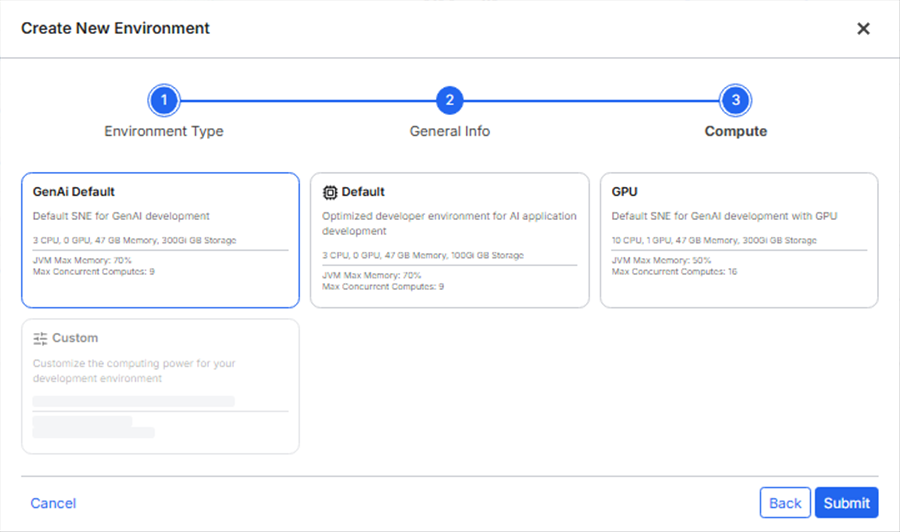
In Compute, keep the preselected compute configuration unless your work needs more resources, then select Submit.
The environment takes a few minutes to reach Running. Wait for that status before continuing, because the extension cannot connect to an environment that is still starting.
You develop against a single-node environment rather than a shared environment because the extension connects only to single-node environments. A shared environment hosts a wider deployment later, through C3 Studio and Release Management rather than the extension.
End state: a single-node environment shows Running in the Studio Envs tab, and you know its name.
Step 3: Connect the extension to your environment
Connect the C3 AI extension to the running environment, which is the gate for everything that follows. First open a workspace for your work: in VS Code, select File > Open Folder and choose or create a folder, for example alarmclock-workspace. For a standalone package, use an empty folder outside any other repository. If your package instead belongs in an existing repository or product ecosystem, open that repository and create the package within it, so it builds alongside the rest of the codebase.
The extension opens a Let's get started panel. Under Select Workspace, confirm it shows your folder. Under Connect to a C3 environment, you enter the environment's development URL, so find that URL first.
The development URL is not the address in your browser's bar when you are in Studio. Studio console addresses such as https://<cluster>/basetoolkit/studio/envs/... fail validation with "URL is malformed." To find the development URL, open your environment's details page in Studio and select the VS Code icon. The Open in VS Code dialog shows the development URL under Option 1: Connect using VS Code Desktop, with a button to copy it.
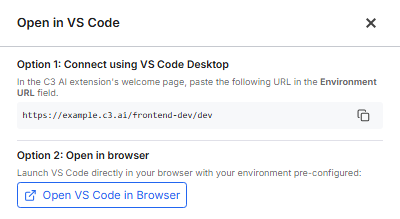
Paste that development URL into the Environment URL field and select CONNECT. In newer versions of the extension you may first see a Login button that opens the authentication page in your browser; sign in there, return to VS Code, and select CONNECT. Authenticate when the browser prompts you.
End state: the extension reports a successful connection to your environment, and you are authenticated.
What you have now
You have the three tools installed, a running single-node environment, and the C3 AI extension connected to it and authenticated. The machine is ready to scaffold a package and deploy it. By default there is no development environment file to fill in and no proxy to configure: local dev with npm run dev shows the interface only, with no backend, and real data appears after you deploy, when the same-origin c3auth cookie authenticates each request automatically. The Local Dev Loop covers an optional proxy if you want live data while developing. Next, create the package in Start from the Template.
Decisions on this page
The setup choices come down to which single-node environment you develop against and how you drive the extension.
Which single-node environment. Reuse an existing single-node environment that already shows Running to save the few minutes a new one takes to start, or create a fresh one when you want an isolated environment for this work. Either way it must be a single-node environment, because the extension does not connect to a shared environment.
How you drive the extension. Use the C3 AI VS Code extension directly, working from its Let's get started, Start Application, and other panels. If your team drives the C3 AI extension from a coding agent instead, the connection target is the same development URL and the same single-node environment, so this setup does not change.