Create C3 Action Tools from the UI
C3 Action tools allow you to wrap existing C3 Type methods and expose them as callable tools for agents. Use C3 Action tools when you want to leverage your Type System logic without writing new Python code.
Open the tools gallery
The steps to open the tools gallery and create a new tool are the same for both Python tools and C3 Action tools. The steps are:
- Navigate to the tools gallery.
- Provide basic details about the new tool.
- Select the tool category.
For detailed instructions, see Create Python Tools from the UI.
When you reach the Select tool category step, select C3 Action Tool, and then select Create to generate the draft tool.
After you create the tool draft, you can configure the tool.
Configure the C3 Action tool
After you create a C3 Action tool draft, the Tool Configuration page opens. This workspace includes three panels:
- Configuration (left): Define the tool's LLM description, C3 Type, and method selection.
- Testing (center): Run standalone or agent-level tests.
- Trace (right): Review execution traces after testing.
Configure tool settings
The Configuration panel specifies how your C3 Action method connects to the agent.
- LLM Tool Description: Enter text that explains what the tool does. This description helps the agent understand when and how to use the tool. For example,
A tool that generates greetings based on user input. - C3 Type: Enter the C3 Type name that contains the method you want to expose. For example,
ALMToolUITestC3Method - Method: Select the static or instance method from the Type dropdown. The dropdown populates with available methods from the specified Type.
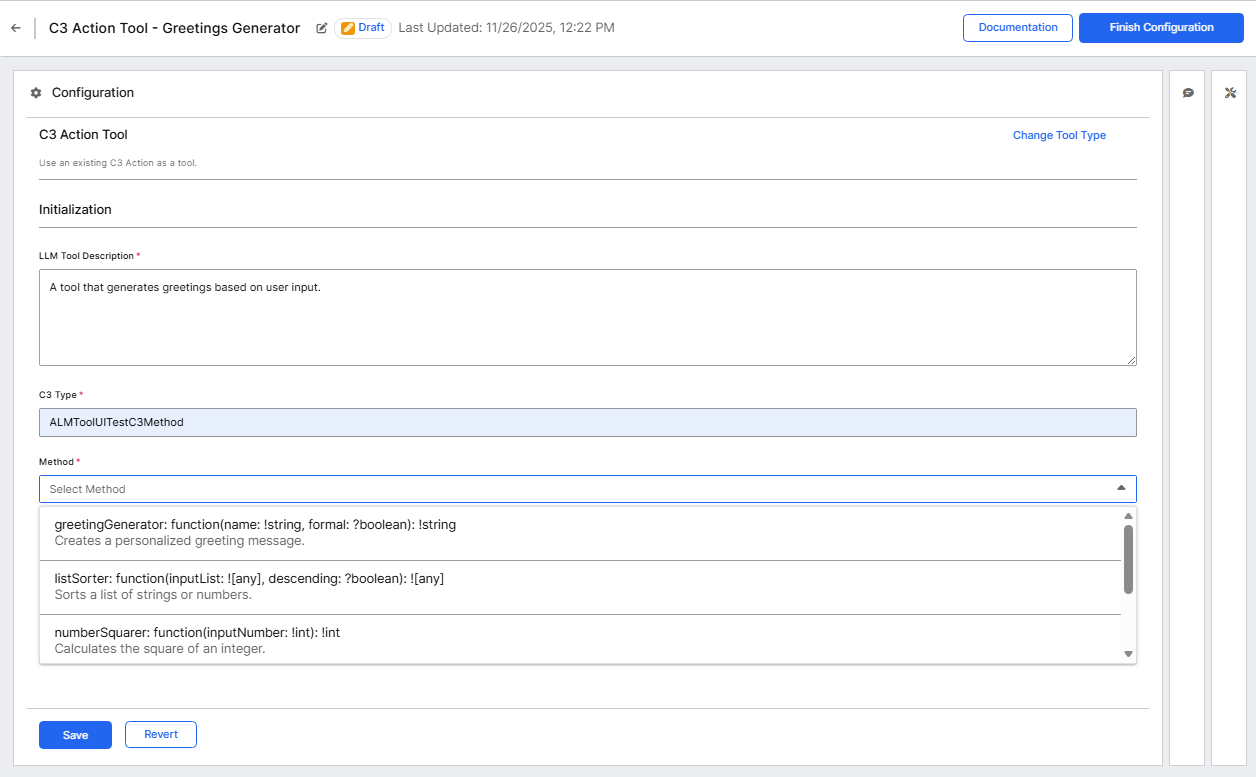
For example in the above image these are the methods in the dropdown:
greetingGenerator: function(name: !string, formal: ?boolean): !string: Creates a personalized greeting message.listSorter: function(inputList: ![any], descending: ?boolean): ![any]: Sorts a list of strings or numbers.numberSquarer: function(inputNumber: !int): !int: Calculates the square of an integer.stringConcatenator: function(stringA: !string, stringB: !string, separator: ?string): !string: Joins two strings together, optionally with a separator.stringReverser: function(inputString: !string): !string: Reverses a given string.
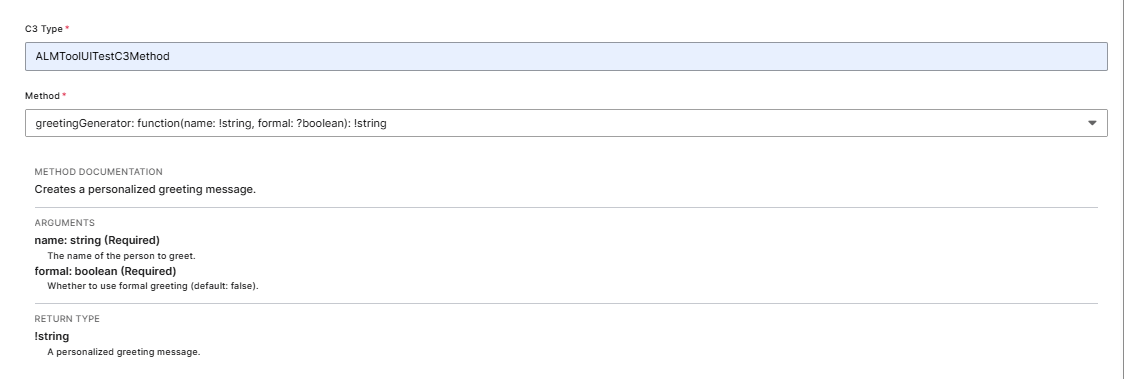
After you select a method, the system automatically extracts and displays:
- Method Documentation: The description from the method's documentation in the C3 Type.
- Arguments: Parameter names, types, and descriptions extracted from the Type definition.
- Return Type: The return type and description from the method signature.
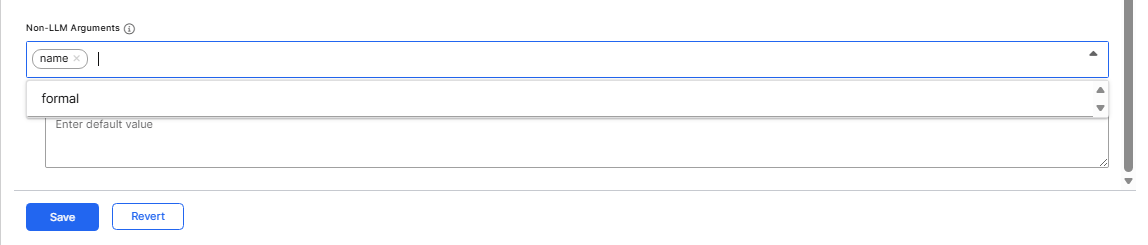
Hide Tool Arguments from LLMs
Non-LLM Arguments (also called injected arguments) are tool parameters that the system injects automatically during the tool call but the LLM cannot see or modify.
Use Non-LLM Arguments for:
- Context information that the system should inject automatically.
- Configuration values that control tool behavior.
- System-level parameters that the agent should not modify.
- Default values that apply across all invocations.
To add Non-LLM Arguments:
- In the Configuration panel, locate the Non-LLM Arguments section.
- Select the dropdown to add a new argument.
- Select the argument you want to inject from the available method parameters.
- Enter a default value for the argument if required.
- The argument is injected automatically during tool execution and hidden from the LLM.
Test the C3 Action tool
The testing process for C3 Action tools is similar to Python tools. You can run standalone tests (i.e. test the tool directly) or test the tool through an agent, to validate your tool configuration.
Run standalone tests
- Select the Standalone Test tab.
- Enter sample input values for the method parameters. Example: For a greeting generator, enter
Thomasfor the name parameter and selectTruefor the formal parameter. - Select Test to execute the method.
- Review the output in the results pane. The response displays the method's return value.
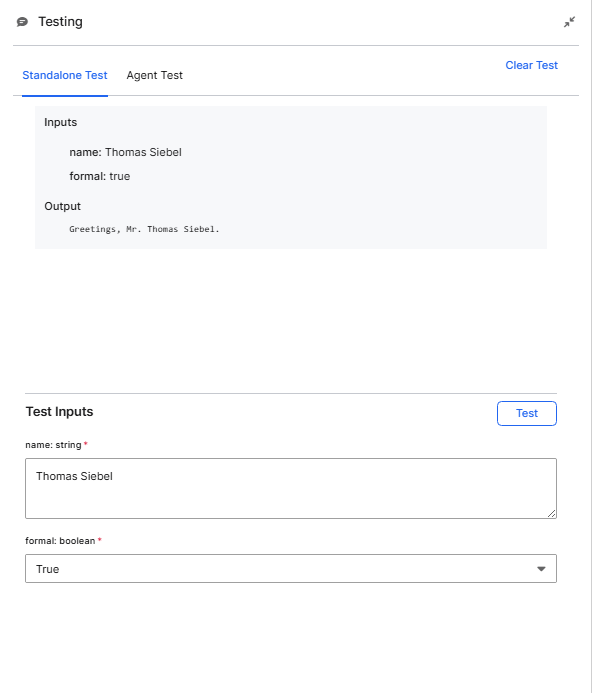
The standalone test confirms the underlying C3 Action method executes correctly with the provided inputs.
Test with an agent
After standalone testing, test how the tool performs when called by an agent.
- Select the Agent Test tab in the Testing panel.
- Select Select Agent to choose an existing agent from your environment.
- Enter a test message that would cause the agent to use your tool. Example:
Generate a formal greeting for Thomas. Use the available tools. - Review the agent's response and the tool execution trace in the Trace panel.
This test confirms the tool integrates correctly with agent workflows and validates that the LLM description effectively communicates the tool's purpose to the agent.
For more details on testing tools, see Create Python Tools from the UI.
Store the tool
After successful validation and testing:
- Select Finish Configuration in the upper-right corner.
- Choose Move to Store to complete configuration. This makes it available for others to add to their agents as well.
Once the tool has been moved to the store, it appears under the Store section in the gallery.
When moving a tool to Store, you can select Publish to package to make the tool available across applications that depend on your package. You must be in development mode to do this.
Verify in agents
The process for adding C3 Action tools to agents is the same as for Python tools. For detailed instructions on verifying your tool in agents, see Create Python Tools from the UI.
Follow these steps:
- Navigate to Agents > Gallery.
- Open an existing draft agent or create a new one.
- In the agent configuration, locate the Tools section and select Add Tool.
- Search for and select your tool.
- Save the agent configuration and test the tool.
For more information on creating agents, see Create Agents from Scratch.