File Upload Configuration Example
Data Fusion is in Beta. Please contact your C3 AI representative to enable this feature.
When first developing your app, you may want to use smaller files for testing purposes. The File upload choice in Add data source allows you to use CSV or parquet files to test connections and functionality with small pieces of data before you're ready to add live data to your app.
After testing, change your data source to one that allows for automatic ingestion or updates.
Use this topic to understand how to upload files and configure schema in Data Fusion. This topic teaches you how to:
- Select and preview files.
- Validate table content.
- Define a schema to ensure data accuracy and compatibility.
- View schema applied to file data.
- Configure file settings for streamlined data uploads.
Getting started
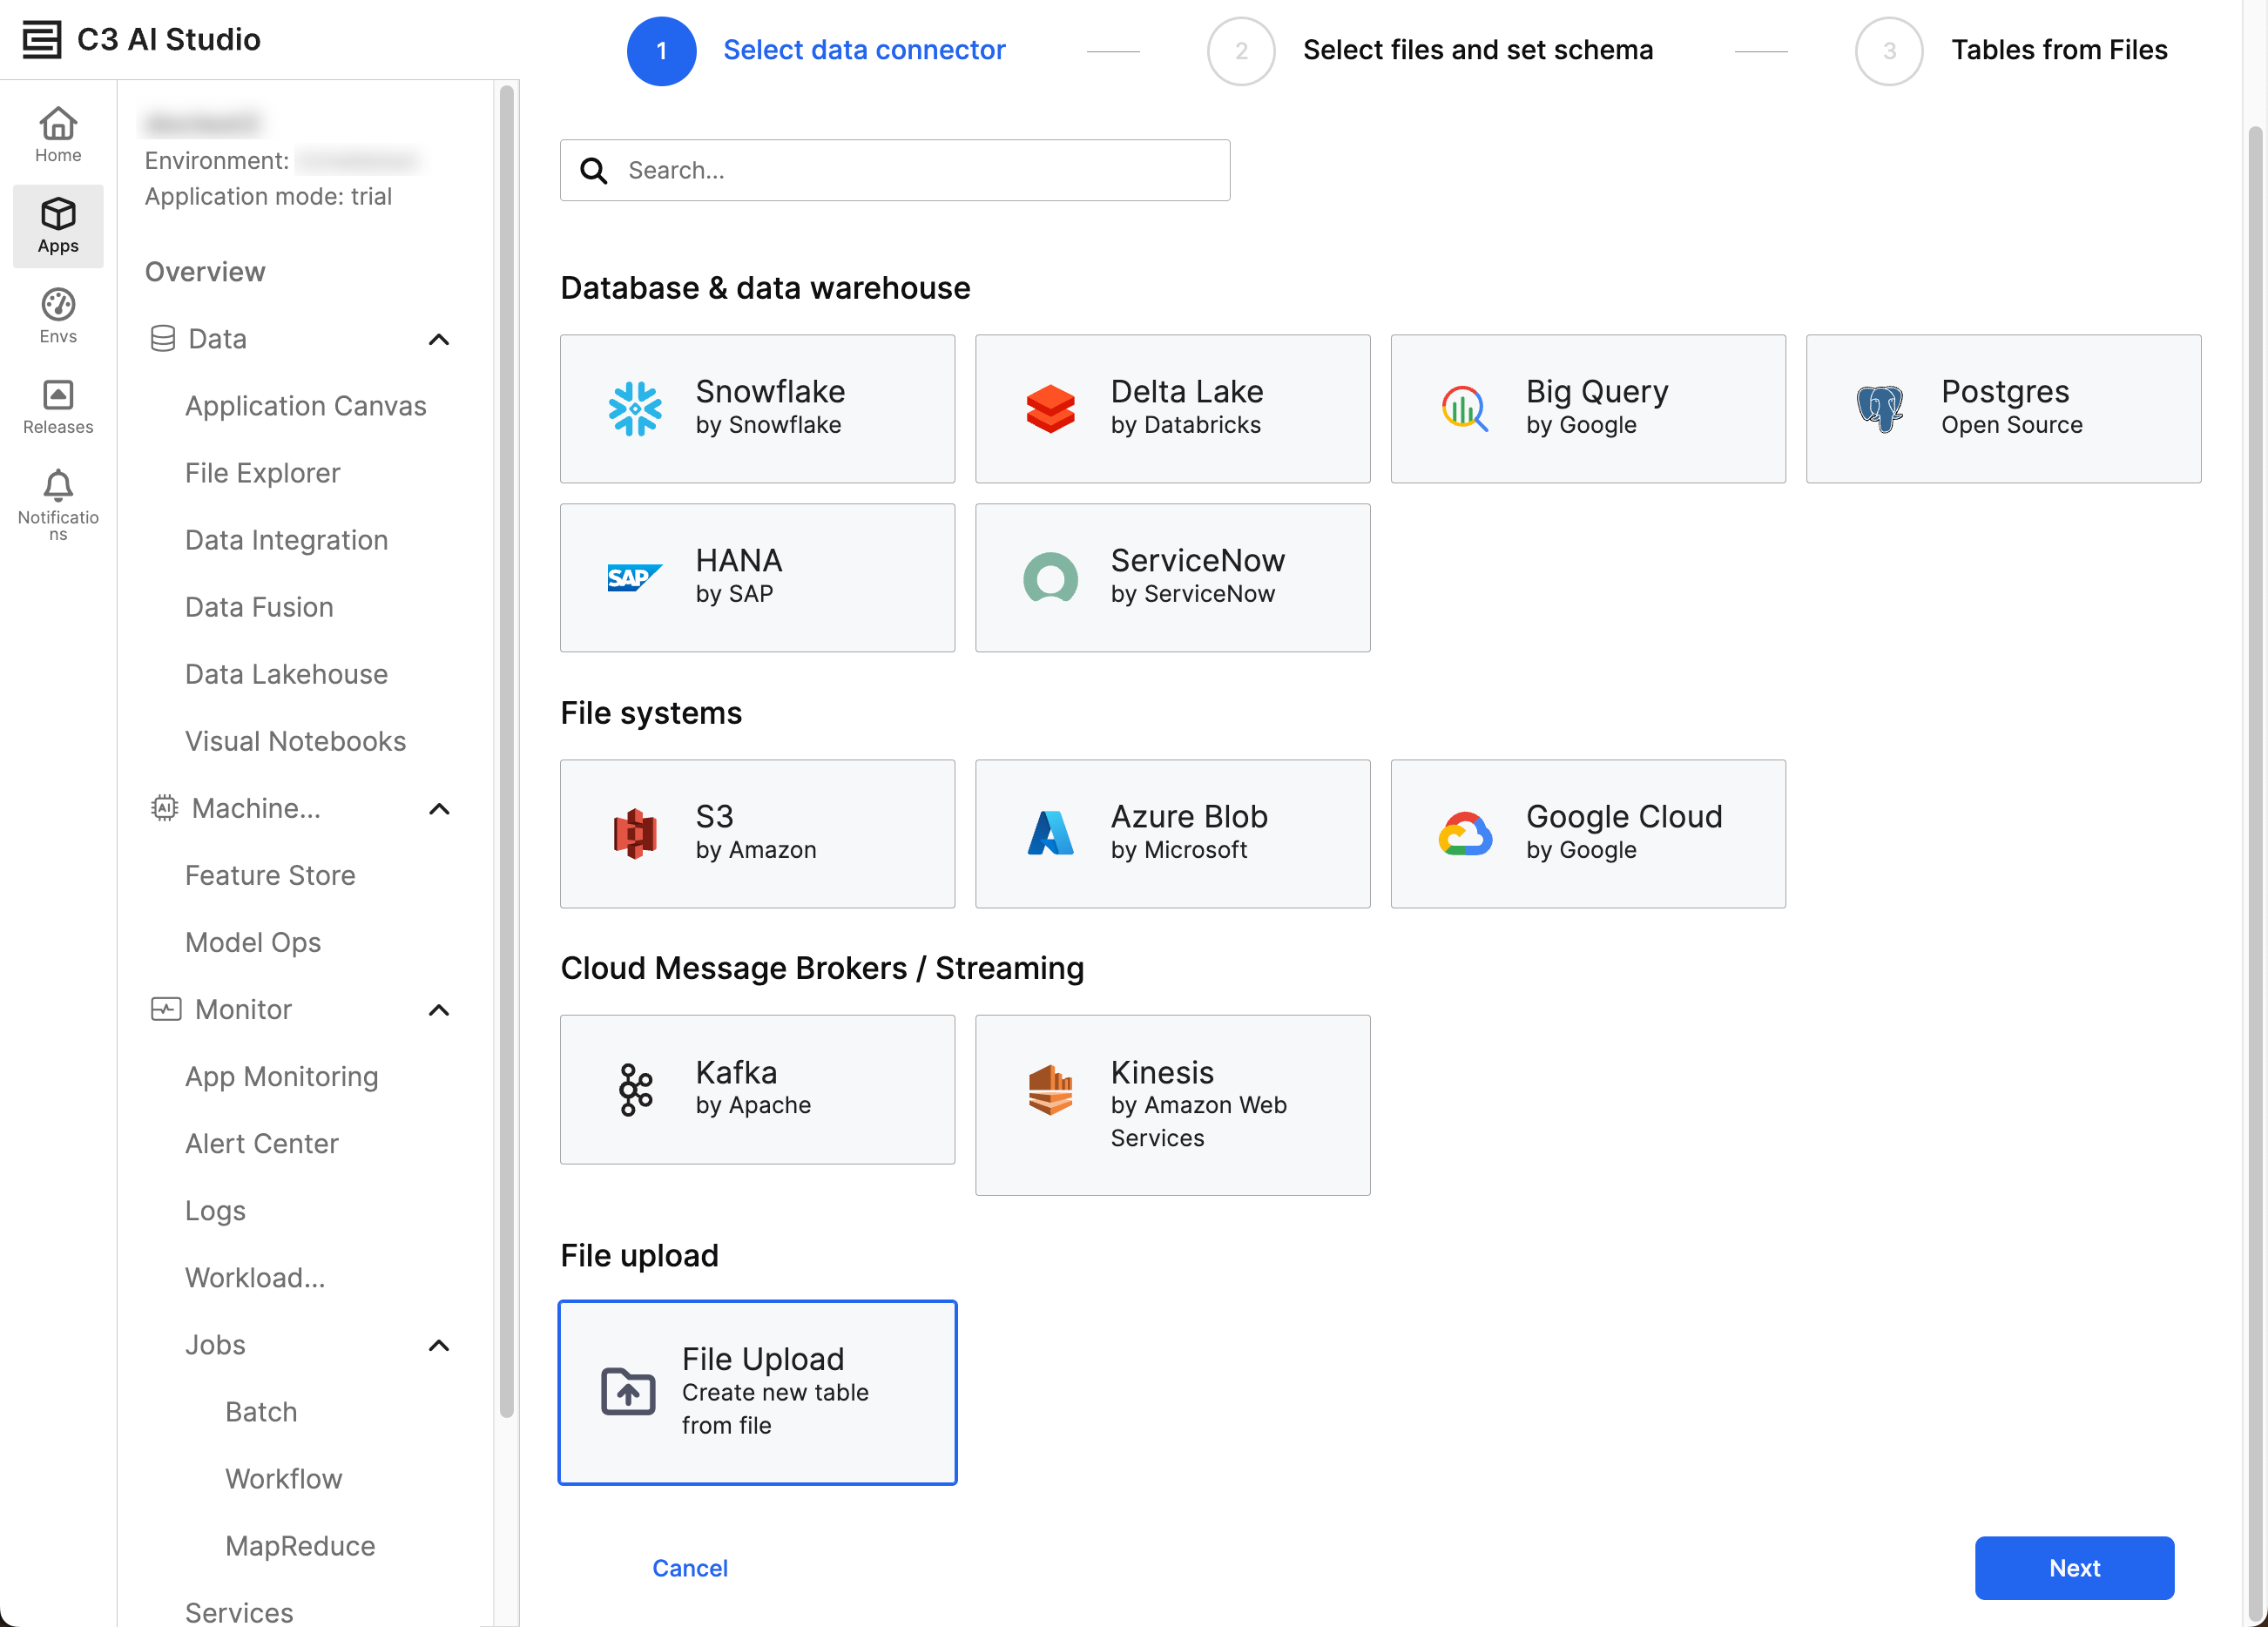
To upload data, select the name of your app from C3 AI Studio and navigate to the Data Fusion tab. Select Add Data Source at the bottom of the Data Sources tab. The Add data source workflow appears, prompting you to select a data connector.
Choose File Upload and select Next to add files.
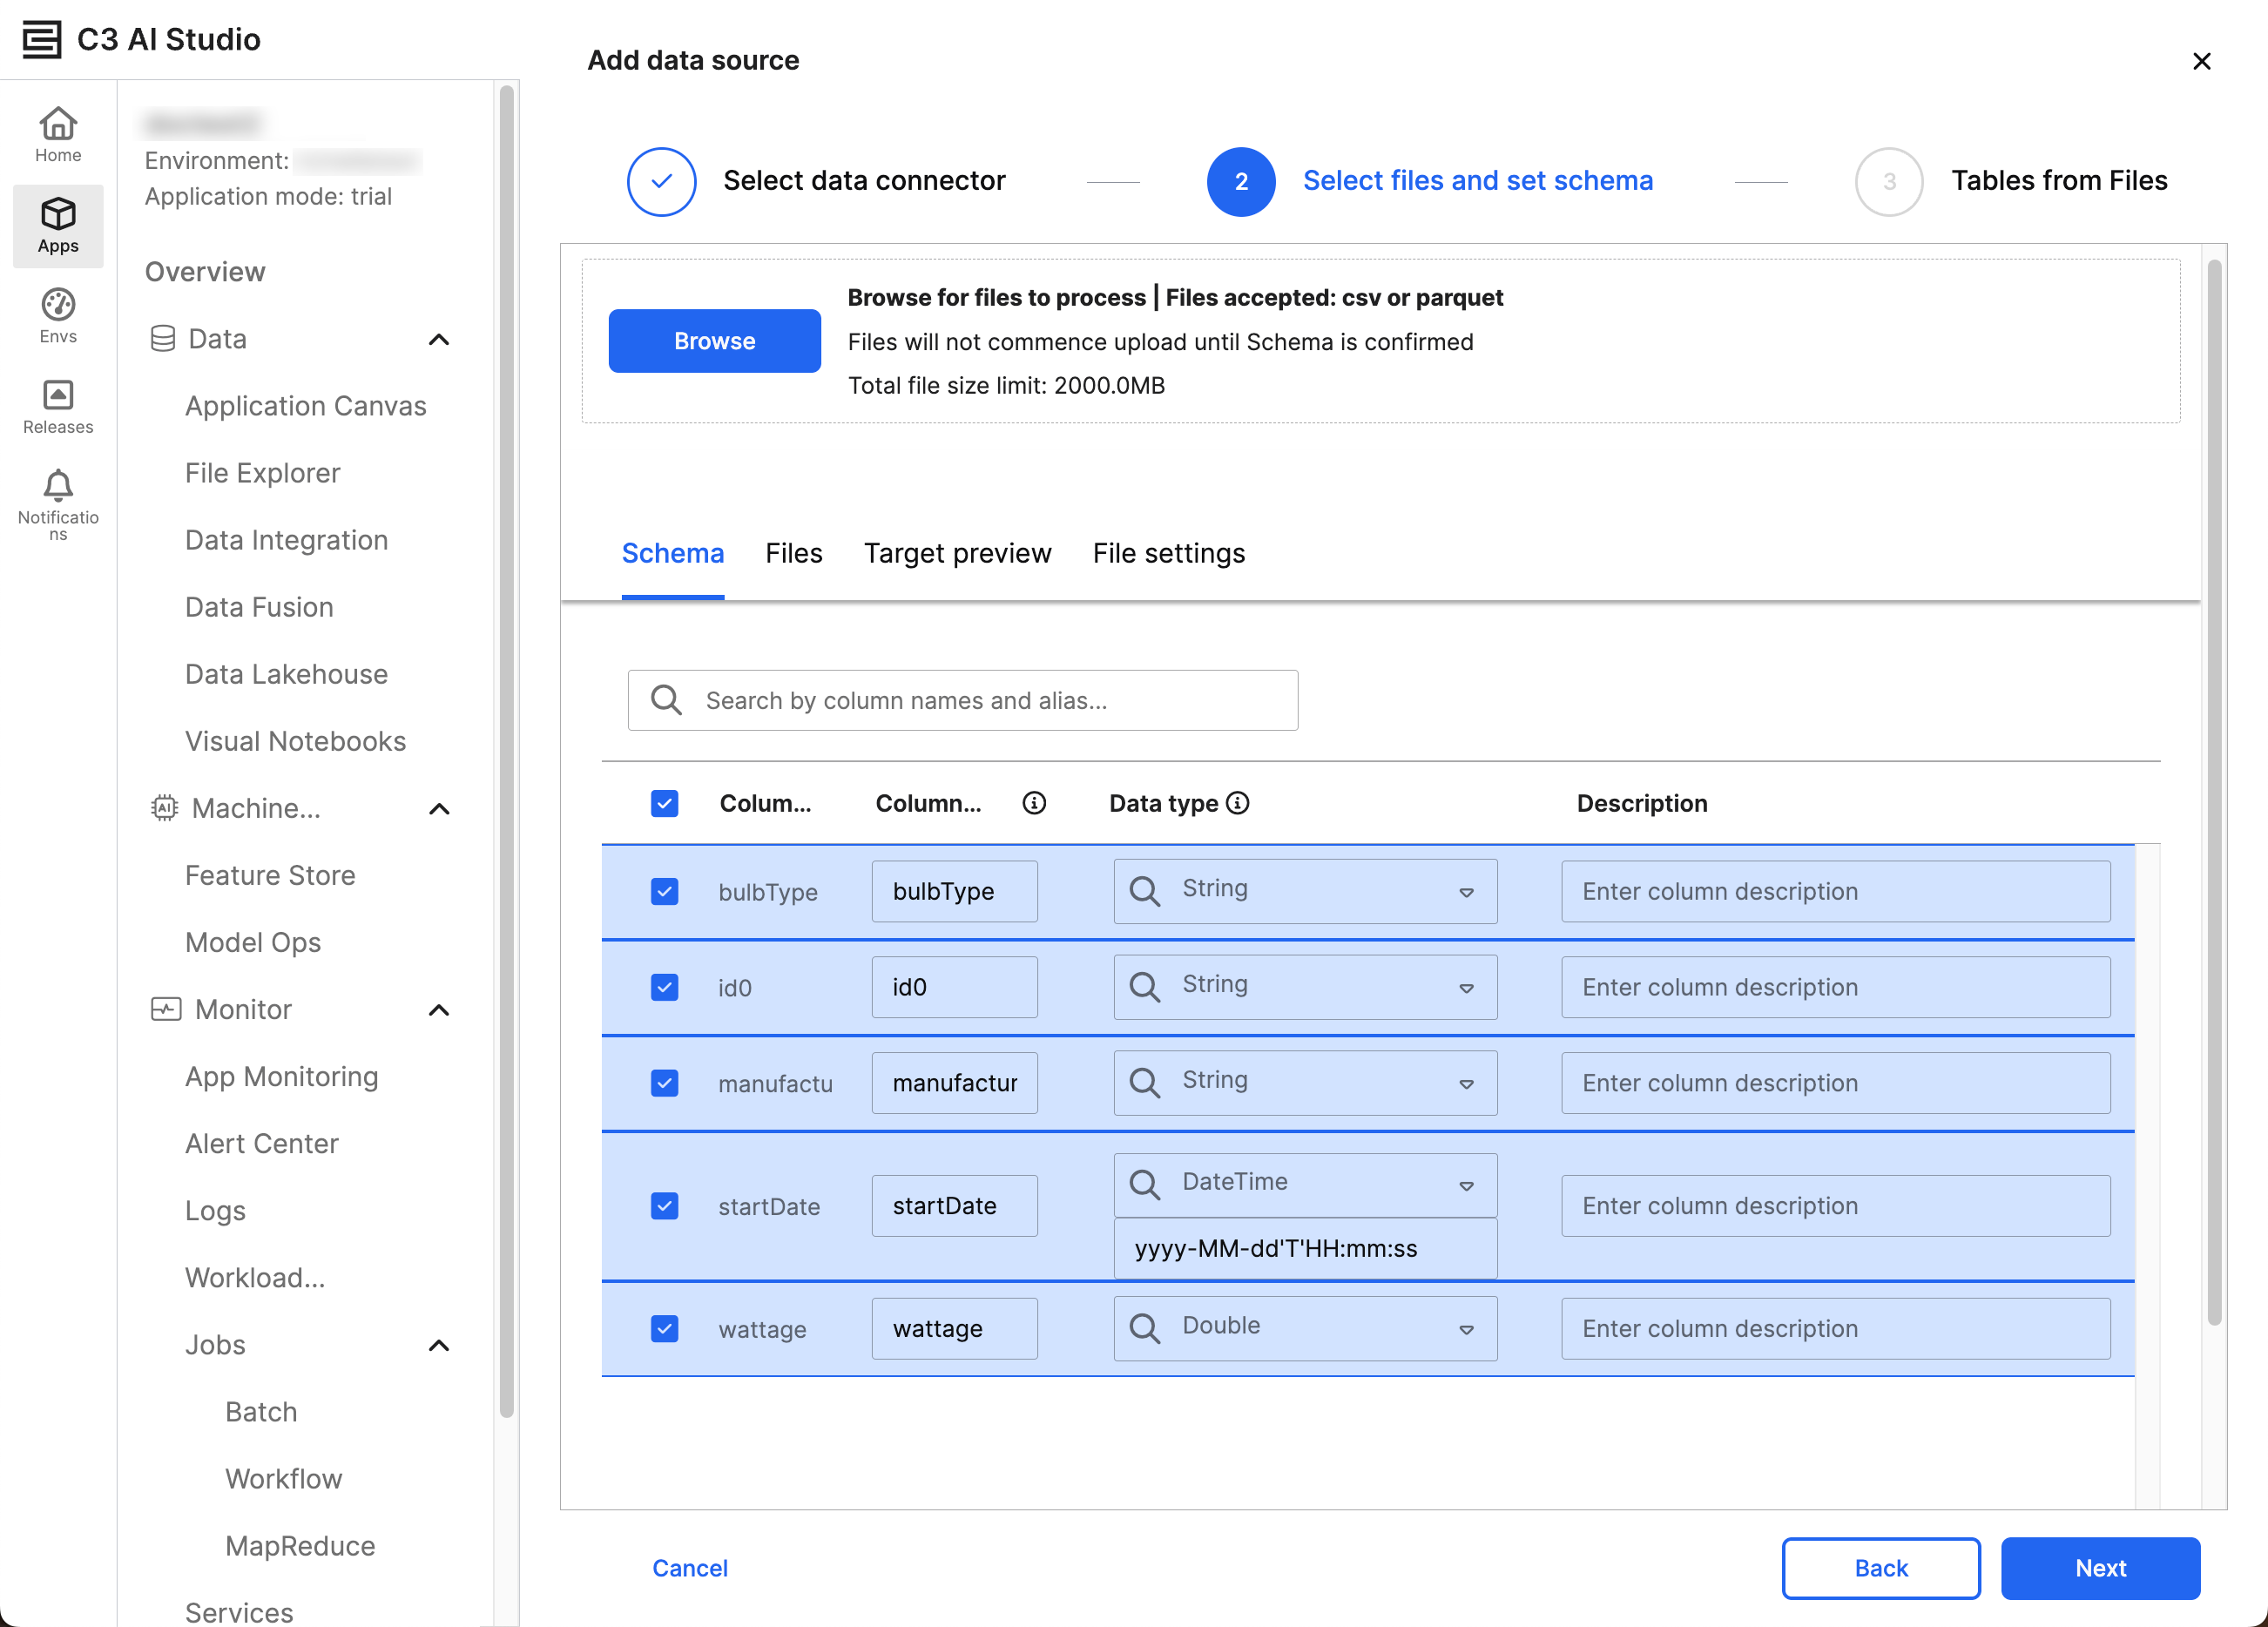
Select files
You should now be in the Select files and set schema step of the Add data source workflow. Either drag files into the upload box or select Browse to open your local file system. If needed, you can select multiple files with the same schema to upload into the same table. The files upload after you set the schema.
When uploading multiple files for the same entity, ensure the following is true about your files:
- Files must have the same headers — If the headers of the files do not match, Data Fusion accepts the schema of the first listed file. Subsequent files that do not match the schema trigger warnings and errors during the upload process.
- Data types must match — If the data types in some entries do not match the schema, Data Fusion replaces the values with
Null. - Use the same file properties — Delimiters must match from file to file.
Set schema
With the files selected for upload, review and update the following tabs as needed:
- Schema
- Files
- Target preview
- File settings
After you confirm the data for all four tabs, select Next.
Review the following sections for more information about each tab.
Schema
You must check the box of every field you need in the schema. Upon checking a field, you can modify the Column alias, Data type, and Description for your target Type.
The Data type must match across all files selected for the table. Ensure the inferred types match your expectations. If they do not, select the dropdown menu to pick the correct data type for each field.
Files
This tab tells you the status of your files and surfaces relevant error messages. Review all selected files. You can delete files by hovering over the row and selecting the remove (trash can) icon.
Target preview
Use this tab to compare your schema to the first 20 entries in your CSV. By using this tab, you can ensure the accuracy of the columns and values.
File settings
Select the delimiters, quote type, and escape character for all your CSVs. After validating the content, select Schema to give column aliases, confirm data types, or add descriptions to the fields.
Review and save files
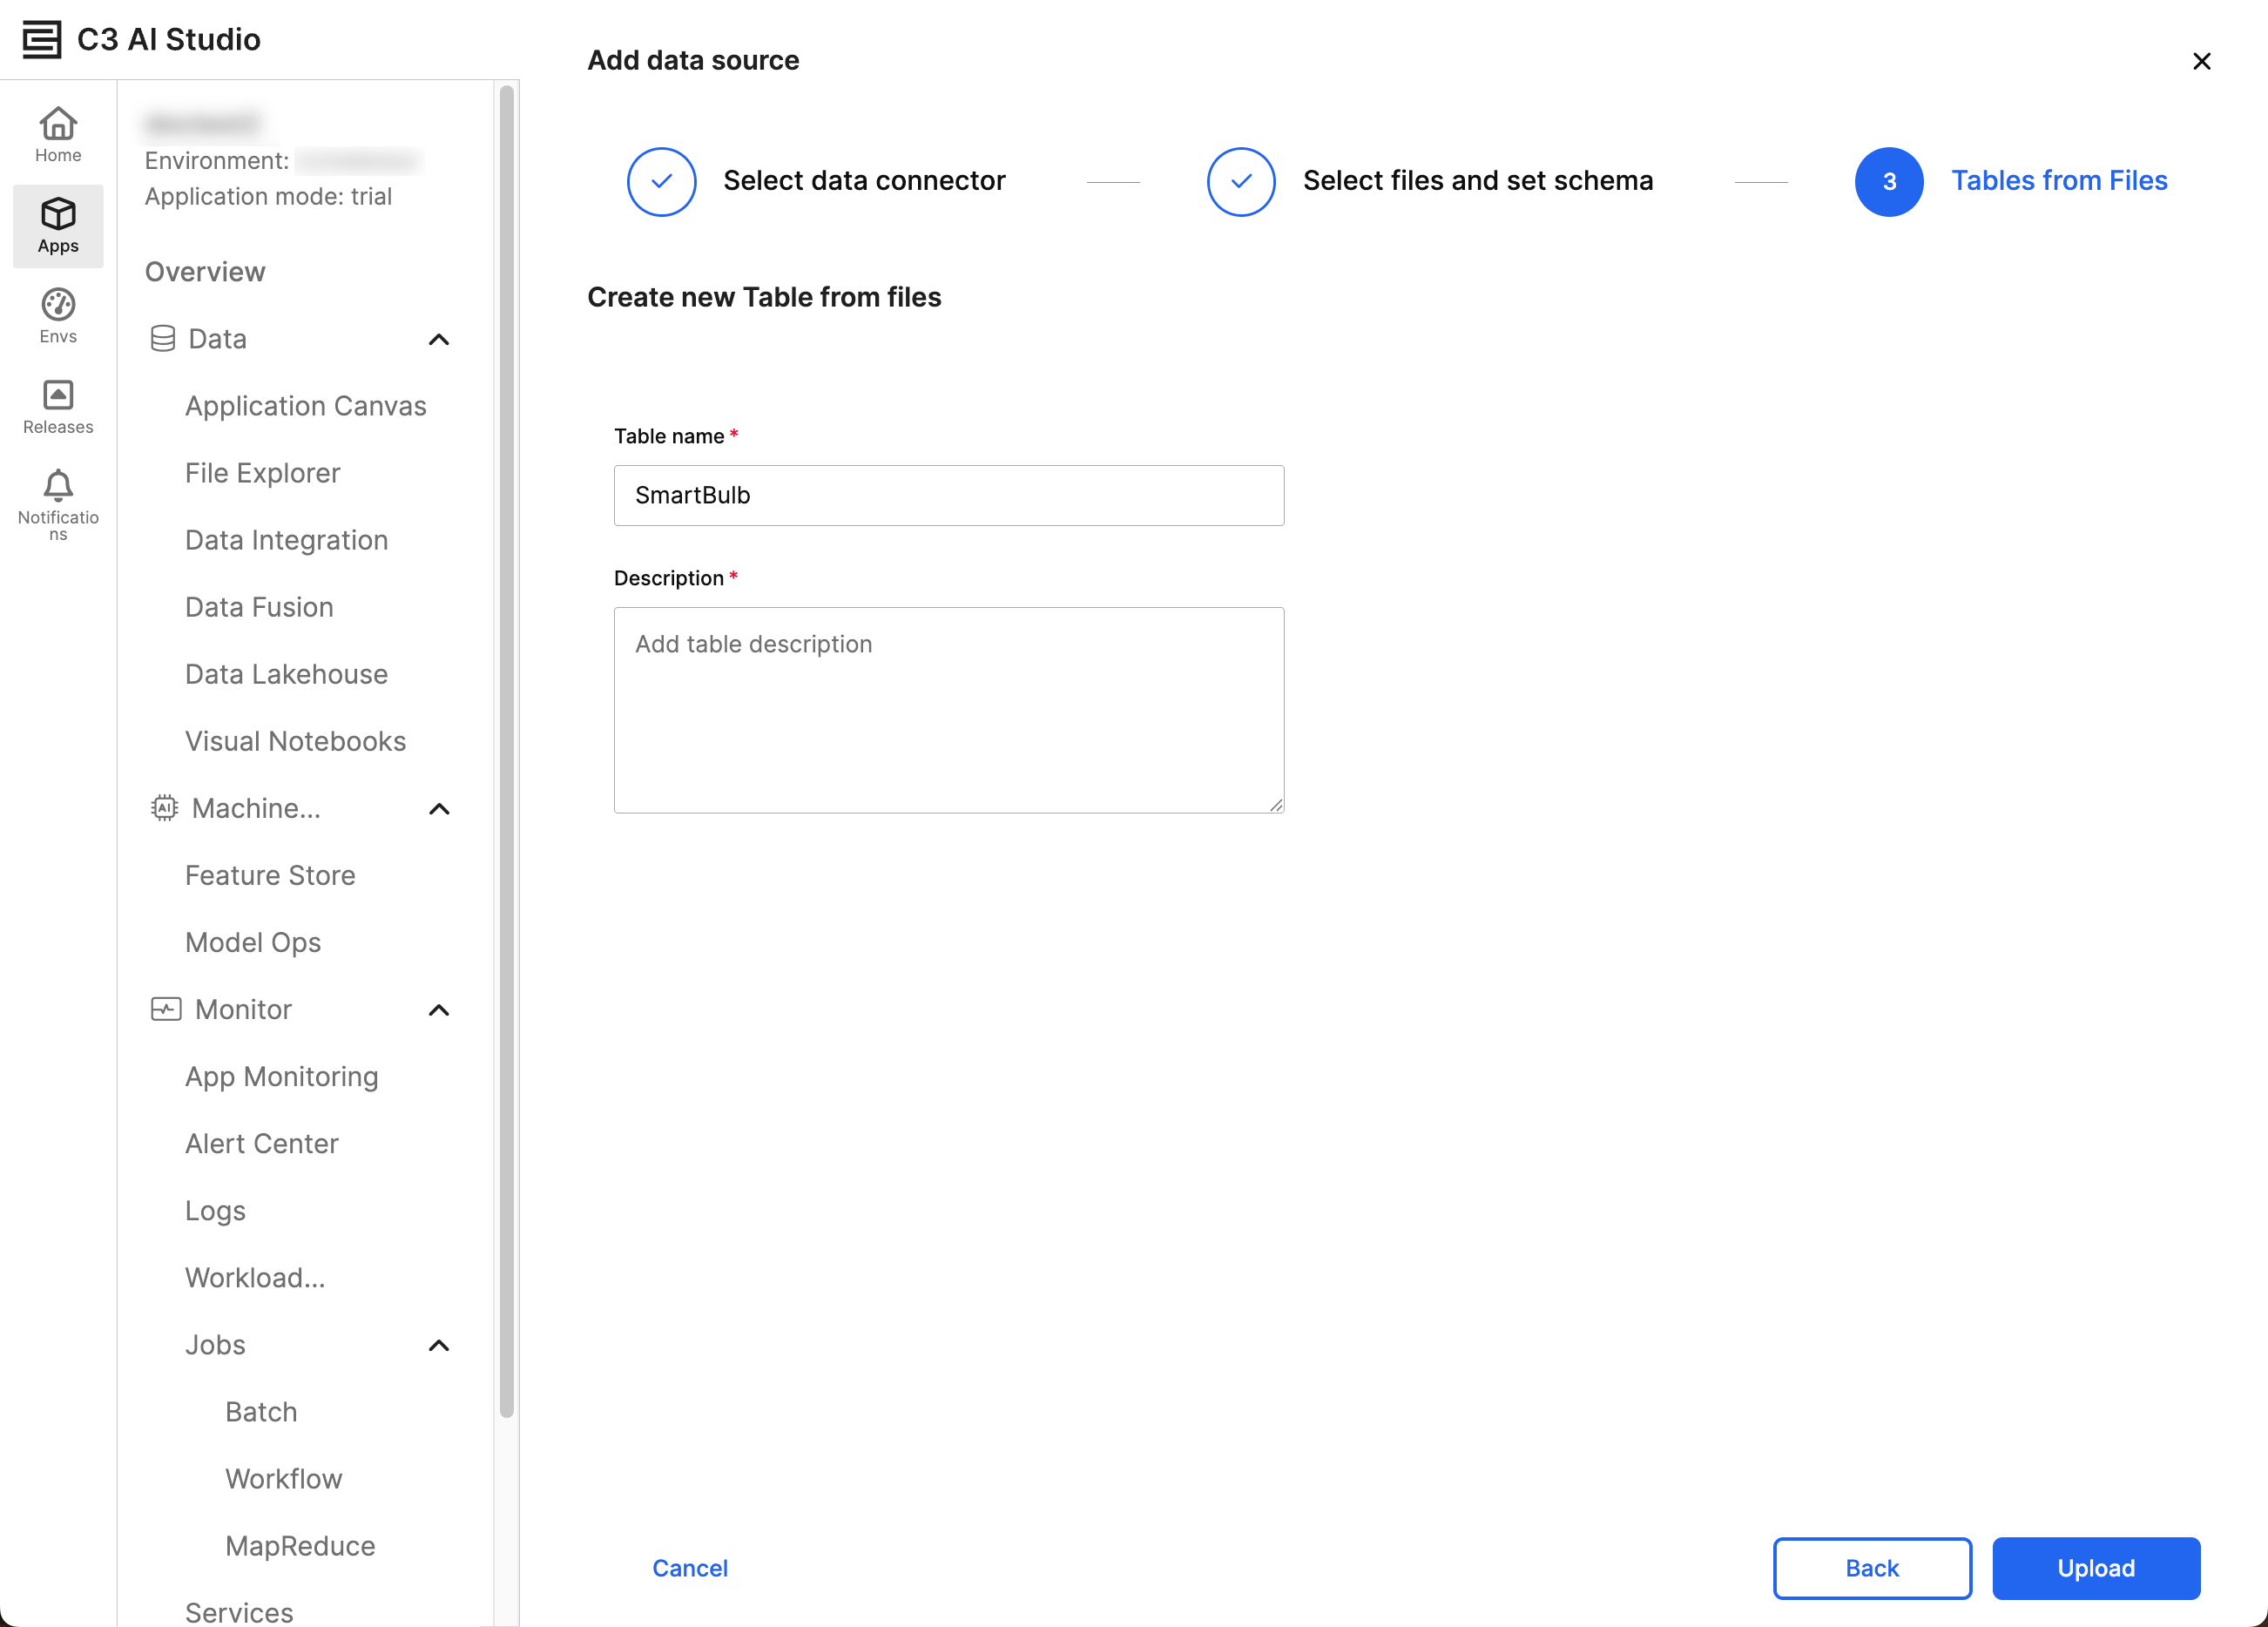
In the Tables from Files workflow stage, enter the Table name and Description. Select Upload to start the upload process for your files. Data Fusion notifies you when the files complete their upload.
You can verify the new C3 Entity by selecting the table name from Data sources.
Modify fields post-upload
After uploading your files, you can preview and edit the schemas for each table. In Data sources, select Tables from Files and the table you would like to review.
The Preview, Schema, and Files tabs allow you to review and modify the data in the following ways:
- Preview — Review the schema and the first 20 rows of data.
- Schema — Review the schema and modify the Column alias or Description fields.
- Files — Delete files or upload more files for this schema.
If you delete files in Data Fusion, you delete all underlying data from C3 databases. Only delete files after confirming you want to delete the data from the application as a whole.
Troubleshooting
If you run into errors while uploading files, review the possible reasons for errors:
- File size should not exceed the platform's limit of 2GB.
- You can only process CSV or Parquet files, and each upload batch must contain the same file extension.
- If one or more column names include a number added by Data Fusion, do not enter an alias that removes the number. Data Fusion adds this number to avoid name space collisions.
- Some or all file column headers do not match the table schema. Update the files to match the schema.