Database Configuration Example — Snowflake
Data Fusion is in Beta. Please contact your C3 AI representative to enable this feature.
Configure the Snowflake data connector in the C3 Agentic AI Platform to securely access and integrate external data from your Snowflake data warehouse. Once successfully set up and tested, this data connection maps Snowflake data to application Entity Types, enabling seamless transformation, analysis, and integration into workflows within the C3 AI ecosystem.
When you create C3 Entity Types from an external database such as Snowflake or Postgres, the resulting entities are External Entity Types. External Entity Types point to data in the source database rather than duplicating the data in C3 Agentic AI Platform. This configuration ensures data stays fresh.
Prerequisites
Before starting, ensure that you have the following:
- A running application in C3 AI Studio
- A Snowflake account with the necessary user credentials
- The host name and port of your Snowflake instance
- Information about the connecting warehouse and database
- Permissions to set credentials in C3 Agentic AI Platform (AppAdmin by default)
Although this tutorial follows the process of connecting and formatting tables from Snowflake, you can use the steps to connect any database or data warehouse listed in Add data source. Connector details for different sources vary.
Configure a Snowflake data connector
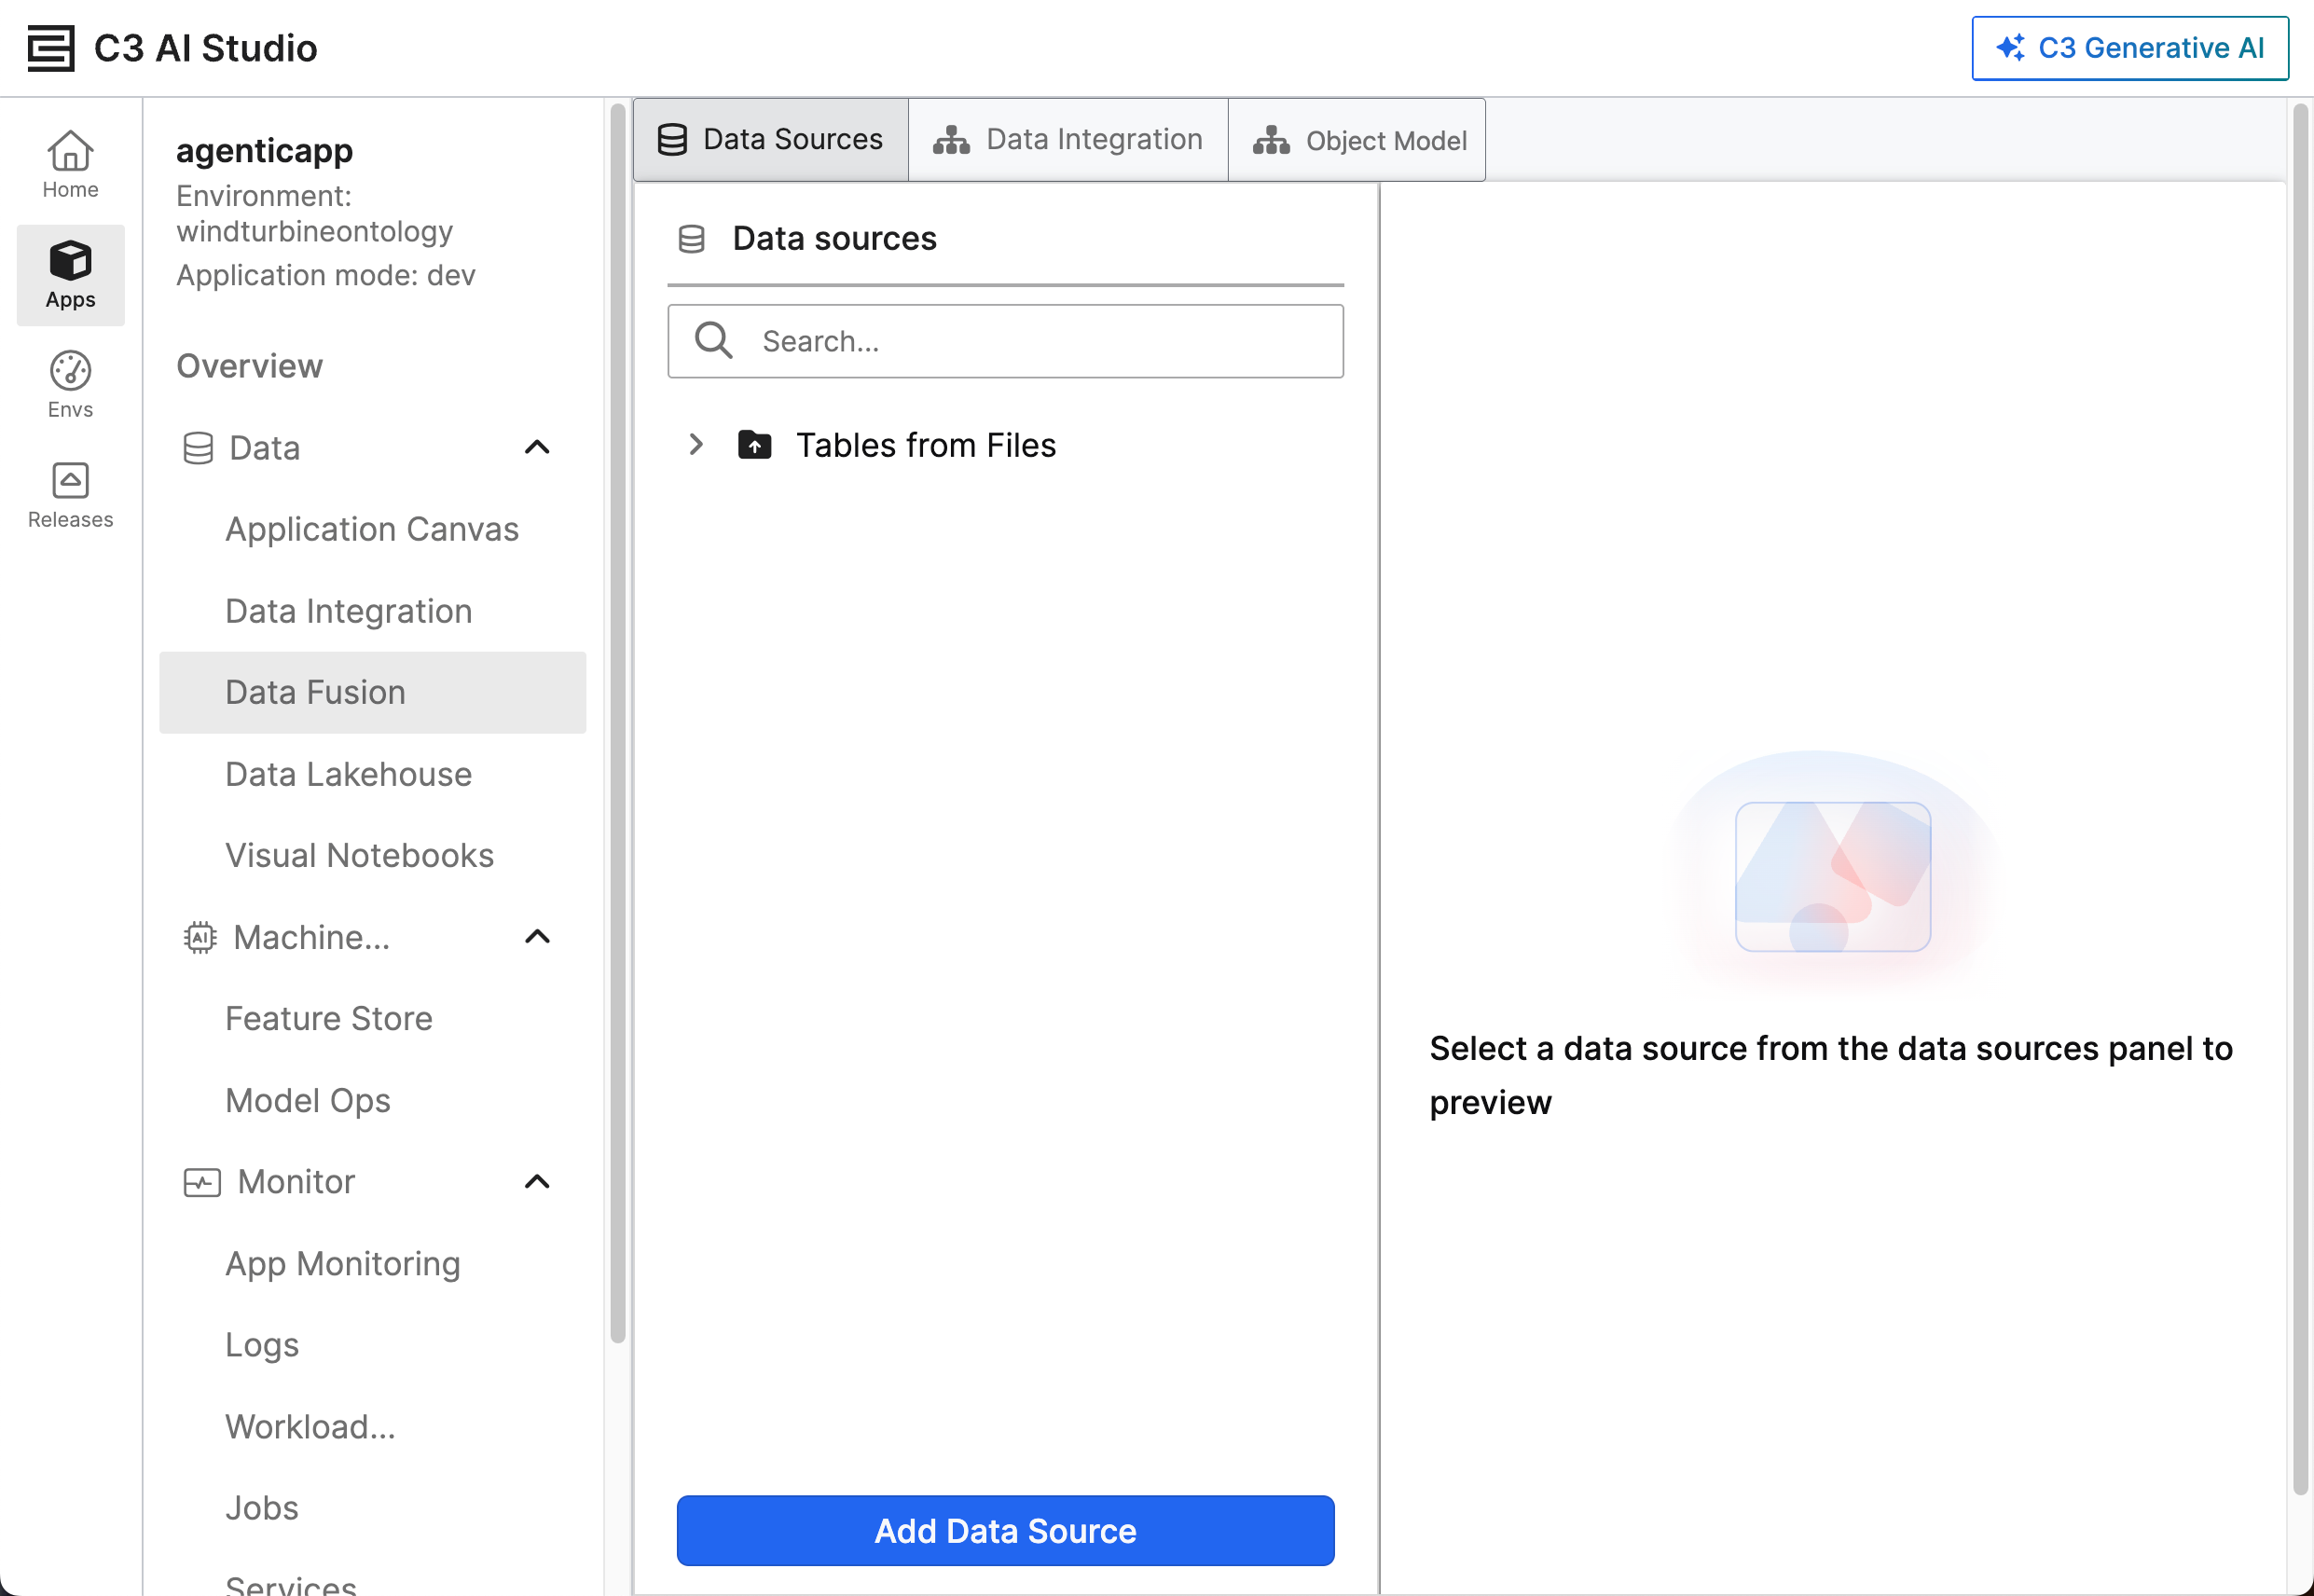
First navigate to the Data Fusion tab in the studio.
- Open your application in C3 AI Studio and select Data Fusion.
- In the Data Sources panel on the left side of the screen, select Add Data Source. The Add Data Source interface opens, displaying a list of supported data connectors.
- Select Snowflake from the list. This selection opens an interface to configure the Snowflake connector.
Enter the following connector details:
- Name — A unique name for the data connector
- Description — An explanation of the connector's purpose
- Host — The host name of your Snowflake instance, such as
xxxxxx.snowflakecomputing.com - Port — The port number for Snowflake (443 by default)
- User and Password — Your Snowflake credentials
- Warehouse — The Snowflake warehouse for query processing
- Database — The name of the Snowflake database for query processing
As of version 8.8, you can secure your Postgres connections using SSL. To successfully configure SSL, you must separate the Client Certificate and Client Key files.
Before finalizing the connection, you can Test Connection. If the test fails, review your configuration for errors in the credentials or host details. Once the connection is verified, select Save to finalize the configuration.
After successfully configuring the Snowflake data connector, you can do the following:
- Preview and Select the relevant tables from your data source.
- Modify the alias.
- Add meaningful descriptions to clarify how you're using data.
Preview and select tables from a data source
From the ellipsis menu, select Update table selections. The Add data source pane pops up.
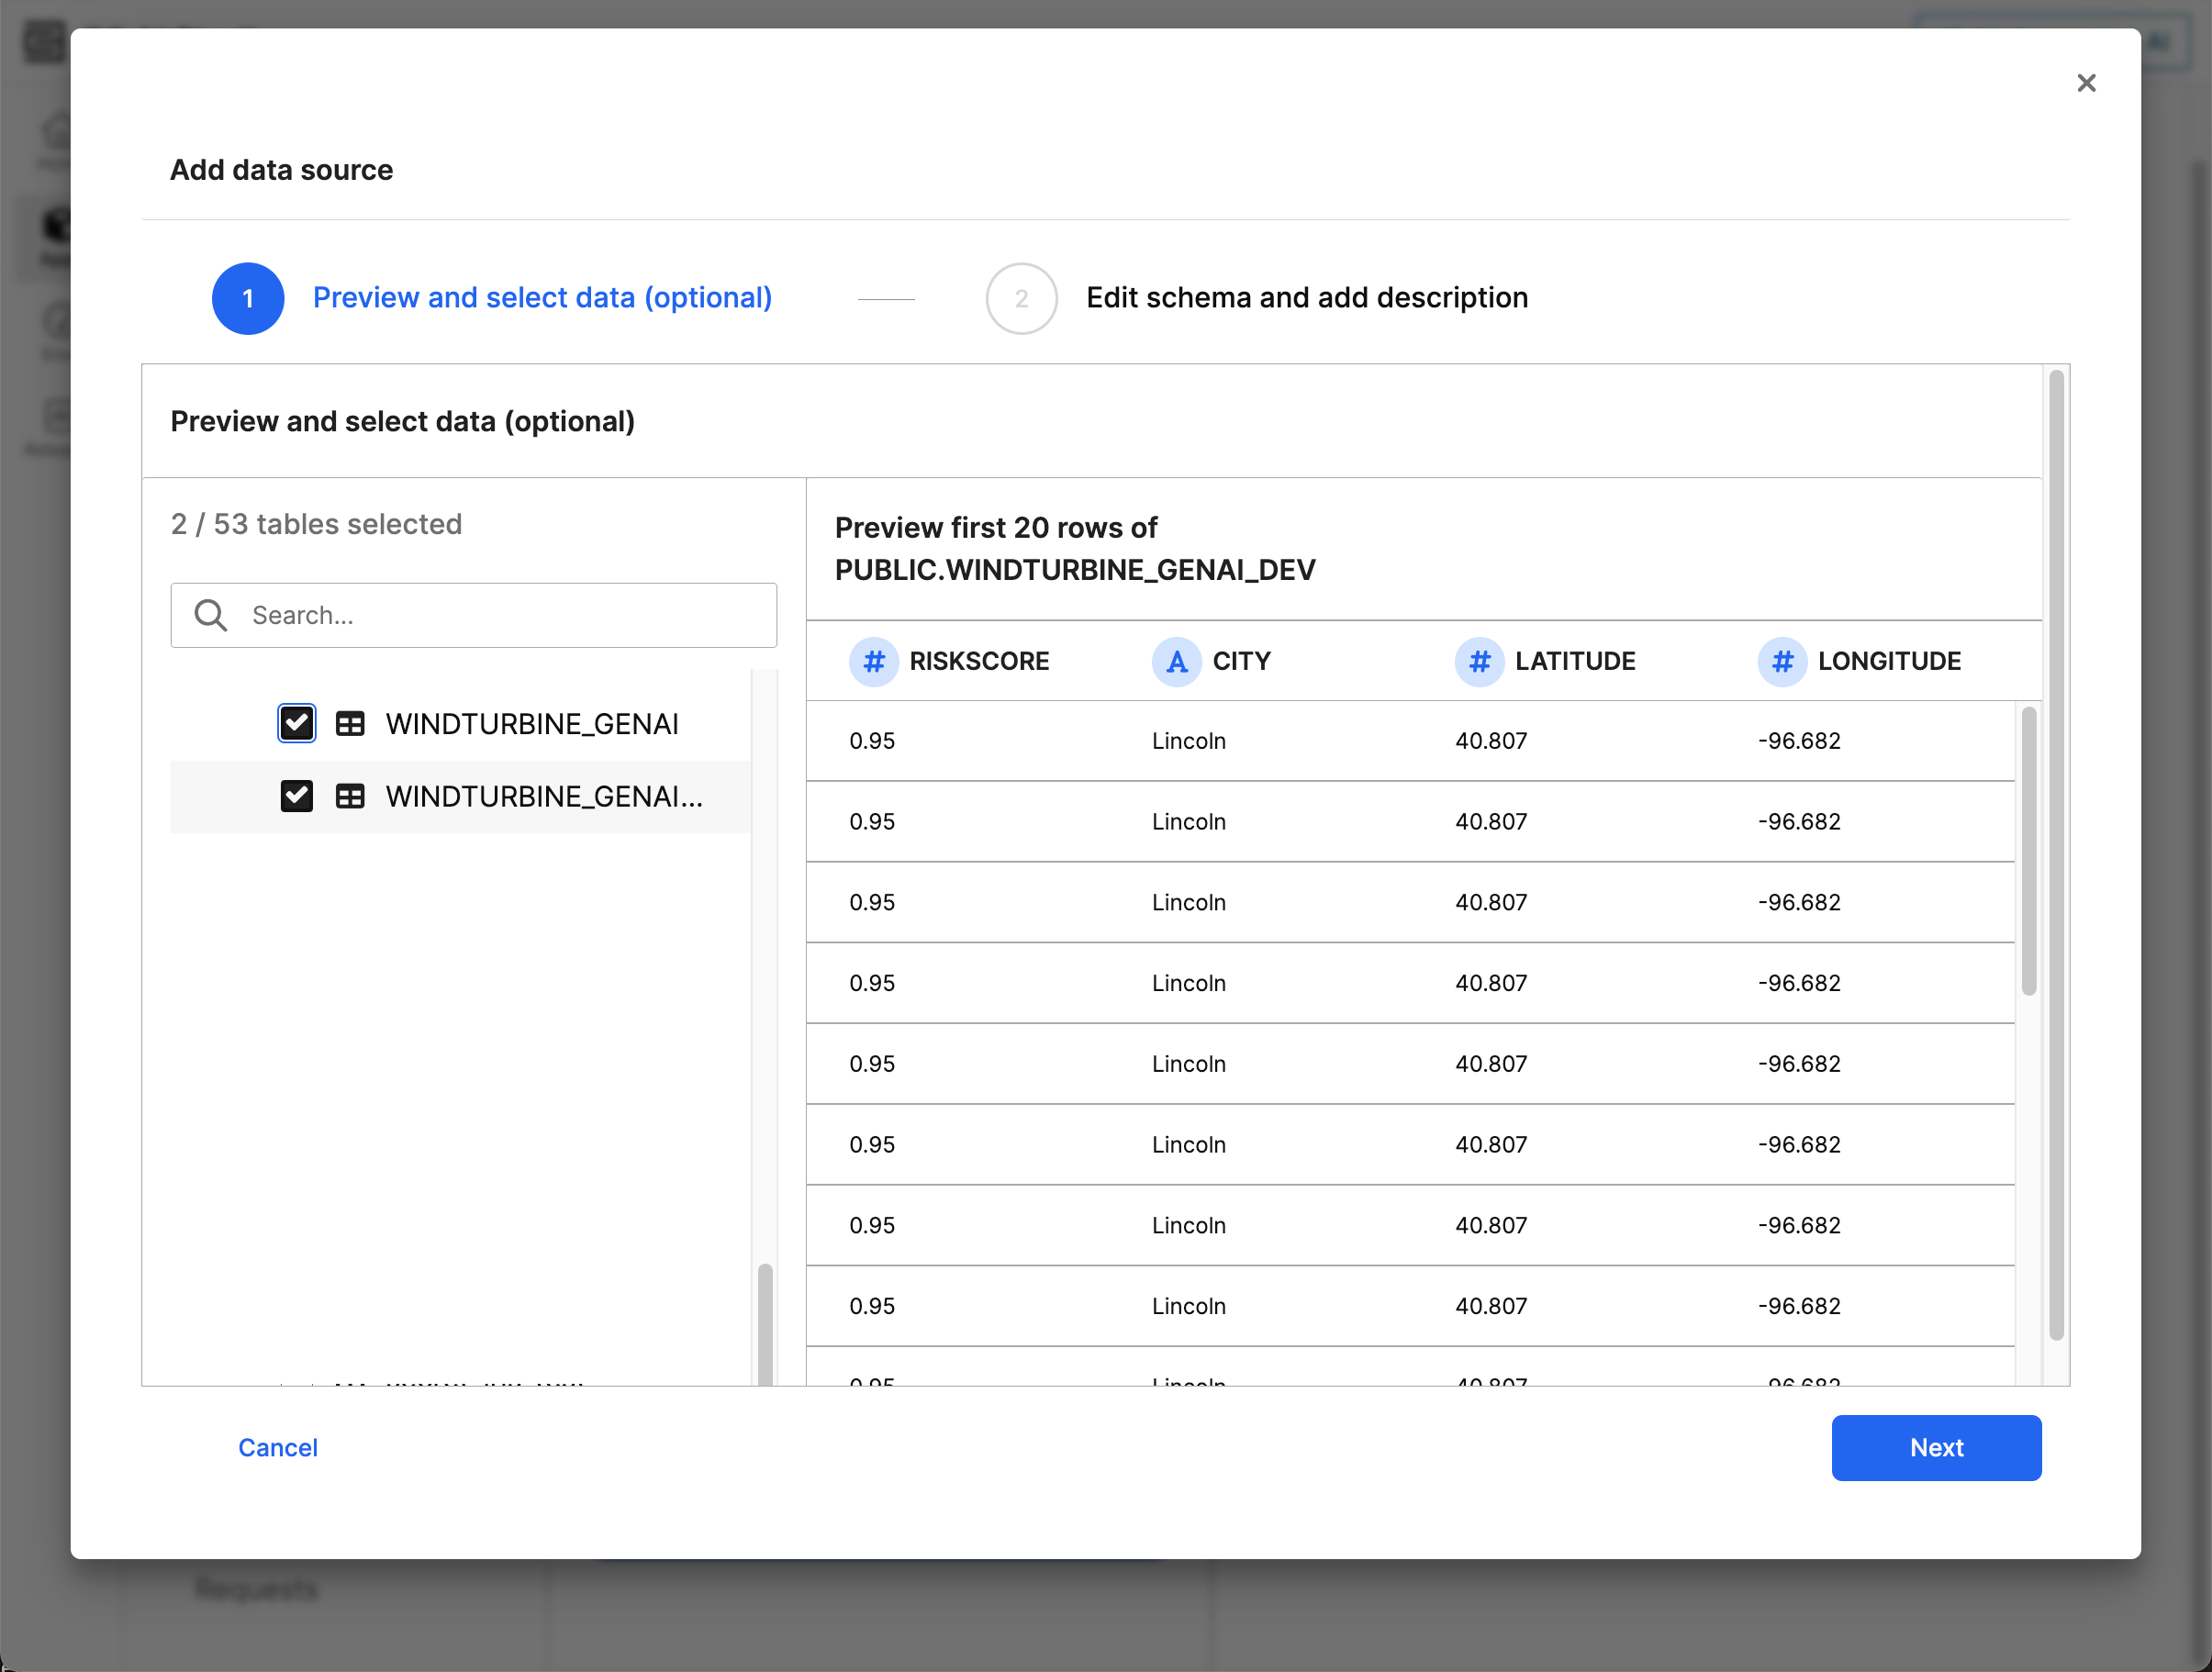
The left list shows available tables in the connected database, organized by schema. Check the box of the table or tables you'd like to preview. Select multiple tables to integrate simultaneously. Each table maps to one schema; you cannot select multiple tables to map to the same schema.
Data Fusion surfaces the first 20 rows of data in the preview pane for you to verify the table content. If you're satisfied with the content, select Next.
After previewing and selecting tables from your data source, you can refine the structure of your data using Edit the inferred schema for the table(s) you select.
Edit the inferred schema for the selected table(s)
In the Edit Schema and Add Description step, review the selected table(s).
- Column name — Ensure the column names match your expectations. The column name corresponds to the name in the database.
- Column alias — By default, the column name becomes the field name in the C3 AI Entity. If you would like the column to have a different name in your entity, change it using this field.
- Data type — Verify data types for each column (such as a string or an int).
- Description — Add details for each column to provide context for its data. If you made a valid selection, a green checkmark appears next to the corresponding tables.
You can modify the the Column alias and Description to make the data more understandable in the context of your C3 application.
Follow the steps in Preview and select tables from a data source to modify your tables after completing your initial selection.
After creation, you can perform the following actions in the Data Sources tab:
- Update connection properties, update table selections, and delete connectors by selecting the ellipsis menu beside the database.
- View and tables by opening the dropdown menu for the database and selecting the appropriate table.
- Preview data from the data source by selecting the name of the table.
- Select new tables or remove tables by selecting Update table selections from the ellipsis menu.