Write tests with Jasmine
The C3 Agentic AI Platform offers out of the box support for writing tests using the Jasmine testing framework. This allows you to write unit and integration tests for your applications.
The testtools package is a dependency to run the tests below, specifically related to the TestApi Type.
Refer to Package Management Overview for more information about the directory structure of a package, including details about the test folder.
Jasmine directory layout
Tests are an integral part of your application package. You can add a test file to the directory that corresponds to the framework you want to use to run the test.
To write tests using the Jasmine testing framework, create a new JavaScript test file in the test/js-rhino/{category} directory.
Below you can find an example directory structure for a package that includes a unit test. The unit test below leverages the Jasmine testing framework.
starterPackage
    |-- starterPackage.c3pkg.json
    |-- src
    |    |-- HelloWorld.c3typ
    |    |-- HelloWorld.js
    |
    |-- test
        |-- js-rhino
               |-- unit
                    |-- test_HelloWorld_utilityFunctions.js
Each JavaScript file contains a test suite. Tests can be organized by category. These are the categories available:
| Test Category | Description |
|---|---|
functional | Set of tests that exercise the application end-to-end. |
integration | Test that two or more systems work as expected. |
performance | Test the performance of APIs and UIs. |
reliability | Test the reliability of APIs. |
scalability | Test how APIs scale with load. |
security | Test the security aspects of the application. |
unit | Unit tests for logic that don't allow systems to communicate. |
Test categories exist to help you keep tests organized, with one exception: Tests added to test/{runner}/unit fail if the test logic tries to persist data in the database.
Categorizing tests helps you create different kinds of scenarios that are stable and do not pollute the testing environment.
The code for the remaining files are below:
The package file.
starterPackage.c3pkg.json
{
  "name": "starterPackage",
  "dependencies": {
     "testtools": "~8.4",
  },
  "description": "A simple starter package."
}
The only Type in this package.
HelloWorld.c3typ
type HelloWorld {
  /**
   * Method that accepts a string and returns the string
   */
  helloWorld: function(input: string) : string js-rhino
}
HelloWorld.js
/**
 * Accept a string and return the string. This is the method we are going to include in the test.
 *
 * @param input - A string
 * @returns {*}
 */
function helloWorld(input) {
    return input;
}
The test file is detailed in the following sections.
Jasmine test file naming convention
Name test files added to the test/{runner}/{category} directory using the test_{Type}.{extension} format. This convention indicates what area the test exercises, and ensures the test runner detects your test files.
The example test below is called, test_HelloWorld_utilityFunctions.js.
Write Jasmine tests
Jasmine provides the global built-in Jasmine functions beforeAll, beforeEach, afterAll, and afterEach.
Leveraging these functions keeps your code more organized and readable. For example:
Any code in
beforeAllis executed only one time before subsequentitblocks, or before all the specs in describe are run.Any code in
beforeEachis executed before each subsequentitblock, or before each spec in thedescribein whichitis called.
When writing tests with the Jasmine framework you define test suites which allow you to group related test cases together, and expectations, which allow you to implement the testing logic:
var filename = "test_HelloWorld_utilityFunctions";

describe(filename, function() {
    let variable;

    // beforeAll runs once, before any of the tests in the describe block are run
    beforeAll(function() {
        // Create a TestApi context
        this.ctx = TestApi.createContext(filename);
        //  Wait for all asynchronous actions (if any) to complete
        TestApi.waitForSetup(this.ctx, null, 1, 120);
        //
        this.helloWorldResponse = HelloWorld.helloWorld("TEST");
        variable = 0;
    });

    // beforeEach runs before each individual test
    beforeEach(function() {
        variable += 1;
    });

    // afterEach runs after each individual test
    afterEach(function() {
        // ...
    });

    // afterAll runs once, after all tests in the describe block are finished
    afterAll(function() {
        // Remove the objects tracked by context and any matched by teardown filters
        TestApi.teardown(this.ctx);
    });

    // Here's a test case
    it('should increment the variable by 1', function() {
        expect(variable).toEqual(1);
    });

    // Here's another test case
    it('should increment the variable again by 1', function() {
        expect(variable).toEqual(2);
    });
});
An explanation of the above test suite:
describe: Groups related test cases into a test suite. Everything inside this block is part of the test suite.beforeAll: Runs one time before any of the test cases in the describe block. In the above test example,beforeAllinitializes a variable with the value0.Any code to create instances of Types, you should call
TestApi.waitForSetupin the topmostbeforeAllblock.JavaScript// beforeAll runs once, before any of the tests in the describe block are run beforeAll(function() { // Create a TestApi context this.ctx = TestApi.createContext(filename); // Wait for all asynchronous actions (if any) to complete TestApi.waitForSetup(this.ctx, null, 1, 120); // this.helloWorldResponse = HelloWorld.helloWorld("TEST"); variable = 0; });
beforeEach: Runs before each test case. Here,beforeEachincrements the variable by1before every test.afterEach: Runs after each test case. In this code, it just prints a message, but it's often used for cleaning up after tests.afterAll: Runs one time after all the test cases in the describe block. Here, it prints a message indicating that all tests are complete.Code to close the session, tear down the TestApi, or remove seed for instance, should be called in the outermost
afterAllblock.JavaScriptafterAll(function () { // Remove the objects tracked by context and any matched by teardown filters TestApi.teardown(this.ctx); });it: Contains the individual test cases. In the code above, there are two test cases that test the increment of the variable.JavaScriptit("HelloWorld.helloWorld('TEST') should return a string", function() { // Check if result is a string expect(this.helloWorldResponse).toEqual("TEST"); }); // Here's a test case it('should increment the variable by +1', function() { expect(variable).toEqual(2); }); // Here's another test case it('should increment the variable again by +1', function() { expect(variable).toEqual(3); }); it('should define TestApi context', function () { expect(this.ctx).toBeDefined(); });
Use the TestApi utility methods
The TestApi Type provides utility methods that are helpful when writing maintainable unit and integration tests, like impersonating users or tracking database inserts so those entries are automatically deleted at the end of the test run to avoid polluting the testing environment.
With TestApi you start by creating an execution context, and then insert data to the database using TestApi.createBatchEntity(). All database insertions are tracked in the execution context, so at the end of the test run you can use TestApi.teardown() to remove all entries from the database.
The execution context can only track database inserts if you use the methods provided in TestApi, so if as part of your test you invoke logic that persists data in the database, you should take care to manually track and delete that data. If you forget to do this, your testing environment is not reset to its original state, which leads to unstable tests that are hard to debug and troubleshoot.
This example below is a more complex and shows how you can leverage the TestApi to track persistable data:
// test_Fixture.js
var filename = 'test_Fixture';
describe(filename, function () {
    beforeAll(function () {
        this.ctx = TestApi.createContext(filename);
        this.fixtures = TestApi.createBatchEntity(this.ctx, 'Fixture', [{}, {}]);
        this.smartBulbs = TestApi.createBatchEntity(this.ctx, 'SmartBulb', [{}, {}, {}]);
        this.smartBulbToFixtureRelations = TestApi.createBatchEntity(this.ctx, 'SmartBulbToFixtureRelation', [{
            from: this.smartBulbs[0],
            to: this.fixtures[0],
            start: '2018-01-01',
            end: '2018-02-01',
        }, {
            from: this.smartBulbs[1],
            to: this.fixtures[0],
            start: '2018-05-01',
        }, {
            from: this.smartBulbs[2],
            to: this.fixtures[1],
            start: '2018-06-01',
            end: '2018-07-01',
        }, {
            from: this.smartBulbs[0],
            to: this.fixtures[1],
            start: '2018-04-01',
            end: '2018-05-01',
        }]);
        TestApi.waitForSetup(this.ctx, null, 1, 30);
    });

    afterAll(function () {
        TestApi.teardown(this.ctx);
    });

    it('verify Fixture.currentBulb', function () {
        var fixture = Fixture.get(this.fixtures[0], 'currentBulb.id');
        expect(fixture.currentBulb.id).toEqual(this.smartBulbs[1]);
        fixture = Fixture.get(this.fixtures[1], 'currentBulb');
        expect(fixture.currentBulb).toBeUndefined();
    });
});
Note how:
- In
beforeAll(), the context is set and instances are created. - The test validates that the fields are populated.
- In
afterAll(), instances created in this test context are removed.
Impersonate accounts
When a method is executed in the server, that method is executed with the permissions associated with the user making the request. You can impersonate a specific user account by invoking one of the three methods available in TestRunner as part of your testing logic:
- TestRunner#asUser allows executing logic while impersonating a specific user.
- TestRunner#asRole allows executing logic with the permissions of a specific role.
Do not use User.impersonate in your testing logic, since it only impersonates a user during the duration of a single server request and your test suite can make multiple requests. This can lead to unstable tests that are hard to troubleshoot.
Run tests from VS Code
Using the VS Code extension, you can run Jasmine tests directly from your editor without having to provision the application package. This allows you to write and fix tests faster.
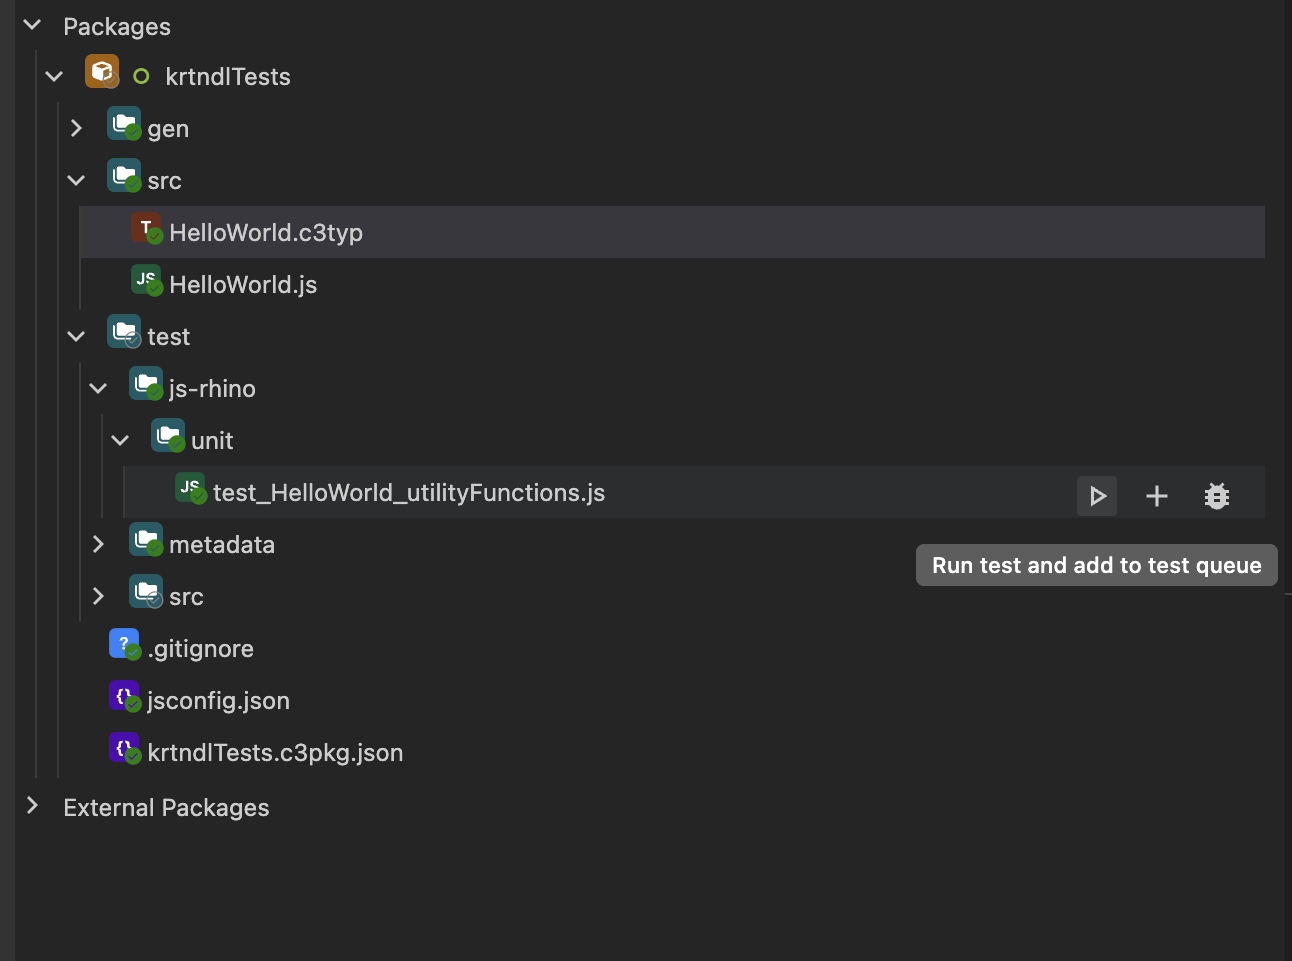
To start, open the test file from your provisioned package in Visual Studio Code. In this example you can use test_HelloWorld_utilityFunctions.js, which is located in the starterPackage package. Expand the test folder and hover over the test file. The button to execute the test is now visible:
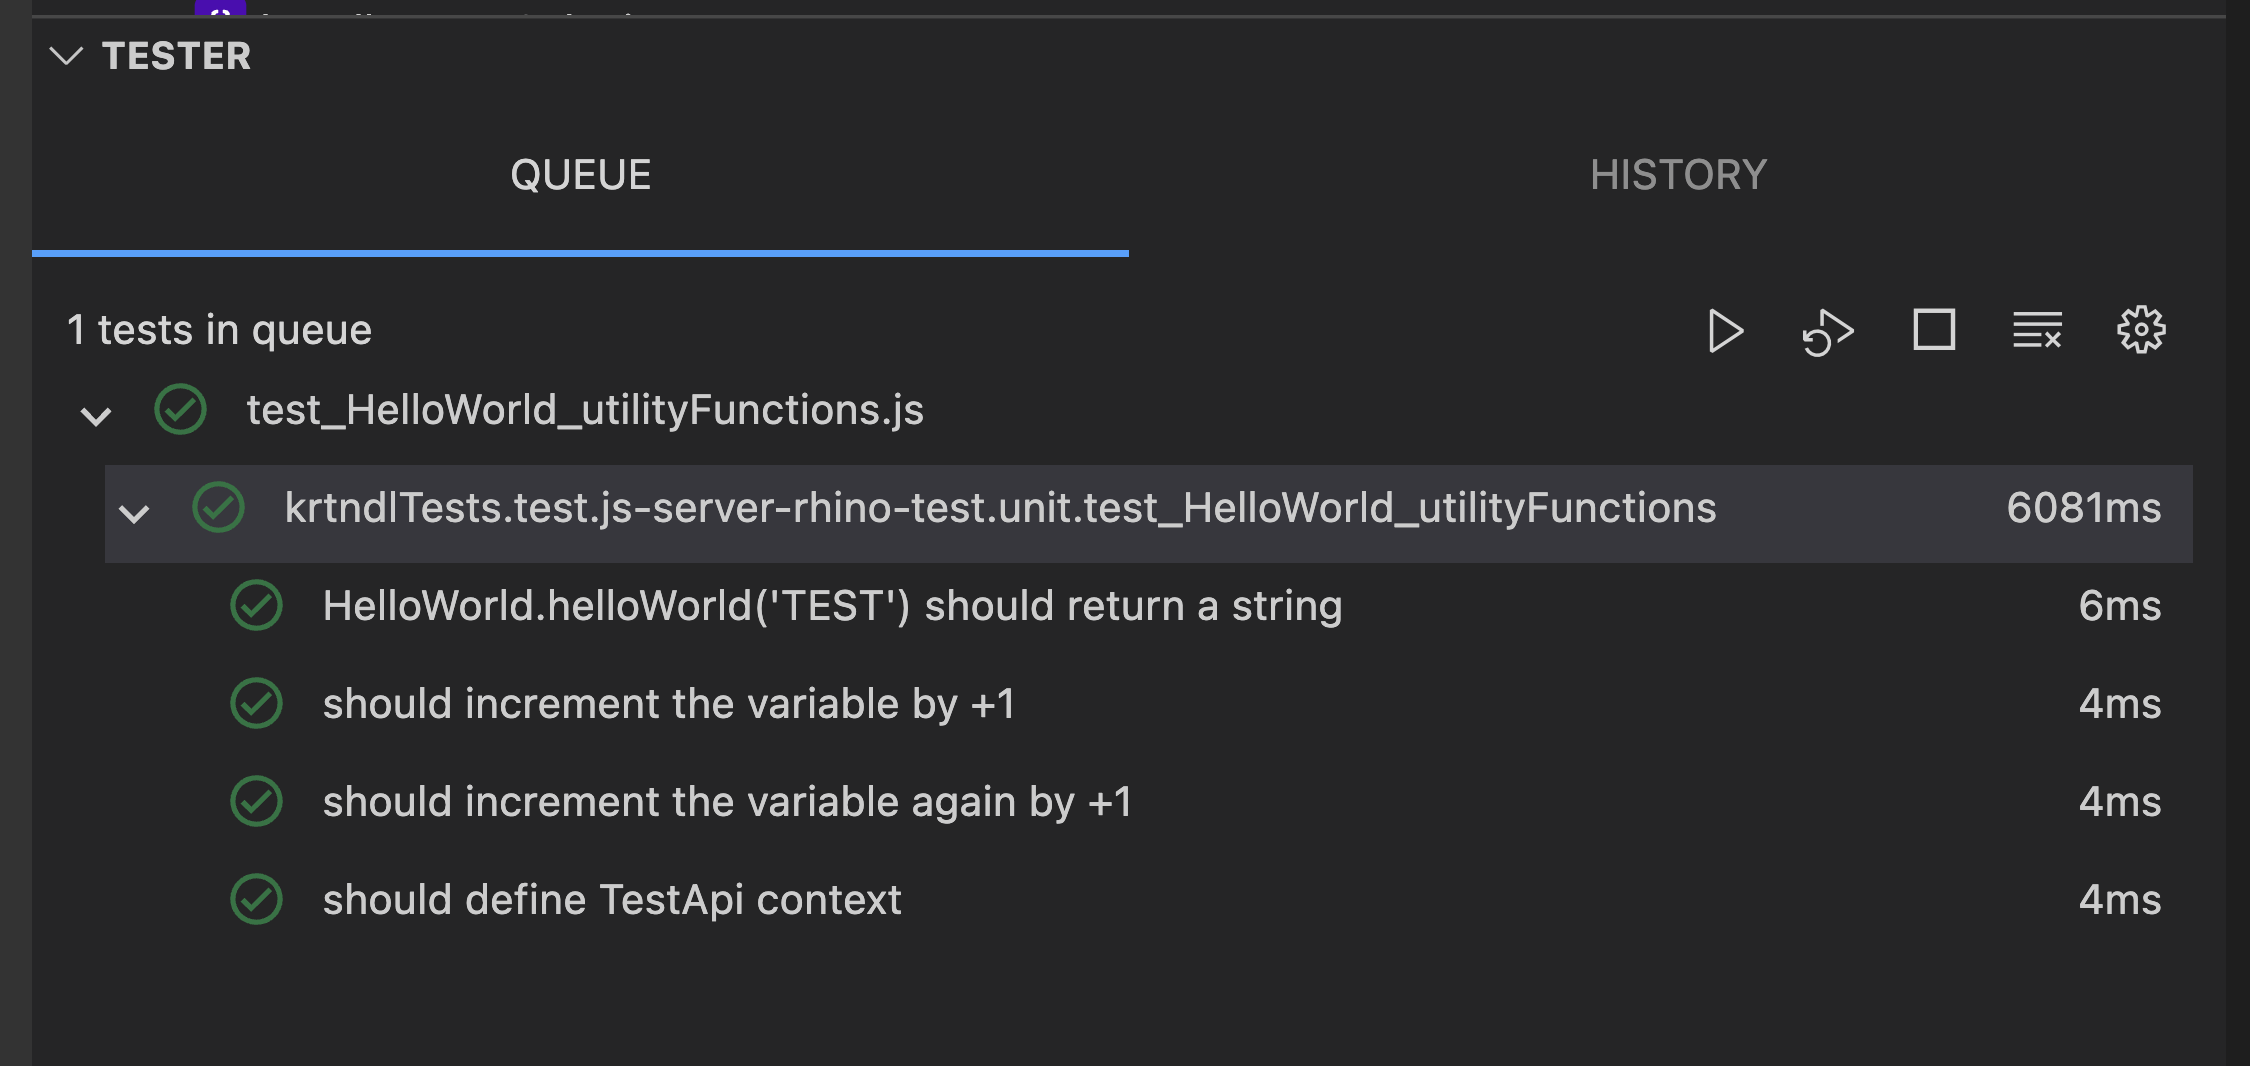
After clicking run test button, the test executes in the environment indicated in the test folder, in this case, js-rhino:
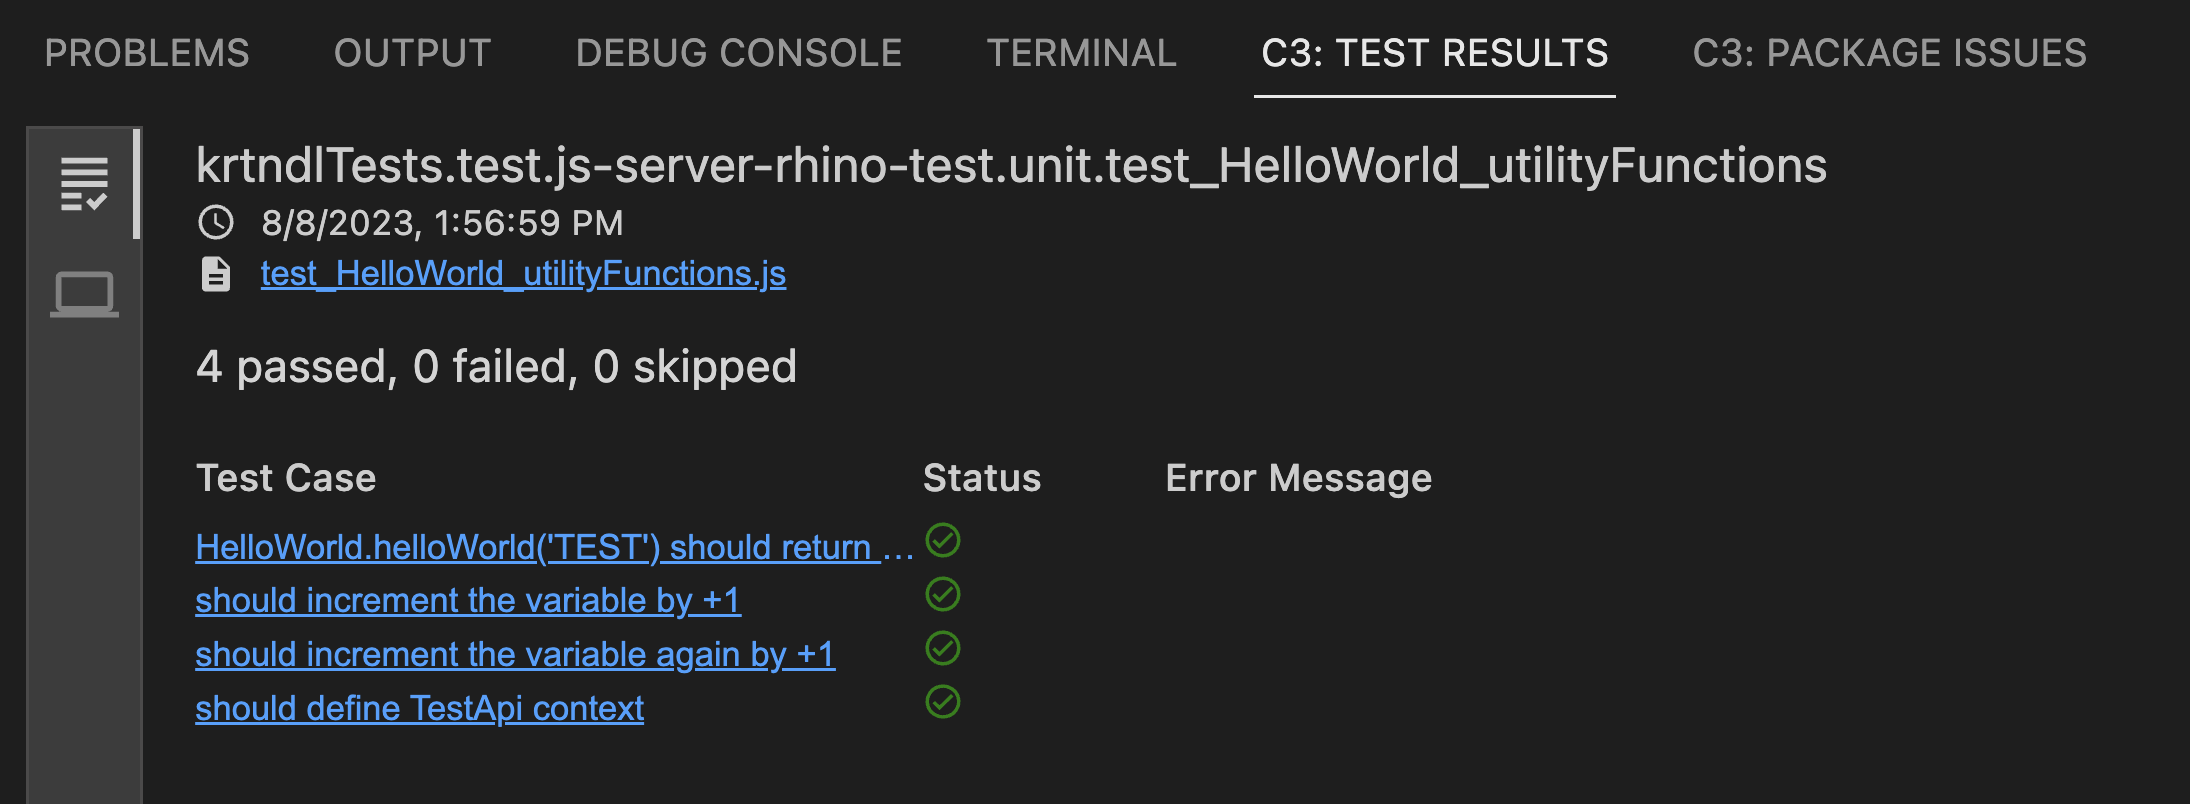
After the test has finished, the test results can be displayed:
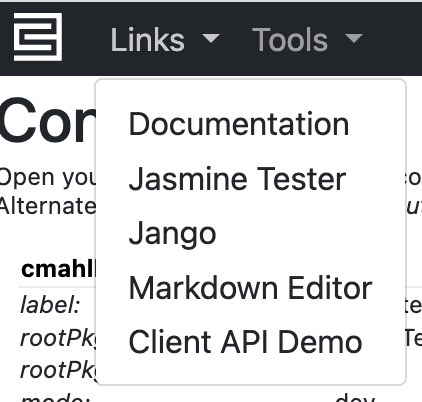
Using the Jasmine Tester
You can also run tests using the Jasmine Tester. In the C3 AI console, select the Links dropdown menu and select the Jasmine Tester menu-item:
The C3 AI Tester page is shown below:
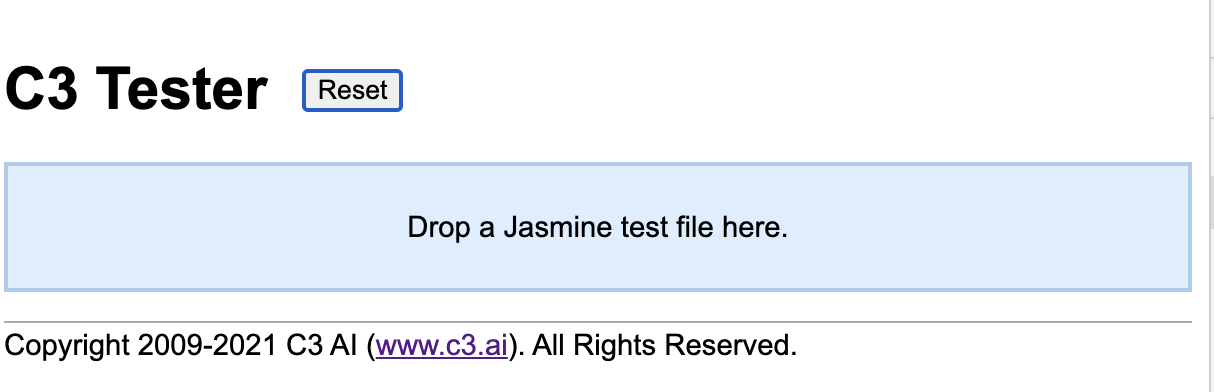
After the C3 AI Tester page loads you can drag your test file to the test file target area.
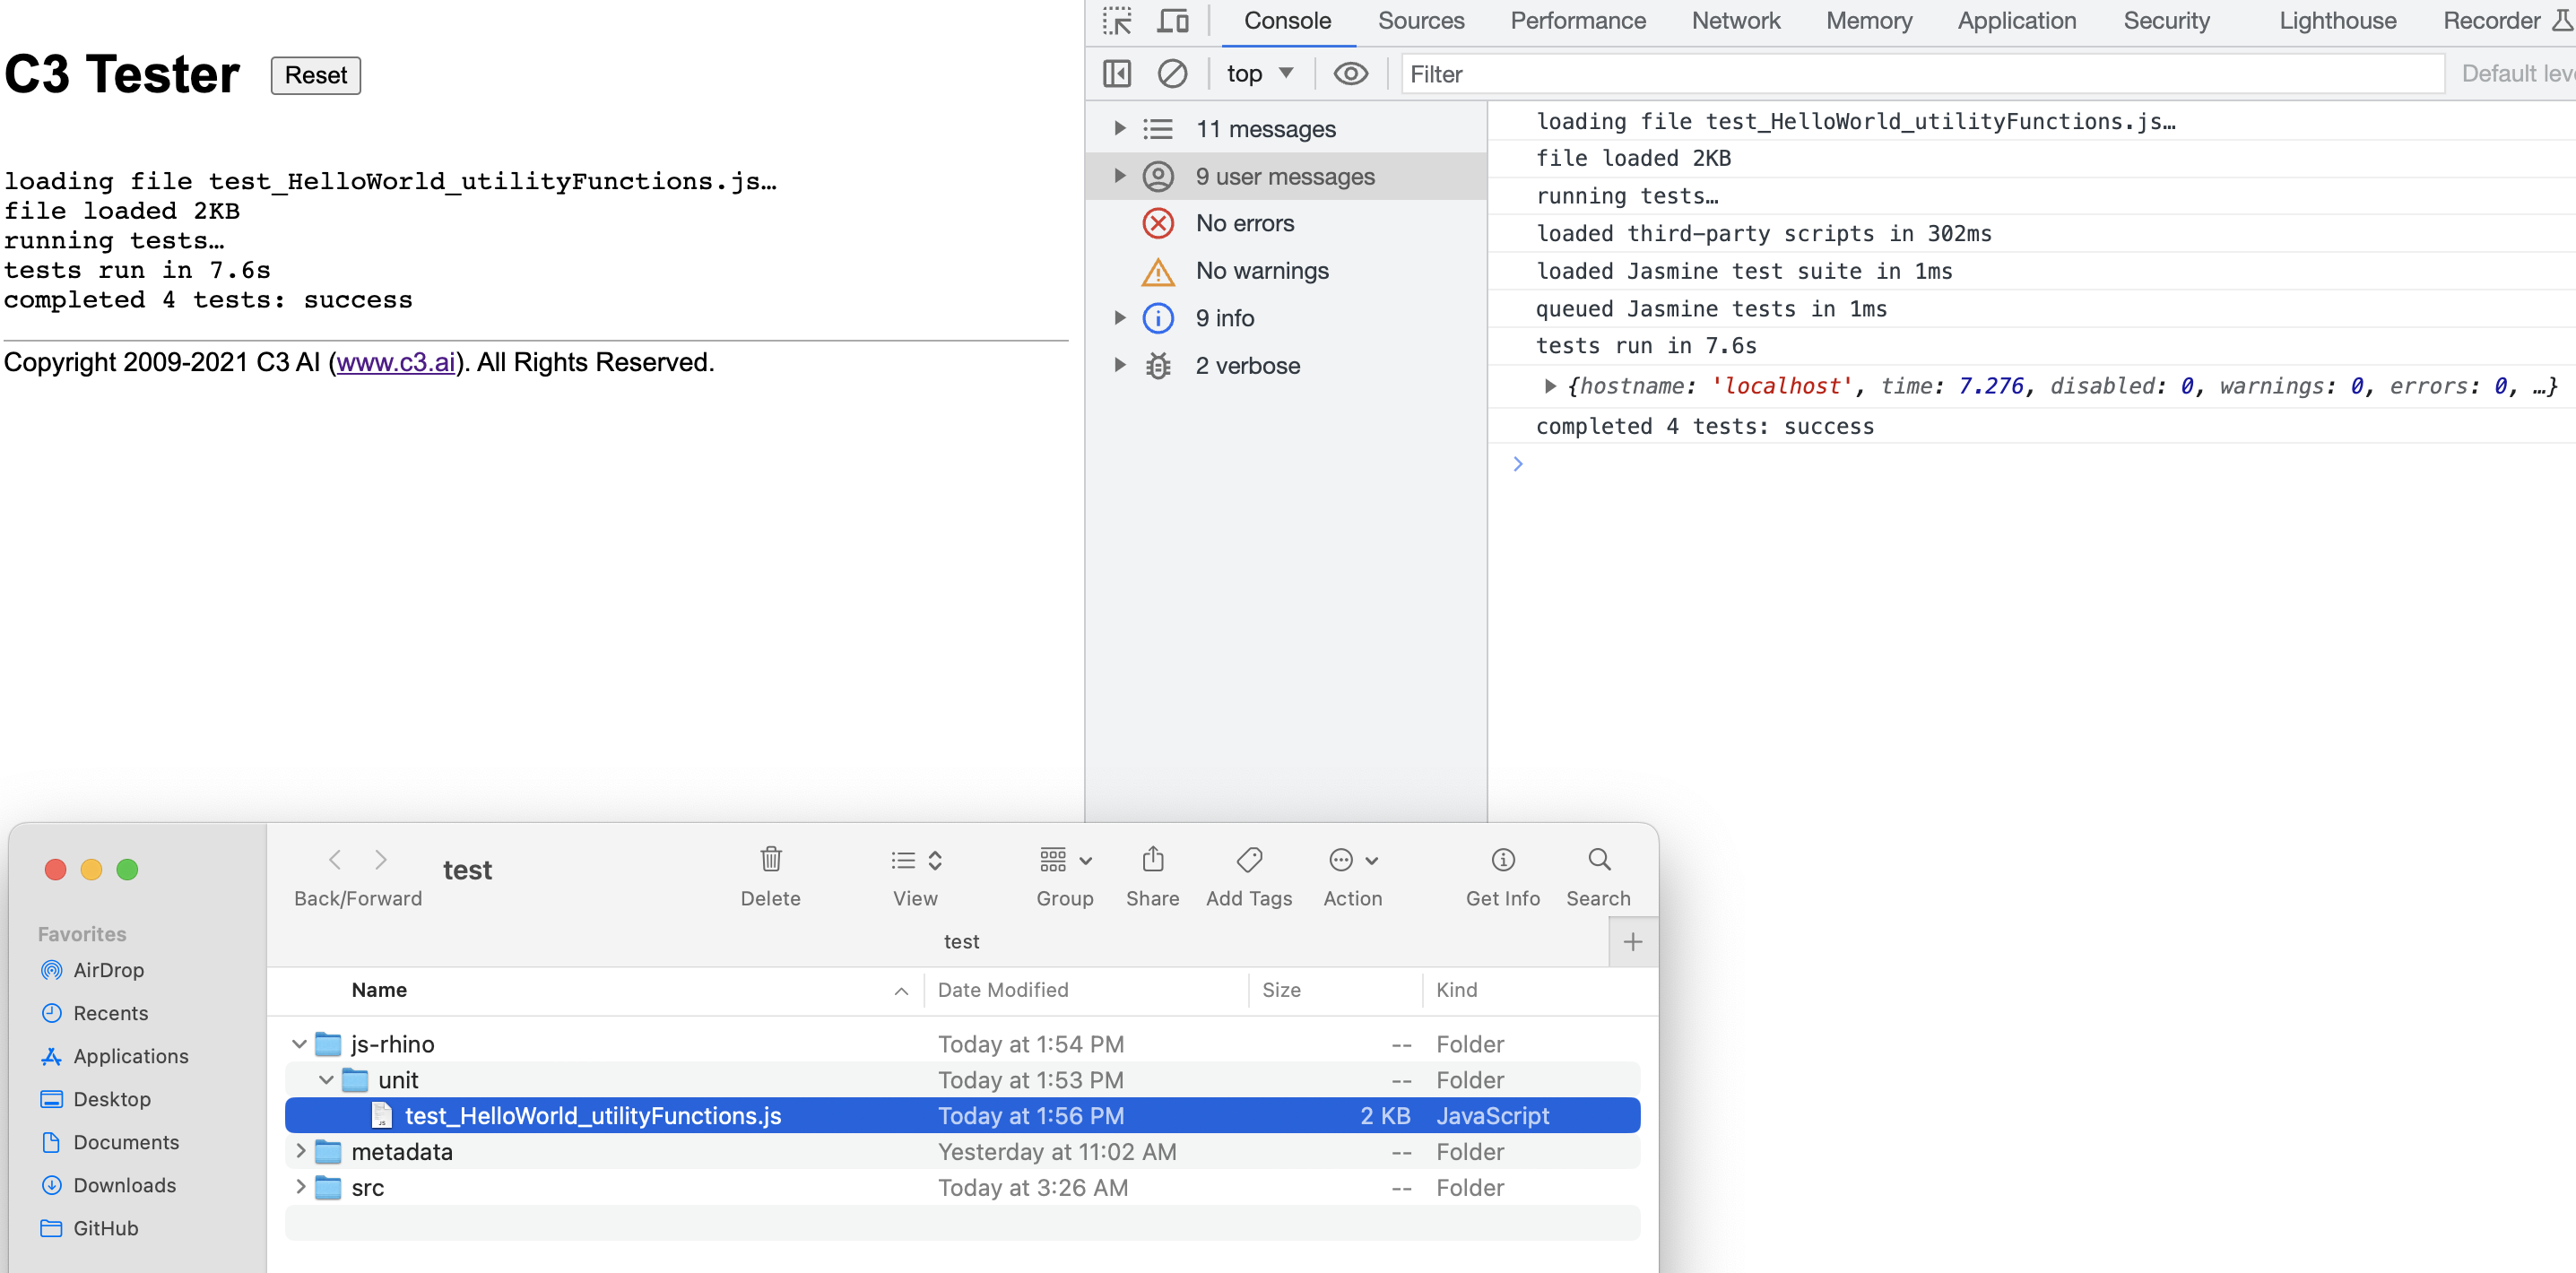
The above screenshot includes the tests in the test_HelloWorld_utilityFunctions.js test suite.
Run provisioned tests from the C3 AI console
You can also run tests from the C3 AI console. Use the TestRunner Type to run any tests, not only Jasmine tests, from the C3 AI console. You can run all Jasmine tests, or only a select few. To execute all tests, run:
// Accepts a the list of tests to run
TestRunner.make().runTests("test_HelloWorld_utilityFunctions")
Below is a convenient helper function that prints the test results in the C3 AI console. You can run the function in the C3 AI console:
function runTest(testPath) {
const failedStyling = 'color: #ed5d53';
const passedStyling = 'color: green';
const skippedStyling = 'color: #FFBF00';
const timeStyling = 'color: #00FFFF';
let results = TestRunner.make().runTests(testPath);
let numPassed = 0;
let numFailed = 0;
let numSkipped = 0;
let time = 0;
results.forEach(function (result) {
result.testsuite.forEach(function (testsuite) {
testsuite.testcase.forEach(function (testcase) {
if (testcase.skipped) {
numSkipped++;
console.log('%c SKIPPED: ' + testcase.name, skippedStyling);
} else if (testcase.failure) {
numFailed++;
console.log('%c' + testcase.name, failedStyling);
console.log('%c FAILED: ' + testcase.failure.message, failedStyling);
} else {
numPassed++;
console.log('%c PASSED: ' + testcase.name, passedStyling);
}
});
time += testsuite.time;
});
});
console.log('%c PASSED: ' + numPassed, passedStyling);
console.log('%c FAILED: ' + numFailed, failedStyling);
console.log('%c SKIPPED: '+ numSkipped, skippedStyling);
console.log('%c TIME: ' + time + 's', timeStyling);
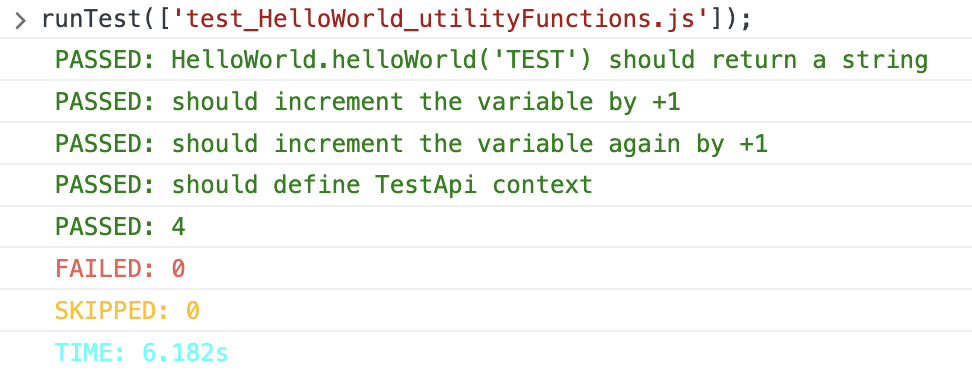
}The above help function can be run from the C3 AI console:
runTest(['test_HelloWorld_utilityFunctions.js']);And output the following results in the console: