Authoring Notebook Tests within Jupyter
You can validate and publish Jupyter Notebooks as tests during development. This topic explains how to author and run notebooks as tests to ensure they function properly for your application's end users and to prevent other contributors from breaking the notebooks.
Authoring notebook test from Jupyter
When authoring tests for notebooks, you can configure individual cells to behave in certain ways during testing. Available configurations allow you to force certain cells to run, add assertions on cell execution (for example, output validation), and more.
Enabling test mode
To modify a notebook for testing, you must enable the test configuration toolbar. Open the notebook, and locate the toggle switch on the toolbar as shown in the image. This toggle activates test mode.

After enabling test mode, a configuration panel appears on the right-hand side of the notebook. You can use this panel to set up different configurations for each cell. Once configured, these settings apply when running the notebook as a test.
Cell configuration options
The notebook tester panel provides descriptions for the available cell configurations. Here are the options you can apply to any cell:
Always execute this cell: Check this option to ensure that this cell always executes, even if prior cells fail. This setting is useful for setup and tear down logic needed for your test to run correctly, regardless of prior cell execution result.Timeout: Enter a string to specify a timeout for cell execution. The default value is 30 minutes. If the cell does not finish execution within this time frame, the kernel is interrupted. You can specify the time in formats such as30mor5min2sec. Refer to Duration#fromString for examples. If you enter an invalid string, the side panel displays a warning and clears the entered value.Check Output: Choose the type of validation you want for the output of the cell:No additional checks: This is the default behavior. The cell passes as long as there are no uncaught exceptions during execution.Check for exact match: The cell passes if the output exactly matches the previous run, including any errors. To use this, you must first run the cell to capture its output, which can be used for future comparisons.Check for regex: You can validate the cell output using a regular expression. After selecting this option, a text box appears where you can enter the regex pattern.
Identifying configured cells
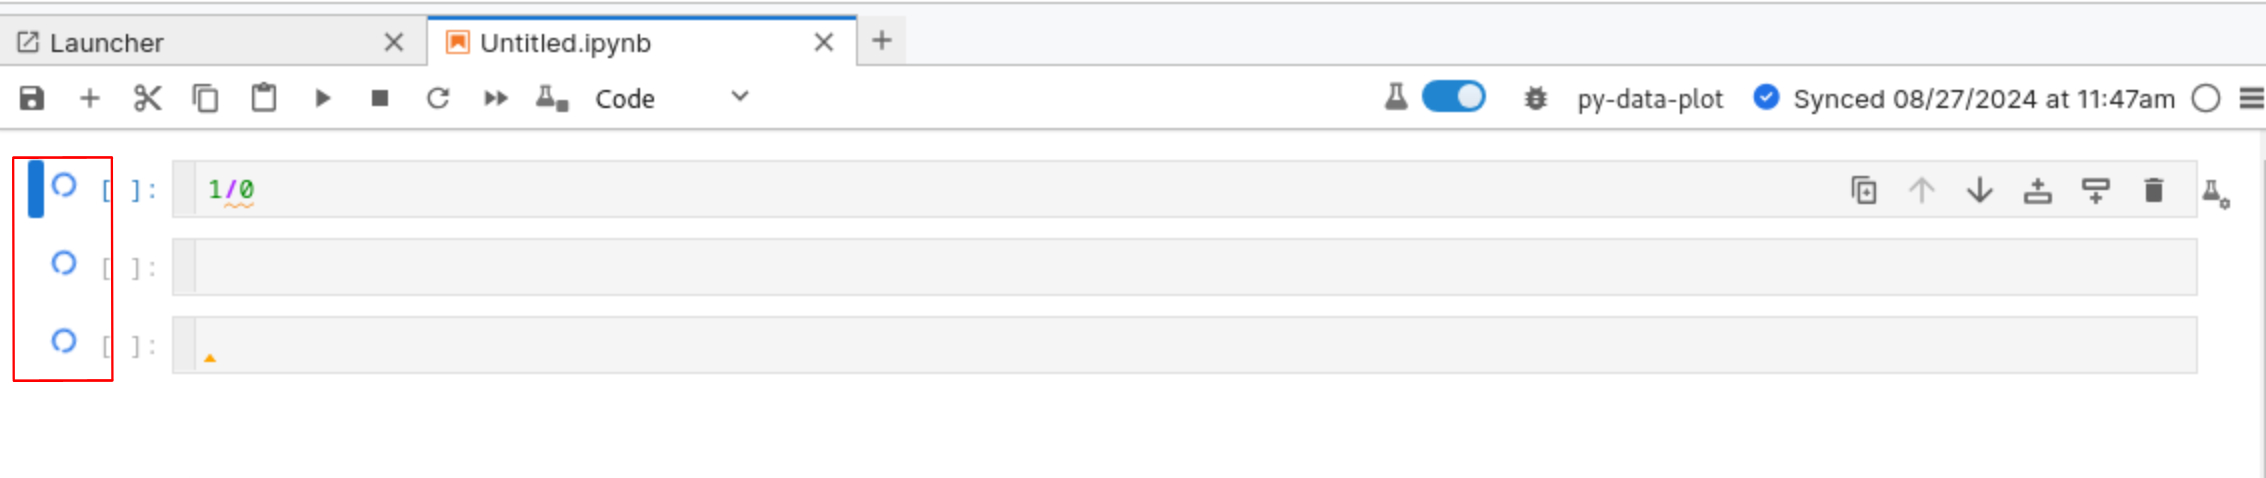
You can identify which cells have configurations by looking at the icon next to them. Configured cells display a special icon to indicate that they contain test configurations.
![]()
These icons only appear when test mode is enabled. Turning off test mode hides the icons and closes the configuration panel.
Running the notebook as test
After enabling test mode, a new button appears next to the Run All Cells button on the toolbar, labeled Run all cells in tester. This button allows you to run the notebook in test mode.

When you select the Run all cells in tester button, spinners appear beside each cell as they execute. Once execution finishes, the spinners change to icons that reflect the status of each cell. The statuses include pass, fail, or skipped.
Note: Running tests in the notebook does not interfere with your current kernel session. The notebook uses a separate kernel session for testing.
Viewing test results
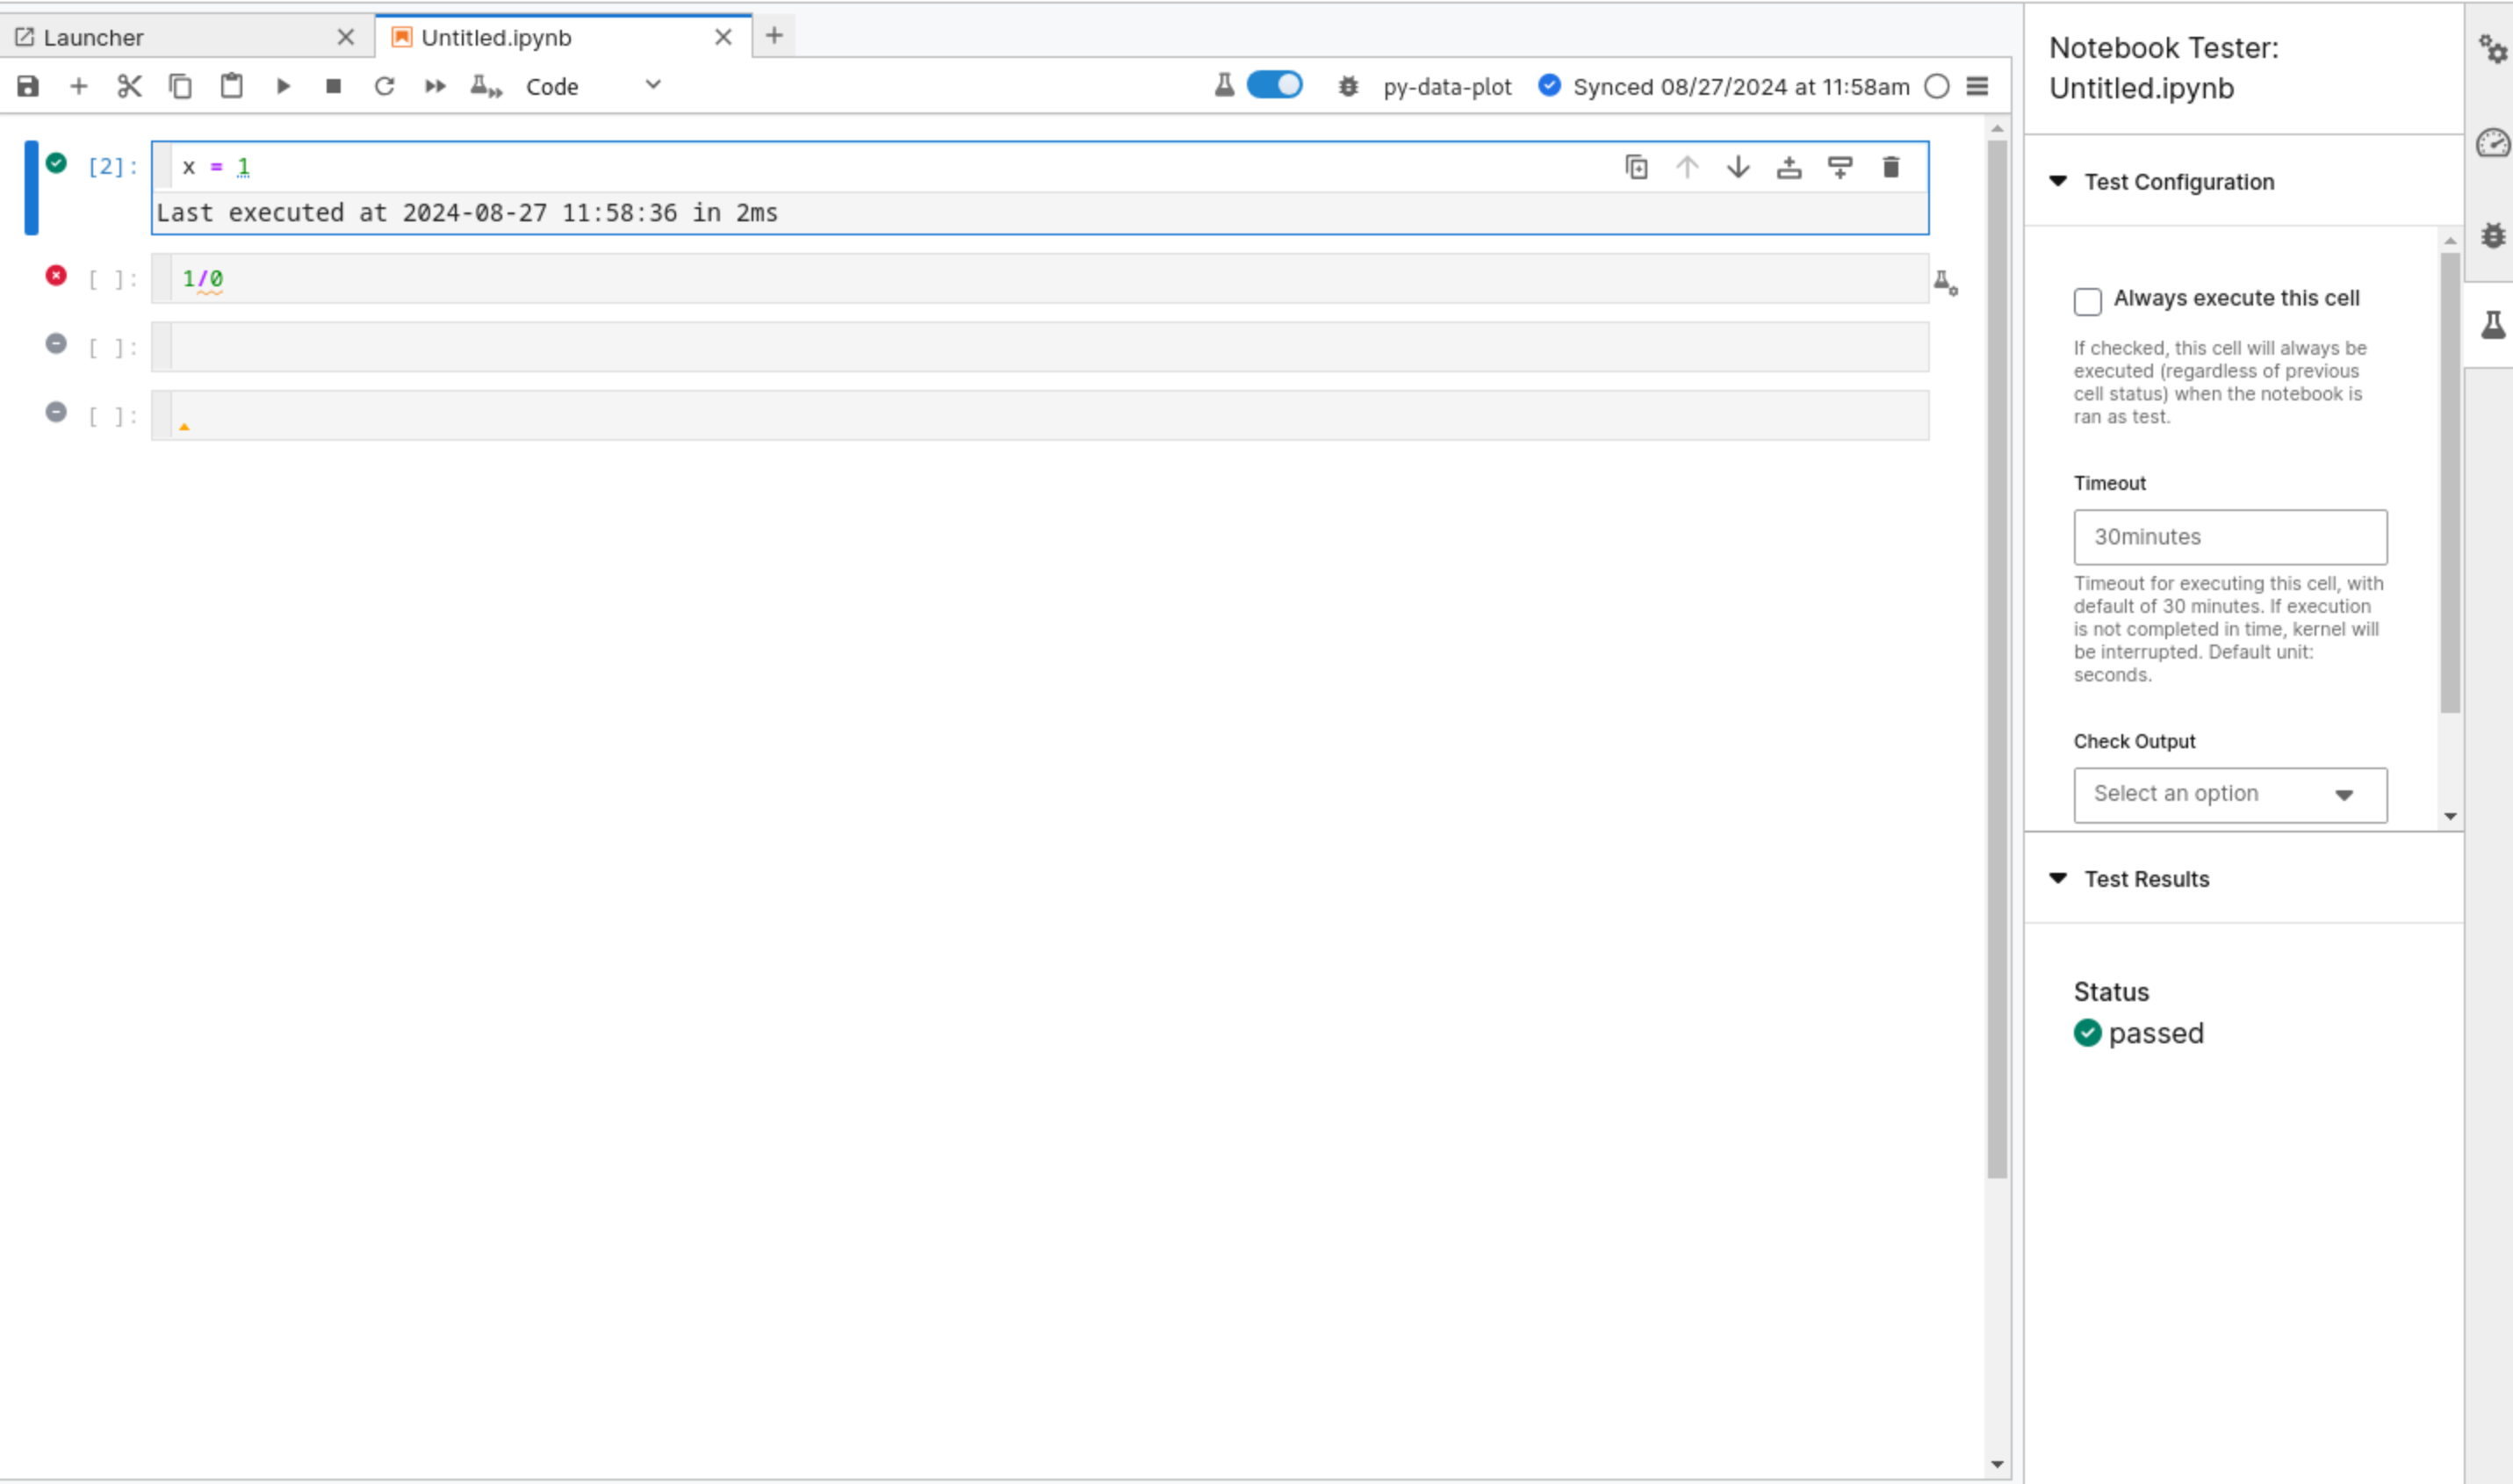
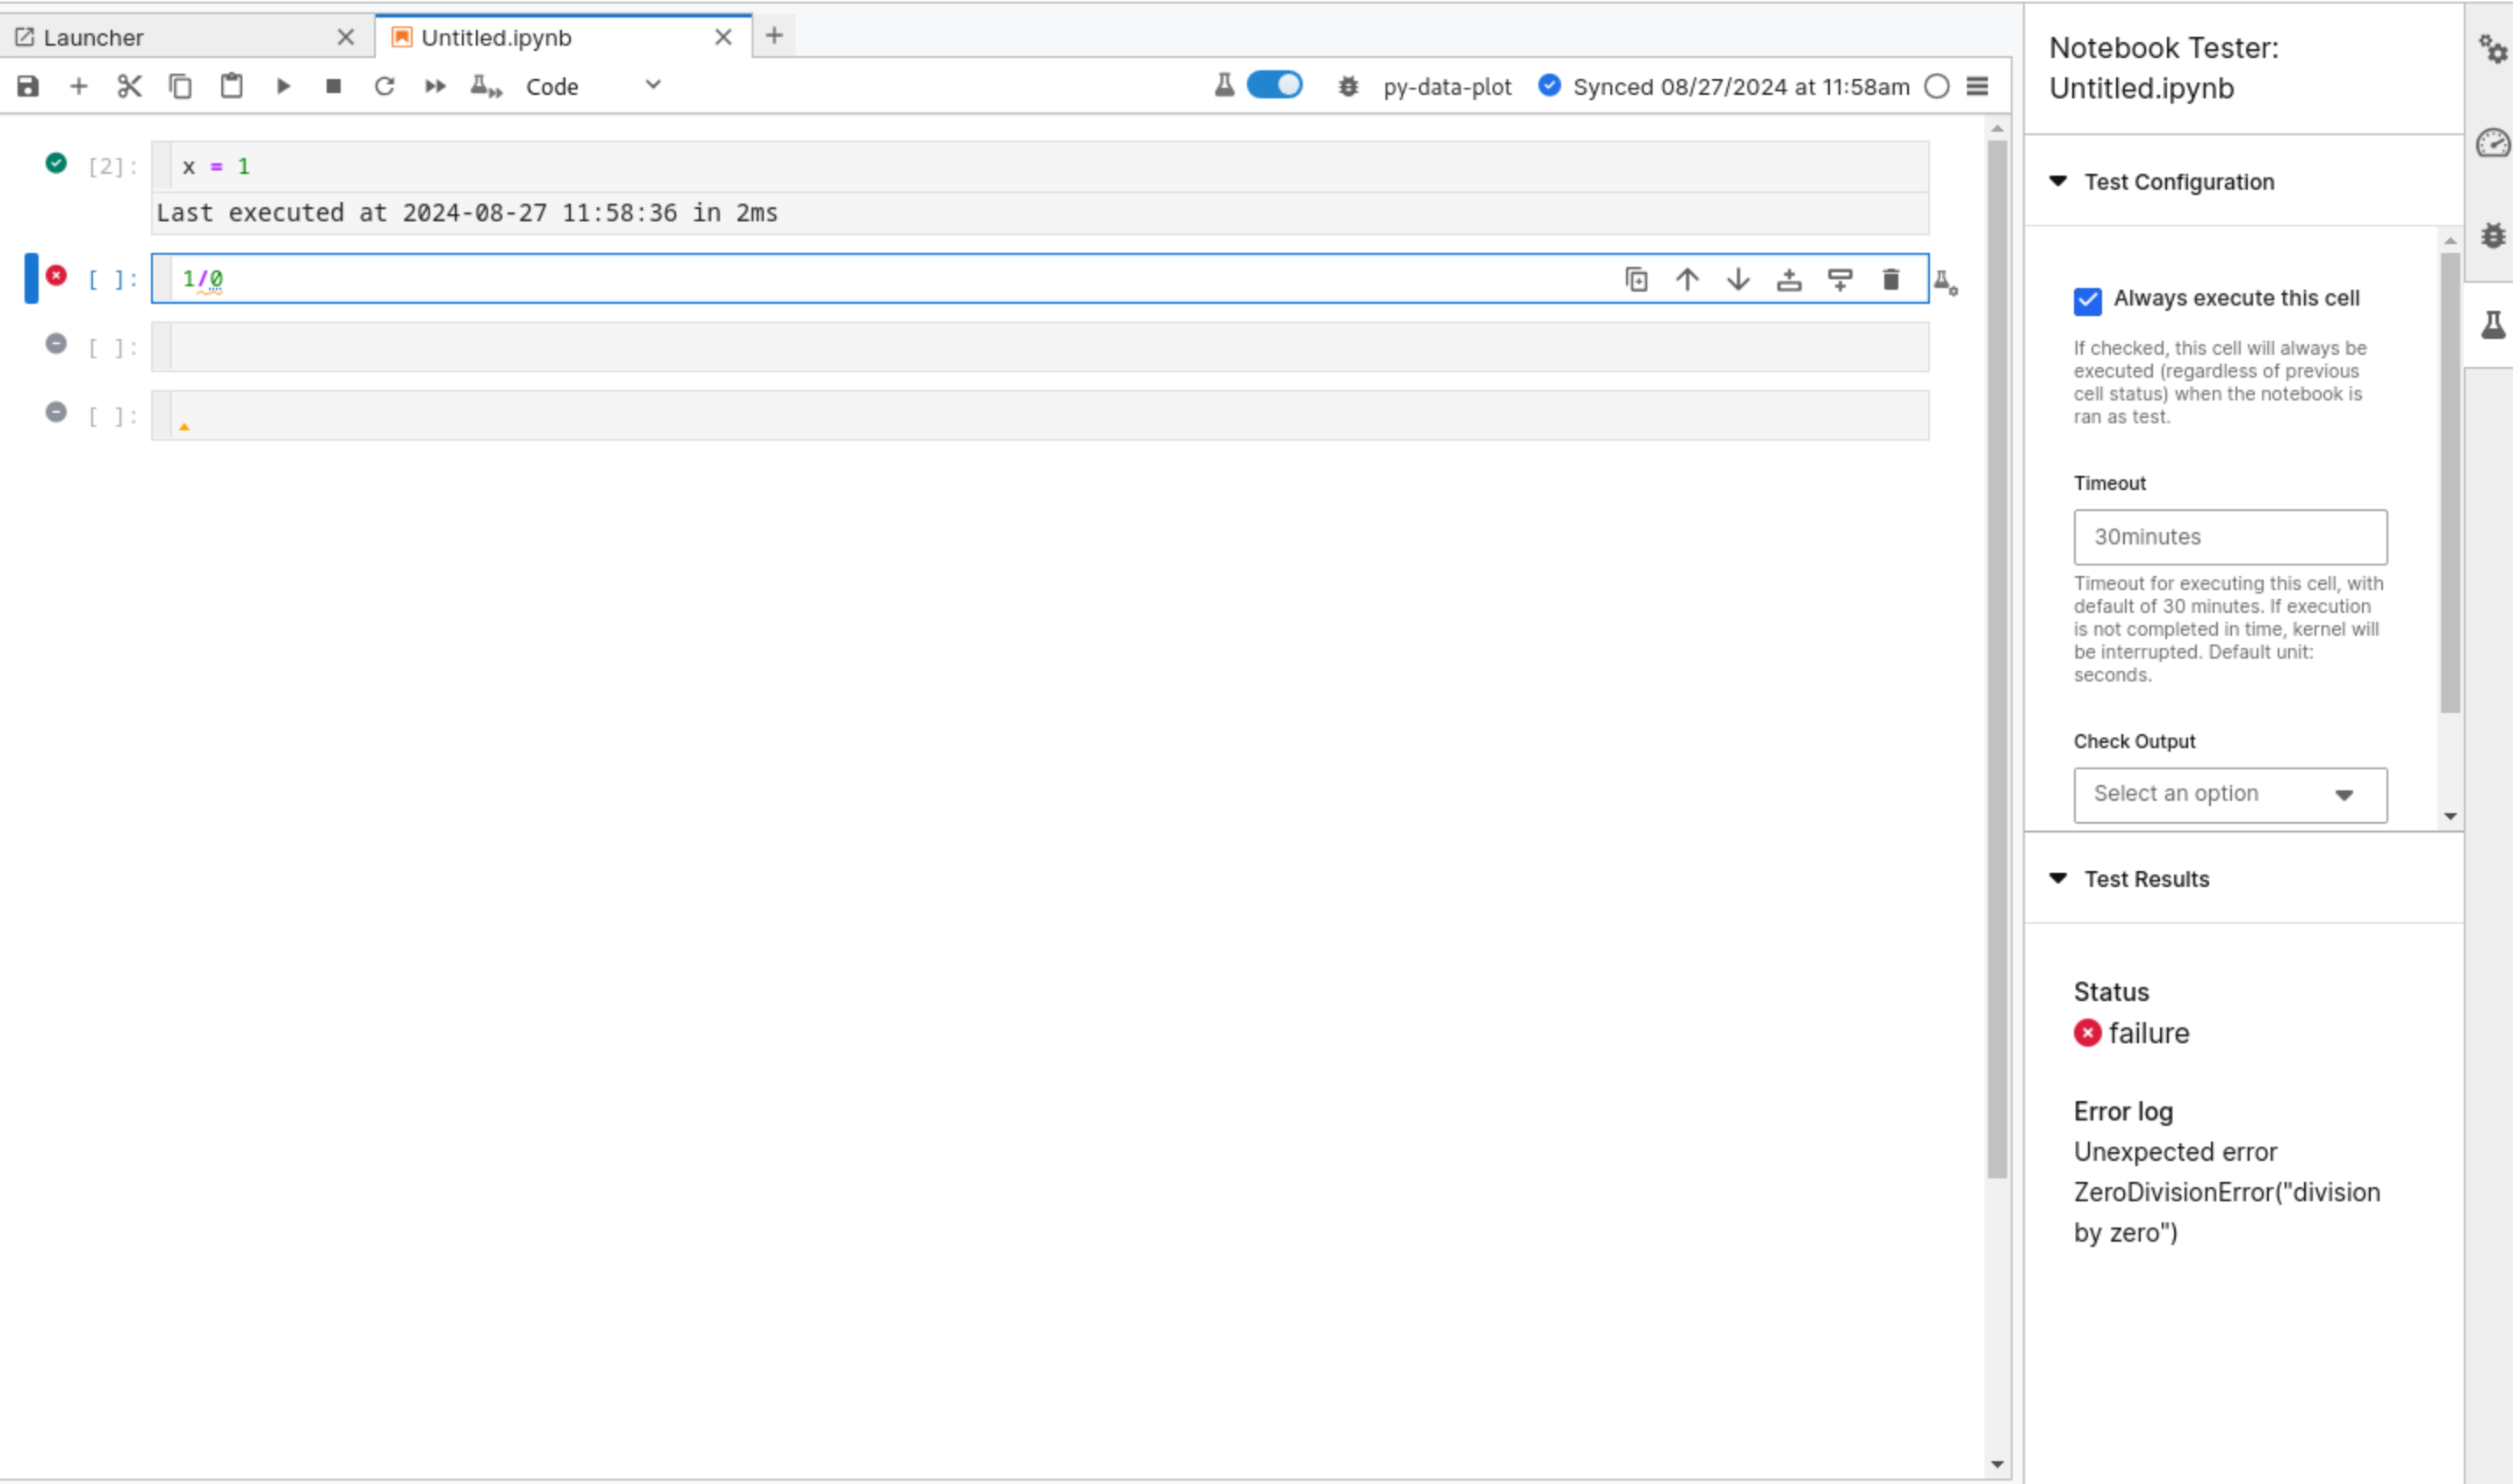
You can review test results for each cell by clicking the test result icon next to the cell. This action reopens the configuration panel, which displays the test results under a section labeled Test Results. If the cell fails, the panel displays the reason.
Passing test result:
Failing test result:
Note: Refreshing the browser erases the test execution status from the notebook.
Stopping notebook test run
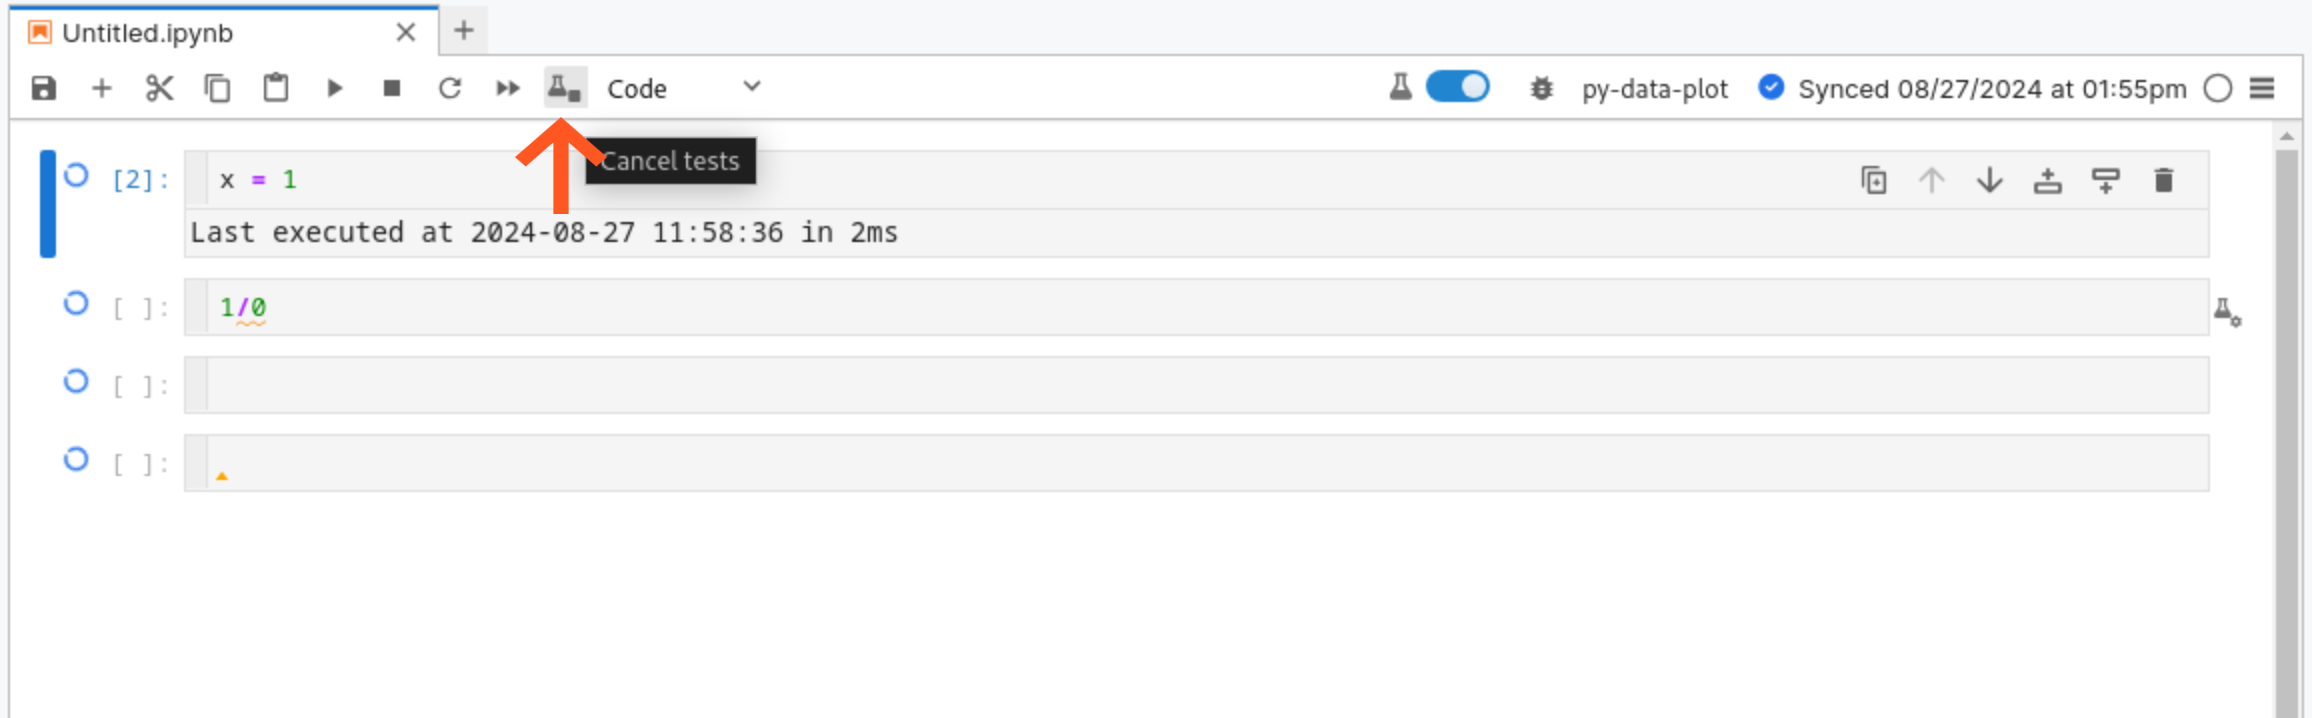
If you need to stop a running test, the Run all cells in tester button changes to a stop button. Select this button to stop the test execution immediately.
When you stop a test run, a confirmation modal appears, asking if you want to cancel the ongoing test.
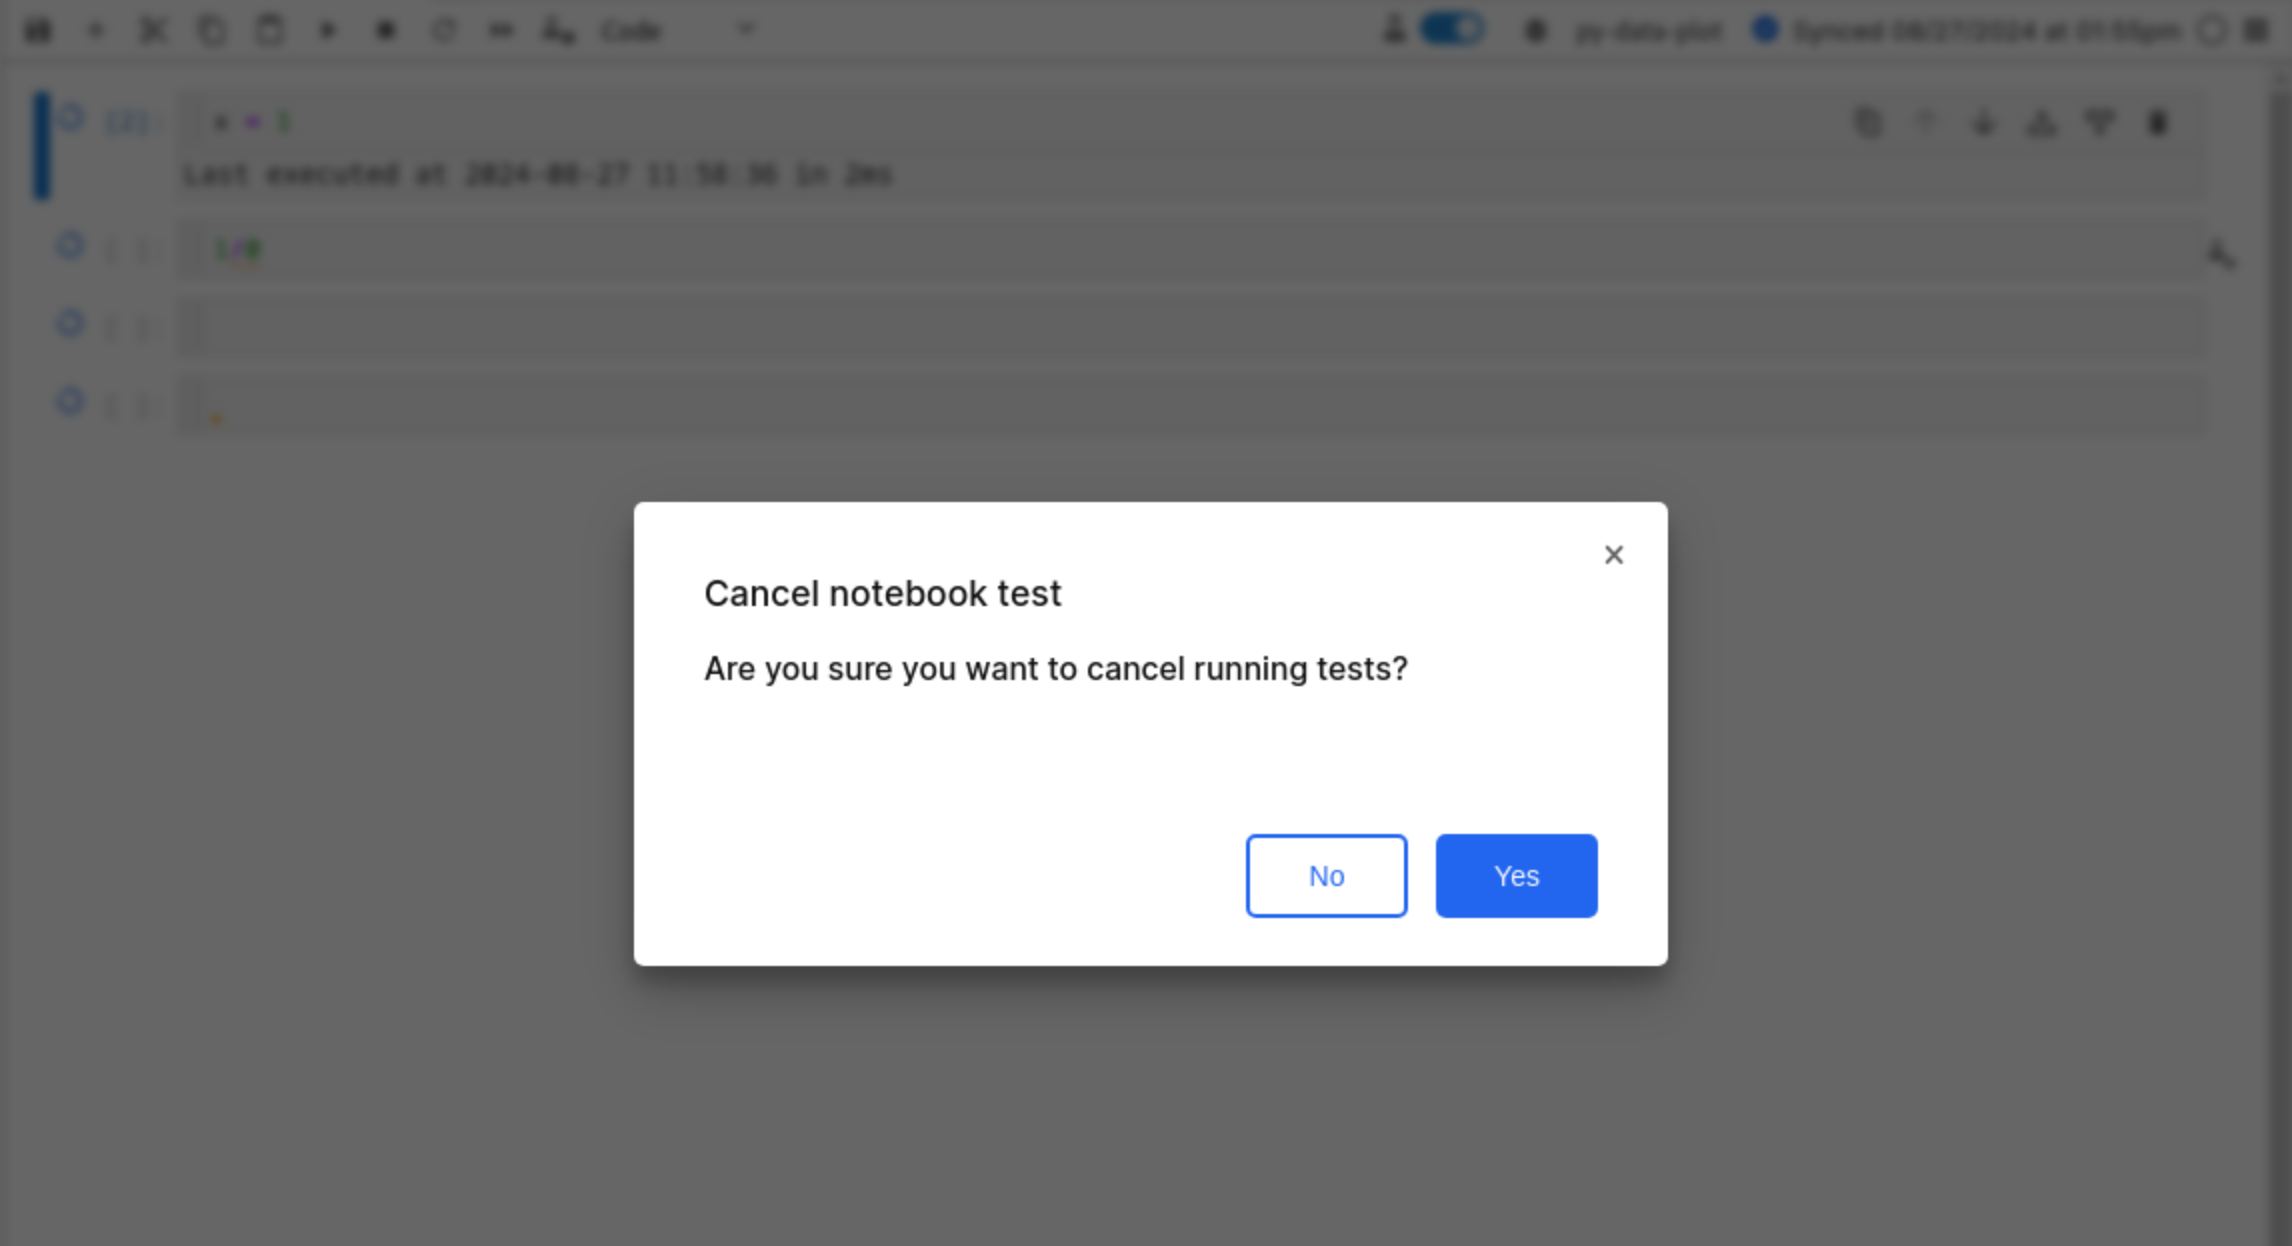
Confirming the action halts the test execution and stops all cells from continuing further.
Publishing notebook test to your application
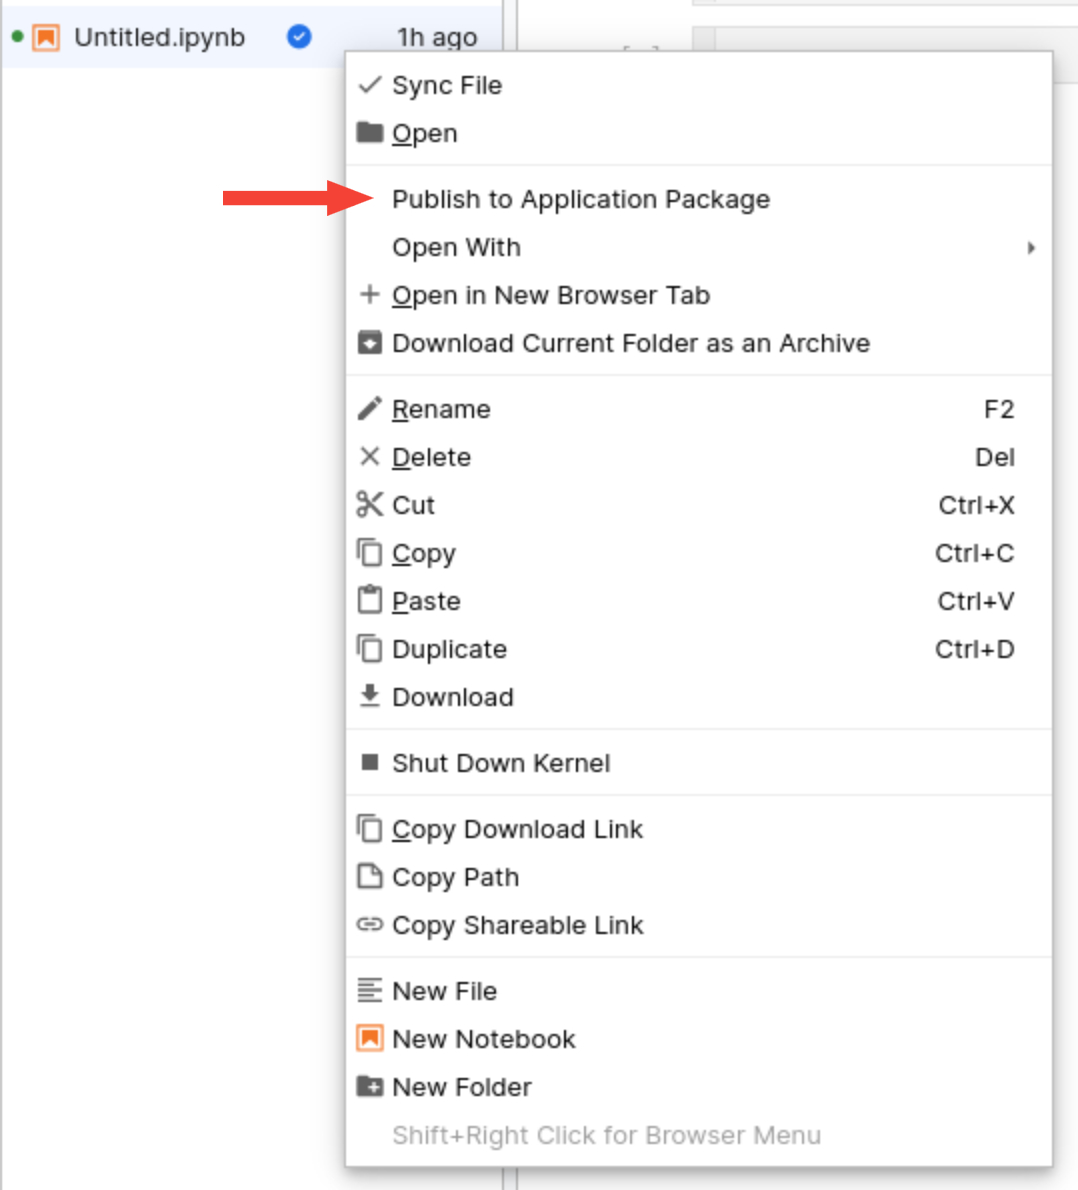
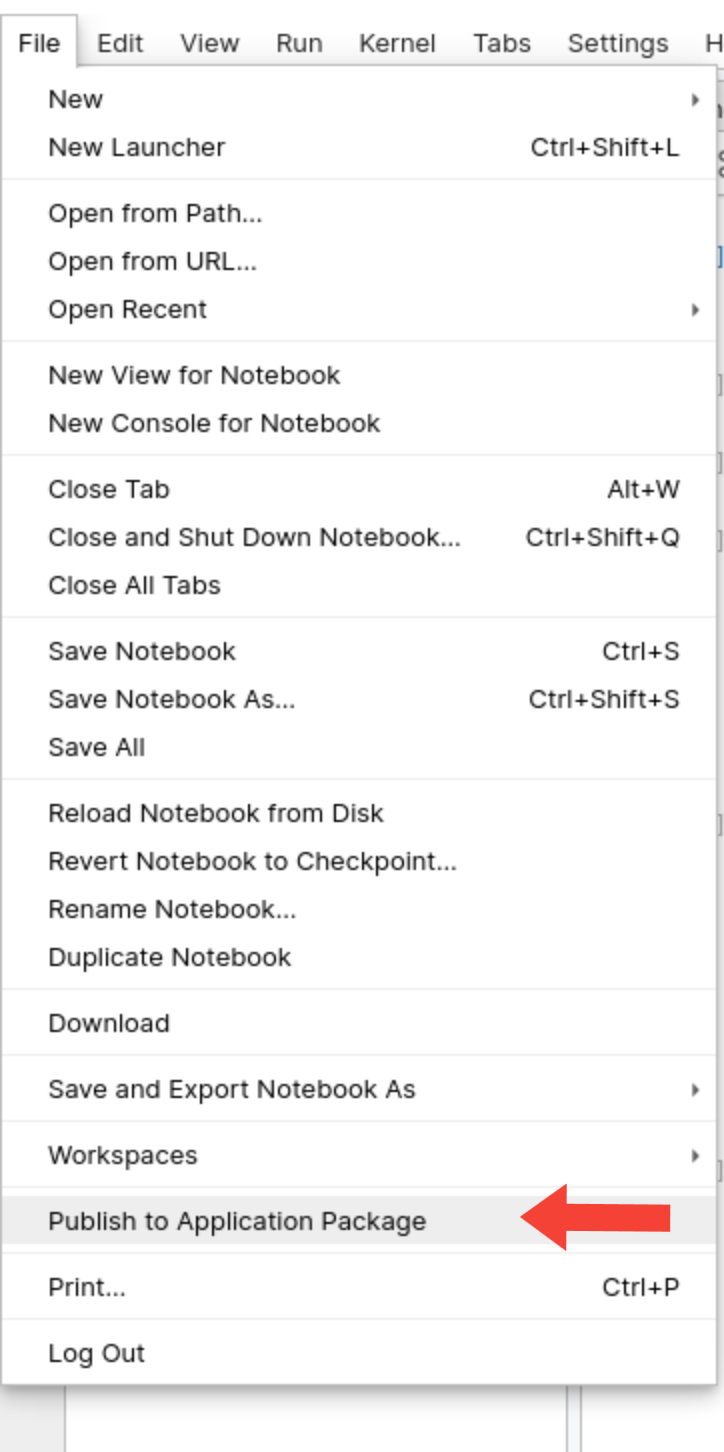
After you finish authoring your notebook and have successfully run the tests, you can publish the notebook as part of your application. Right-click the notebook in the file tree or select the Publish to Application Package option from the File menu.
This action opens a modal where you can specify the target path and folder for publishing the notebook. Follow the modal's instructions to publish the notebook and register it for testing in your application package.
Note: If the notebook already has test-configured cells, the system automatically checks the relevant options for you in the modal.
Important notes
Before you run notebook tests, consider these constraints:
- Ensure the notebook’s kernel corresponds to a seeded ImplLanguage.Runtime.
- If the notebook modifies package metadata, you cannot run the notebook as a test.