ADLS Output Node
Export data from Visual Notebooks to Azure Data Lake Storage (ADLS). You must have an existing ADLS account to use this node. For more information about ADLS, see Azure Data Lake Storage.
Prerequisites
Follow the steps below to connect your ADLS account to Visual Notebooks.
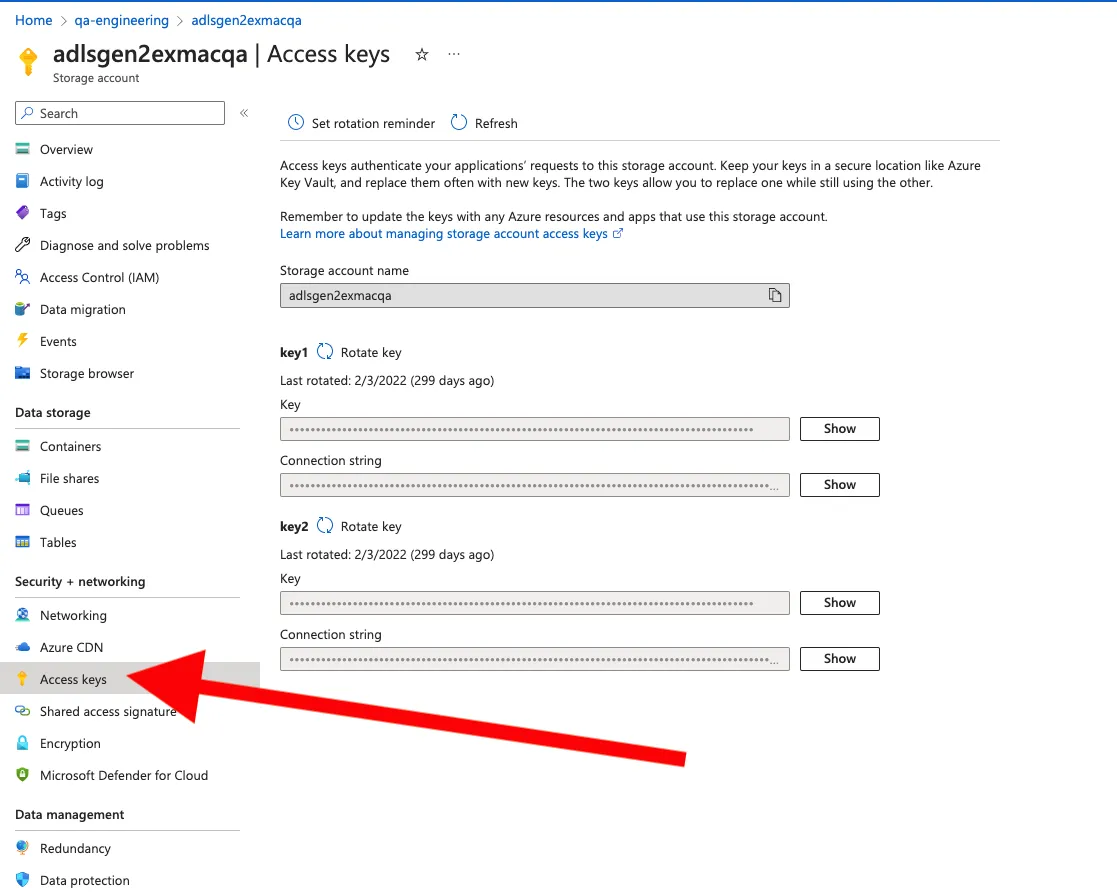
- Sign into Azure Portal and navigate to ADLS storage account
- Select Access Keys from the lefthand navigation menu
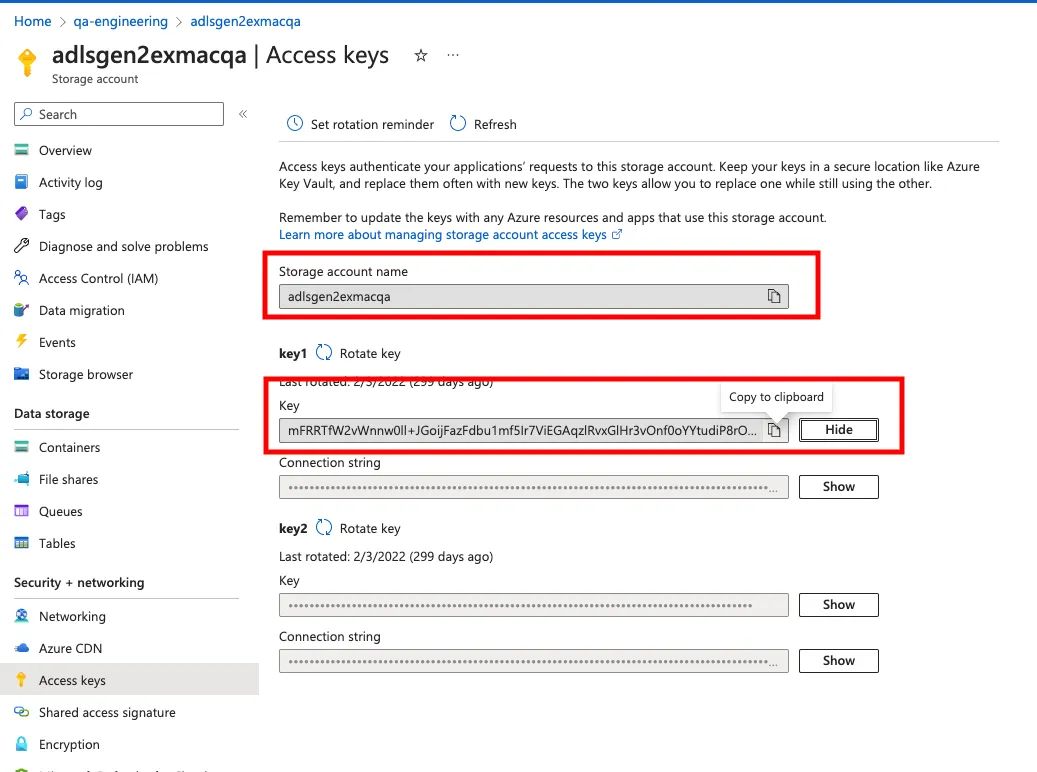
- Show either of the keys and copy the value
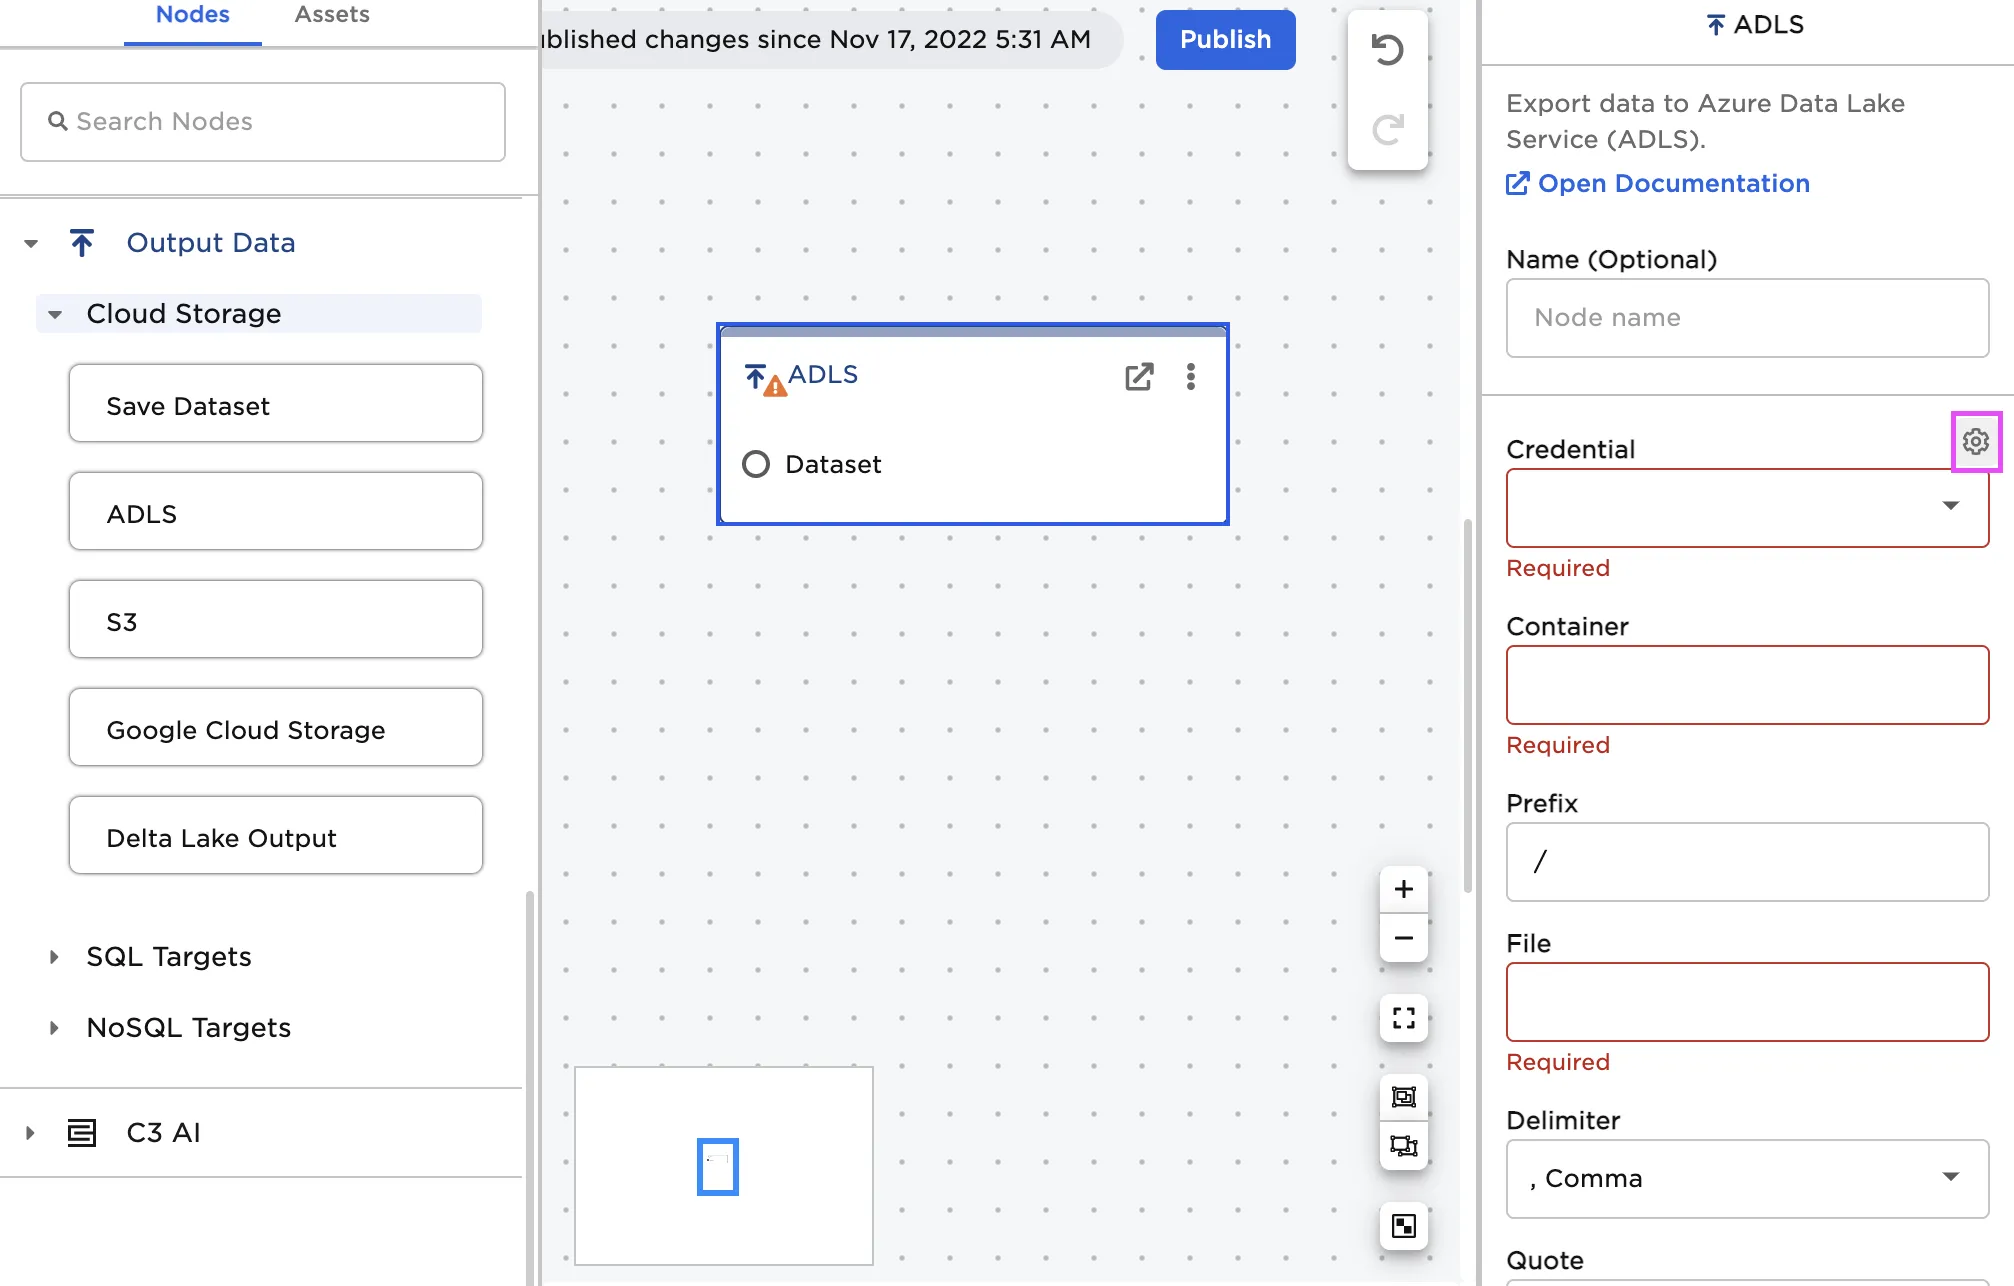
- In Visual Notebooks, drag an ADLS node onto the canvas
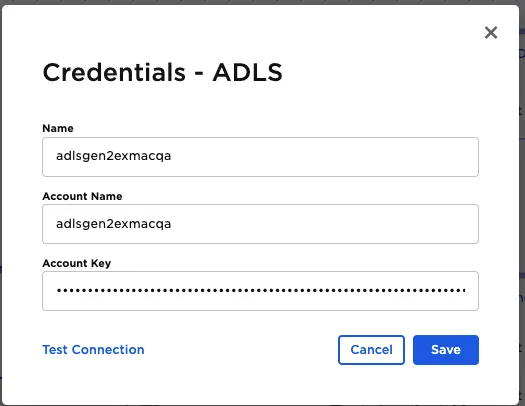
- Select the gear icon beside the Credential field
- Select the plus sign in the upper right corner
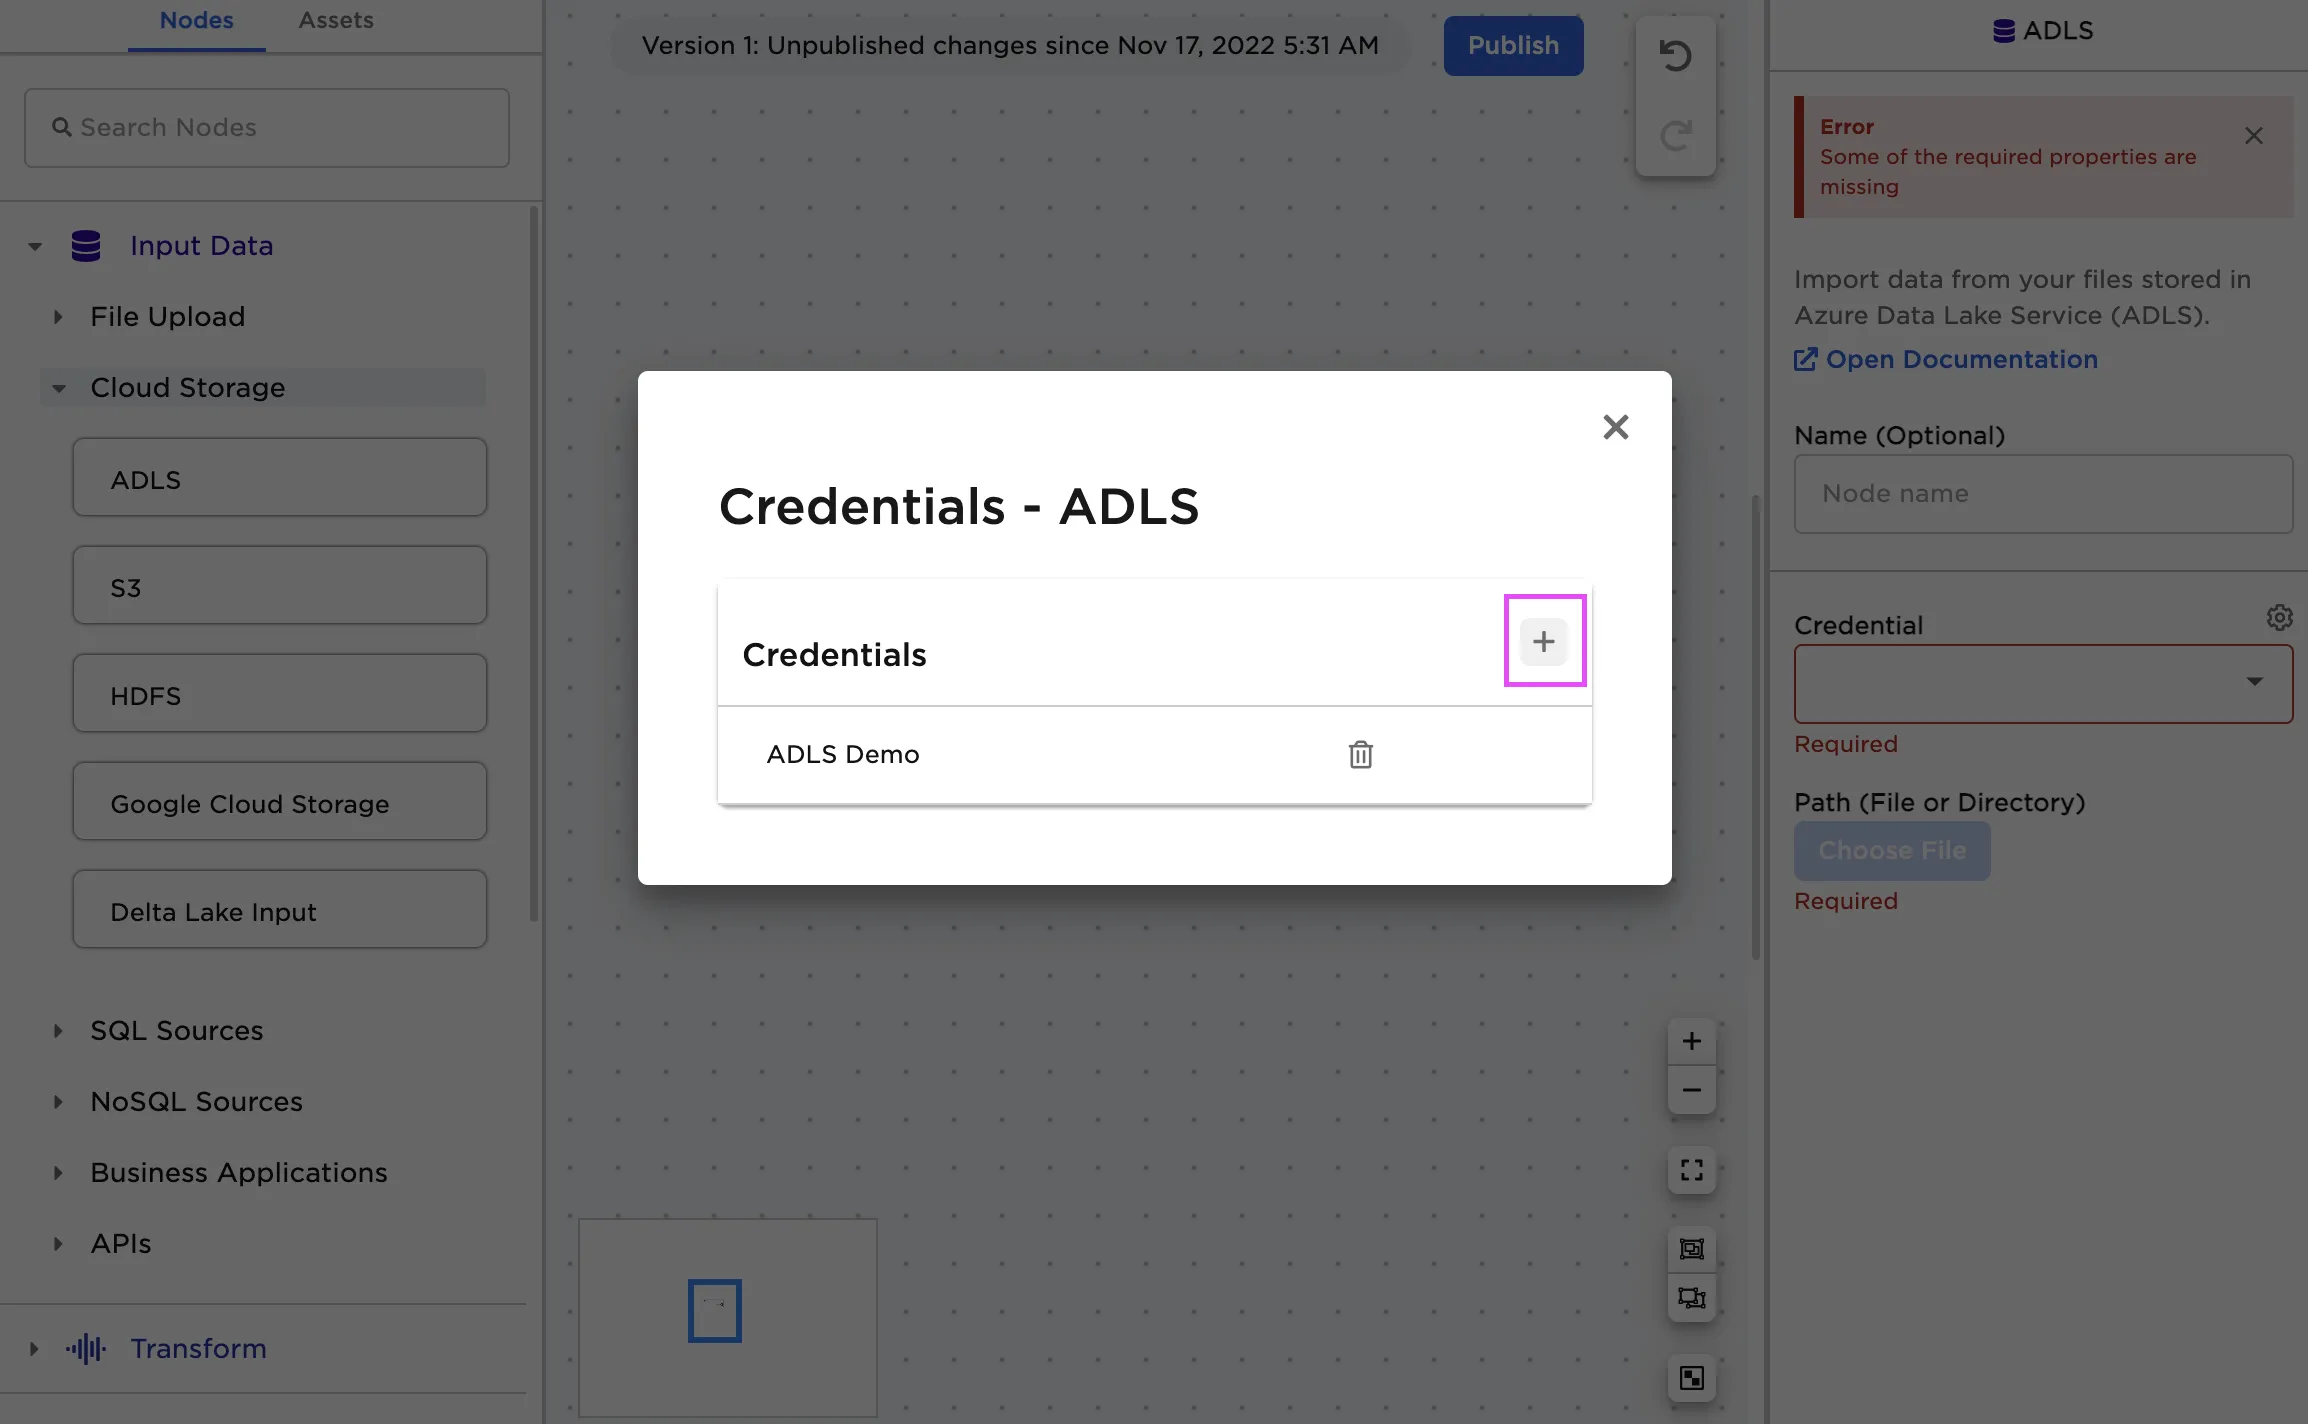
- Paste the contents of the storage account name into Account Name and key into Account Key
Configuration
| Field | Description |
|---|---|
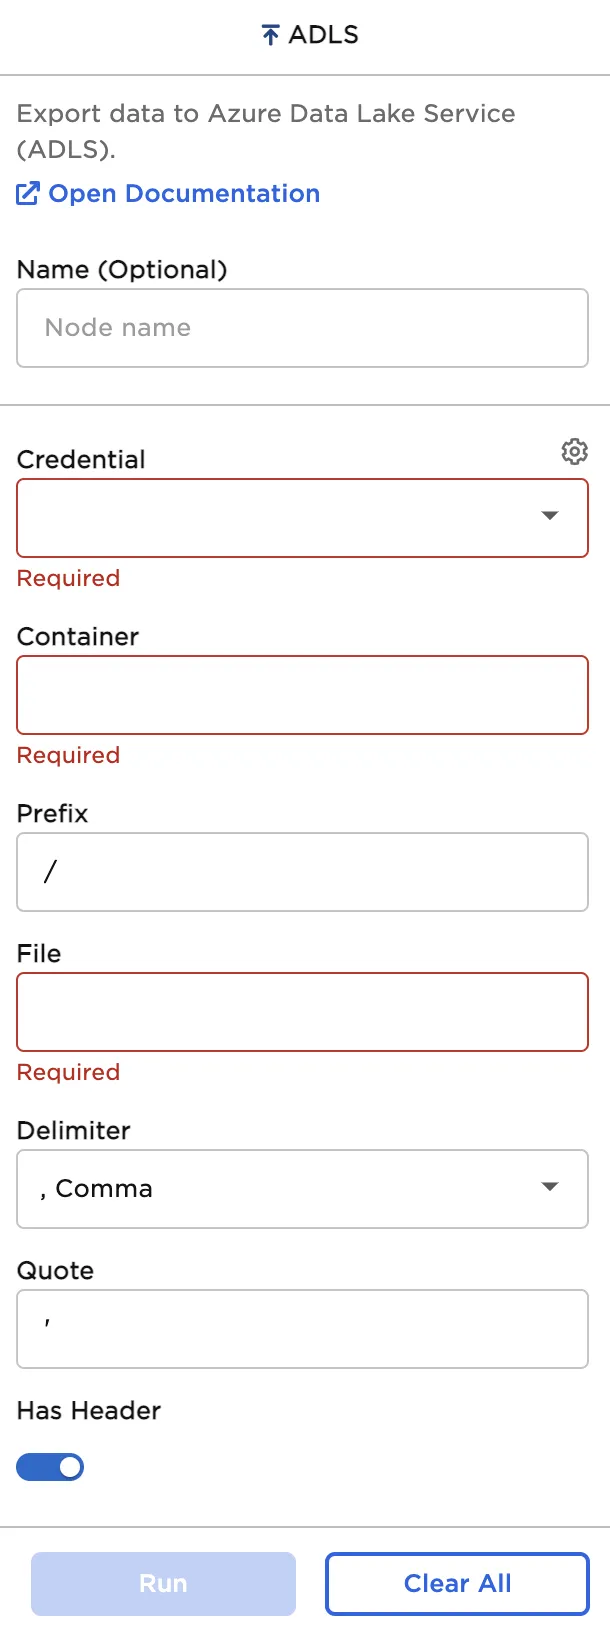
| Name Optional | Name of the node An optional user-specified node name displayed in the canvas, both on the node and in the dataframe as a tab. |
| Credential Required | The information needed to access ADLS data Select a saved credential from the dropdown menu. Select the gear icon to add a new credential or delete existing credentials. |
| Container Required | The ADLS container to upload into Enter the name of an existing ADLS container. |
| Prefix Default: / | The prefix for the file Enter a new or existing prefix. Prefixes are similar to directories in a file system. |
| File Default: Off | The file name Enter a name for the CSV file that will be uploaded to ADLS. |
| Delimiter Default: Comma | The character that separates values Set the delimiter to comma, pipe, colon, semicolon, tab, or space. |
| Quote Default: ' | The character that surrounds values to ignore Set the quote to any character. Delimiters inside quotes are ignored. |
| Has Header Default: On | Header data to be used as column names Toggle the "Has Header" switch on to use the dataframe column names as the first row of the CSV file. |
Node Inputs/Outputs
| Input | A Visual Notebooks dataframe |
|---|---|
| Output | None |
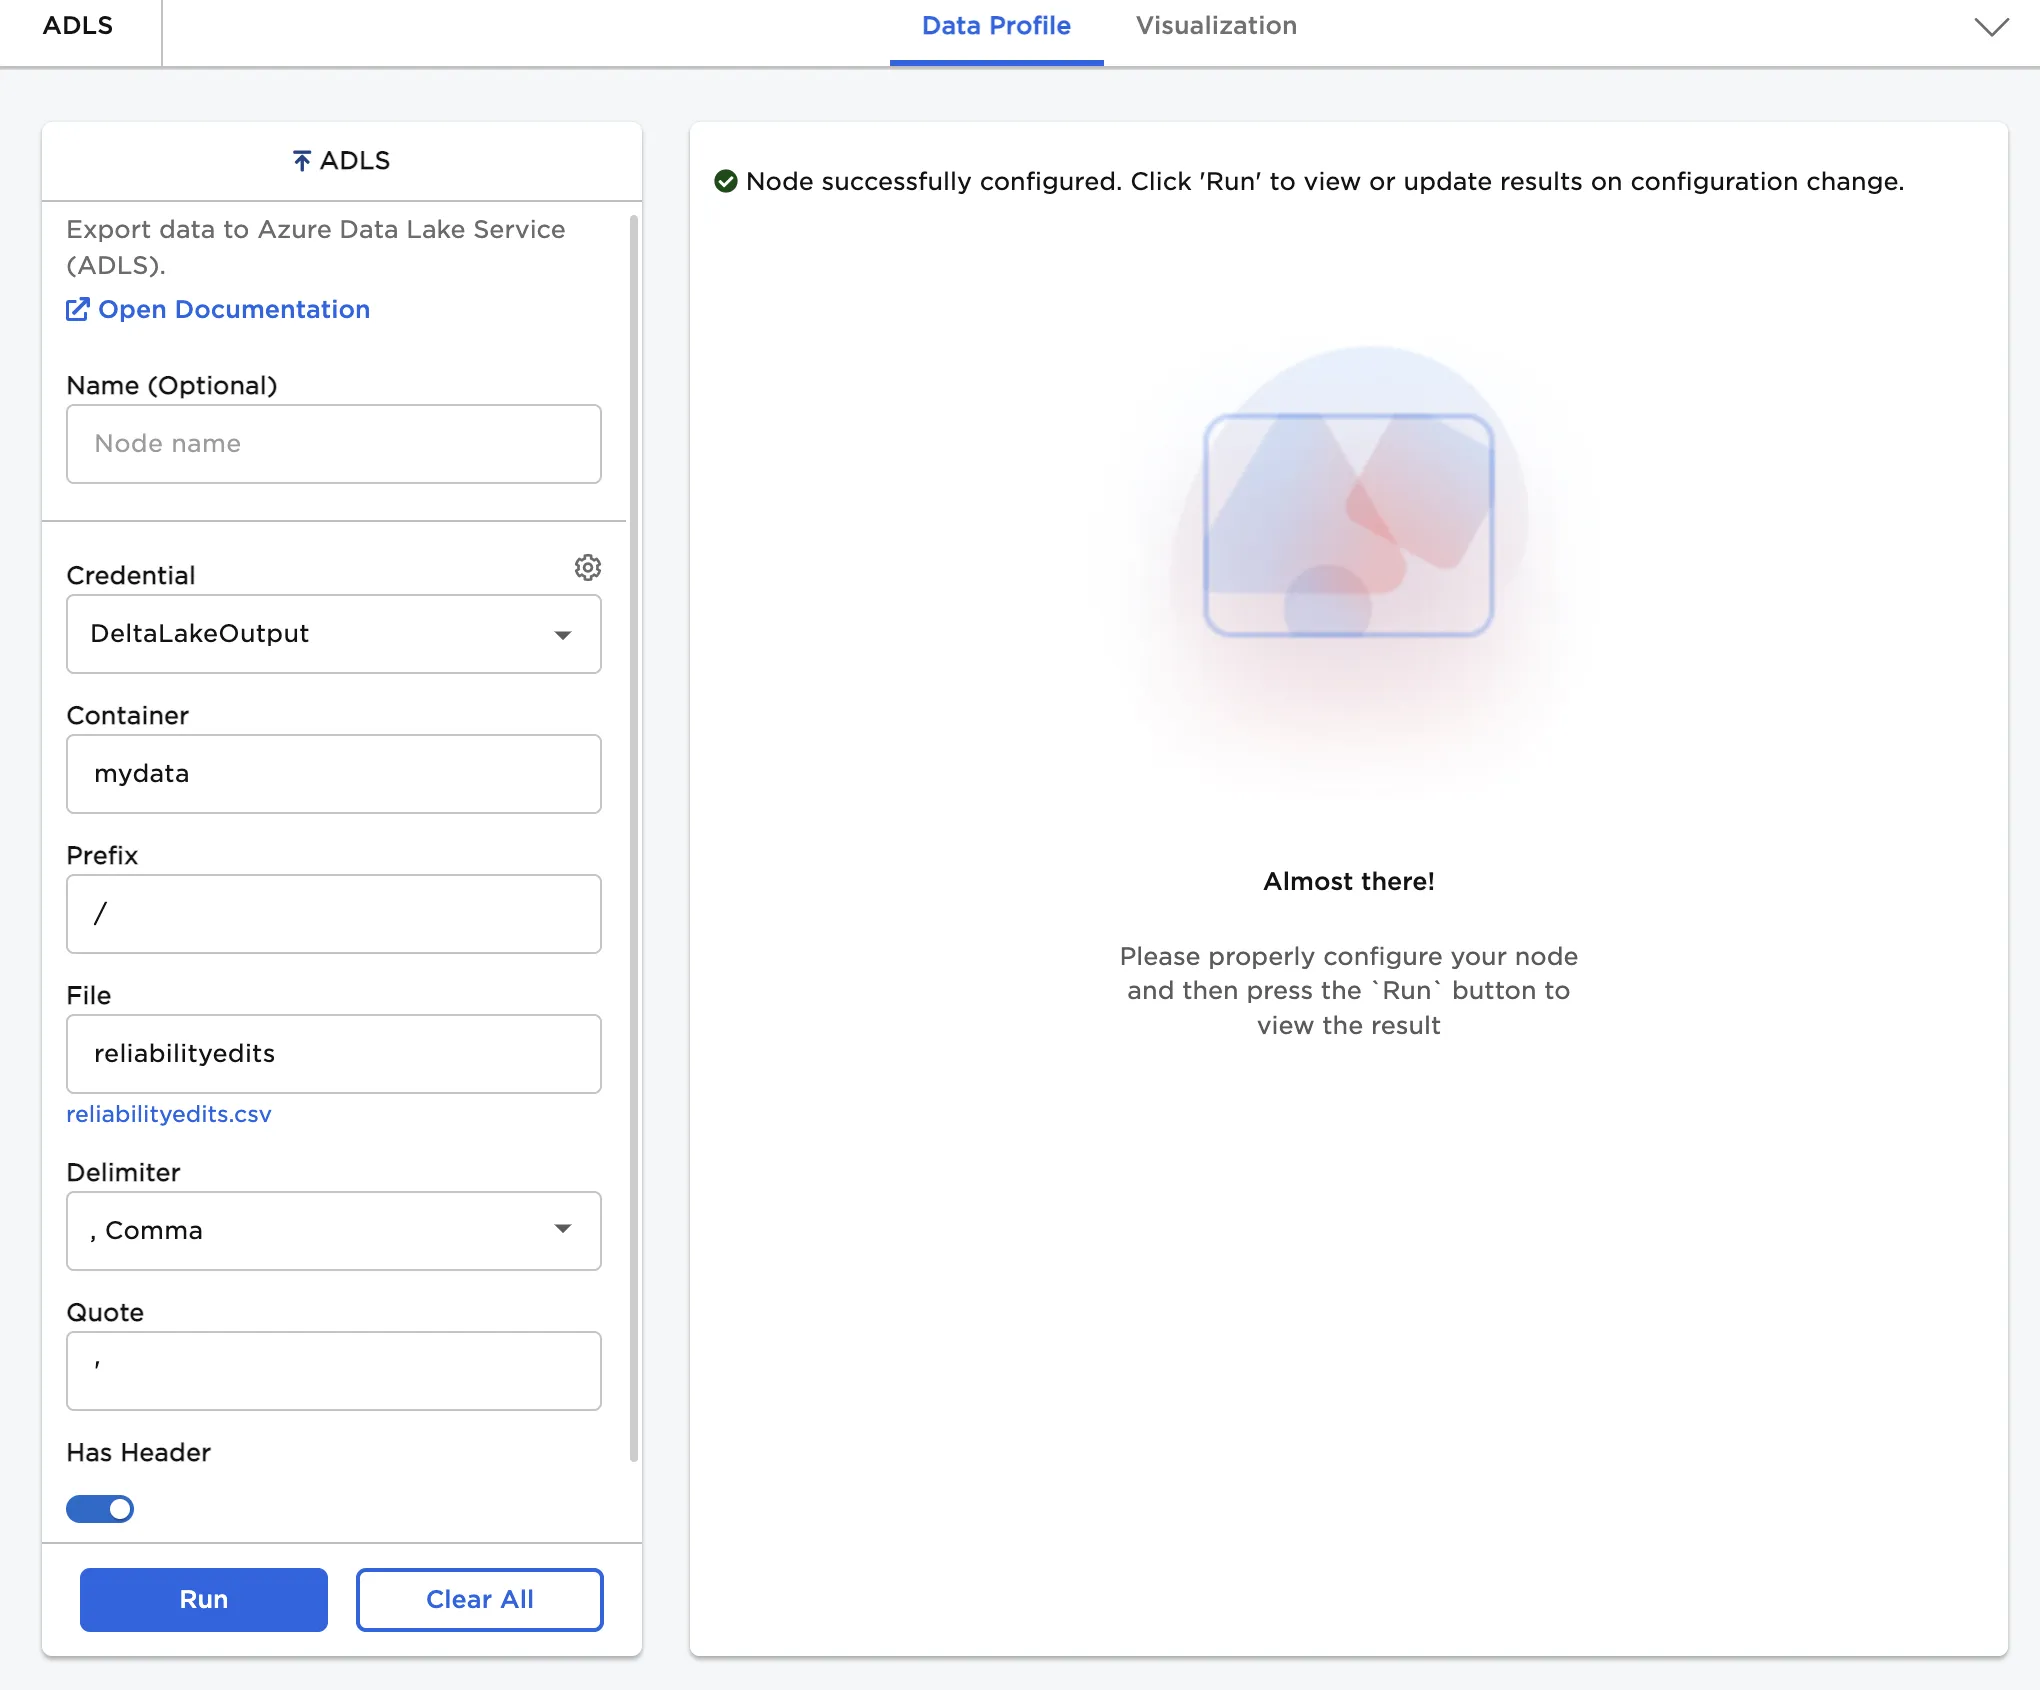
Figure 1: Example output
Examples
Follow the steps below to save data from Visual Notebooks to ADLS.
- Connect an ADLS output node to an existing node.
- Select the saved credentials used to access ADLS. If you have not yet saved credentials, follow the steps in the Prerequisites section above.
- Enter the name of an ADLS container and enter a name for the file.
- Select Run to save the data to ADLS.
Although the node doesn't display any output, the data saves successfully. The data should be present in your ADLS account.
Figure 2: ADLS output node