Delta Lake Output Node
The Delta Lake Output node enables you to export dataframes from Visual Notebooks to Delta Lake storage.
Prerequisites
Before using the Delta Lake Output node, ensure you have valid access credentials. Follow these steps to set up a new Delta Lake connector:
- Add a Delta Lake Output node to your Visual Notebooks workspace
- Click the gear icon next to the Credential field

- Click the plus icon in the upper right corner
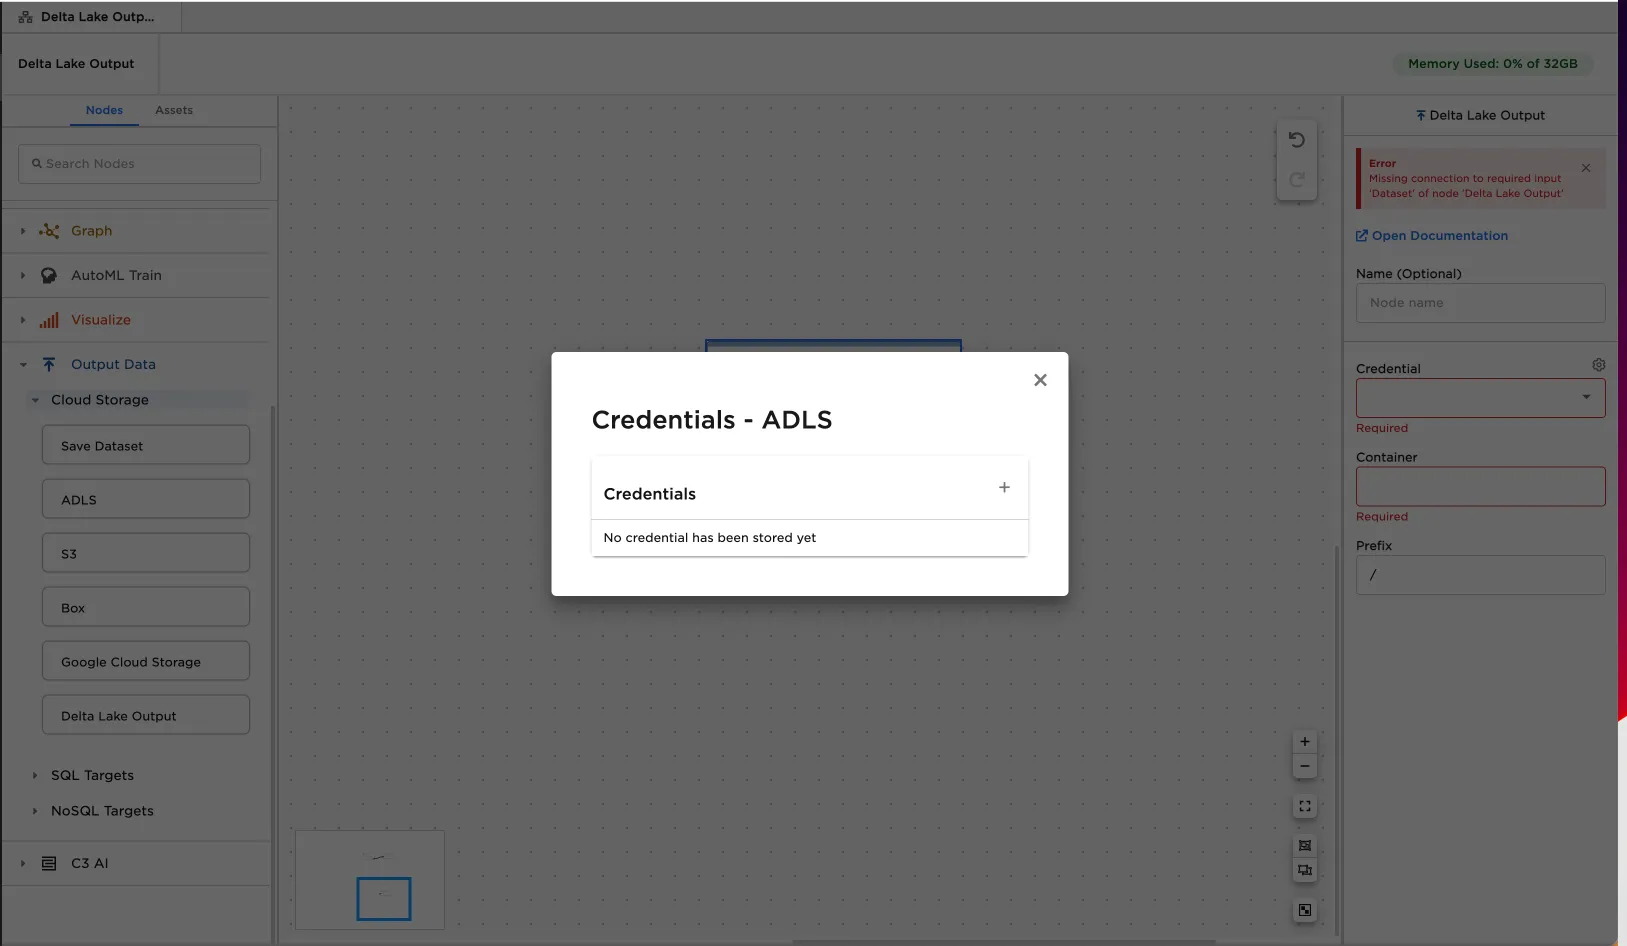
- Enter a descriptive name for the credential
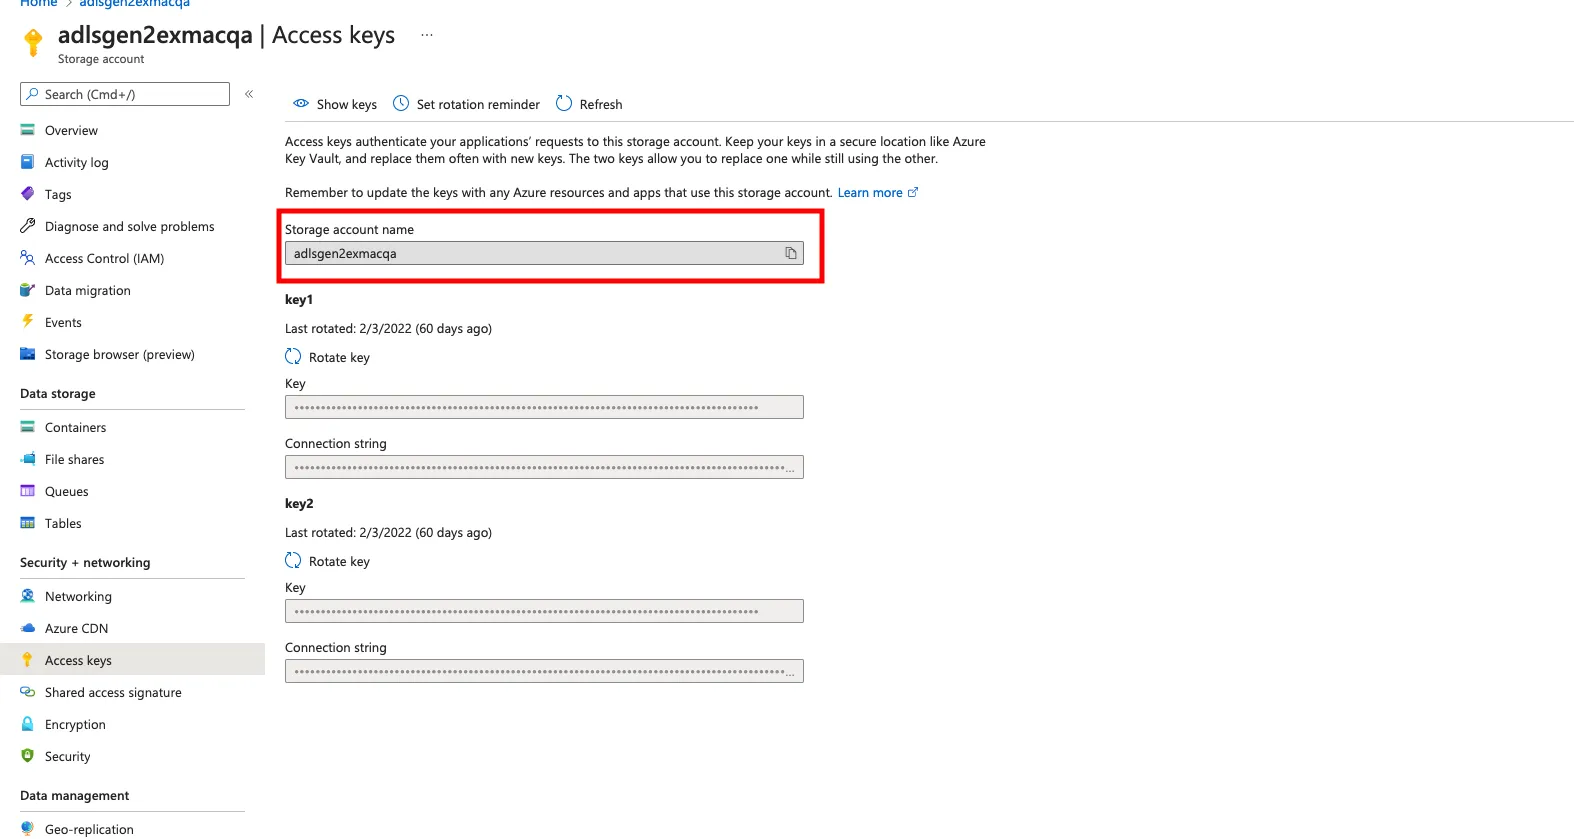
- Obtain your ADLS Access Key:
- Navigate to your Delta Lake storage account in Azure Portal
- Select Access keys from the left navigation menu
- Copy the storage account name to Visual Notebooks
- Click Show keys
- Copy one of the Key values to Visual Notebooks
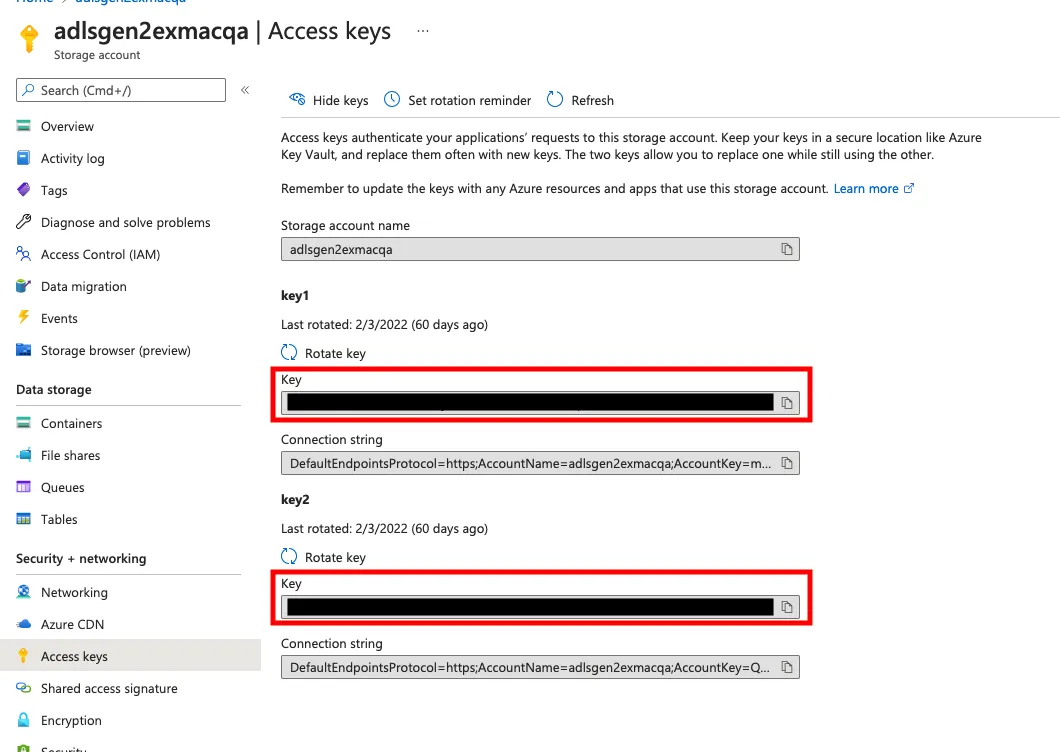
- Save your credentials in Visual Notebooks
Configuration
| Field | Description |
|---|---|
| Name | The node name displayed in your workspace Optional - Defaults to None |
| Credential | Authentication information for Delta Lake access Required Select a saved credential or click the gear icon to manage credentials |
| Container | Target Delta Lake container for data upload Required Must be an existing container name |
| Prefix | Storage prefix path for the output file Optional - Defaults to / Can be new or existing prefix |
Node Inputs and Outputs
| Type | Description |
|---|---|
| Input | Visual Notebooks dataframe |
| Output | None - Data is exported to Delta Lake |
Usage Example
- Connect the Delta Lake Output node to any node that produces a dataframe output
- Configure the node:
- Select your Delta Lake credentials
- Specify the target container
- Set the desired prefix path
- Run the node to export your data
While the node doesn't produce a visible output in Visual Notebooks, it successfully exports your data to the specified Delta Lake location.
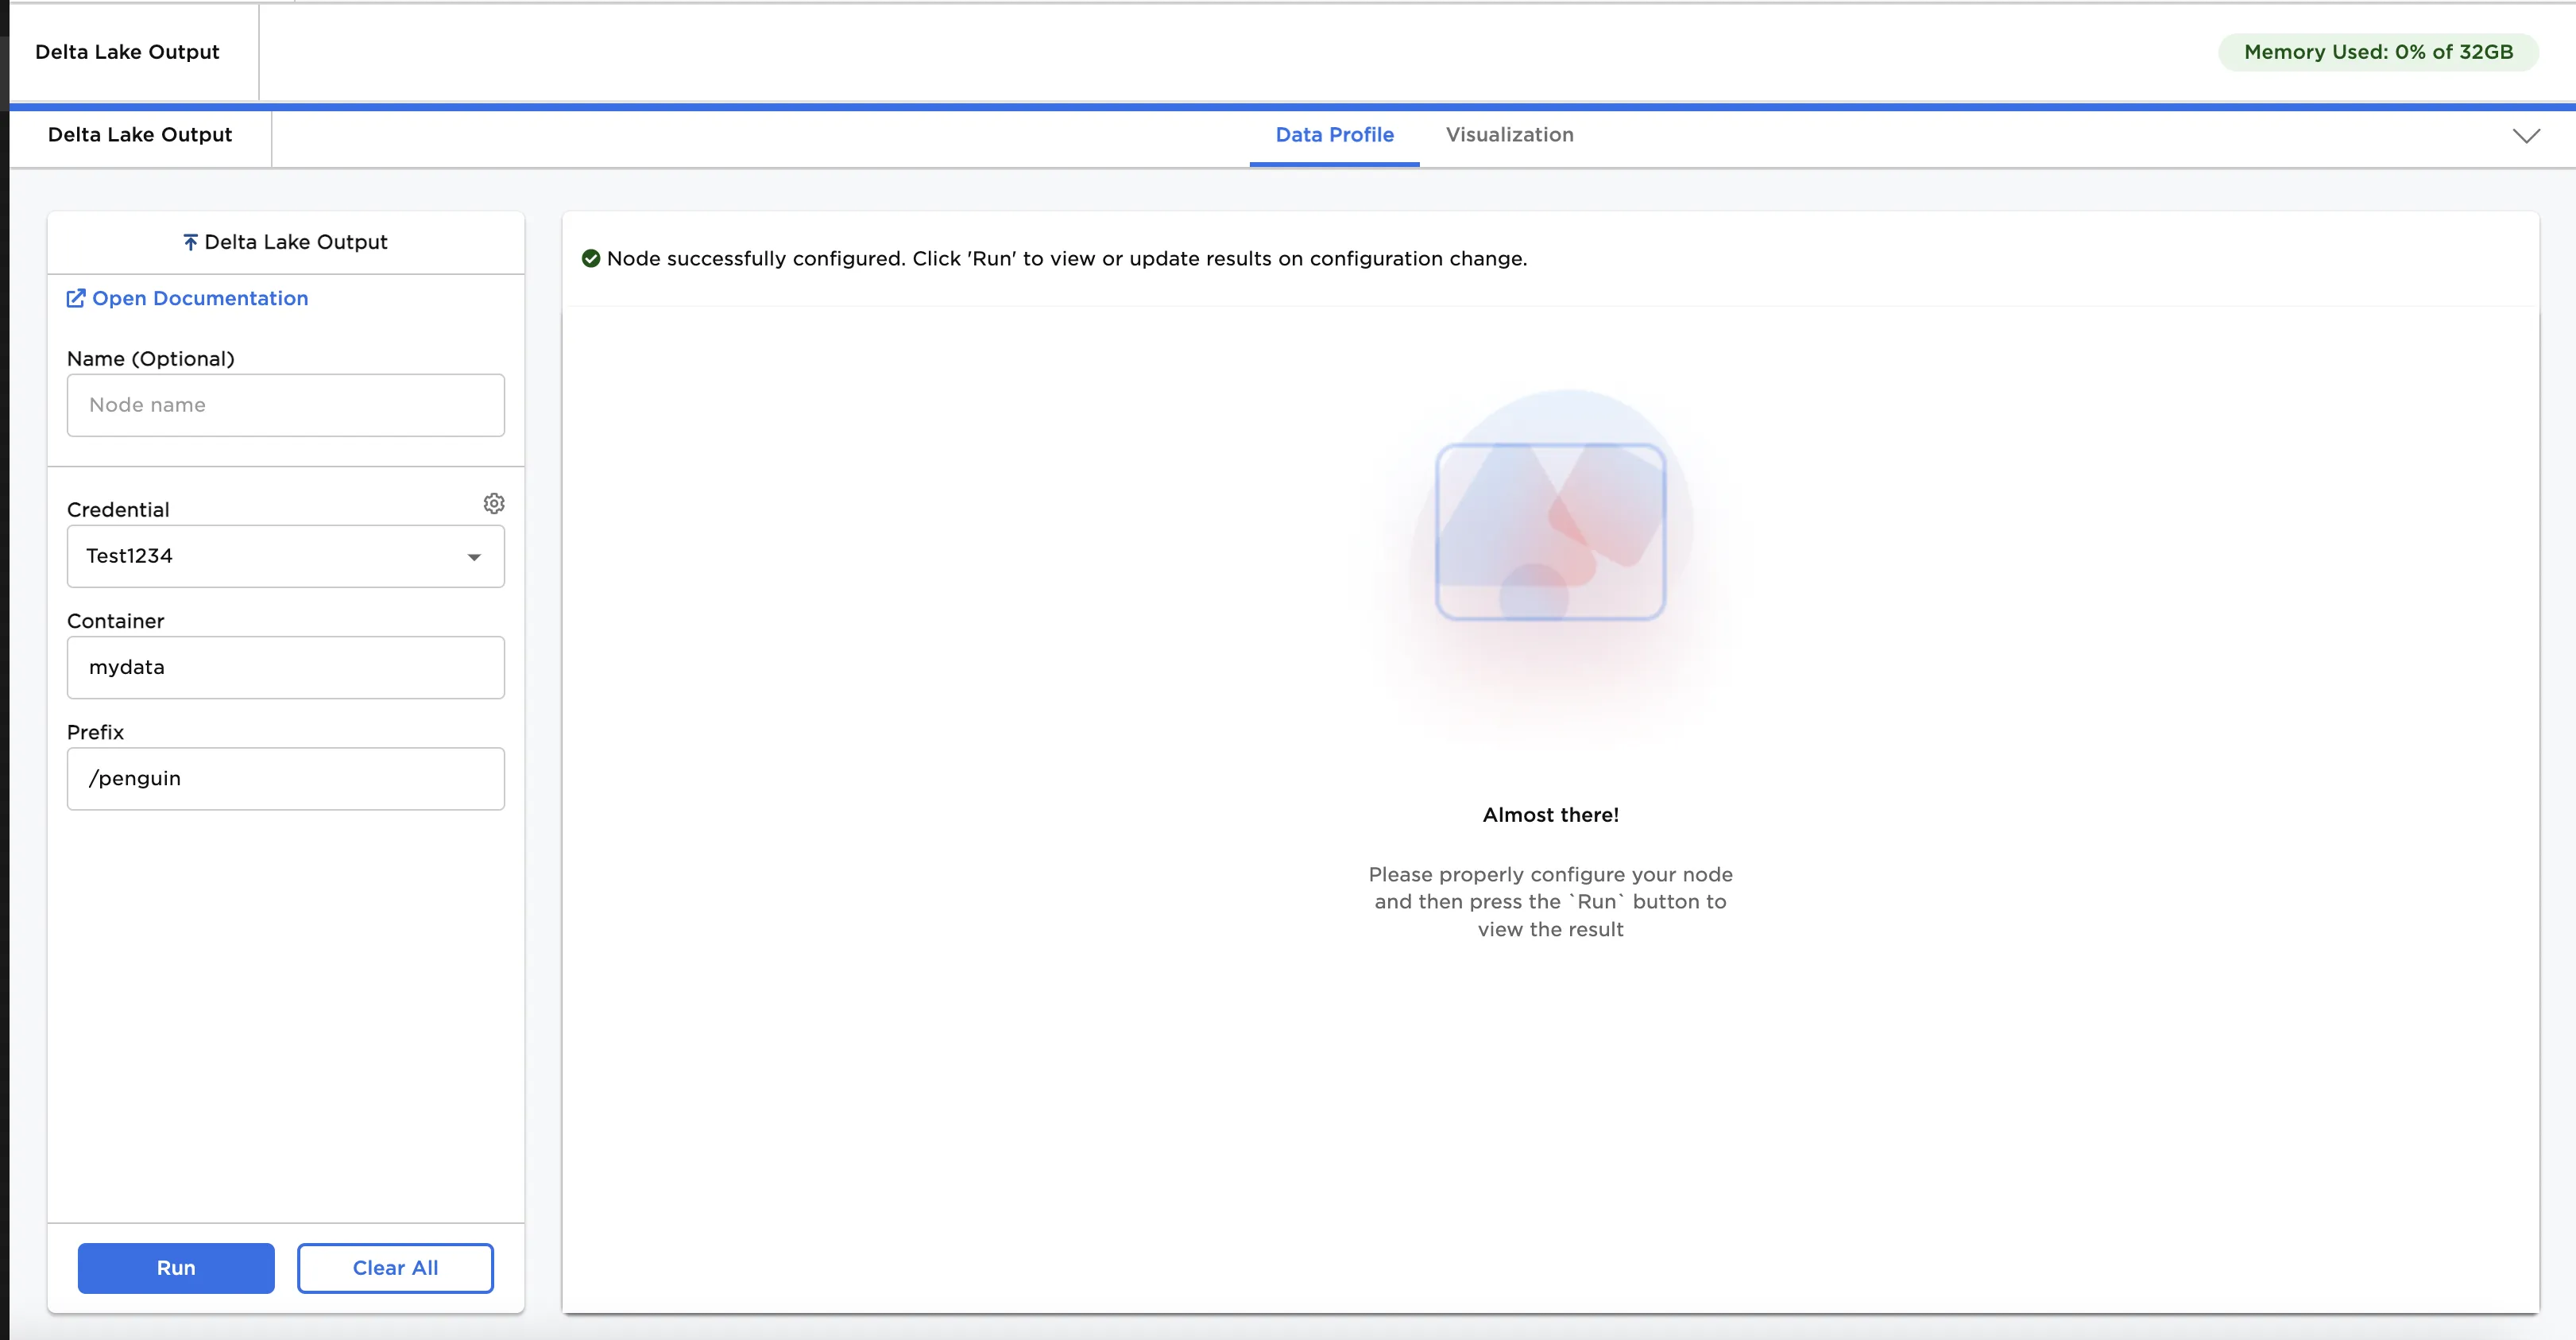 Figure 1: Configuring the Delta Lake Output node for data export