Assembling Arrays in Visual Notebooks
Combine data from multiple columns into a single column of type Array, consisting of an ordered list.
Arrays in Visual Notebooks can contain the following combinations of data types:
- Strings, numeric (i.e., double, integer, long), timestamp and Boolean (Note: all data is converted to string)
- Multiple arrays
If an Array consists entirely of numeric values, it will be labeled as type Vector.
Data analysis often involves a large number of concurrent mathematical operations on structured data (i.e., stored in a database and indexable by row and column). Matrix algebra is most commonly used to perform these operations efficiently. Arrays are equivalent to row vectors, and they complement the efficient column operations built into Visual Notebooks. Several transformations are provided for manipulating Arrays, including creating Arrays, extracting values from Arrays and disassembling Arrays.
Configuration
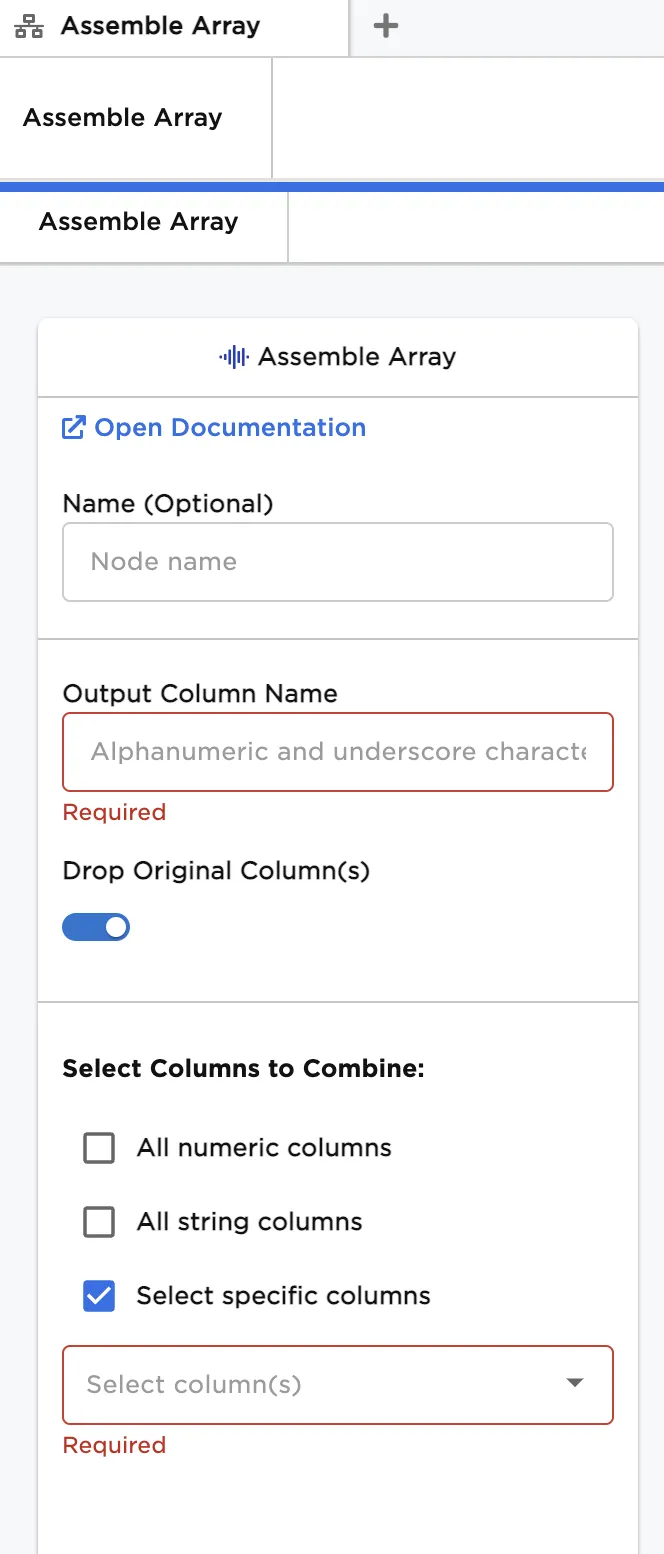
Configuration sidebar
| Field | Description |
|---|---|
| Name (default=none) | Name of the node - A user-specified node name, displayed in the canvas and in the dataframe as a tab. |
| Output Column Name Required | Output column name for the new Array column - Enter a name for the column containing the Array to be created. |
Drop Original Column(s) (default=On) | Toggle to drop or keep the original column - Leave the switch on to delete the original columns used to form the new Array. Except for the column names, column data is preserved in the new Array column. Toggle the switch off to keep the original columns. |
| Select Columns to Combine Required | Columns to combine to form a new Array column - Each column occupies a specific position in the Array. Columns are assembled from left to right based on ordering in the input dataframe. |
Node Inputs/Outputs
| Input | A Visual Notebooks dataframe |
|---|---|
| Output | A dataframe with at least one Array column and a column of labels |
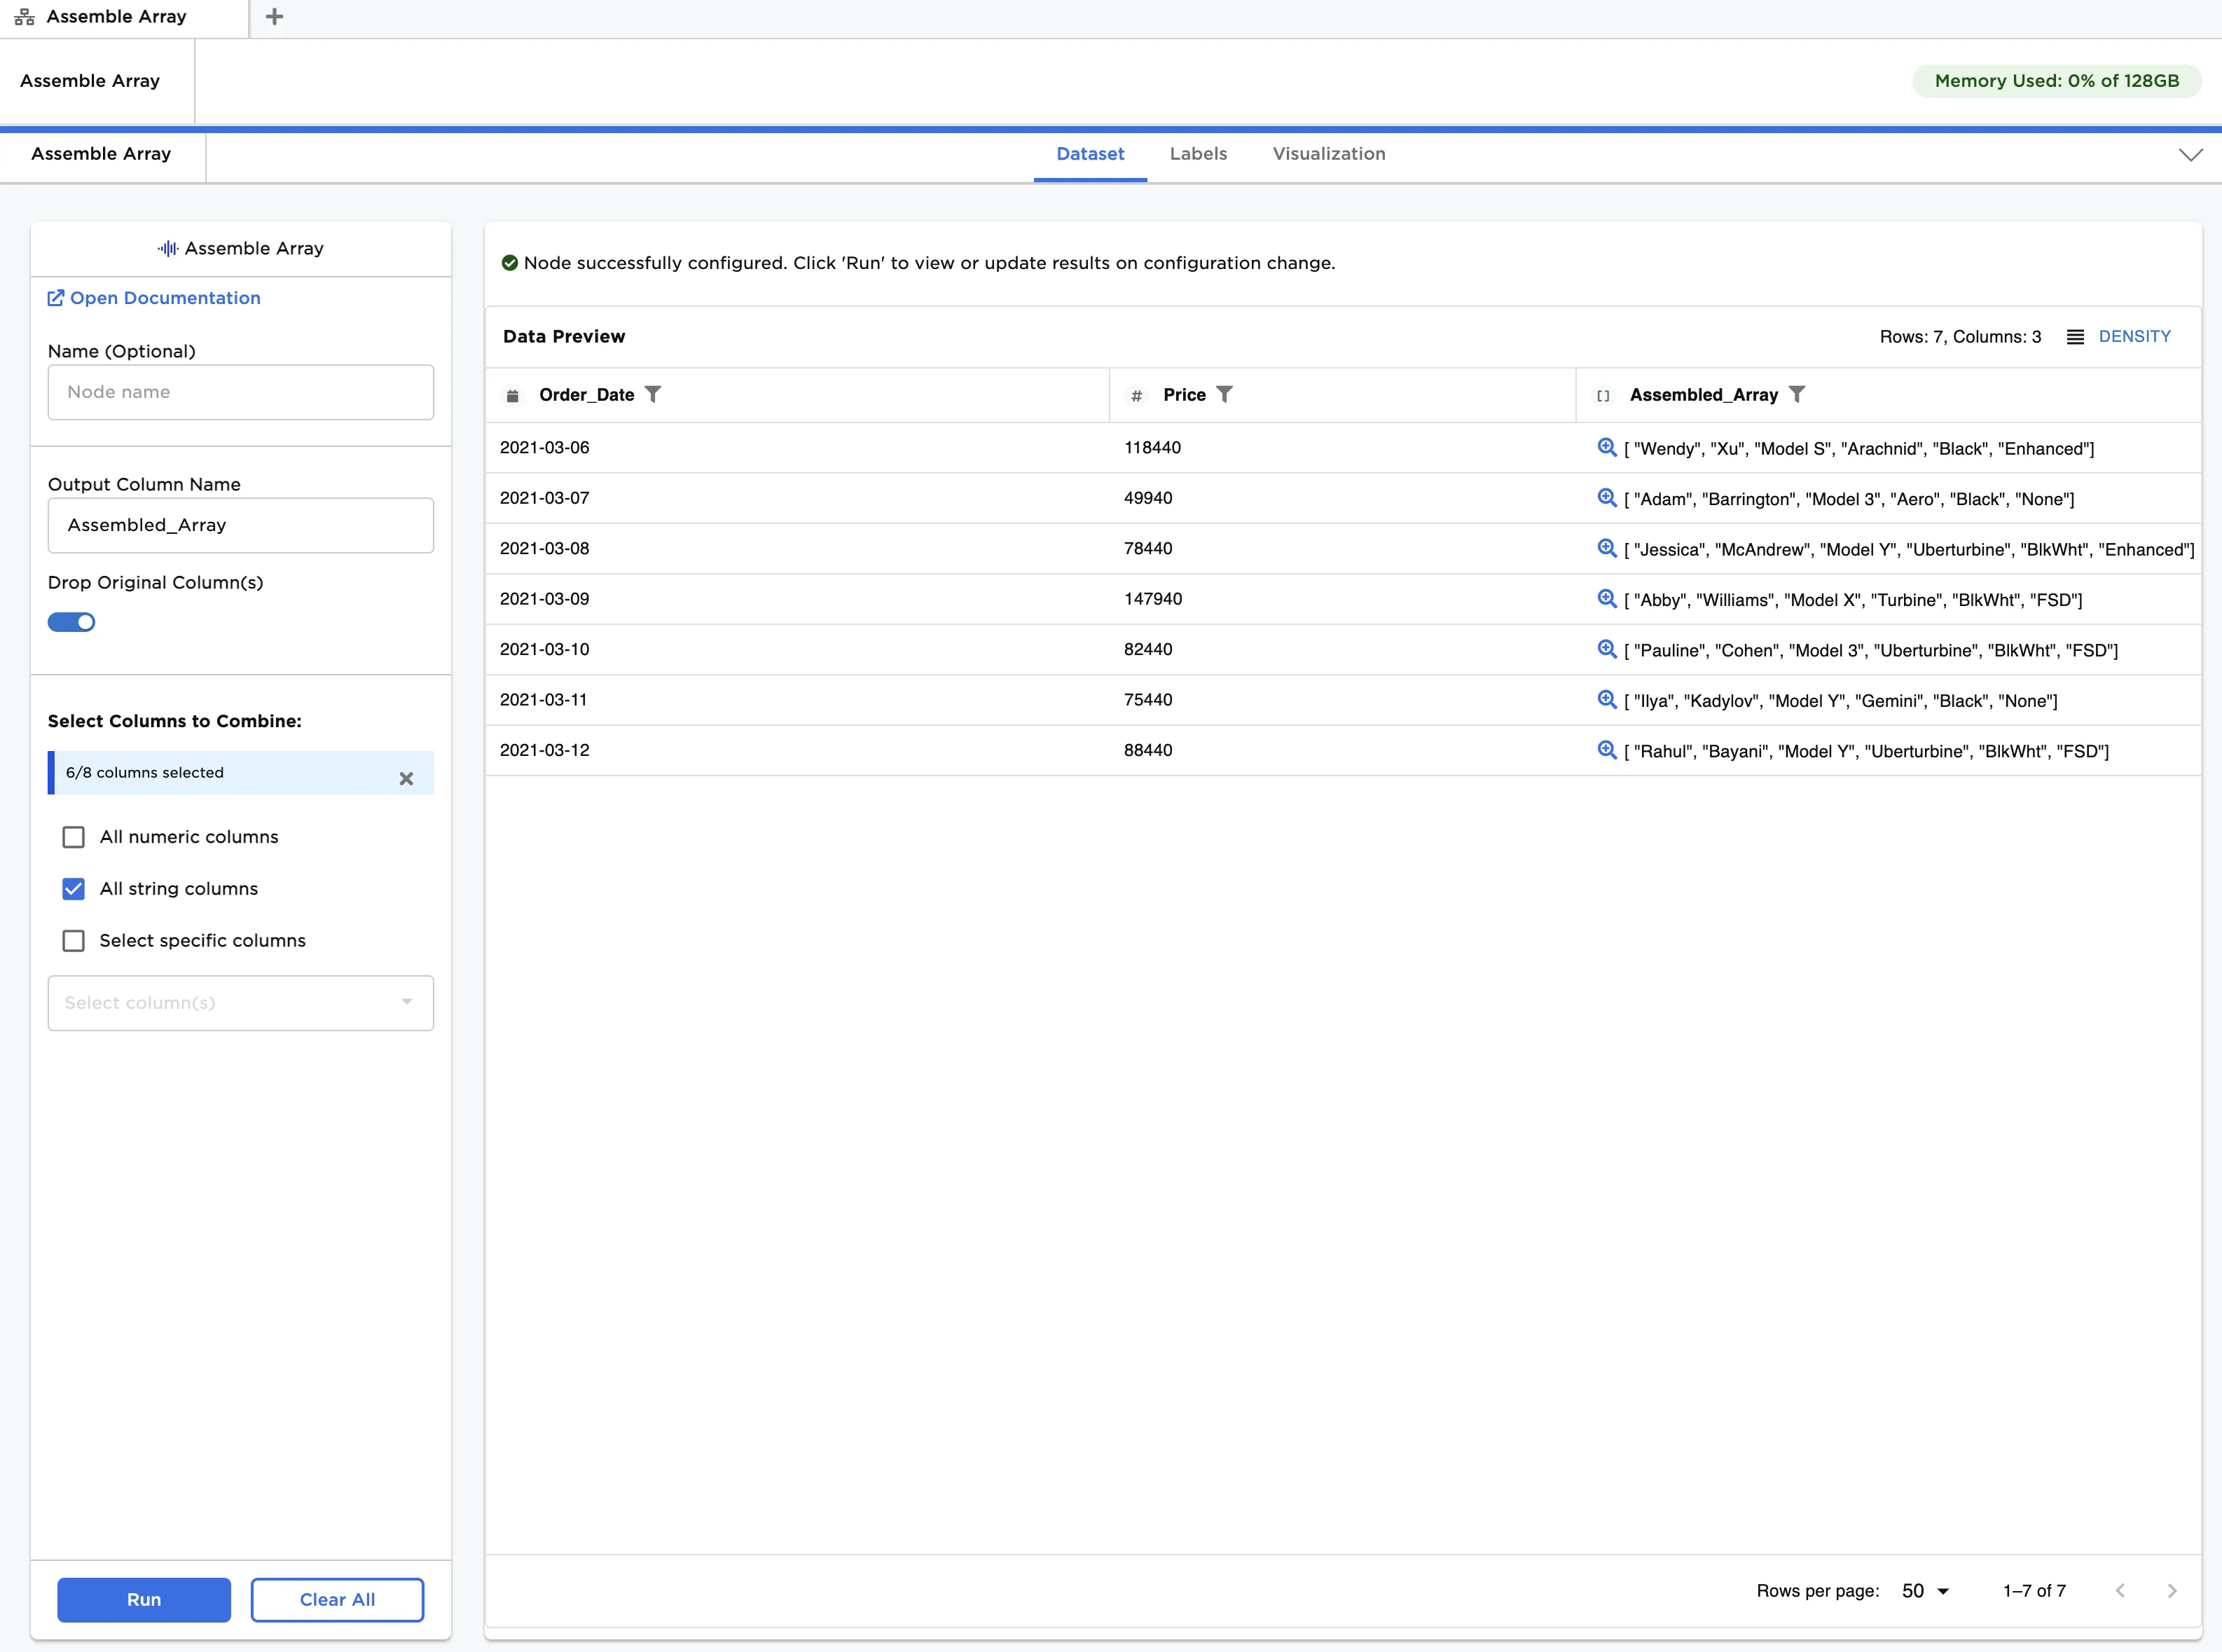
Figure 1: Example dataframe output
Examples
The data shown in Figure 2 is used in the following example. It contains operating data for a number of gas turbine powered generators, including temperatures, pressures, speed, and output power components. We would like to group related columns into Arrays as follows:
Temperatures
- Inlet Temperature
- Combustion Temperature
- Exhaust 1 Temperature
- Exhaust 2 Temperature
Pressures
- Inlet Pressure
- Combustion Pressure
- Interstage Pressure
Speed
- Input RPM
Power Components
- Output Voltage
- Output Current
The first example demonstrates how to create a single Array from a group of columns. The second example demonstrates how to create a nested Array from multiple Arrays, each created with a unique group of columns.
The example data is available in the Visual Notebooks sample datasets.
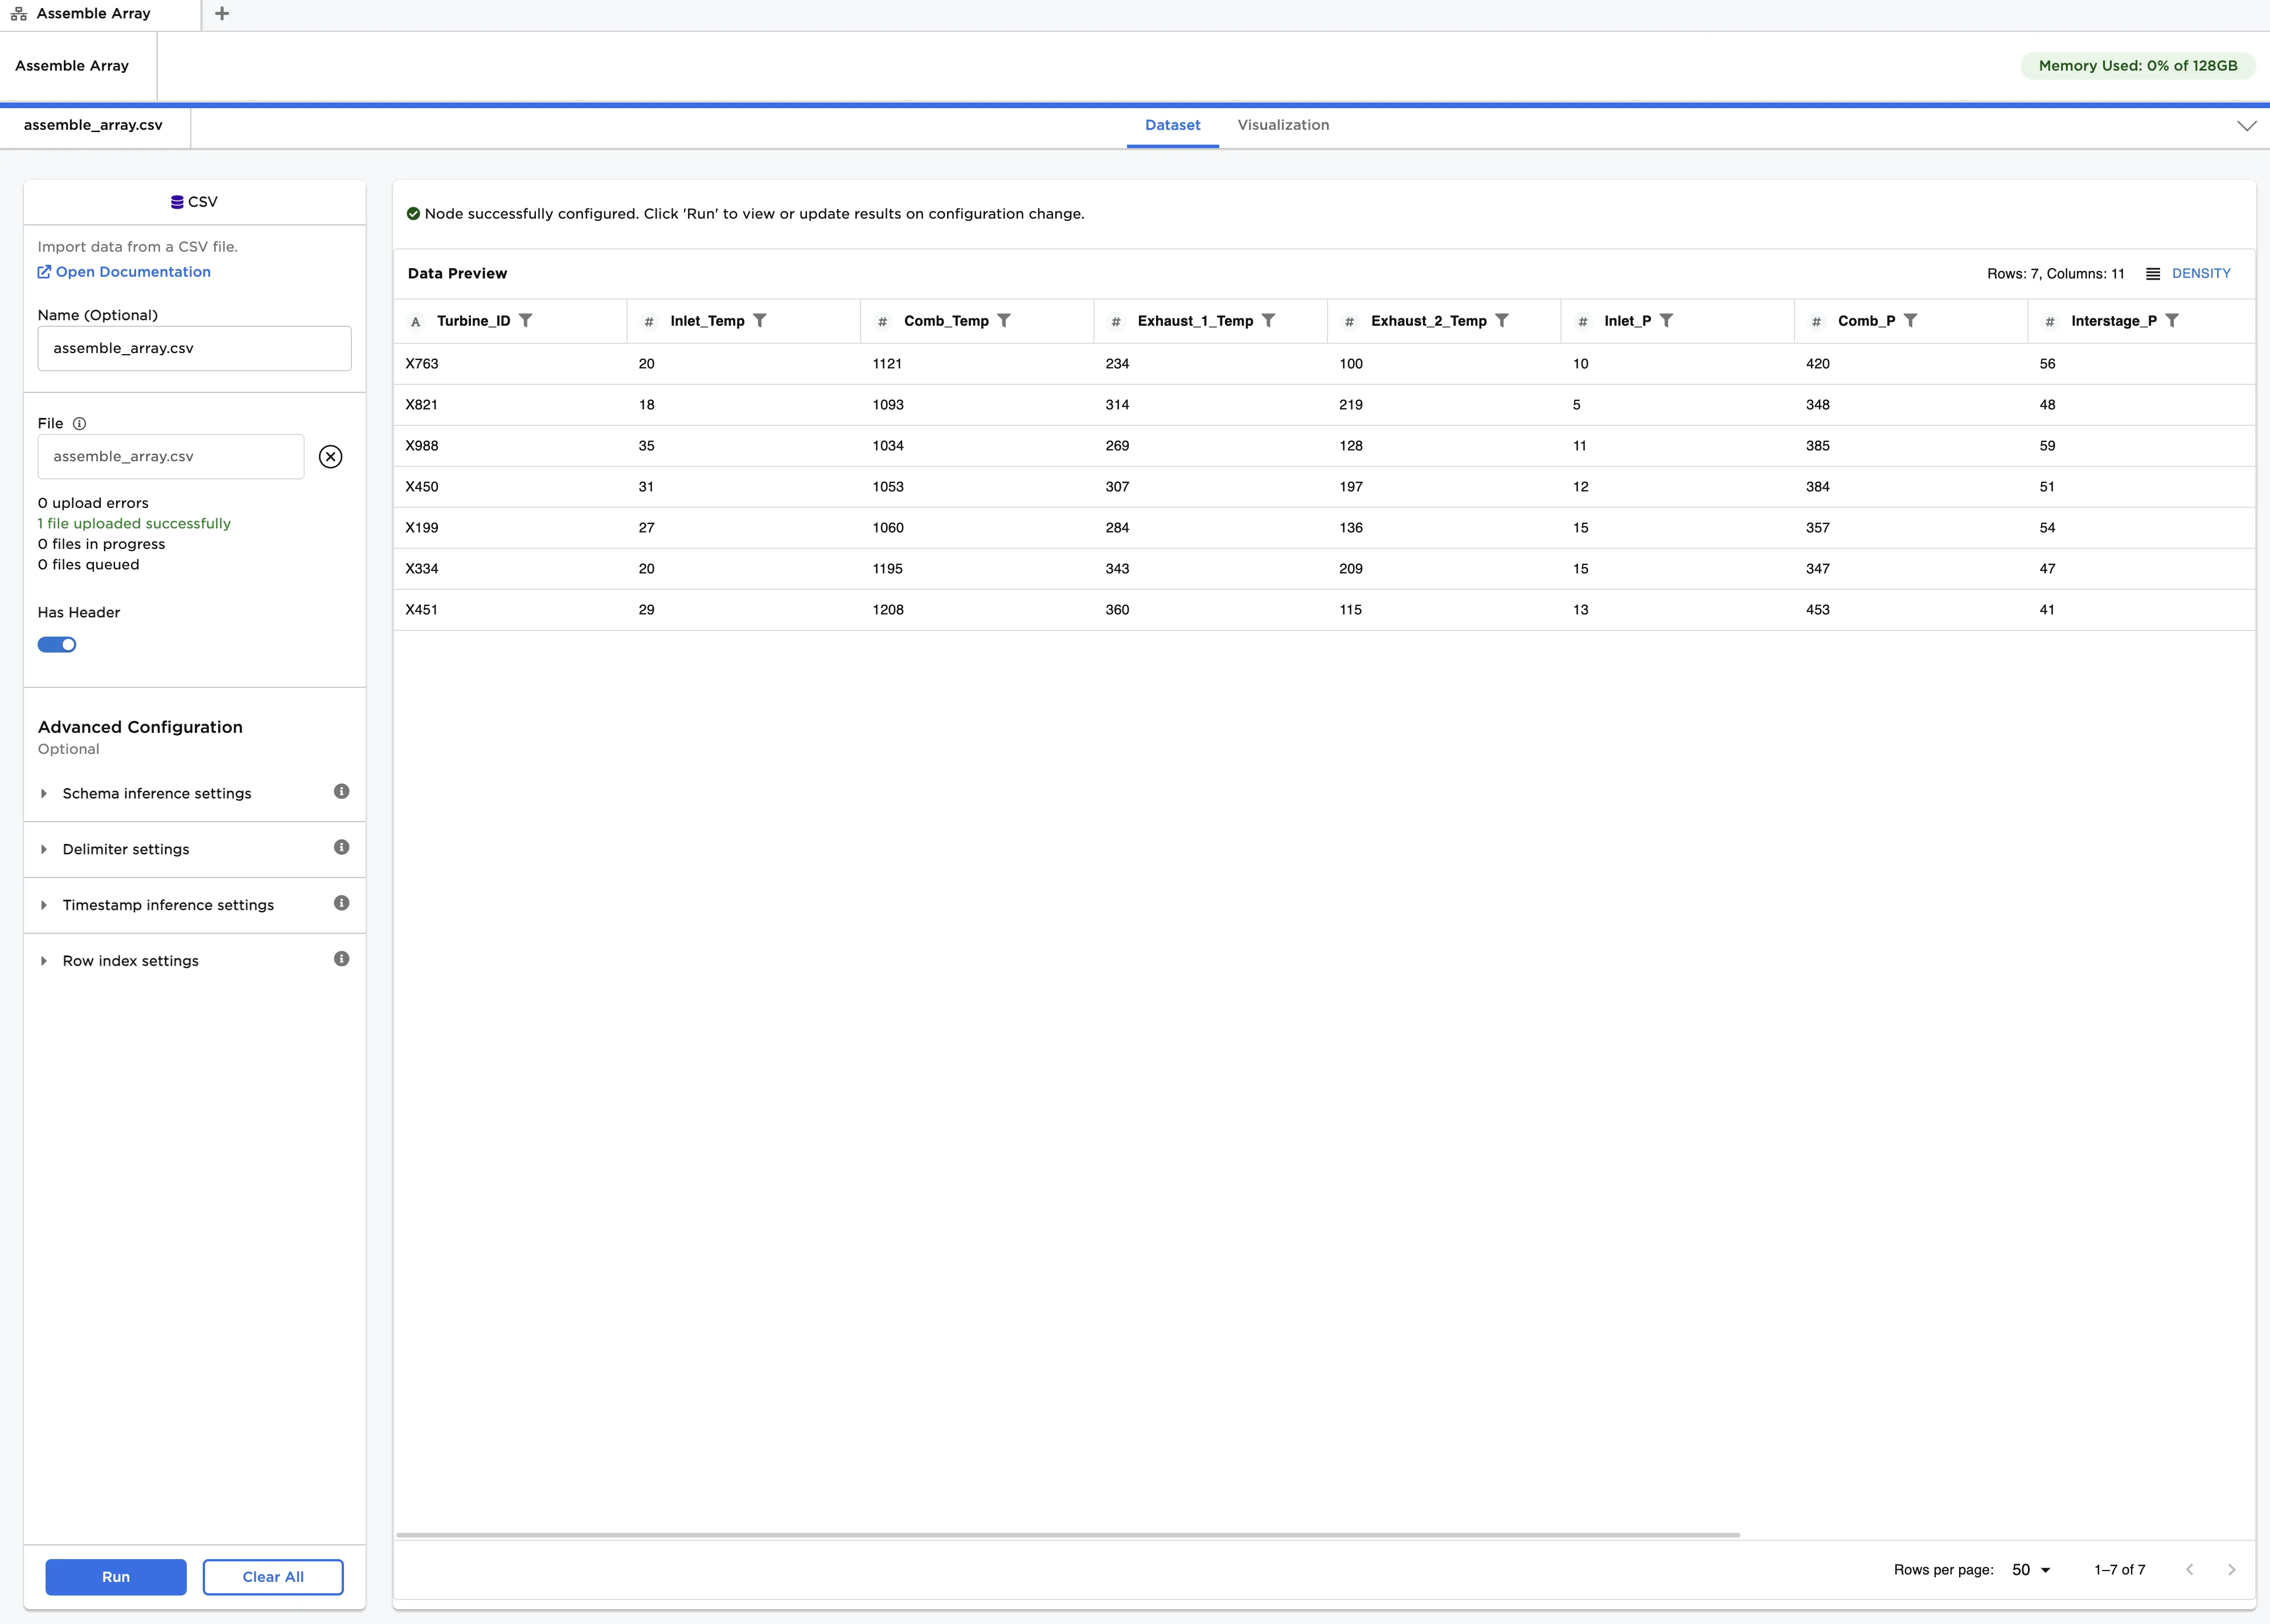
Figure 2: Example input data
Example 1 - Assemble simple Array from Temperature fields
In this example, we create an Array from the temperature columns.
- For simplicity, let's first drop all columns except the four temperature columns: Inlet_Temp, Comb_Temp, Exhaust_1_Temp, and Exhaust_2_Temp. Connect a Select or Drop Columns node to an existing node. In this case, it is connected to a CSV node with the example data provided.
- Ensure Select Columns to Keep is selected for Selection Method.
- In Select Columns to Combine check Select specific columns and add the four temperature columns. Click Run.
- Connect an Assemble Array node to the Select or Drop Columns node.
- Enter
Tempsfor Output Column Name. - Toggle Drop Original Columns to off.
- In Select Columns to Combine check Select specific columns and check Select all. Click Run.
After running the node, the new "Array" column can be found as the fifth column, which is shown in Figure 3. Note that the node has two output ports: "Dataset" and "Labels". "Dataset" is the dataframe output, while "Labels" is a list of the column names used to create the Array. Labels are useful when the original columns are dropped, and you need to preserve their names to identify entries in the Array.
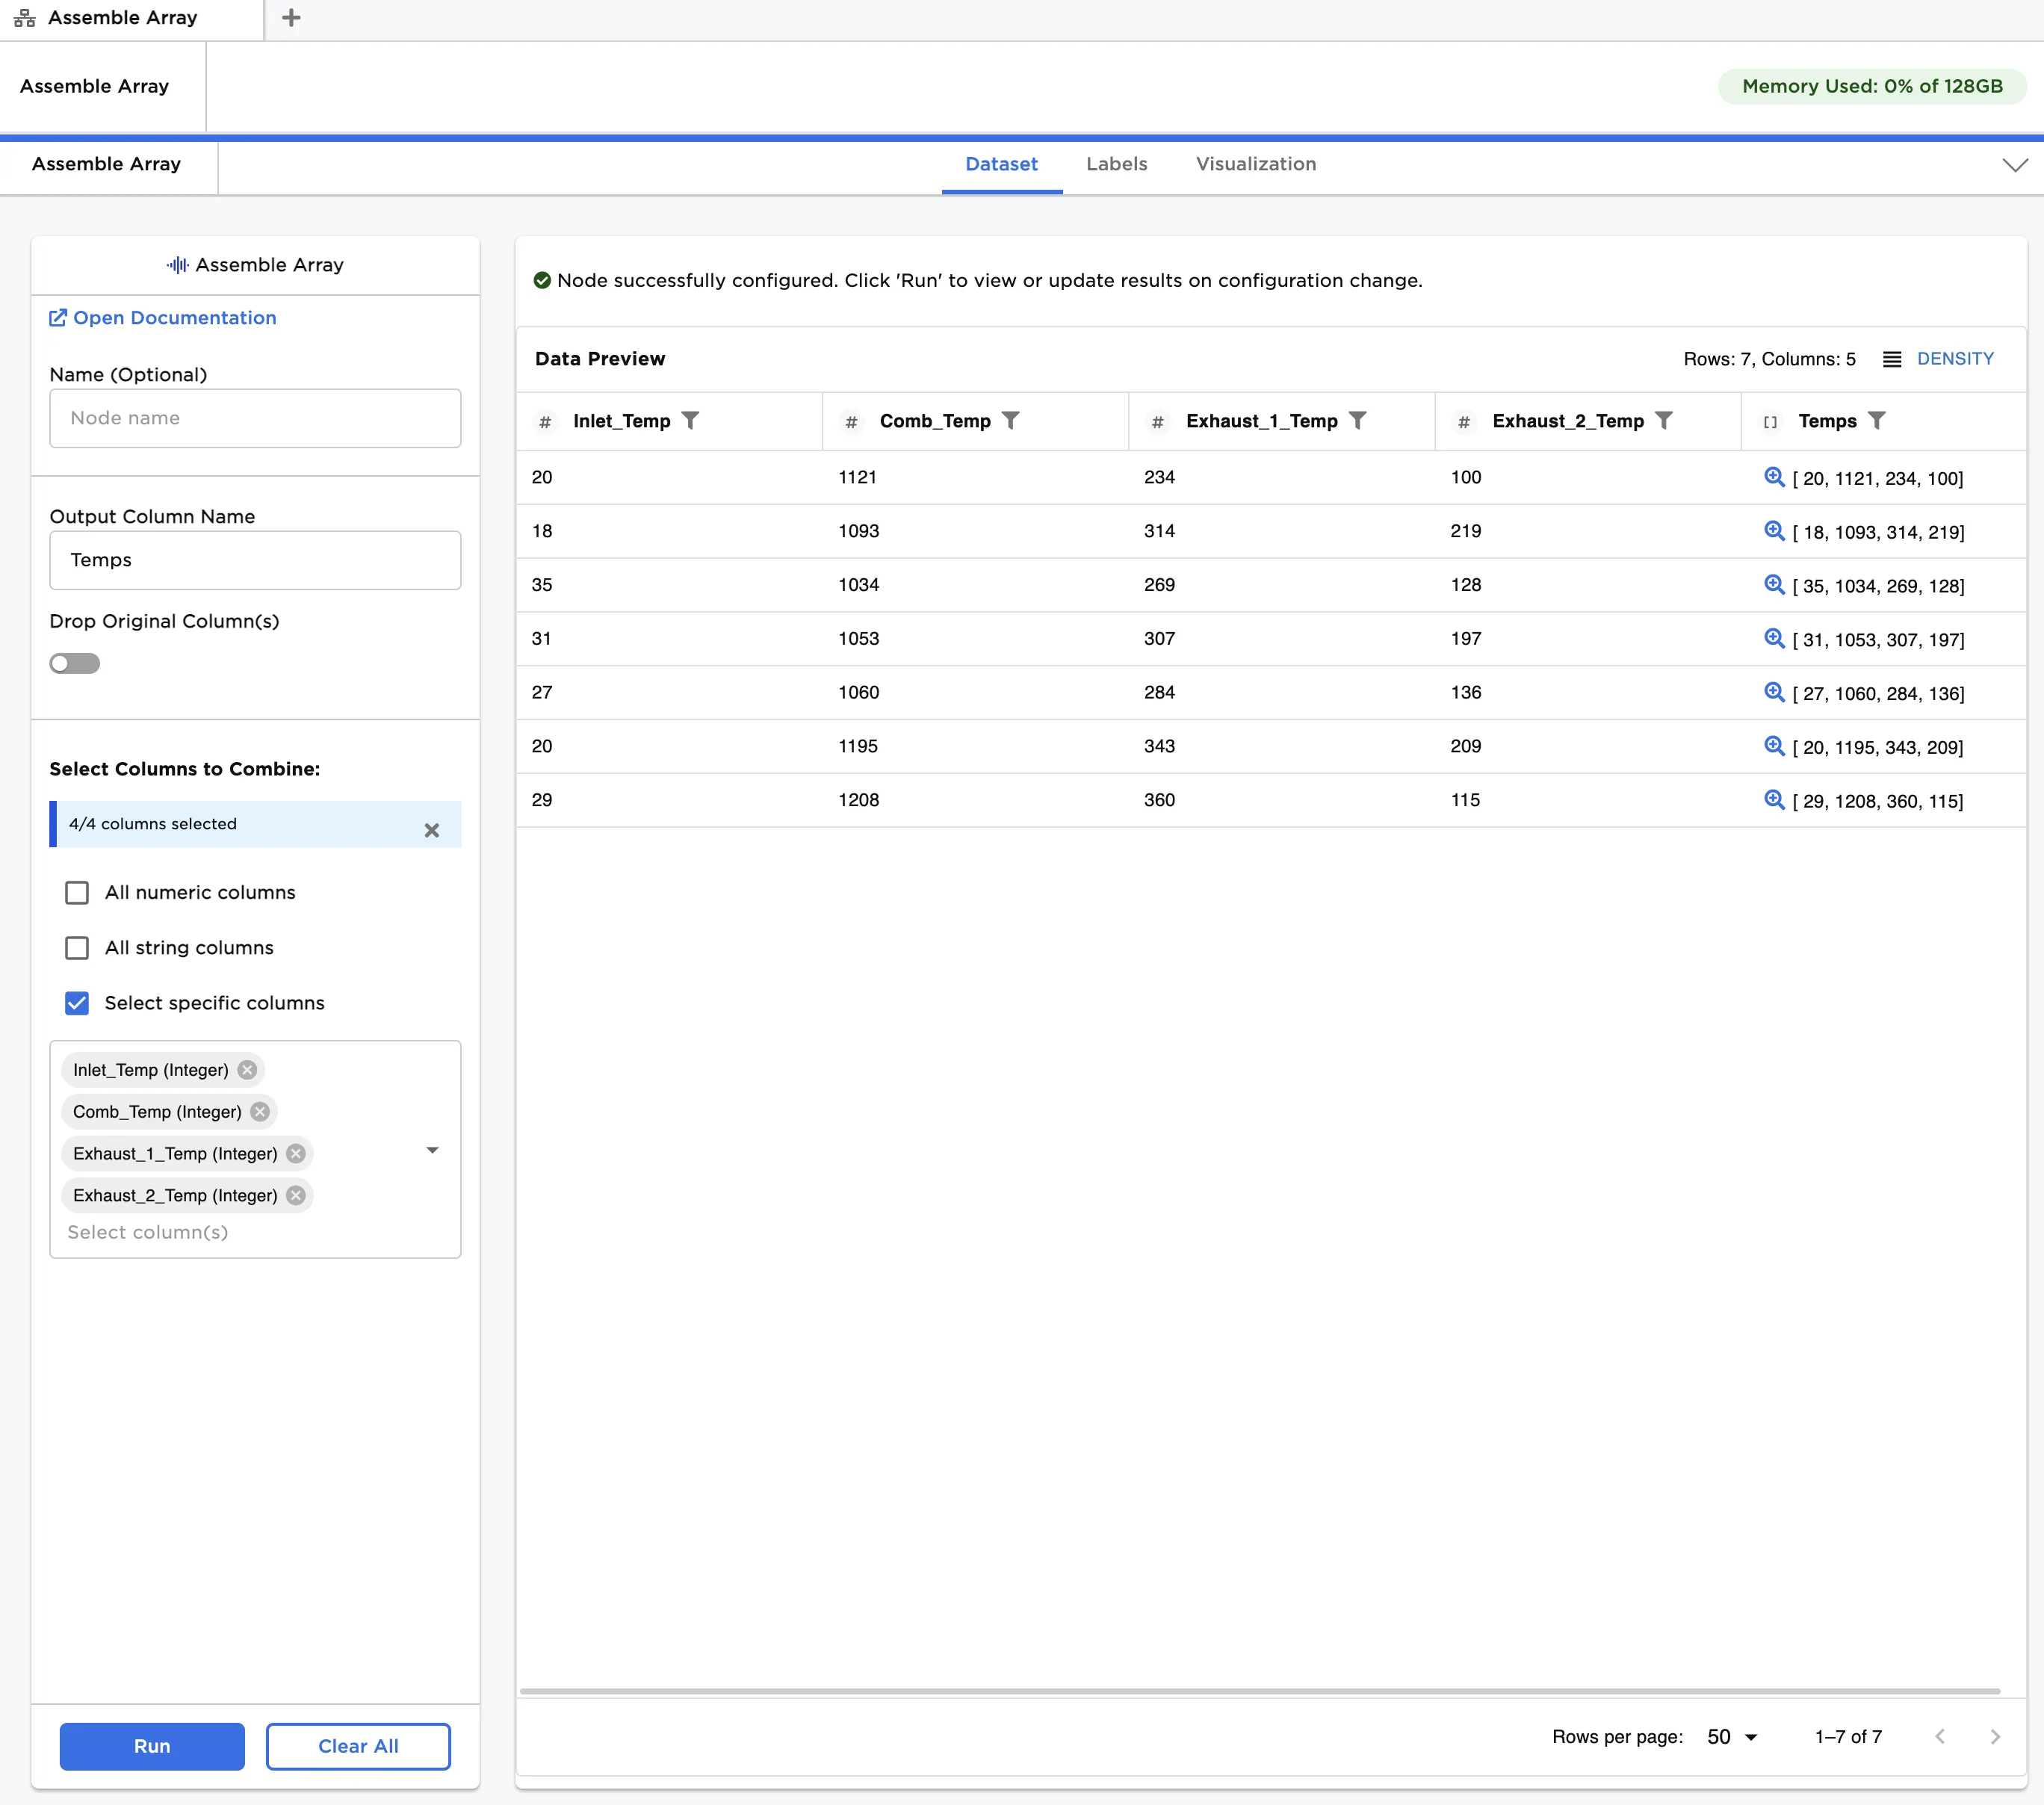
Figure 3: Assembling a simple Array
Example 2 - Nested Arrays
Returning to the original dataset, we now create the four simple Array columns: Temps, Pressures, Speed, and Power_Comp in multiple Assemble Array nodes. We demonstrate combining the columns by adding a single Assemble Array node, after the four simple Array column nodes, called "Parameters". See Figure 5 for a sample setup of the workspace.
- Connect an Assemble Array node to a CSV node with the example data provided.
- Enter
Combine Tempsfor Name, andTempsfor Output Column Name. - Ensure Drop Original Columns is toggled on.
- In Select Columns to Combine check Specific columns and add the four temperature columns: Inlet_Temp, Comb_Temp, Exhaust_1_Temp, and Exhaust_2_Temp. Click Run.
- Connect a new Assemble Array node to the output of the Combine Temp Fields (Assemble Array) node.
- Repeat Steps 2-5, creating
Combine Pressures,Speed, andCombine Power_Compnodes, with column groupings and output column names provided at the beginning of the examples section. You should have four Assemble Array nodes connected in series, with the output dataframe as shown in Figure 4. - Connect a new Assemble Array node to the last node, and combine all columns into a new Array called
Parameters. The node name should beAssemble all into Parameters.
Figure 5 shows how the Array columns are combined to form Parameters, along with the contents of the Parameters column. You can see that all of the gas turbine operating parameters are now stored compactly in a single Array, which can be used to perform additional calculations efficiently.
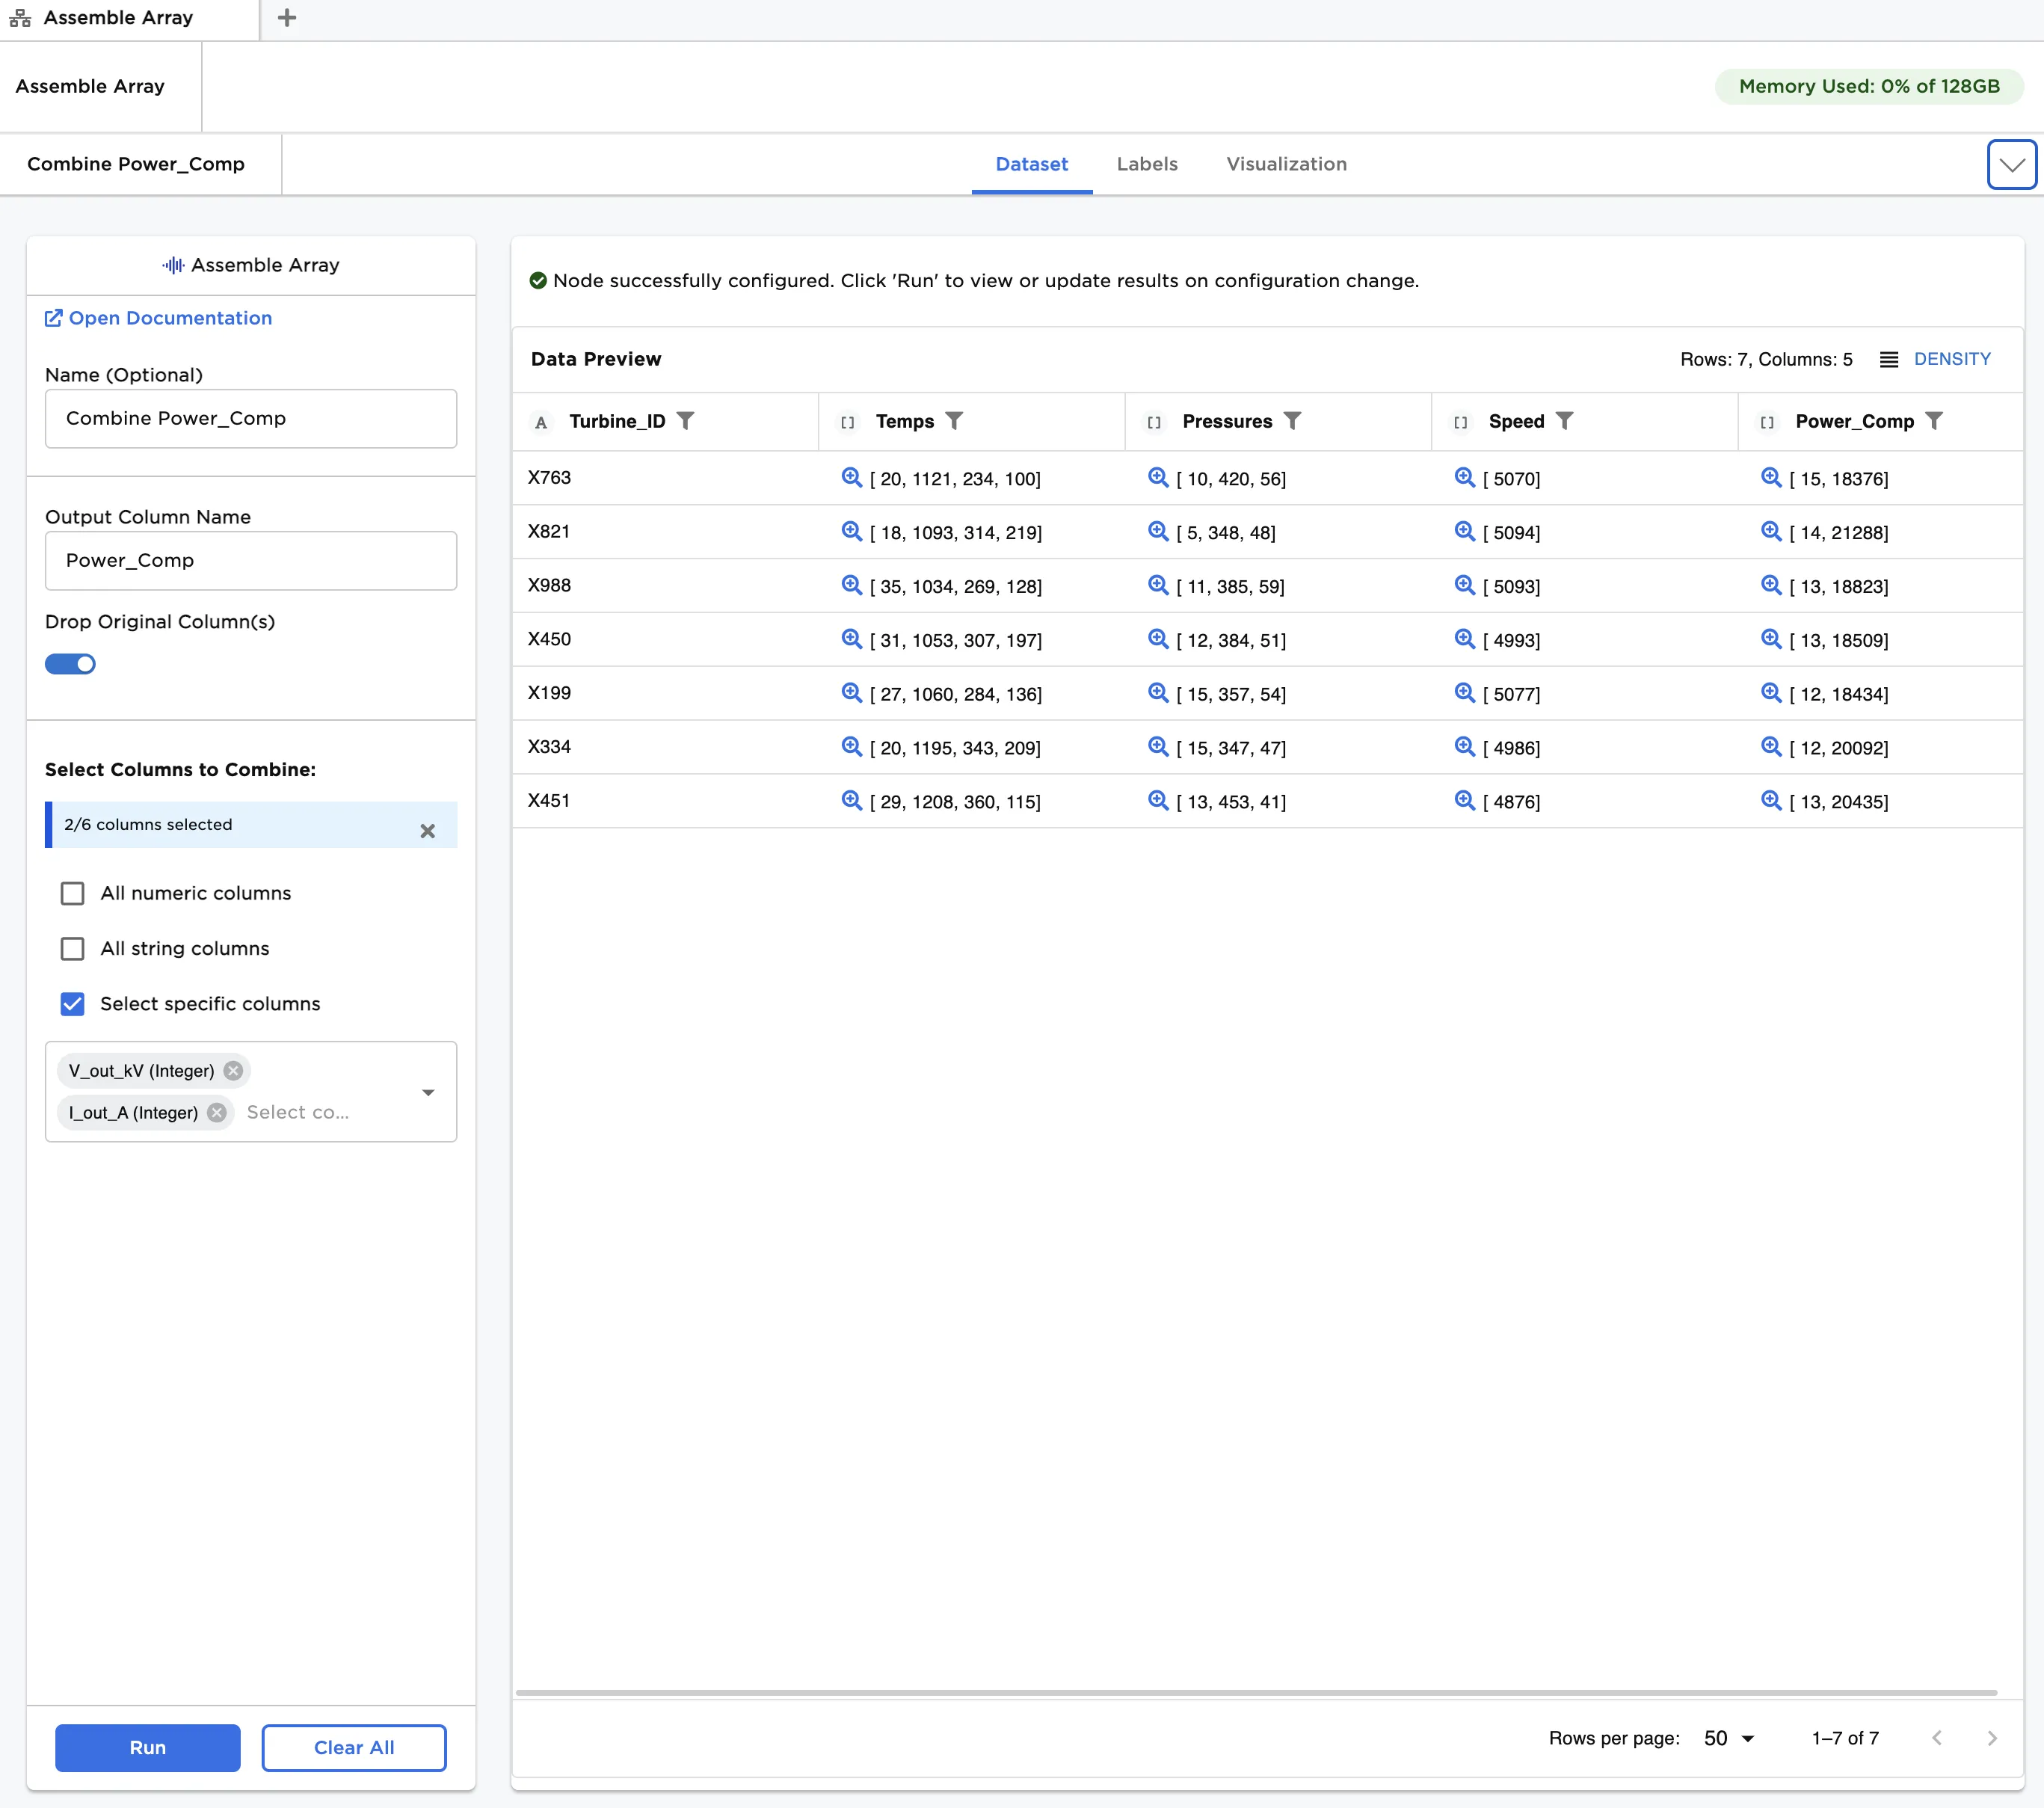
Figure 4: Using "Assemble Array" to create multiple Array columns

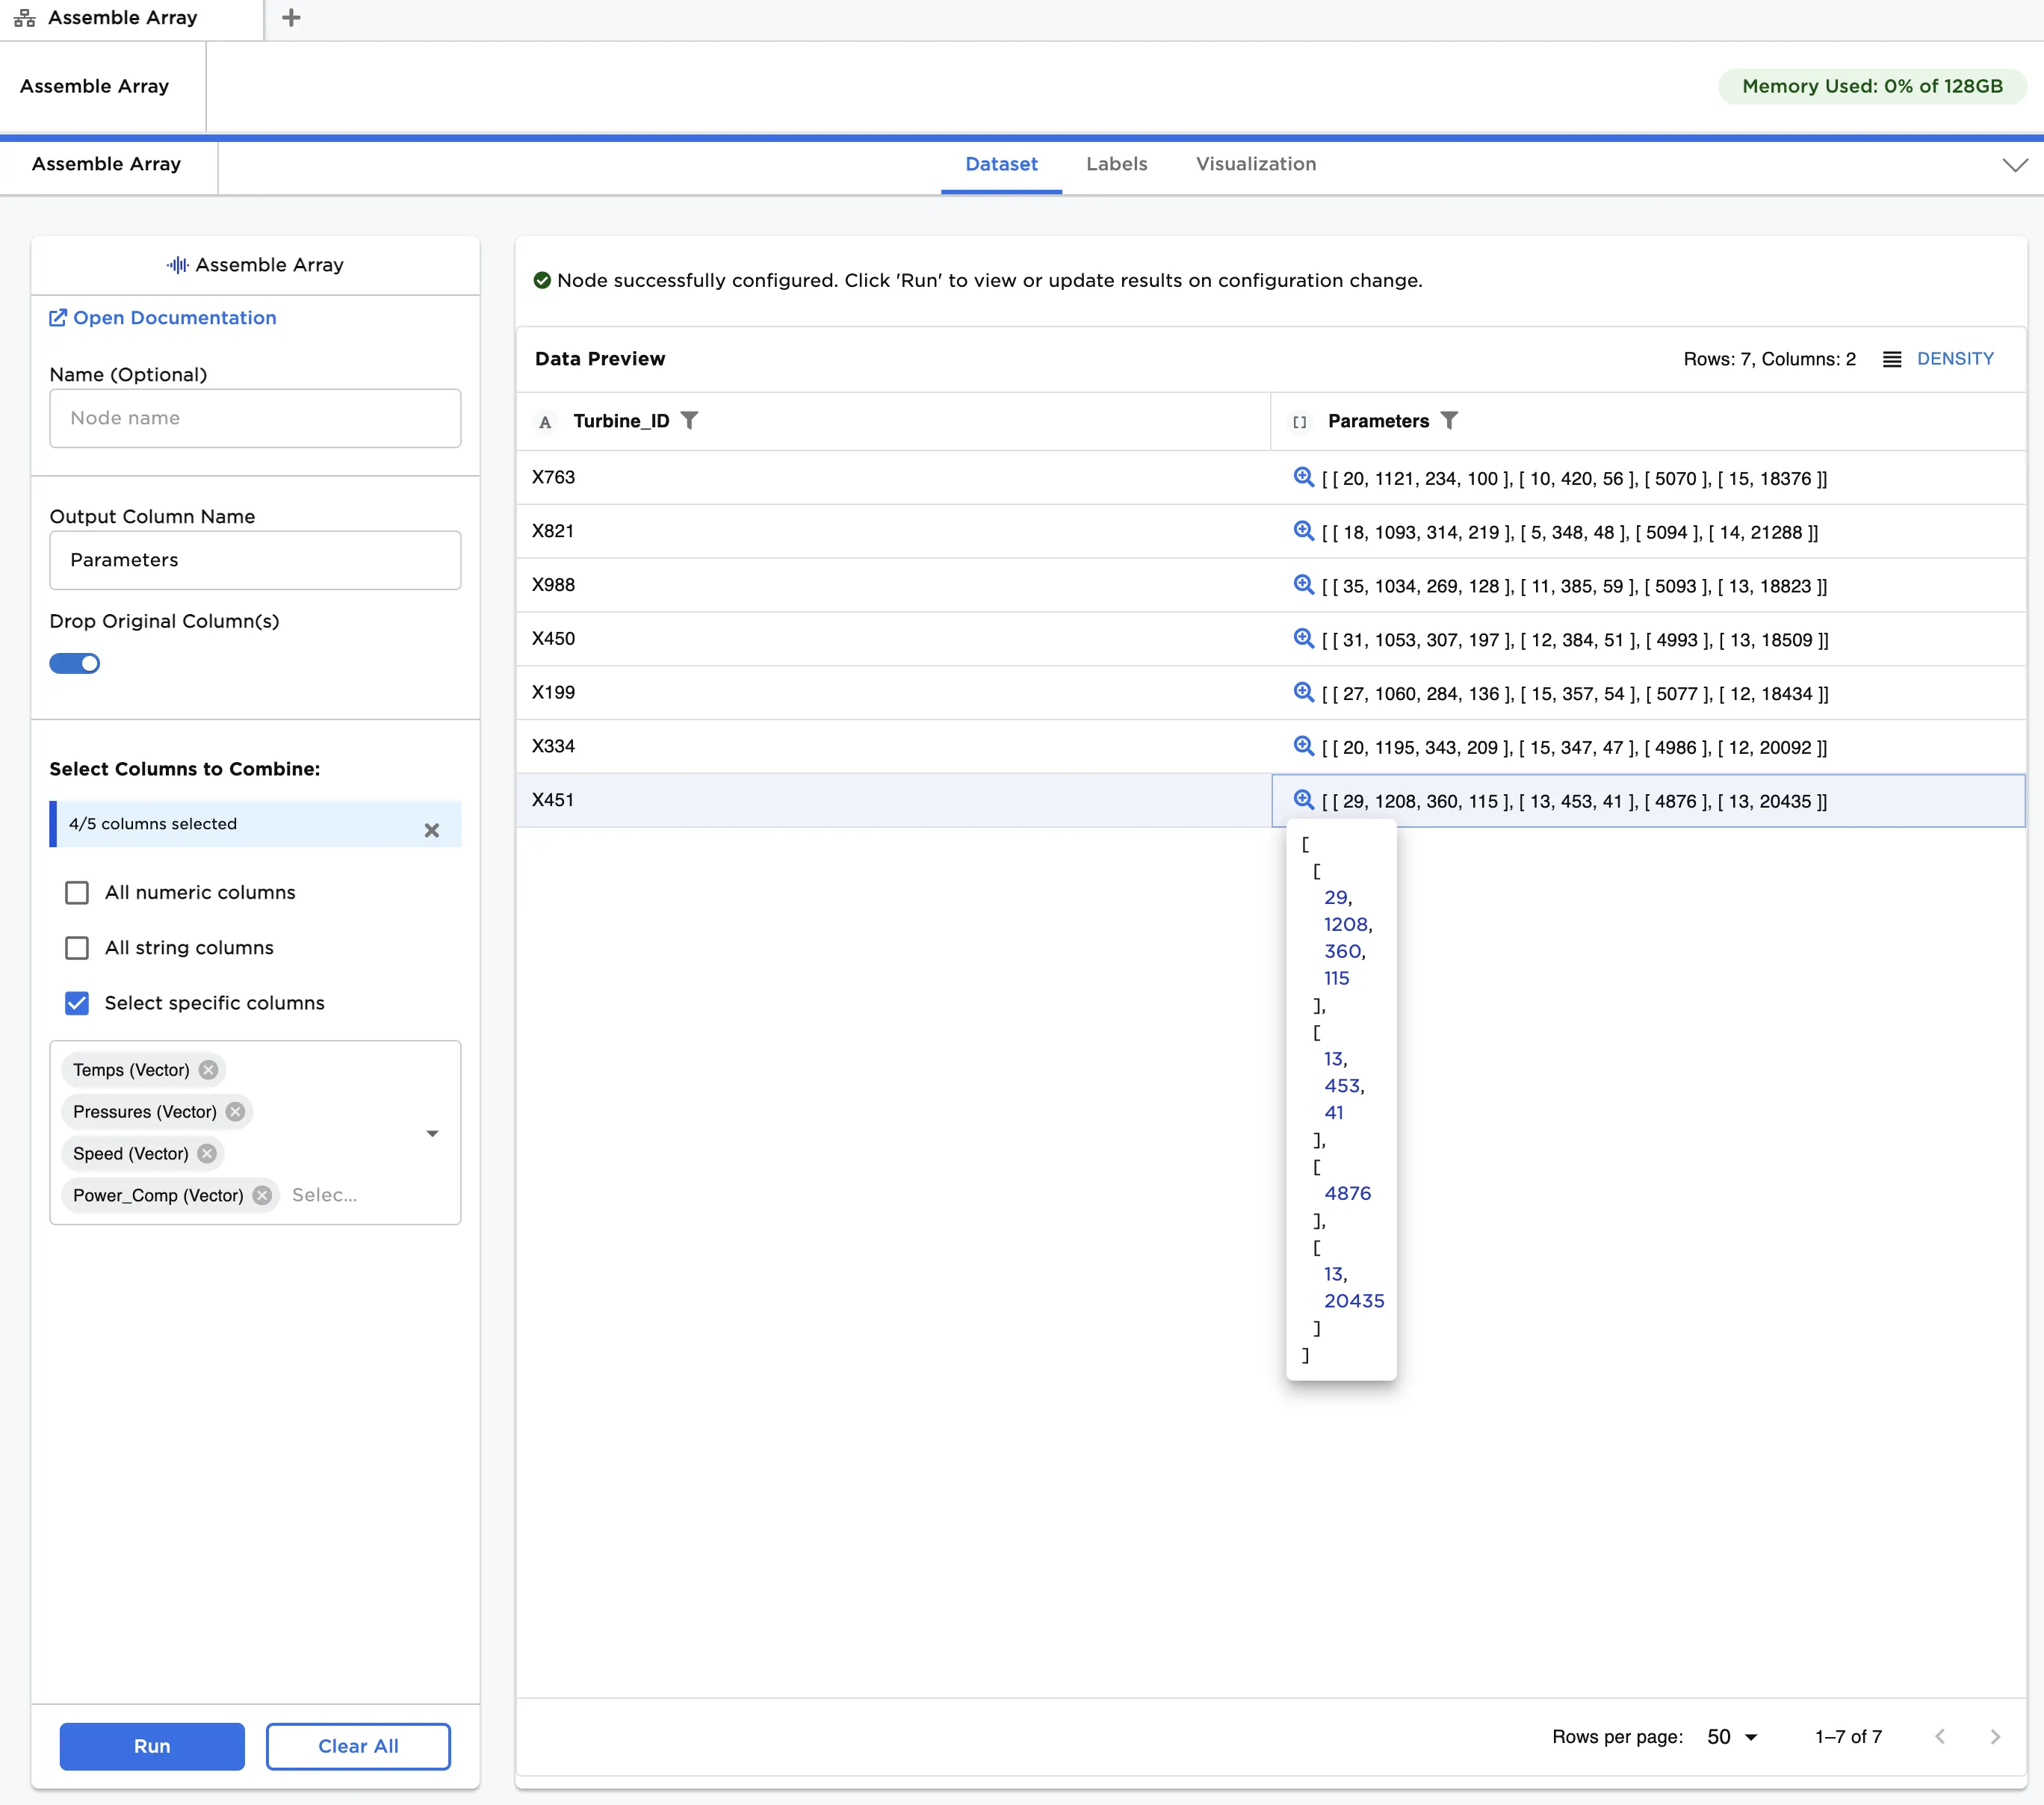
Figure 5: Using "Assemble Array" to create a nested Array