Assembling Objects in Visual Notebooks
Combine data from multiple columns into a single column of type Object, consisting of key/value pairs, or nested key/value pairs.
Objects in Visual Notebooks are equivalent to:
- JavaScript objects as defined using JavaScript Object Notation "JSON" syntax
- Python dictionaries
Data analysis often involves "semi structured" data provided as JSON or XML input files. Such data may not cleanly fit into a flat tabular structure and often involves wrangling of more complex "Object" columns. Visual Notebooks provides several transformations for manipulating Objects, including creating Objects, extracting fields from Objects, and disassembling Objects.
Configuration
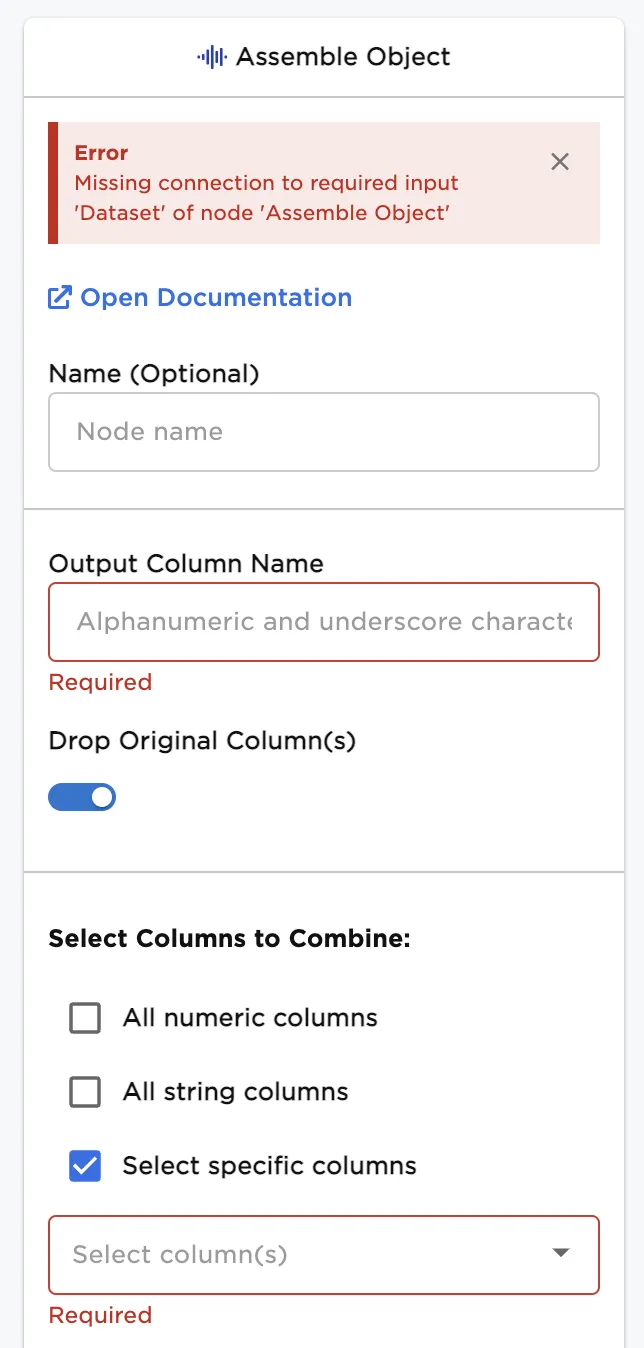
Configuration sidebar
| Field | Description |
|---|---|
Name (default=none) | Name of the node - A user-specified node name, displayed in the canvas and in the dataframe as a tab. |
| Output Column Name Required | Desired output column name for the new Object column - Enter a name for the column containing the Object to be created. |
Drop Original Columns (default=On) | Toggle indicating whether the selected input columns should be dropped from the output - Leave the switch on to delete the columns used to form the new Object. The column information, however, is preserved in the new output Object column. Toggle the switch off to keep the selected columns. |
| Select Columns to Combine Required | Select columns that will be combined to form a new object column - The original columns names of the selected columns form the keys within the Object column. |
Node Inputs/Outputs
| Input | A Visual Notebooks dataframe |
|---|---|
| Output | A dataframe with at least one Object column |
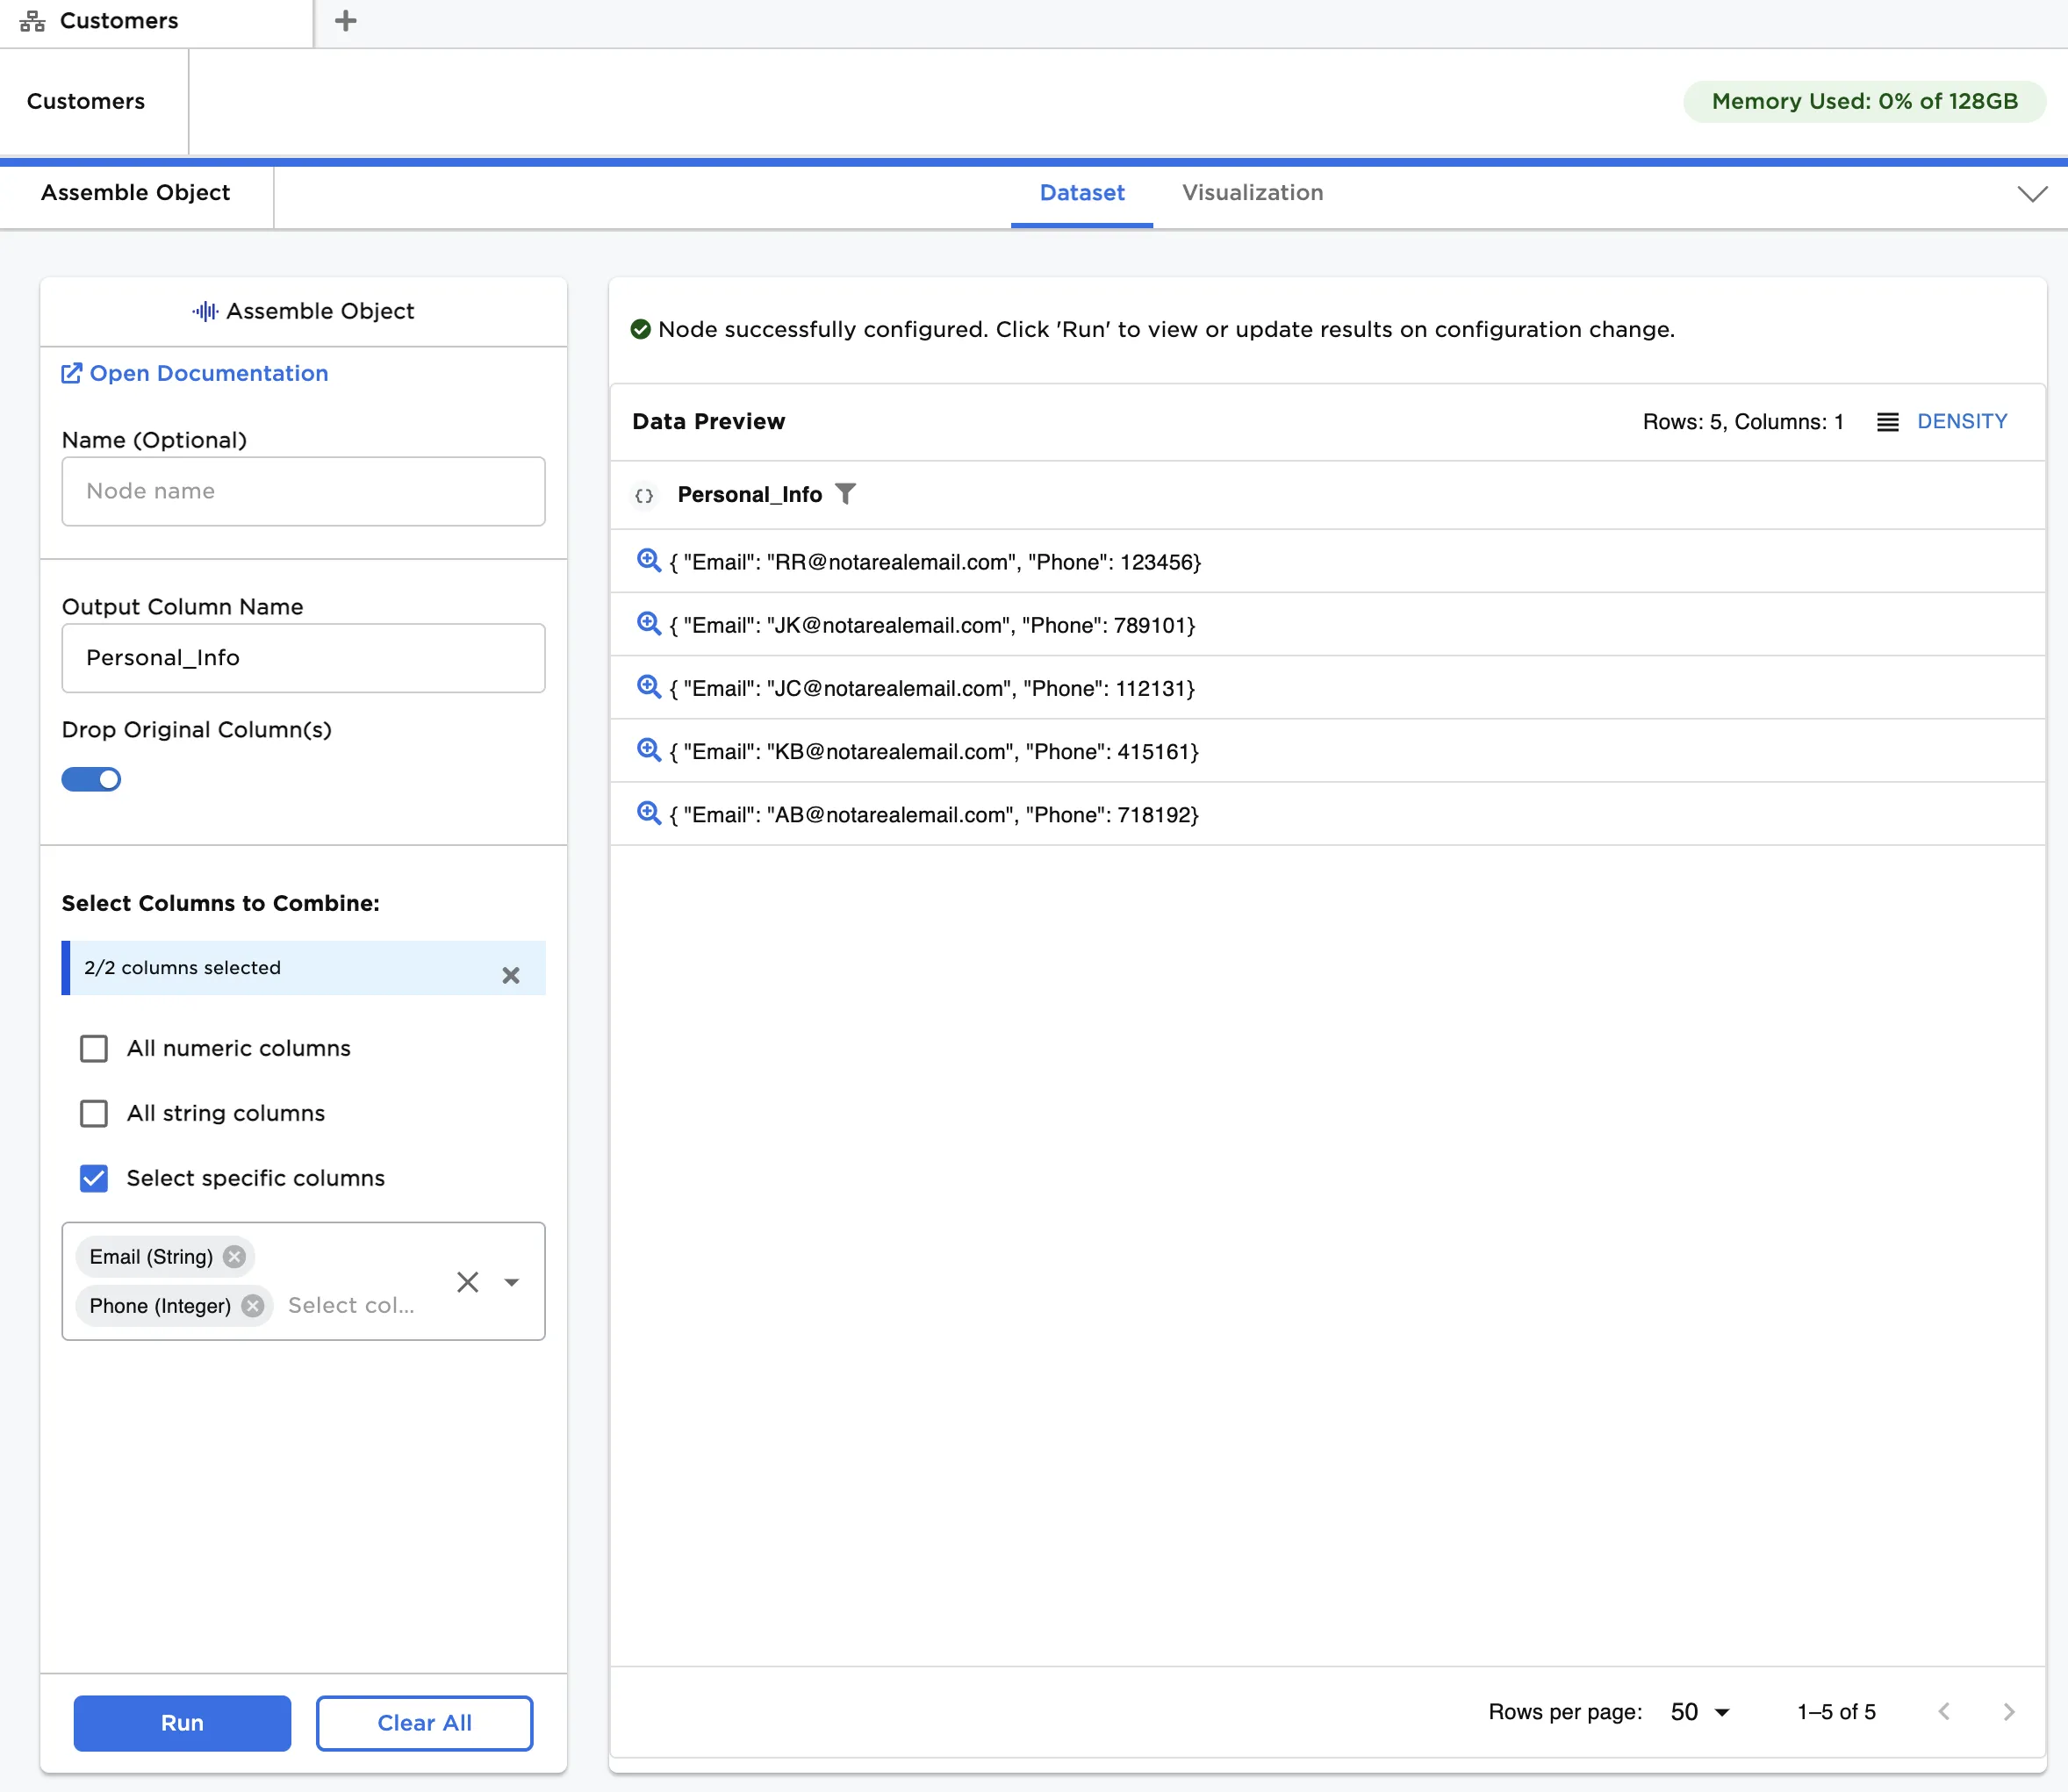
Figure 1: Example dataframe output
Examples
The data shown in Figure 2 is used in the following examples. It contains a flat table of customer information. We would like to group related columns into Objects as follows:
Member
Name:
- First Name
- Last Name
- Suffix
Location:
- Current Location
- City
- State
- Previous Location
- City
- State
- Current Location
Contact:
- Phone
The first example demonstrates how to create a single object from a group of columns. The second example demonstrates how to create a nested object from multiple objects, each created with a unique group of columns.
The example data is available in the Visual Notebooks sample datasets.
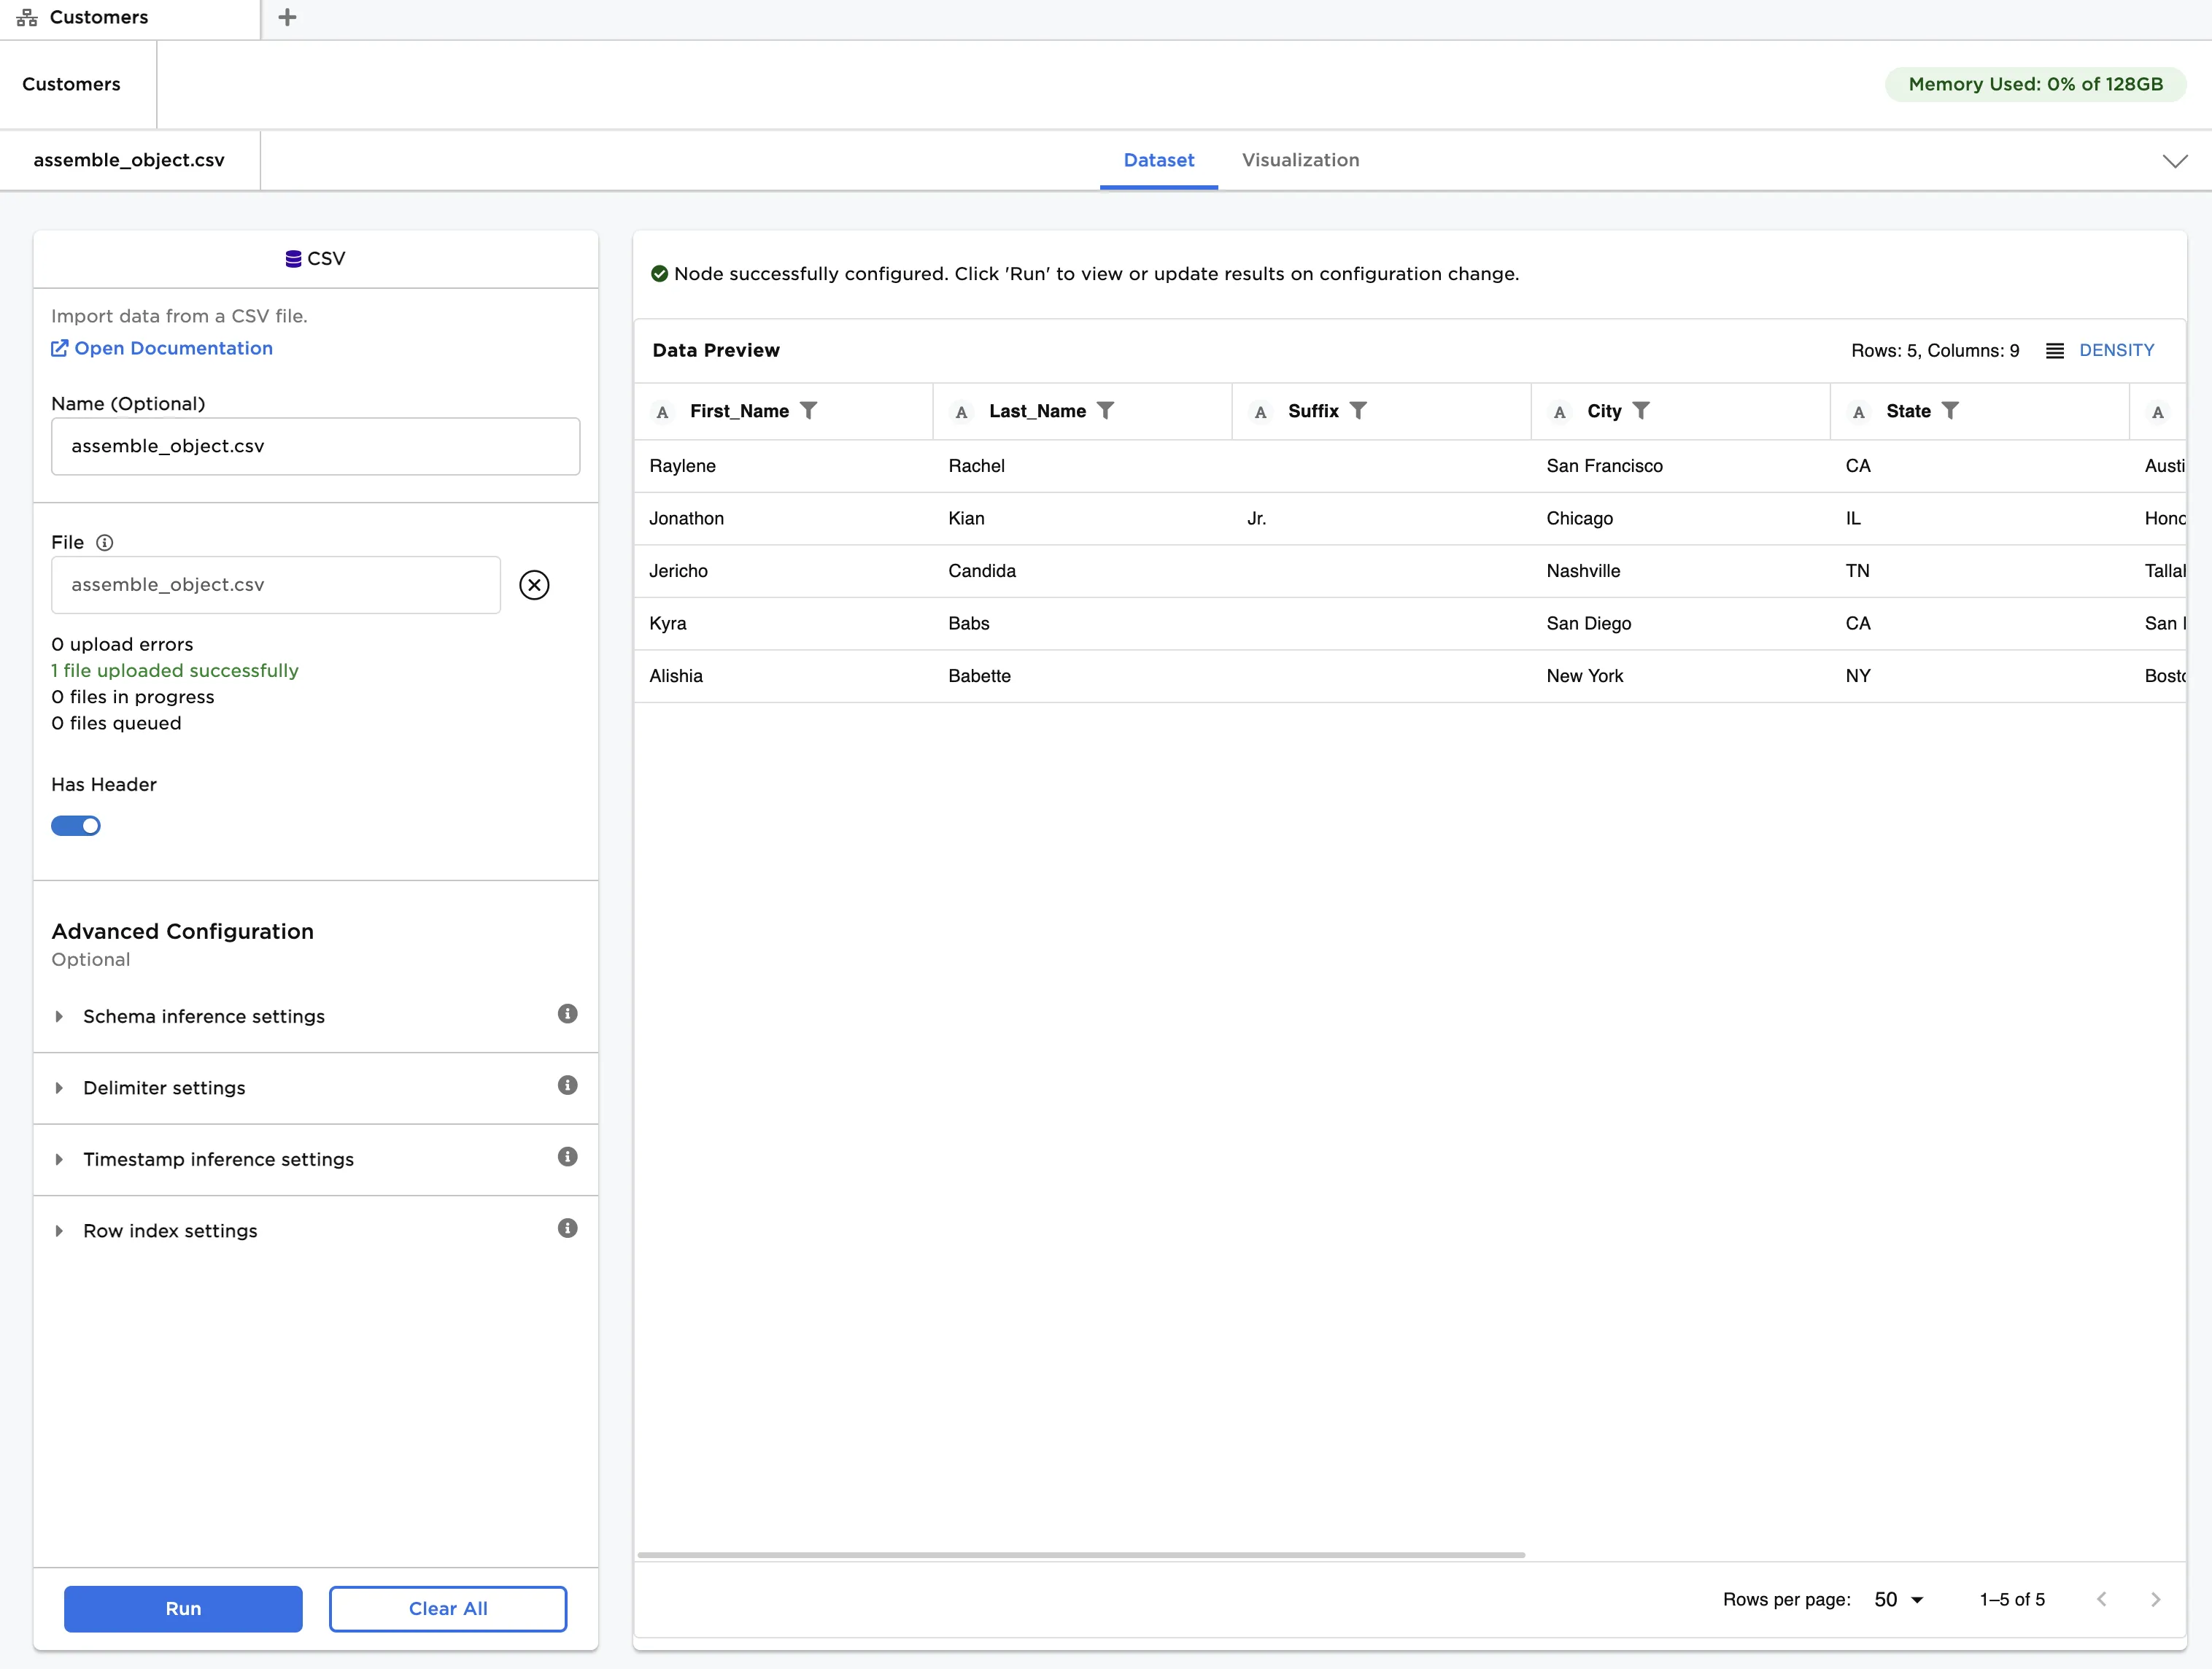
Figure 2: Example input data
Example 1 - Assemble Simple Object from Name fields
In this example, we will create an Object from the name columns.
- For simplicity, let's first drop all columns except the three name columns: First Name, Last Name, and Suffix. Connect a Select or Drop Columns node to an existing node. In this case, it is connected to a CSV node with the example data provided.
- Ensure Select Columns to Keep is selected for Selection Method.
- In Select Columns to Combine check Select specific columns and add the three name columns. Click "Run."
- Connect an Assemble Object node to the Select or Drop Columns node.
- Enter "Name" for Output Column Name.
- Toggle Drop Original Columns to off.
- In Select Columns to Combine check Select specific columns and check "Select all." Click "Run."
After running the node, the new "Object" column can be found as the fourth column, which is shown in Figure 3.
The column profile of the object column shows us the schema. Notice the schema includes three keys that match the three selected column names: First_Name, Last_Name, and Suffix.
By clicking the magnifying glass associated with a row inside an Object column, we can inspect the Object values for a given row. The values match the values found in the input columns.
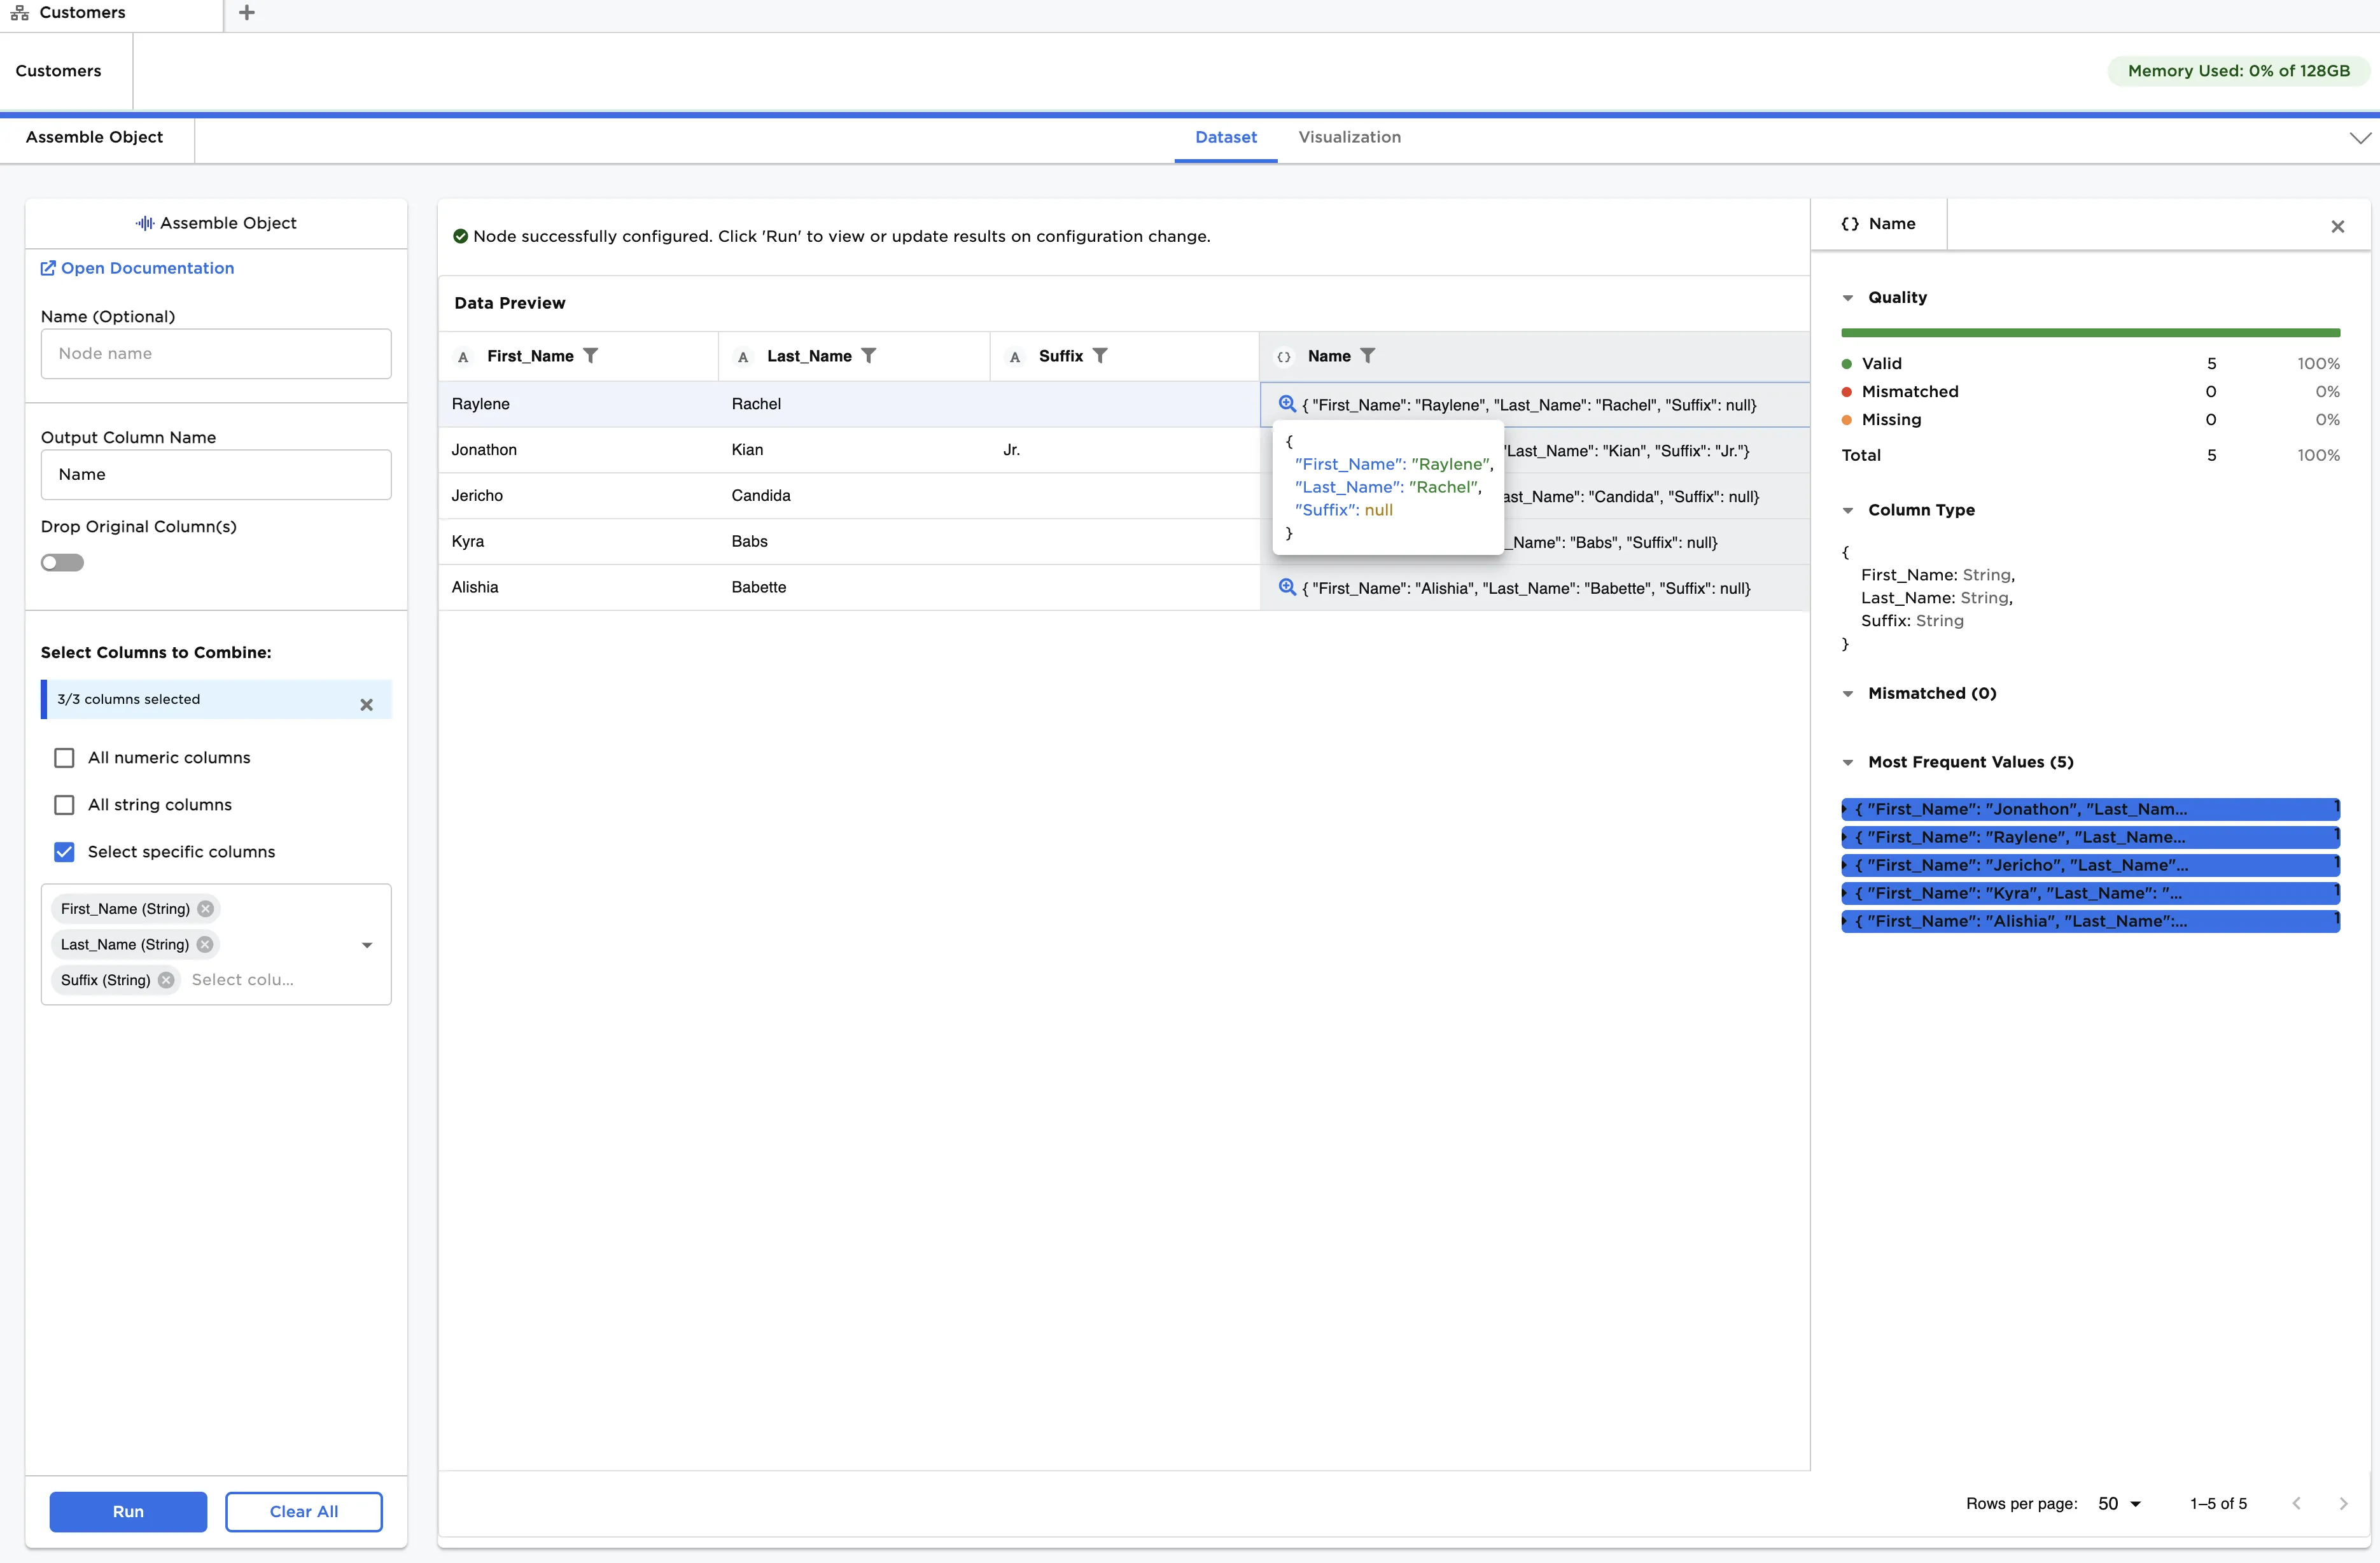
Figure 3: Assembling a simple Object
Example 2 - Nested Objects
Returning to the original dataset, we now create the four simple Object columns: Name, Current_Location, Previous_Location, and Contact. Note that any column can be combined into a new Object, including Arrays and other Objects.
We demonstrate combining Object columns by combining "Current_Location" and "Previous_Location" into a single column called "Location" and then finally combing all the new columns into a single Object called "Member".
- Connect an Assemble Object node to a CSV node with the example data provided.
- Enter "Combine Name Fields" for Name, and "Name" for Output Column Name.
- Ensure Drop Original Columns is toggled on.
- In Select Columns to Combine check Specific columns and add the three name columns: First Name, Last Name, and Suffix. Click "Run."
- Connect a new Assemble Object node to the output of the "Combine Name Fields" Assemble Object node.
- Repeat Steps 2-5, creating "Combine Current Location," "Combine Previous Location," and "Combine Contact Details" nodes, with column groupings and output column names provided at the beginning of the examples section. You should have four Assemble Object nodes connected in series as shown in Figure 4.
- Connect a new Assemble Object node to the last node, and combine the "Current_Location" and "Previous_Location" Object columns into a new Object called "Location." The node name should be "Combine Previous and Current Locations."
- Connect a new Assemble Object to the last node, and combine all columns into a new Object called "Member." The node name should be "Assemble all into Member." Figure 5 shows the expected output.

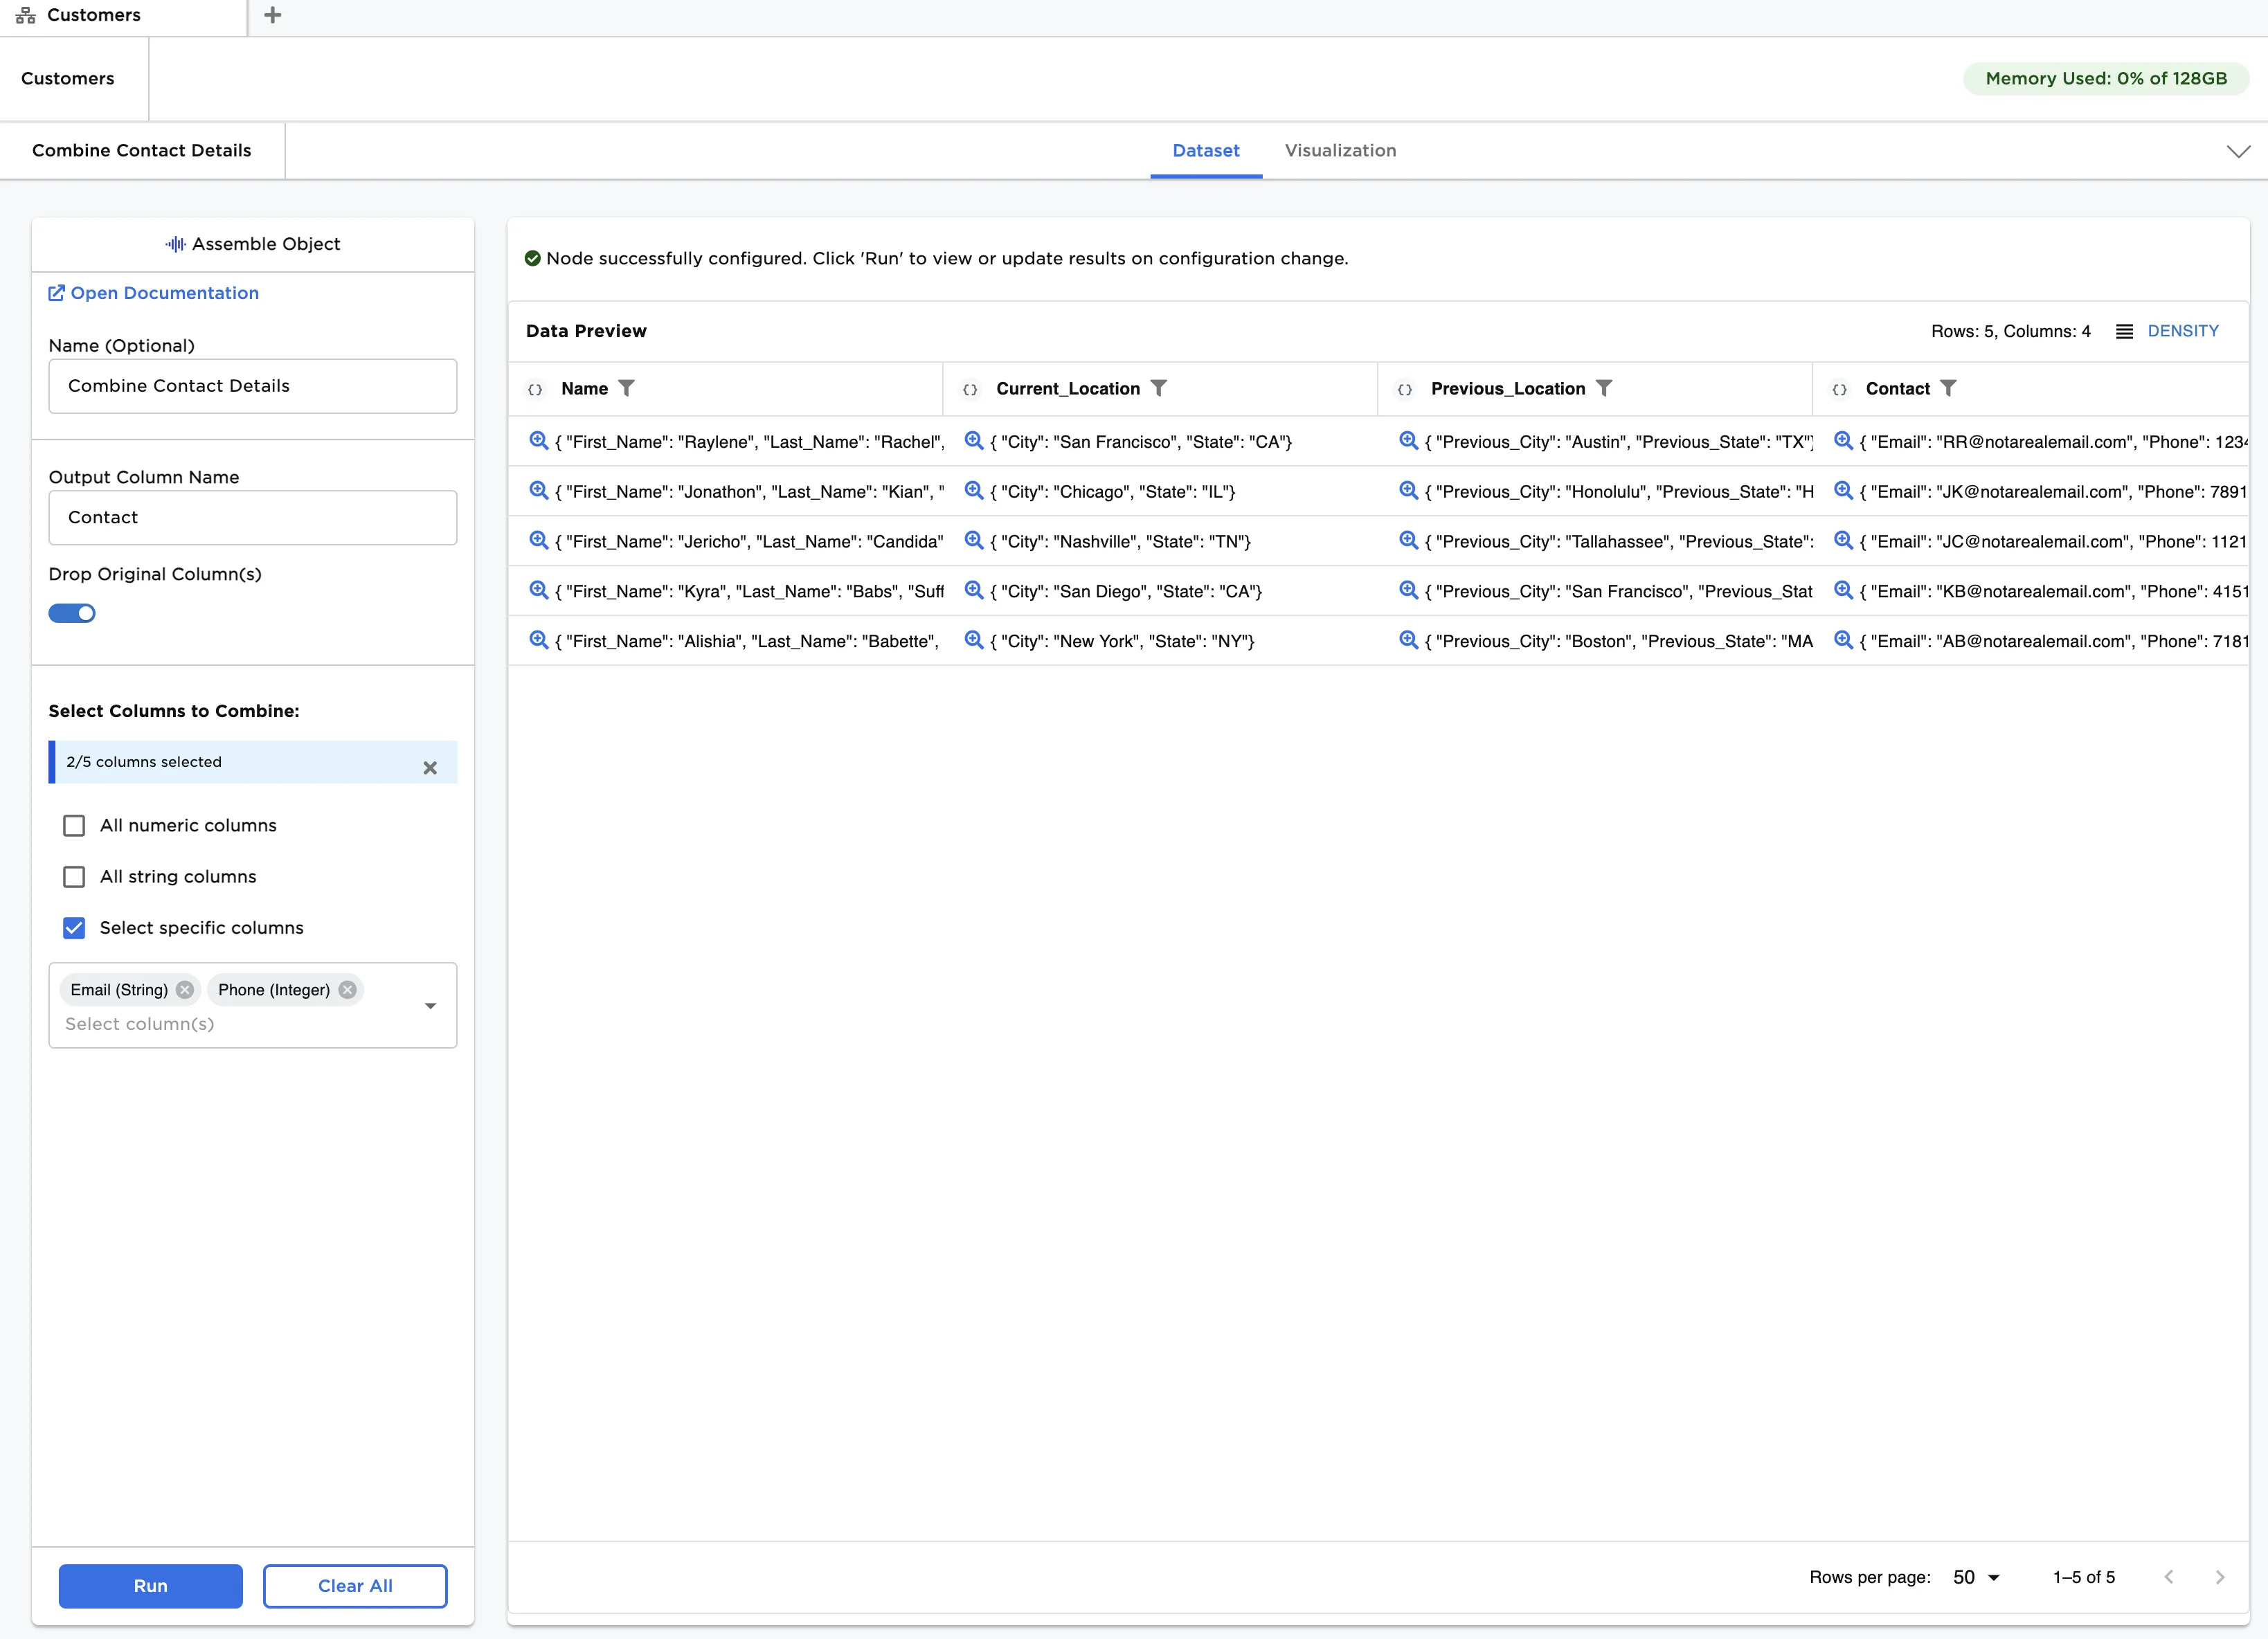
Figure 4: Using "Assemble Object" to create multiple Object columns: Initial grouping

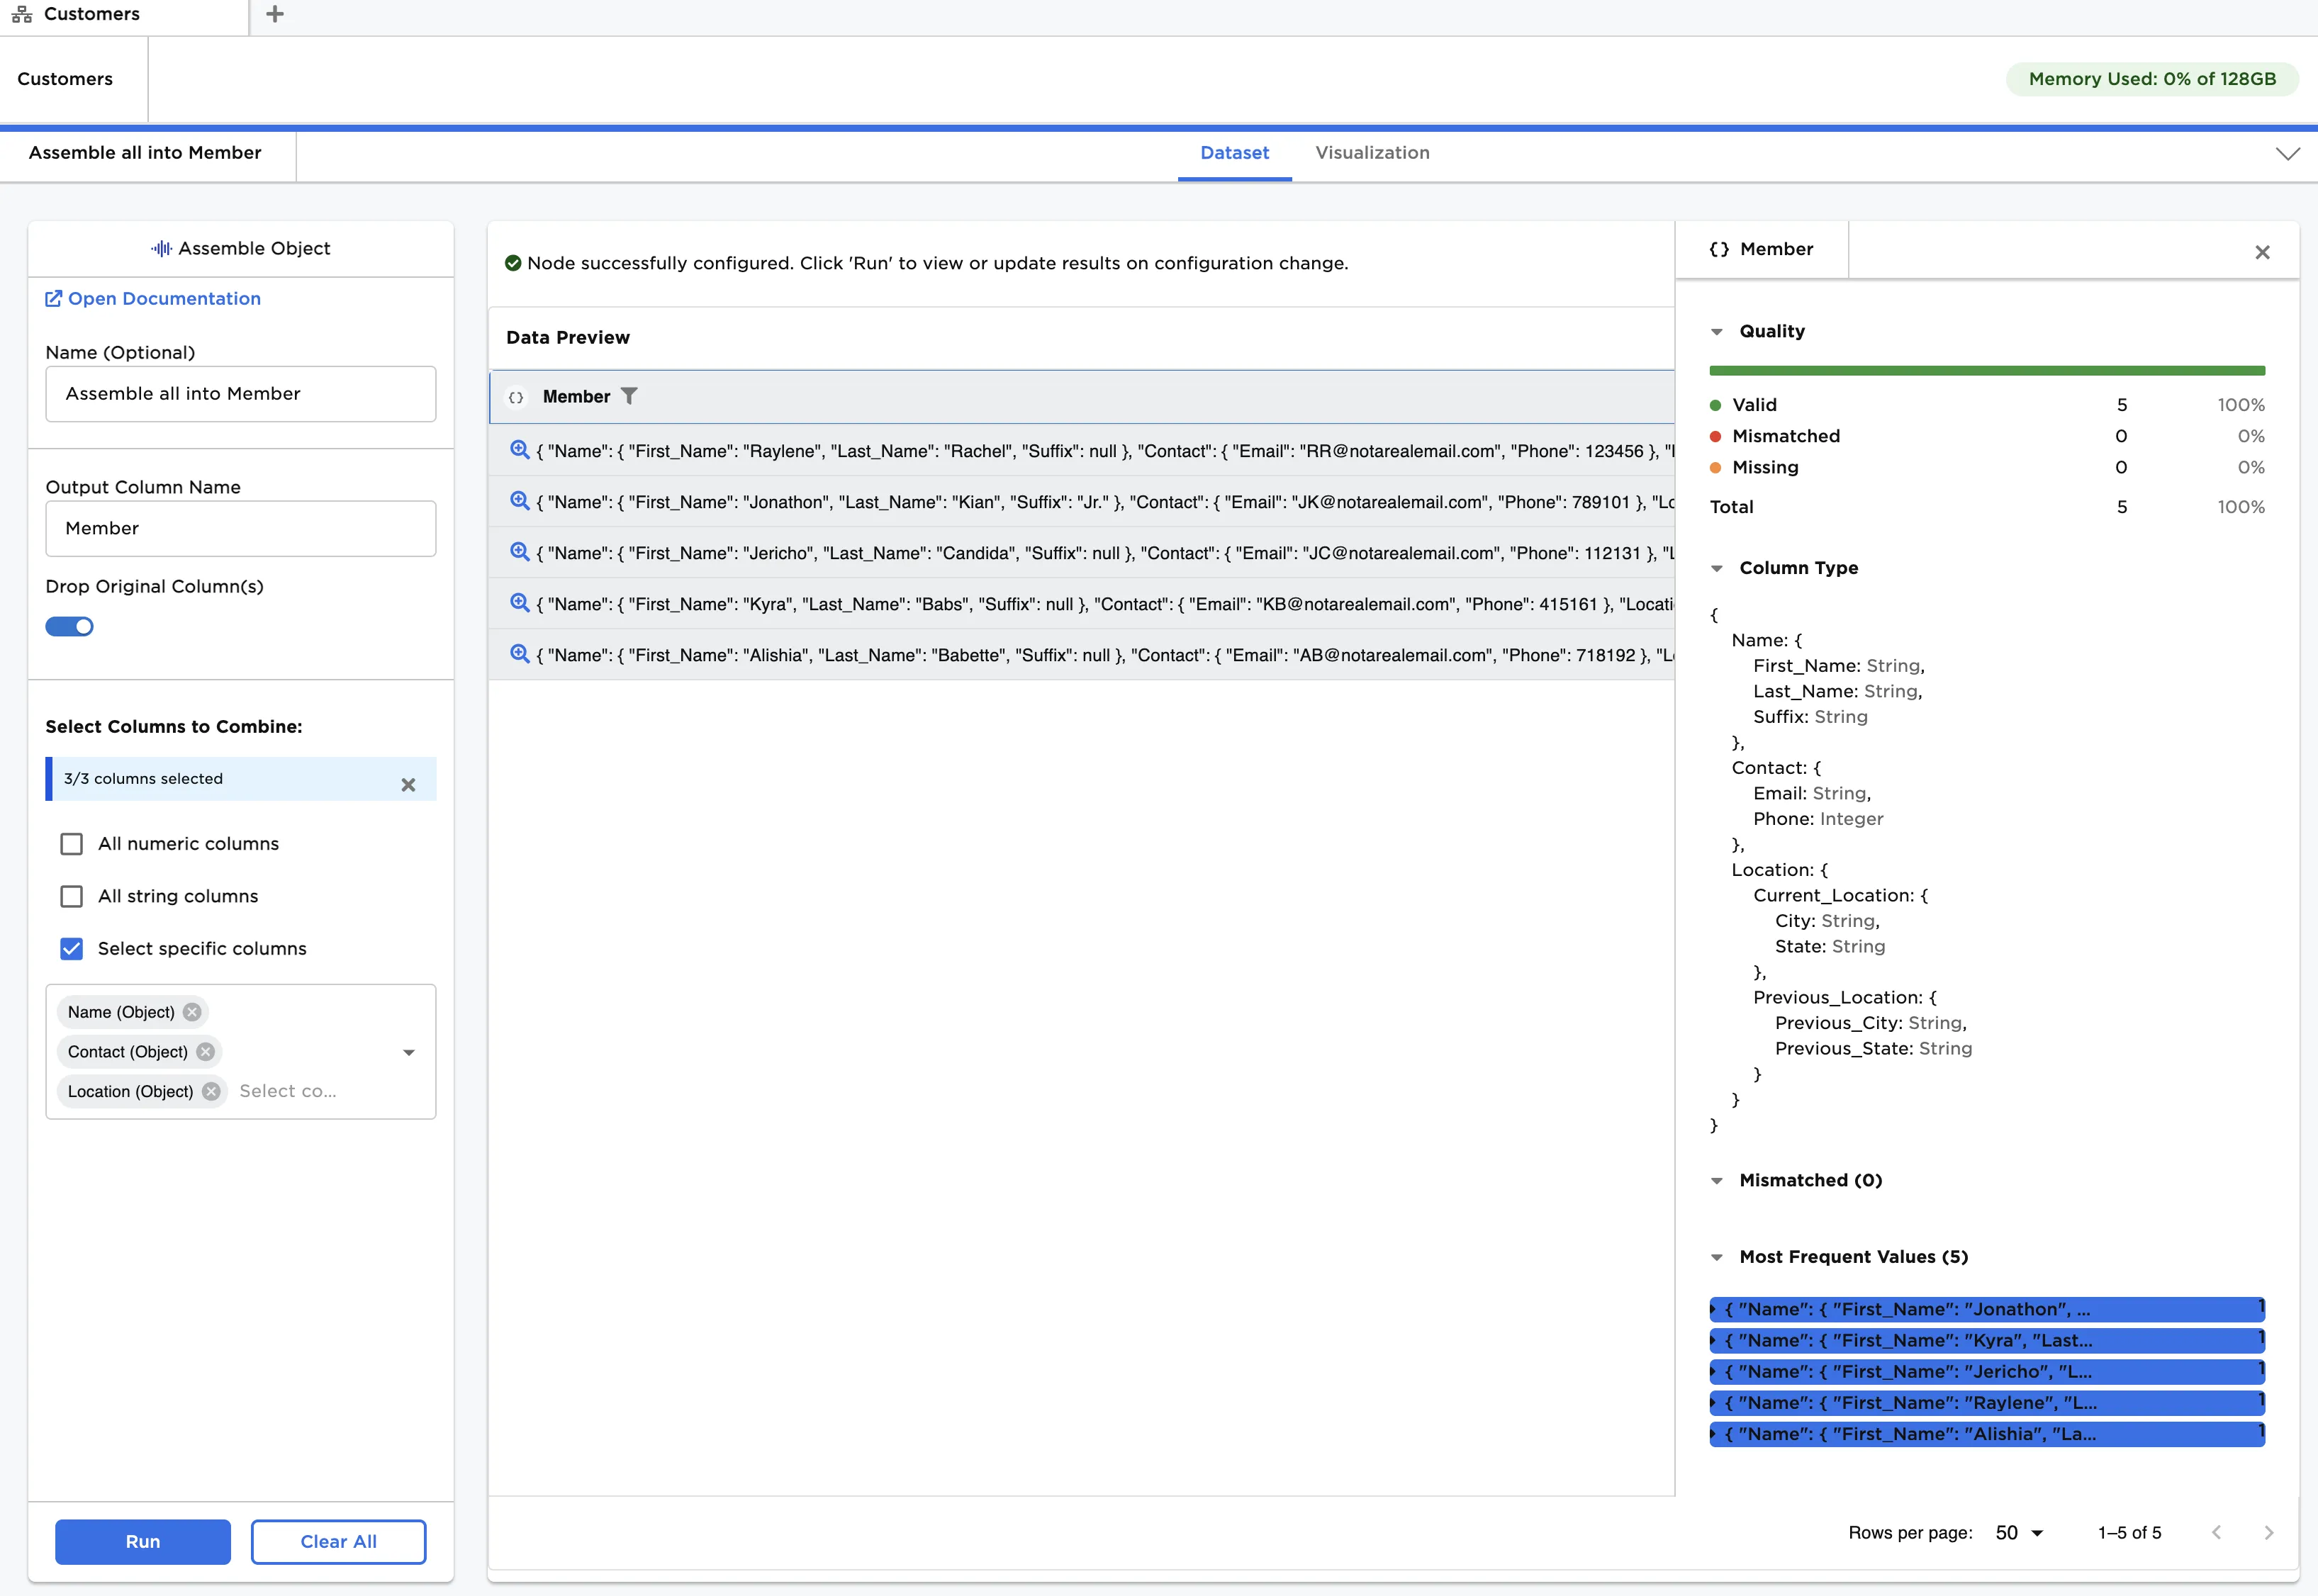
Figure 5: Using "Assemble Object" to create multiple Object columns: Final grouping