Assigning Time Zones in Visual Notebooks
The Assign Time Zone node in Visual Notebooks allows you assign time zones based on UTC to datasets with a timestamp column. Separate nodes are needed for each timestamp column.
The Assign Time Zone node is especially useful for situations when the time of day (and possibly the date) changes for a shipment when it crosses a time zone. If time zones are not configured on a network dataset that spans multiple time zones, time-of-day values in an analysis can be a source of confusion. Adding the Assign Time Zone node and applying time zones to timestamp columns enables your network dataset to handle time zones differences.
Configuration
| Field | Description |
|---|---|
| Name (default=none) | Name of the node - An optional user-specified node name displayed in the workspace, both on the node and in the dataframe as a tab. |
| Column Required | The column with timestamps - Select the column with timestamps from the auto-populated dropdown menu. If all of the columns in the menu appear dimmed, use a "Columns - Type Converter" node to convert the time column to the timestamp data type. |
| Assign Time Zone Required | UTC Time zone selections - Select a time zone using the dropdown menu arranged by major time zones, or by typing in the name of a city. |
Node Inputs/Outputs
| Input | A Visual Notebooks dataframe |
|---|---|
| Output | A dataframe with UTC time zones applied to a timestamp column. A separate node is needed for each timestamp column. |
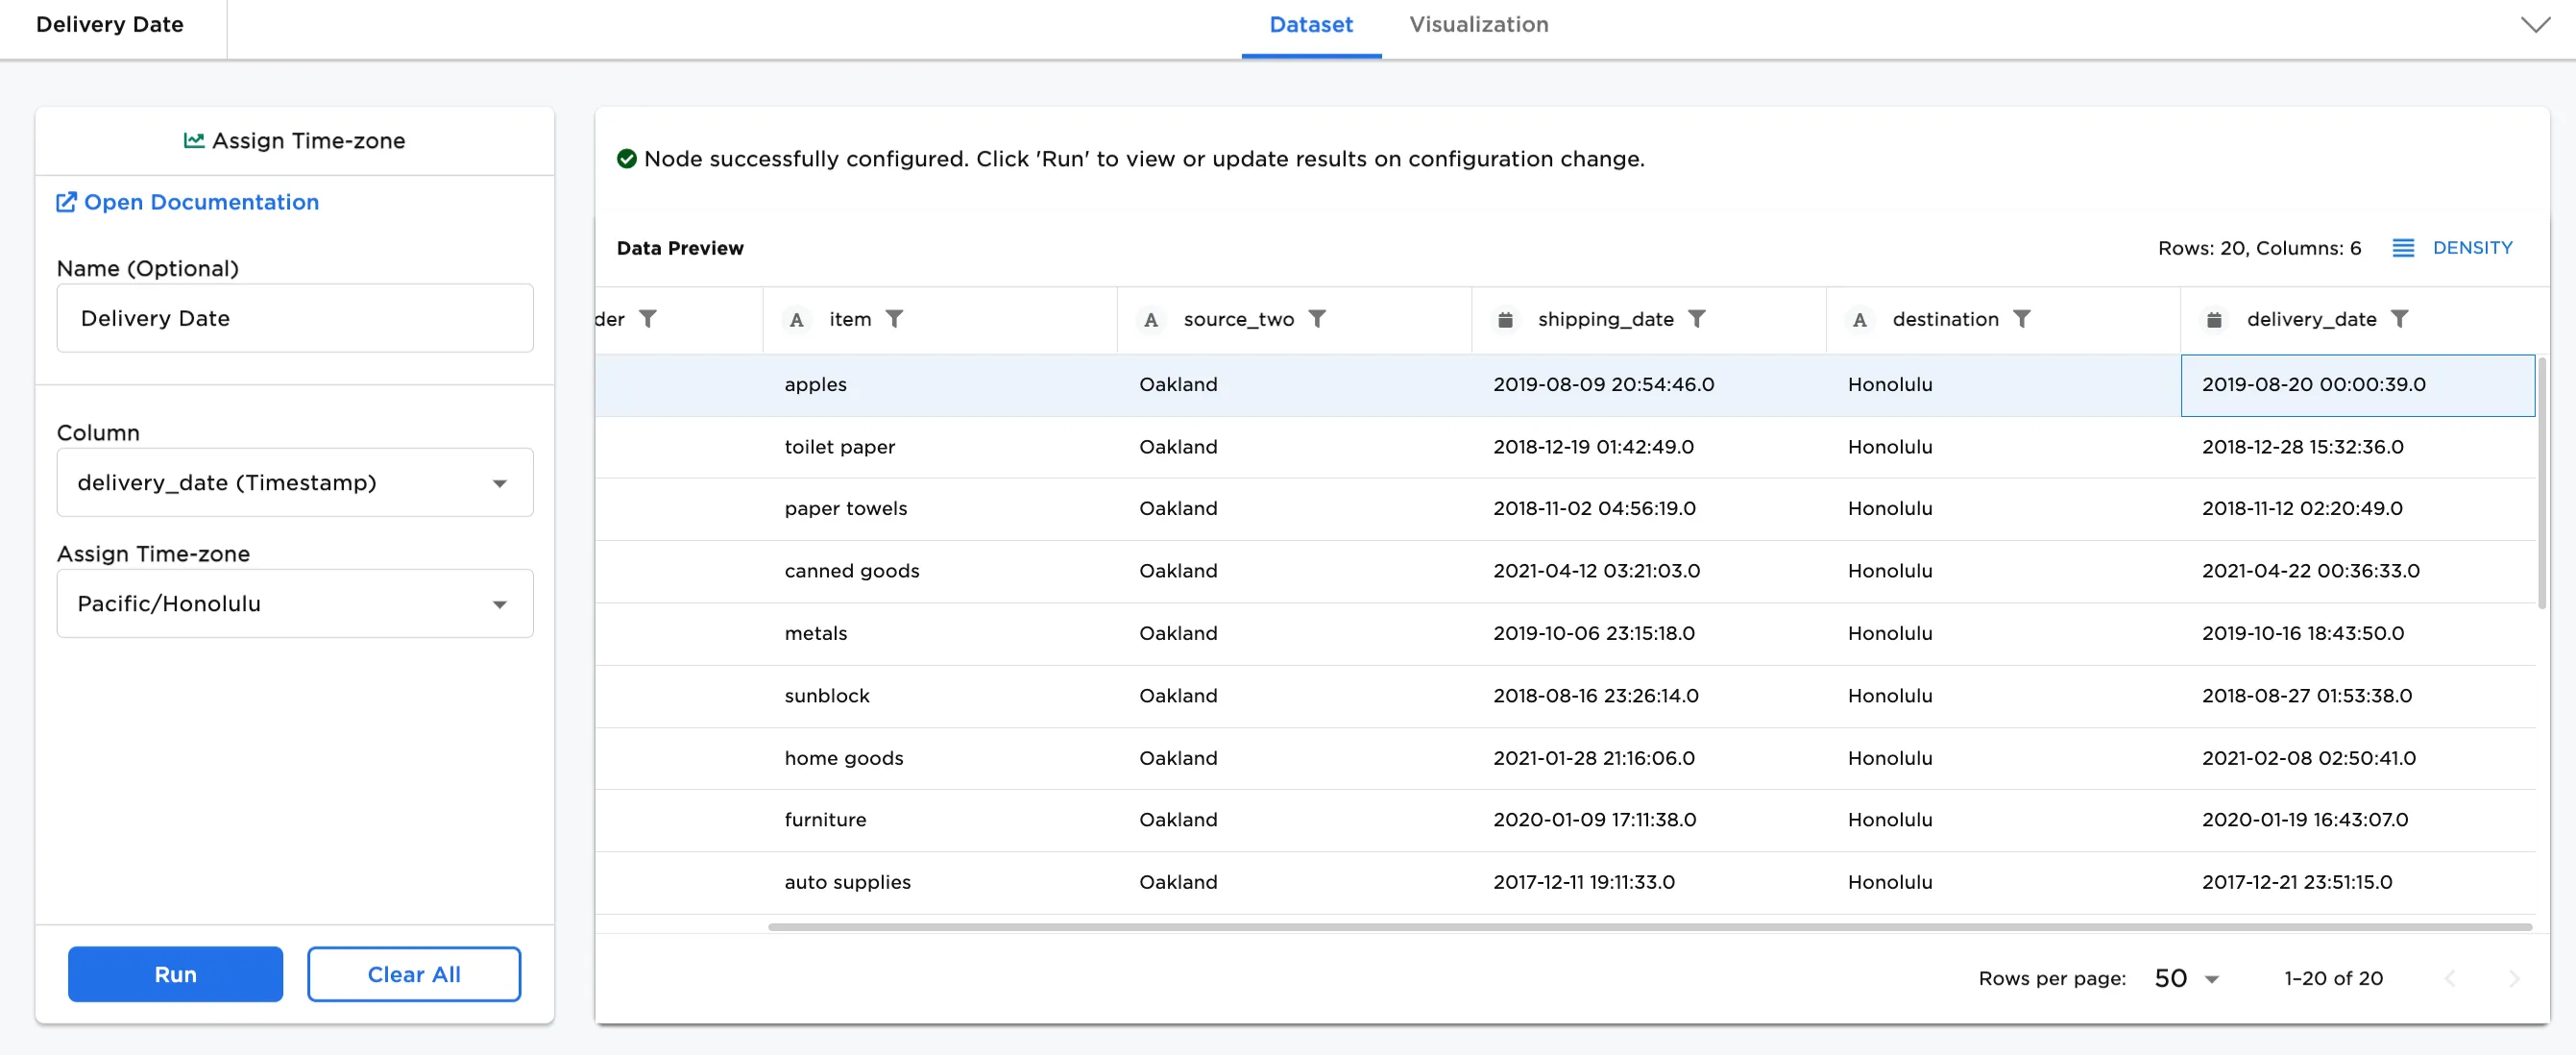
Figure 1: Example output
Examples
The examples use a dataset that shows the transfer of goods from Oakland to Honolulu with shipping and delivery dates. The example data is available in the Visual Notebooks sample datasets.
Note: Multiple Assign Time Zone nodes can be connected in sequence to a dataset with multiple timestamp columns.
- Add a CSV node with at least one timestamp column to your workspace. In this case, the CSV node is named "Shipping Oakland to Honolulu".
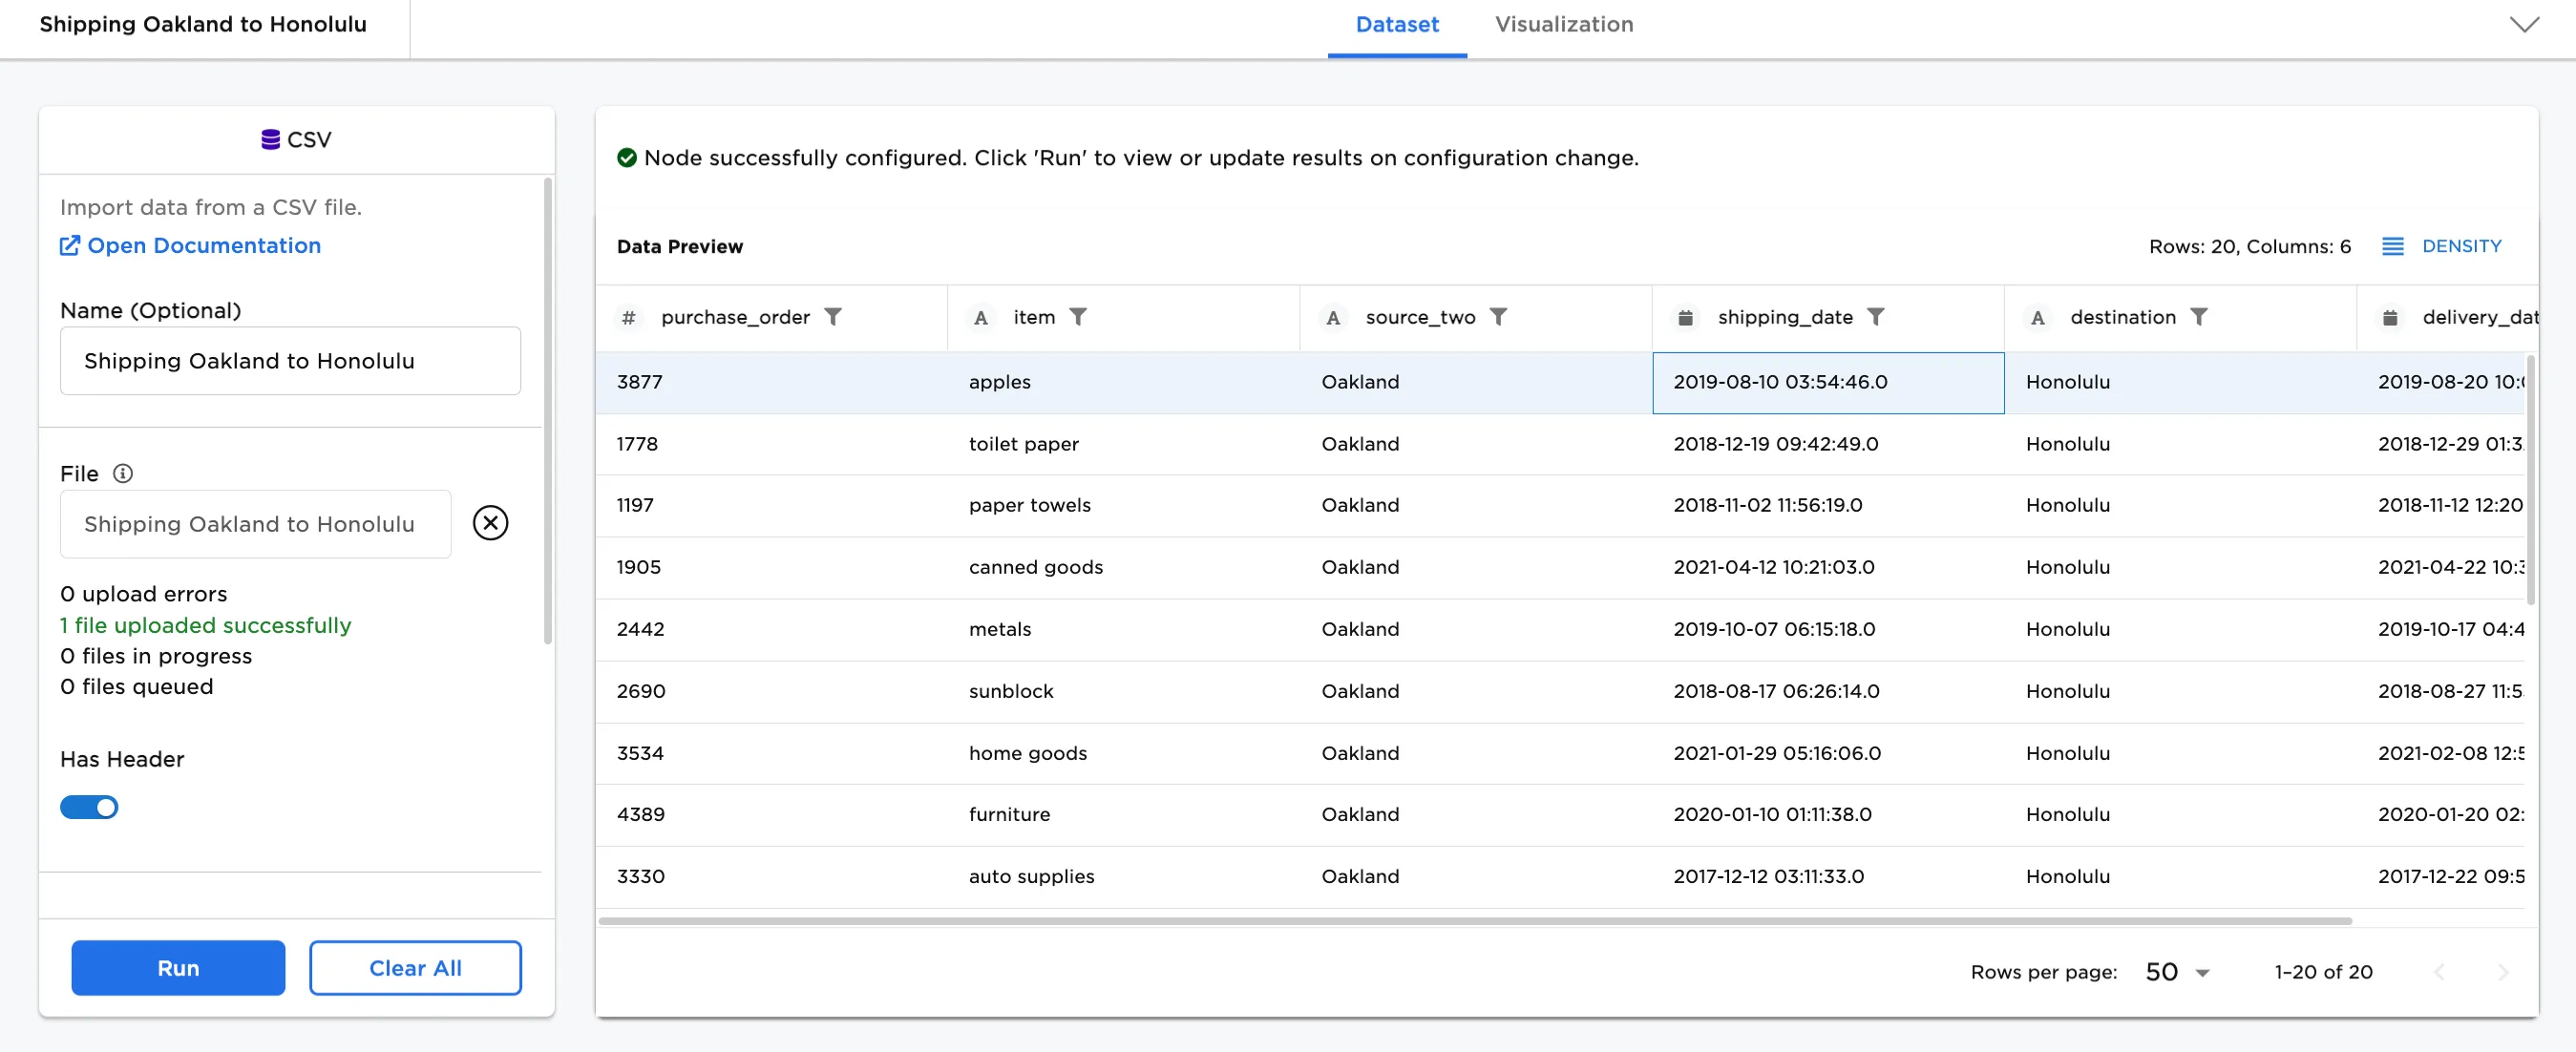
Figure 2: Example dataframe
- Connect an Assign Time Zone node to the "Shipping Oakland to Honolulu" CSV node.
- In Column, select the shipping date column in the dropdown.
- In Assign Time Zone, select the appropriate timezone, or start typing a city name in the desired time zone. In this case, Los_Angeles has been selected for the timezone since it is in the same timezone as Oakland. Note that an underscore is used in place of spaces in names ("Los_Angeles" instead of Los Angeles).
Notice that in Figure 2, the shipping date for the first line is "2019-08-09 03:54:46.0" and in Figure 3, after applying the time zone, the time changes to "2019-08-09 20:54:46.0".
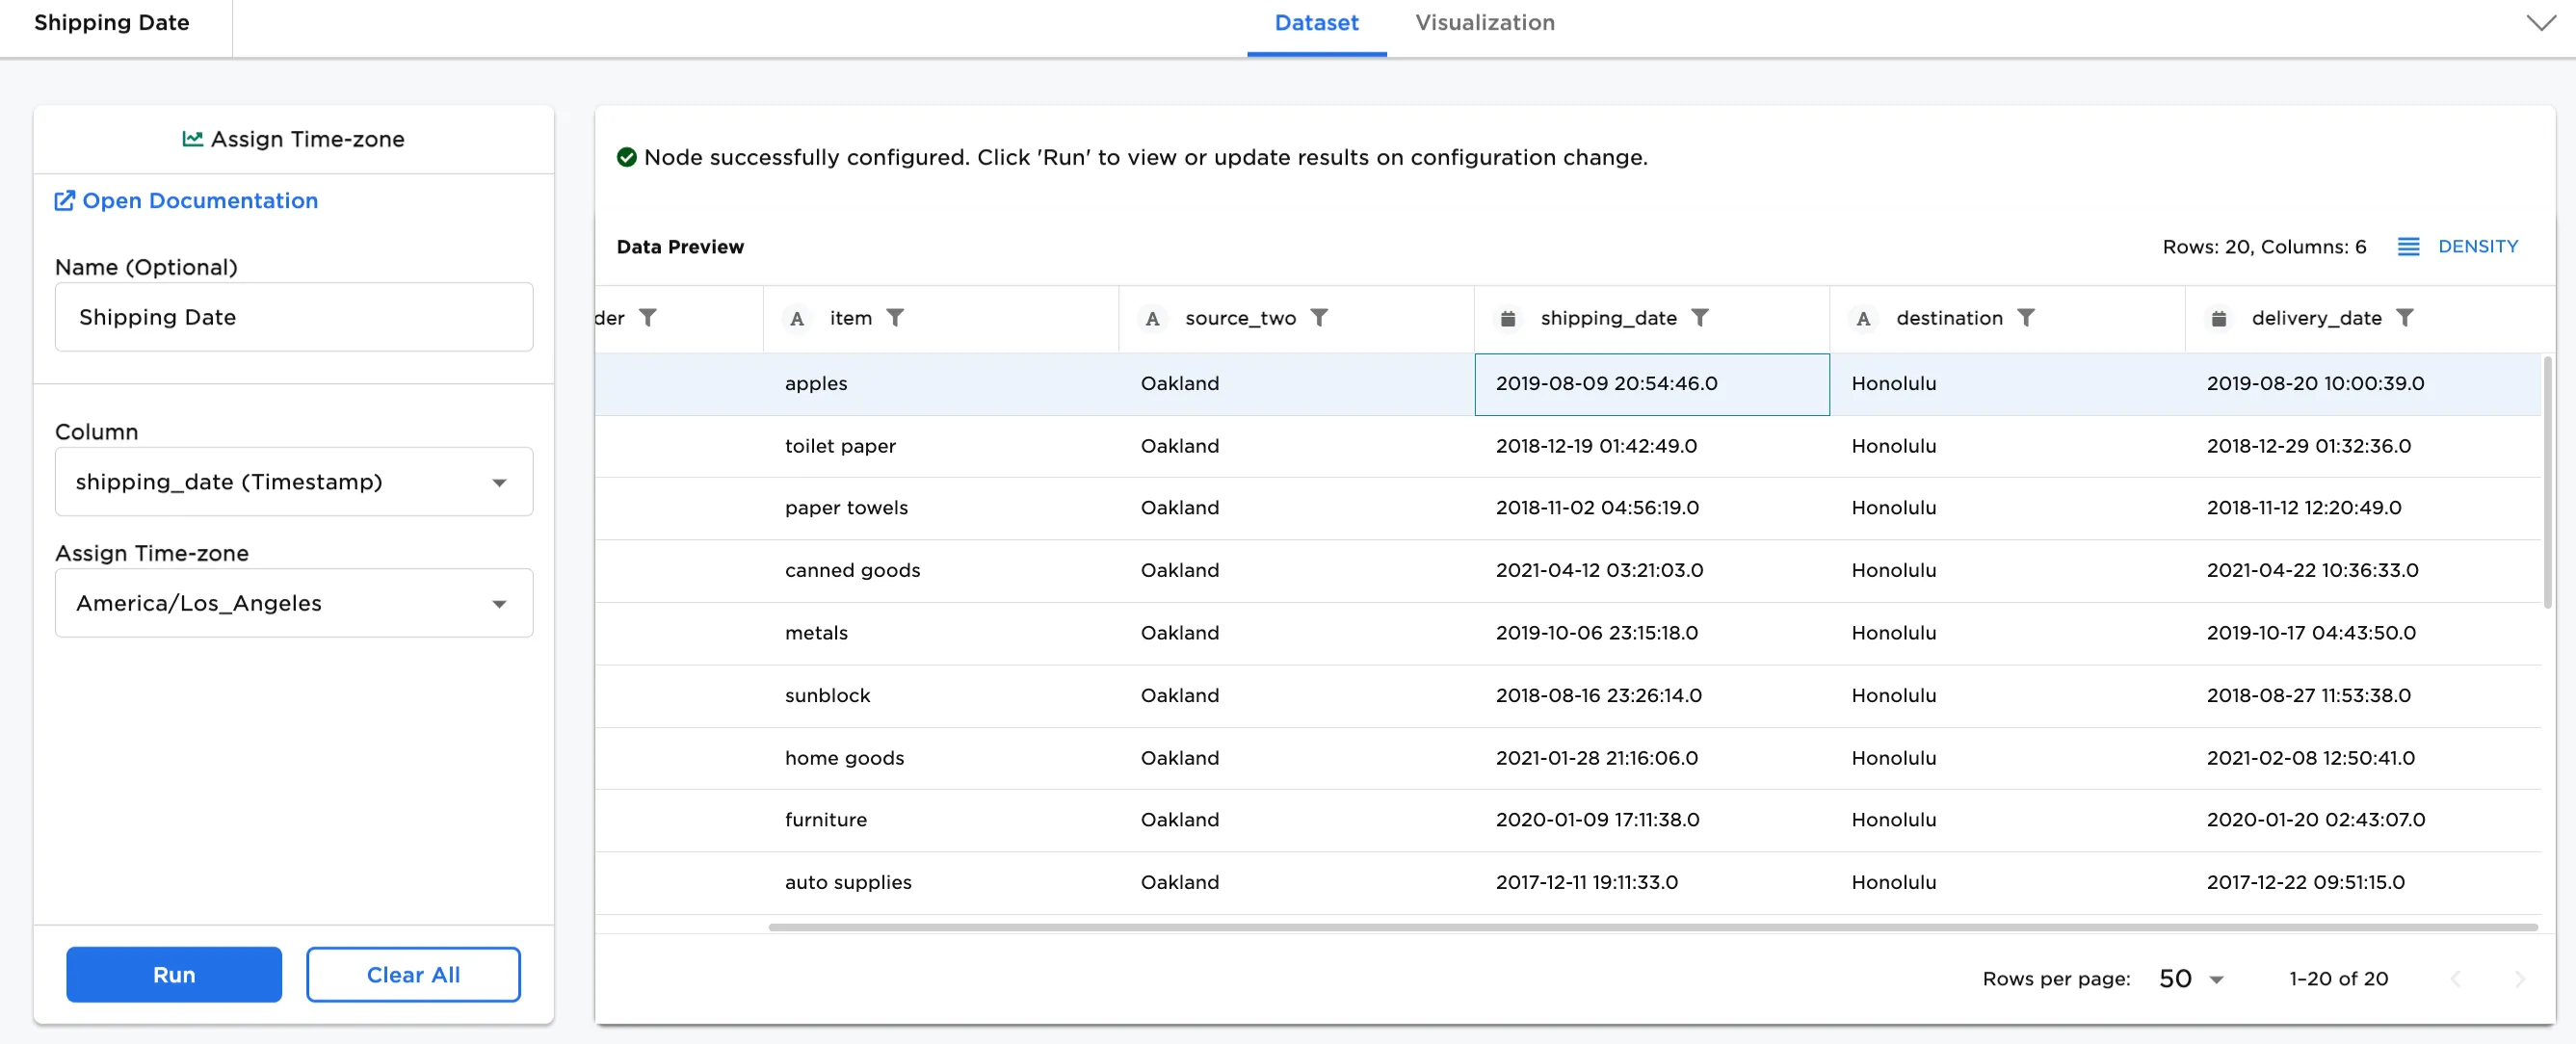
Figure 3: dataframe with an assigned timezone on the shipping date
- Now, add a second Assign Time Zone node to the workspace. In this case, "Delivery Date" has been added as the name of the node.
- In Column, select the delivery date column in the dropdown.
- In Assign Time Zone, select the appropriate timezone, or start typing a city name in the desired time zone. In this case, Honolulu has been selected.
Notice that in Figure 3, the delivery date for the first line is "2019-08-20 10:00:39.0" and in Figure 4a, after applying the time zone, the time changes to "2019-08-20 00:00:39.0".
Figure 4a: Example dataframe with an assigned timezone with delivery date added
Figure 4b shows what the final workspace looks like for changing the time zone on both shipping date and delivery date.
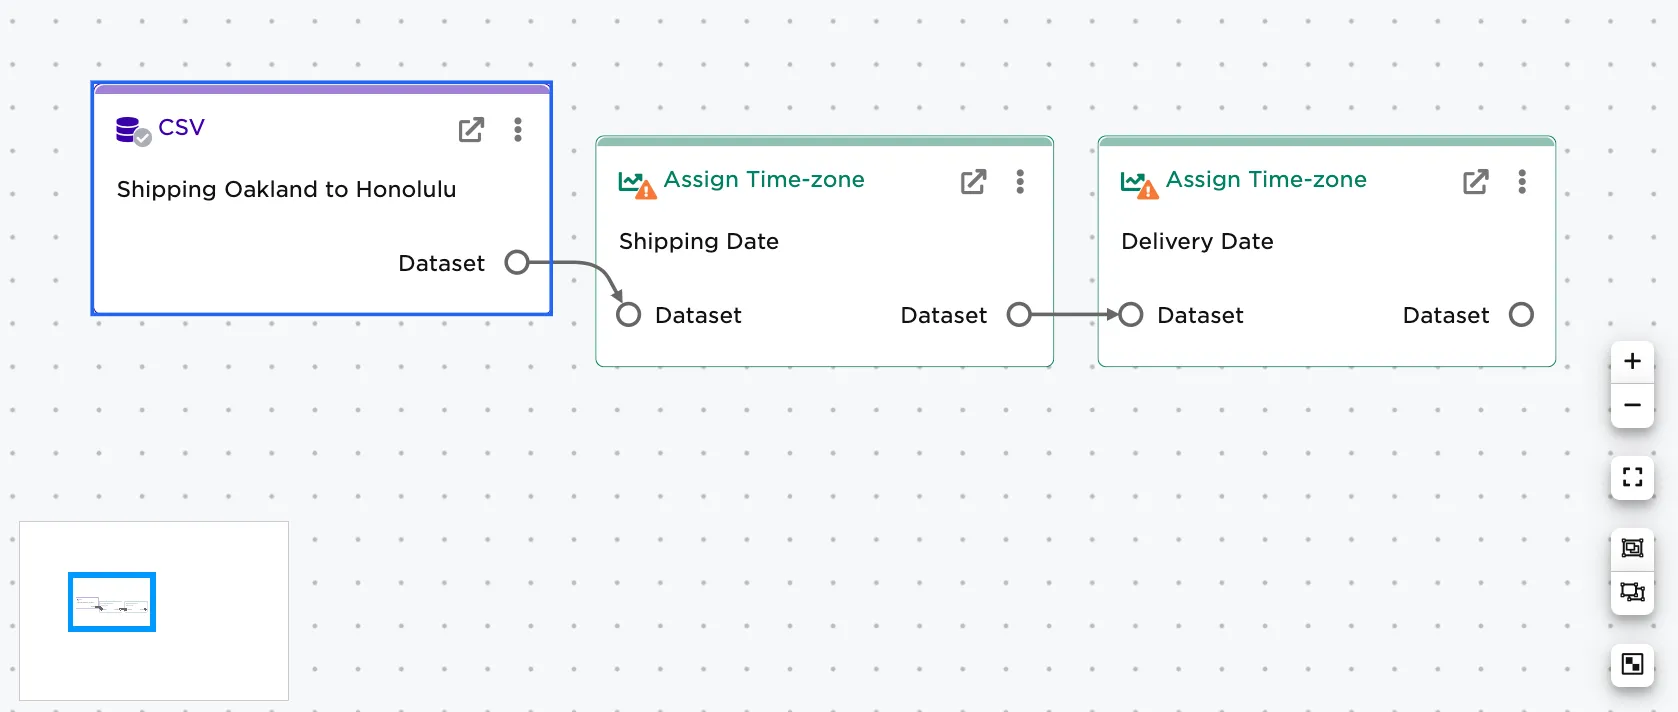
Figure 4b: Example workspace