Columns - Sort and Index
Sorting is the process of arranging items in a dataset in a specific order. Indexing is the process of adding tags or markers to improve the speed (latency) of retrieving data from a database table.
Configuration
Sort
| Field | Description |
|---|---|
| Name (default=none) | Field to name the chart: An optional user-specified node name displayed in the workspace, both on the node and in the dataframe as a tab. |
| Sorting Options (default=none) | Column to sort the data: Select a column to sort the dataset. |
| Add Additional Sort Step (default=none) | Additional column to sort the data: Select additional columns to sort the dataset. |
Index
| Field | Description |
|---|---|
Add column to index (default=off) | Create an index column: Turn on to create a column to index the dataset. |
| Set Index Column Name (default=none) | Name the new index column: Create a name for the new index column name. |
Start Indexing at (default=1) | Select start row for indexing: Select which row to start indexing from. |
Index Column location (default=Index as first column) | Select location for index column: Select whether to add the new index column to the first row or the last row. |
Node Inputs/Outputs
| Input | A Visual Notebooks dataframe |
|---|---|
| Output | A dataframe with sorted and indexed columns. |
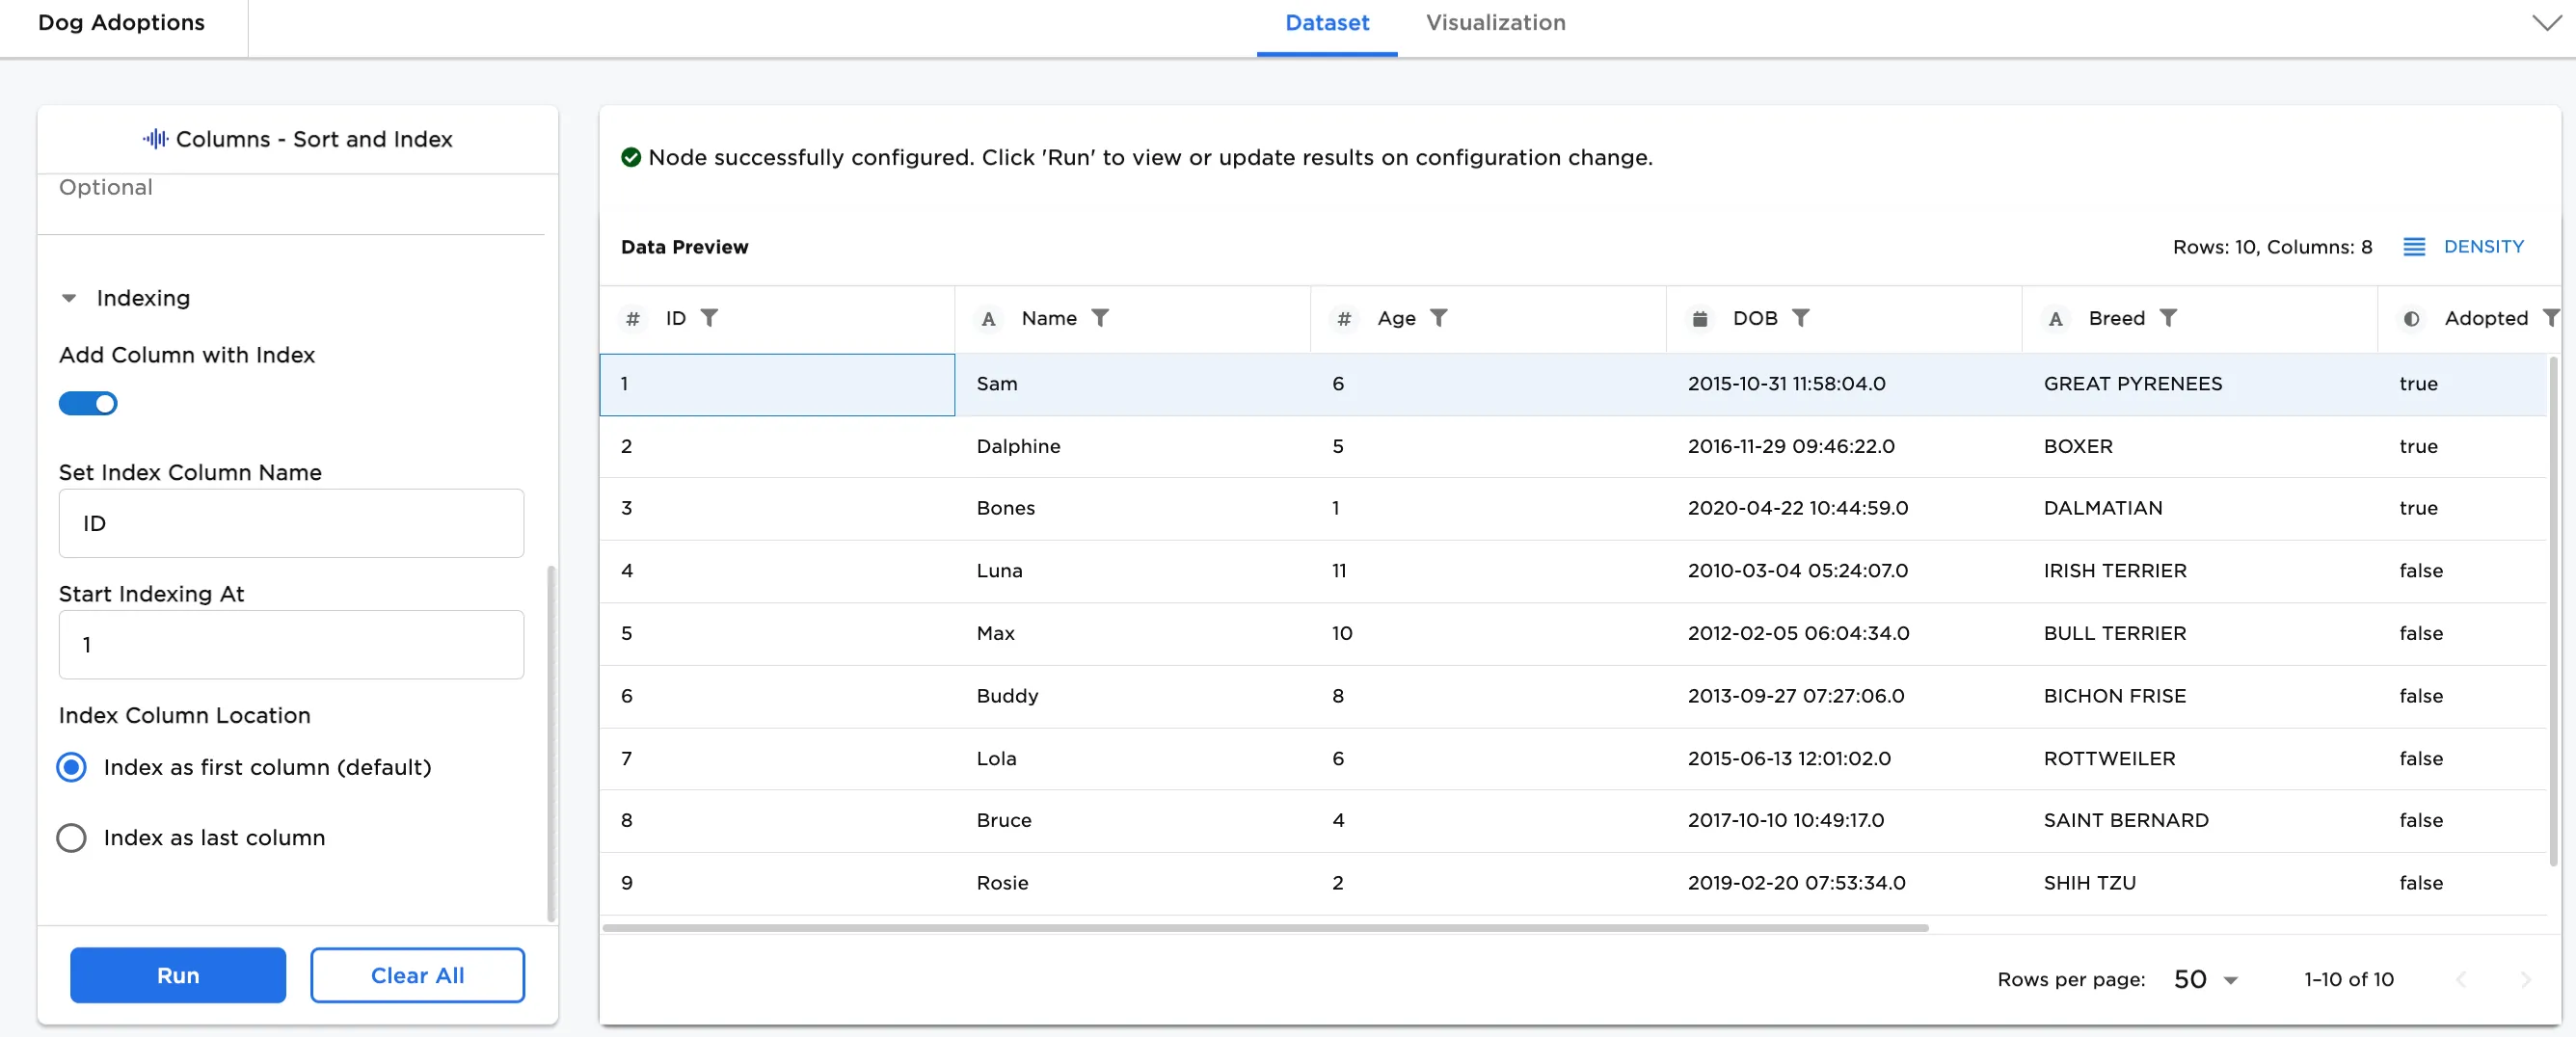
Figure 1: Example dataframe output
Examples
Any grassroots startup could start with small samples of data. Take for example, Dog Foster and Rescue startups. Their data might start off with basics, but later as they grow, their data needs expand. As they grow, they might find a need to sort their data on a column. When there isn't an id column, an index column can be created and assigned to each row.
The following examples illustrate how the sort and index functions work in Visual Notebooks. This example uses a dataset that shows the adoption status and age of dogs.

Figure 2: Example input dataframe /visual-notebooks-custom-sql-function
- Connect an existing node to the Columns - Sort and Index node. If you are using the sample columns_sort_index.csv for dog adoptions in a CSV node, connect it to the the Columns - Sort and Index node.
- To sort the data, click on Add a sort step, select a column to Sort by, and click Run. In this case, the "Adopted" (True/False) column is selected to sort the data.
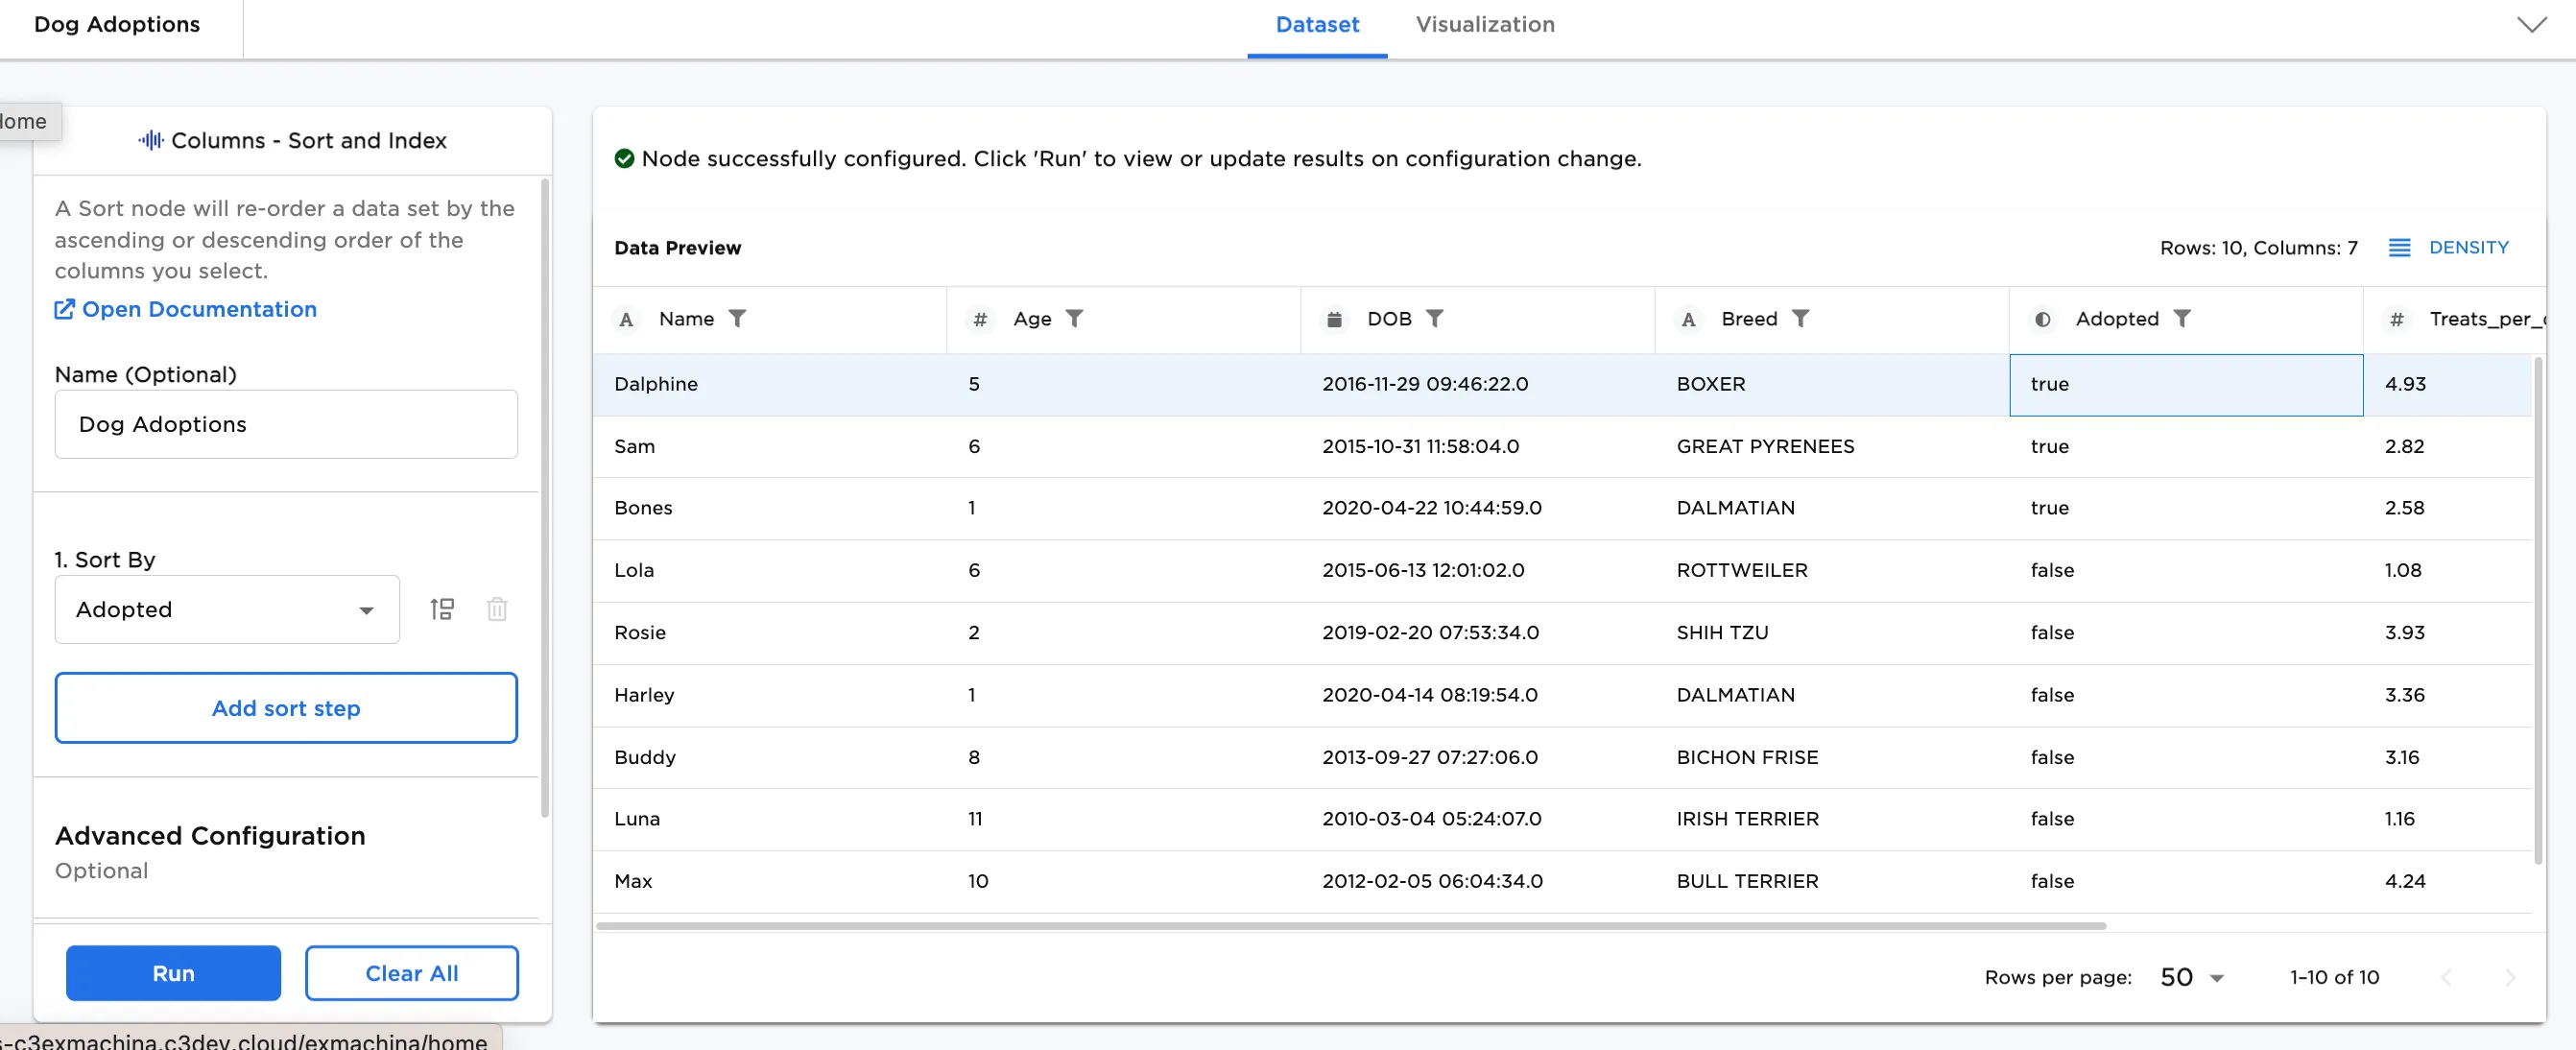
Figure 3: Example dataframe with columns sorted by Adopted status
- Additional sorting columns can be added. Click on Add a sort step again, select another column to Sort by, and click Run. Figure 4 shows a second sort option by the dog's "Age" in addition to adopted status.
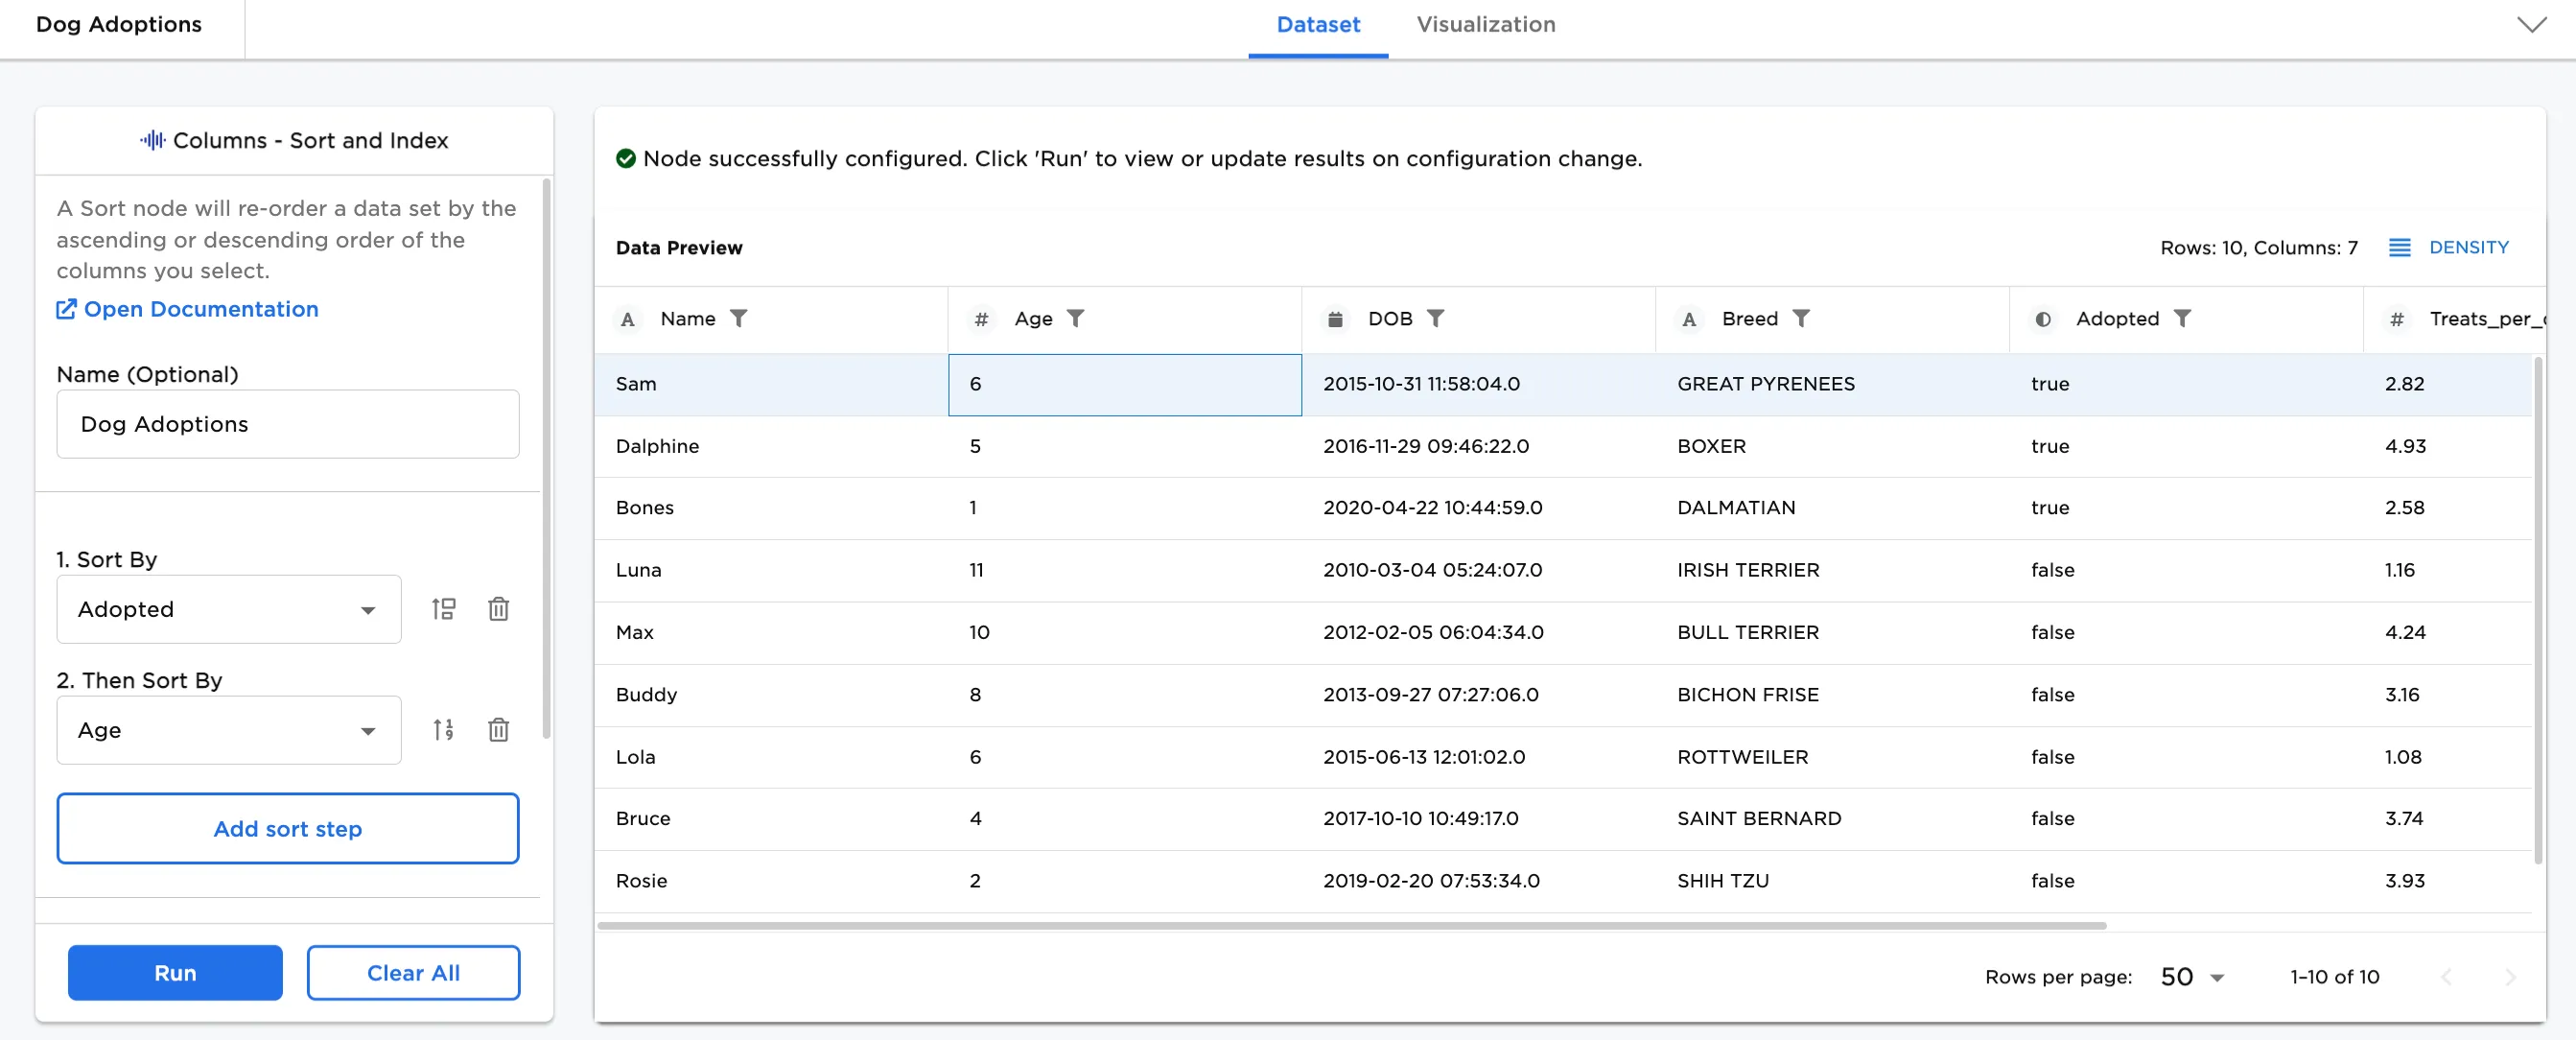
Figure 4: Example dataframe sorted on two columns
- Optionally, an index column can be added to the dataset. The following steps were taken to produce the dataframe shown in Figure 5 with a new index column.
- Toggle on Add Column with Index
- Set Index Column Name. In this example, "ID" has been added as the column name.
- Update Start Indexing At to another row. This example keeps "1" as the default. Note: Row 1 refers to the first row of data. The header row is separate.
- Select the Index Column Location. This example keeps the default as Index as first column.
- Click Run
Figure 5: Example dataframe sorted on two columns with an index column