Join
The Join node in Visual Notebooks combines rows from two datasets based on related columns to create a new single dataset. Only datasets that have a column in common can be joined.
Configuration
| Field | Description |
|---|---|
| Name default=none | Field to name the chart An optional user-specified node name displayed in the workspace, both on the node and in the dataframe as a tab. |
| Select Columns to Join *Required | Columns to join from each dataset Select columns From Left Dataset and From Right Dataset to be combined by the Join node into a new dataset. |
| Add Column Pair to Join default=none | Add new Columns to join Choose additional column pairs to add to the join. |
Select Join Type default=Left Inclusive Join | How to join columns Select from different options that determine how columns will be joined into a new dataset. Selections include: Left Inclusive Join, Right Inclusive Join, Full Outer Join, Inner Join, Left Exclusive Join, Right Exclusive Join, Full Outer Exclusive Join, and Cross Join. Descriptions of each are available in the Configuration panel. |
Advanced Configurations (optional)
| Field | Description |
|---|---|
Select Columns to Keep default=All Columns | Column selection An option to select columns to keep and columns to remove from the Left and Right datasets. Selecting the Specific Column button allows dropdown selection of columns to keep. |
Overlapping Columns Suffix default=Default | Adds a suffix to overlapping columns An optional user-specified suffix can be added for overlapping columns or the default is added instead. |
| Output Sort Order default=none | Select a Sort Order An optional user-specified sort order can be applied to the data. |
Node Inputs/Outputs
| Input | A Visual Notebooks dataframe |
|---|---|
| Output | A dataframe joining columns from two other dataframes |
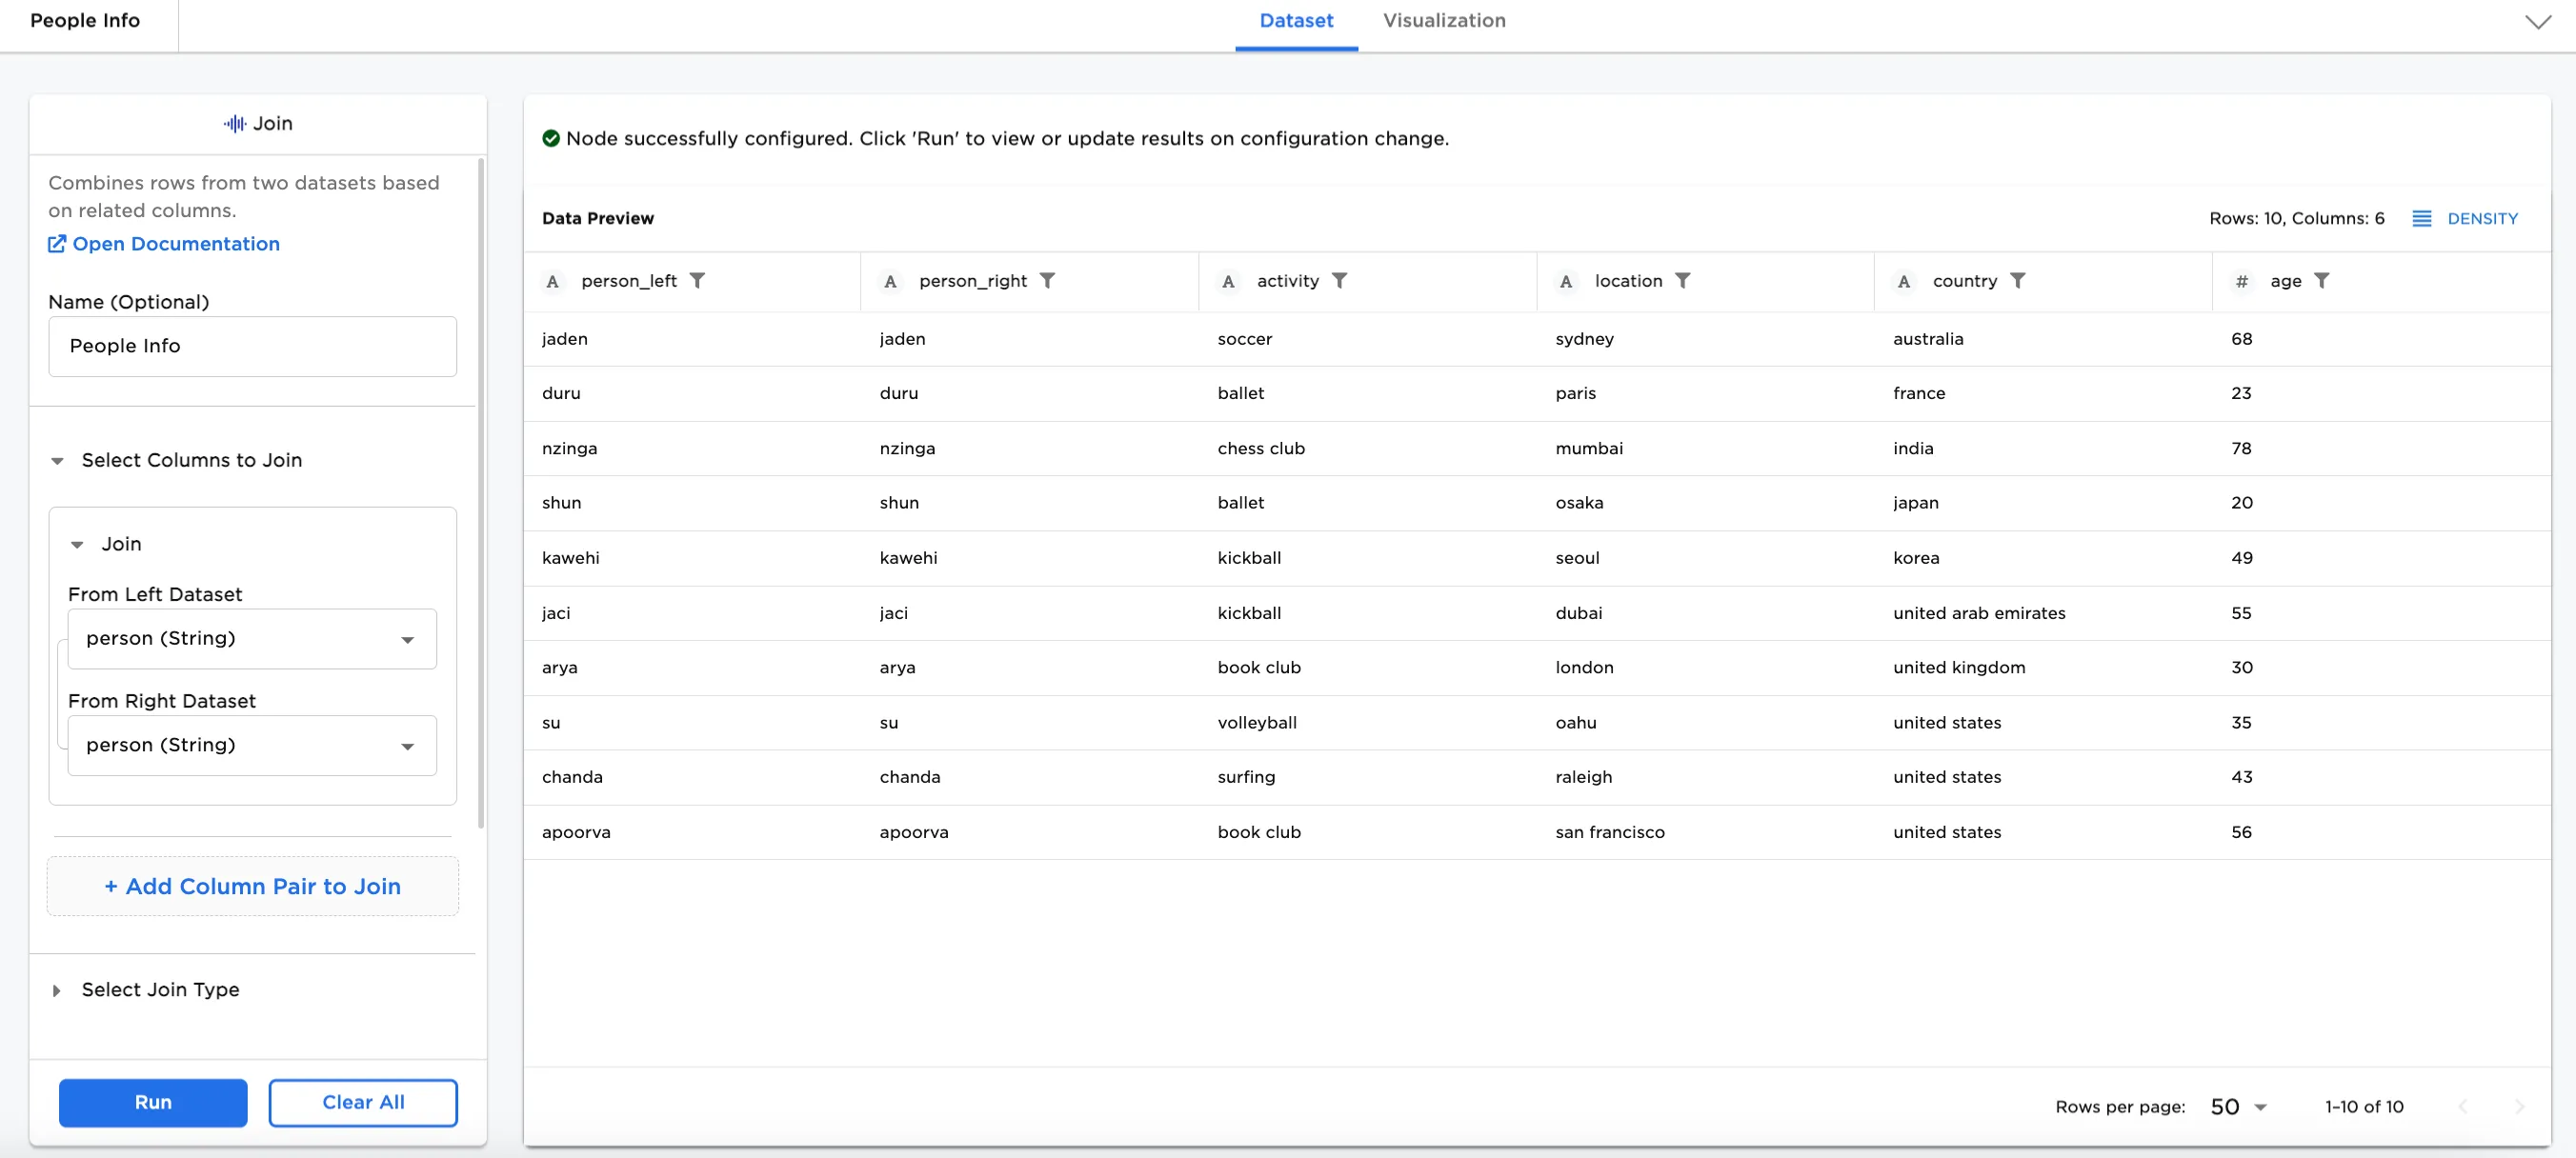
Figure 1: Example dataframe output
Examples
The Join node connects two datasets. Sometimes human resources have separate reports or queries about employees. Each query has different information about employees, but all the queries have employee ID columns in common. It is possible to take the columns from different queries and join them together based on employee ID.
In our examples, we have some information about a list of people in one dataset, and different information about the same list of people in another dataset. The datasets both have two columns in common. Each dataset is uploaded to its own CSV node.
- Connect the join_people_activities.csv node to the Left connector of the Join node and connect the join_people_ages.csv node to the Right connector of the Join node.
- Optionally, add names to the nodes for clarity. In this case, the nodes have been renamed to:
- join_people_activities.csv node = "People with Activities and Locations"
- join_people_ages.csv node = "People and Ages"
- Join node = "People Info"
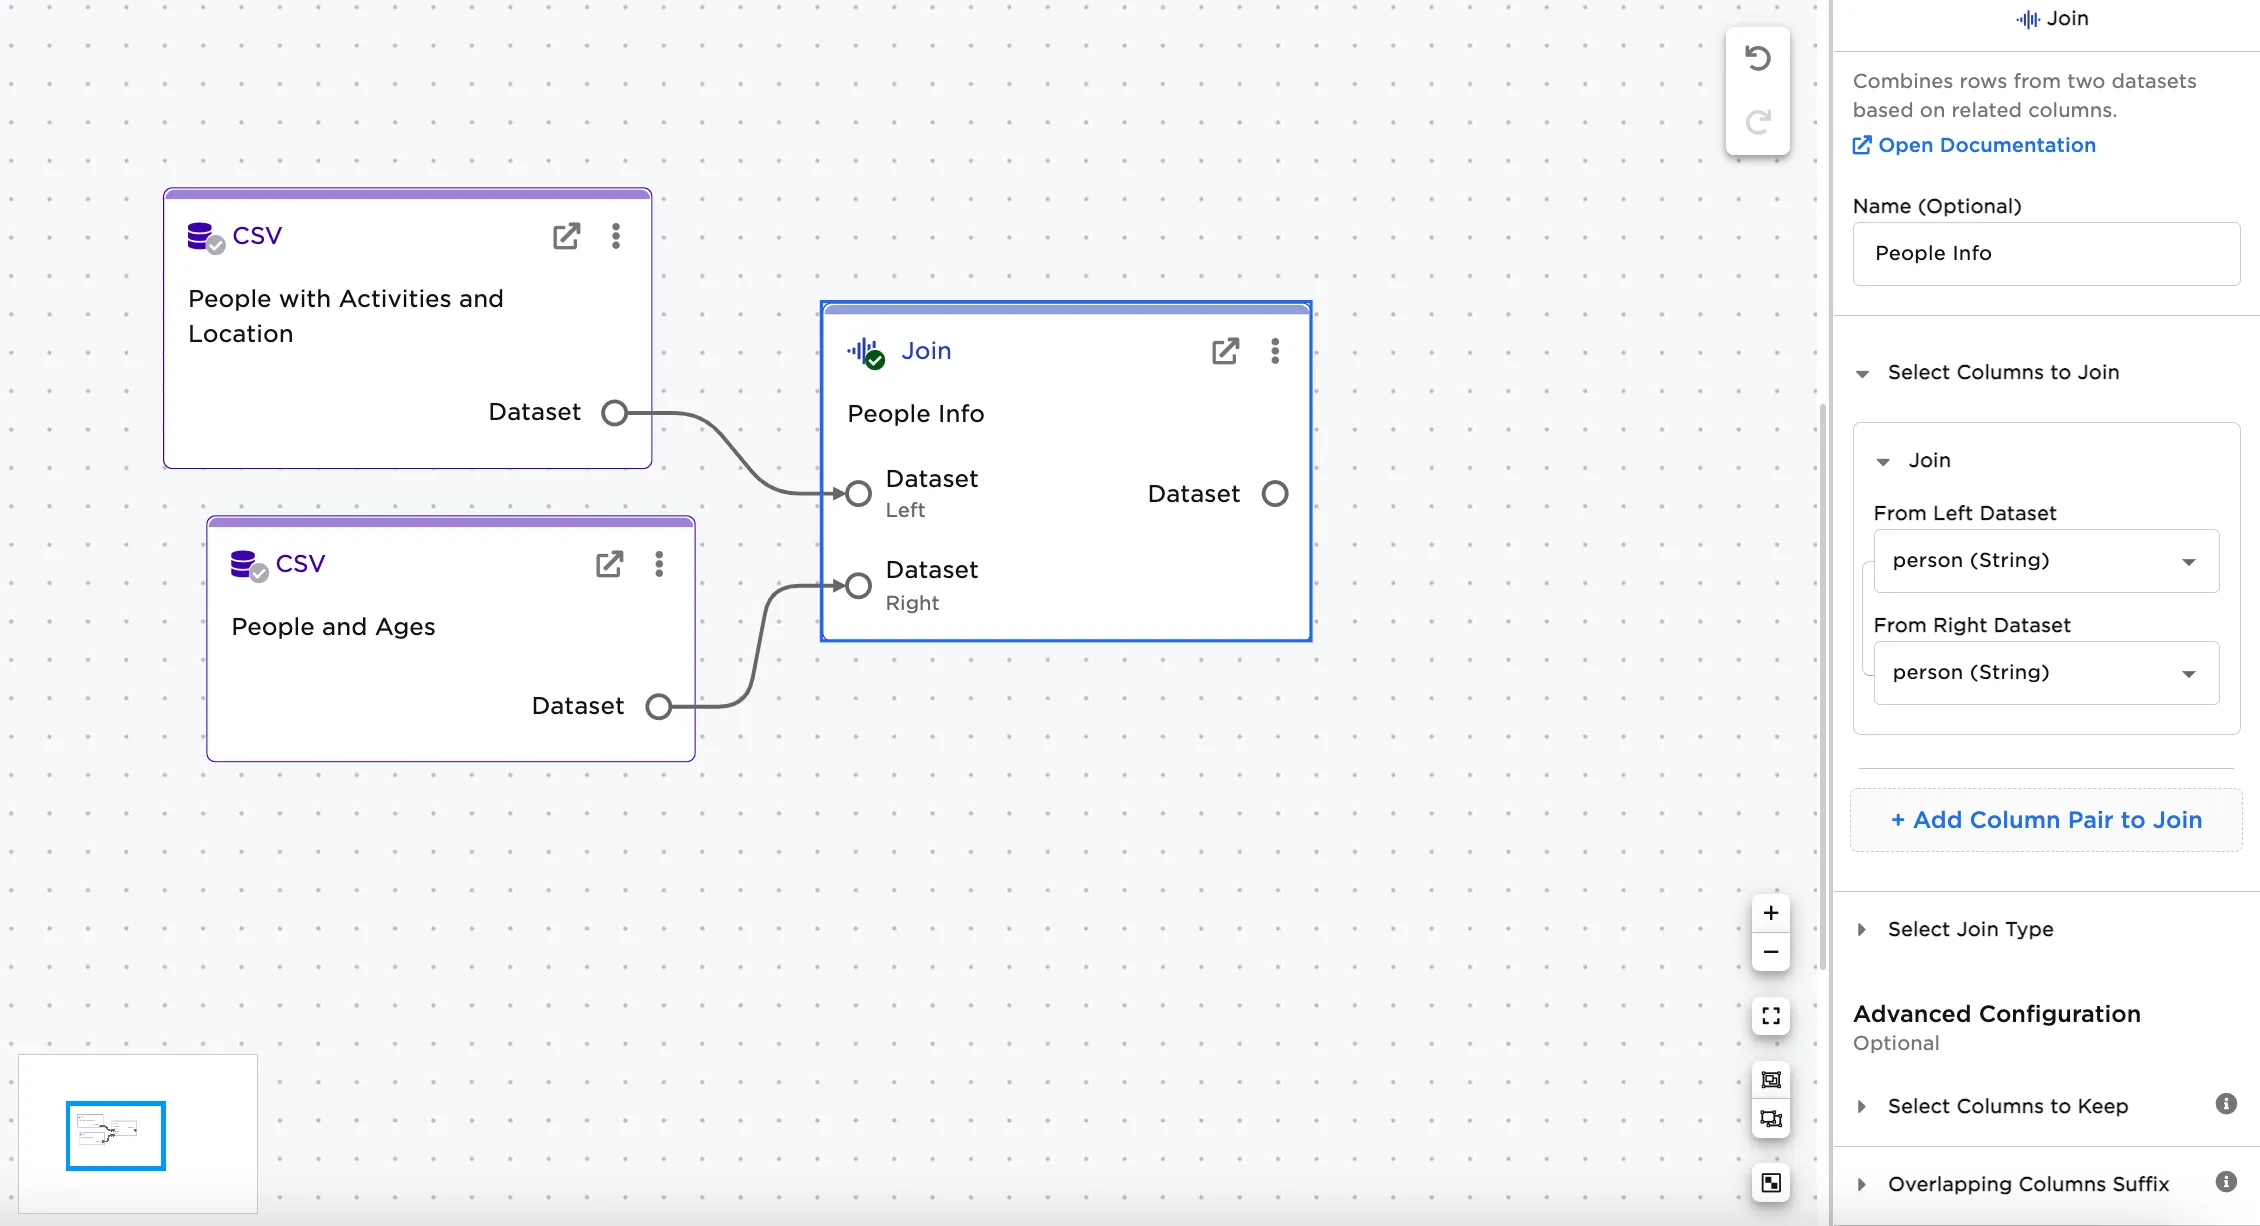
Figure 2: Example workspace
- Selecting each CSV node, you can see that "People with Activities and Locations" dataset has person, last_name, activity, location, and country columns, whereas the "People and Ages" dataset has person, last_name, and age columns. The person column is related in both datasets. For more information about configuring each CSV node, select one CSV node and click the Open Documentation link.
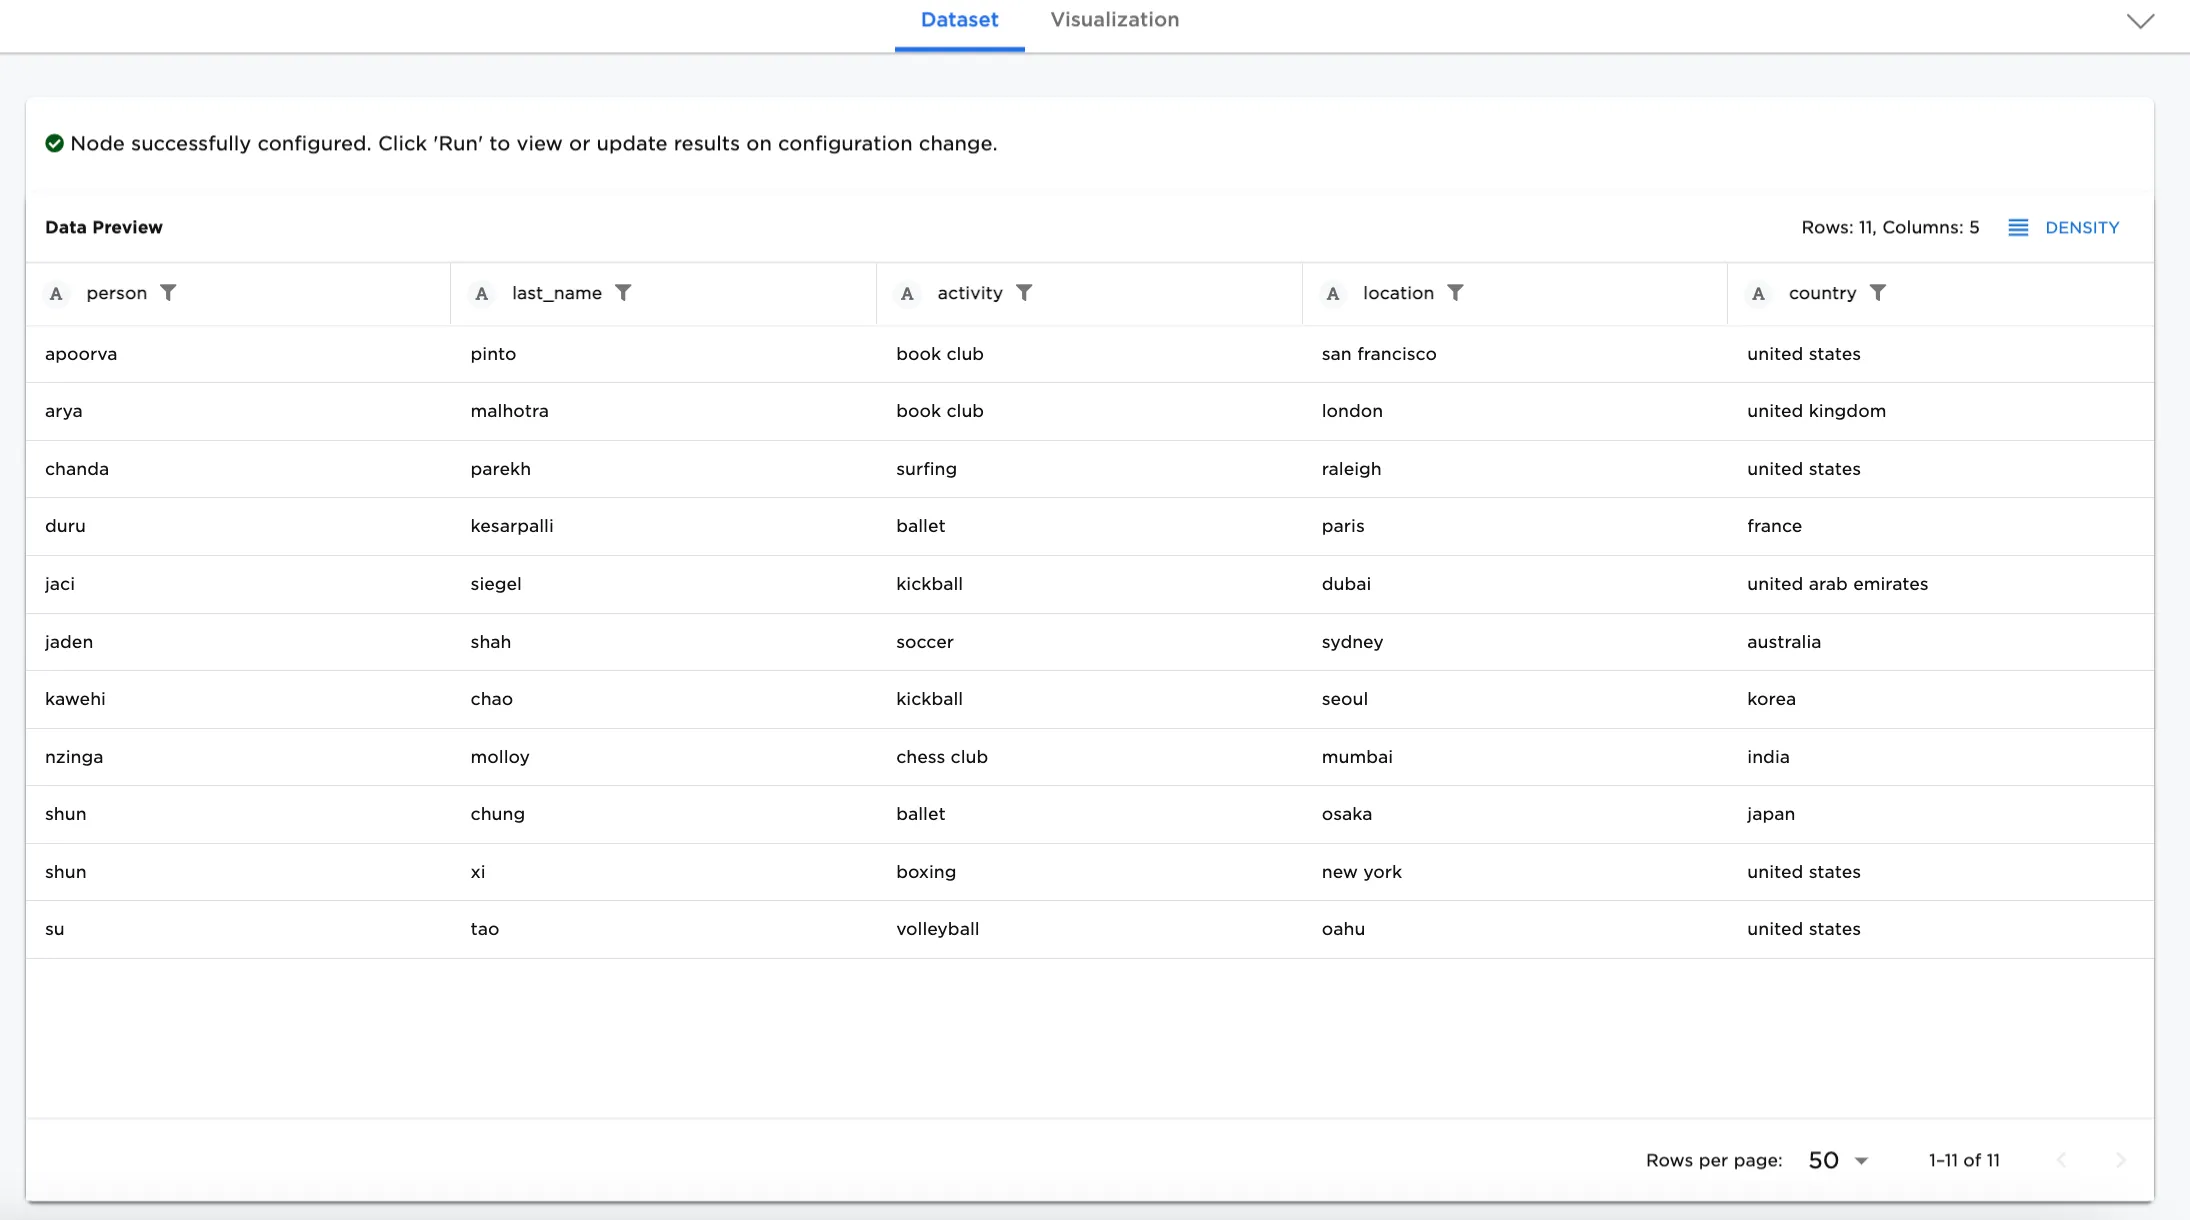
Figure 3a: Example dataset for People with Activities and Locations
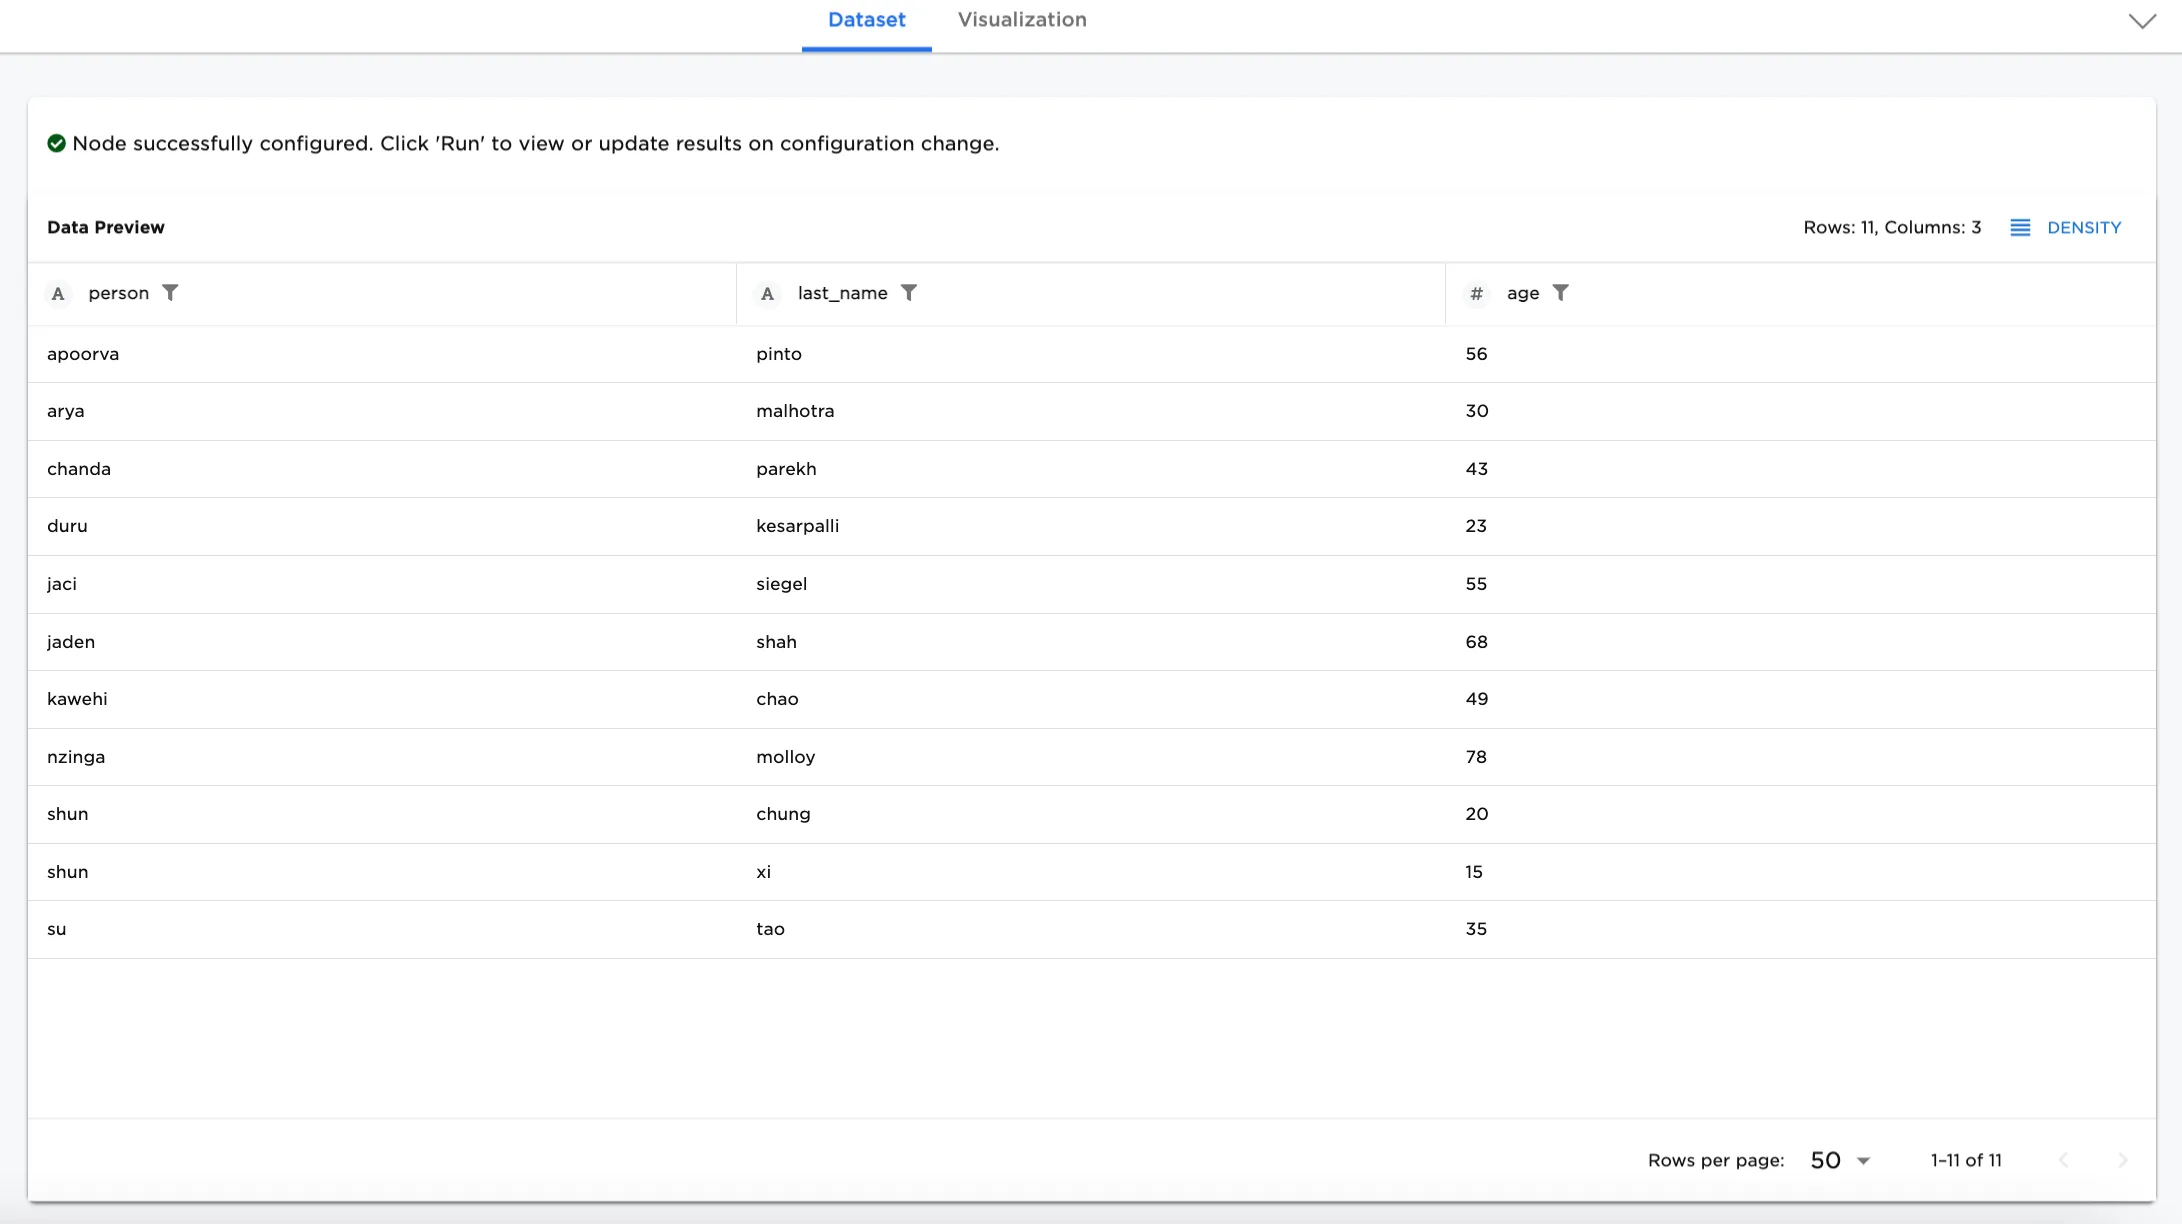
Figure 3b: Example dataset for People and Ages
- Next, select the columns to join From Left Dataset and From Right Dataset. The join should be made on the columns that match. In this case, both datasets have a person column.
- Select Run.
Figure 4 shows the output of joining the two datasets by person.
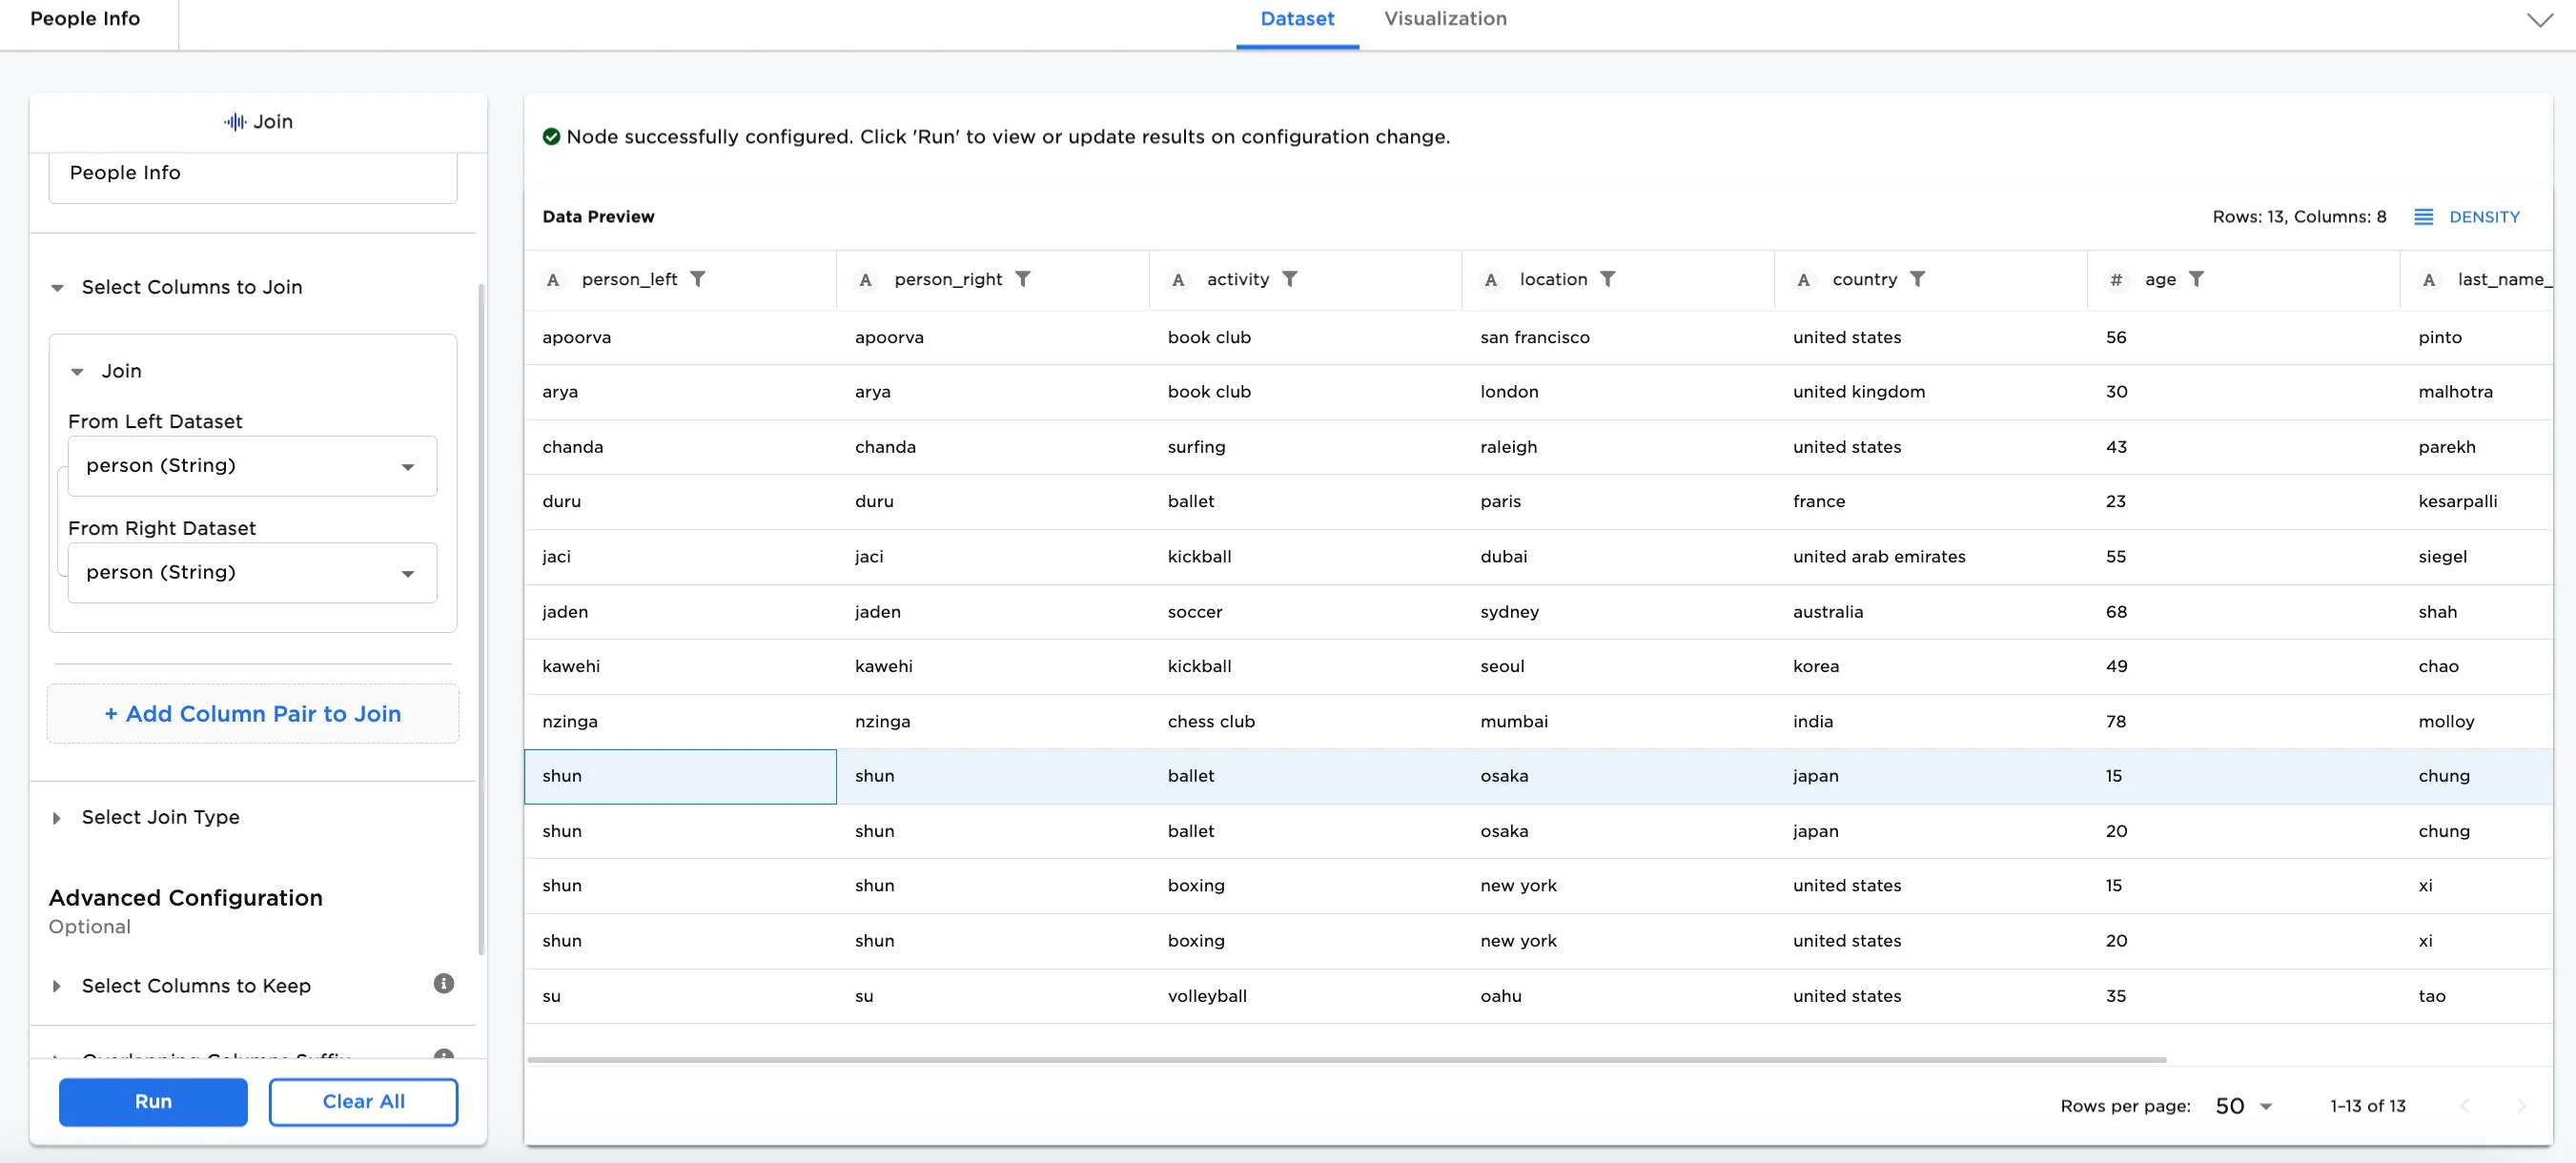
Figure 4: Example of joining on a column
Notice that there are two people with the same first name, "shun", resulting in 4 lines. To remove the duplicate lines, use the Add Column Pair to Join option to join the datasets by last_name also. The resulting dataset shows only one line each for "shun chung" and "shun xi".
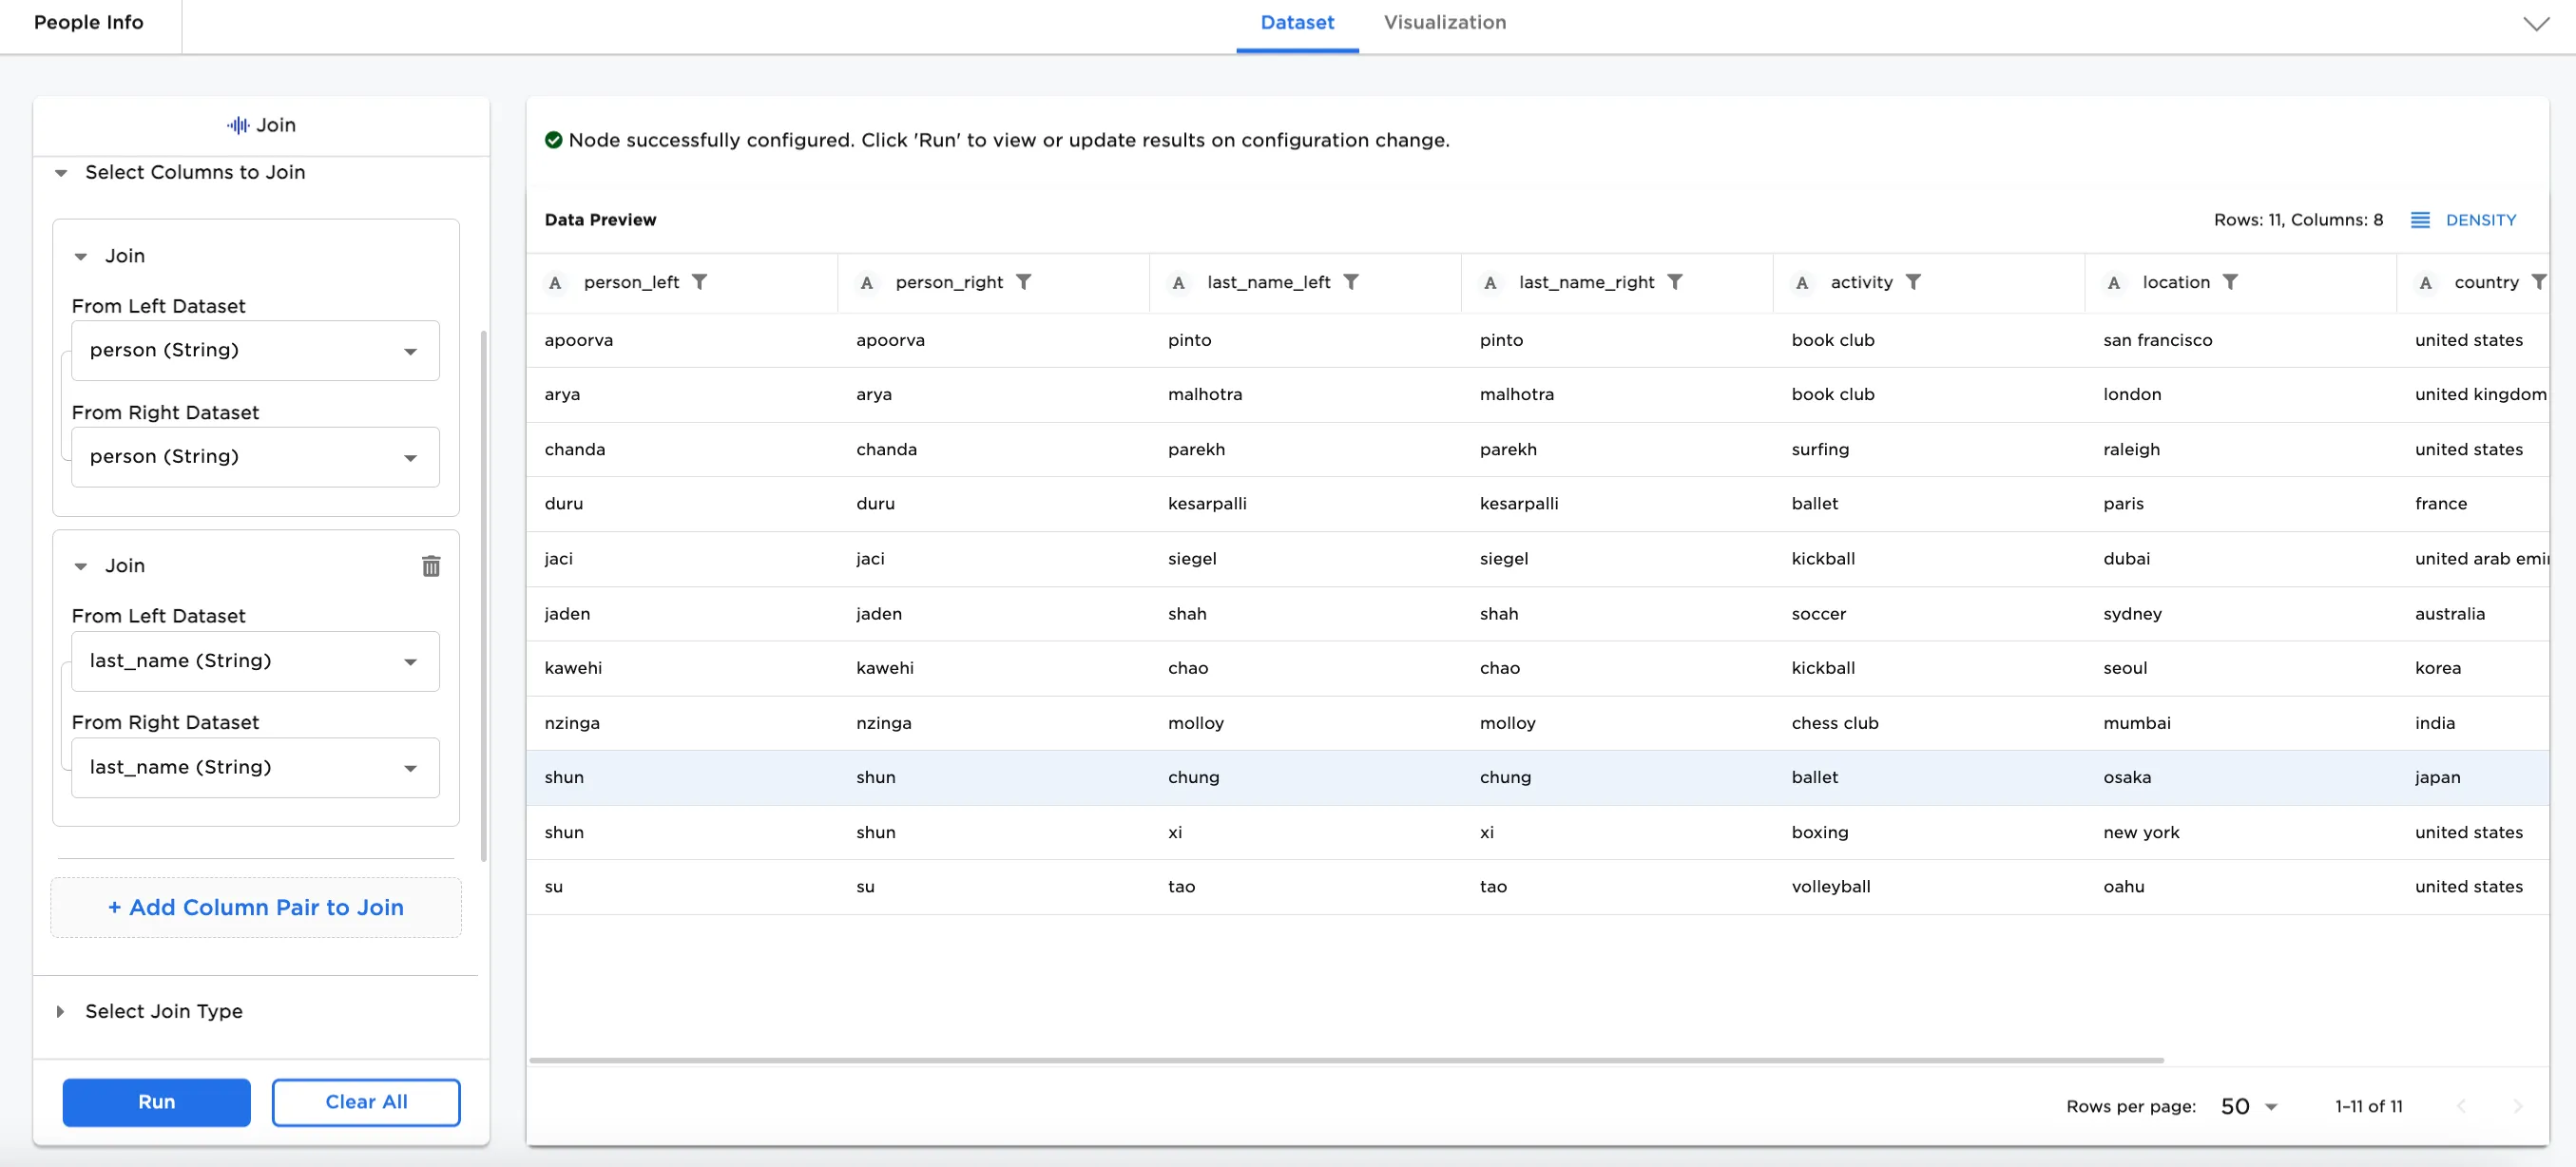
Figure 5: Example of adding another join column
Optionally, configurations can be added. In this case, the following selections have been made. This will show a user-specified suffix for columns in common and sort the output by country and age.
- Select Join Type: Left Inclusive Join
- Overlapping Columns Suffix
- Suffix for Columns on Left: "_left_side"
- Suffix for Columns on Right: "_right_side"
- Output Sort Order
- 1. Sort By: country (descending)
- 2. Sort By: age (ascending)

Figure 6: Example of configuration options
Other optional configurations can be added. In this case, the following selections have been made. These selections allow specific columns to be shown: activity, location, and age. Note that the Sort By selection in Figure 6 points to a column that is not kept here--country. The Sort by selection needs to be removed to keep the columns shown in Figure 7.
- Under Select Columns to Keep: Specific Columns is selected.
- From Left Dataset: activity and location are selected.
- From Right Dataset: age is selected.
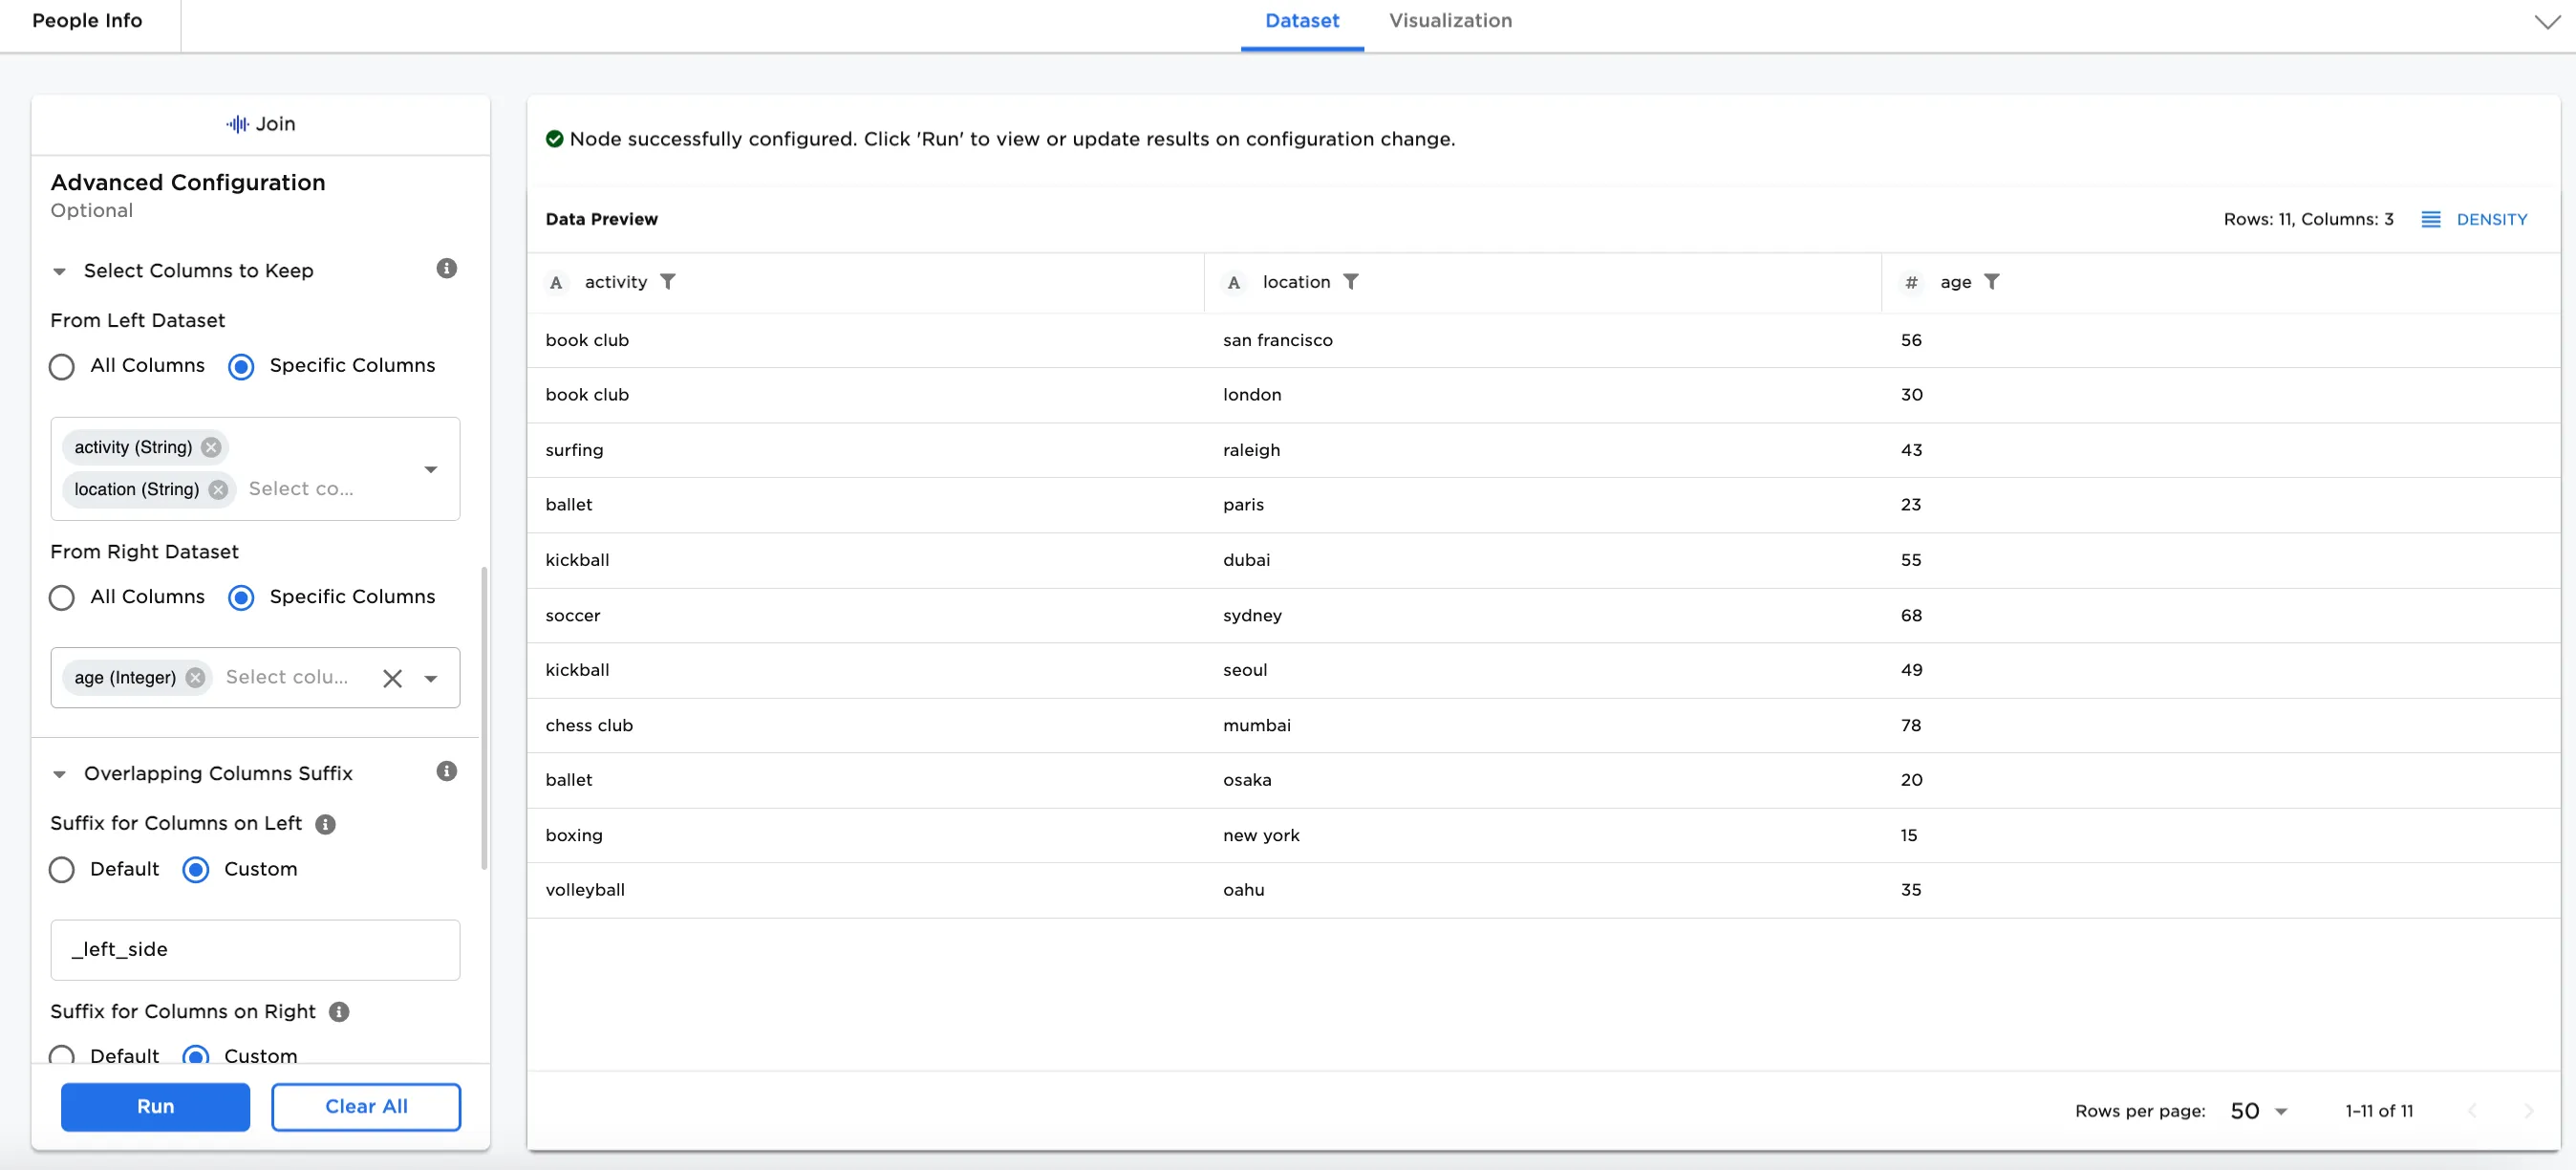
Figure 7: Example of keeping select columns