ADLS Node
Input data from Azure Data Lake Storage (ADLS) to Visual Notebooks. You must have an existing ADLS account to use this node. For more information about ADLS, see Azure Data Lake Storage.
Prerequisites
Follow the steps below to connect your ADLS account to Visual Notebooks.
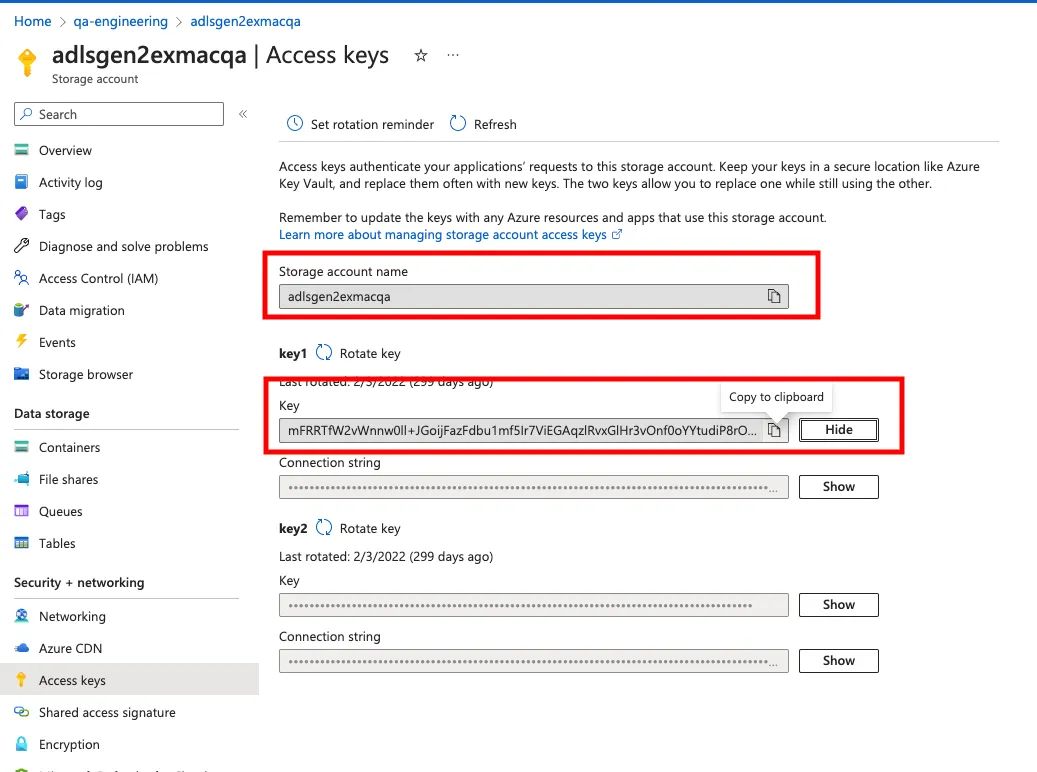
- Sign into Azure Portal and navigate to ADLS storage account
- Select Access Keys from the lefthand navigation menu
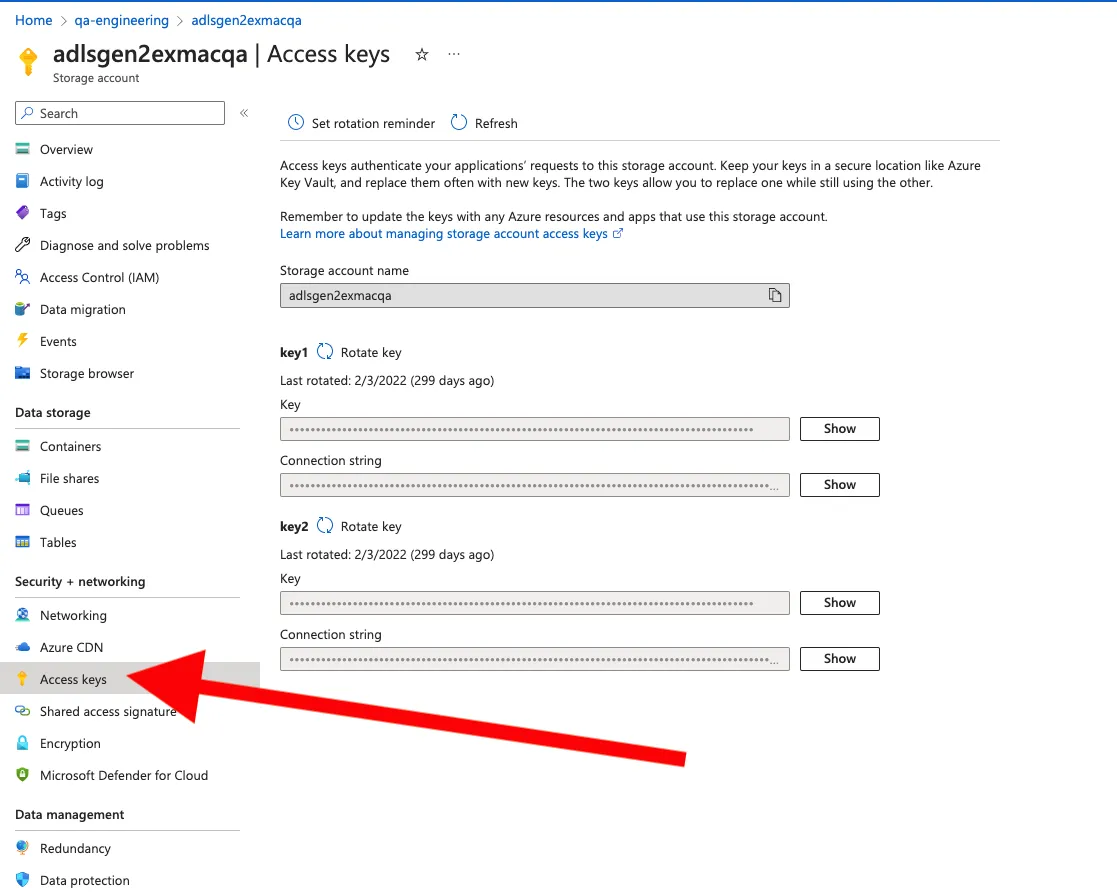
- Show either of the keys and copy the value
- In Visual Notebooks, drag an ADLS node onto the canvas
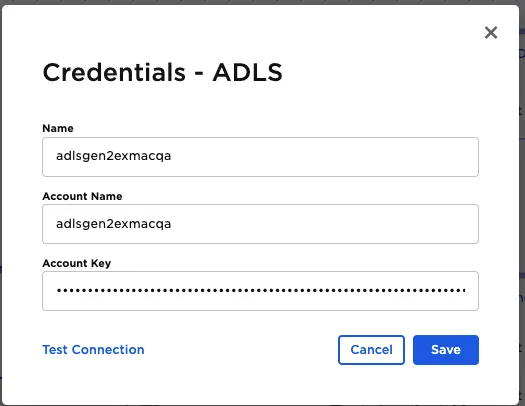
- Select the gear icon beside the Credential field
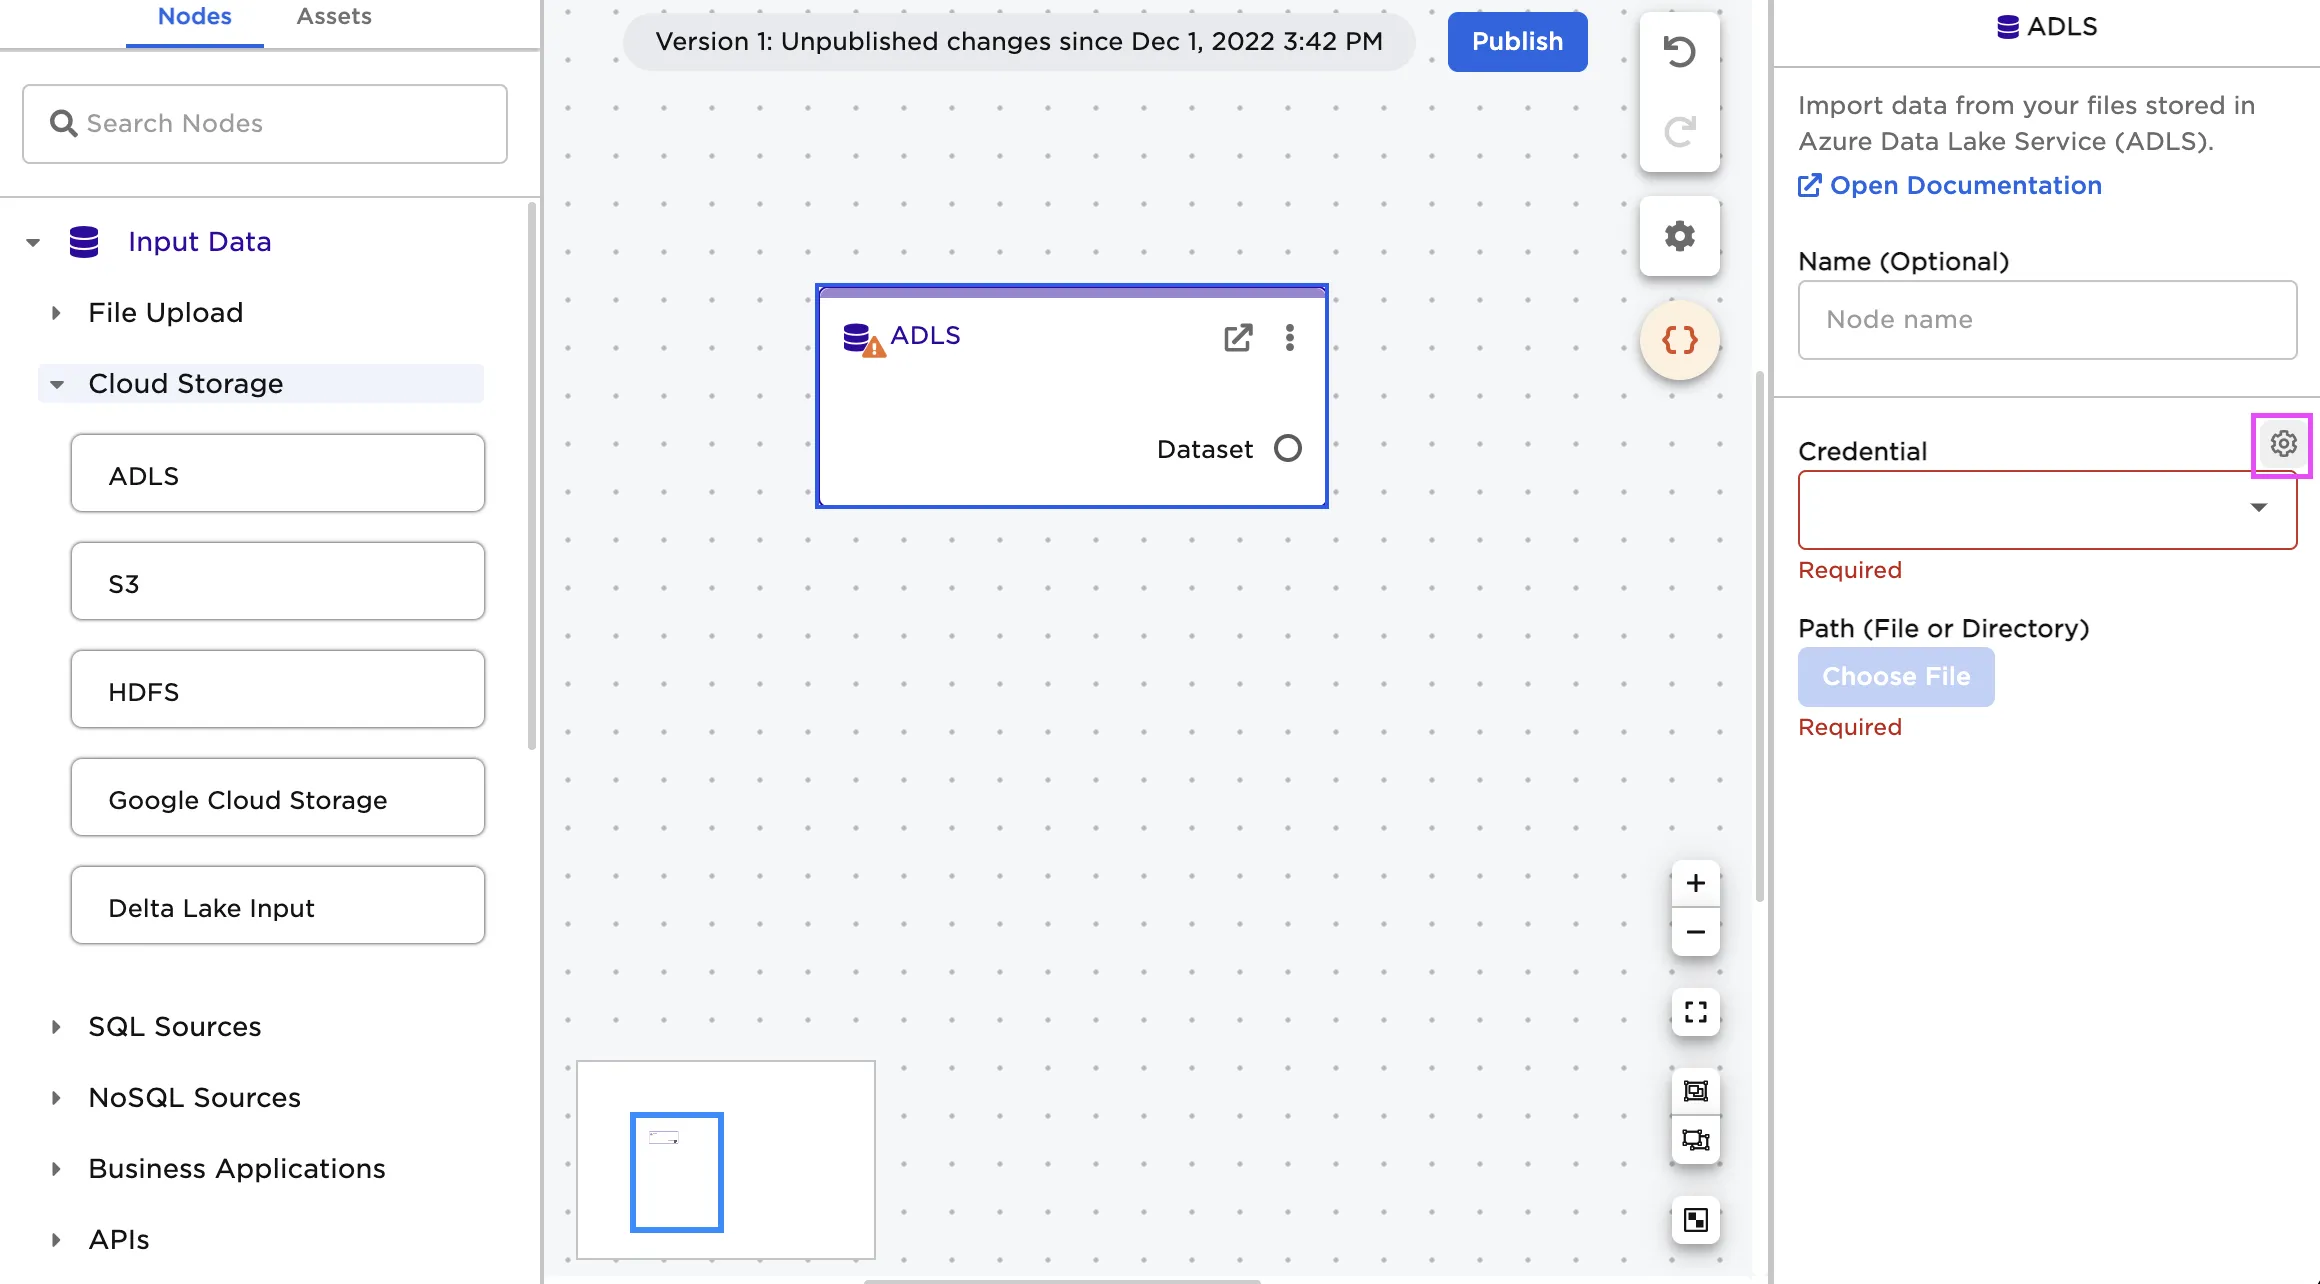
- Select the plus sign in the upper right corner
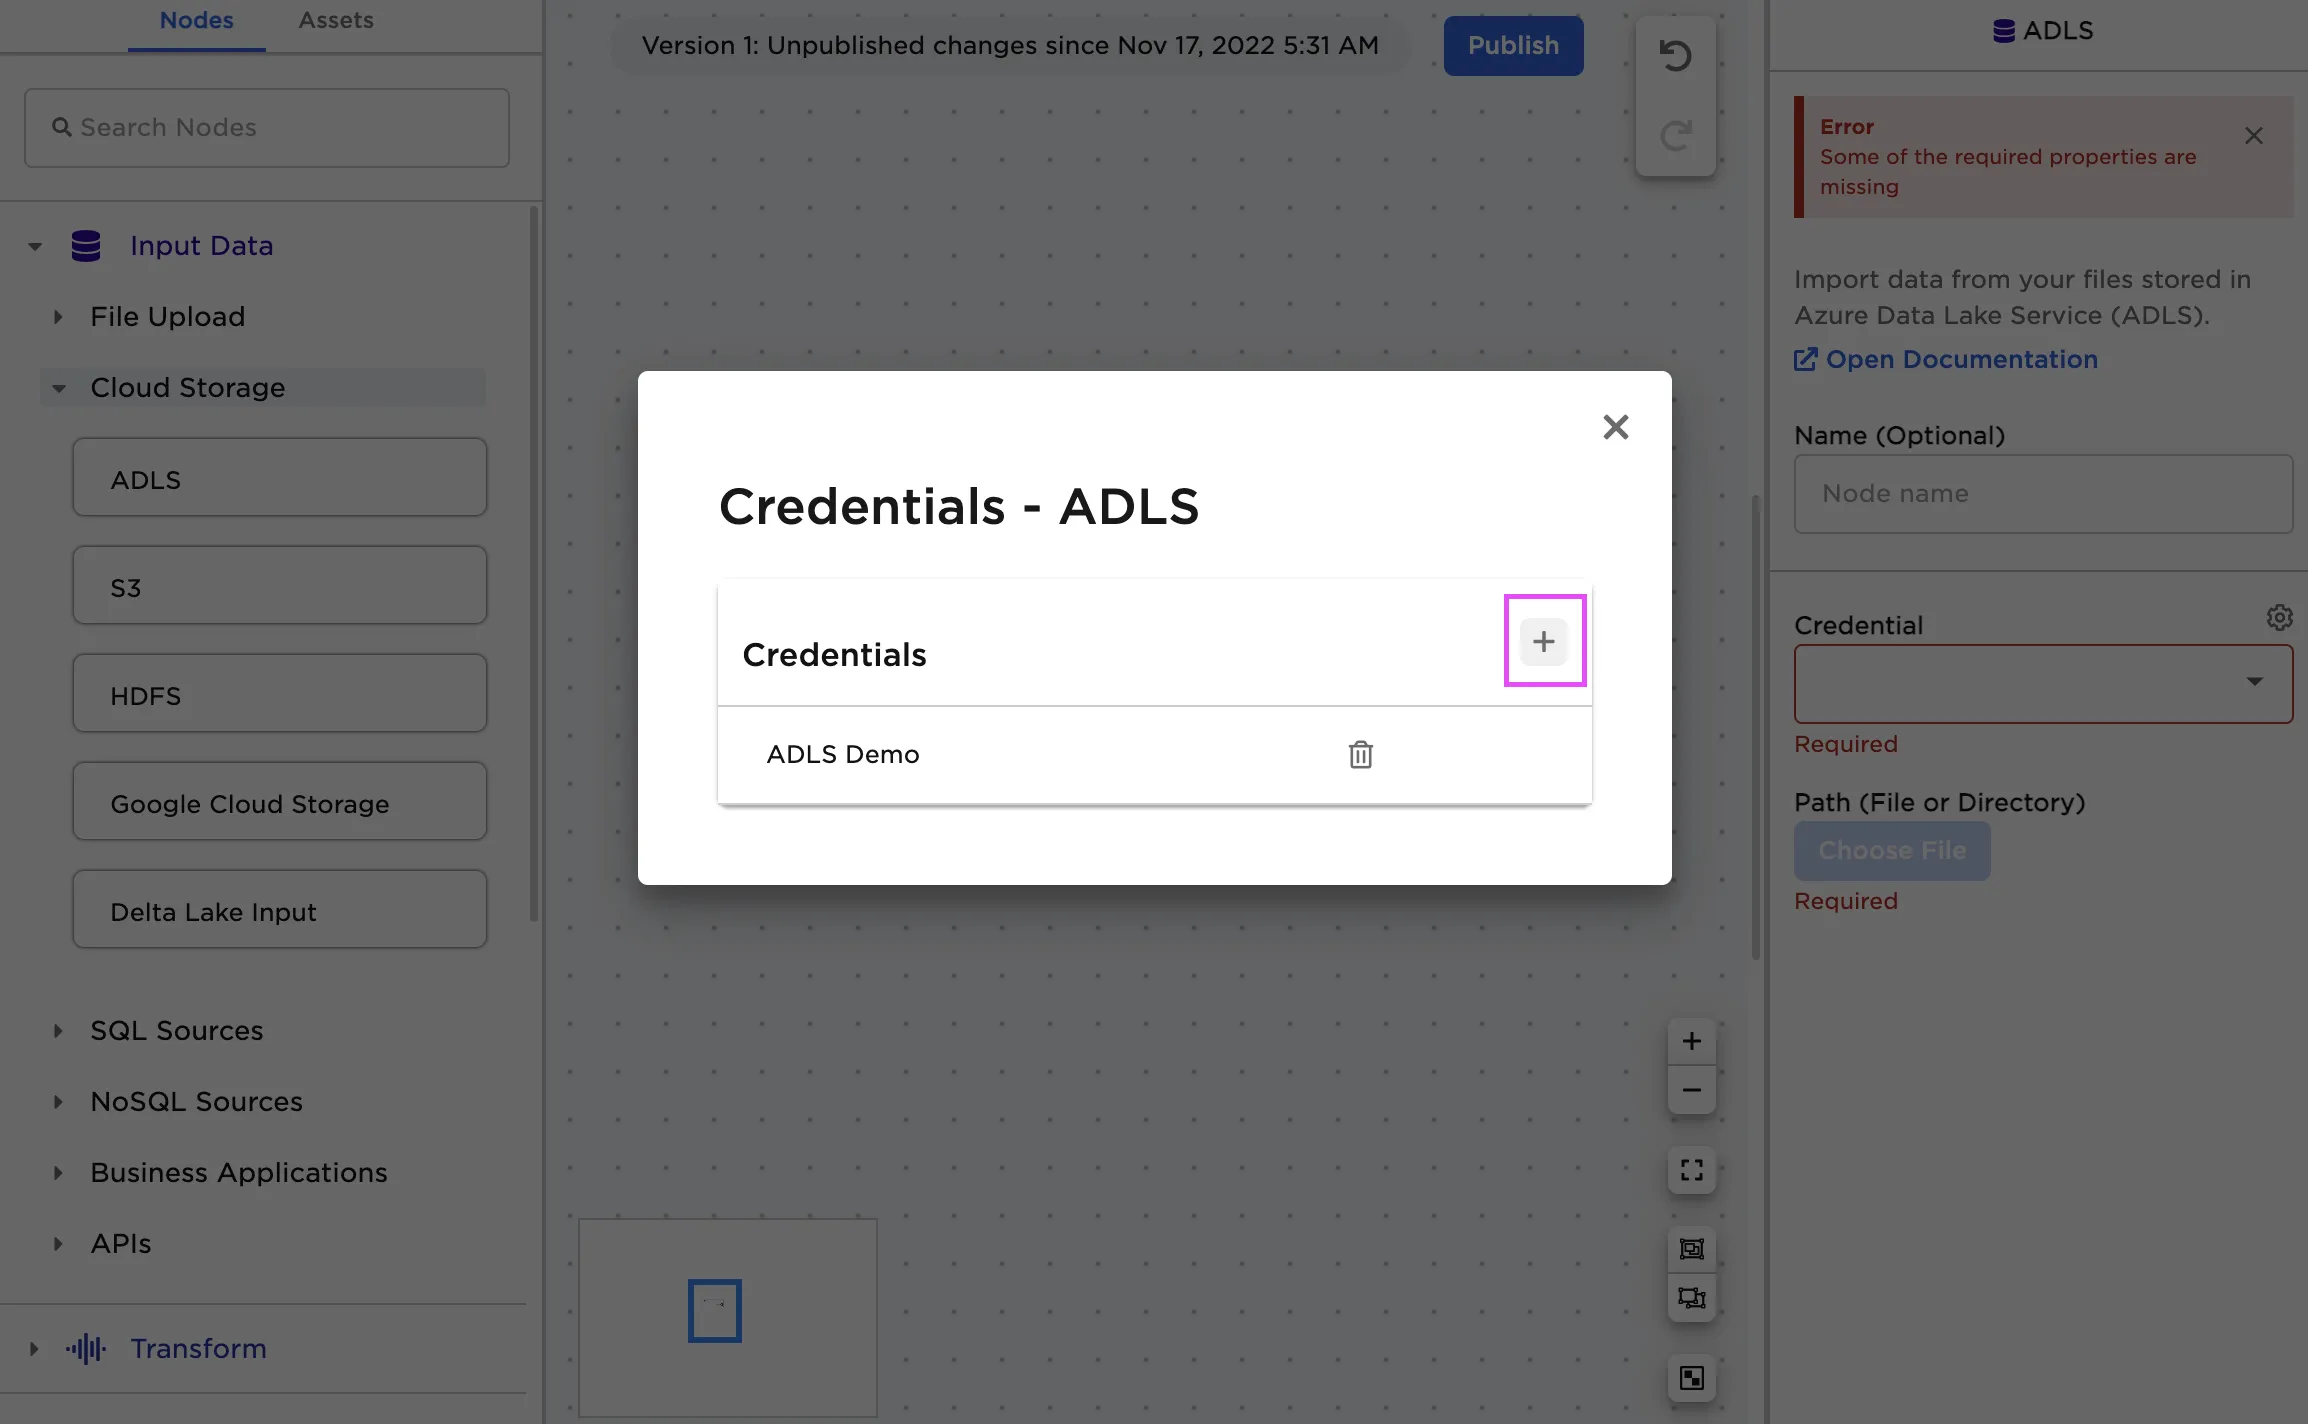
- Paste the contents of the storage account name into Account Name and key into Account Key
Configuration
Initial configuration sidebar 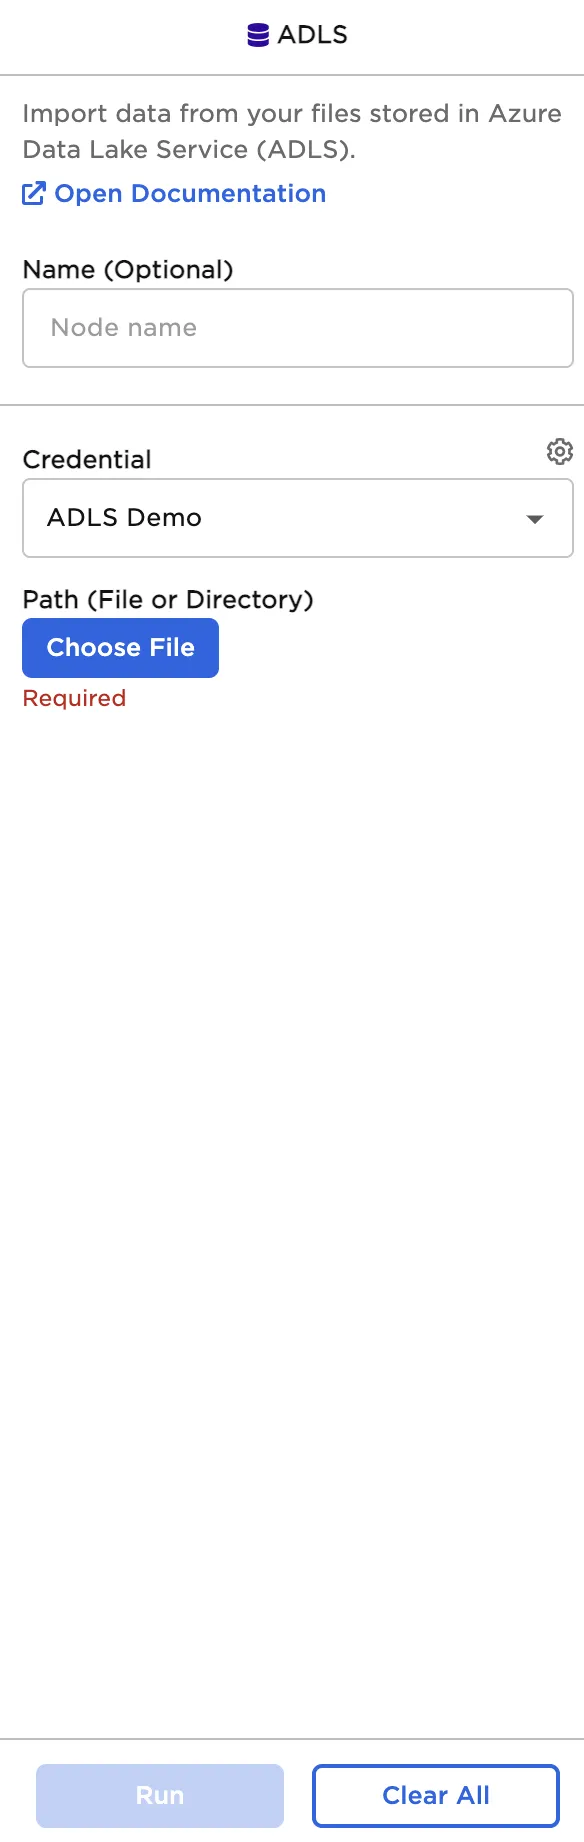
Sidebar after selecting a file 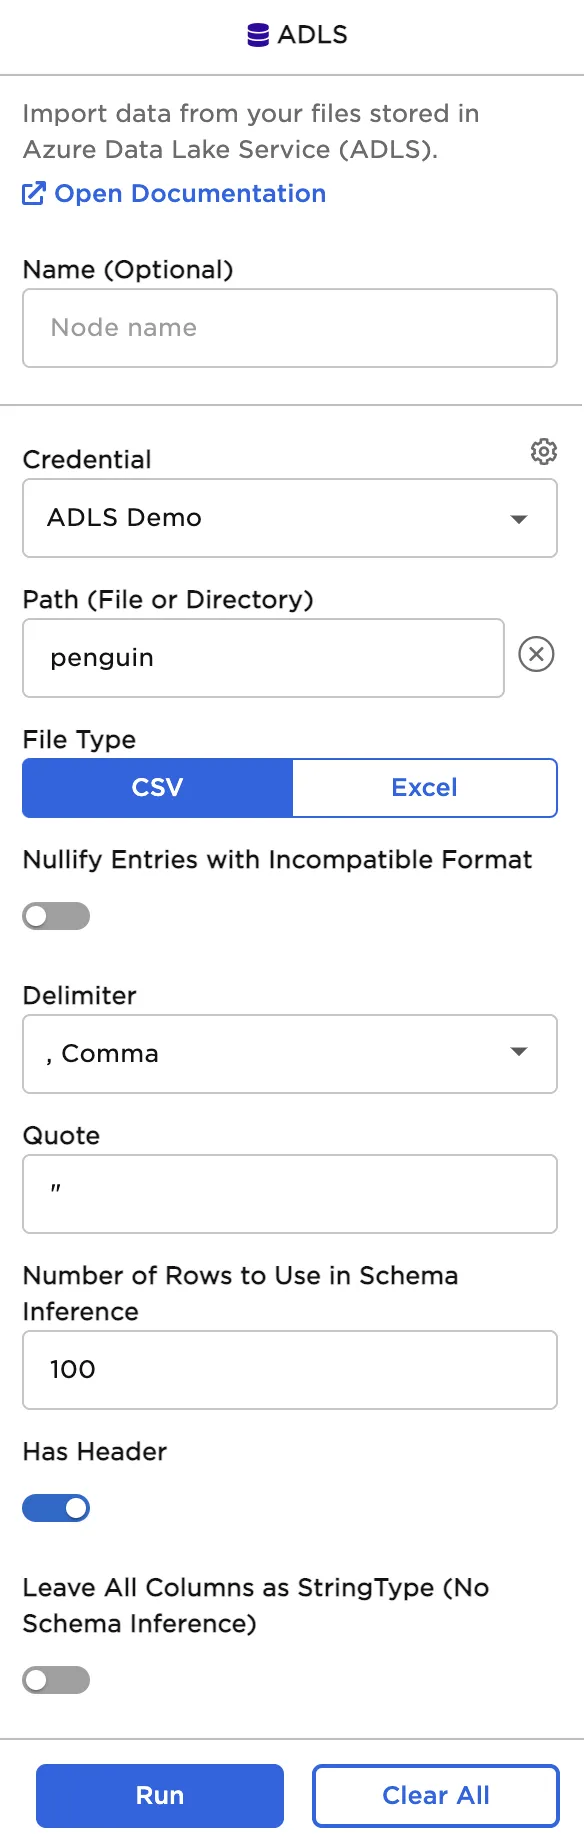
| Field | Description |
|---|---|
| Name Optional | Name of the node An optional user-specified node name displayed in the canvas, both on the node and in the dataframe as a tab. |
| Credential Required | The information needed to access ADLS data Select a saved credential from the dropdown menu. Select the gear icon to add a new credential or delete existing credentials. |
| Path Required | The file to upload Select the bucket and the desired file from the pop-up menu. The rest of the fields appear after a file is selected. |
| Nullify Entries with Incompatible Format Default: Off | Discard bad values Toggle this switch on to find values with data types (string, integer, decimal, Boolean, etc.) that are different from the data type found in the rest of the column. Entries with different data types are changed to null values. |
| Delimiter Default: Comma | The character that separates values Set the delimiter to comma, pipe, colon, semicolon, tab, or space. Only change this field if the uploaded file uses nonstandard formatting. |
| Quote Default: " | The character that surrounds values to ignore Set the quote to any character. Delimiters inside quotes are ignored. Only change this field if the uploaded file uses nonstandard formatting. |
| Number of rows to use in schema inference Default: 100 | Rows used to determine a column's data type Set this value to any valid whole number. Visual Notebooks reads the number of rows specified, starting with the first row of the file. These rows are used to determine each column's data type. |
| Has Header Default: On | Header data to be used as column names Toggle the "Has Header" switch on if the uploaded file has an initial header row of column names. Toggle the switch off to use numerical column names ("_c0", "_c1", etc.) instead. |
| Leave all columns as StringType (no schema inference) Default: Off | String data type Toggle this switch on to read all columns as strings and upload all values. |
Node Inputs/Outputs
| Input | None |
|---|---|
| Output | Visual Notebooks returns a table, called a dataframe, that contains all uploaded data. Columns are labeled and include a symbol that specifies the data type of that column. |
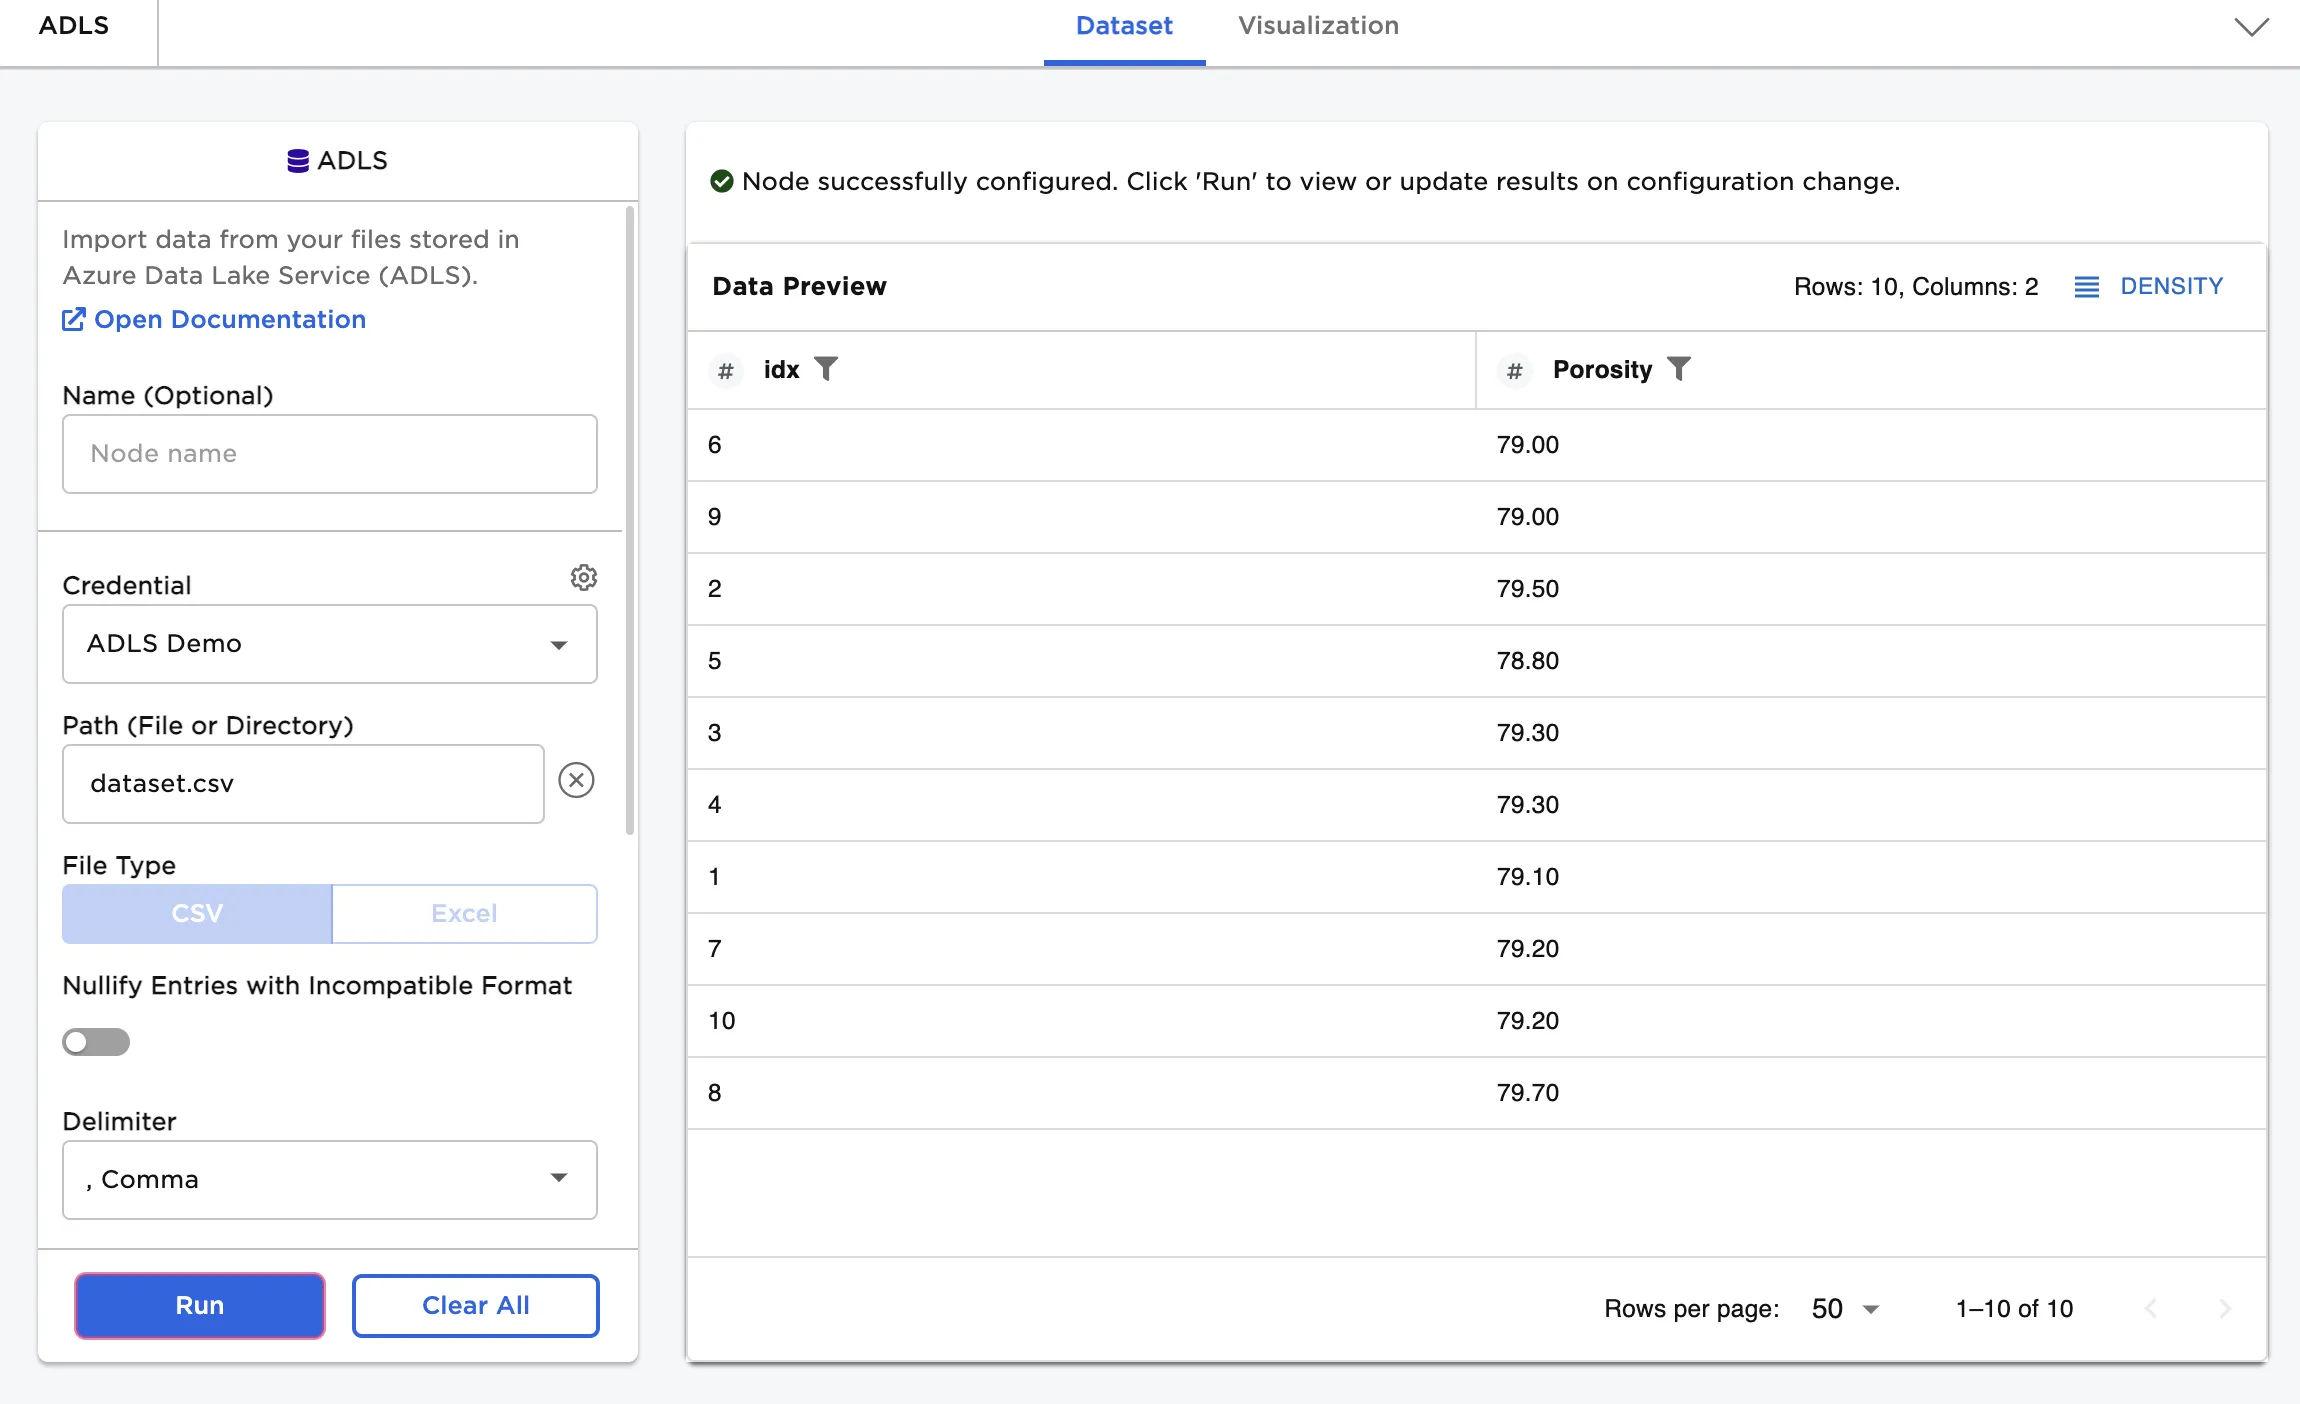
Figure 1: Example output
Examples
Follow the steps below to import data from ADLS.
- Select the saved credentials used to access ADLS. If you have not yet saved credentials, follow the steps in the Prerequisites section above.
- Select the file to upload using the Path field.
- Select Run to create a dataframe with the default settings.
Notice that columns are labeled and include a symbol that specifies the data type of that column. Various data types are present in the data and are accurately represented in the dataframe.
Figure 2: Example dataframe with default settings
If you want to upload all data as strings, toggle the Leave all columns as StringType (no schema inference) switch on and select Run. Notice that the "A" symbol beside each column indicates the string data type.
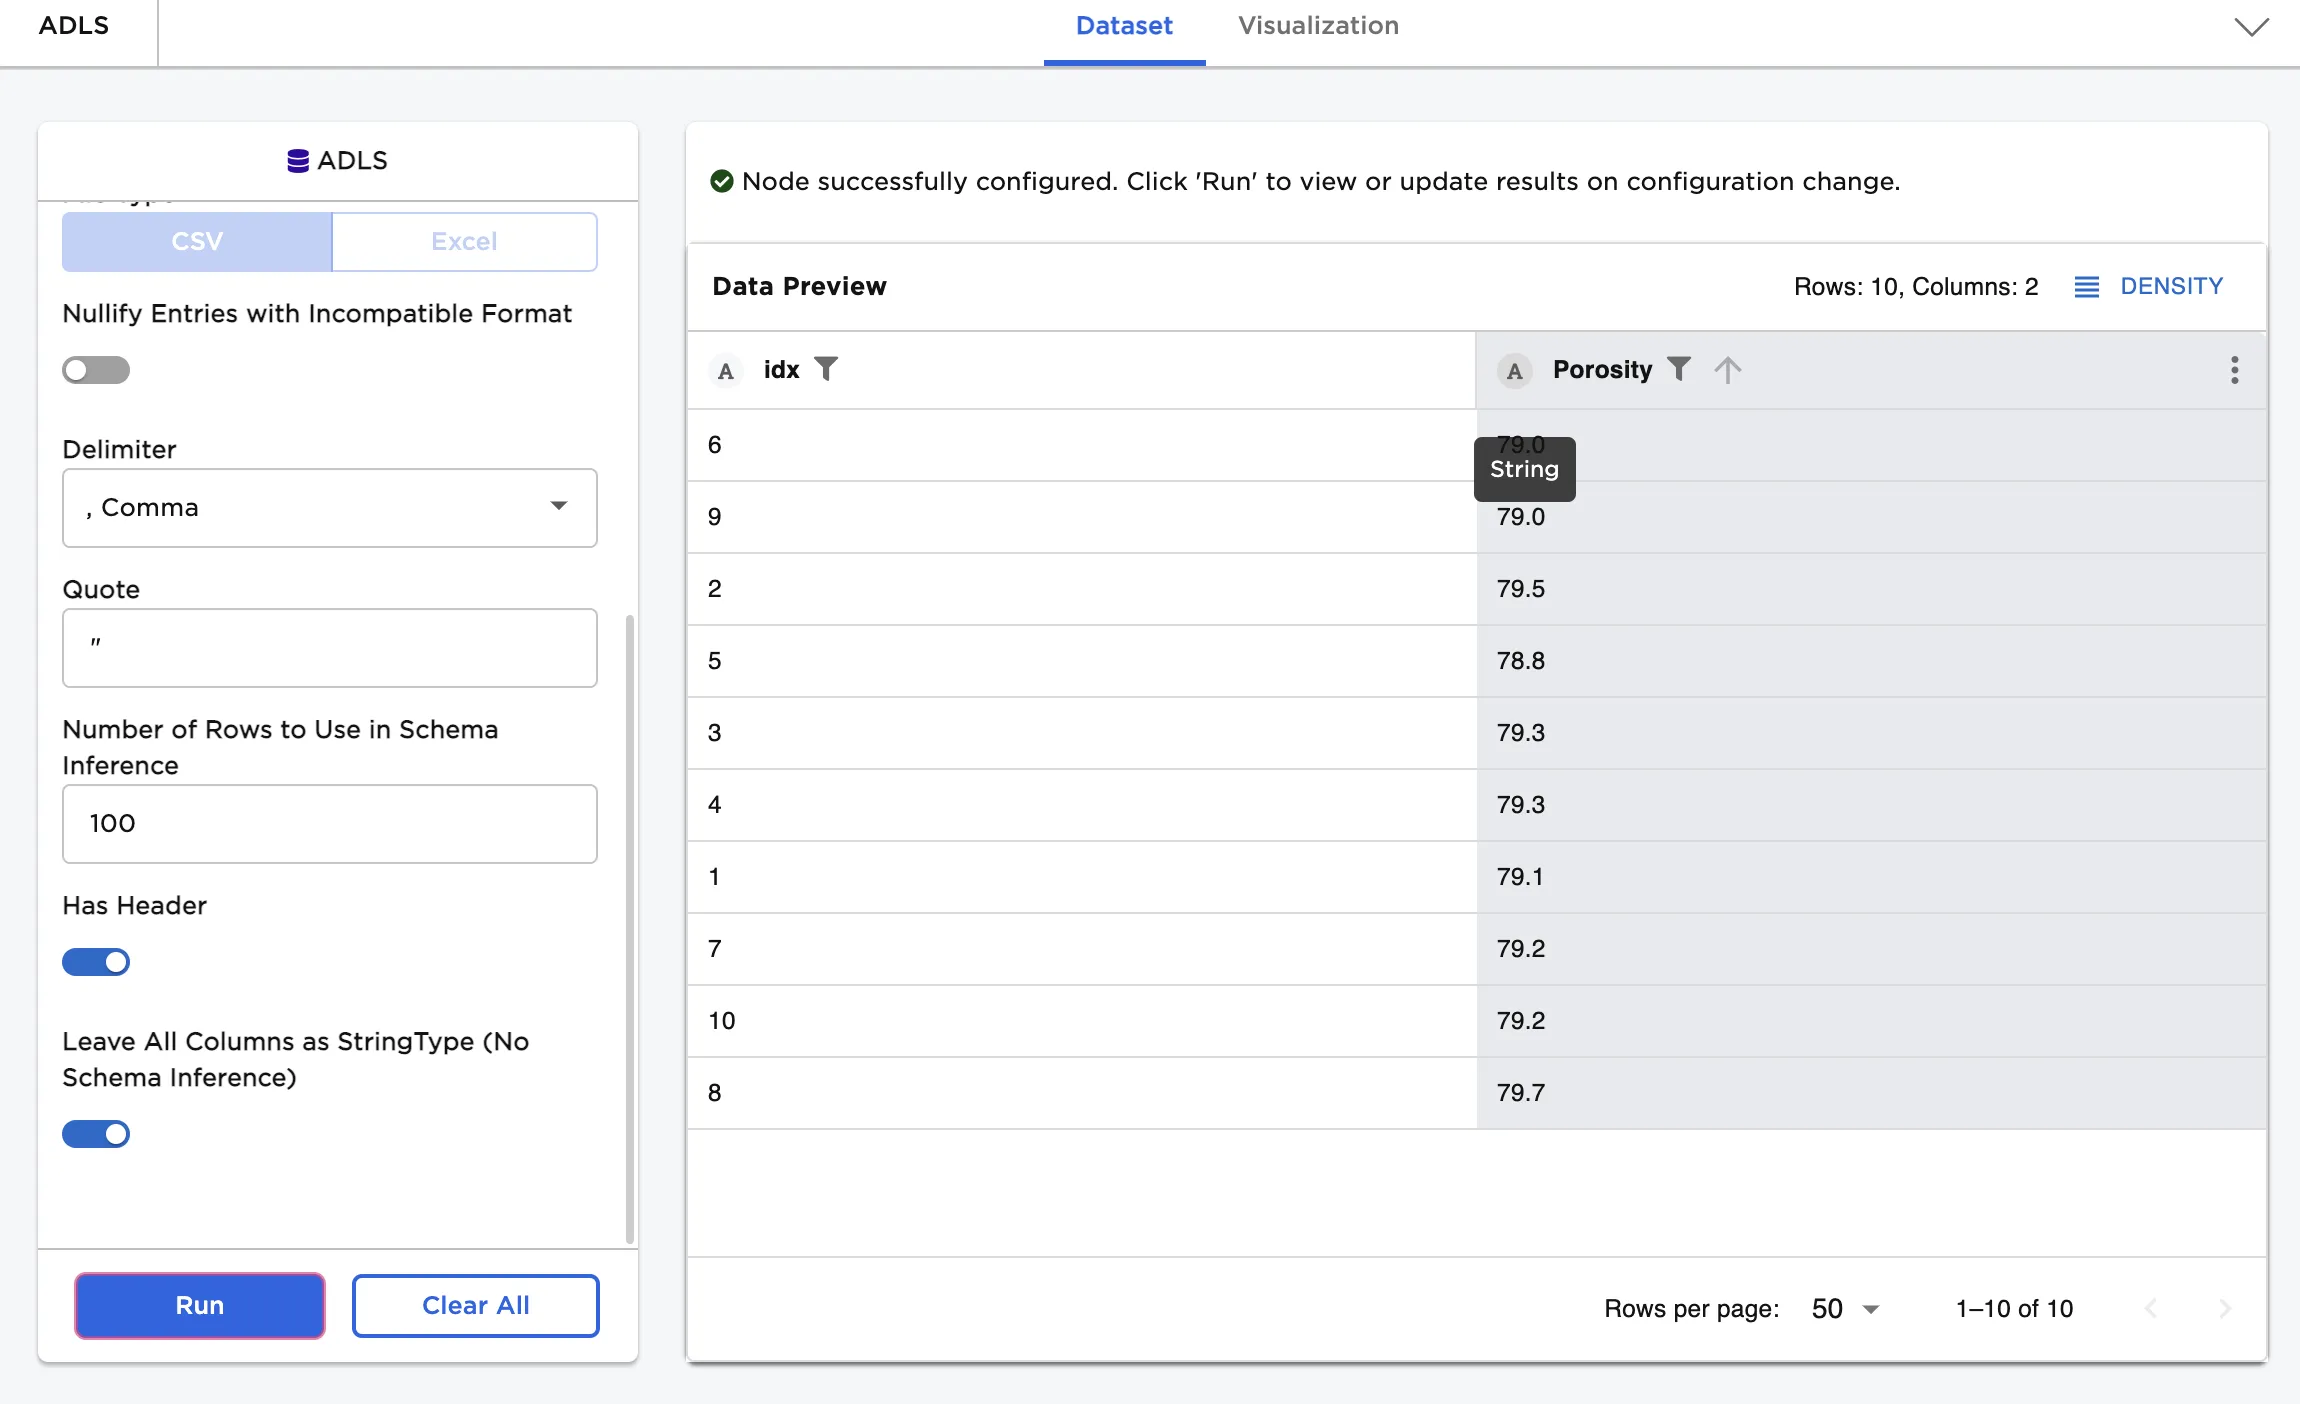
Figure 3: Example dataframe with all data uploaded as strings