Delta Lake Input Node
Load data from Delta Lake into Visual Notebooks.
Prerequisites
Follow the steps below to add credentials for Delta Lake. You must have a valid access key or service principal.
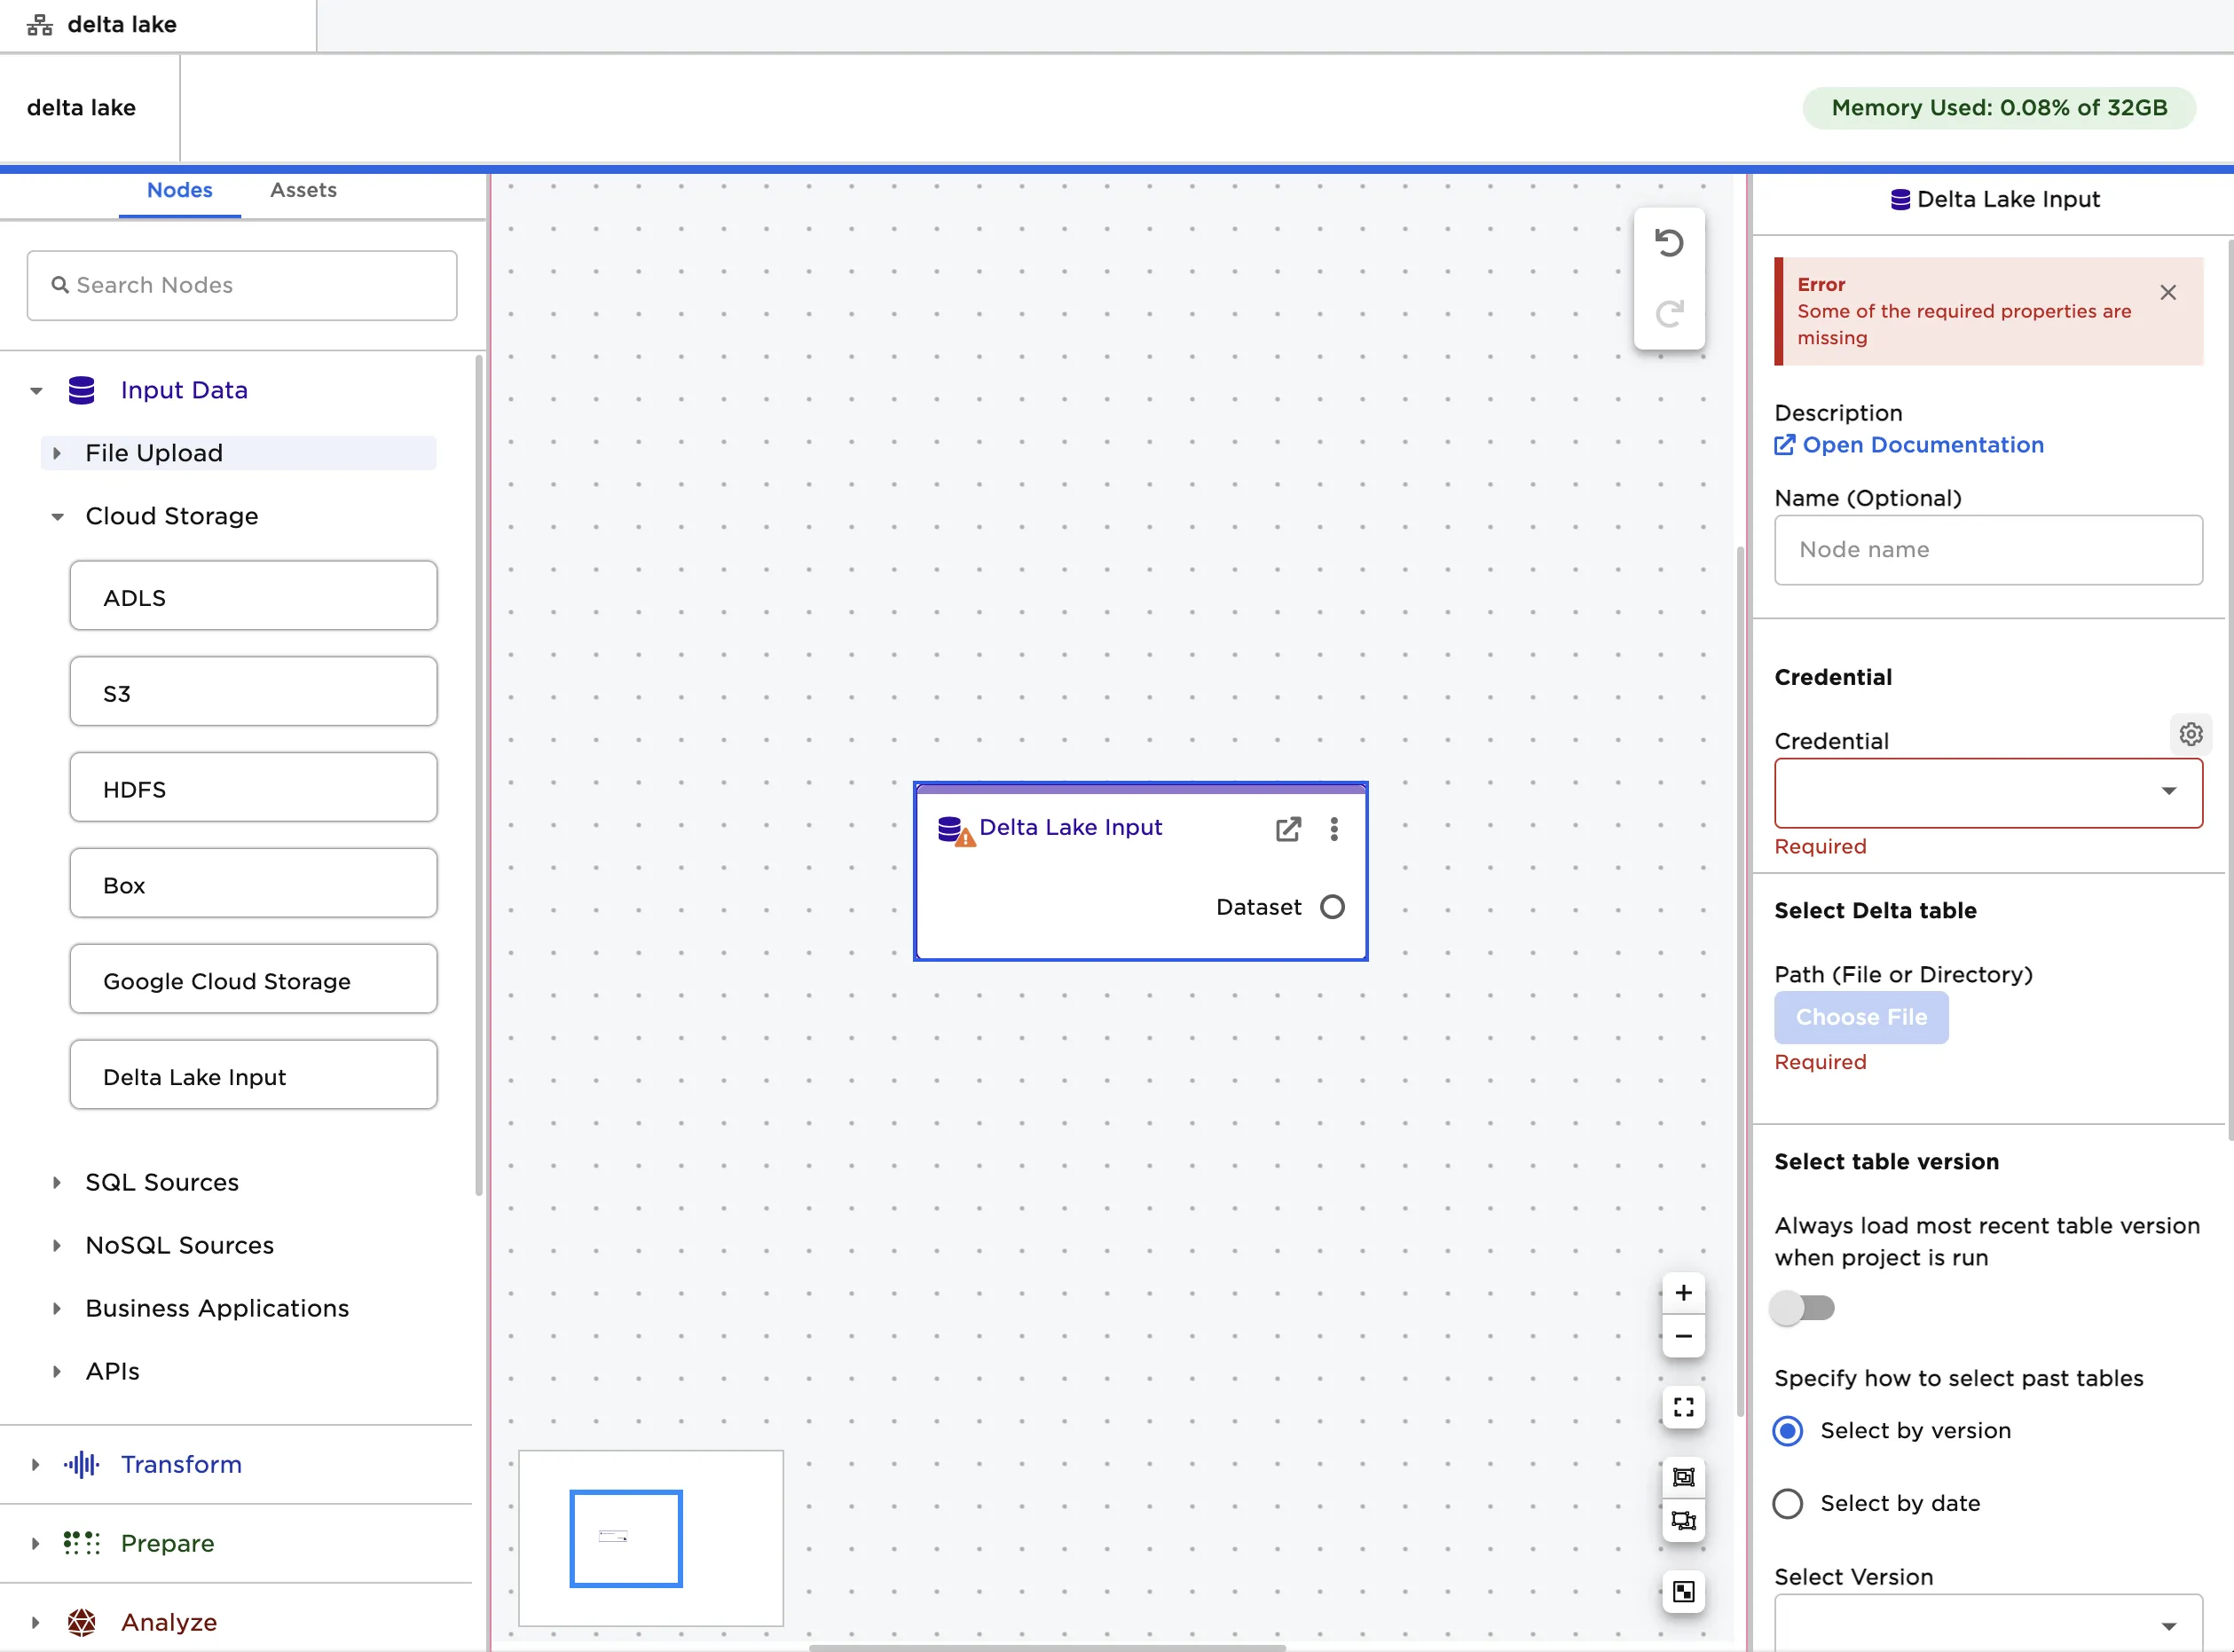
- Drag a Delta Lake Input node onto the Visual Notebooks workspace
- Select the gear icon beside the Credential field
- Select the plus sign in the upper right corner
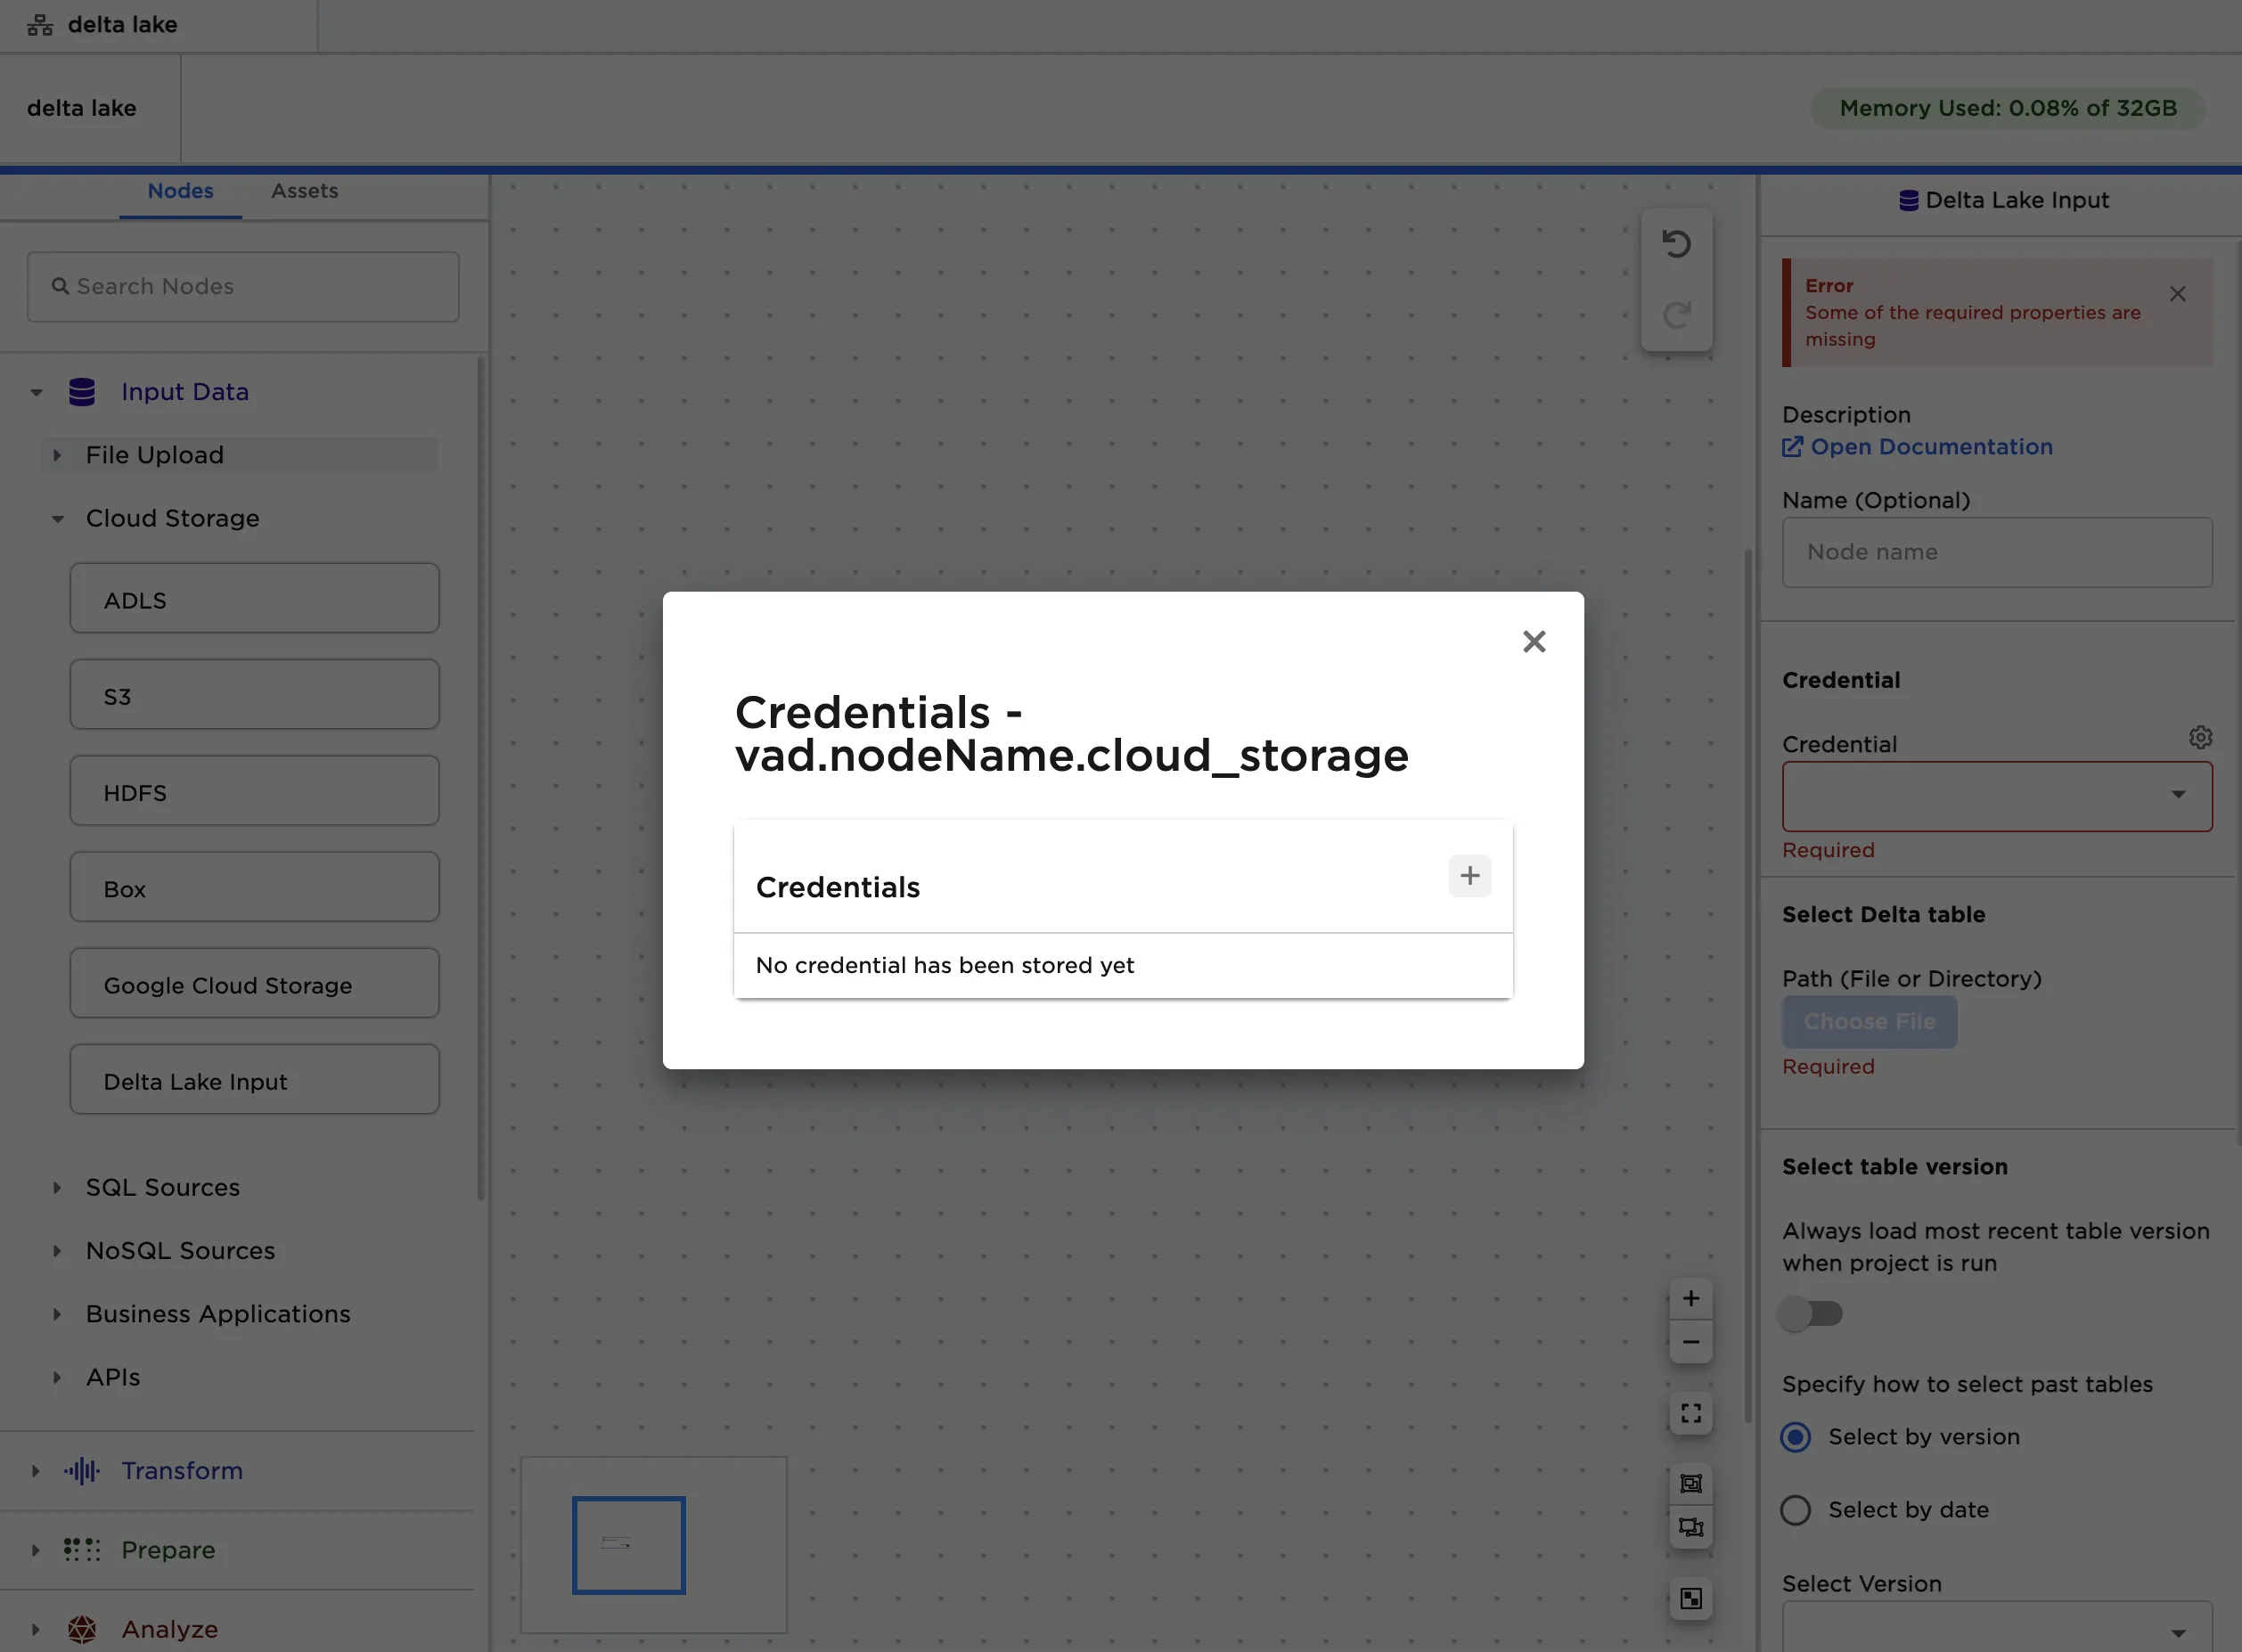
- Enter a name for the credential
- Select Azure, then select ADLS Gen 2
- Select Access Key or Service Principal, then follow the instructions in the corresponding section below
Access Key
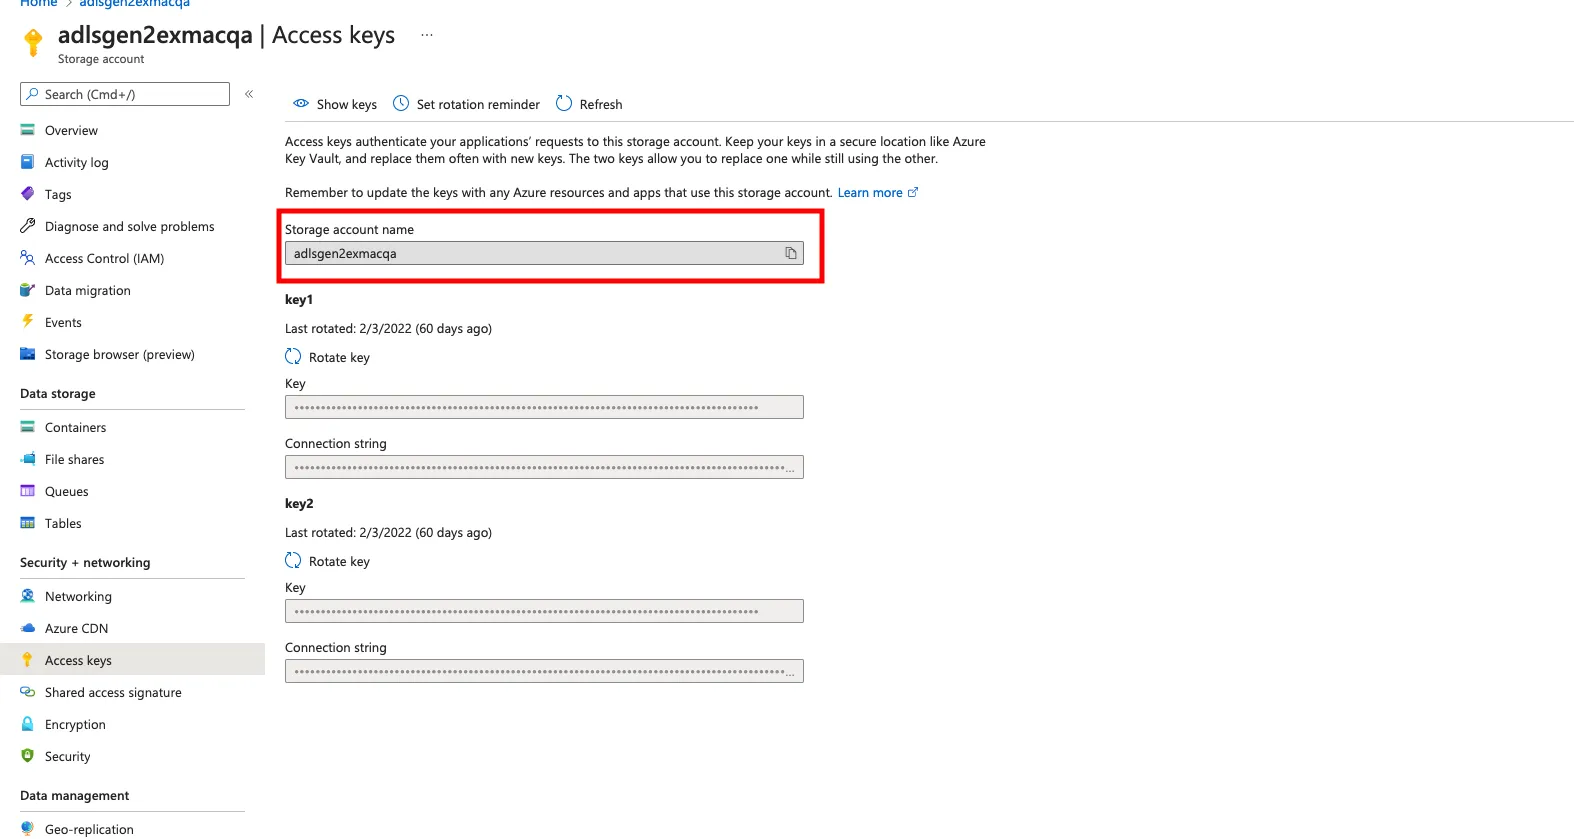
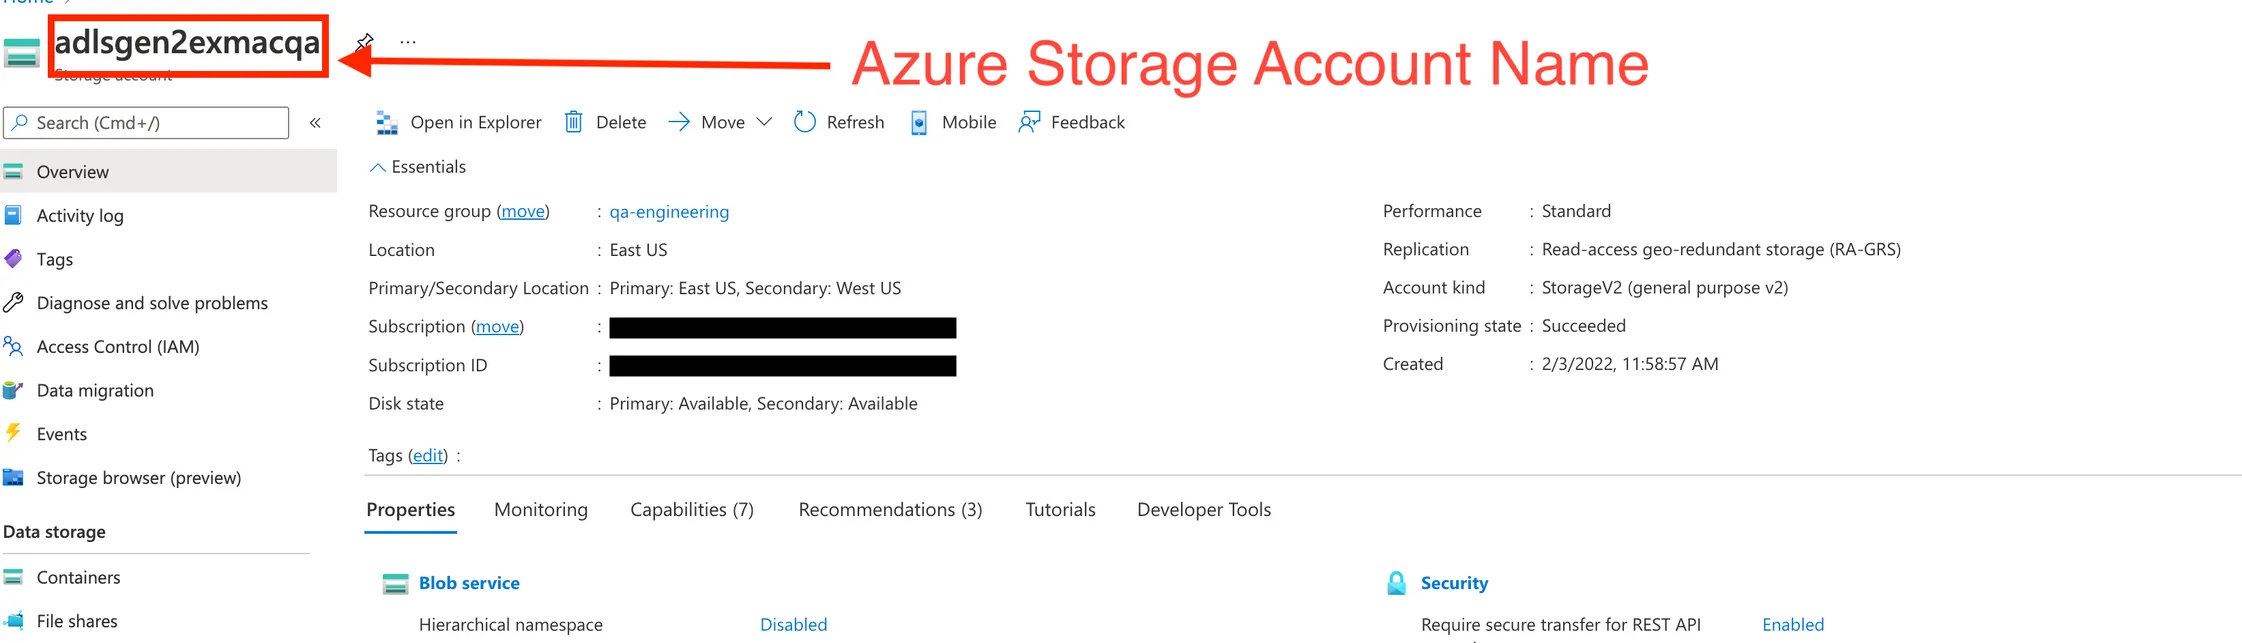
- Search for the ADLS storage account with Delta Lake tables in Azure Portal
- Select Access keys in the left-hand navigation menu
- Copy the storage account name to the Visual Notebooks credentials modal
- Select Show keys
- Copy the contents of one of the Key fields to the Visual Notebooks credentials modal
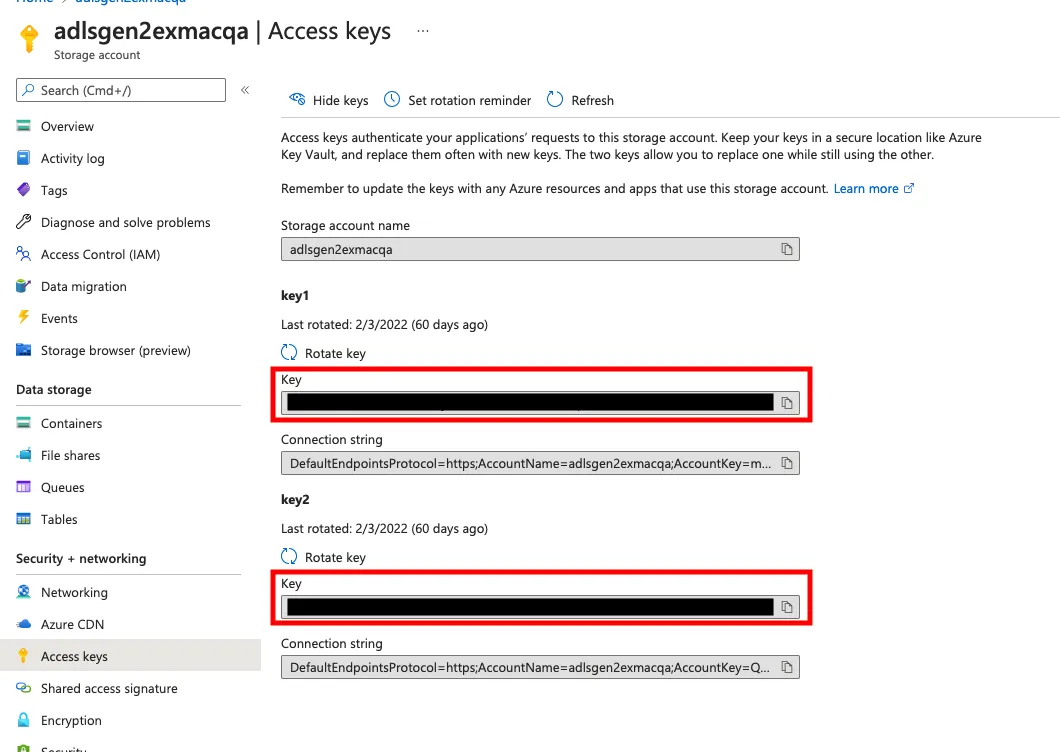
- Save the credentials in Visual Notebooks
Service Principal
- Search for App registrations in Azure Portal
- Select New registration

- Register the new application
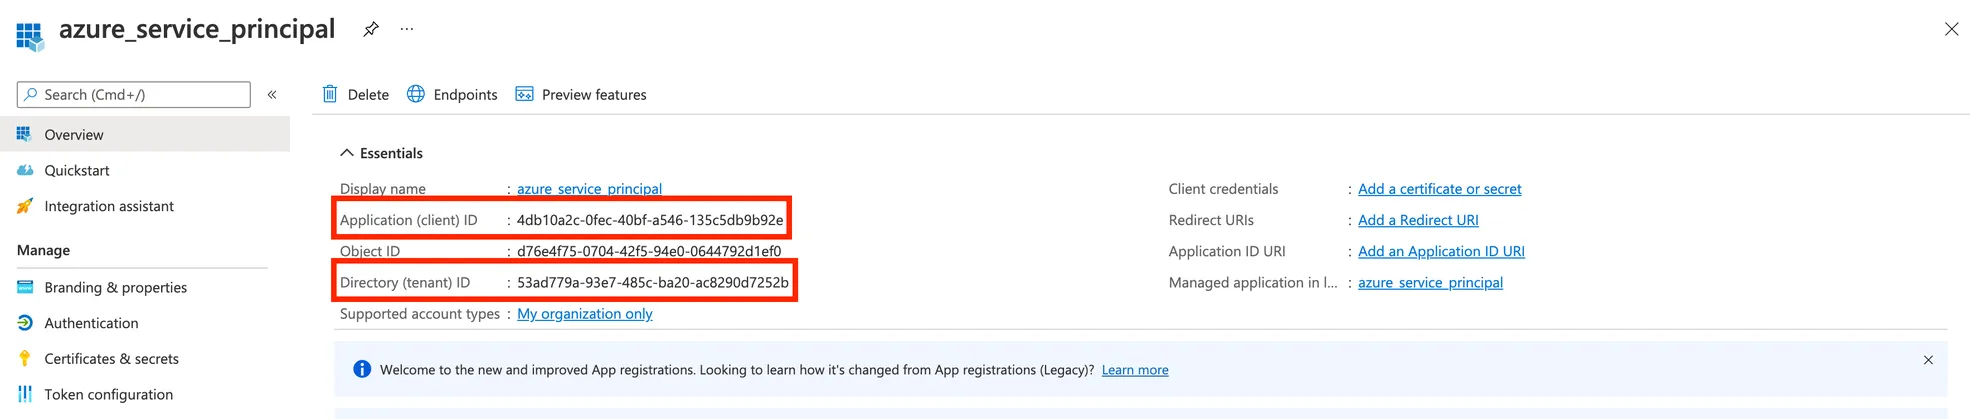
- Copy the Application (client) ID field to the Visual Notebooks credentials modal
- Copy the Directory (tenant) ID field to the Visual Notebooks credentials modal
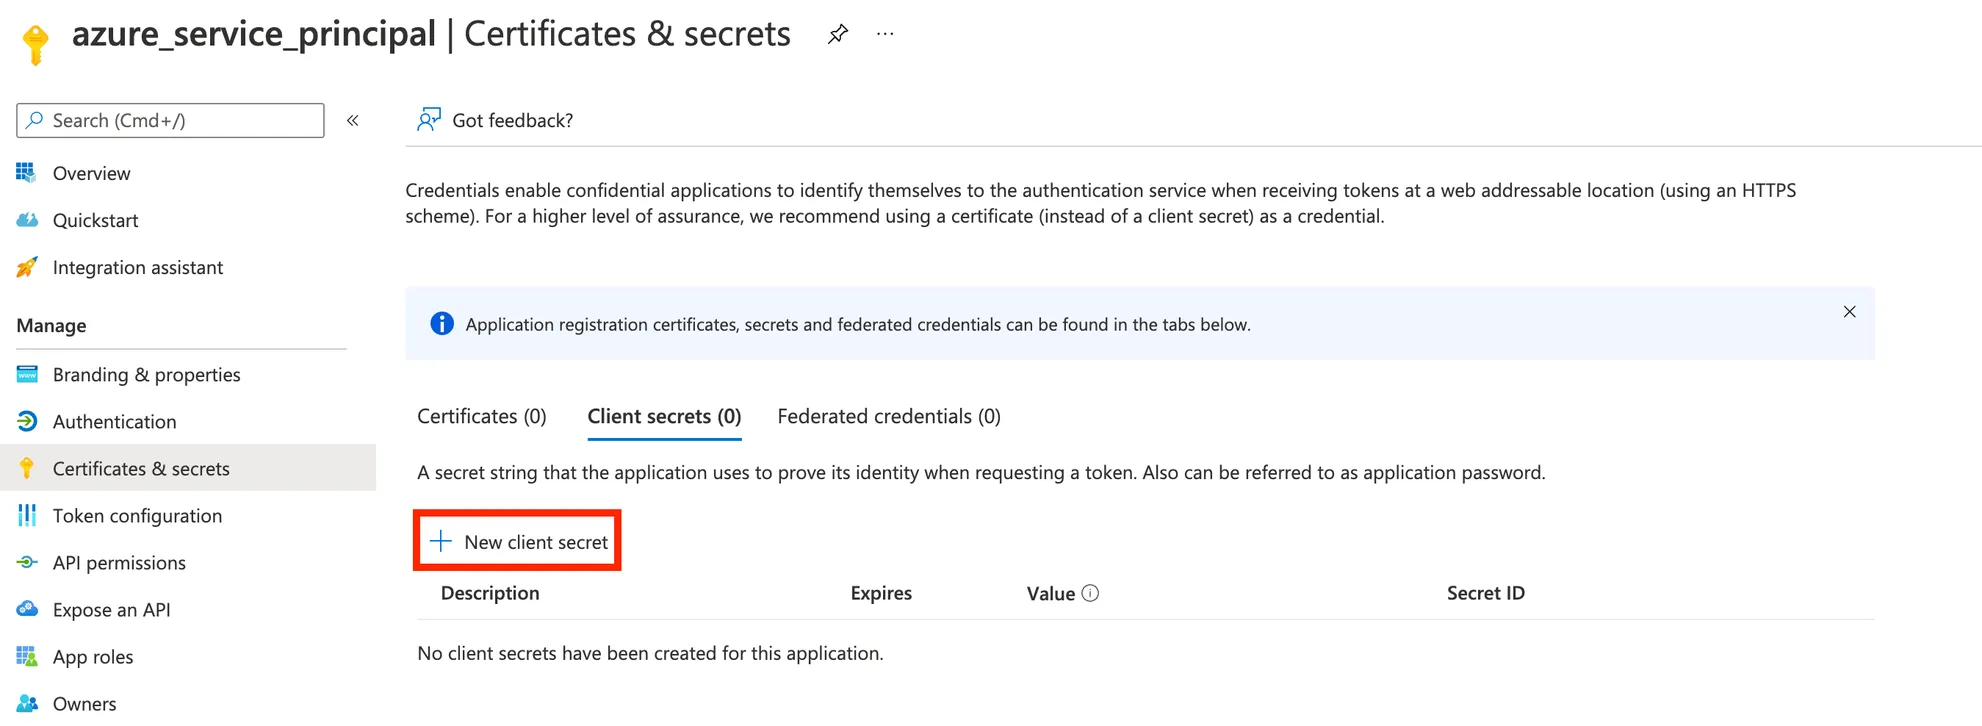
- Select Certificates & secrets in the left-hand navigation menu
- Select New client secret
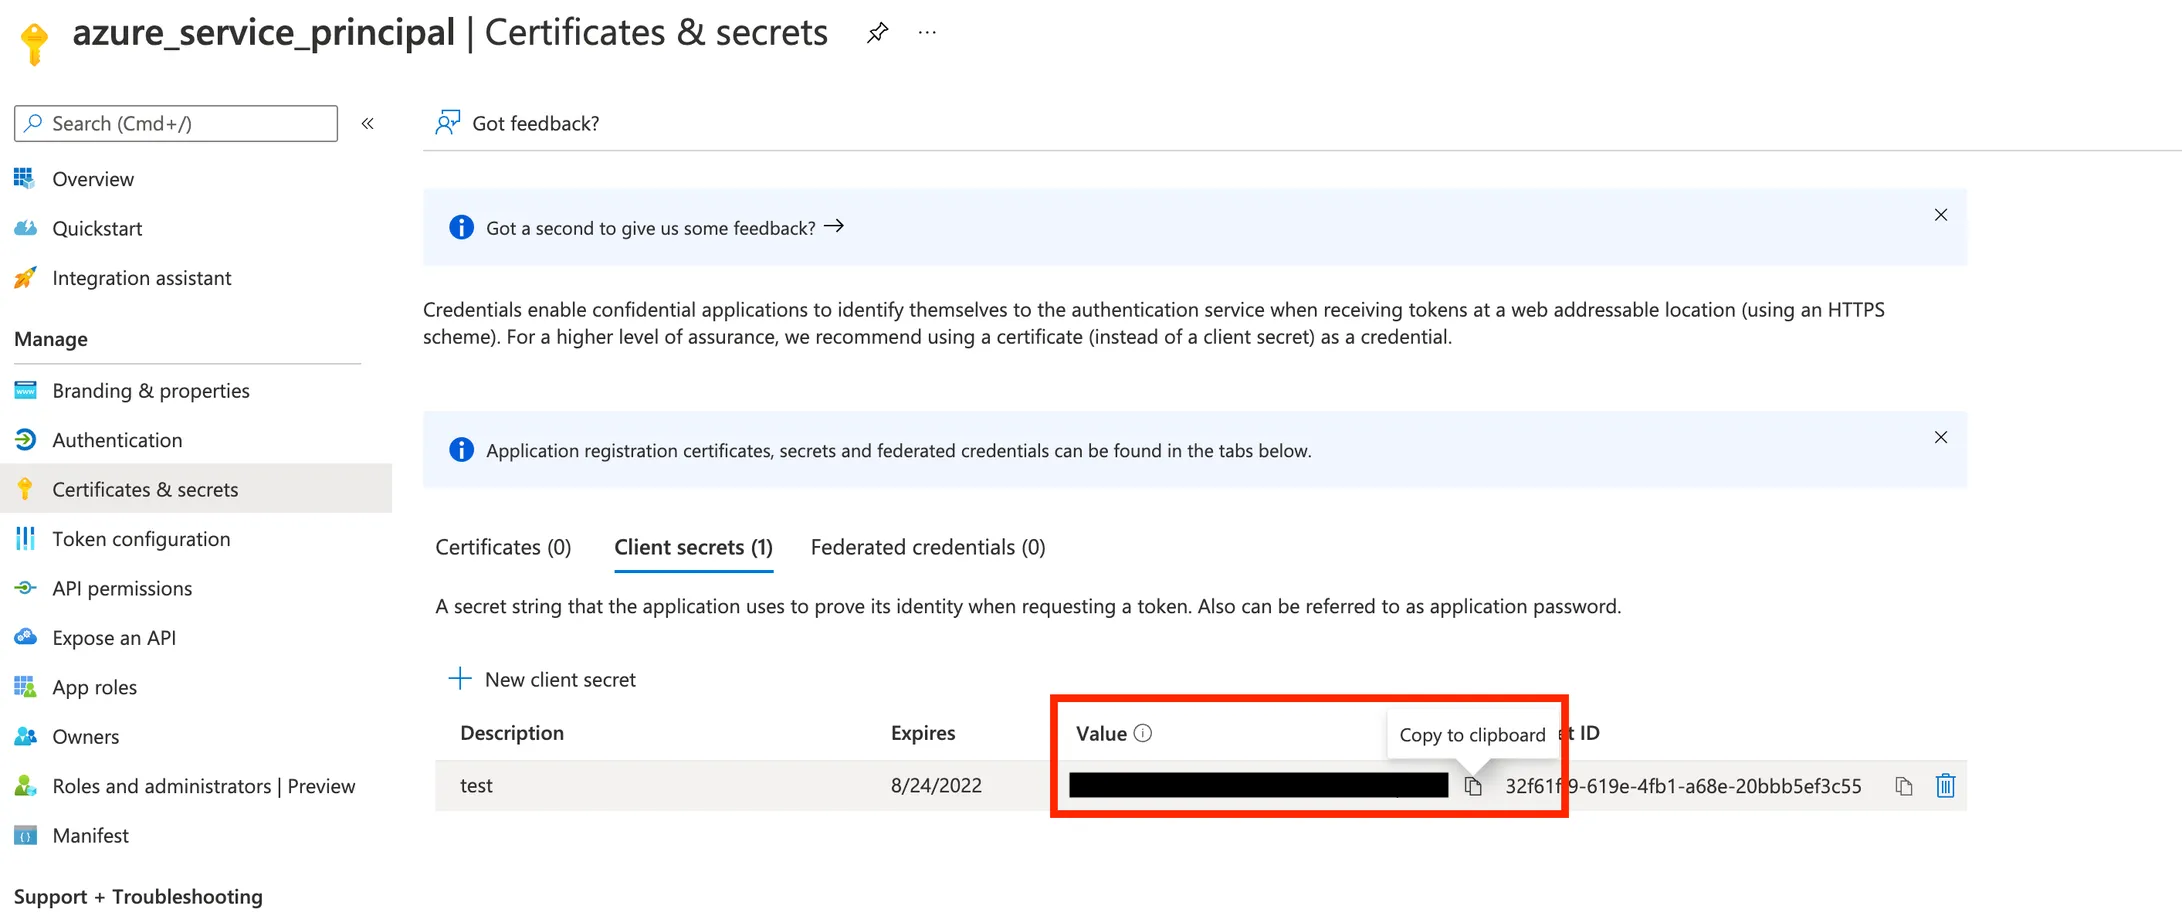
- Copy the client secret value to the Visual Notebooks credentials modal
- Search for the ADLS storage account with Delta Lake tables in Azure Portal
- Copy the storage account name to the Visual Notebooks credentials modal
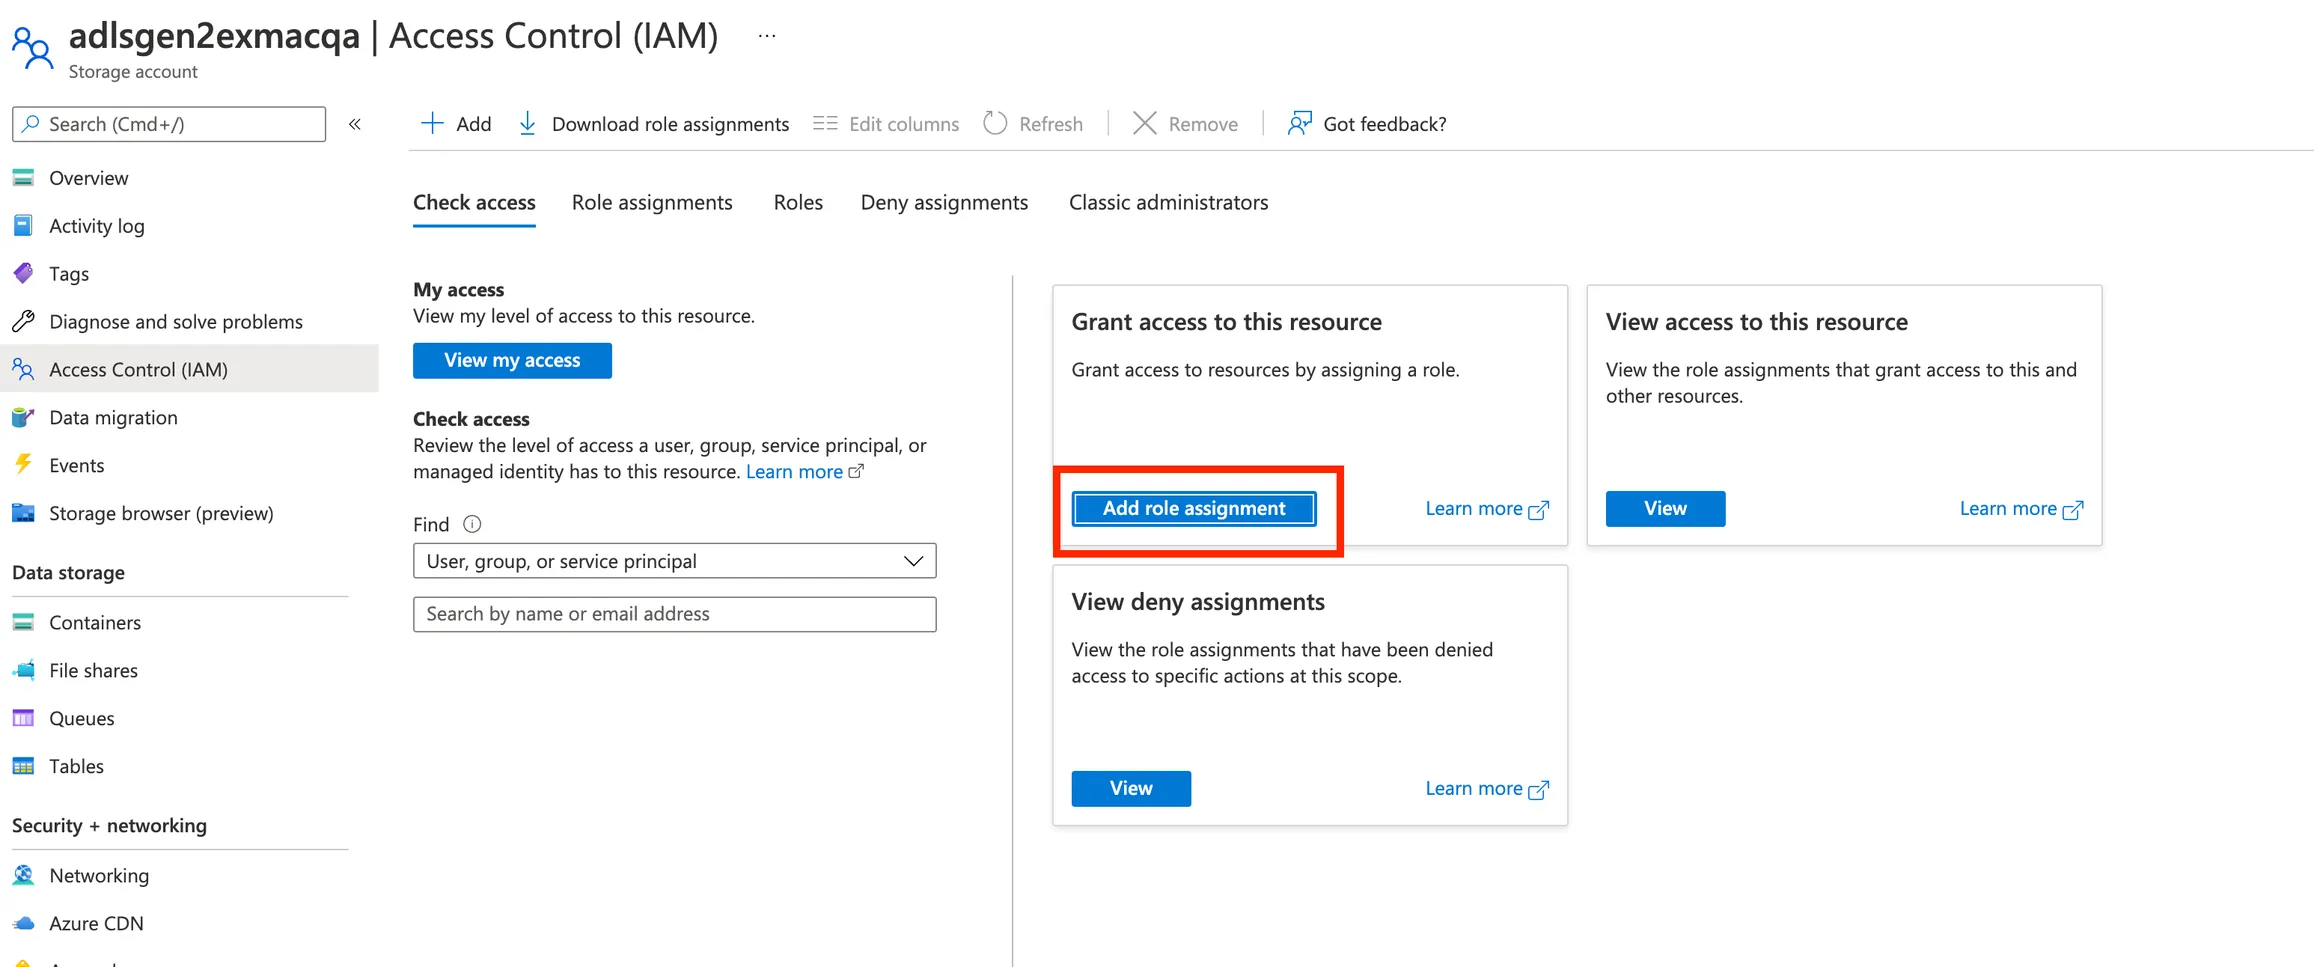
- Select Access Control (IAM) in the left-hand navigation menu
- Select Add Role Assignment to open the "Add role assignment" page
- Choose the Storage Blob Data Contributor role assignment and select Next
- Click Select members
- Search for the name of the application you created and select it
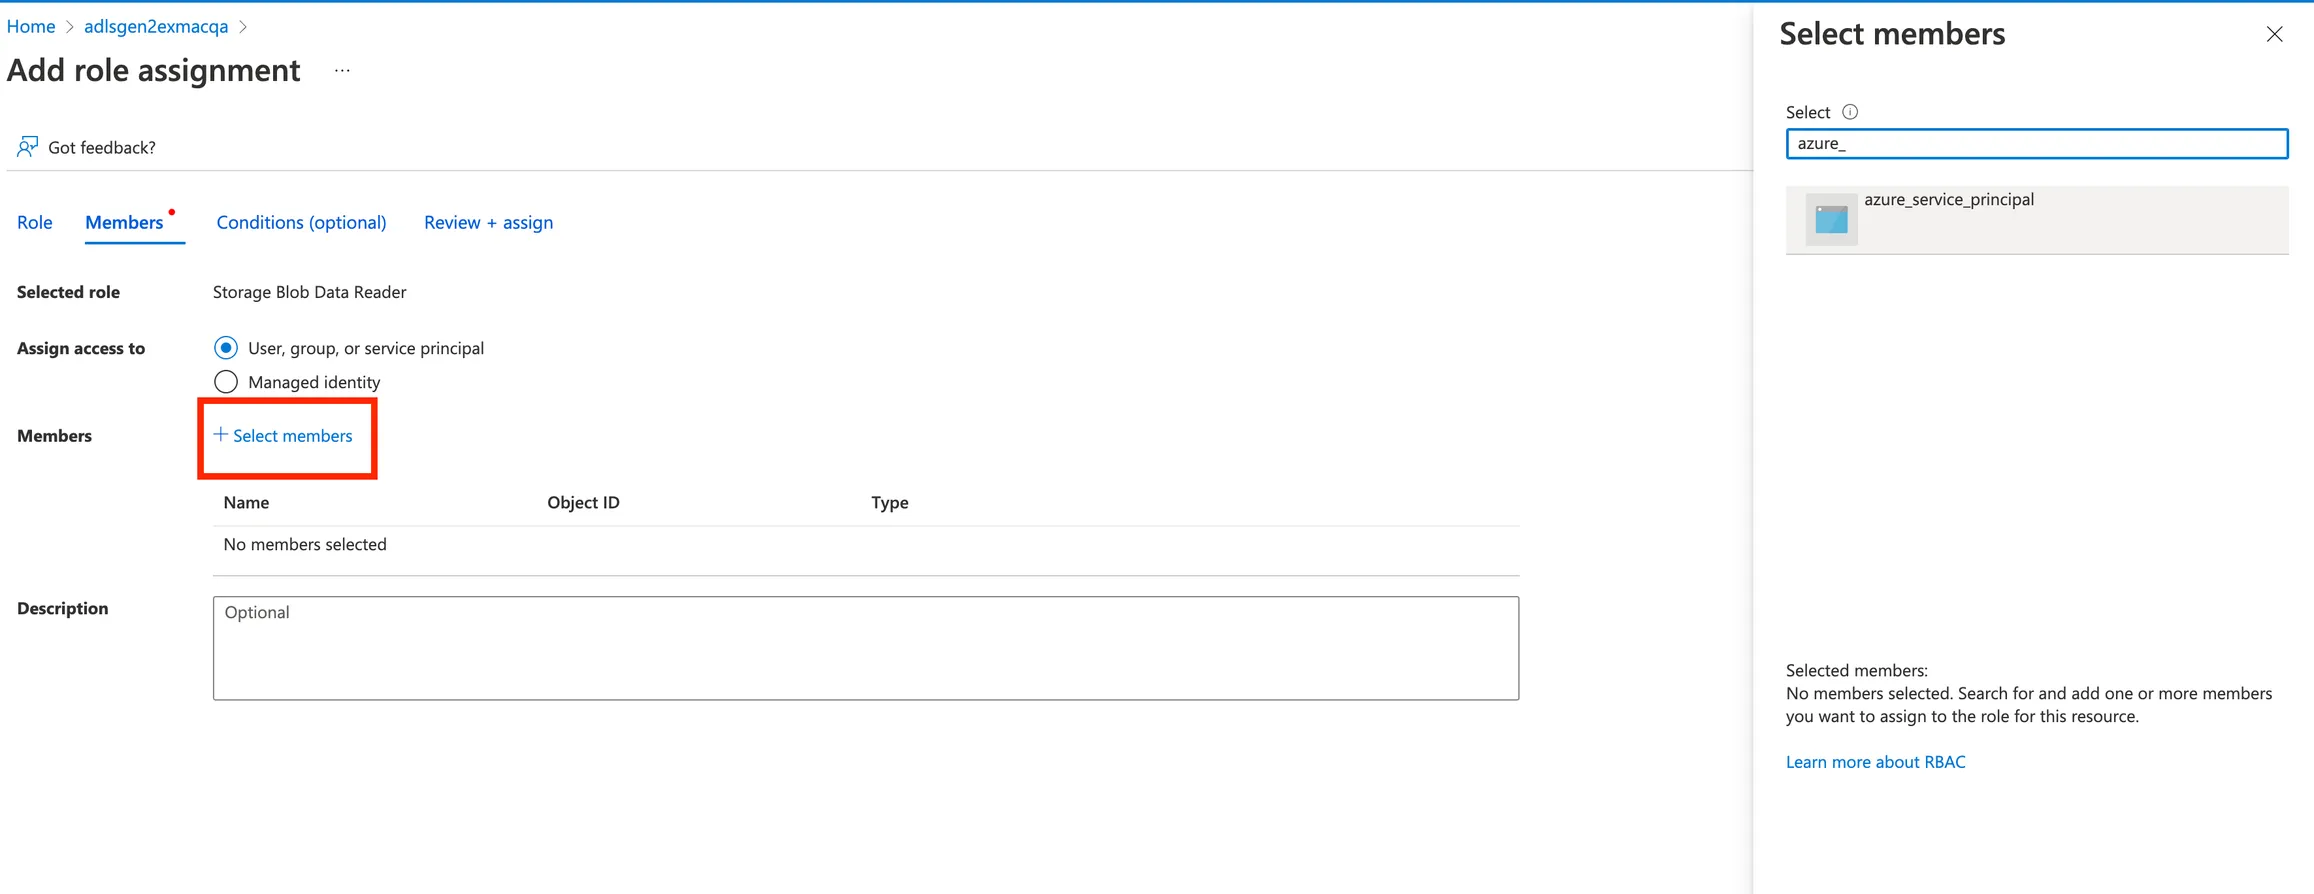
- Click Select in the bottom right corner
- Select Review + assign and wait for the role assignment to complete
- Save the credentials in Visual Notebooks
Configuration
| Field | Description |
|---|---|
| Name Default: Snowflake | A user-specified node name displayed in the workspace |
| Credential Required | The information needed to access Delta Lake data Select a saved credential from the dropdown menu. Select the gear icon to add a new credential or delete existing credentials. |
| Path Required | The Delta Lake table to upload Select a container and delta table using the popup menu. Note that Delta tables contain a folder called _delta_log. |
| Always load most recent table version when visual notebook is run Default: Off | Table version Toggle this switch on to always load the most recent version of the selected table. Leave this toggle switch off to always load the same version of the selected table, regardless of whether there's a newer version available. |
| Specify how to select past tables Default: Select by version | Past table selection If "Always load most recent table version when visual notebook is run" is toggled off, specify how to select the desired version of the table. Select the desired version of the table by version number or by date. |
| Select Version Optional | Previous table version If "Select by version" is selected in the "Specify how to select past tables" field above, select a table version from the auto-populated dropdown menu. |
| Select Date Optional | Previous table date If "Select by date" is selected in the "Specify how to select past tables" field above, select a date and time from the calendar popup menu. The version of the table that was most recent on that particular date is used. |
| Query Optional | The portion of the table to upload Enter a SQL query that returns the desired data. If a query is not provided, the entire table is loaded into Visual Notebooks. |
| Cache output Default: On | Table caching Toggle this switch off to load the selected table onto disk. The table will load quickly, but computations will take longer. Leave this toggle switch off to cache the selected table in memory. Running computations on the data will be fast, but the table will take longer to load. |
Node Inputs/Outputs
| Input | None |
|---|---|
| Output | Visual Notebooks returns a table, called a dataframe, that contains all uploaded data. Columns are labeled and include a symbol that specifies the data type of that column. |
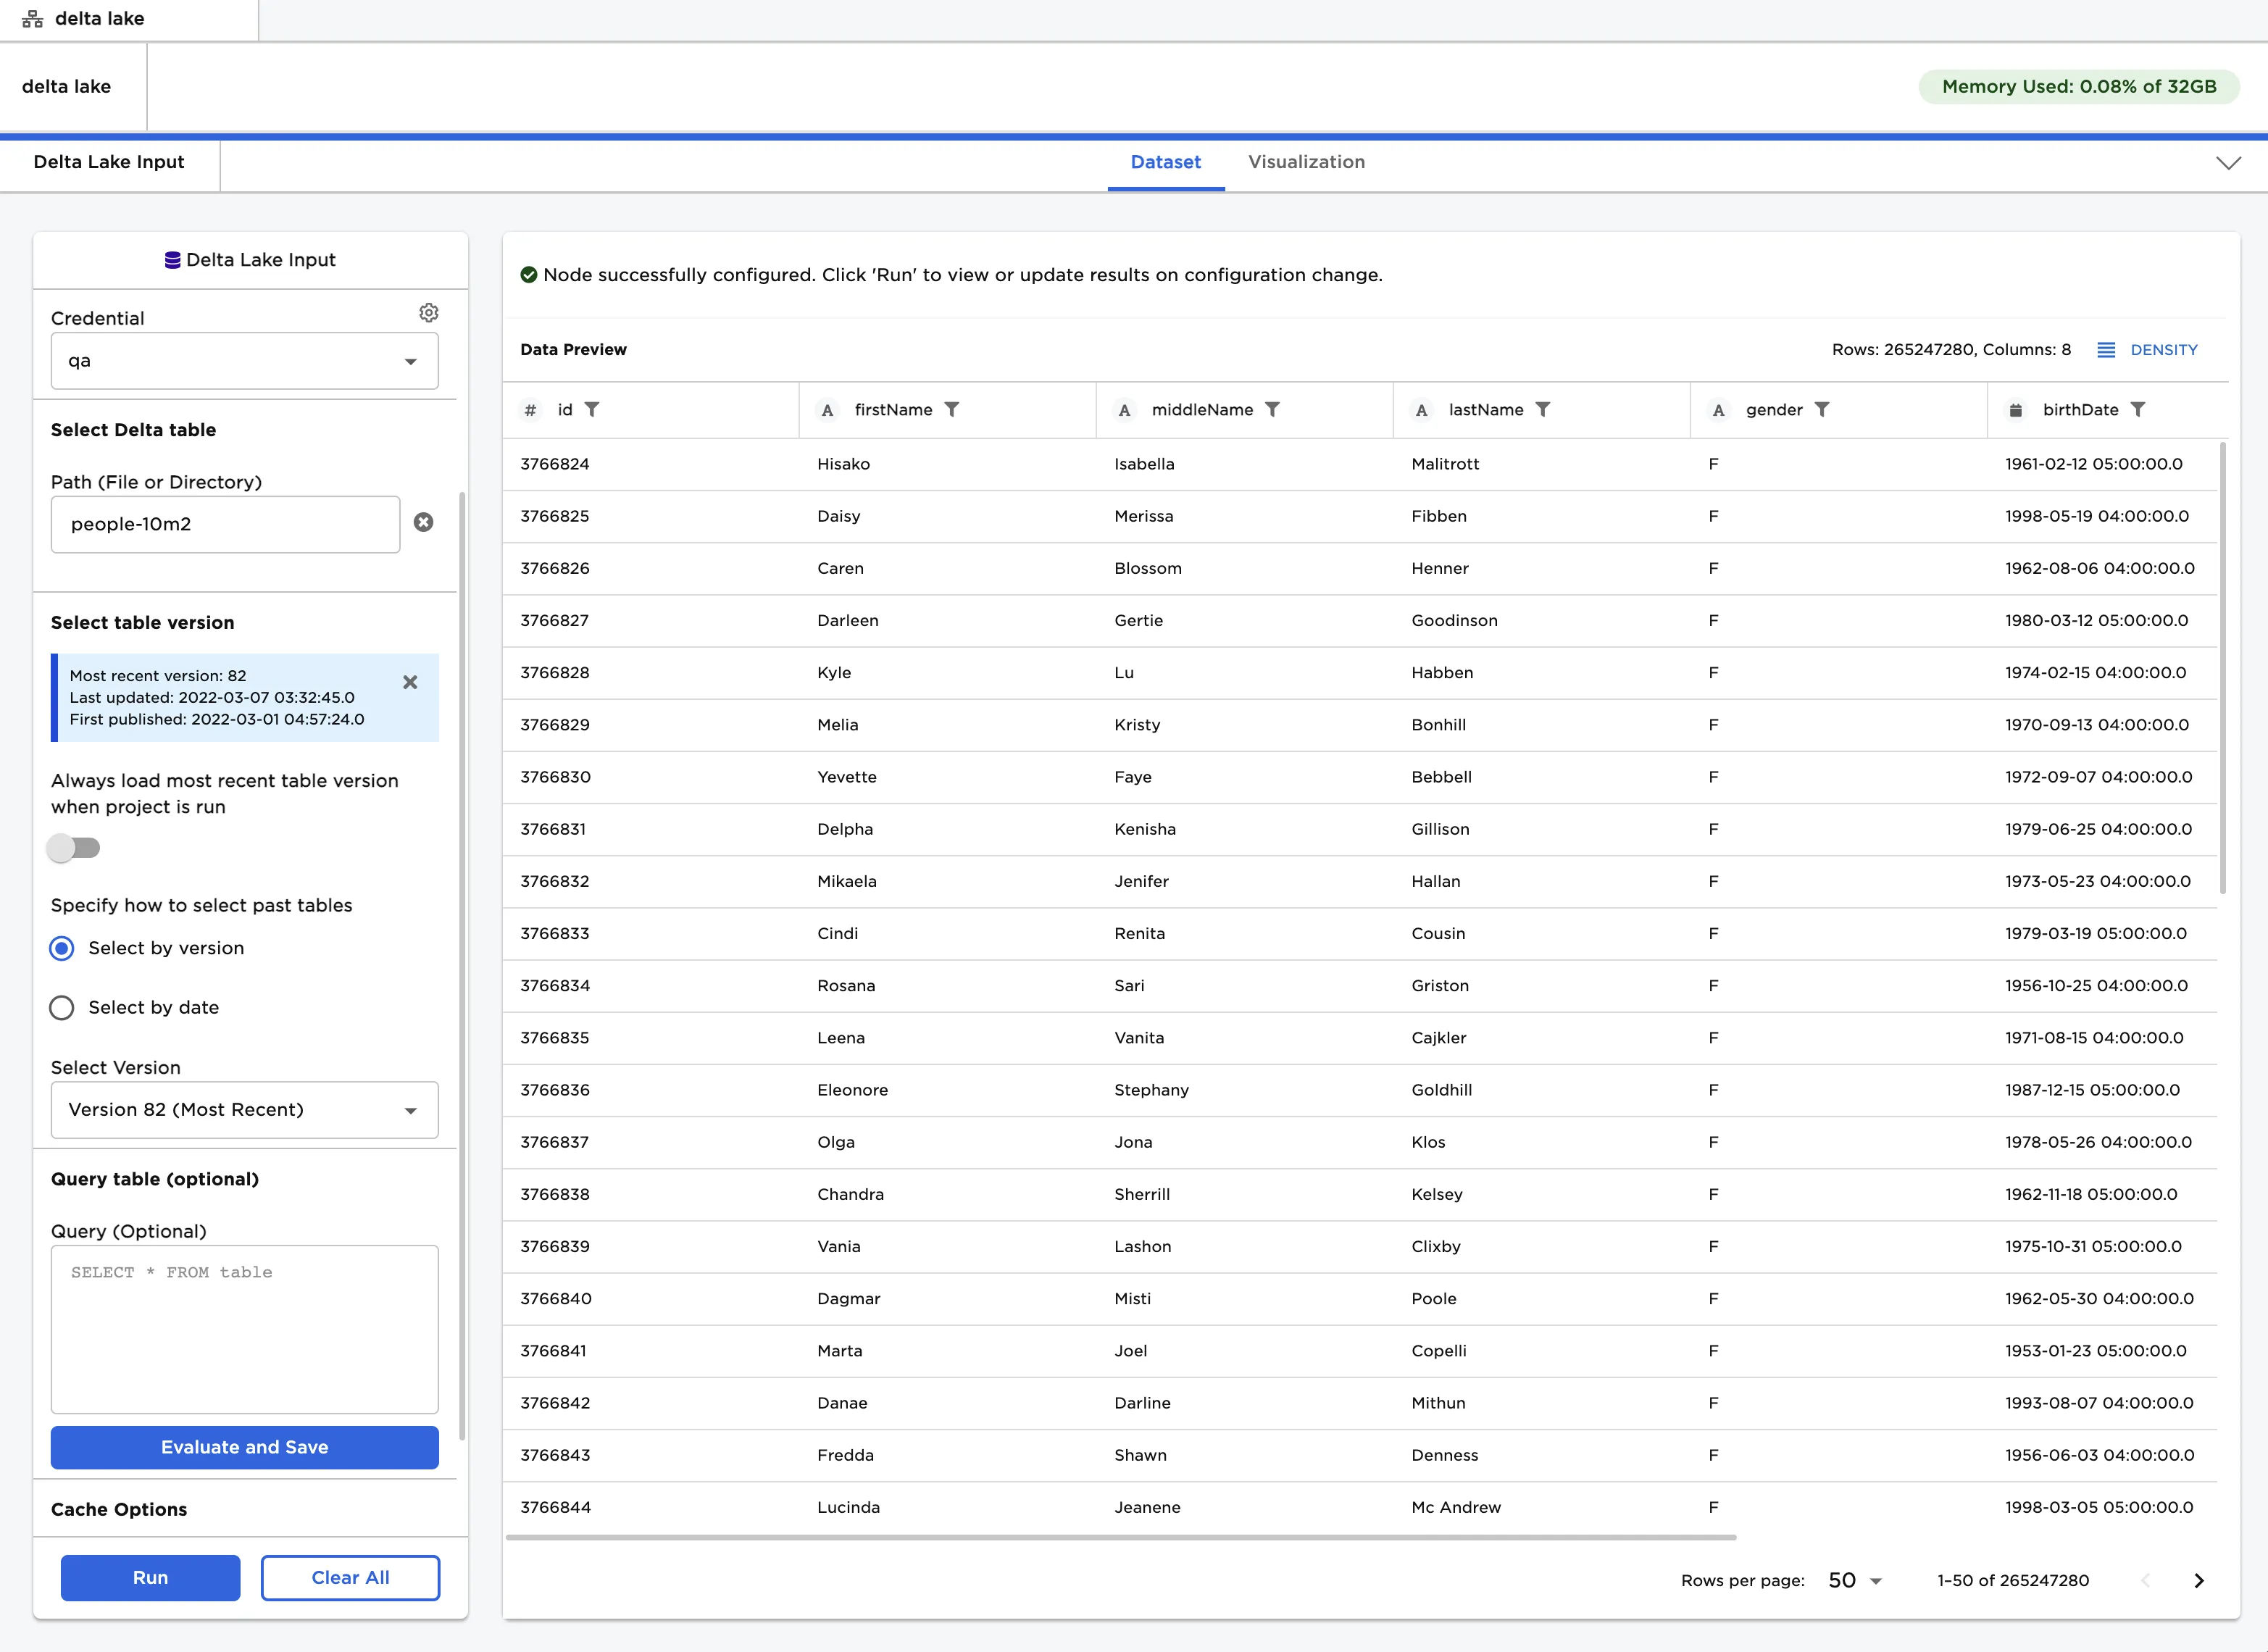
Figure 1: Example dataframe output
Examples
- Select the "Choose Path" button. Select a container and Delta Lake table. Notice that Delta Lake tables contain a subfolder called
_delta_log. Select a Delta Lake table to highlight both the parent folder and the_delta_logsubfolder. Do not select only the_delta_logfolder.
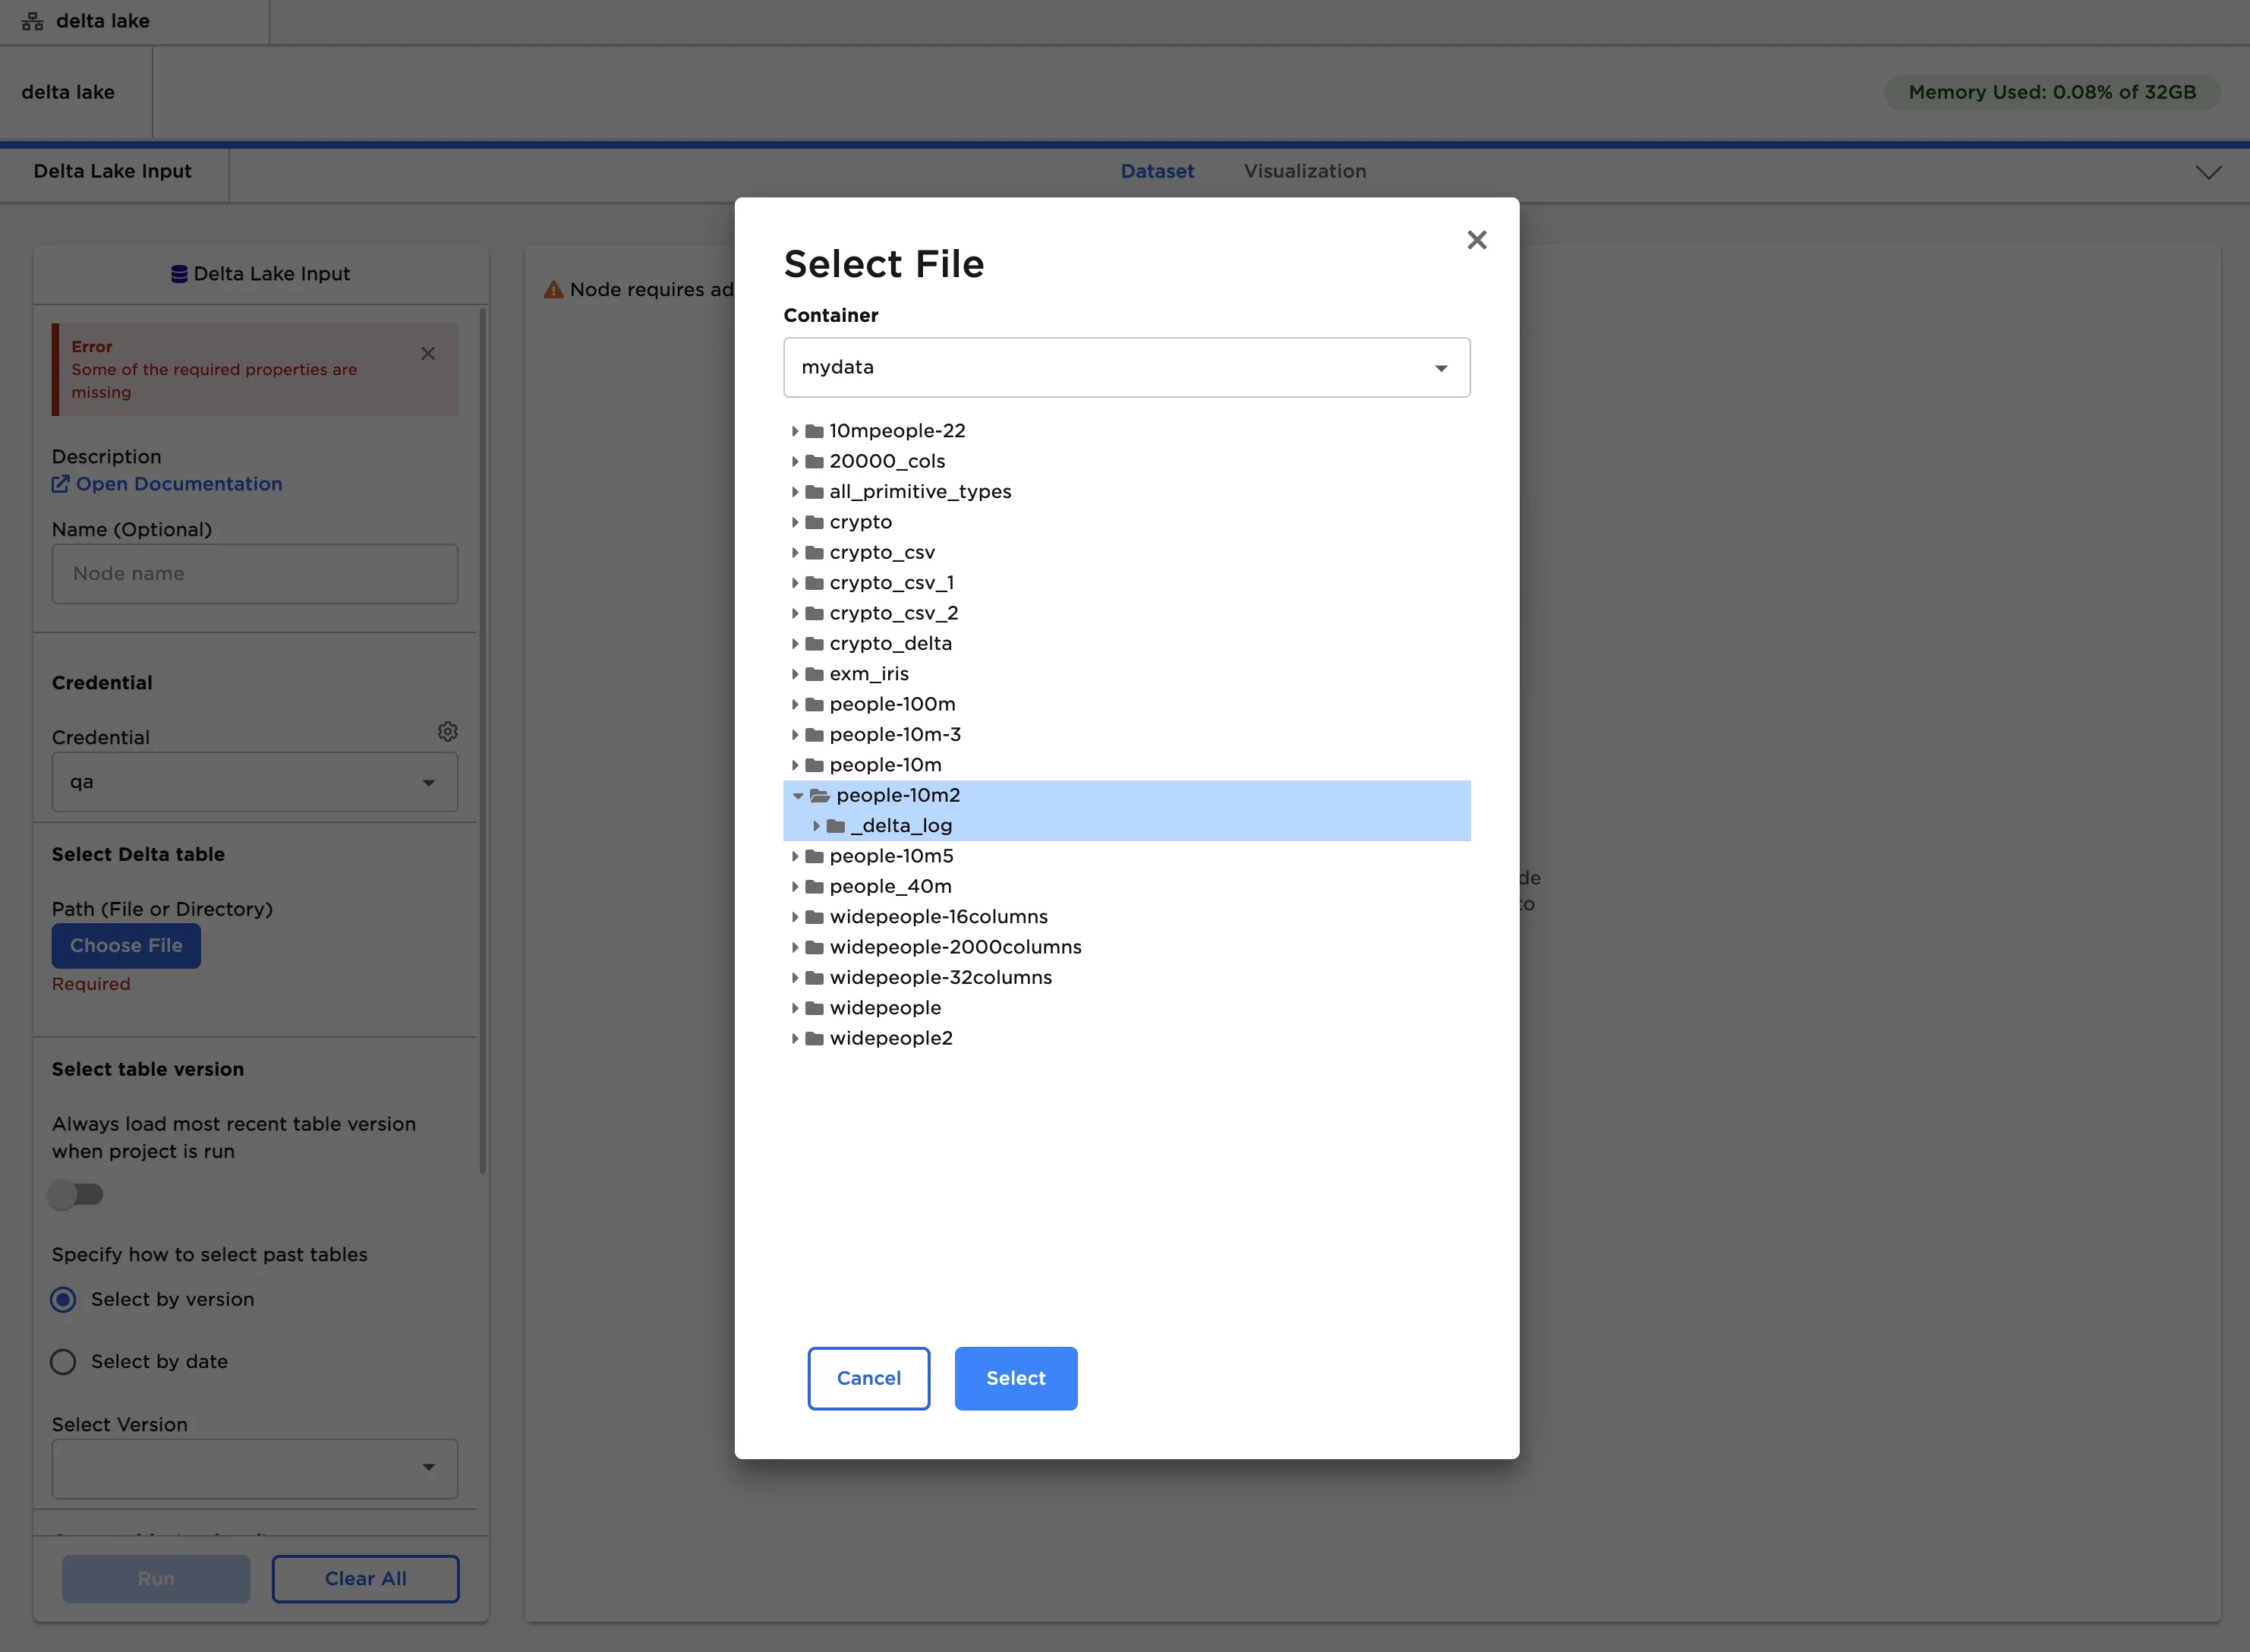
Figure 2: Selecting a Delta Lake table using the pop-up menu
- Select a version of the table to upload for the "Select Version" field.
- Select "Run" to create a dataframe.
Figure 3: Example dataframe created from a Delta Lake table
- Write a query that returns the desired data. Use
tableto refer to the table selected in the "Path" field- In the example below, the query returns the "firstName", "middleName", and "lastName" columns for the first 100 rows of the selected table.
- Select "Run" to create a dataframe with only the selected data.
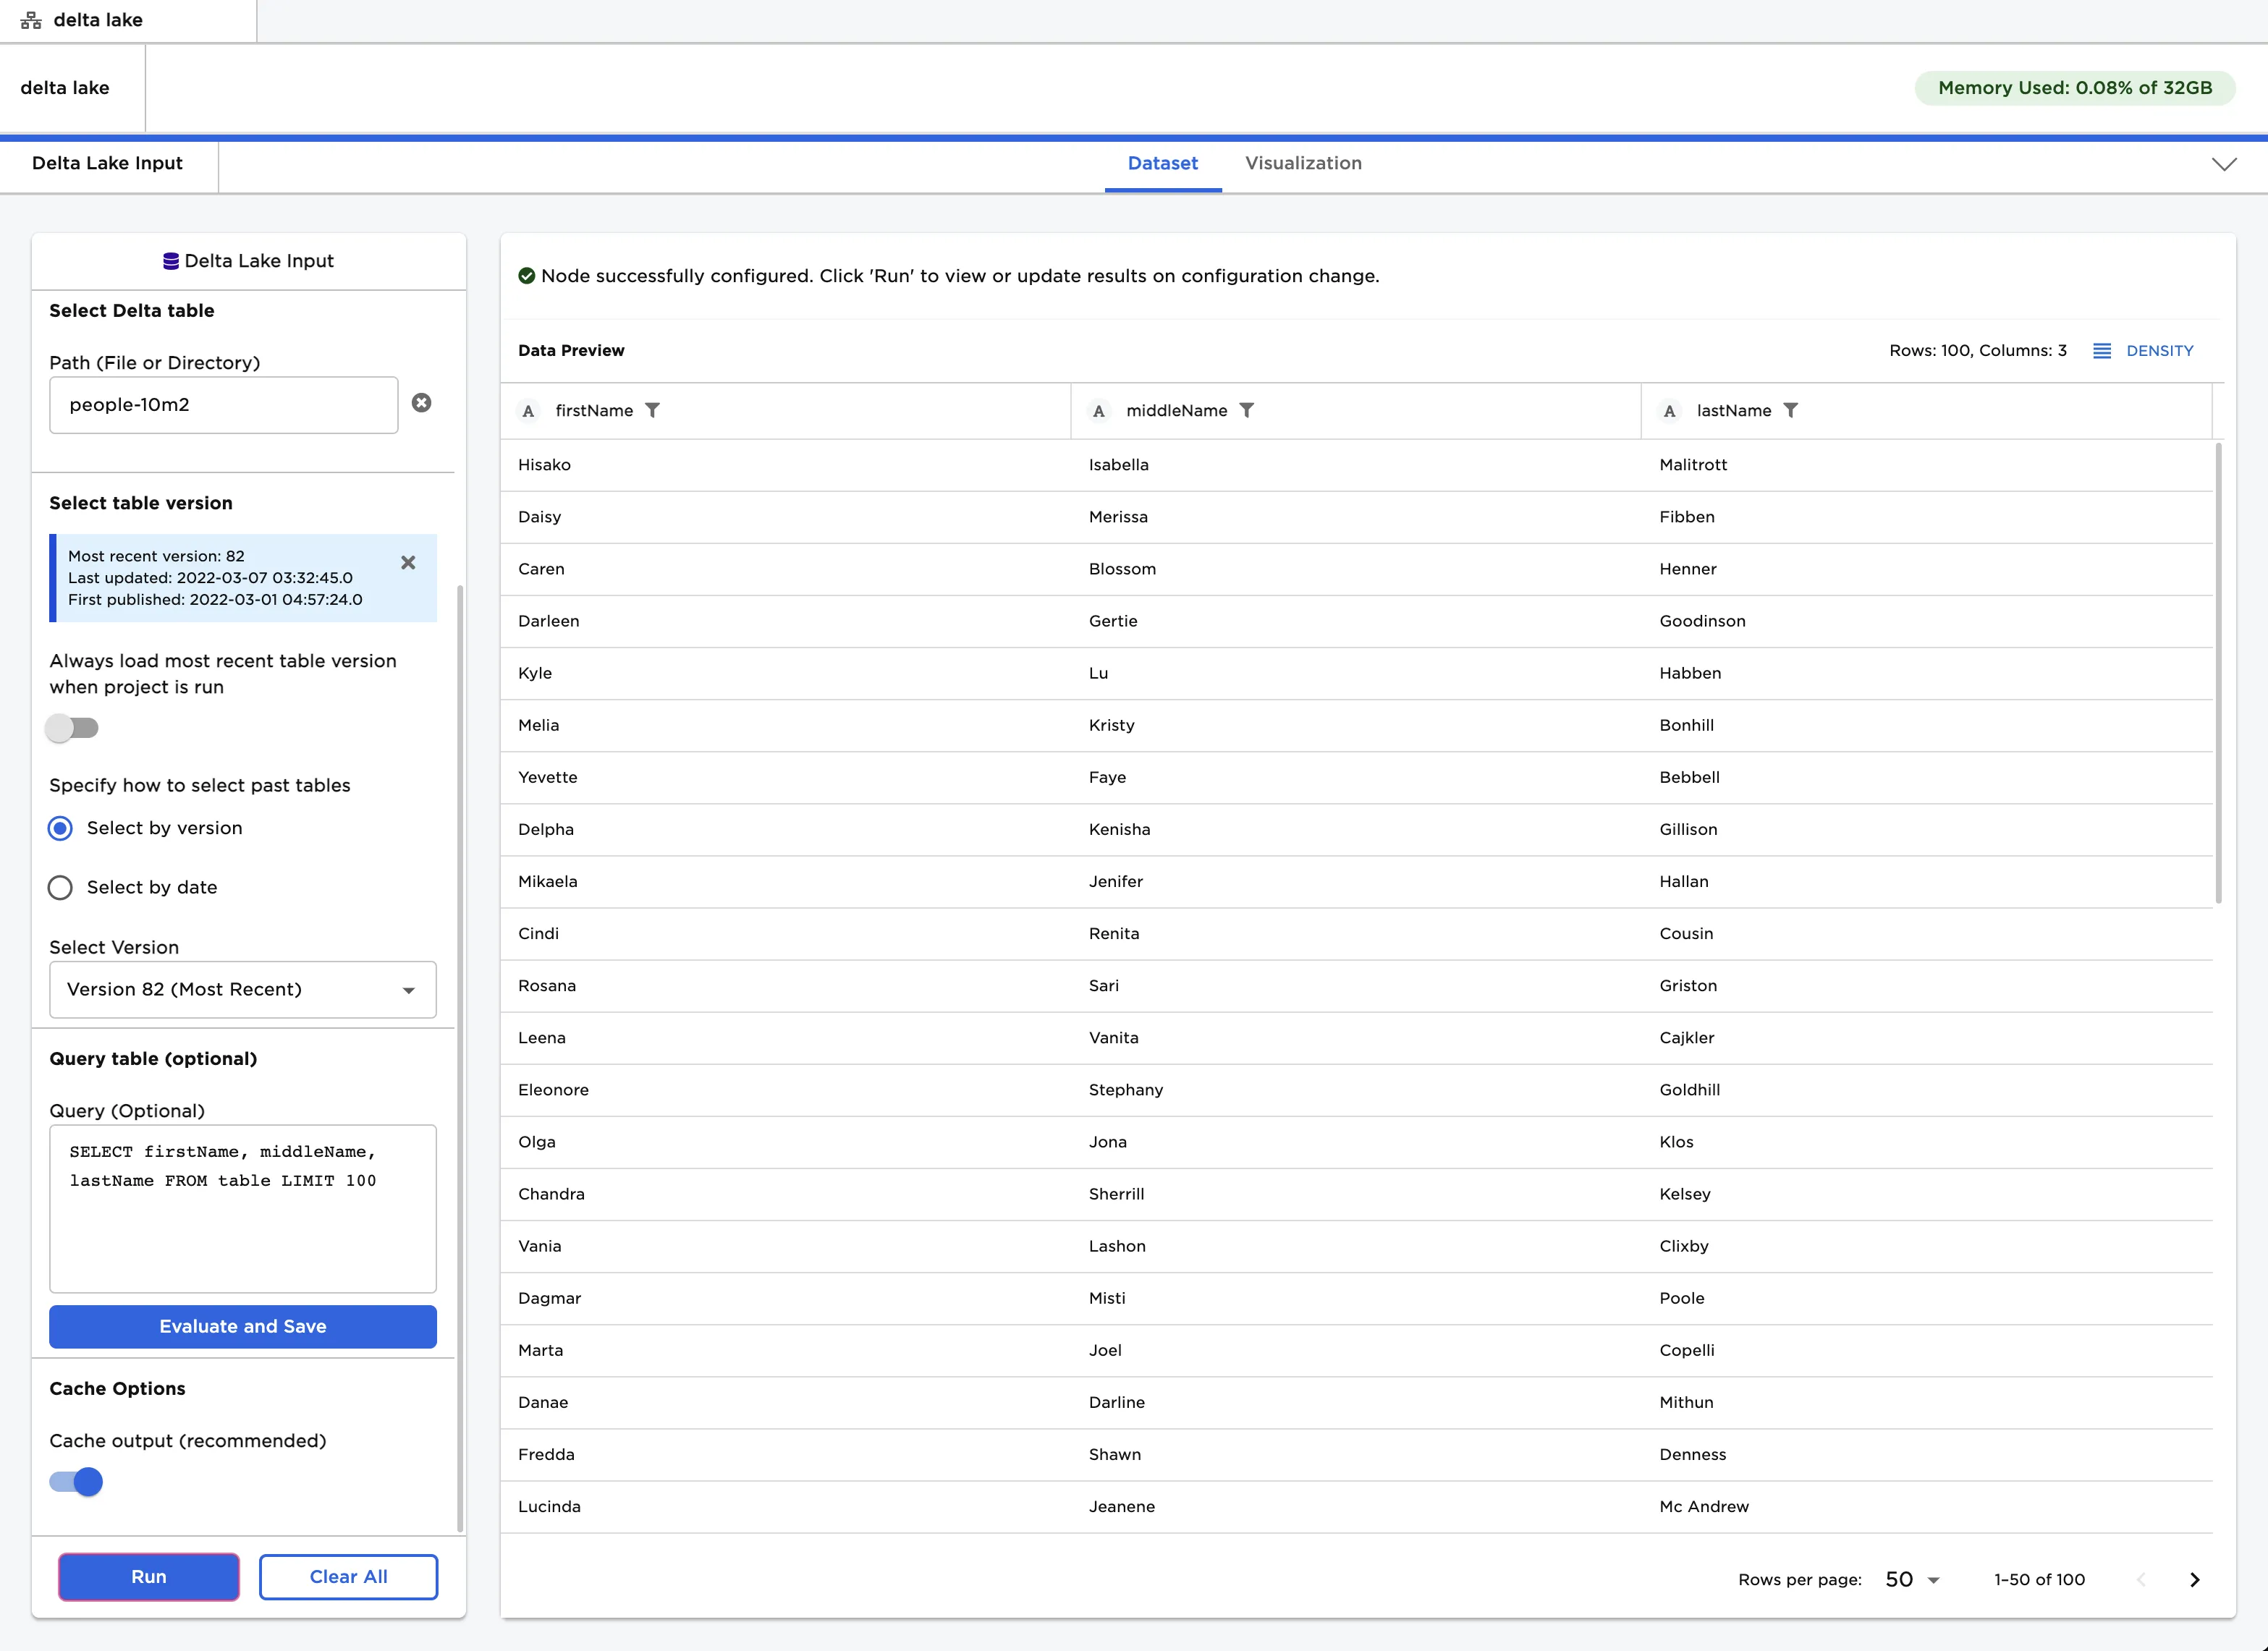
Figure 4: Example dataframe created from a SQL query