Snowflake Node
Load data from Snowflake into Visual Notebooks.
Prerequisites
Follow the steps below to add credentials for Snowflake. You must have a valid Snowflake URL, username, and password.
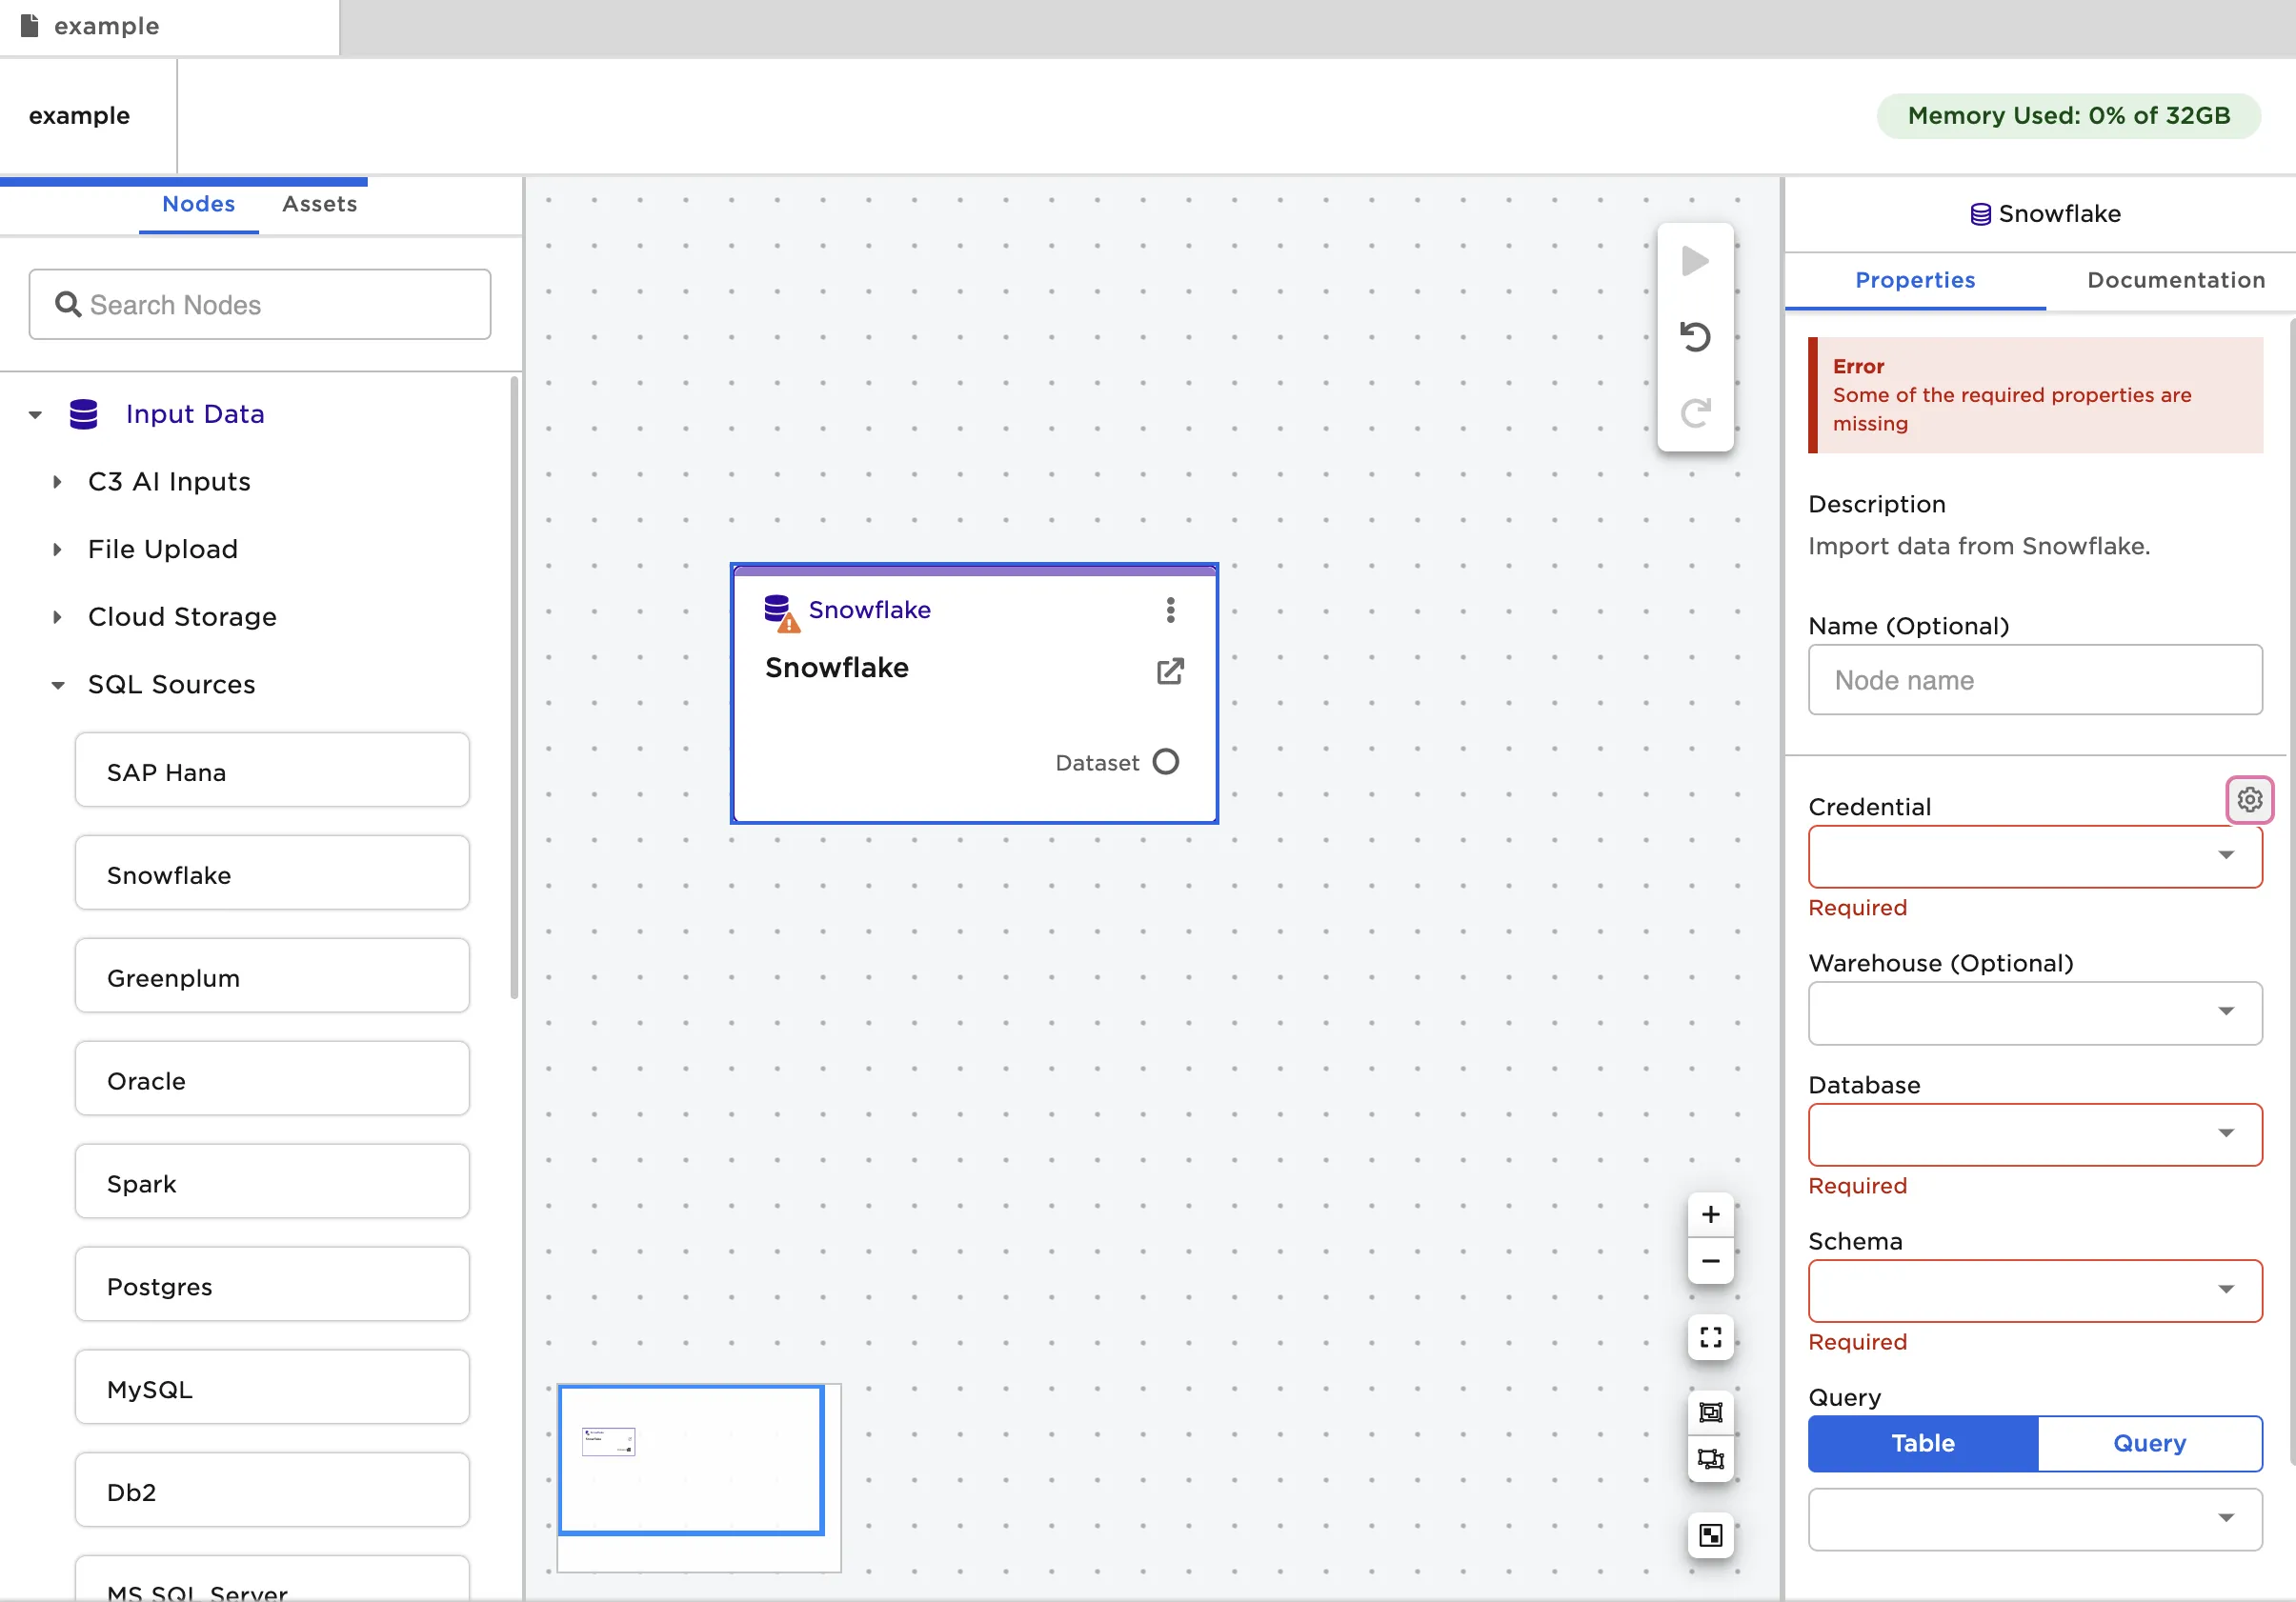
- Drag a Snowflake node onto the Visual Notebooks workspace
- Select the gear icon beside the Credential field
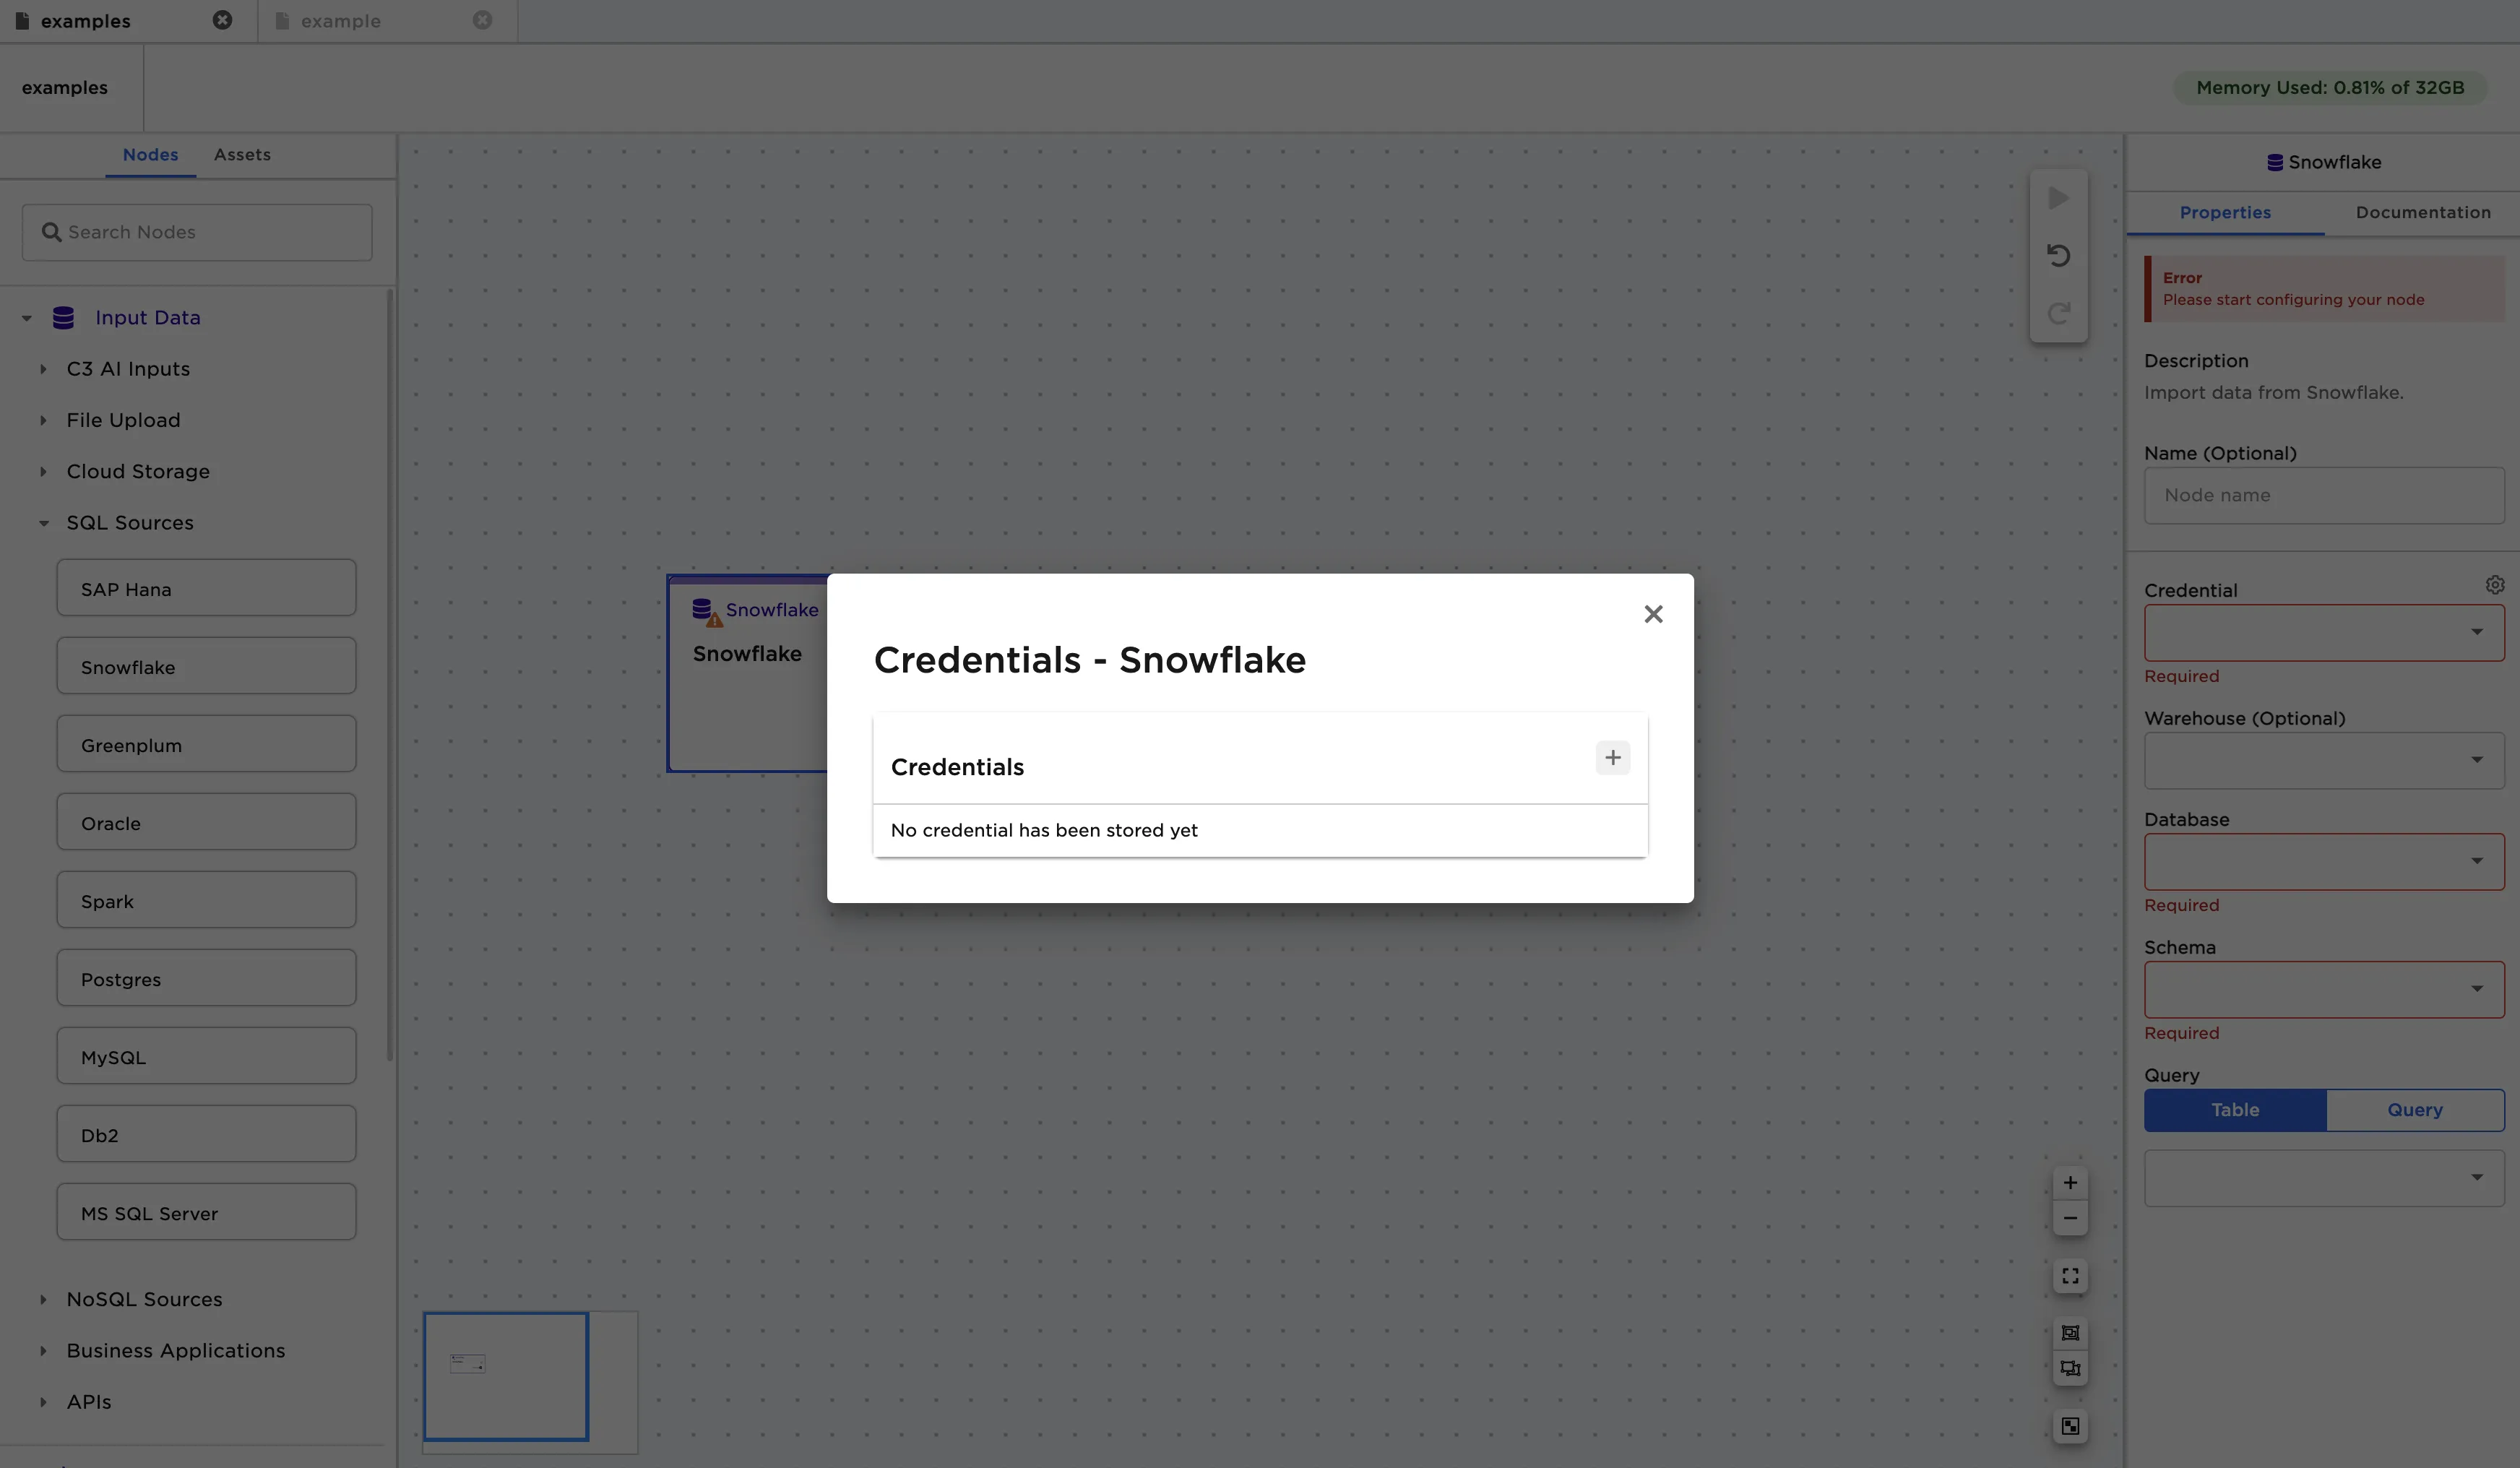
- Select the plus sign in the upper right corner
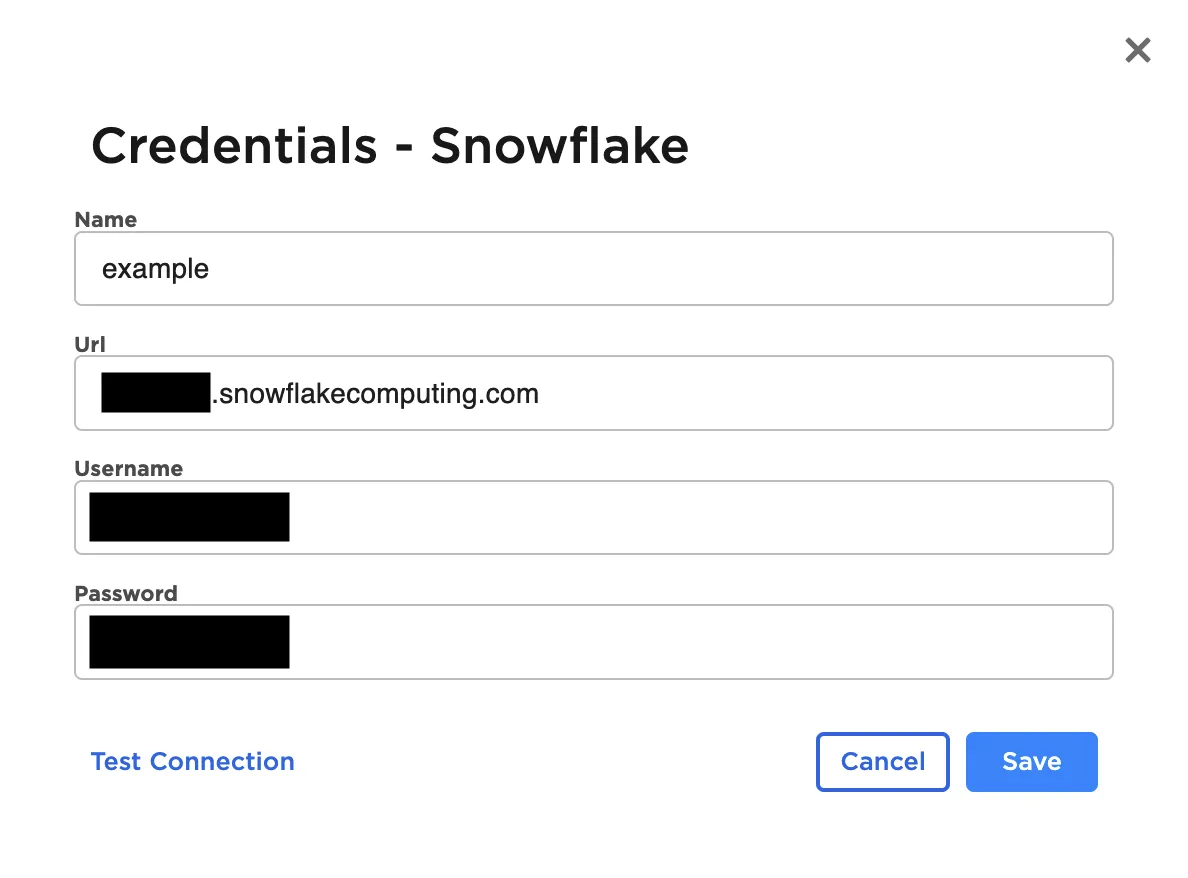
- Enter a name for the credential
- Enter the URL that you use to log into the Snowflake web interface
- The URL should be in the following format:
.snowflakecomputing.com - For more information about account identifiers, see the Snowflake documentation
- The URL should be in the following format:
- Enter the username and password you use to access Snowflake
Configuration
| Field | Description |
|---|---|
| Name Default: Snowflake | A user-specified node name displayed in the workspace |
| Credential Required | The information needed to access Snowflake data Select a saved credential from the dropdown menu. Select the gear icon to add a new credential or delete existing credentials. |
| Warehouse Optional | The name of the Snowflake warehouse Select the warehouse from the auto-populated dropdown menu. |
| Database Required | The name of the desired Snowflake database Select the database from the auto-populated dropdown menu. |
| Schema Required | The name of the desired Snowflake schema Select the schema from the auto-populated dropdown menu. |
| Query Required | The data to upload Select the table you want to upload from the auto-populated dropdown menu or enter a SQL query that returns the desired data. |
Node Inputs/Outputs
| Input | None |
|---|---|
| Output | Visual Notebooks returns a table, called a dataframe, that contains all uploaded data. Columns are labeled and include a symbol that specifies the data type of that column. |
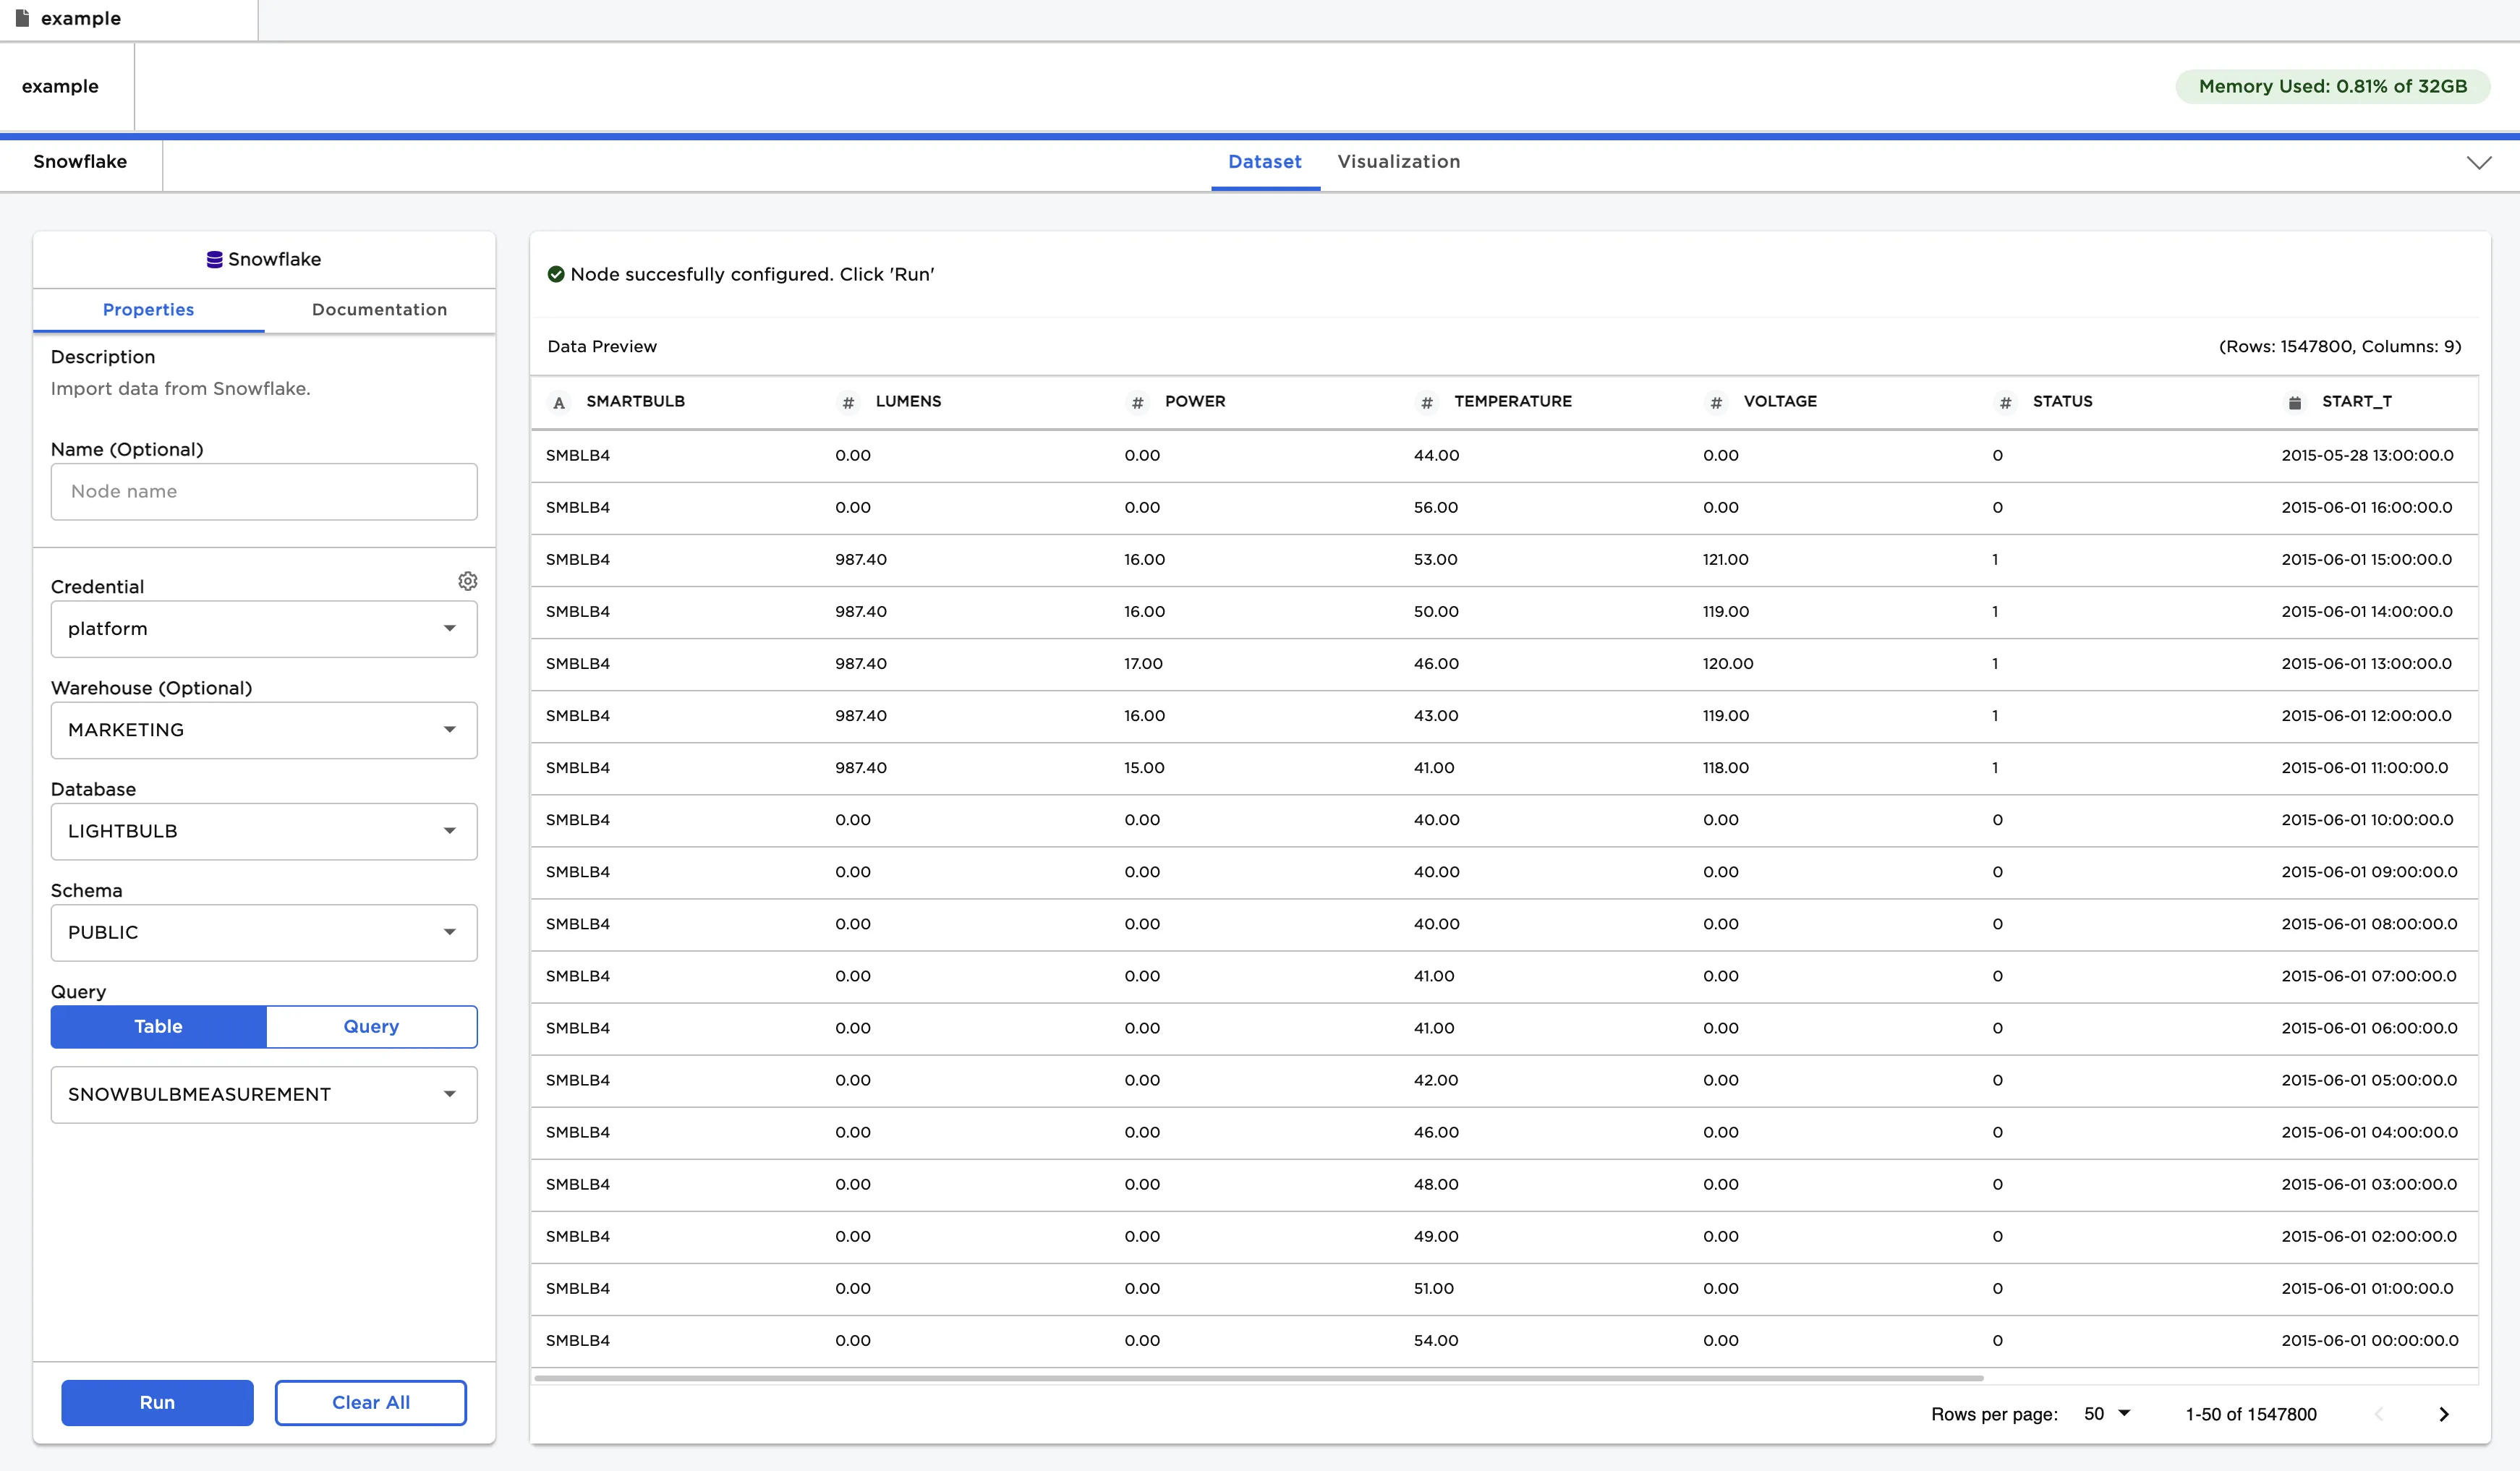
Figure 1: Example dataframe output
Examples
- Select the Snowflake database, schema, and table that contains the desired data.
- Select "Run" to create a dataframe.
Figure 2: Example dataframe created from a Snowflake table
- Select a Snowflake database and schema.
- Write a query that returns the desired data.
- In the example below, the query returns the "Lumens" and "Temperature" columns for the first ten rows of the "SNOWBULBMEASUREMENT" table.
- Select "Run" to create a dataframe.

Figure 3: Example dataframe created from a Snowflake query