Time Extract
Extract timestamp functions in Visual Notebooks.
Configuration
| Field | Description |
|---|---|
| Name | An optional user-specified node name displayed in the workspace, both on the node and in the dataframe as a tab. |
| Time Column | Column(s) with timestamps Select the column with the desired timestamp from the auto-populated dropdown menu. If all columns in the menu appear dimmed, use a Columns - Type Converter node to convert the desired column to the timestamp data type. |
| Select Functions | Function options Function choices include: Select all, Year, Month, Day, Day of Week, Weekday, Hour, Minute, Second. |
Node Inputs/Outputs
| Input | A Visual Notebooks dataframe |
|---|---|
| Output | Dataframe with additional time extract column(s) |
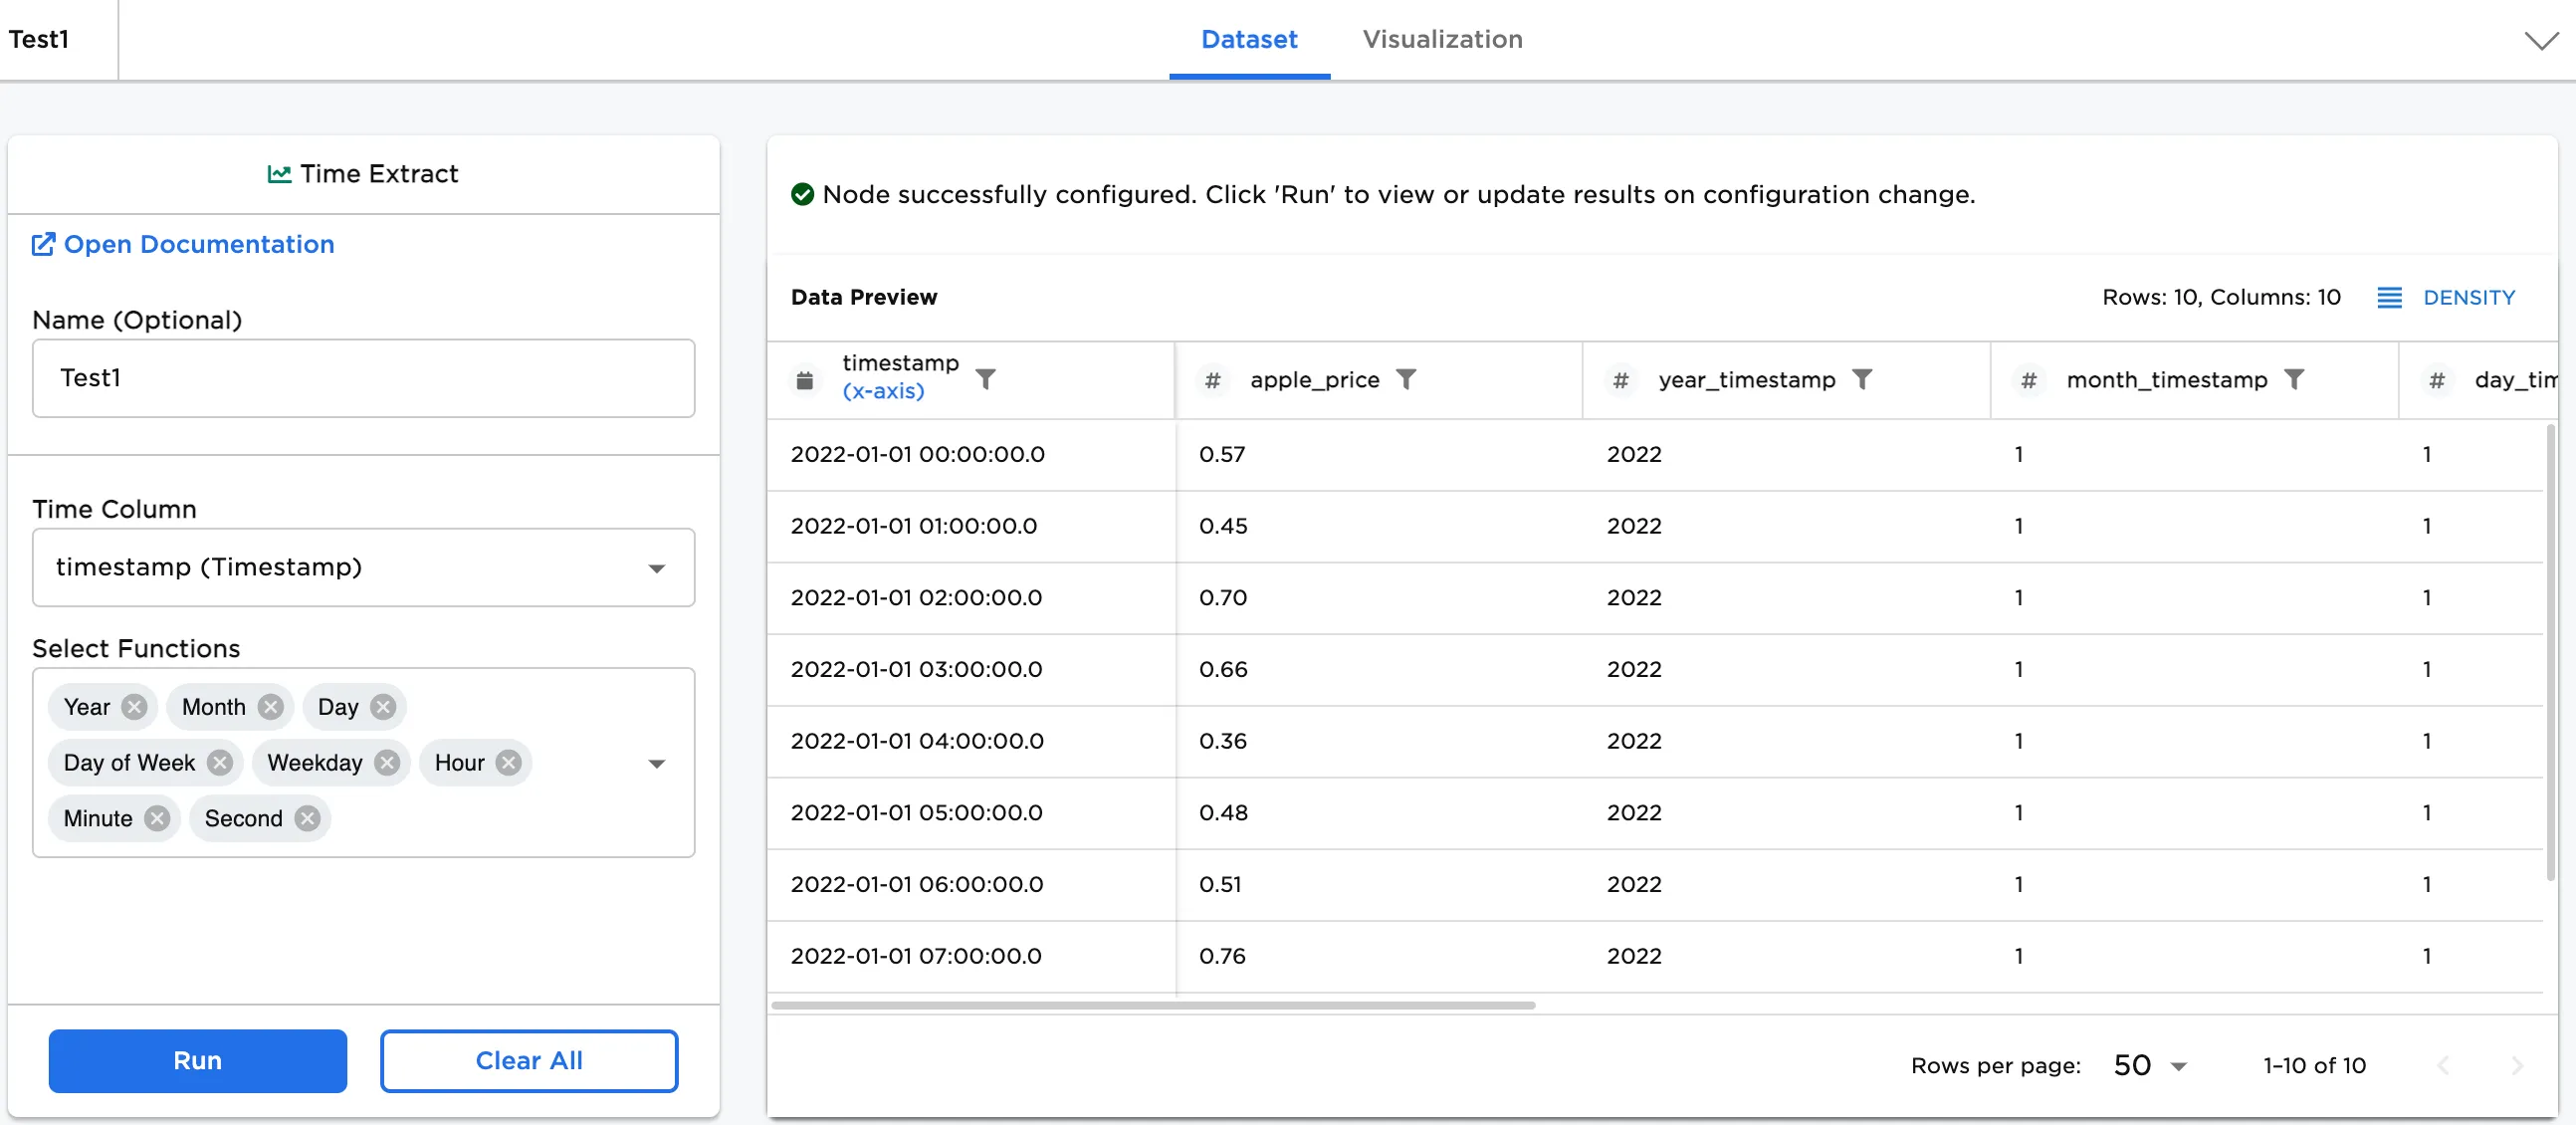
Figure 1: Example dataframe output
Examples
The dataset includes information about the price of apples over time. The following image shows an example input node:
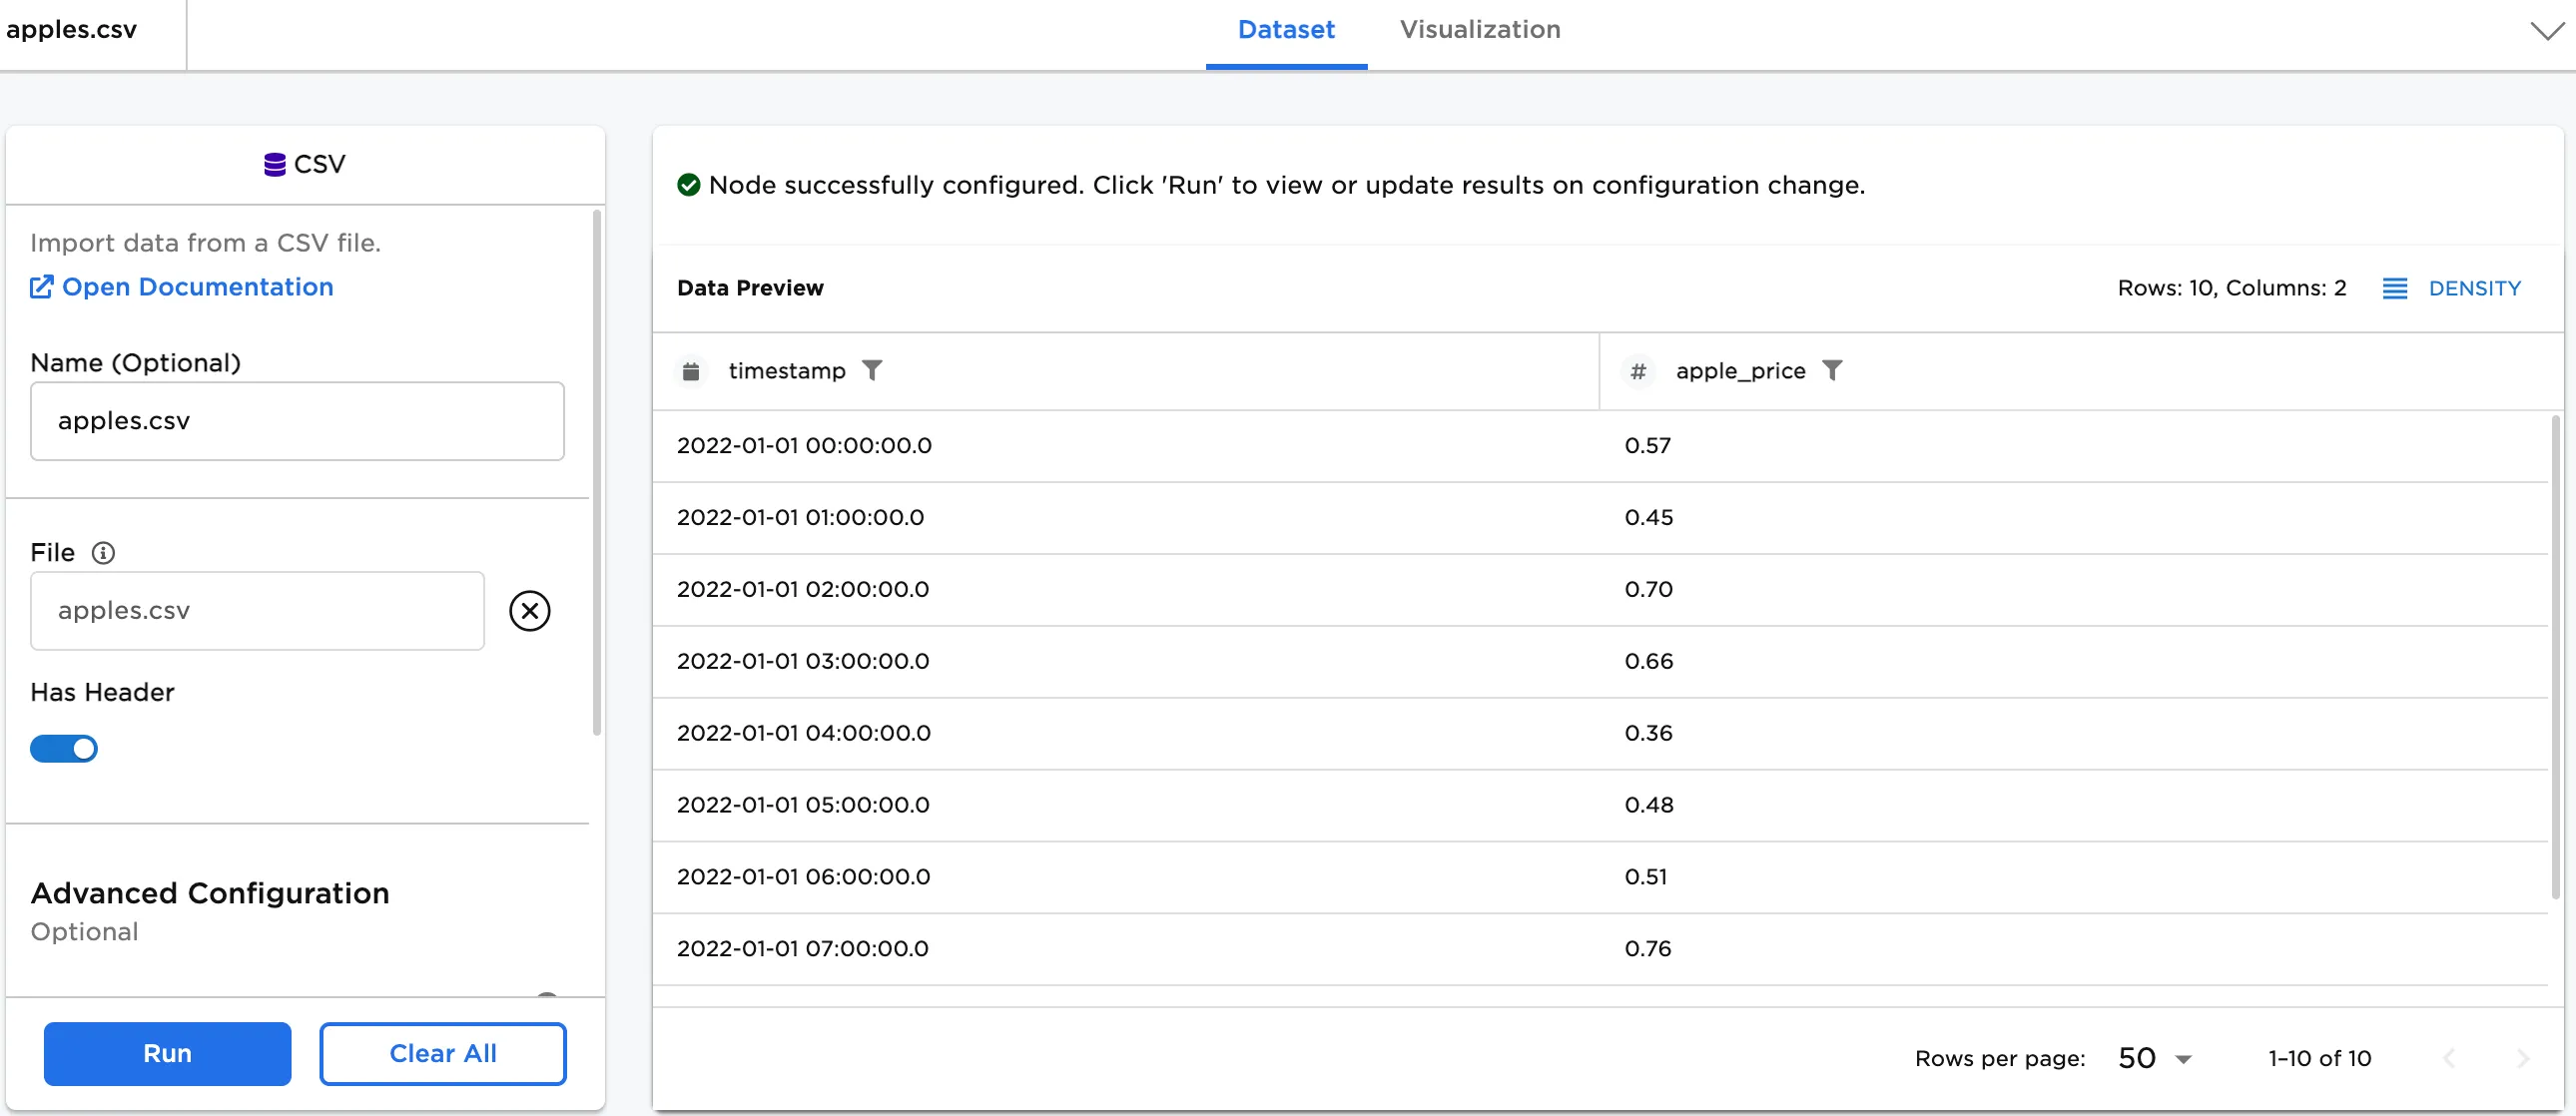
Figure 2: Example input data
First, extract one time function.
- Connect the data or an existing node to the Time Extract node.
- Double click on the Time Extract node.
- (optional) If you would like to differentiate this node, enter a name in the Name field. In this case, "Test1" has been entered. This name also appears in the node and as a tab in the dataset. The option to name is also available in the dataset.
- Select "timestamp (Timestamp)" in the Time column.
- Select the individual functions to see in the dataset, or select all. In this case, Day of Week has been selected. Note: The Day of Week column in the dataset assigns a numeric value for each day. In this case, 7 = Saturday.
- Select Run.
The Timestamp information is added to the dataset.
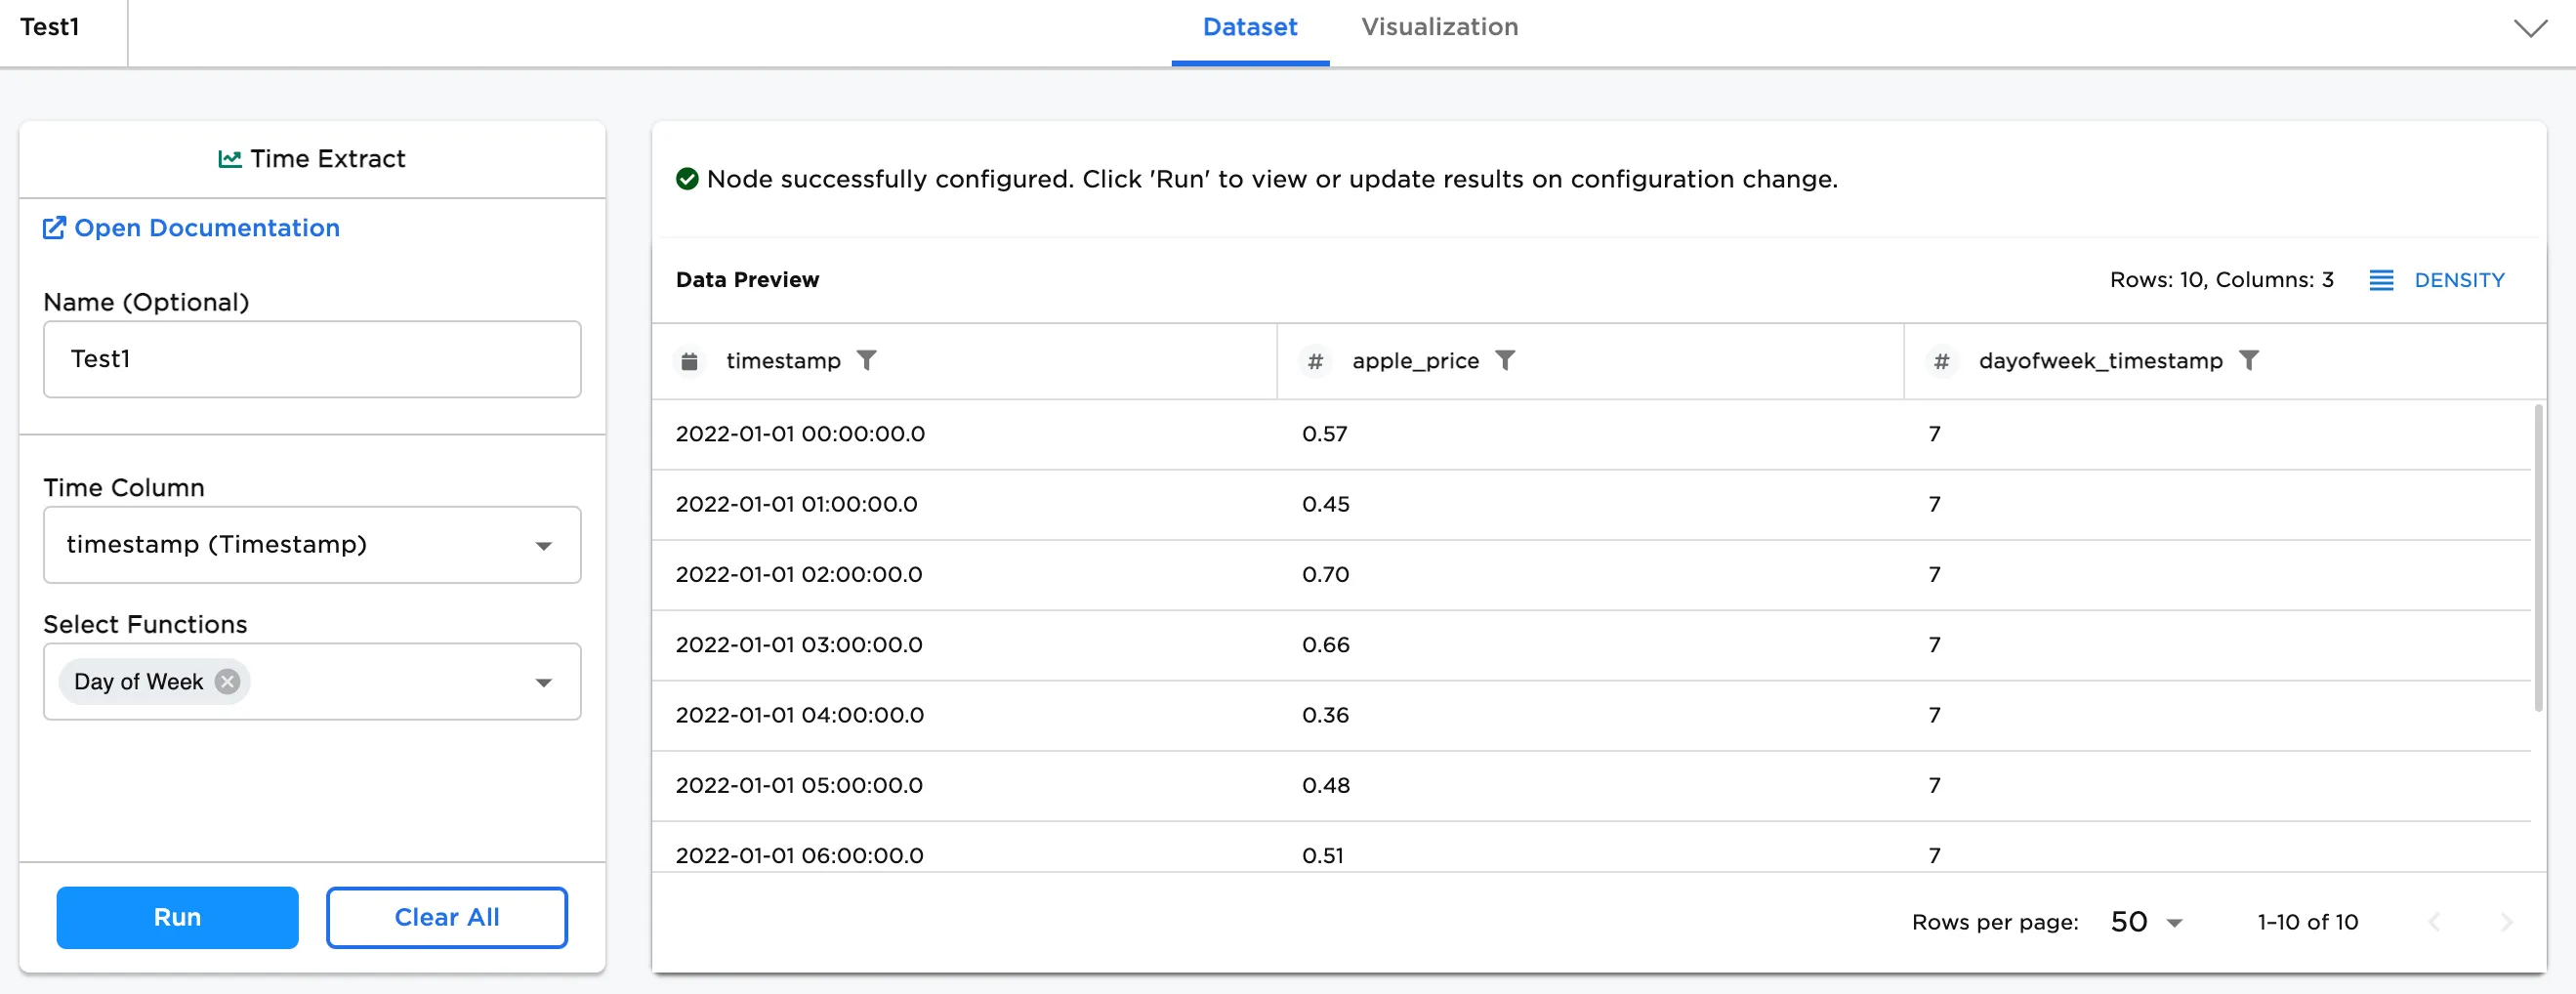
Figure 3: Example dataframe with Day of Week selected
Next, add another function.
- Select a second Functions to see in the dataset. In this case, Hour has been selected.
- Select Run.
The Timestamp information is added to the dataset.
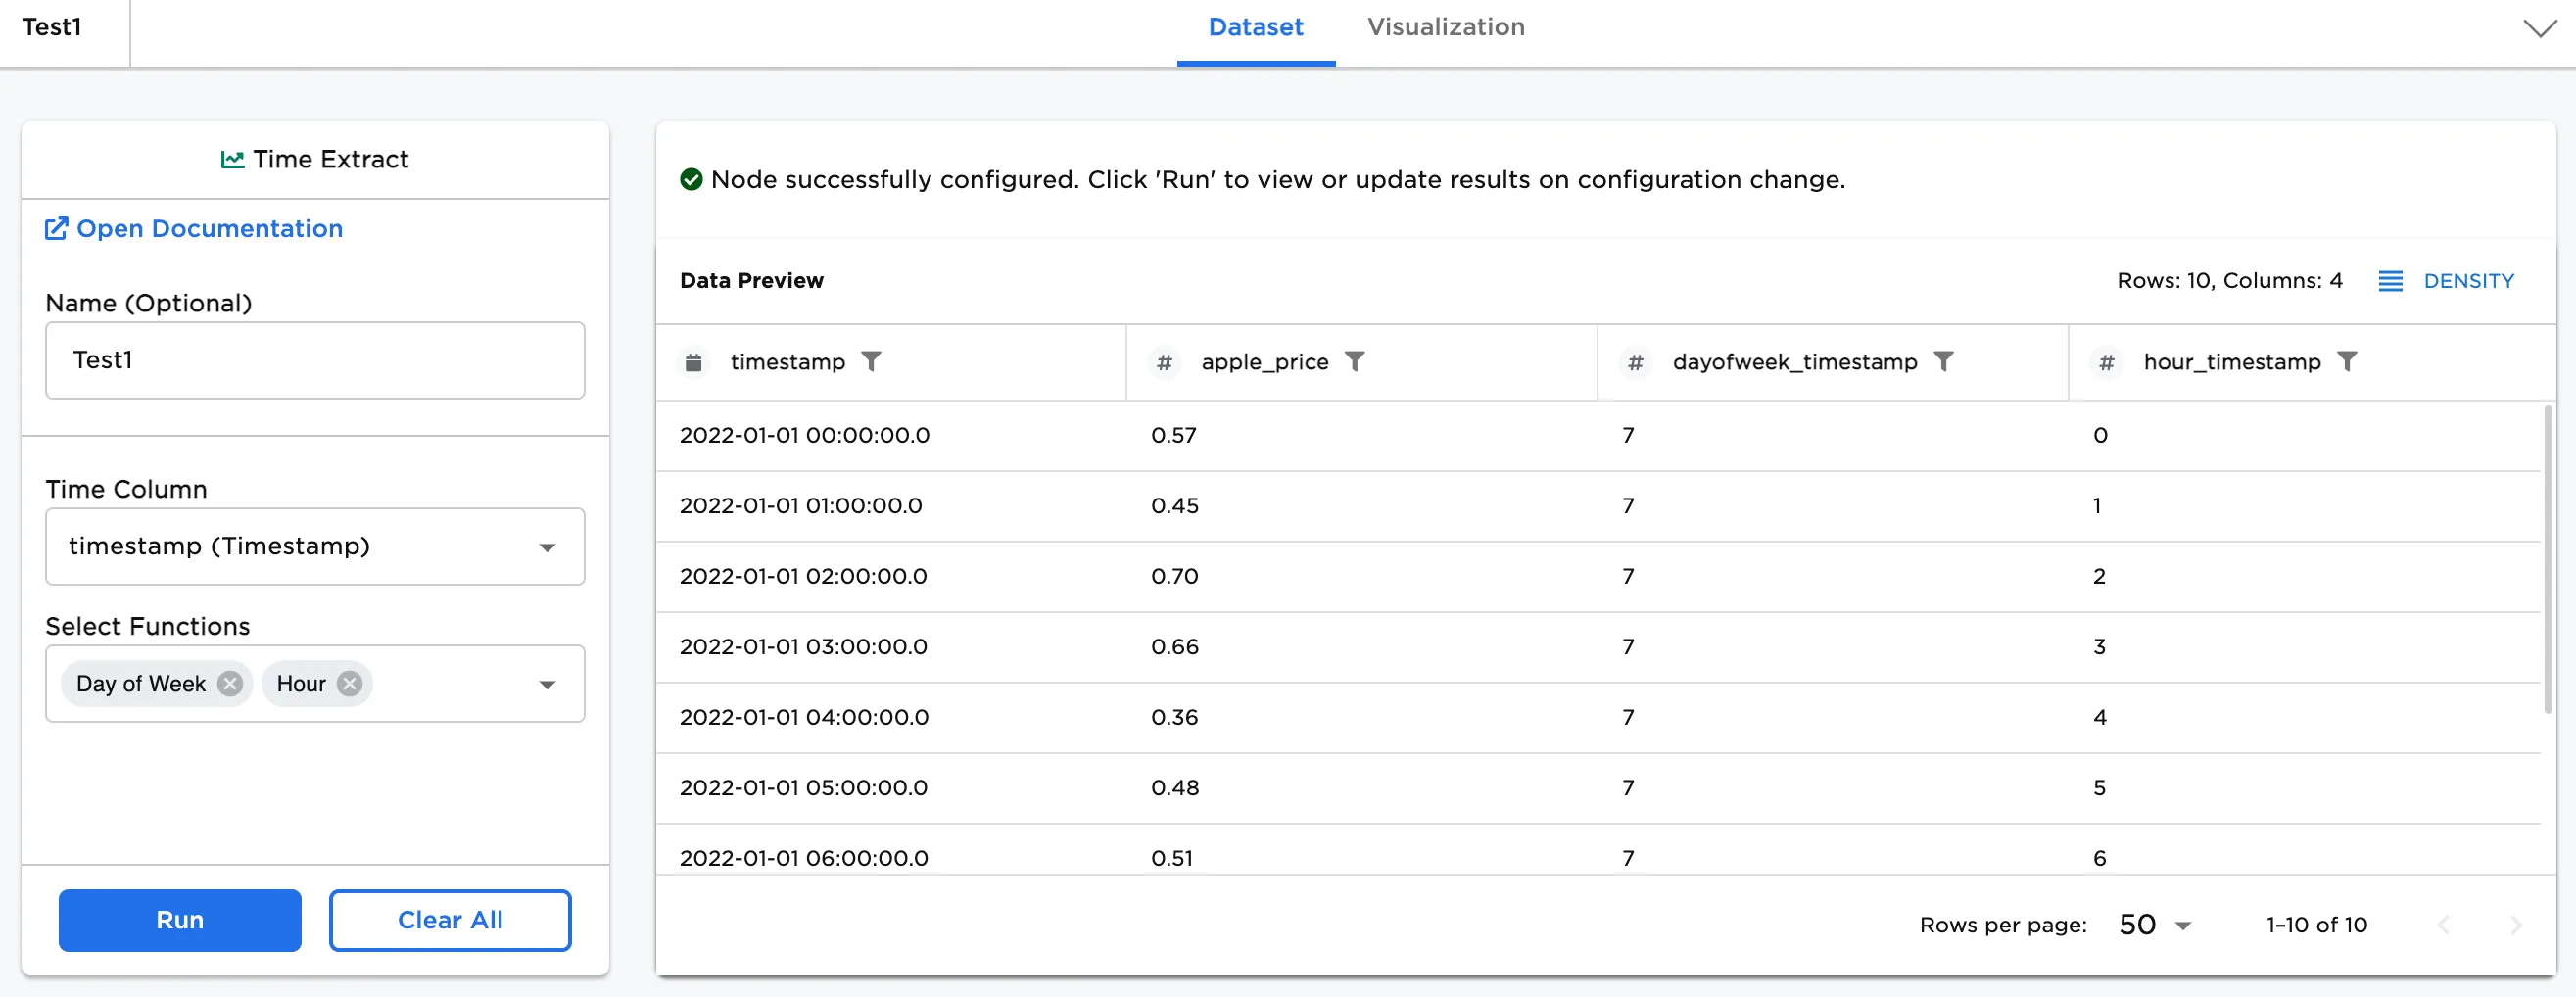
Figure 4: Example dataframe with additional hour column