Work in Multiple Chats
Each chat in your workspace runs its own agent, and the chat panel holds as many chats as you need. Using more than one chat keeps unrelated work apart, and lets you ask a question while a long change is still running.
Open a new chat, give that chat one subject, and track each chat's status from its own tab. Closing a tab keeps the conversation, so you can reopen any chat later. Each chat also carries its own mode, model, and reasoning effort. You can place the chat panel on the left, in the center, or on the right, and zoom the conversation to a size that suits you.
A question can come up while a change is still running. Ask how the application calculates days of supply in a second chat, and the agent keeps building your Coverage page in the first.
Start a new chat when the subject changes
A chat carries the whole conversation forward. Every message you send reaches the agent together with everything said in that chat already. The agent reads the whole conversation each time, which is why it can act on a request you made ten messages ago.
Sending the whole conversation each time is also what makes a long chat use more of your LLM budget. C3 Code measures usage in tokens, which count the text going to the agent and the text coming back. A short question at the end of a fifty-message chat sends all fifty messages again. The same question in a new chat sends only the question.
Start a new chat in any of these situations:
- You move to a different page, record, or feature.
- Your next request is independent of the current chat, and that chat is already long.
- A question arises that should not be added to a chat already building a change.
A chat holding one subject also keeps the agent's answers on that subject, with nothing from unrelated work mixed in.
Keep the original chat rather than closing the chat. That conversation holds the record of how the work was built, and you can reopen the conversation at any point.
For seeing what you have used against each quota, see My Usage and Cost.
Open a second chat
Select New chat in the chat panel. The new chat opens as its own tab in the tab strip.
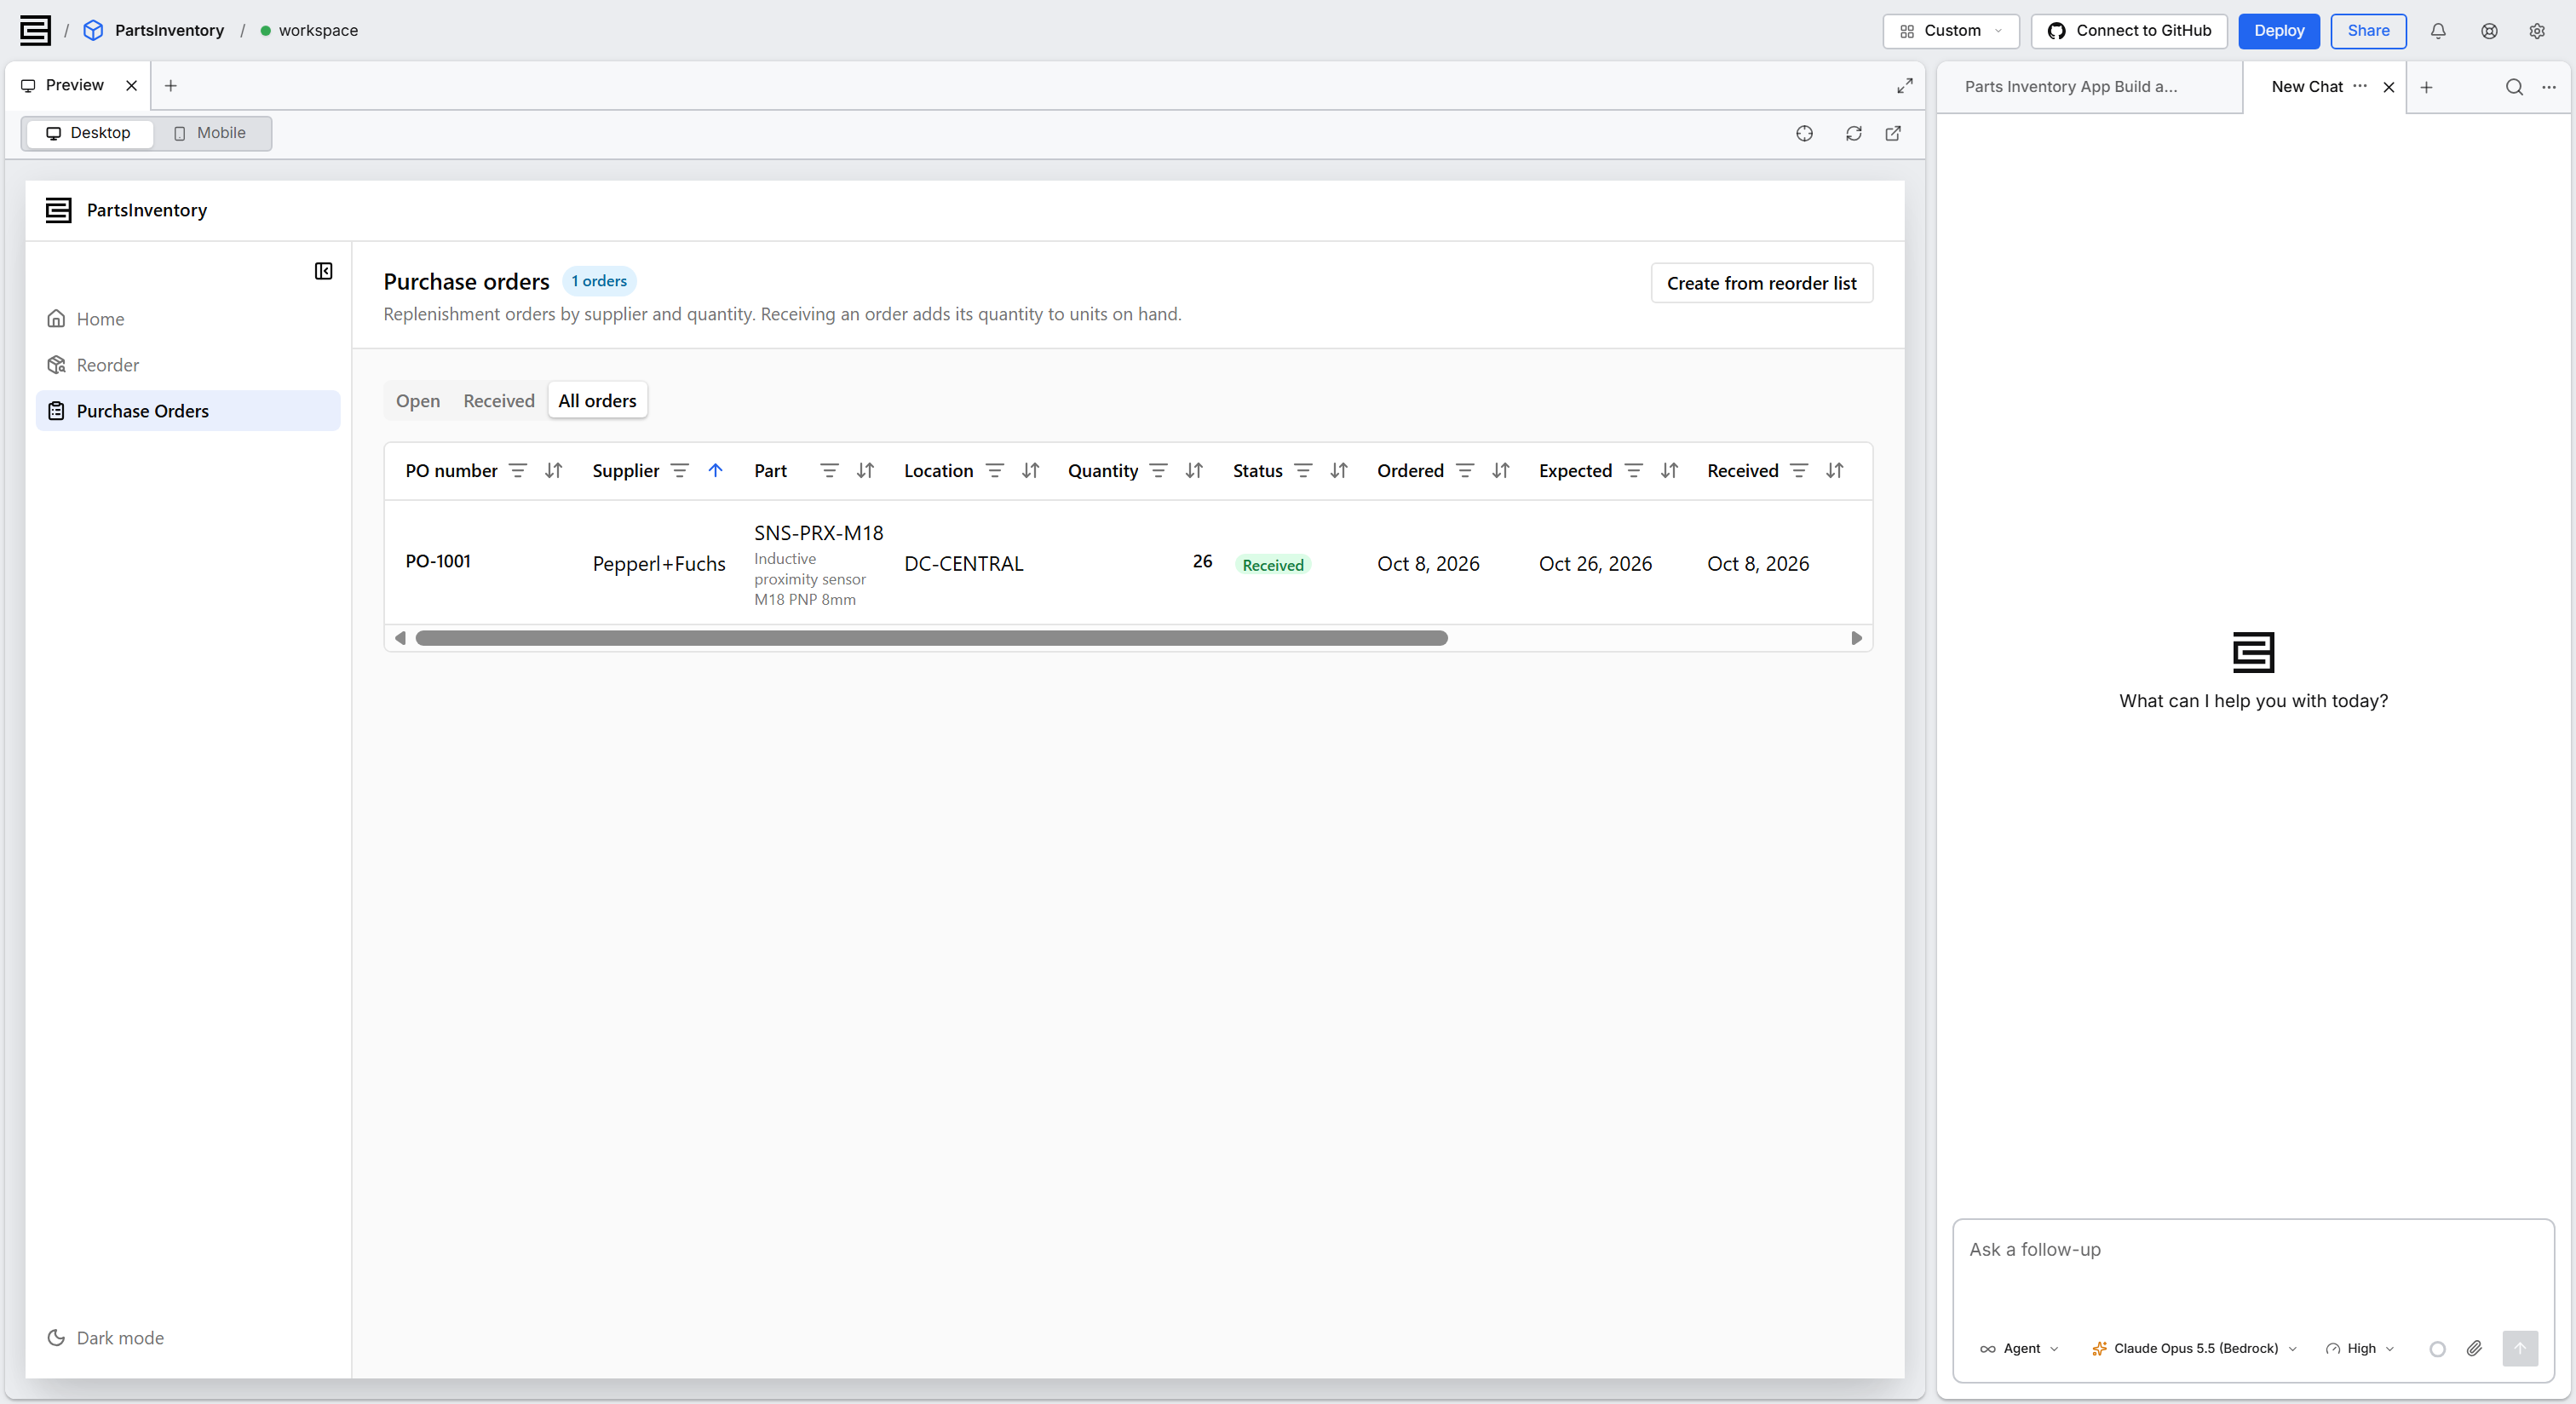
A new chat starts under the placeholder name New Chat. Once the conversation has a few messages, C3 Code replaces that placeholder with a title drawn from what you asked. To rename the chat yourself, select Rename in the tab's ... menu, or double-select the tab. The title becomes editable in place: press Enter to save the new name, or Escape to keep the old one.
Each tab's ... menu also downloads that chat as a file (Download chat session) and closes several tabs at once: Close others, Close to the left and Close to the right.
Run two chats at once
Each chat runs its own agent, so a request in one chat starts while another chat is still working. Send a long change, leave that change running, then open a second chat and fix a label in the meantime.
Both chats build the same application. Both chats write to the same files, read the same database, and feed the same preview. Give concurrent chats work in different parts of the application. Two chats editing different pages do not interfere with each other. Give a change that spans the whole application a chat of its own, and let that change finish before starting another.
To follow both chats without switching tabs, give each chat a pane of its own: a separate area of the chat panel. Open a chat tab's ... menu, then select Split right to place the chat beside the others or Split down to stack it under them. Each pane has its own tab strip and its own chat input. Drag the border between panes to resize them.
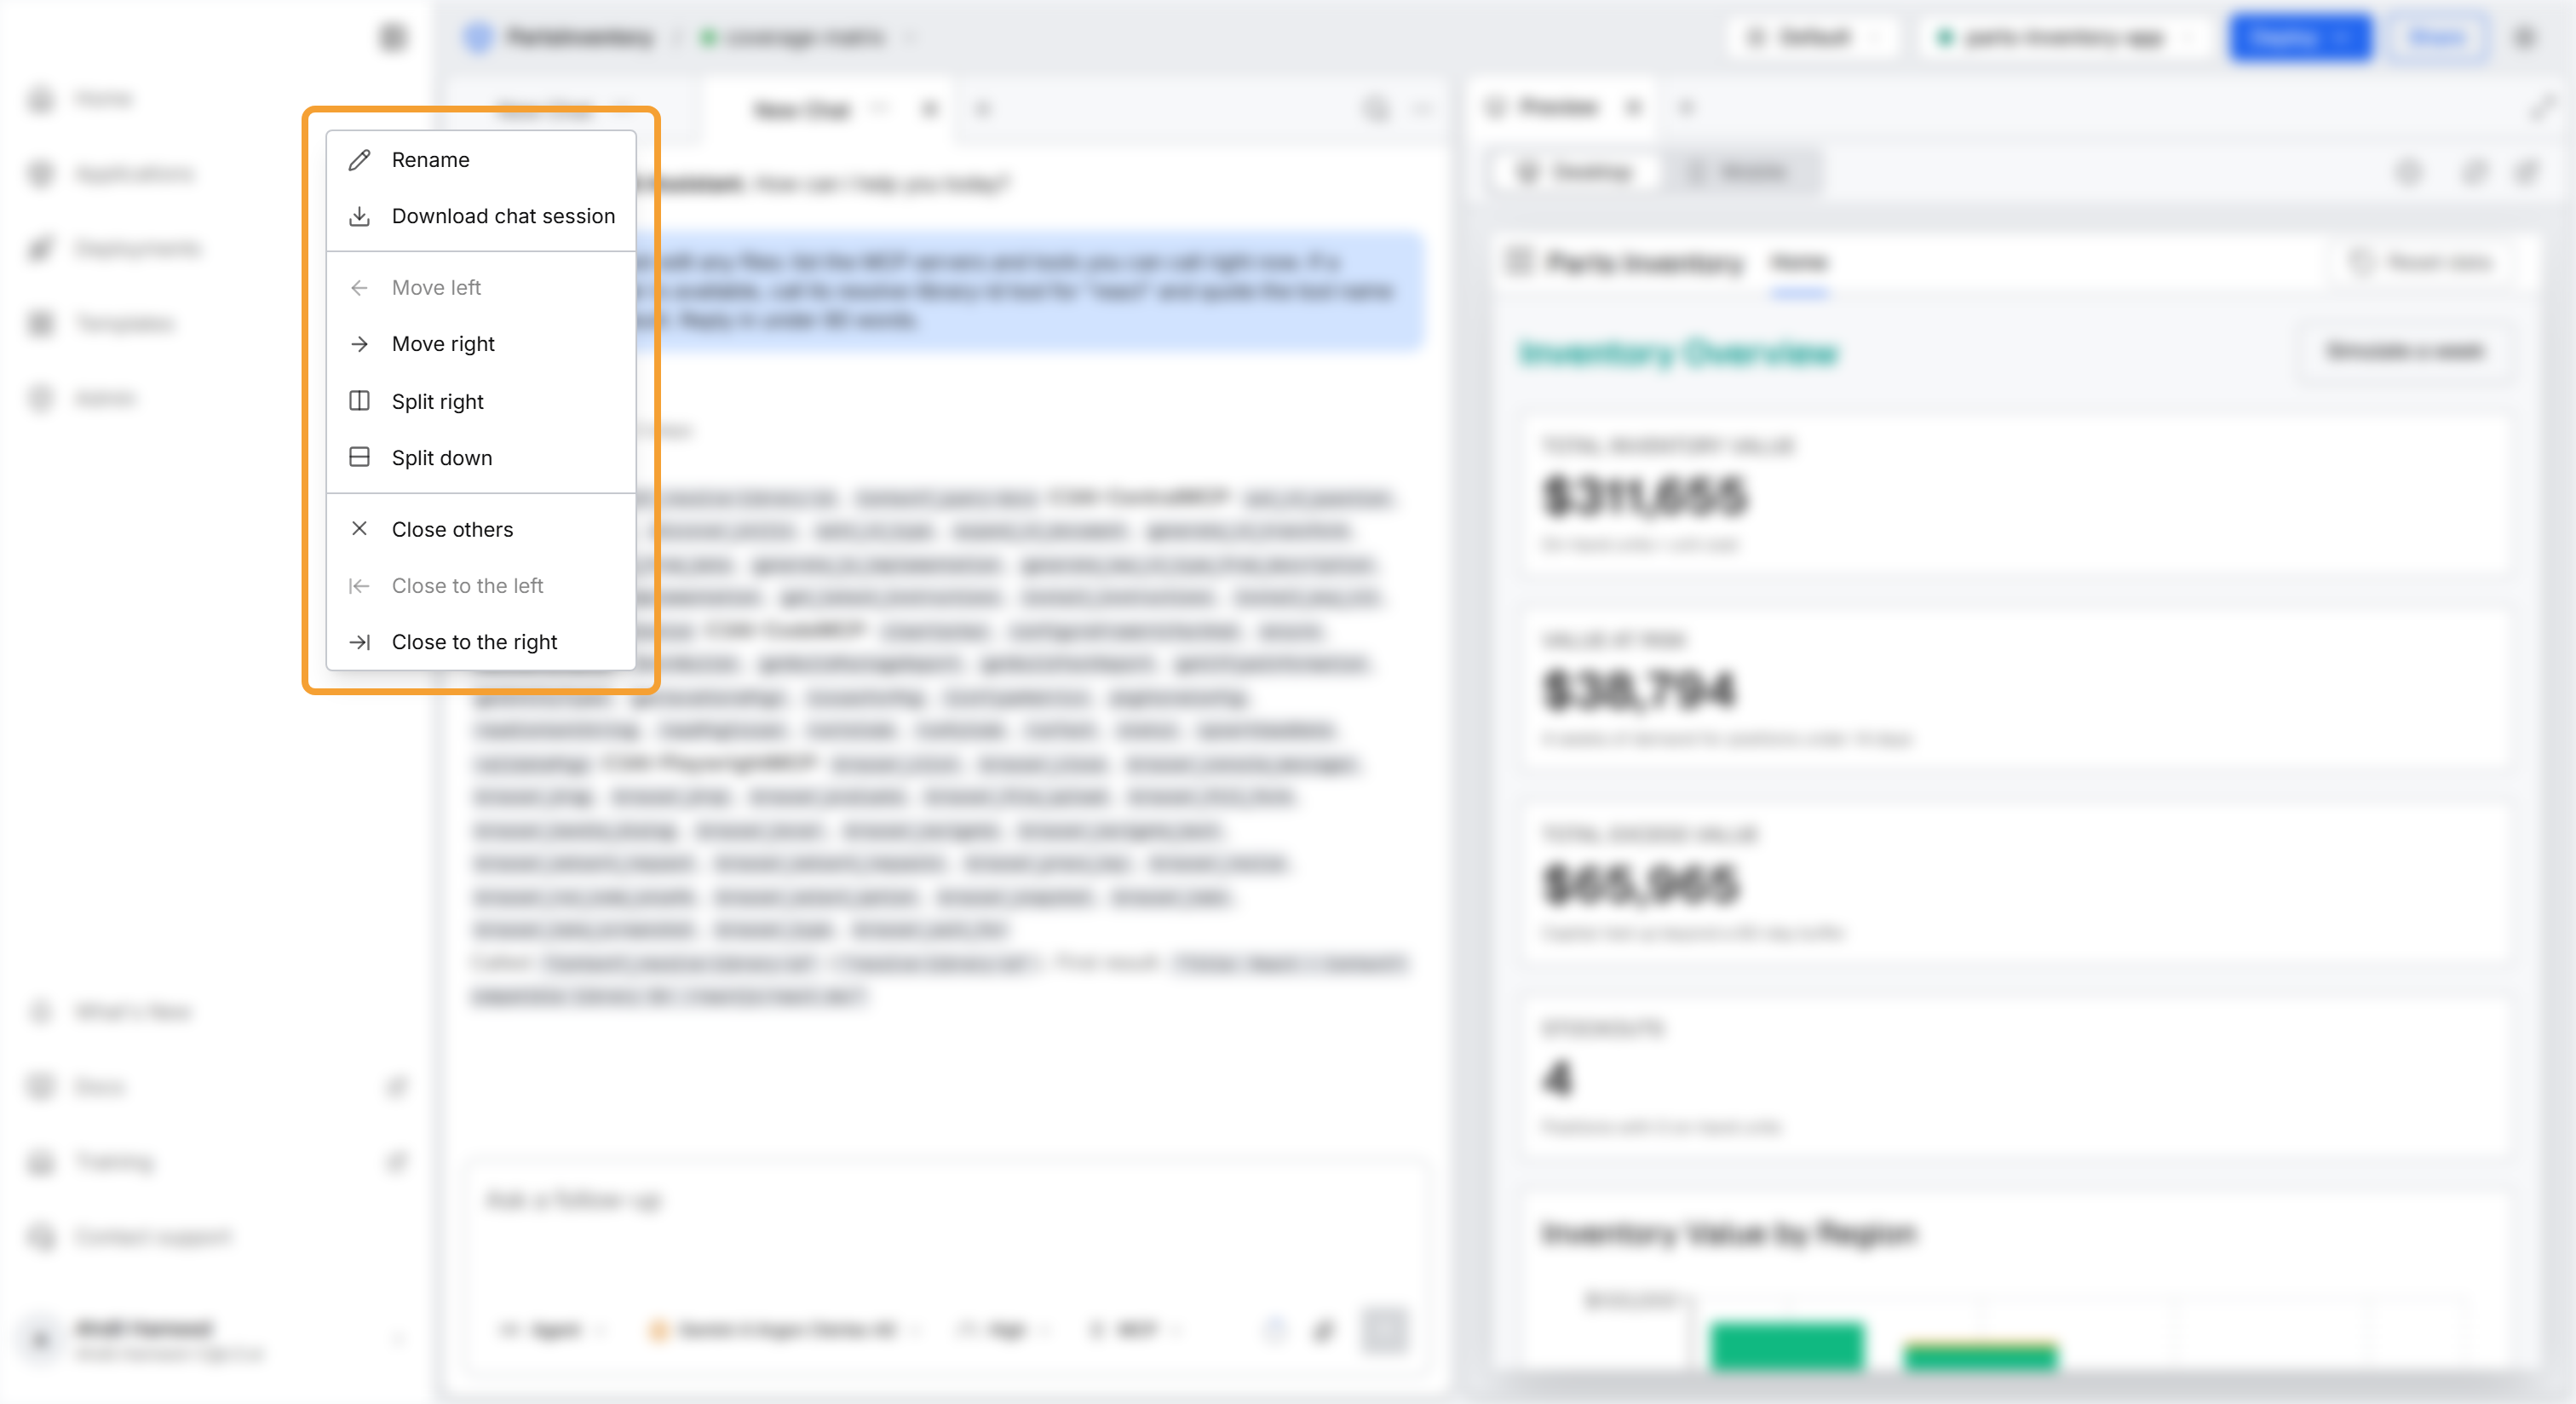
You can also arrange chats by dragging their tabs, the same way you arrange the tool tabs in your workspace. Drag a tab along its tab strip to change its place, or onto another pane's tab strip to move the chat into that pane. Drop a tab on any edge of a pane to open a new pane on that side. Chat tabs stay in the chat panel, and tool tabs stay out of it. In the tab's ... menu, Move left and Move right shift the tab one place without dragging. A pane closes when its last tab leaves. Split and the move actions are unavailable when the chat is the only tab in its pane. C3 Code remembers the arrangement for each workspace in your browser.
Two agents editing the same file at once can overwrite each other. C3 Code warns you when you start typing in one chat while an agent in another chat is still editing. Dismissing that warning hides it permanently, so read the warning before you dismiss it.
Read what each chat is doing
Each tab reports its own state, so you can leave one chat working and watch that chat from another. Three indicators appear on the tab itself:
- Processing: the agent is working on that chat's request.
- New response available: the agent answered while you were in a different chat.
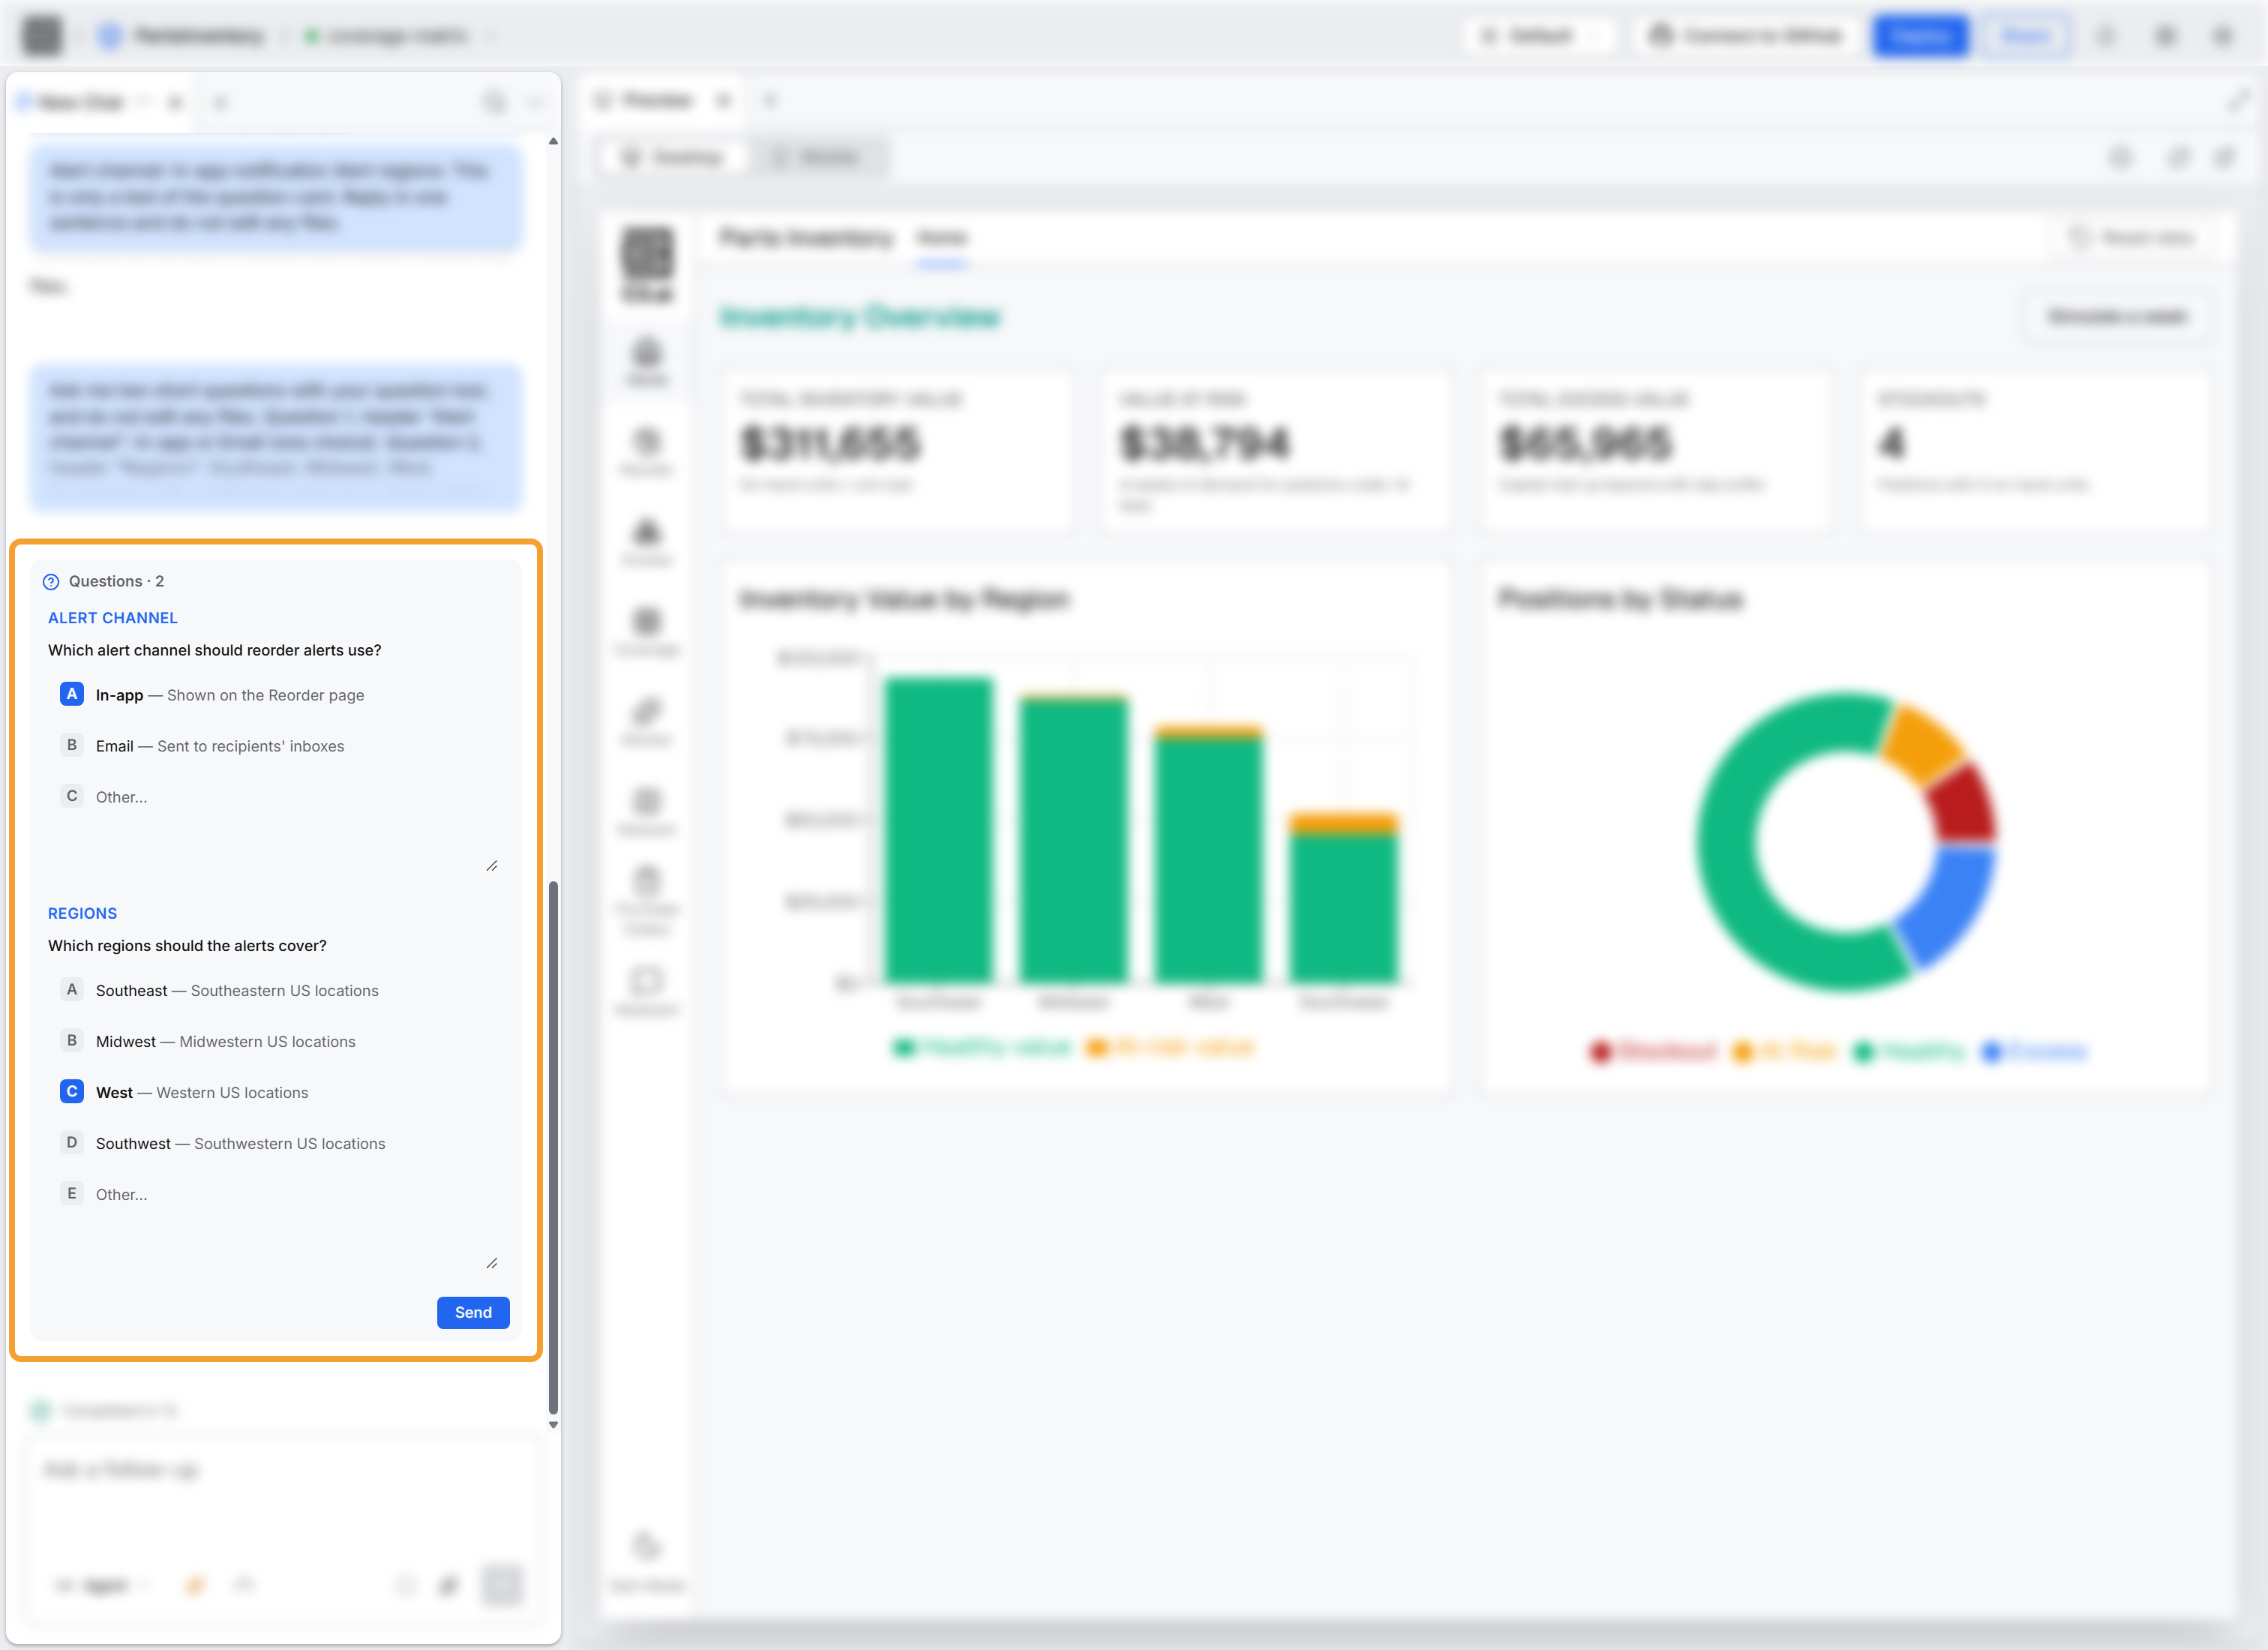
- Action needed: the agent asked a question and is waiting for you.
Watch for Action needed. The agent stops when it asks a question, so a chat that appears slow is sometimes a chat waiting for you.
The agent asks its questions in a Questions card in the conversation, and each question lists lettered options. Select an option, or type your own answer in the Other… field when no option fits.
Prompts you send while the agent works wait in a queue, then run in order. When the agent asks you a question, the queue pauses until you reply. Answer the question, or select Resume to run the queued prompts without answering.
Each queued prompt keeps the model and reasoning effort you selected when you sent it. To change a queued prompt before it runs, select Edit prompt on it. The prompt opens in the chat input, where you can change its text and its model. Send it to save the change, and the prompt keeps its place in the queue.
Some actions need your approval before the agent takes them. The chat then shows a Permission required card, and the queue waits until you select Allow or Deny. For example, the agent always asks before it edits c3pkg.json, the file that lists your application's package dependencies.
For a larger request, the agent can hand parts of the work to subagents, which are helper agents that work in parallel inside the same chat. A Subagents list in the conversation shows each one with its status: Running, Done, Error, or Stopped. Select a subagent in the list to read its output in a tab of its own. Select Stop to end one you no longer need.
Set the mode, model, and reasoning effort for each chat
The mode, the model, and the reasoning effort belong to the chat, not to the workspace. Each chat carries selectors of its own in the chat panel footer, and changing those selectors in one chat leaves every other chat unchanged. The three selectors set how the agent handles your next message:
- Mode: Agent reads your workspace, writes files, and runs commands. Ask answers questions and changes nothing.
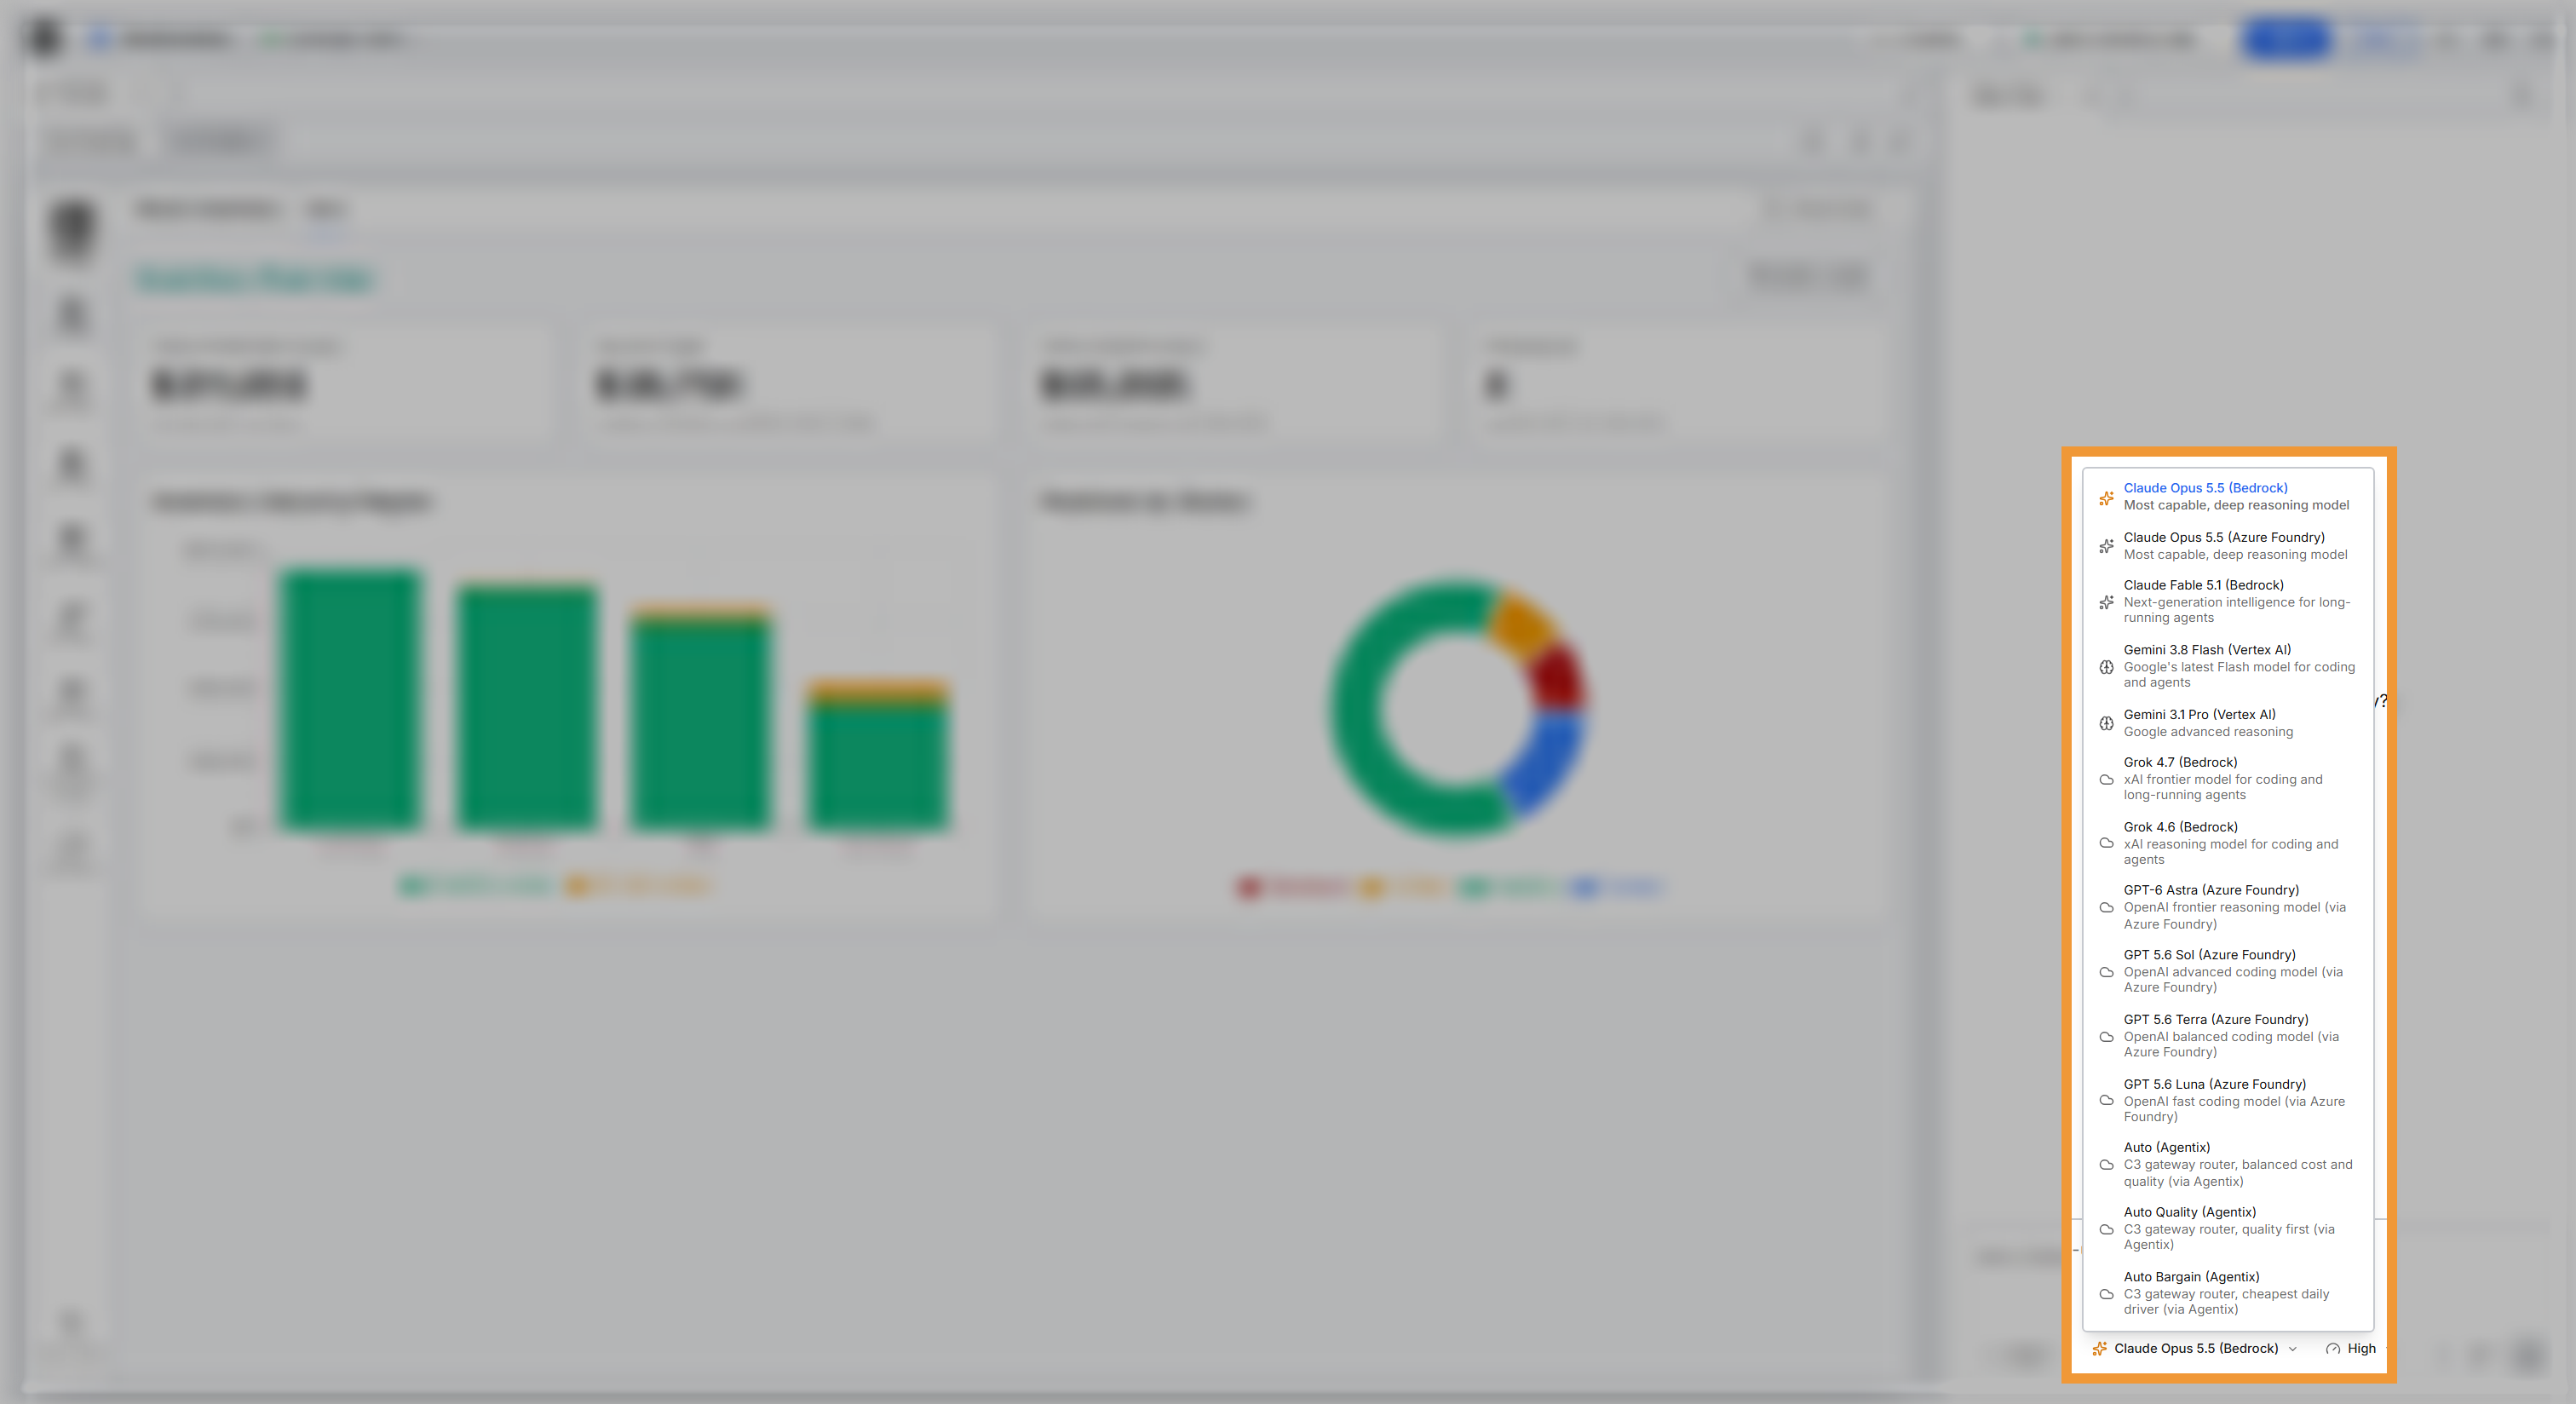
- Model: each model name ends with the service that hosts it, such as Claude Opus 5.5 (Bedrock) or Gemini 3.1 Pro (Vertex AI). The Auto, Auto Quality, and Auto Bargain entries, hosted by Agentix, route each request to a model for you. Auto balances cost and quality, Auto Quality puts quality first, and Auto Bargain picks the cheapest option.
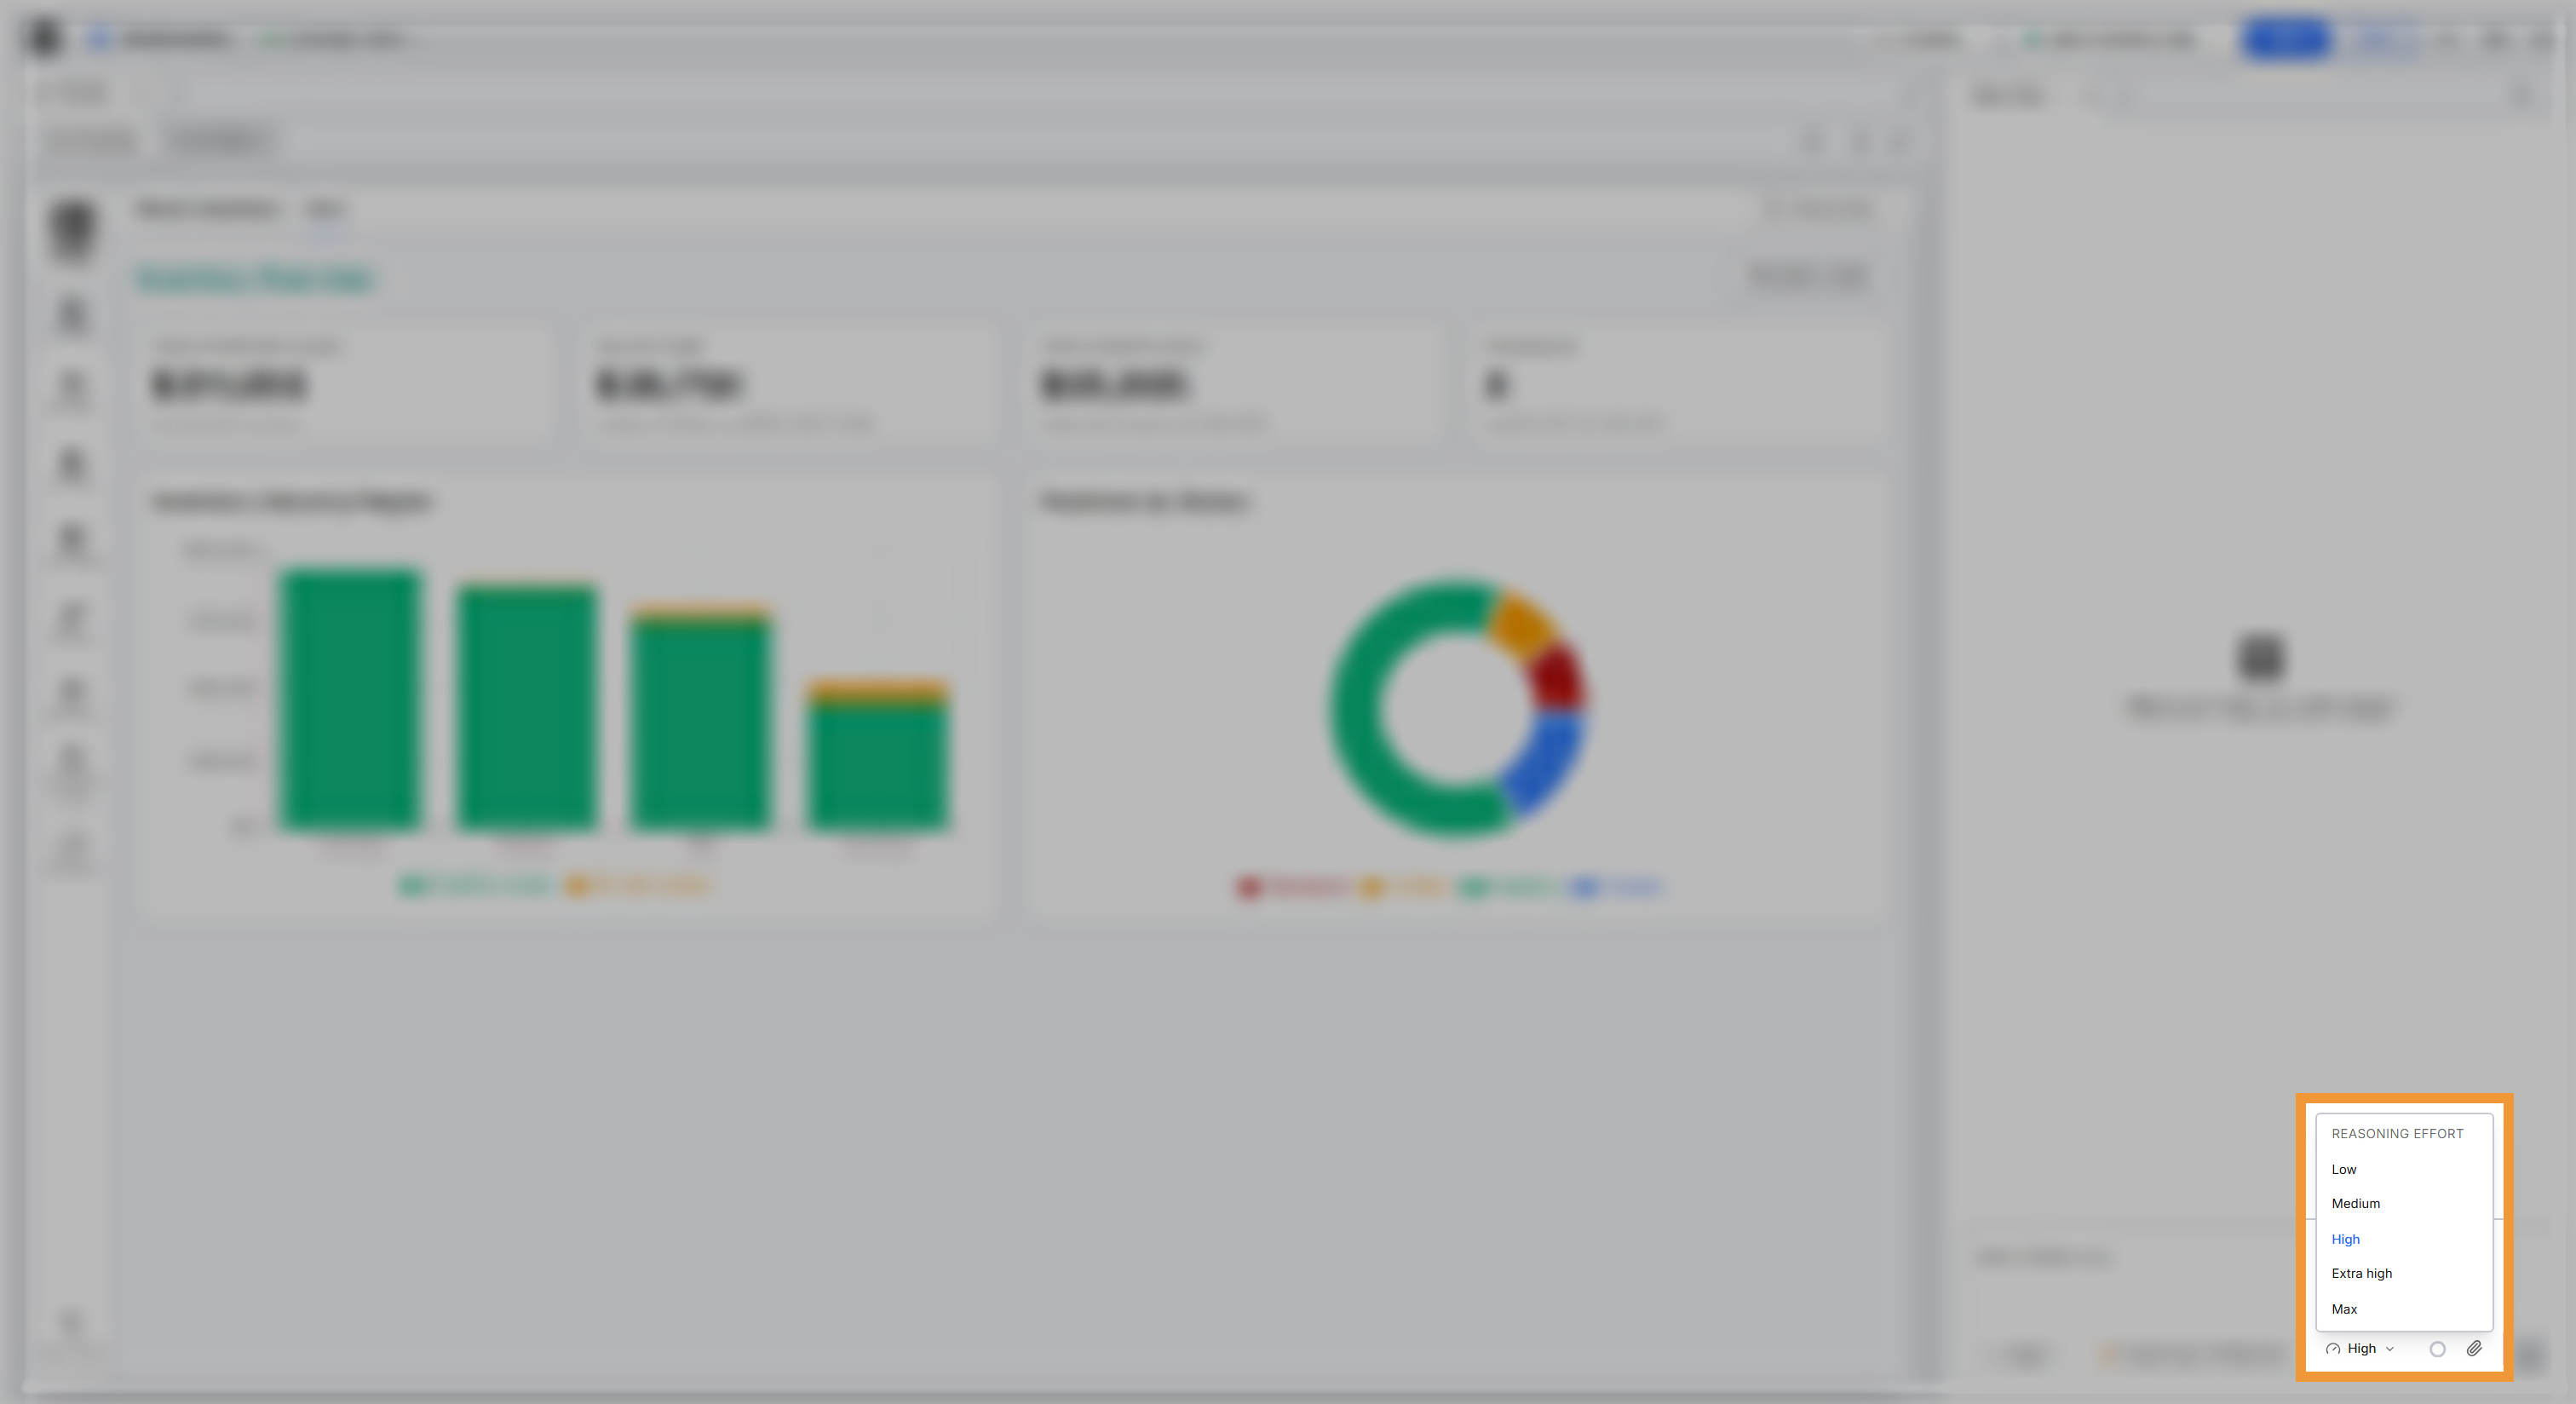
- Reasoning effort: how much the model reasons before it answers, from Low to Max for most models. Higher effort suits harder problems and can spend more of your LLM budget. The selector appears only for models with adjustable reasoning.
Open the model selector to see each model with its host and a short description:
The reasoning effort selector sits next to the model selector:
The models in your selector depend on your environment. Some environments offer only the built-in models, and others also list a self-hosted or third-party model reached through a custom endpoint. A model added this way behaves like any other model in the selector.
For writing a first prompt and refining the result, see Start from Scratch.
Track context usage
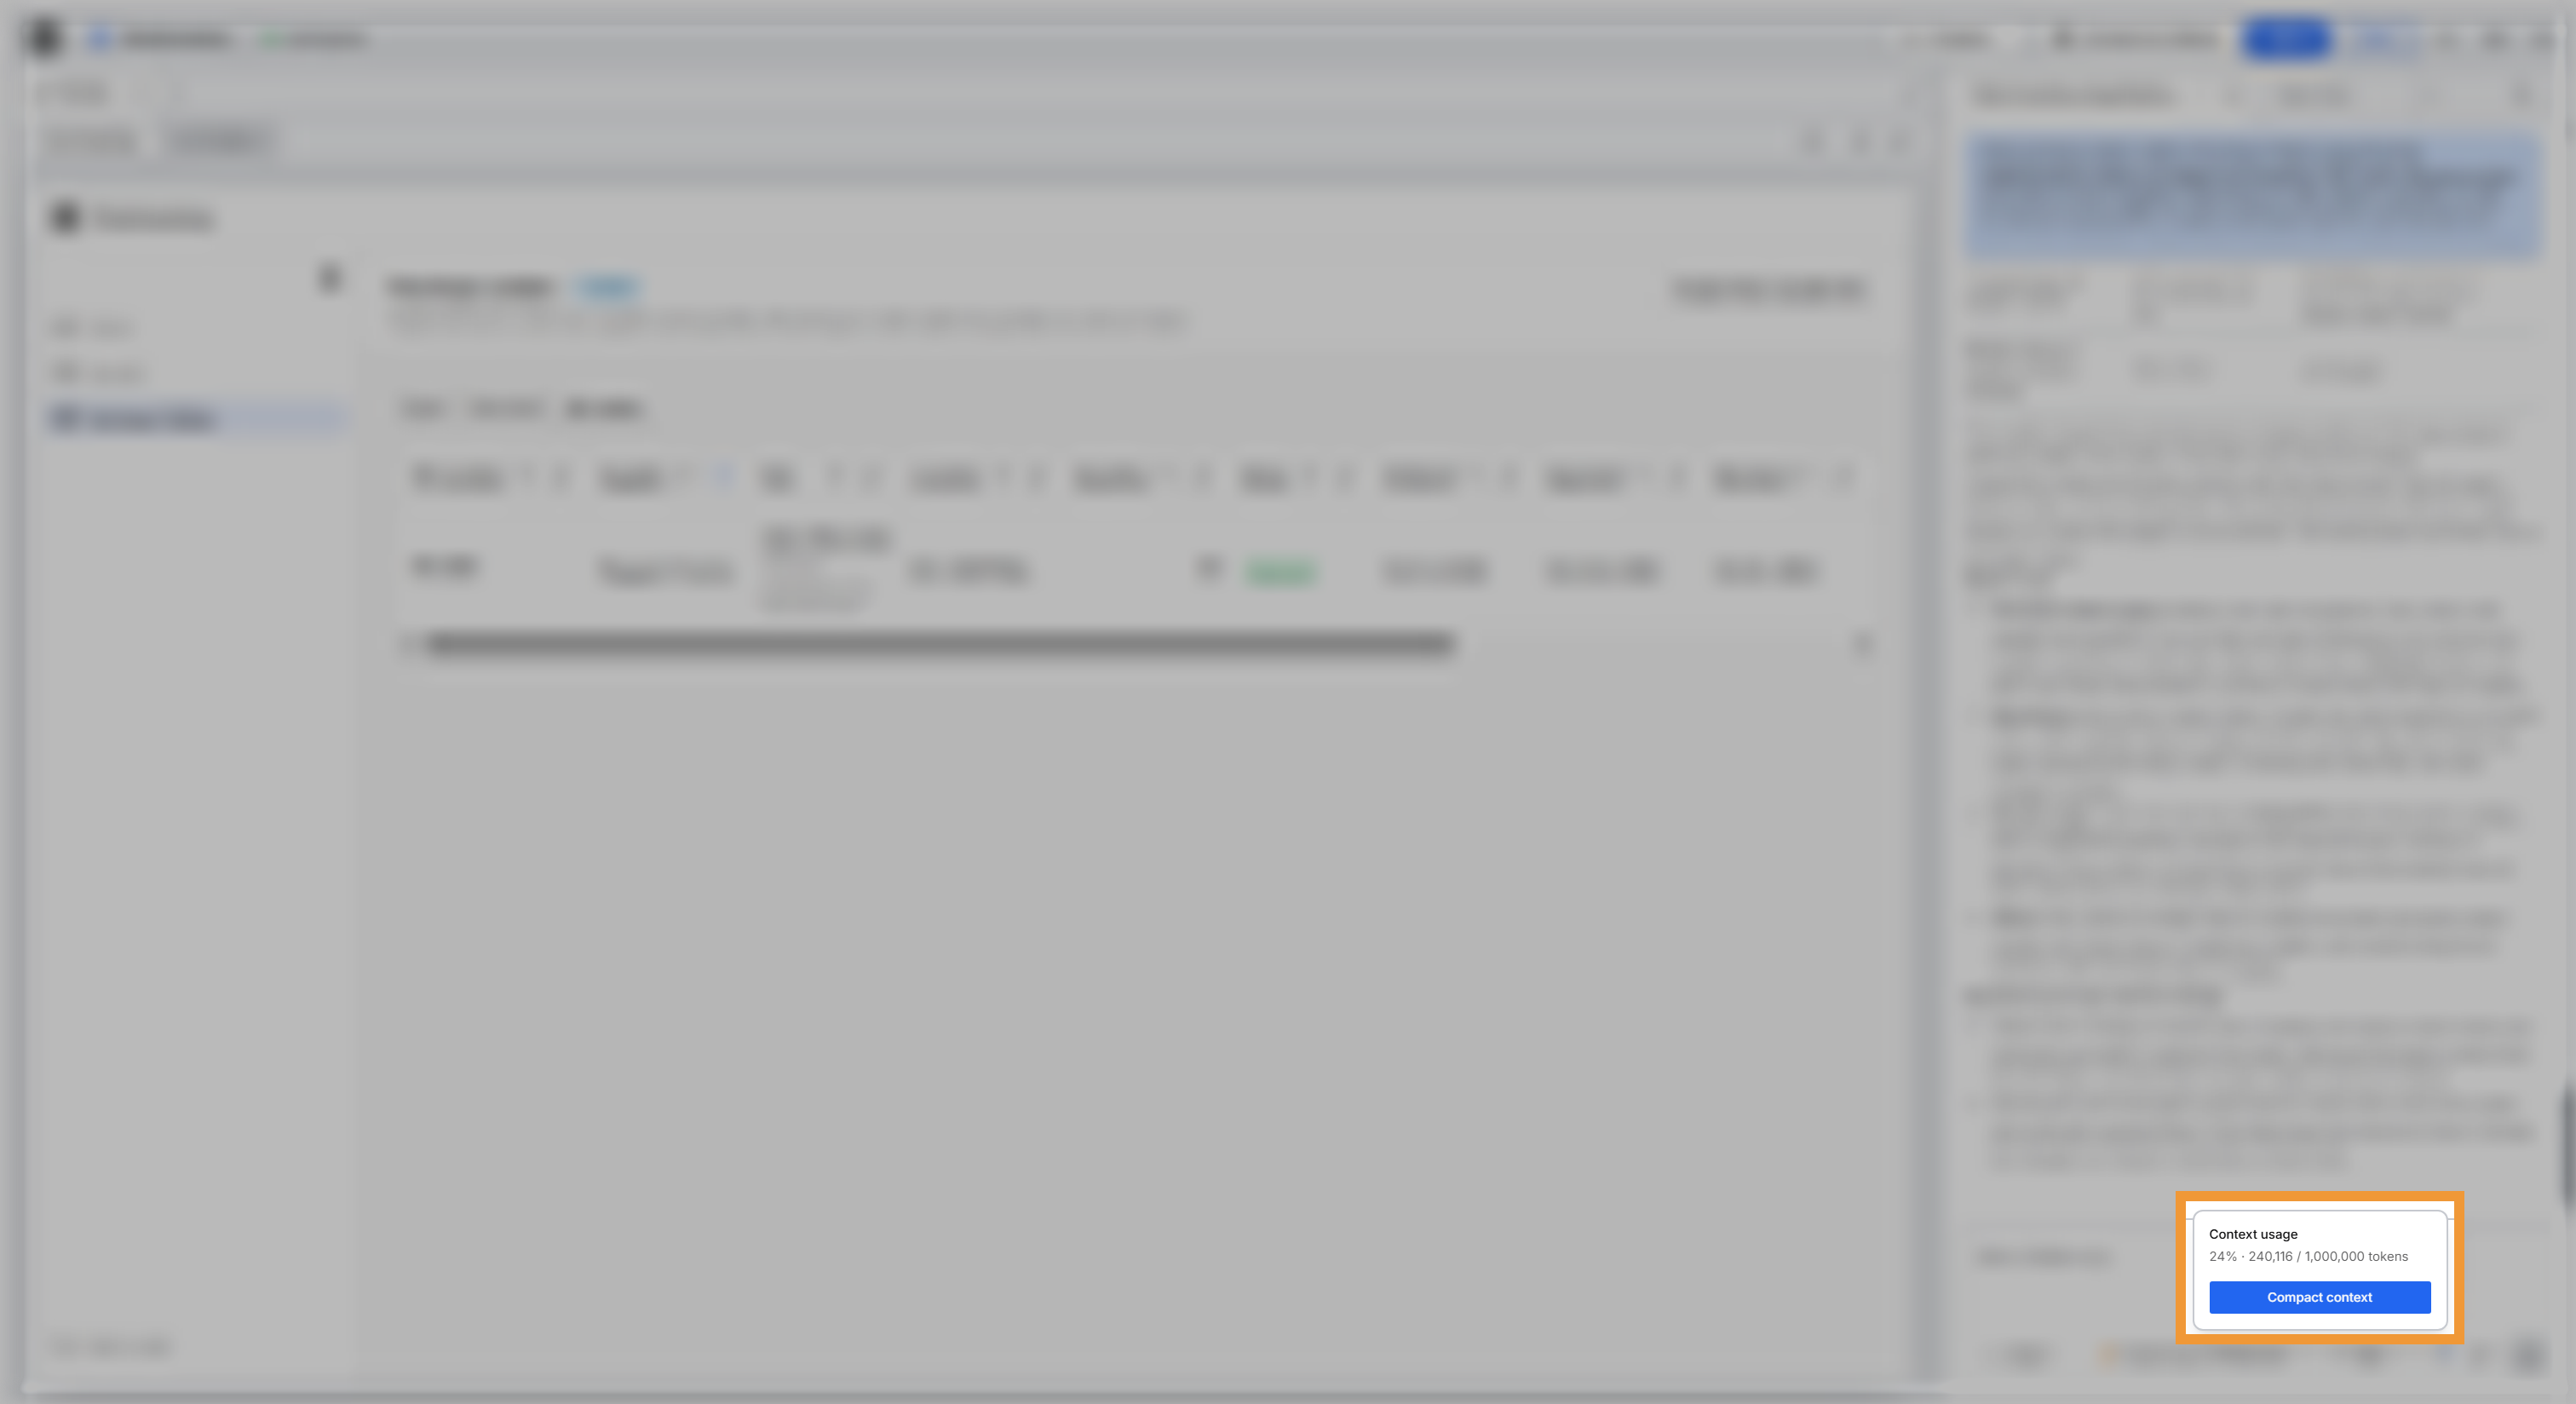
Every model works within a context window: the amount of the conversation it can hold and re-read on each turn. As a chat grows, it fills that window and leaves less room for new work. The context usage meter in the chat panel shows how full the window is and opens a panel with the exact numbers. From that panel, you can compact the conversation to free up room.
Select the meter to open a panel titled Context usage. The panel shows the percentage used and the token counts: the tokens the conversation currently occupies, out of the model's context window. These tokens measure the conversation held in the model's window, not the token quota your work counts against.
When the window is filling, compact the conversation to free up room. Select the meter, then select Compact context. C3 Code condenses the earlier messages, so the chat keeps its key context while occupying less of the window. While it runs, the ring shows a spinner and the button reads Compacting context…. When it finishes, the panel confirms Context compacted. Compacting condenses only the chat you compact, and every other chat keeps its full conversation. Compact context becomes available again after the agent finishes its current request.
Turn MCP servers on or off in a workspace
An MCP server connects the agent to an outside system, such as a documentation service or your team's issue tracker. Every MCP server you add in Settings starts out on in all your workspaces.
Unlike the mode and the model, MCP servers apply to the whole workspace, not to one chat. Select MCP, next to the model selector, to list the servers you added. Turn off a server's switch when its tools do not apply to this application, so the agent works only with the servers that fit the job. Select the switch again to turn the server back on.
The change covers every chat in the workspace and applies from your next message. It affects only you: other people who work in the workspace keep their own servers.
A warning icon on MCP means a server has an error or needs you to sign in again. Open the menu to see which server, and select Reconnect if the menu offers it.
For adding a server, reading its status, and reconnecting it, see Connect MCPs.
Reopen a chat you closed
Closing a tab keeps the chat and the full history of that chat, and shortens the tab strip to what you are working on now.
Select Search chats in the tab strip to bring a closed chat back. Search chats groups chats as Today, Yesterday, Previous 7 Days, and Older, and marks each chat that is already open with a dot. Search by name to find any chat in the workspace. Selecting a closed chat reopens that chat as a tab, with the history intact.
A reopened chat keeps its mode, and its reasoning effort returns to the model's default, such as High. Check the effort before you send the next prompt.
To keep a transcript outside the workspace, select Download chat session in the chat tab's ... menu. C3 Code saves the chat as a JSON file.
Move and zoom the chat panel
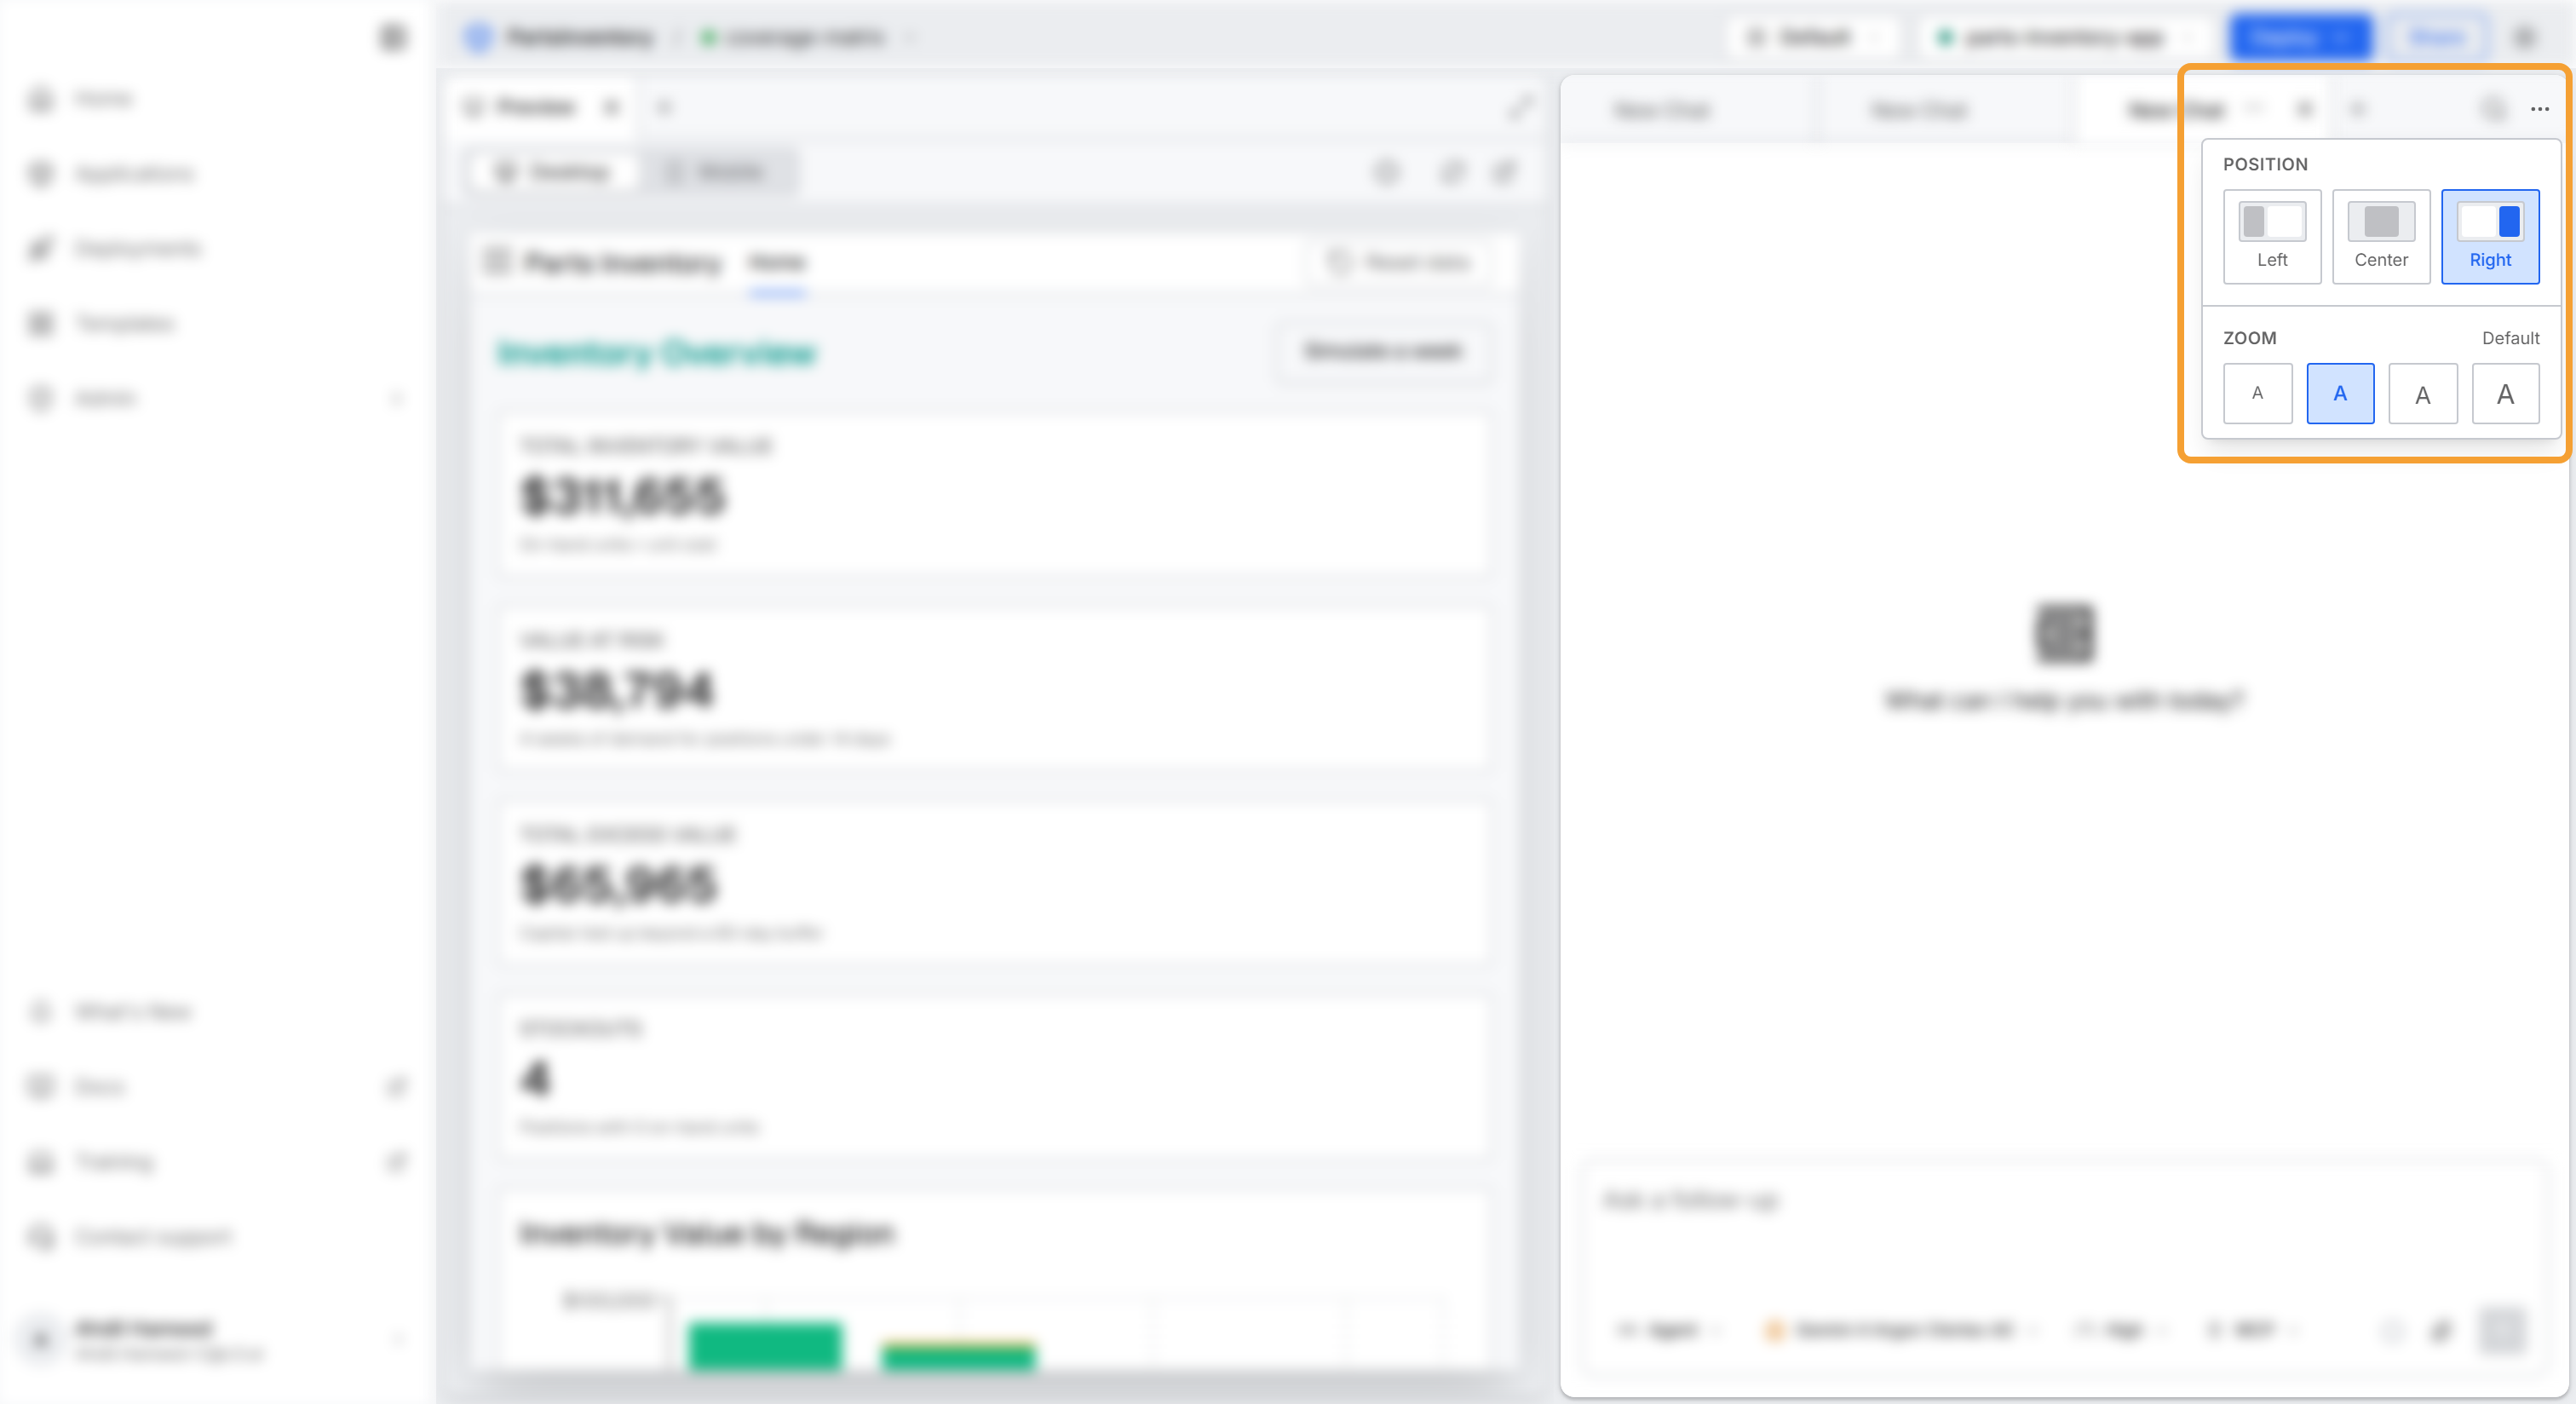
Place the chat panel where it suits the work in front of you. Select Chat actions (...) at the top of the chat panel, then choose a Position:
- Left: docks the chat on the left, next to the workspace. The chat panel starts in this position.
- Center: hides the workspace and centers the conversation, so you can focus on a long exchange with the agent.
- Right: docks the chat on the right, next to the workspace.
The same menu sets the chat's Zoom: Small, Default, Large, or Extra large. Zoom enlarges or shrinks the conversation and the chat input, and leaves the tab strip and the rest of the workspace at their usual size. The menu stays open after you pick a size, so you can compare sizes before you close it. The zoom applies to every chat, and C3 Code remembers it in your browser.
Attach files to a message
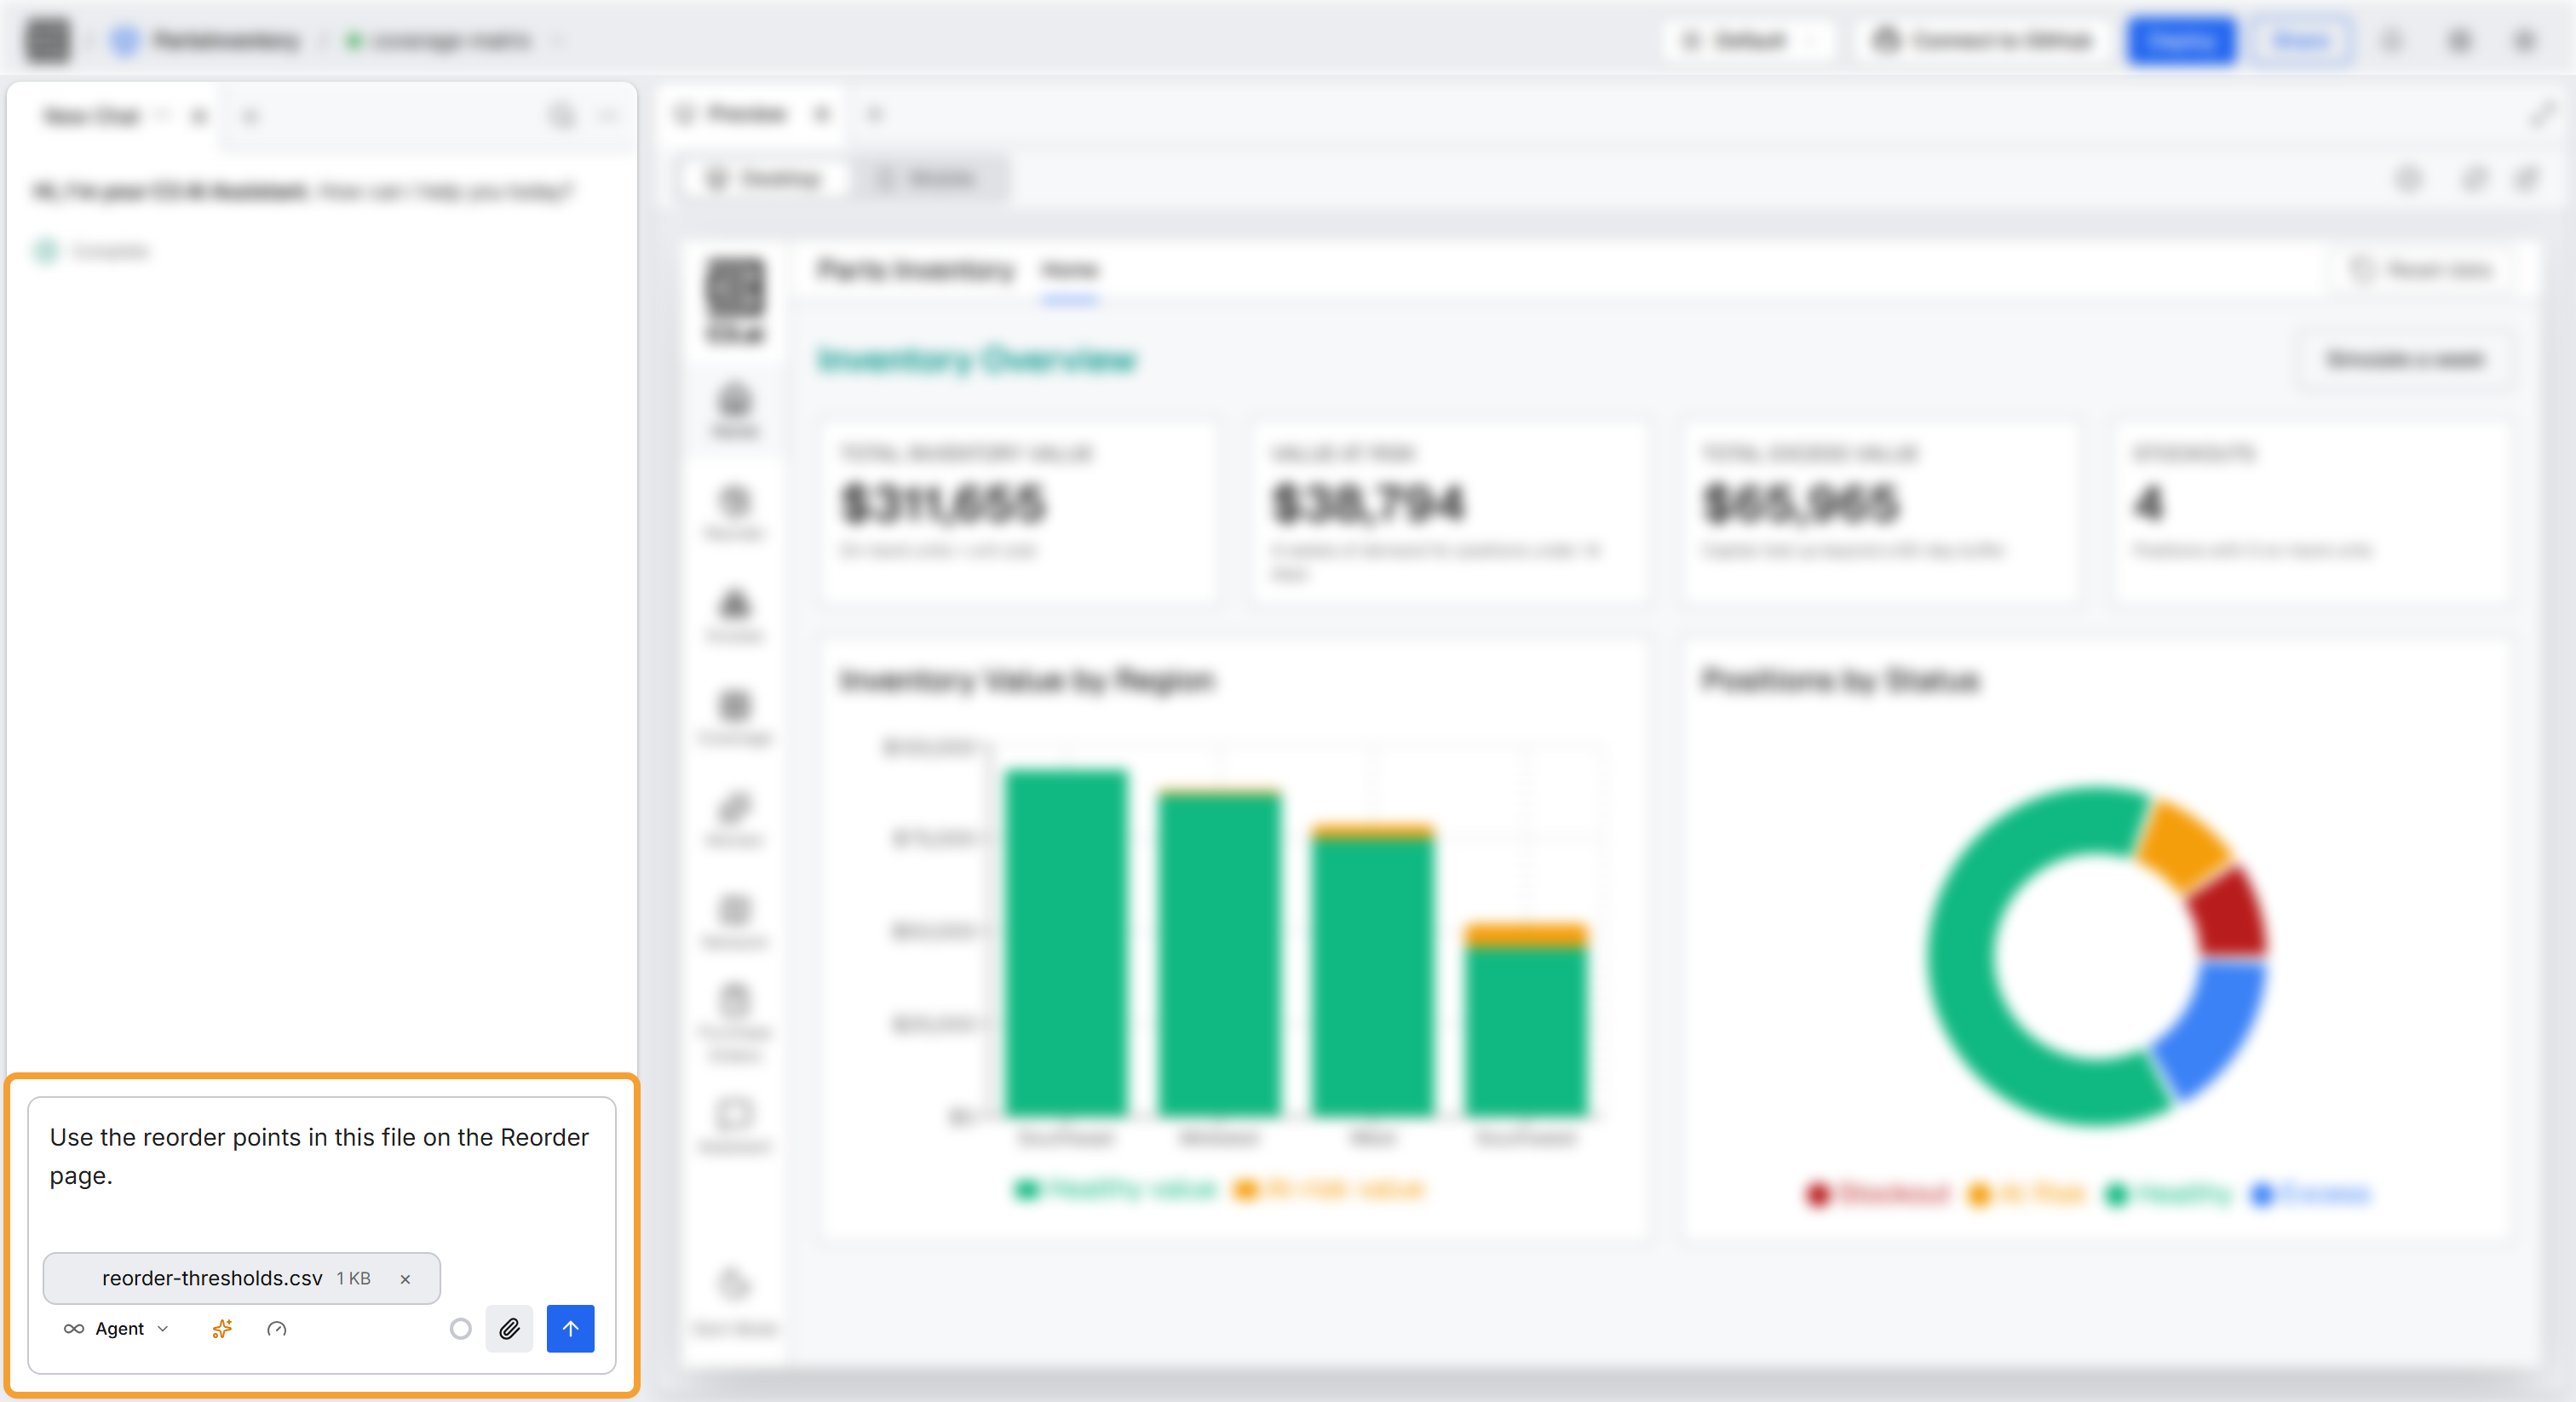
Attach a file when the agent needs material you already have, such as a specification, a spreadsheet of sample records, or a screenshot. The agent reads each attached file together with the message you send it with.
Add files to the chat input in any of three ways:
- Select Attach files and choose the files.
- Drag the files onto the chat input, and drop them when the input reads Drop files to attach....
- Paste an image, such as a screenshot, into the chat input.
The chat accepts documents, text, data, and code files, and PNG and JPEG images. It turns away video, audio, archives, executables, database files, and other image formats such as GIF and SVG. Each message carries up to 10 files, at most 20 MB each and 100 MB in total. Each file in a message needs a different name.
Rate a response
Rate a response to record whether the agent's answer helped you. Point to the agent's last message in a reply, and three controls appear under it:
- Copy: copies the response text to your clipboard.
- Good response (thumbs up): records a positive rating for that reply.
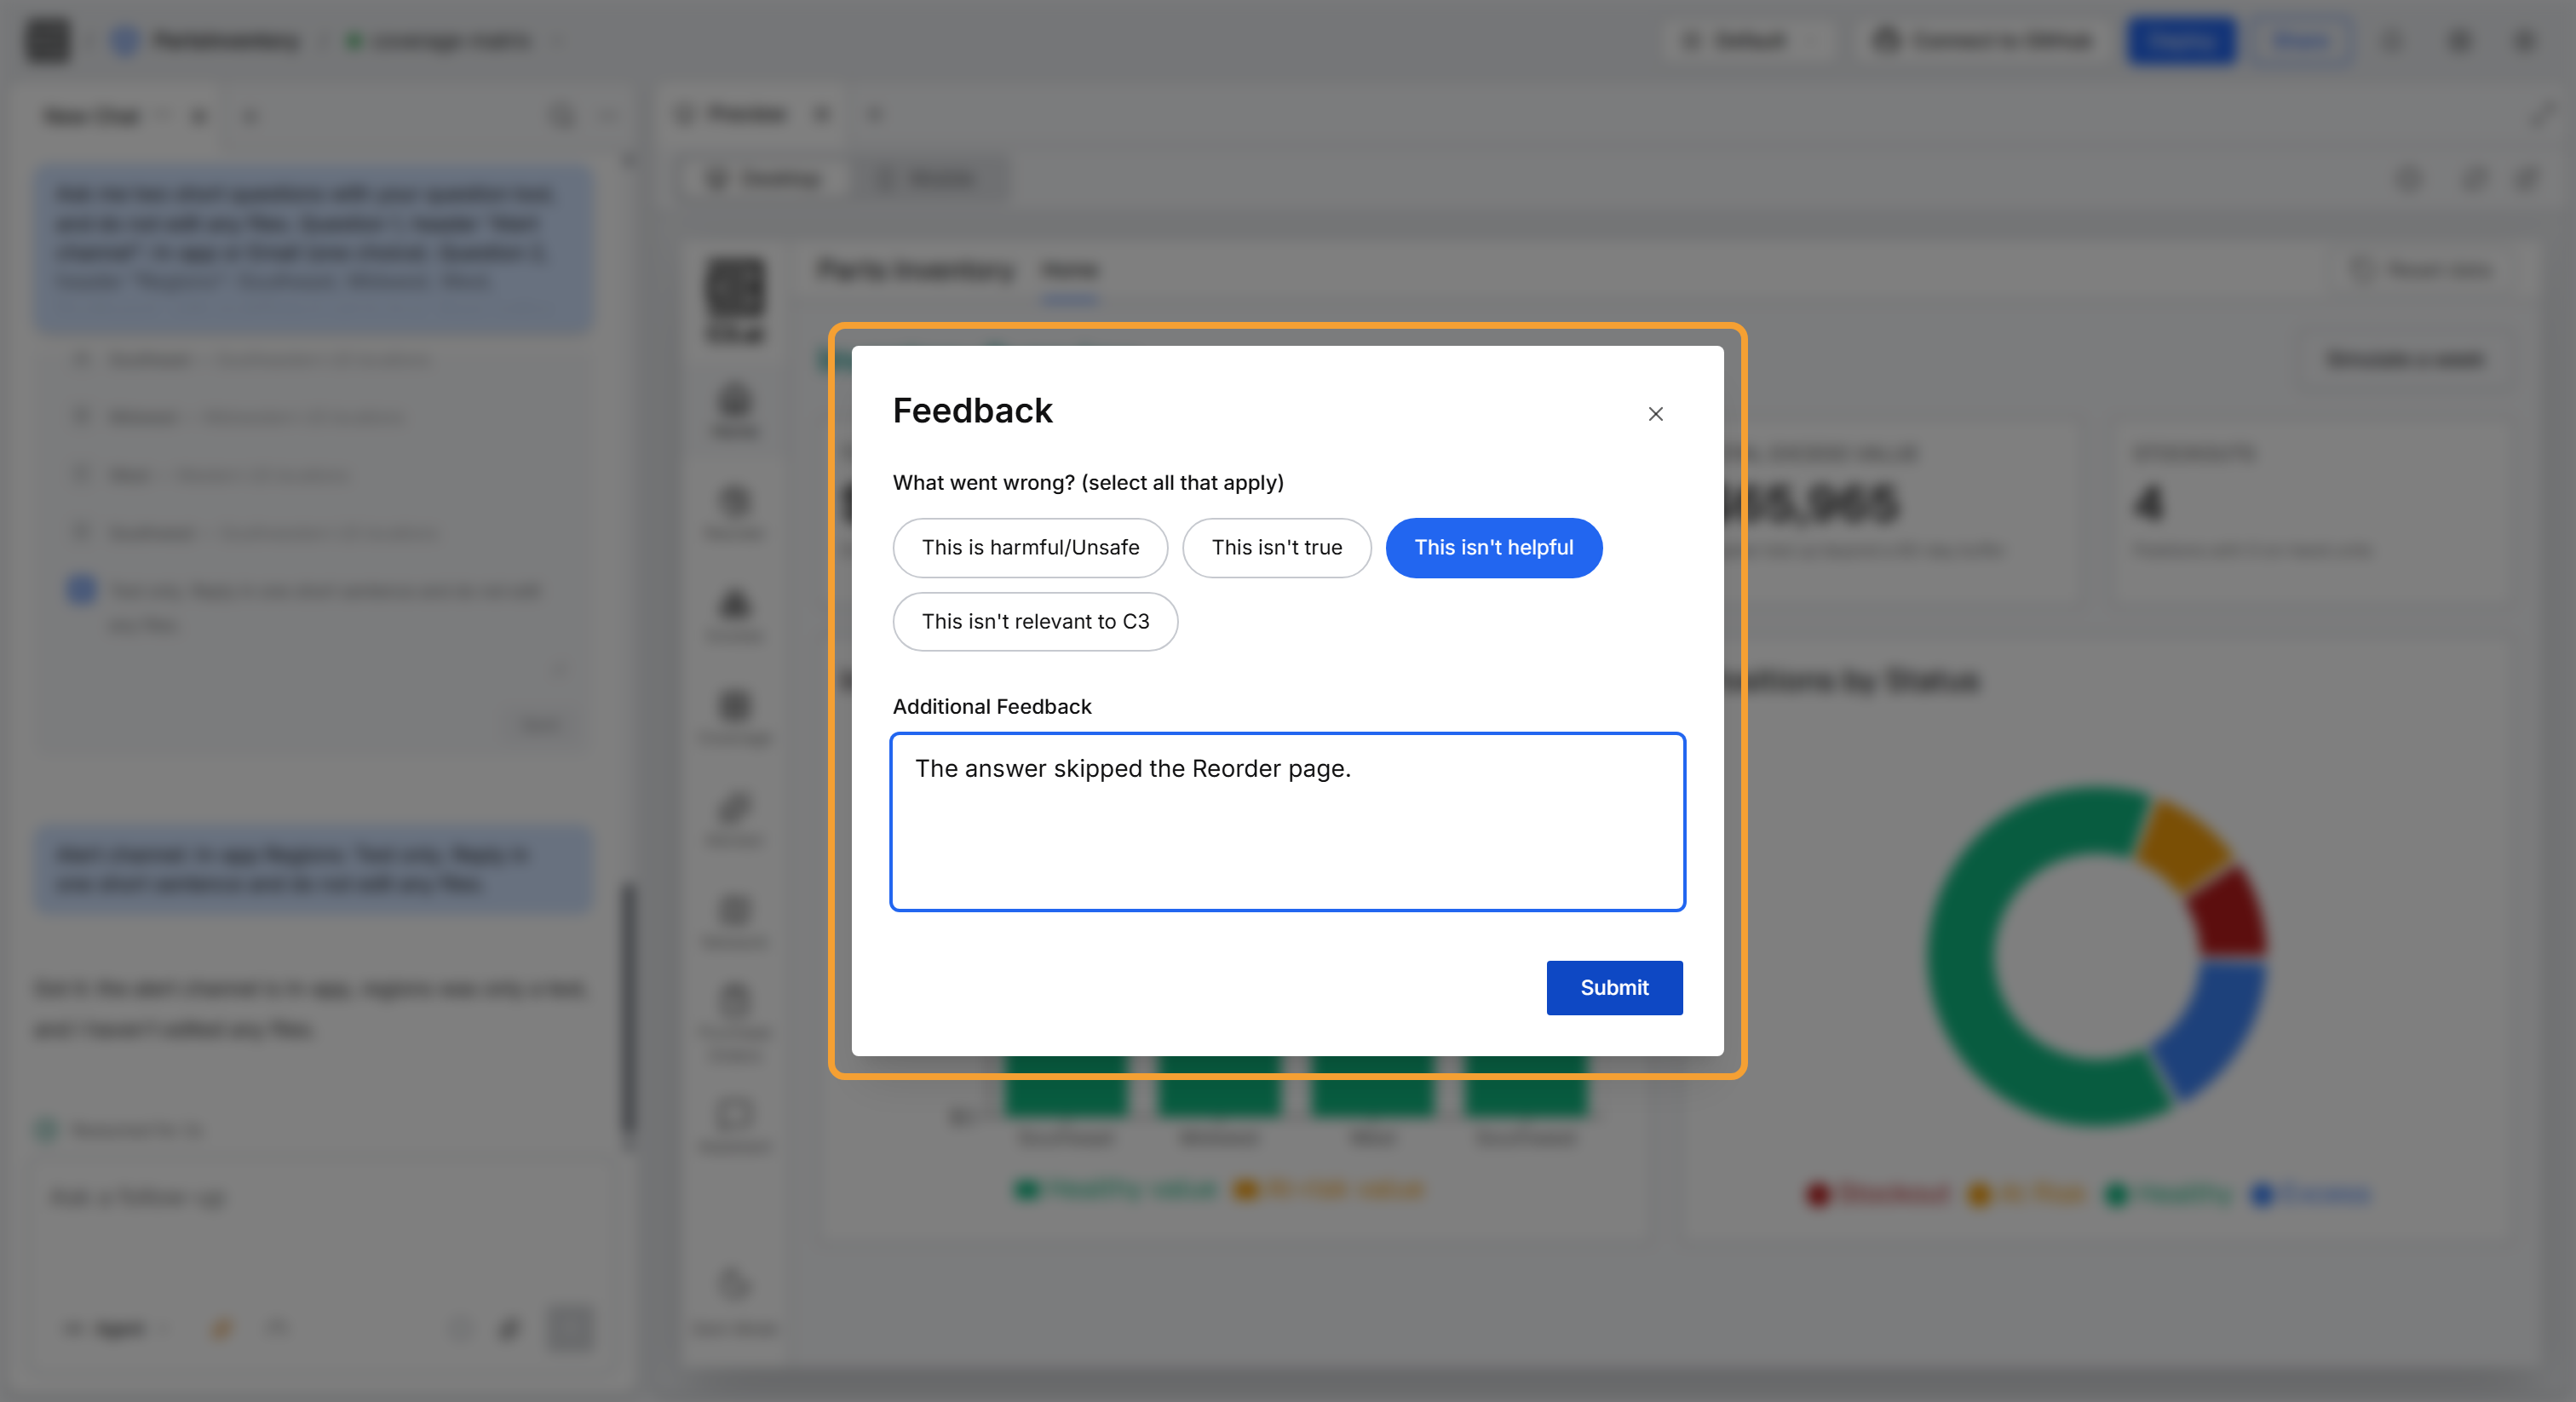
- Bad response (thumbs down): opens the Feedback dialog. Select every reason that applies, add any detail under Additional Feedback, then select Submit.
Where to go next
These pages cover the work you run across those chats: