Workflows Canvas
You have opened a workflow from the Agentic Workflows list and want to see what the agent built. The canvas shows the workflow's graph: its nodes, which are the steps, and the edges that set the order the steps run in. Read the graph, validate the workflow, and select a node to inspect it. While the workflow is unpublished, you can edit a node directly. After you publish the workflow, you can schedule its runs from the Start node.
Read the graph
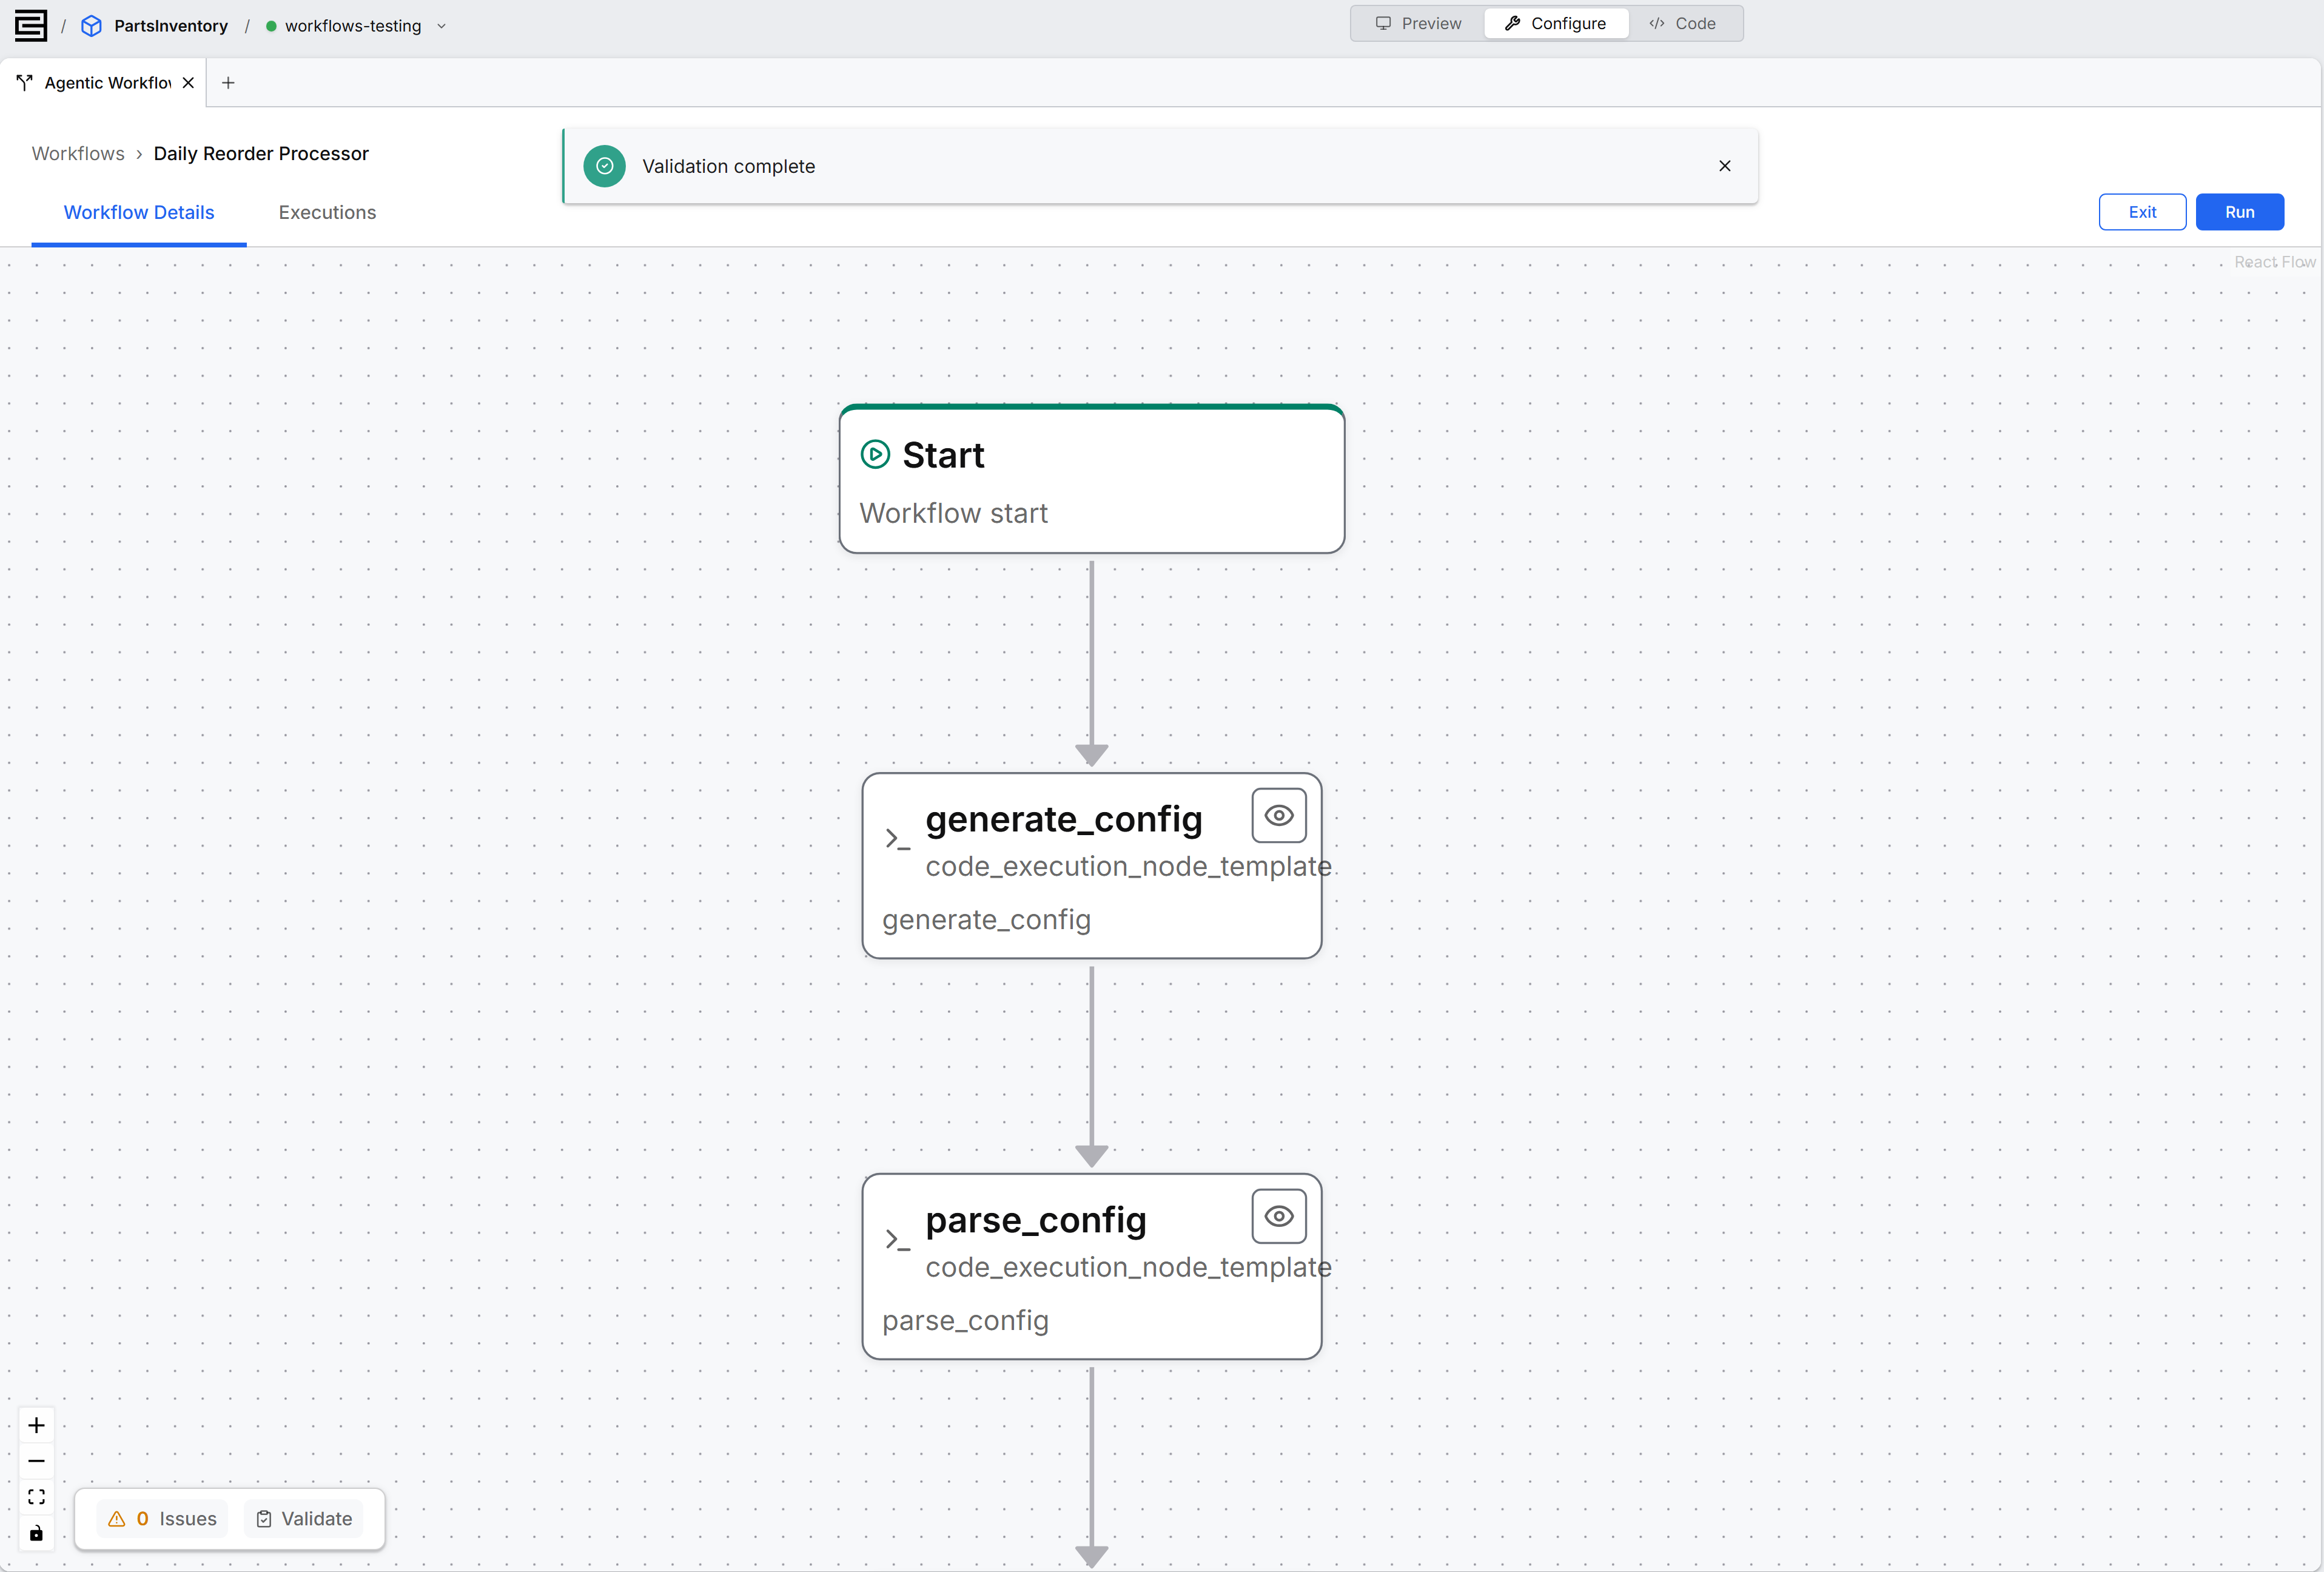
Open the workflow's Workflow Details tab to see its canvas, with every node the agent added and every edge between nodes. A run begins at the node marked Start. Use the canvas controls to zoom in and out, fit the whole graph in view, and turn panning on or off.
To add or remove a node, or to change how nodes connect, describe the change to the agent.
See Author a Workflow with the Agent.
Check whether the workflow validates
Validation checks the graph for issues that would stop the workflow from running, and the detail page shows the issue count next to the Validate Workflow button. Select Validate Workflow to check again, for example after the agent changes the graph. A count of zero means the workflow is ready to run.
Edit a node while the workflow is unpublished
Select any node other than Start to open its Configuration panel, which has three sections:
- Details: the node's template, kind, and category. The kind is START for the node where a run begins, END for a node where a run finishes, or GENERAL for any other node.
- Variables: the node's input and output fields. The node's template sets the fields you can edit: input, output, both, or neither.
- Parameters: the node's values, such as a prompt or a code snippet. Edit a parameter in its field.
Select Save Changes to keep your edits, or Cancel to discard them.
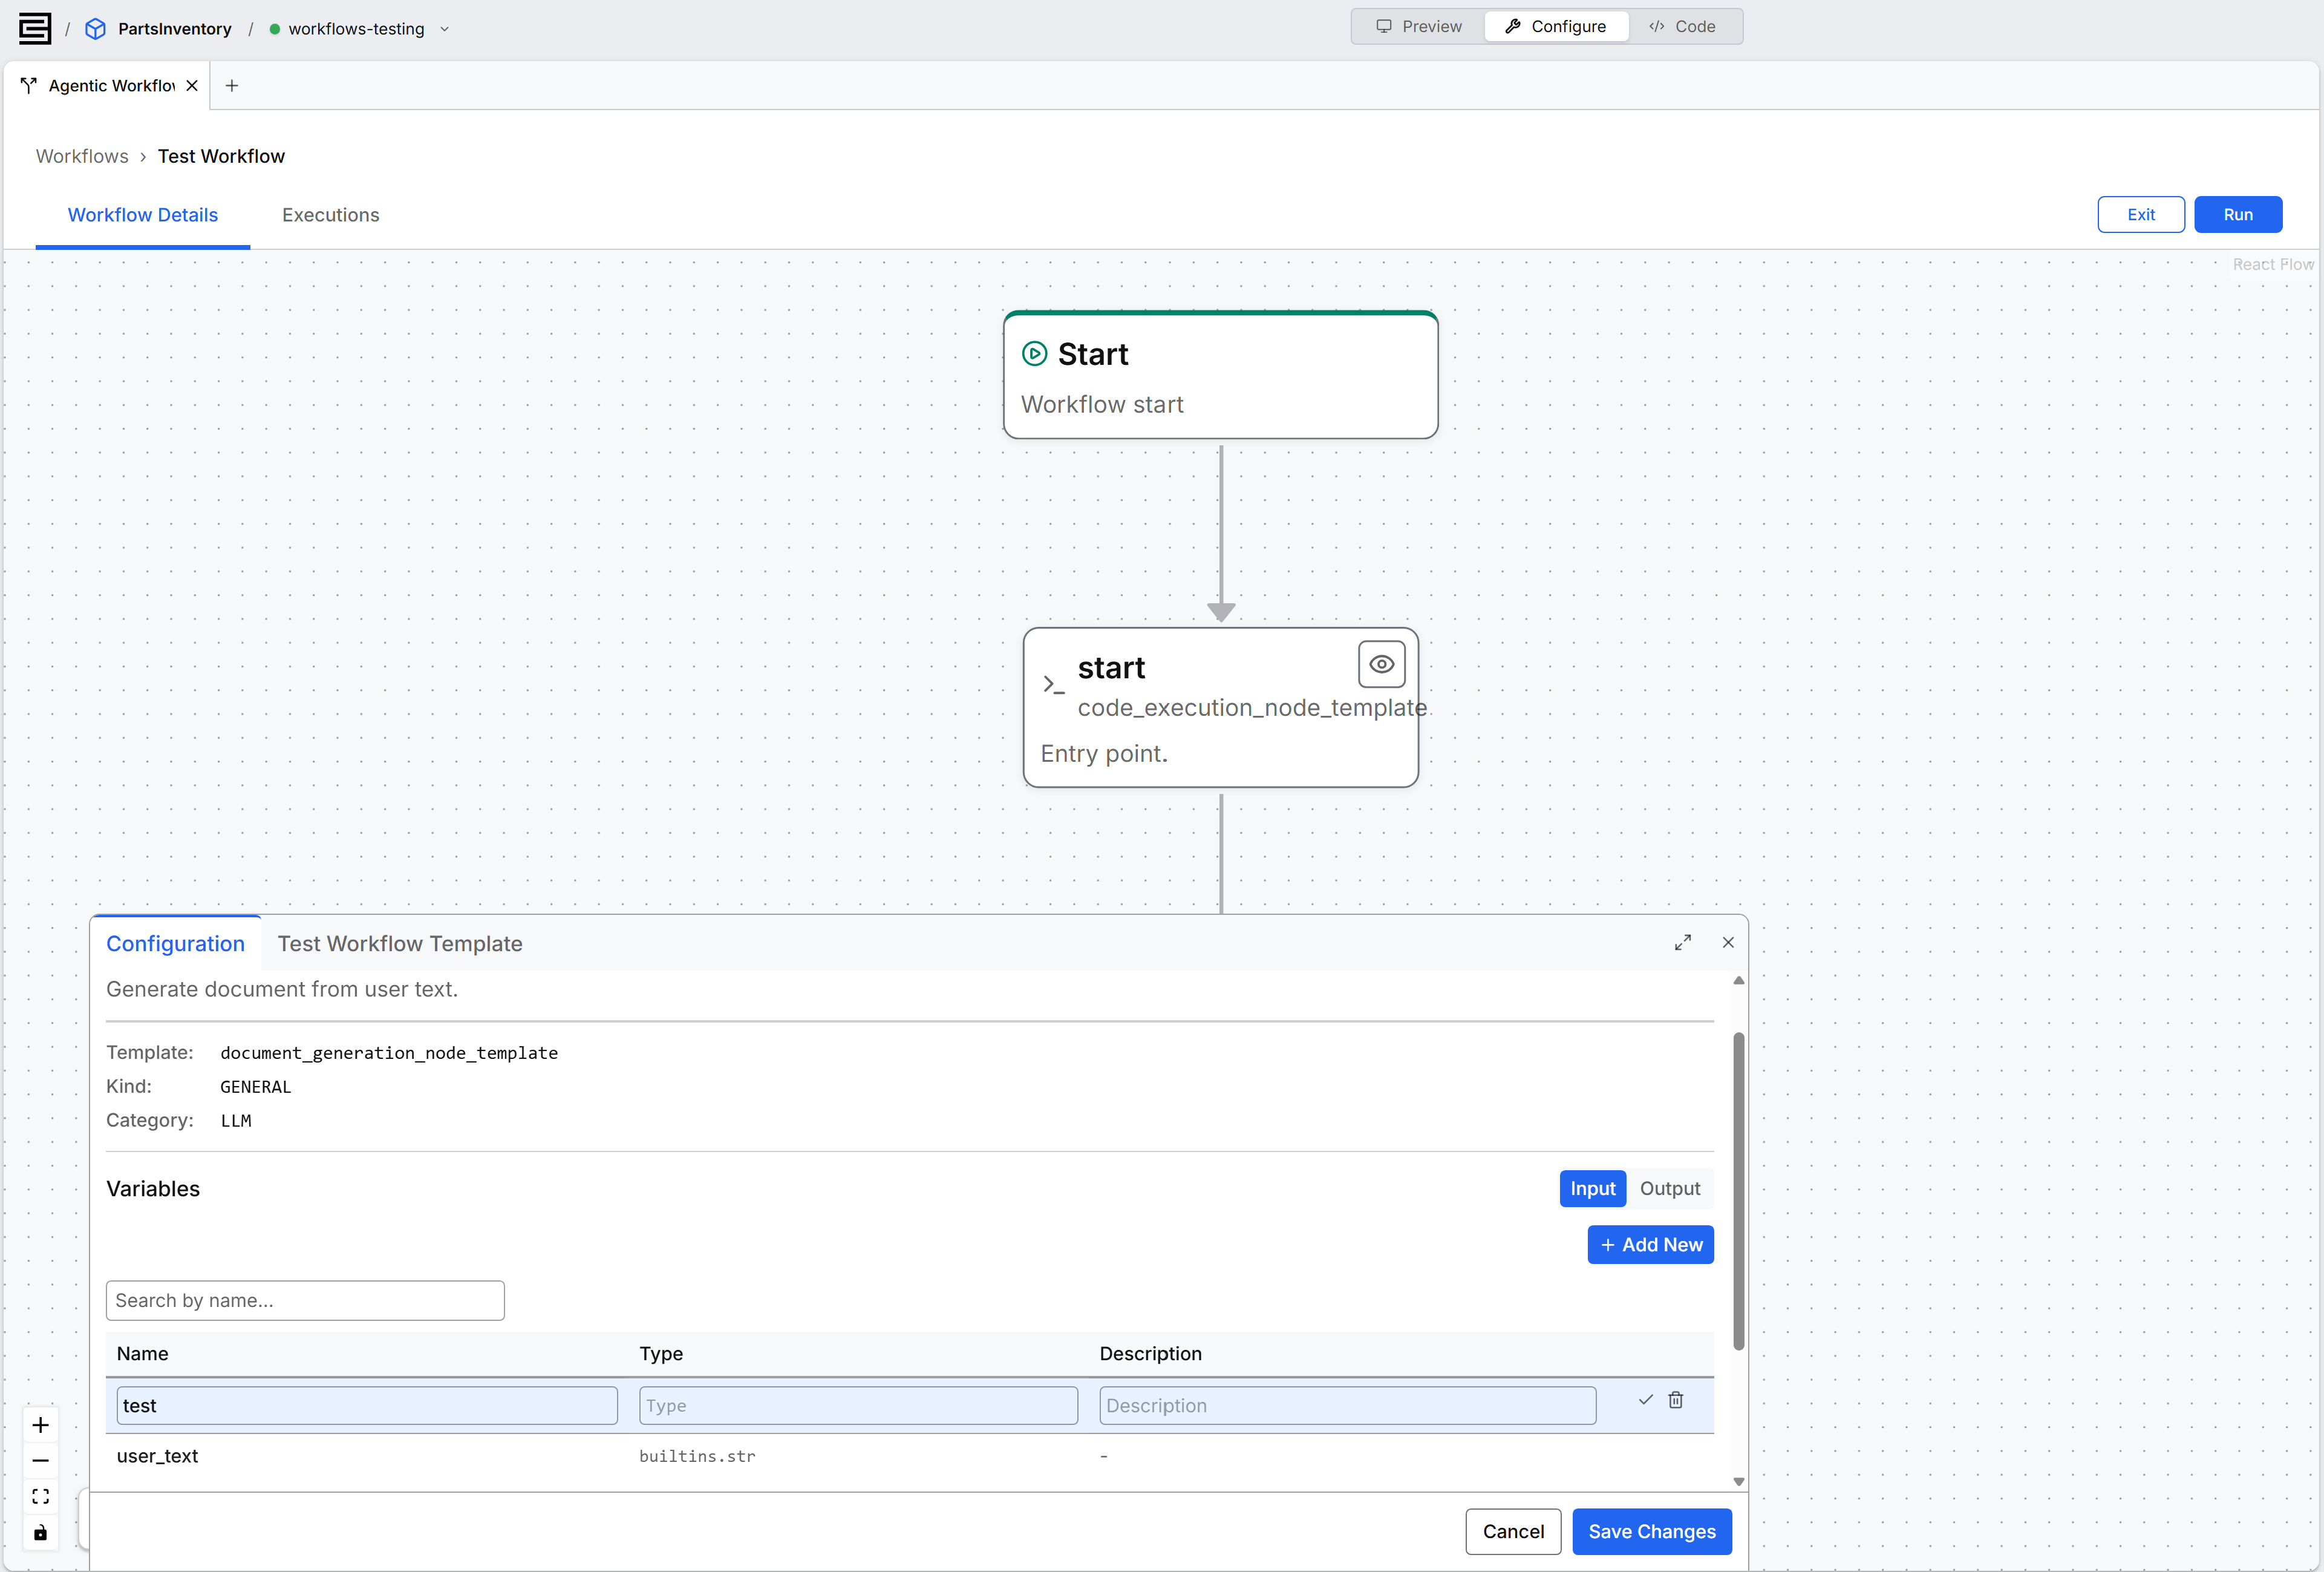
After you publish the workflow, the panel becomes view-only and the Cancel and Save Changes buttons disappear. To change a published workflow, ask the agent.
See Author a Workflow with the Agent.
Schedule a published workflow
Select the Start node to open its Schedule panel. Set an interval and a time unit, then select Schedule to run the workflow on that recurring cadence. To stop the recurring runs, select Unschedule.
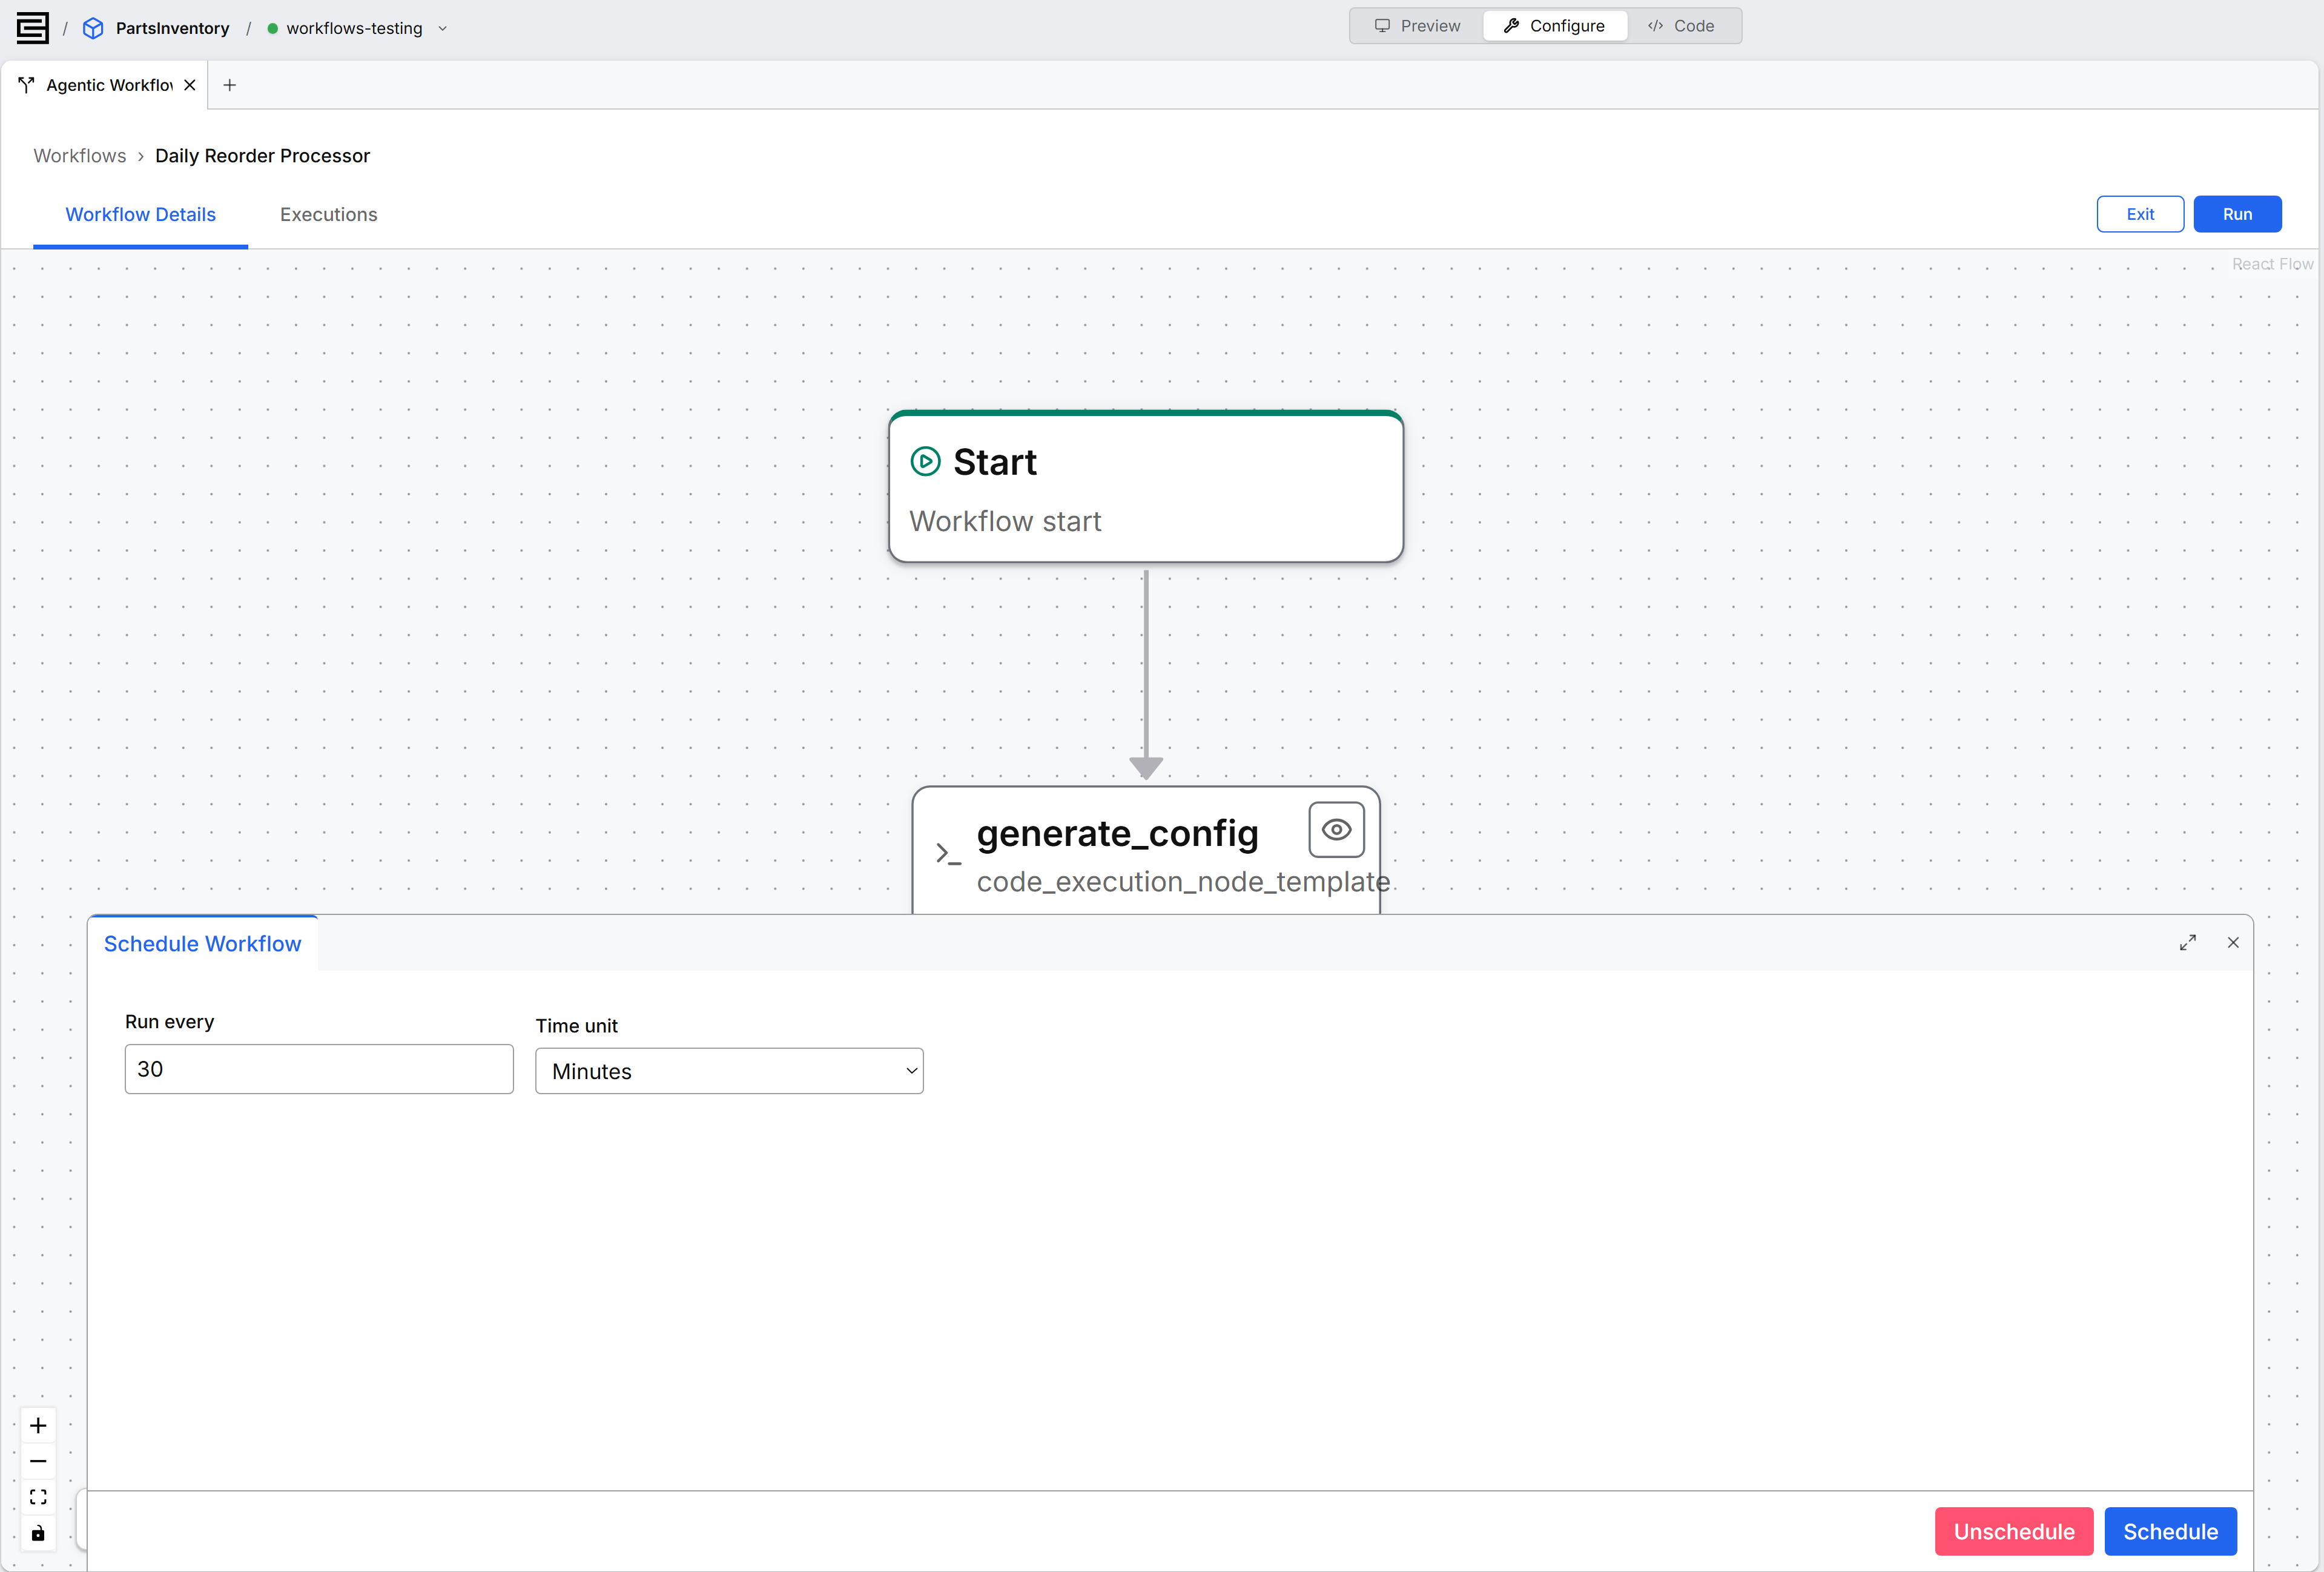
Scheduling needs a published workflow. Until you publish the workflow, Schedule and Unschedule are disabled, with the message "Workflow must be published before it can be scheduled." A schedule works for a workflow that runs without asking for input. A workflow with a step that pauses for input stays unscheduled, because no one is present to answer.