Manage Your Workflows
Every workflow the C3 Code agent builds appears in your application's Agentic Workflows list, along with the workflows your teammates build. Use the list to find, publish, clone, rename, or delete a workflow, then run the workflow and review what each run produced. Several runs of one workflow can proceed at the same time.
Create a new workflow by describing it to the agent in chat. See Author a Workflow with the Agent.
Find a workflow in the list
Open the list, then sort or scan its columns to find the workflow you want:
- Open your application in C3 Code, select + next to your open tabs, select View all, then select Agentic Workflows.
- Find the workflow by its Name, Description, Owner, Status, Schedule, Last Run, or Interrupt value.
- To sort the list, select a column header.
- To open a workflow, select its name.
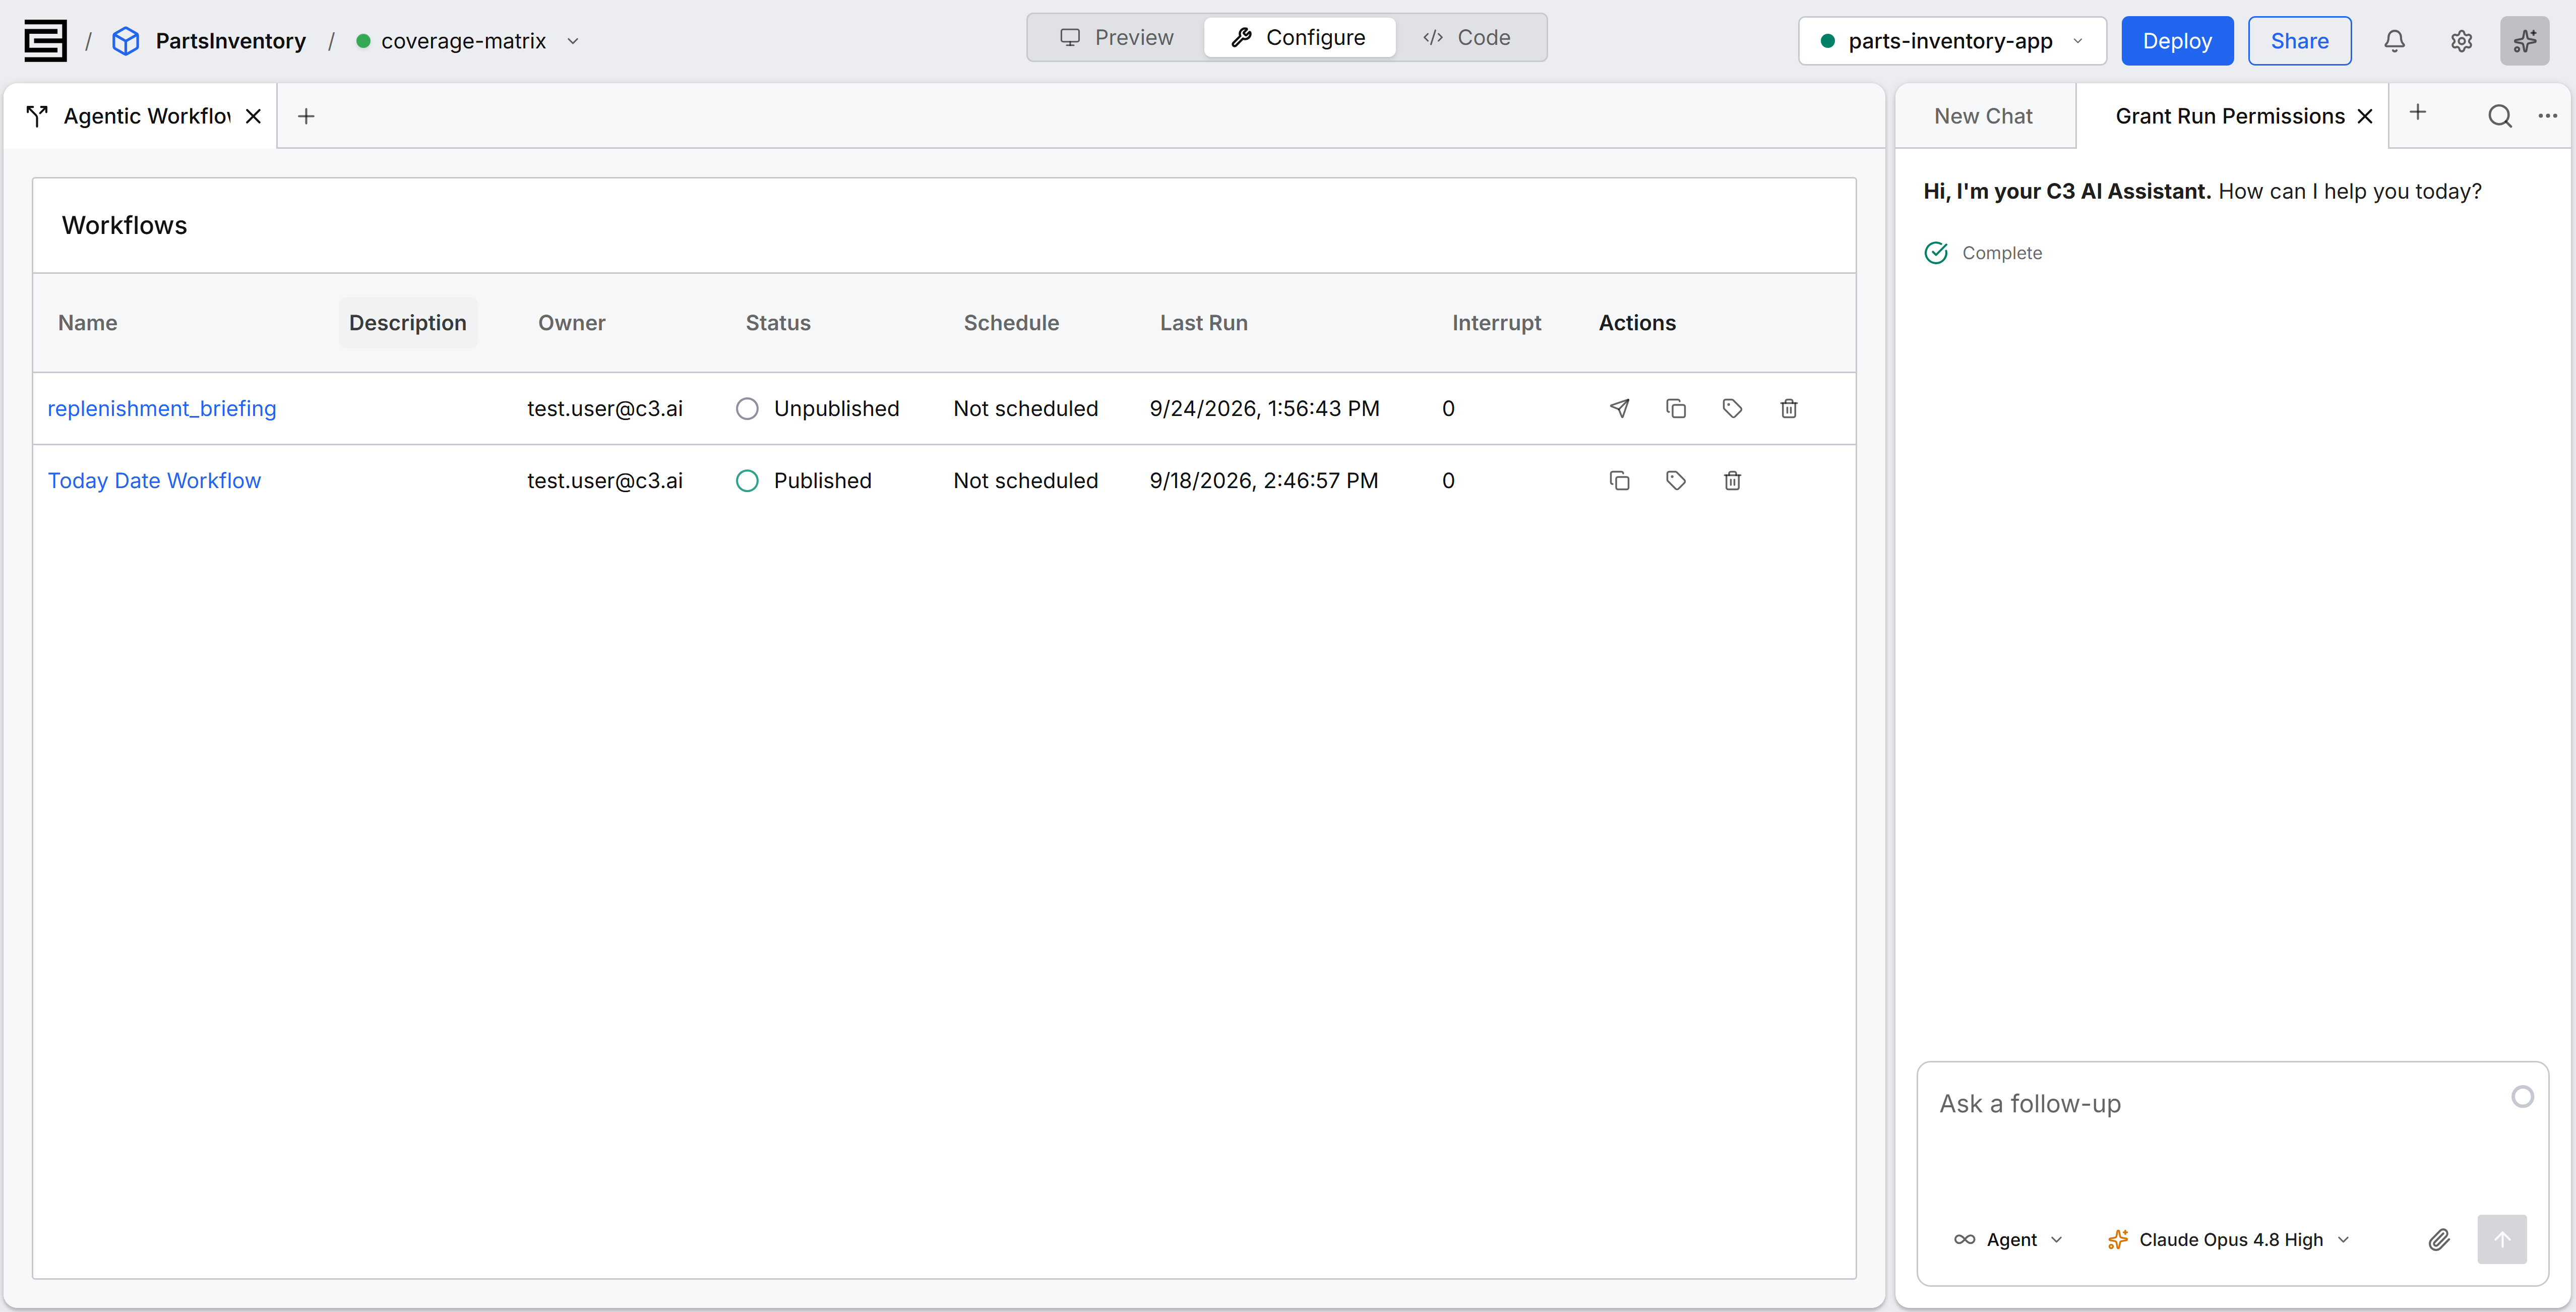
The Interrupt column counts the points in the workflow where a run pauses to ask someone for input. Status reads Published or Unpublished. Only a published workflow can run on a schedule, and Schedule shows how often that workflow runs, if it has a schedule. Set or change the schedule from the Start node on the workflow's canvas, as described in "Schedule a published workflow."
See Workflows Canvas.
Publish, clone, rename, or delete a workflow
Point to a workflow's row to show its action icons, then select one:
- Publish: publishes an unpublished workflow. The icon appears only on unpublished workflows.
- Clone: creates an unpublished copy named after the original with
_copyadded, and leaves the original unchanged. - Edit Name: renames the workflow in place.
- Delete: removes the workflow from the list, after you confirm.
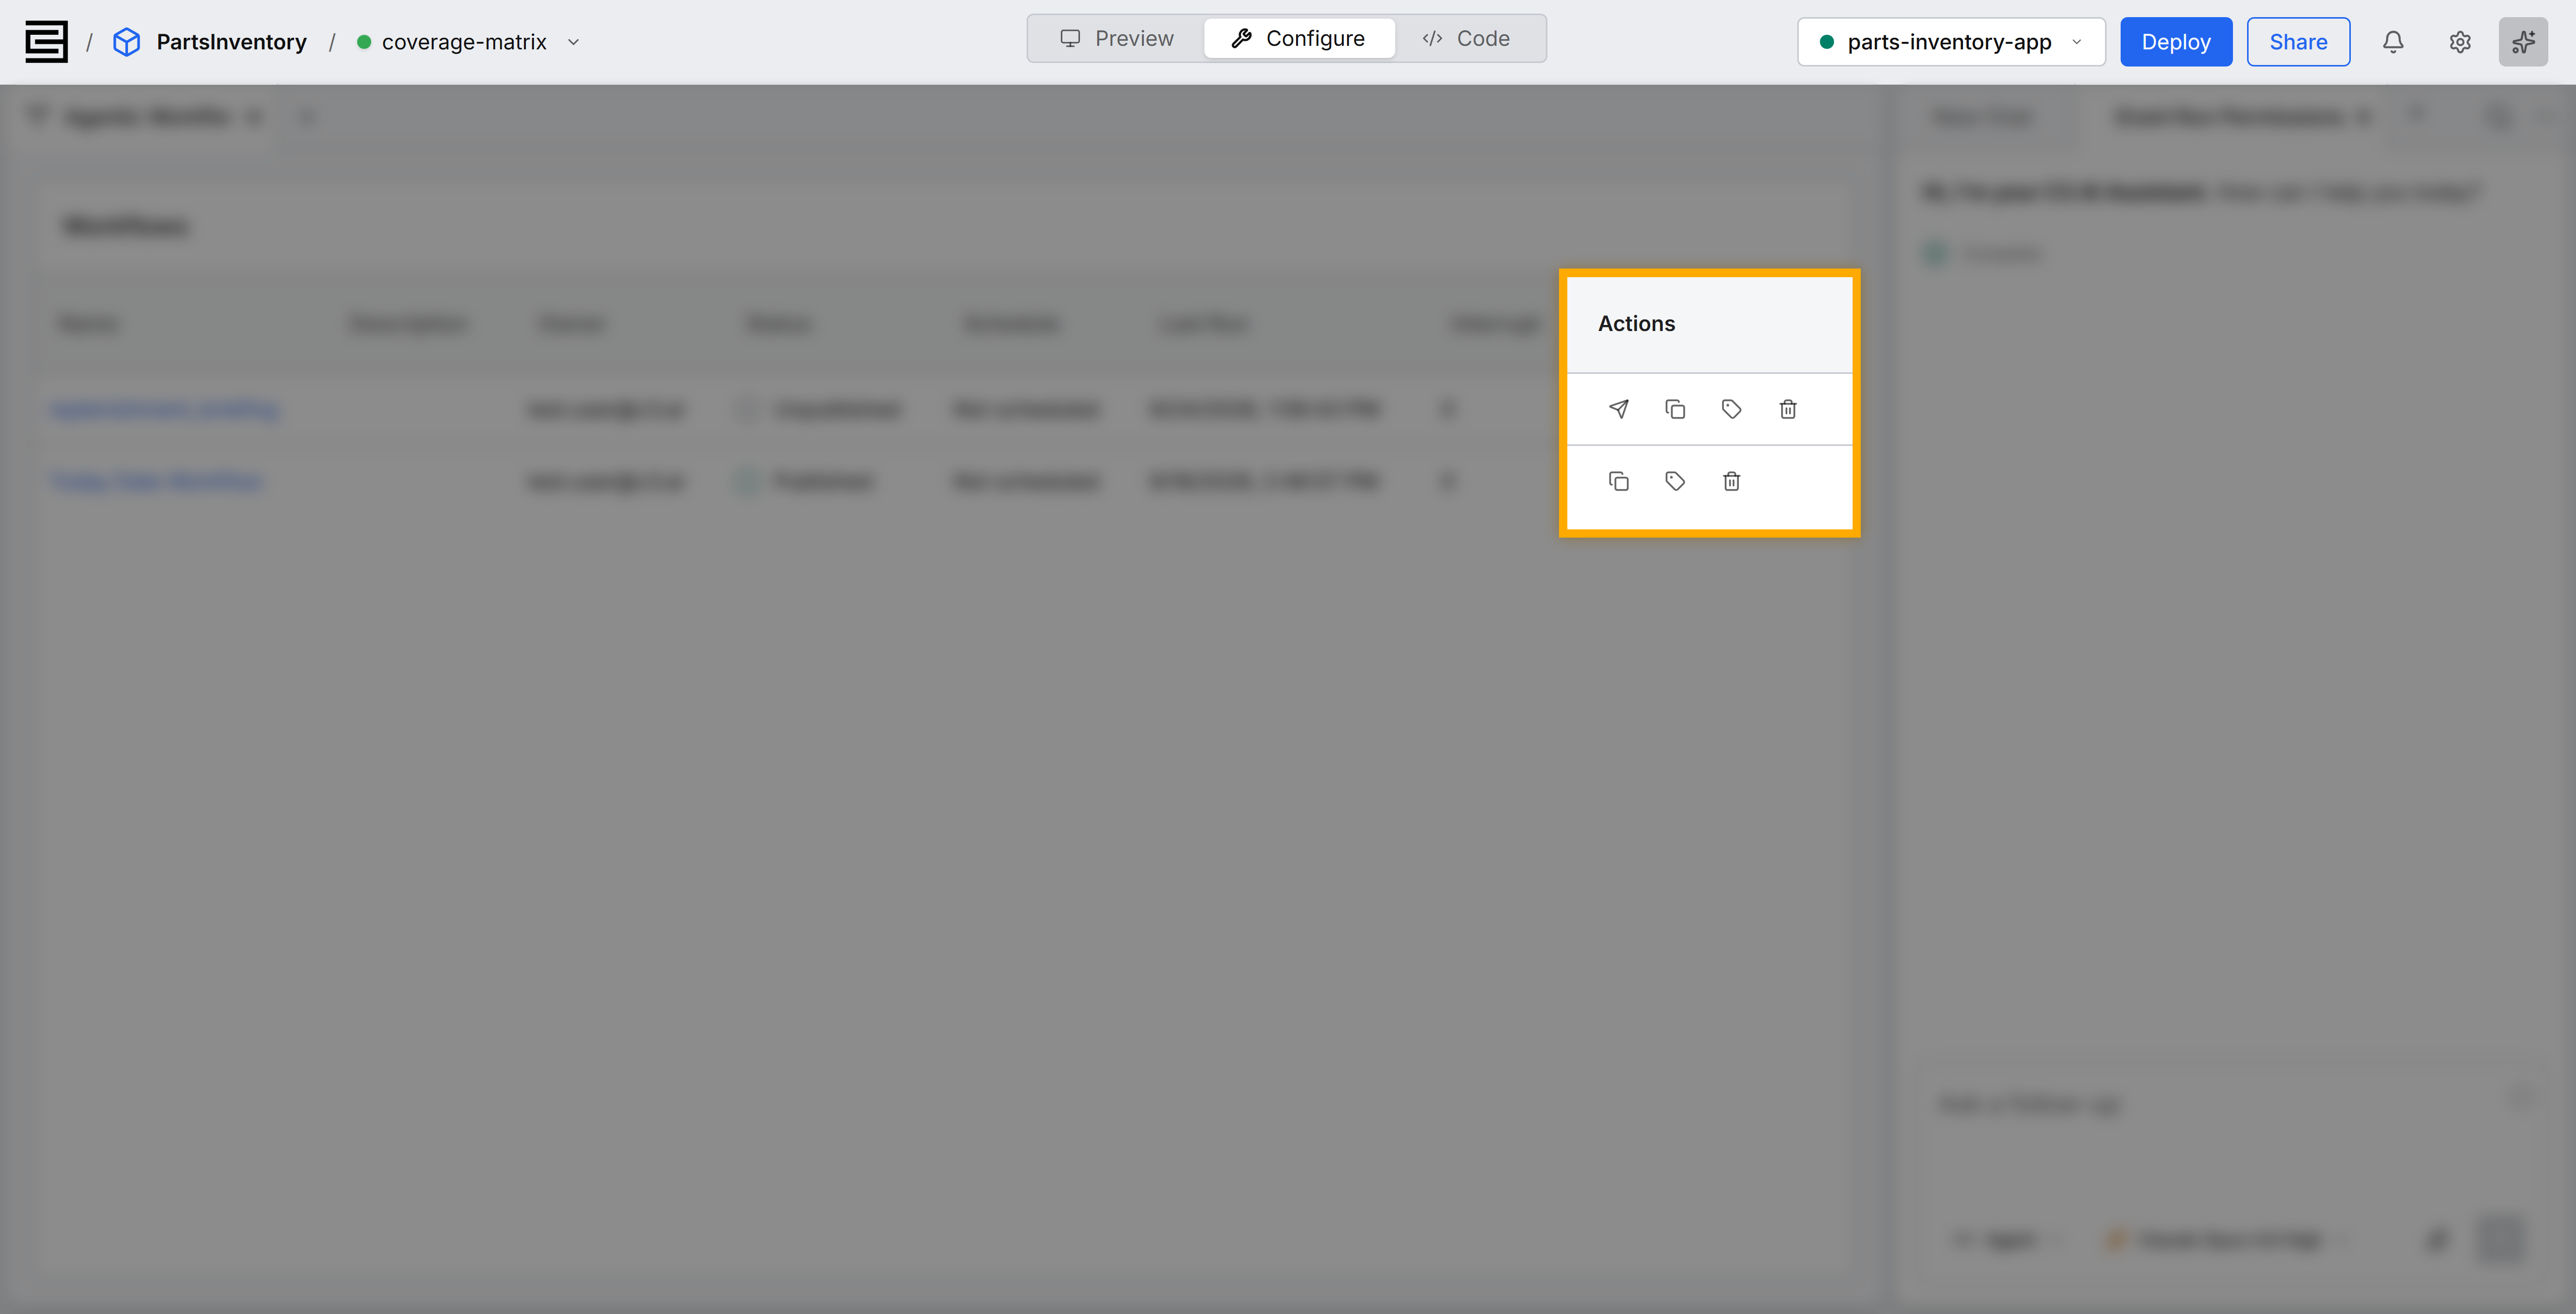
Publishing, cloning, renaming, and deleting need at least WorkflowEditor access. A user with only WorkflowViewer sees an Open link in place of the icons, and can open and view a workflow but not change it. To change a workflow, ask someone with WorkflowEditor access, or ask the agent to do it for you in a conversation.
Run a workflow
Select Run on the workflow's detail page. If the workflow needs input before it starts, it shows a form. Fill in the form and submit it to start the run.
Running a workflow needs at least WorkflowEditor access. A user with only WorkflowViewer sees Run disabled, with the tooltip "You have workflow viewer access; Run is not available." To run the workflow, ask someone with WorkflowEditor access, or ask the agent in a conversation to start the run for you.
Review a run's output
Open the workflow's Executions tab and select a run to see what it produced:
- Open the workflow's Executions tab.
- Select a run in Run History to see its nodes and status.
- Select Expand output on a node to see what that node produced.
A run's status reads Running, Interrupted, Completed, or Error. An interrupted run is waiting for someone's input. To narrow Run History to runs with one status, filter by status.
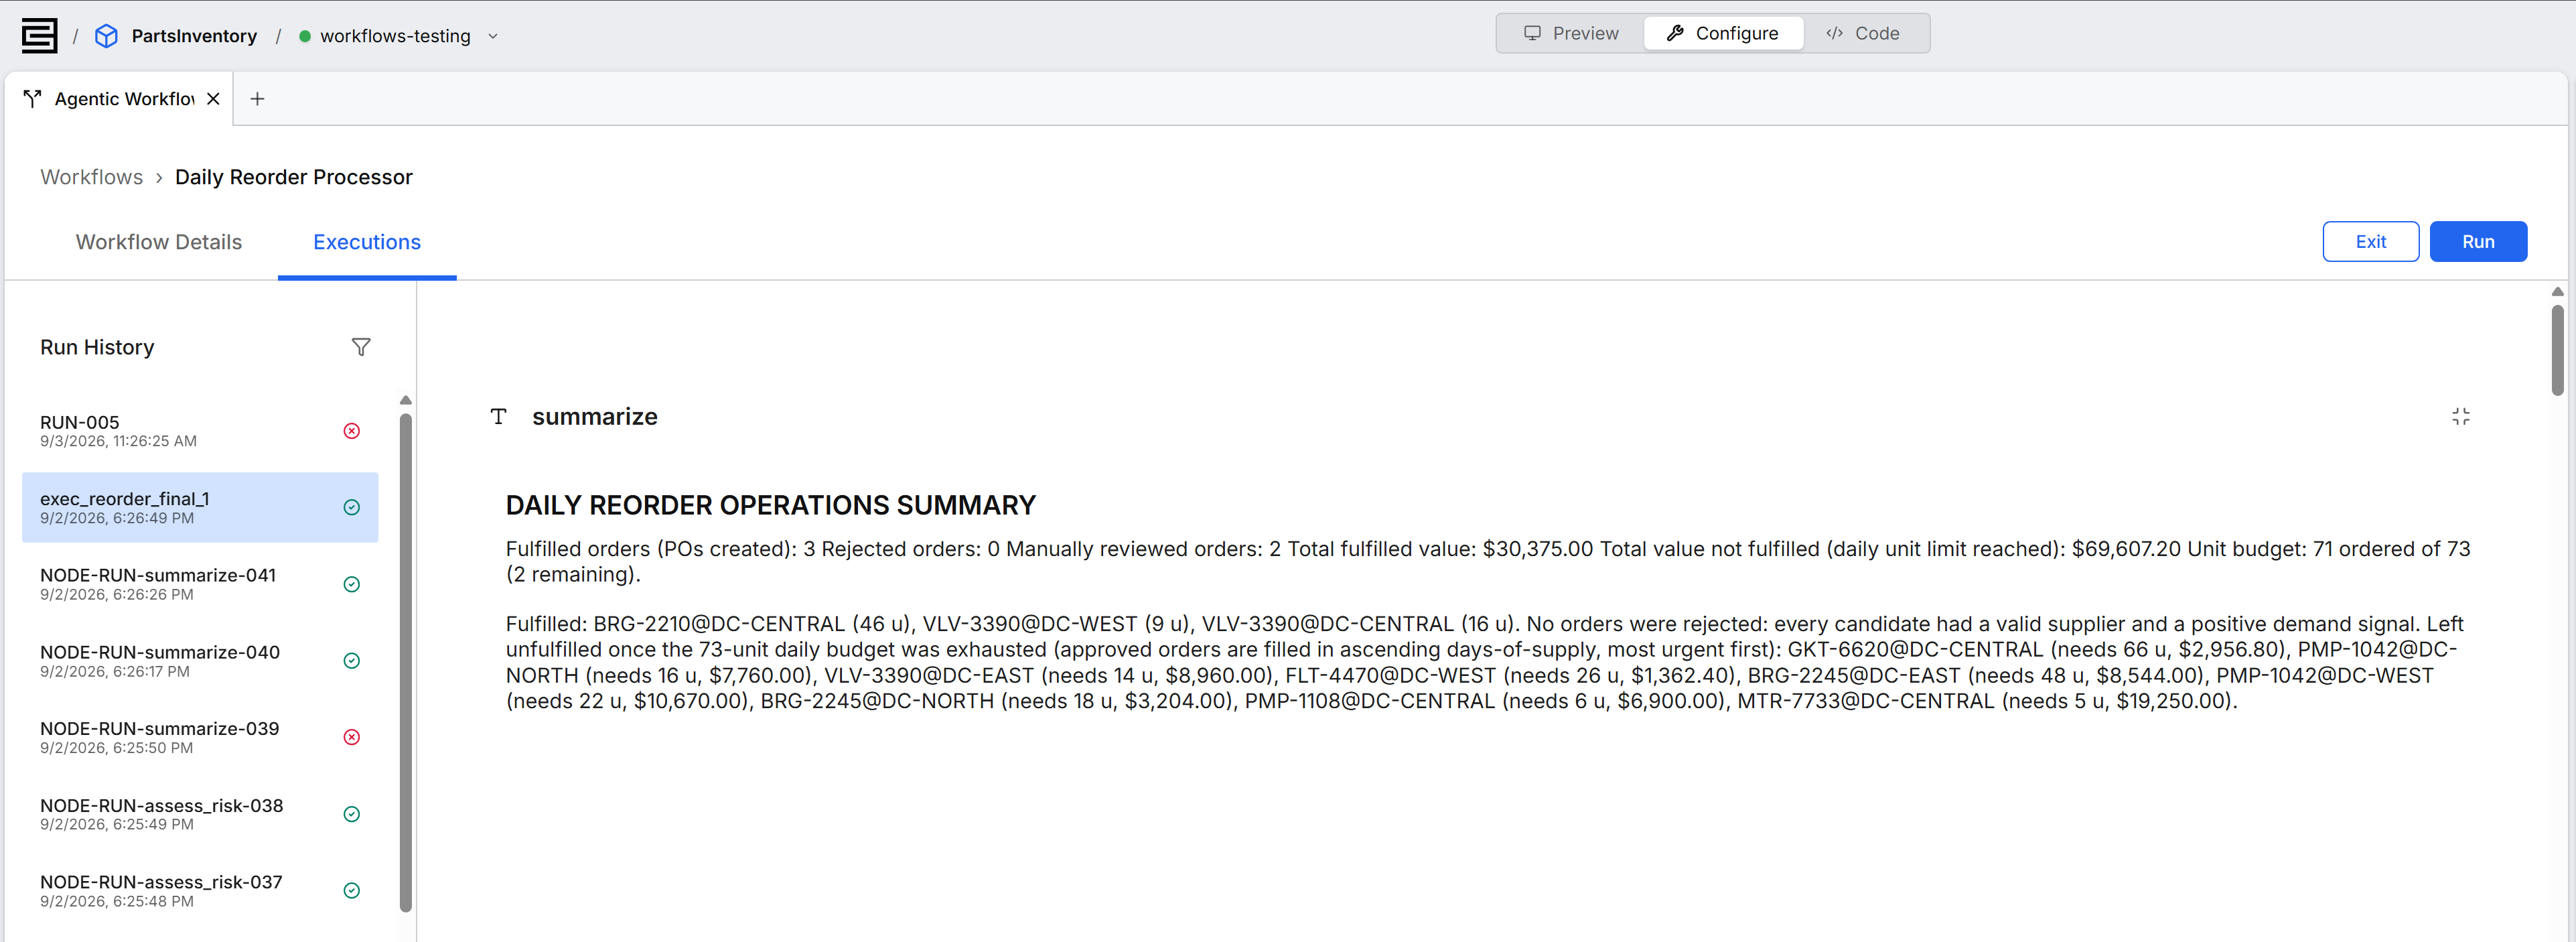
A node's text output appears next to that node on the Executions tab, even when you started the run from a conversation with the agent. Structured output, such as a table or a chart, appears as a formatted visualization on the same tab.
Run a workflow more than once at a time
Start a second run while an earlier run is still in progress, and the two runs proceed independently. Each run keeps its own status and its own entry in Run History.