C3 Data Lake Snapshot Versioning and Management
Overview
C3 AI Data Lakehouse tables use the Apache Iceberg storage format, which provides native, immutable versioning for all data operations. Modifications to a table (such as append, overwrite, or merge) automatically create a new snapshot of the table. These snapshots preserve the complete state of the data at each point in time, enabling comprehensive historical visibility, auditability, and reproducibility across workloads.
Snapshot management runs from a notebook — the C3 AI Studio Data Lakehouse page does not expose snapshot history, tags, rollback, or expiration. The code samples below use the Python API, with a separate Inspect snapshots with SQL section for the Iceberg metadata tables through Spark Connect.
Features
- Snapshot history: Use
snapshotHistory()to view all snapshots and their metadata. - Time travel: Use
readArrowIteratorwith theasOfparameter to query data at a specific point in time. - Tag snapshots: Assign descriptive and readable names (tags) for important snapshots. Use
tagSnapshot(),snapshotByTag(),tags(), andremoveTag()to manage named references. - Versioned reads: Read specific table versions using snapshots, timestamps, or tags. Use
readArrowIterator(filter, projections, batchSize, asOf)for time travel, then call.read_pandas()on the result. - Rollback: Use
rollbackToSnapshot()to restore a previous snapshot. - Expire snapshots: Use
expireSnapshots()to release storage held by old snapshots. - Inspect snapshots with SQL: Query the Iceberg metadata tables through Spark Connect to inspect snapshots, files, and partitions.
Snapshots allow you to maintain a complete audit trail. The tag and rollback functions simplify managing and accessing historical states. Snapshot expiration releases storage held by snapshots you no longer need.
Create a C3 AI Data Lakehouse table
The following code creates a C3 AI Data Lakehouse table called versioned_measurements. It prints a confirmation message once the table is successfully created. This table will be used as an example to illustrate how the features in this guide are used.
Input:
catalog = c3.DataLake.Catalog.inst()
schema = c3.ValueType.fromString("{t: datetime, activePower: double, generatorRotationSpeed: double, gearOilTemperature: double, asset: string}")
spec = c3.DataLake.CreateTableSpec.builder().name("versioned_measurements").schema(schema).build()
table = catalog.createTable(spec)
print(f"Created table: {table.name}")
Input:
Start a Spark cluster instance and create a Spark session.
cluster = c3.SparkCluster.inst()
ss = cluster.dataSparkSession()Snapshot history
Each write operation creates a new snapshot. See the image below for the Snapshot feature in the user interface.
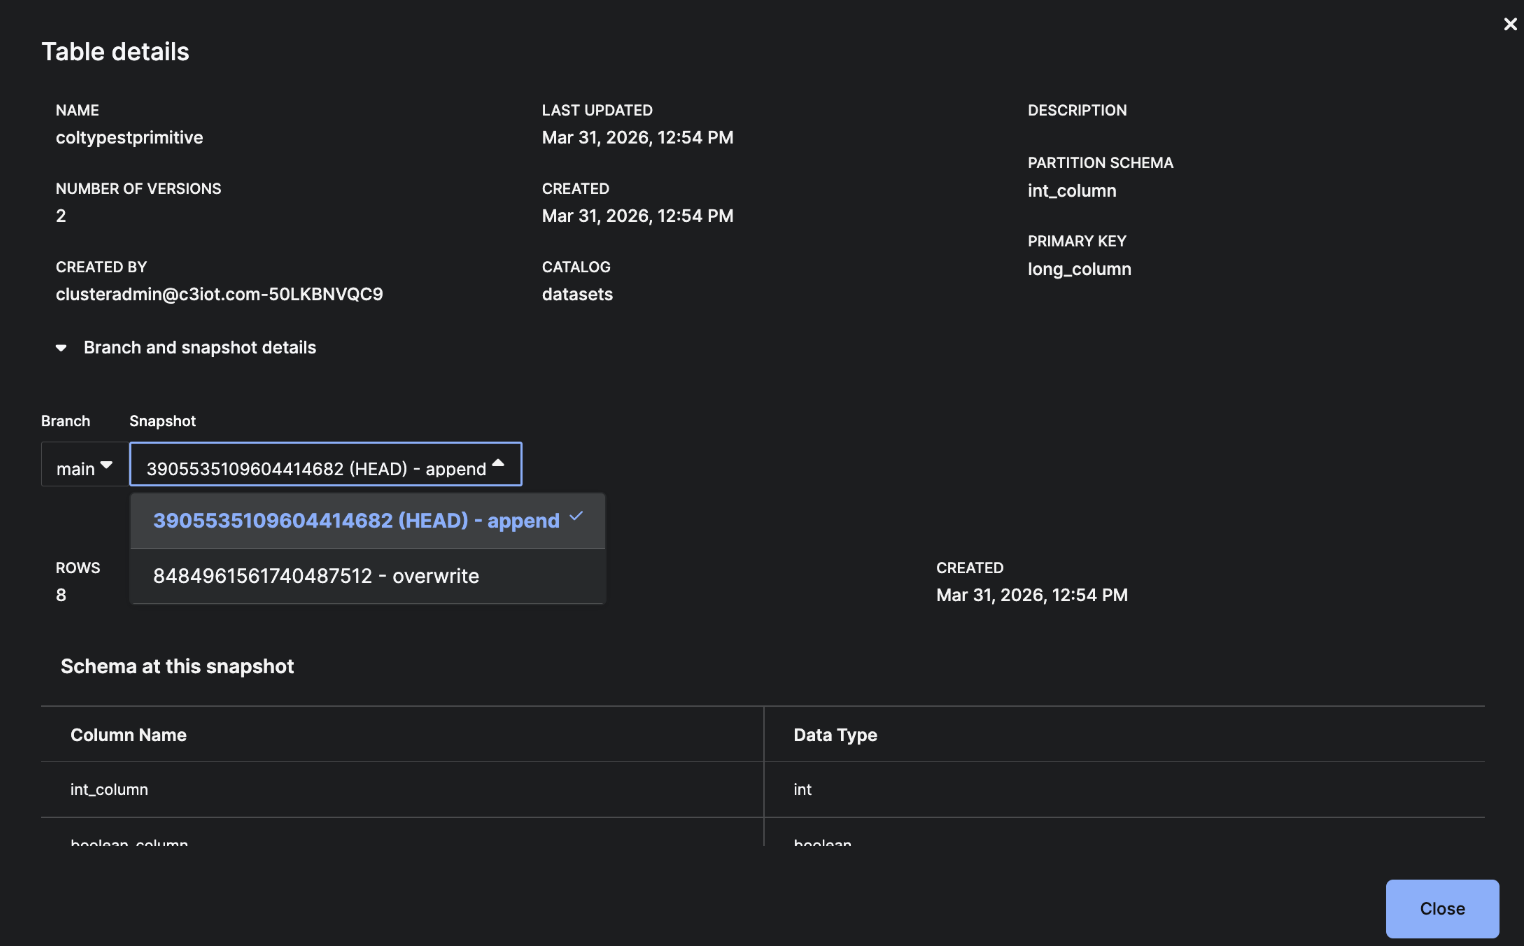 |
| Snapshot history of a branch |
Example: Write multiple batches and view snapshot history
The following example illustrates how to create multiple snapshots and navigate snapshot history.
Input:
Read two CSV files and append them to a table to create separate snapshots for each write operation.
# Read data from CSV and write to table - creates first snapshot
m1 = ss.read_csv('gcs://c3--datasets/WindTurbine_1000assets_3GB/WindTurbine/CanonicalWindTurbineMeasurement/inbox/measurements-1.csv')
firstSnapshot = m1.write_table(table, mode="append")
print(f"First snapshot ID: {firstSnapshot.snapshotId}")
print(f"First snapshot timestamp: {firstSnapshot.timestampMillis}")
print(f"First snapshot operation: {firstSnapshot.operation}")
print(f"Row count: {firstSnapshot.rowCount}")

# Append more data - creates second snapshot
m2 = ss.read_csv('gcs://c3--datasets/WindTurbine_1000assets_3GB/WindTurbine/CanonicalWindTurbineMeasurement/inbox/measurements-10.csv')
secondSnapshot = m2.write_table(table, mode="append")
print(f"\nSecond snapshot ID: {secondSnapshot.snapshotId}")
print(f"Second snapshot row count: {secondSnapshot.rowCount}")

# Get all snapshots in chronological order
history = table.snapshotHistory()
print(f"\nTotal snapshots: {len(history)}")
for snap in history:
   print(f"  Snapshot {snap.snapshotId}: {snap.operation} at {snap.timestampMillis}, rows: {snap.rowCount}")
Output:
Retrieve and display the complete snapshot history (snapshot IDs, timestamps, operations, and row counts).
First snapshot ID: 2431888661795132738
First snapshot timestamp: 1769153437834
First snapshot operation: append
Row count: 518

Second snapshot ID: 1033412224625592251
Second snapshot row count: 15558

Total snapshots: 2
 Snapshot 2431888661795132738: unknown at 1769153437834, rows: 518
 Snapshot 1033412224625592251: unknown at 1769153442633, rows: 15558
The operation field returned by snapshotHistory() may appear as unknown even when a directly accessed snapshot object reports a more specific operation such as append. This reflects differences in how operation metadata is exposed by these APIs.
Time travel
Use snapshots or timestamps to query a table as it existed at any point in time. Query the data using the asOf parameter with readArrowIterator.
Example: Query by timestamp
Input:
Load a historical version of a Data Lakehouse table as it existed at the first snapshot's timestamp.
ss.load_table(table=catalog.table("versioned_measurements"), asOf=c3.DateTime.fromMillis(firstSnapshot.timestampMillis)).shapeOutput:
Return the table's dimensions (row count and column count).
(518, 5)Input:
Perform a time-travel query on a Data Lakehouse table to compare historical and current data.
# Get timestamp from first snapshot
firstSnapshotTime = c3.DateTime.fromMillis(firstSnapshot.timestampMillis)

# Read table as it existed at first snapshot time using readArrowIterator with asOf
historicalData = table.readArrowIterator("", [], 10000, firstSnapshotTime).read_pandas()
print(f"Data at first snapshot: {len(historicalData)} rows")
print(historicalData.head())

# Read current data (no asOf parameter)
currentData = table.read_pandas()
print(f"\nCurrent data: {len(currentData)} rows")

# Find snapshot at a specific timestamp
snapAtTime = table.snapshotAsOf(firstSnapshotTime)
print(f"\nSnapshot at timestamp (first timestamp): {snapAtTime.rowCount}")
Output:
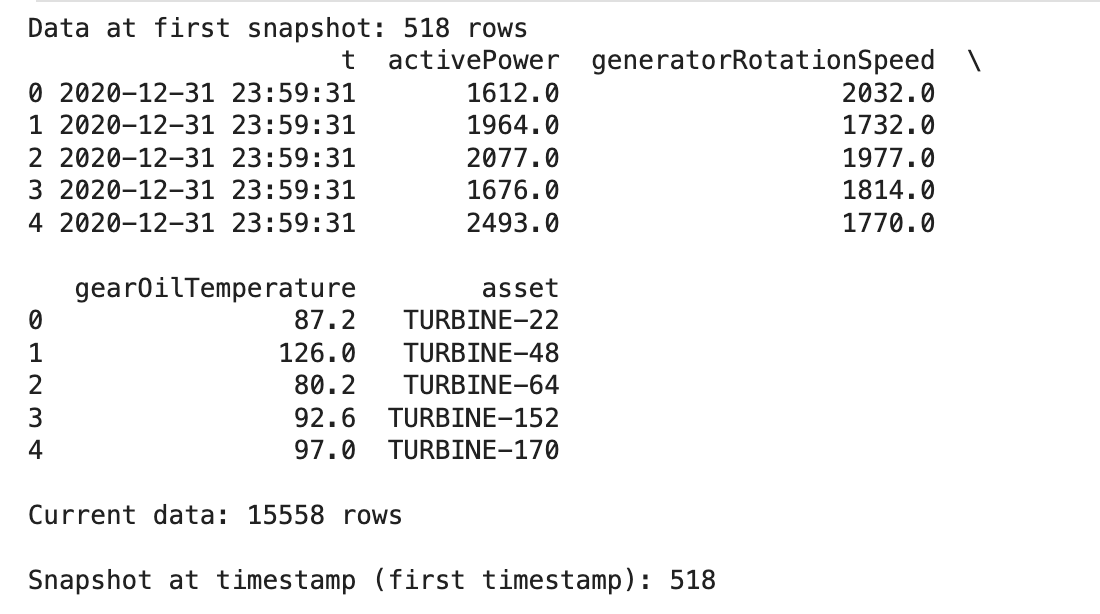 |
| Output comparing first snapshot to current data in a table |
Tag snapshots
Use tags to assign descriptive names for important snapshots. The following are some example tag names:
- release-v1.0
- production-ready
One table can be assigned multiple tags.
Example: Tag snapshots
Tag snapshots with descriptive names for easier version management. Retrieve snapshots by tag, list all tags, and remove tags when no longer needed.
Input:
# Tag the first snapshot
table.tagSnapshot(firstSnapshot.snapshotId, "initial_load")
print(f"Tagged snapshot {firstSnapshot.snapshotId} as 'initial_load'")

# Get snapshot by tag
snap_by_tag = table.snapshotByTag("initial_load")
print(f"Snapshot for tag 'initial_load': {snap_by_tag.snapshotId}")
print(f"Matches snapshot 1: {snap_by_tag.snapshotId == firstSnapshot.snapshotId}")

# Tag the second snapshot
table.tagSnapshot(secondSnapshot.snapshotId, "with_updates")

# List all tags
allTags = table.tags()
print(f"\nAll tags: {allTags}")
for tagName, snapshotId in allTags.items():
   print(f"  {tagName} -> {snapshotId}")

# Remove a tag
table.removeTag("with_updates")
print(f"\nTags after removal: {table.tags()}")
Output:
Tagged snapshot 2431888661795132738 as 'initial_load'
Snapshot for tag 'initial_load': 2431888661795132738
Matches snapshot 1: True

All tags: {initial_load: 2431888661795132738, main: 1033412224625592251, with_updates: 1033412224625592251}
 initial_load -> 2431888661795132738
 main -> 1033412224625592251
 with_updates -> 1033412224625592251

Tags after removal: {initial_load: 2431888661795132738, main: 1033412224625592251}Versioned reads
Use readArrowIterator with the asOf parameter for time travel. The following are various methods to read specific table versions:
- Snapshots
- Timestamps
- Tags
Example: Read by tag
Retrieve a tagged snapshot by its descriptive name rather than using a timestamp or snapshot ID.
Input:
df = ss.load_table(catalog.table("versioned_measurements"), tagName="initial_load")
df.head()
Output:
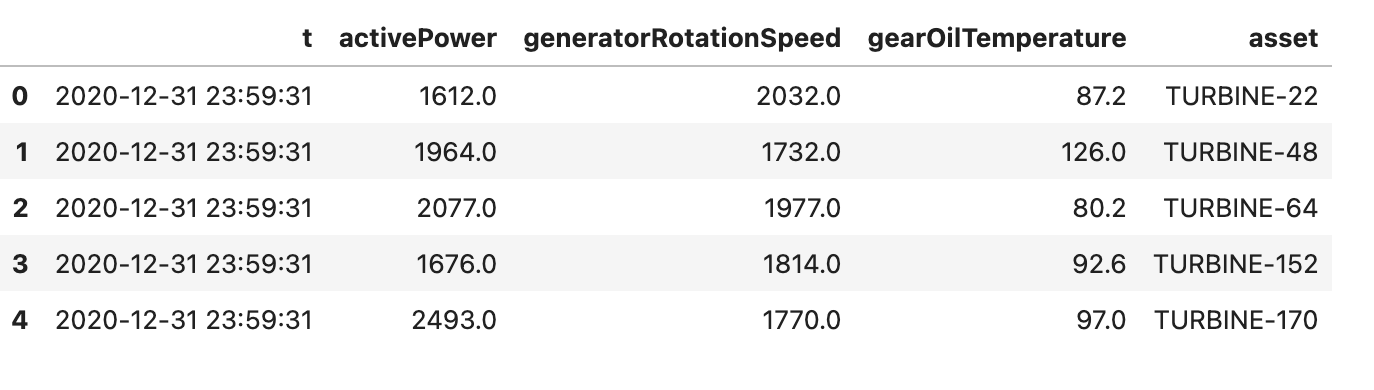 |
| Table snapshot with tag name "initial_load" |
Input:
Return the DataFrame dimensions (rows and columns).
df.shapeOutput:
(518, 5)Example: Snapshot timestamp, snapshot tag, and readArrowIterator with asOf
Input:
Access historical data versions by snapshot timestamp, tag, and filtering or projection. This shows the flexibility of the C3 AI Data Lakehouse's time-travel capabilities.
# Read using snapshot's timestamp (time travel)
firstSnapshotTime = c3.DateTime.fromMillis(firstSnapshot.timestampMillis)
data_via_snapshot = table.readArrowIterator("", [], 10000, firstSnapshotTime).read_pandas()
print(f"Read via snapshot timestamp: {len(data_via_snapshot)} rows")

# Read using timestamp (time travel)
data_via_time = table.readArrowIterator("", [], 10000, firstSnapshotTime).read_pandas()
print(f"Read via timestamp: {len(data_via_time)} rows")

# Read using tag - get snapshot by tag, then use its timestamp
tagged_snapshot = table.snapshotByTag("initial_load")
taggedTime = c3.DateTime.fromMillis(tagged_snapshot.timestampMillis)
data_via_tag = table.readArrowIterator("", [], 10000, taggedTime).read_pandas()
print(f"Read via tag: {len(data_via_tag)} rows")

# Read with Arrow iterator using asOf (with filter and projections)
arrow_iter = table.readArrowIterator("asset == 'TURBINE-1'", ["t", "activePower", "asset"], 100, firstSnapshotTime)
count = 0
while arrow_iter.hasNext():
   count += arrow_iter.next().rowCount()
print(f"\nRead via Arrow iterator (asOf with filter): {count} rows")
Output:
Read via snapshot timestamp: 518 rows
Read via timestamp: 518 rows
Read via tag: 518 rows

Read via Arrow iterator (asOf with filter): 0 rowsRollback
Rollback restores a table to a previous snapshot by creating a new snapshot with the rolled-back state. Use rollbackToSnapshot() to restore a previous snapshot.
Example: Rollback a snapshot
Input:
Retrieve a table named versioned_measurements.
table = catalog.table("versioned_measurements")Input:
Retrieve a table's full history of snapshots, showing all past versions and changes made to the table.
table.snapshotHistory()Output:
Two Iceberg table snapshots, showing some of the following details:
- snapshot ID
- creation time
- row counts
[
  {
    "type": "DataLake.Table.Snapshot.Iceberg",
    "snapshotId": "2431888661795132738",
    "dataSchema": {
      "named": true,
      "fieldTypes": [
        {
          "name": "t",
          "index": 0,
          "valueType": {
            "type": "DateTimeType",
            "name": "datetime"
          }
        },
        {
          "name": "activePower",
          "index": 1,
          "valueType": {
            "type": "DoubleType",
            "name": "double"
          }
        },
        {
          "name": "generatorRotationSpeed",
          "index": 2,
          "valueType": {
            "type": "DoubleType",
            "name": "double"
          }
        },
        {
          "name": "gearOilTemperature",
          "index": 3,
          "valueType": {
            "type": "DoubleType",
            "name": "double"
          }
        },
        {
          "name": "asset",
          "index": 4,
          "valueType": {
            "type": "StringType",
            "name": "string"
          }
        }
      ]
    },
    "created": "2026-01-23T07:30:37Z",
    "updatedRowCount": 518,
    "rowCount": 518,
    "dataSize": 7416,
    "timestampMillis": 1769153437834,
    "operation": "unknown"
  }
]
Input:
Show the current snapshot of the table. This represents the latest version of the table.
table.currentSnapshotOutput:
Iceberg table snapshot that includes its snapshot ID, schema, creation time, row counts, data size, and other metadata.
{
 "type" : "DataLake.Table.Snapshot.Iceberg",
 "snapshotId" : "2431888661795132738",
 "dataSchema" : {
   "named" : true,
   "fieldTypes" : [ {
     "name" : "t",
     "index" : 0,
     "valueType" : {
       "type" : "DateTimeType",
       "name" : "datetime"
     }
   }, {
     "name" : "activePower",
     "index" : 1,
     "valueType" : {
       "type" : "DoubleType",
       "name" : "double"
     }
   }, {
     "name" : "generatorRotationSpeed",
     "index" : 2,
     "valueType" : {
       "type" : "DoubleType",
       "name" : "double"
     }
   }, {
     "name" : "gearOilTemperature",
     "index" : 3,
     "valueType" : {
       "type" : "DoubleType",
       "name" : "double"
     }
   }, {
     "name" : "asset",
     "index" : 4,
     "valueType" : {
       "type" : "StringType",
       "name" : "string"
     }
   } ]
 },
 "created" : "2026-01-23T07:30:37Z",
 "updatedRowCount" : 518,
 "rowCount" : 518,
 "dataSize" : 7416,
 "timestampMillis" : 1769153437834,
 "operation" : "unknown"
}
Input:
Roll the table back to its first snapshot, read the restored data, and print the number of rows and the snapshot ID of the new current snapshot.
# Rollback to first snapshot
table.rollbackToSnapshot(firstSnapshot.snapshotId, confirm=True)

rolledBackData = table.read_pandas()
print(f"\nRolled back data rows: {len(rolledBackData)}")

current_snapshot = table.currentSnapshot
print(f"Current snapshot after rollback: {current_snapshot.snapshotId}")
current_snapshot.rowCount
Output:
Rolled back data rows: 518
Current snapshot after rollback: 2431888661795132738Expire snapshots
Snapshots accumulate as a table evolves. Each write produces a new snapshot, and the underlying data files persist as long as some snapshot references them. Use snapshot expiration to release the storage held by snapshots older than a retention window.
spec = (
    c3.DataLake.Table.ExpireSnapshotSpec.builder()
    .retentionWindow("1d")
    .minimumSnapshots(1)
    .build()
)
table.expireSnapshots(spec)
retentionWindow accepts a C3 Period string (1d, 7d, 30d). minimumSnapshots guarantees at least the specified number of recent snapshots survive, regardless of age.
Expiration removes the underlying data files. After expiration, queries against an expired snapshot fail, and time-travel reads against that snapshot are no longer possible.
Schedule expiration
For routine maintenance, run expiration on a schedule. The platform does not ship a dedicated snapshot-expiration cron in 8.11. Register one in your application's package by creating a CronJob that calls expireSnapshots() on the tables you want to maintain. See Schedule a Job with CronJob for more information.
Inspect snapshots with SQL
The Iceberg metadata tables expose snapshot, file, and partition details through Spark Connect. Use these queries when you want to understand storage usage, scan partition statistics, or inspect the full snapshot lineage from SQL.
SELECT * FROM datasets.dfl.versioned_measurements.snapshots ORDER BY committed_at DESC;
SELECT * FROM datasets.dfl.versioned_measurements.files;
SELECT * FROM datasets.dfl.versioned_measurements.partitions;
For the SQL Editor in C3 AI Studio, see Data Lakehouse in C3 AI Studio.