Artifact Cards for Studio Homepage
The Studio homepage allows you to interact with artifacts that are available to you. These artifacts are split into 3 main categories:
- C3 AI Applications — Contains the C3 AI Applications your cluster has the artifacts for. Some examples of C3 AI Applications are Demand Forecasting or ESG.
- Plugins — Contains packages that applications may depend on. These packages are typically not standalone applications.
- Quickstarts — These are instructional packages that are intended to familiarize you with using C3 AI features.
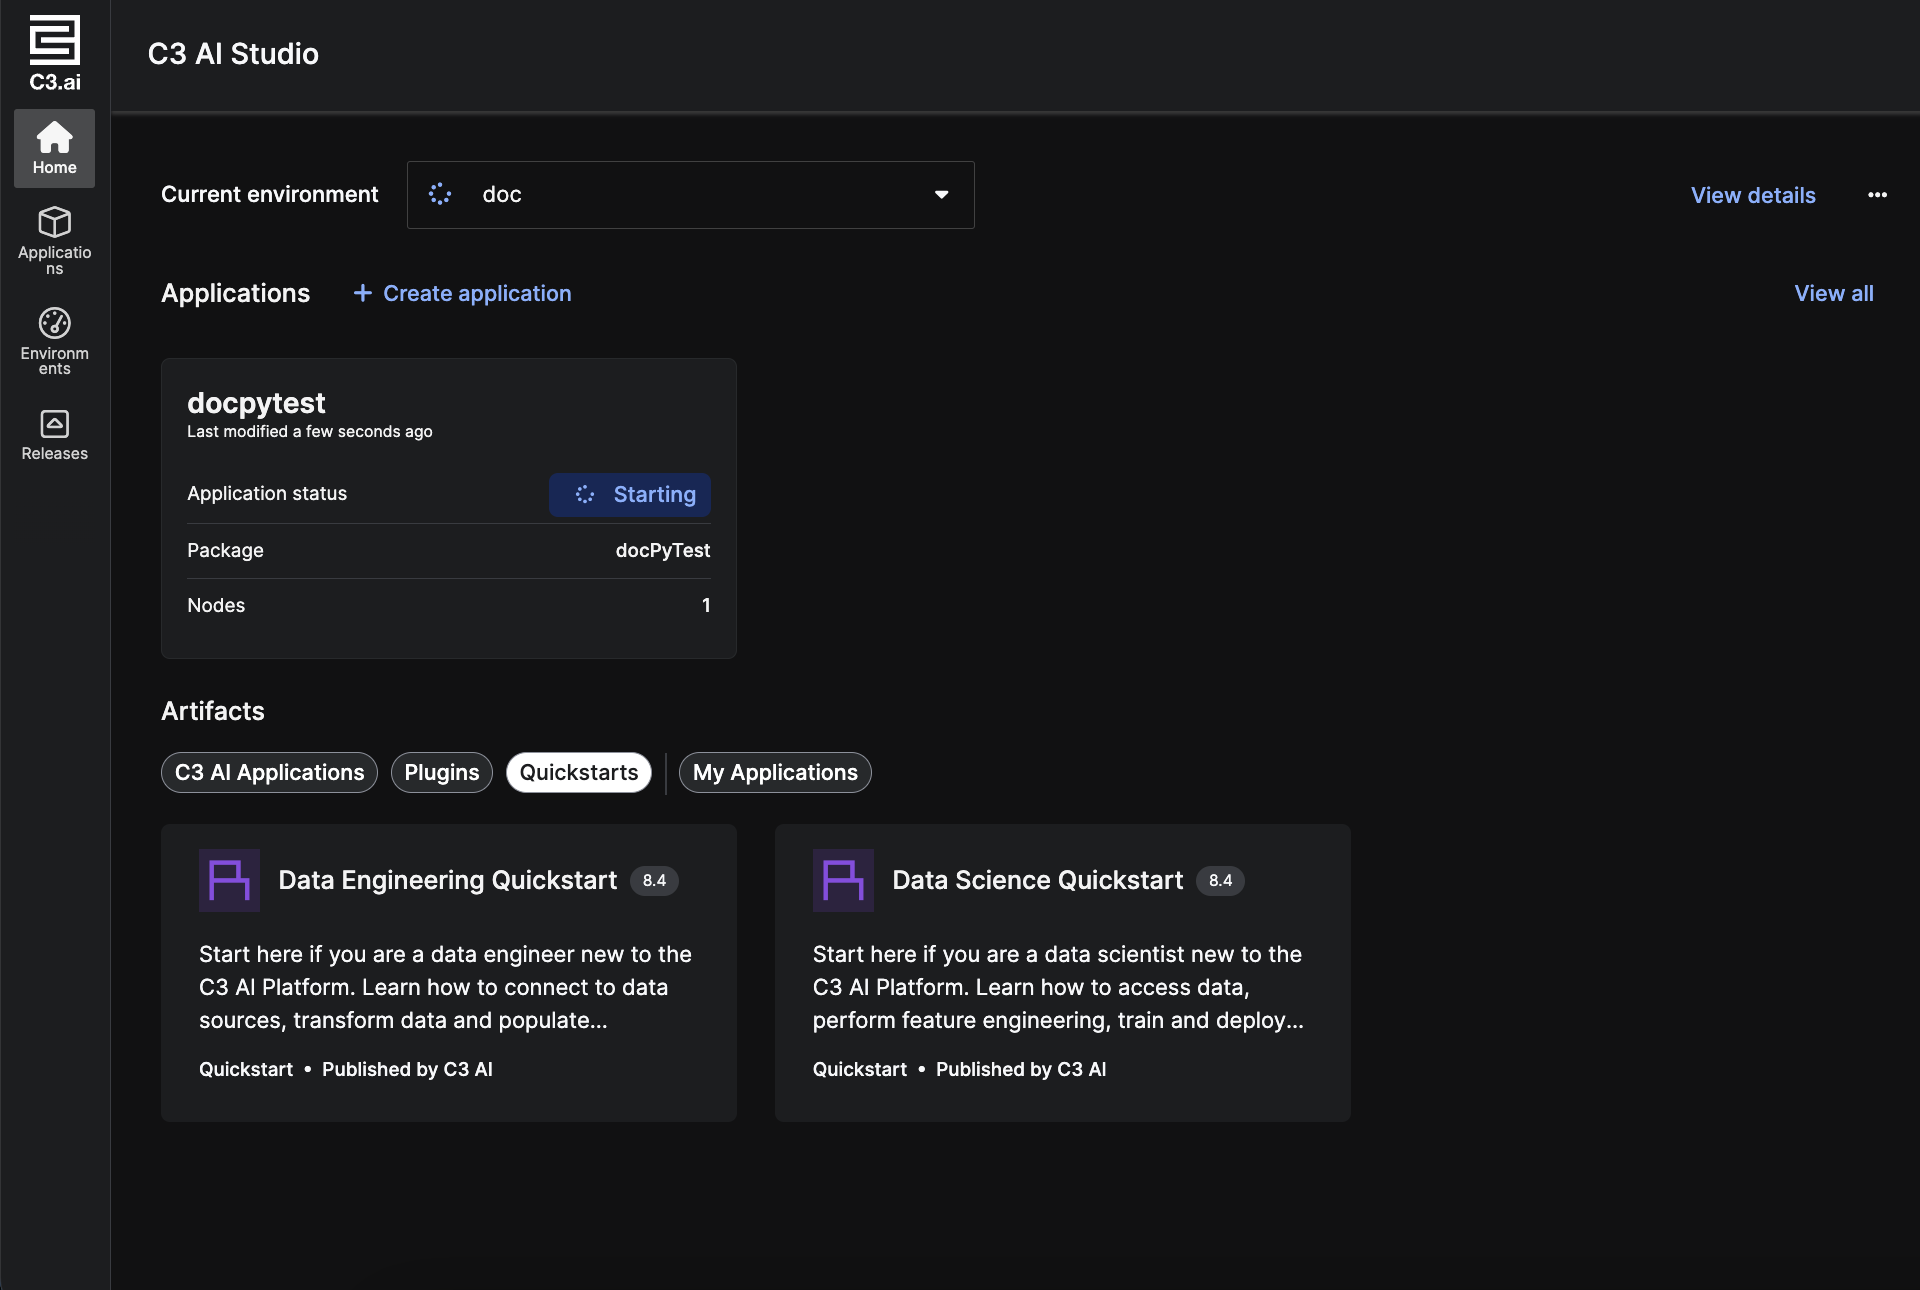
Plugins and Quickstarts are only deployed when you select a Single-node environment (SNE).
View Quickstarts
Selecting a Quickstart card, like Data Engineering Quickstart or Data Science Quickstart, opens the documentation for that specific package. You can deploy the application you've opened by selecting Deploy Application on the top right of the documentation page. You can then directly write and edit the deployed application depending on your use case.
The example below shows an open page for the Data Engineering Quickstart.
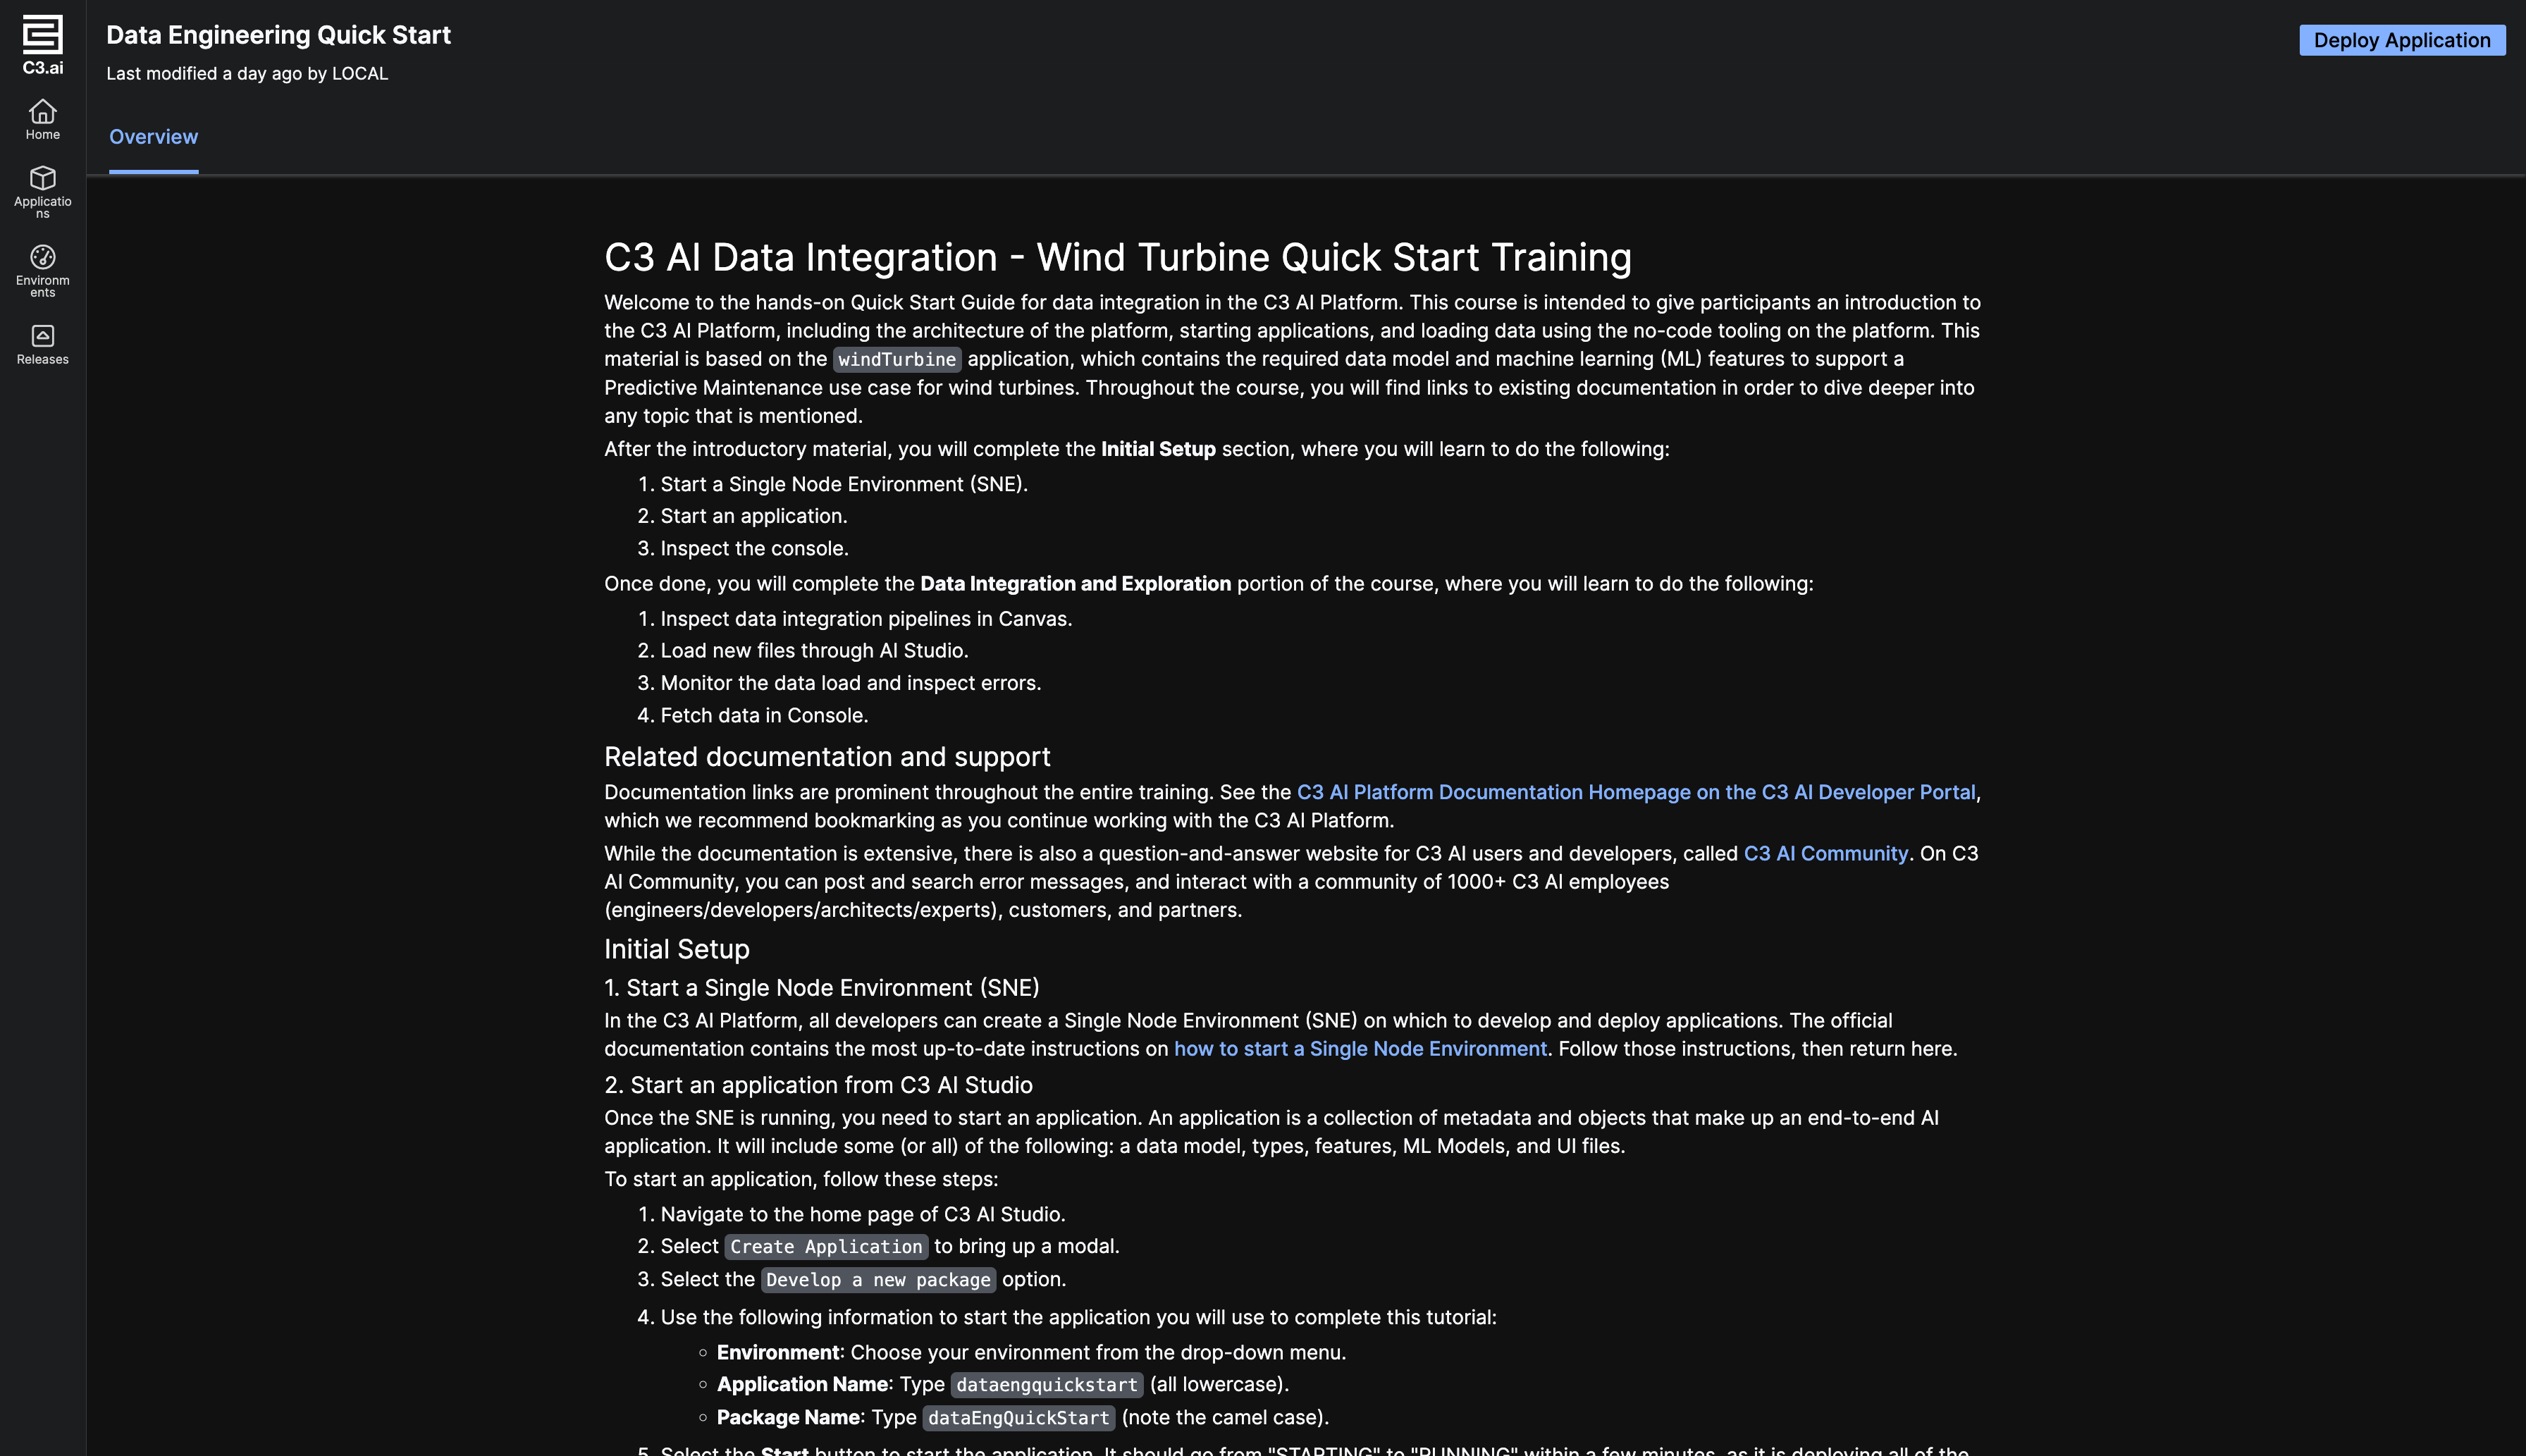
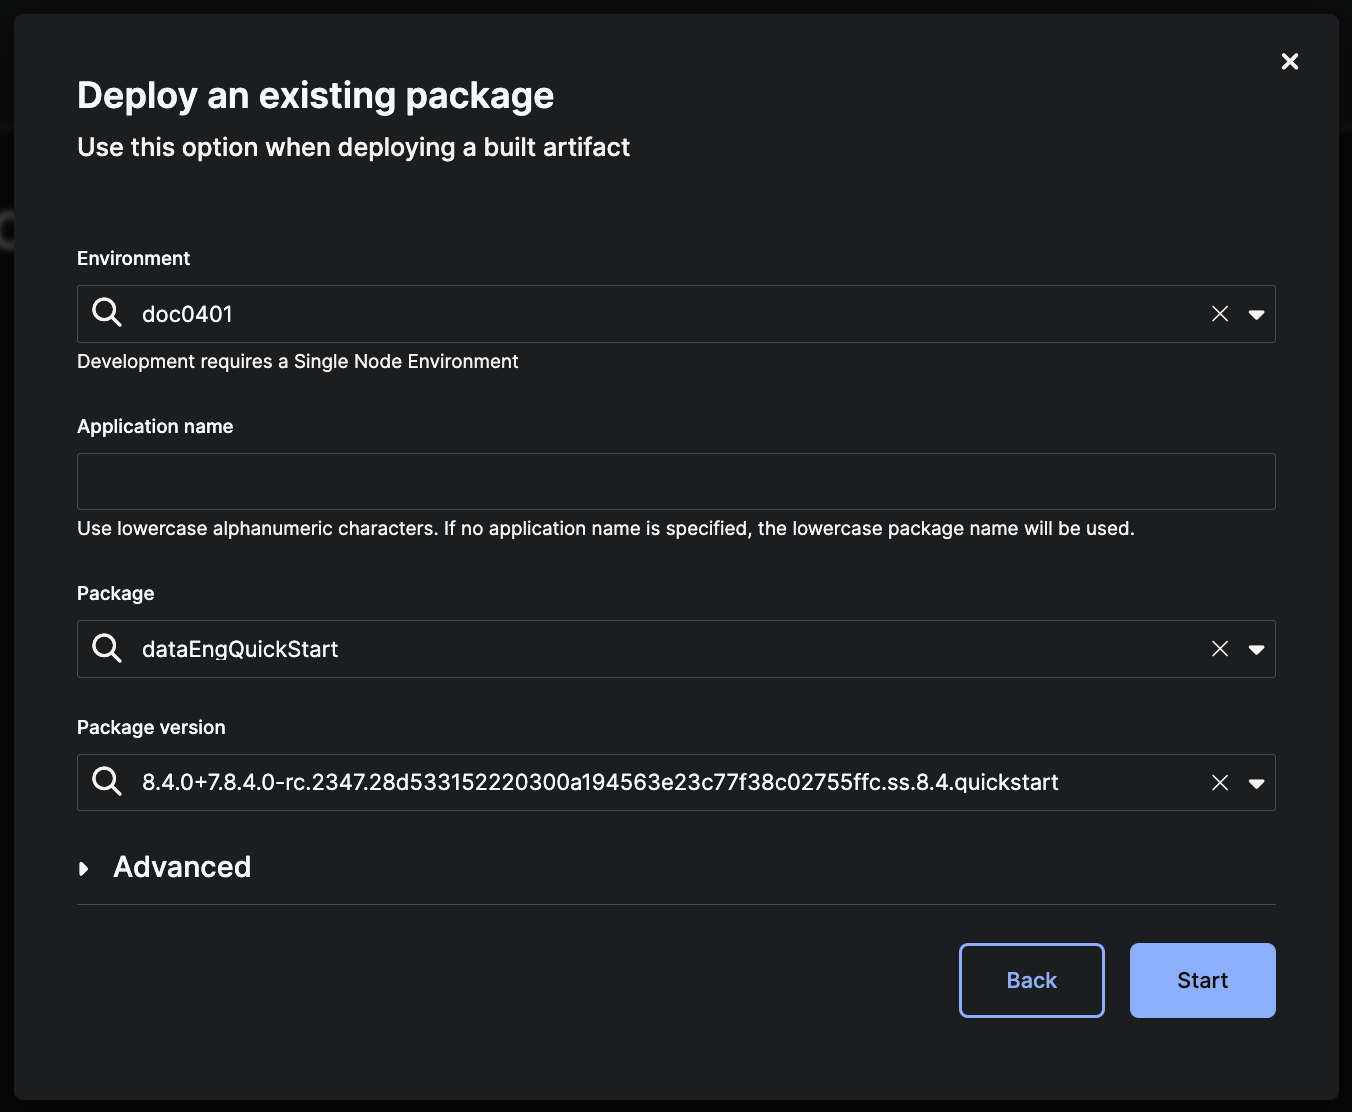
Selecting Deploy Application opens a pre-filled package deployment modal. Select Start to begin deploying the package.
Package structure for documentation
Documentation for your package is available to view using artifact cards. If you want to display documentation for your package in AI Studio, you need to add it to the src/doc folder of your package. All documentation files should be in the .c3doc.md file format.
package/
├── ...
└── src/
    ├── ExampleType.c3typ
    └── doc/
        ├── documentation-files.c3doc.md
For more information on where to save documentation files, see Document Types and Topics.
Configure visibility
To create an artifact card visible in AI Studio, you must create a config.js file at the appropriate JarvisService.GitRepository's jarvisFilePath. The jarvisFilePath is used to read a configuration or custom steps that you want to run in the Jarvis pipeline.
Create and modify your config file
Below is an example of a config.js file that you can place in your repository's jarvisFilePath. The config.js file should be in a folder called config/ and in a separate folder path that contains no other JS files. An example of a valid repository structure is provided in the "Set a jarvisFilePath" section.
data = {
  configValues: {
    artifactResources: [
      {
        path: "testPkg/src/doc/testPkg.c3doc.md",
        displayName: "Test Package",
        category: "Application",
        description: "This is a description for the test package.",
        iconPath: "img/testPkg.png"
      },
      {
        path: "testPkg2/src/doc/testPkg.c3doc.md",
        displayName: "Test Package 2",
        category: "Quickstart",
        description: "This is a description for the 2nd test package.",
        iconPath: "img/testPkg2.png"
      },
    ]
  }
}
You must have an artifactResources variable in your configValues for artifact resources to publish artifact cards to the AI Studio homepage. For each package, you must populate a few fields.
| Variable | Definition |
|---|---|
| path | Path to the main documentation markdown file for the package (<pkg>/src/doc/<doc-name>.c3doc.md). |
| displayName | Formatted name that you want to display for the artifact. |
| category | The category for your package must be one of "Application", "Plugin", or "Quickstart". |
| description | A short description for the artifact. Note that the description is cut off on the UI if it is too long. |
| iconPath | If there is a specific icon for the package, save the relative path from the document to the image. |
Note: All the above fields are required for an artifact to be displayed on the homepage of Studio.
Set a jarvisFilePath
If your package does not have a jarvisFilePath, you must set a path. Open the static console of the jarvisservice app and run the following script:
// Set the variables to fetch the appropriate repo and point to the right Jarvis path
// The following are SAMPLE VALUES
var url = 'https://github.com/myrepository';
var packagesPath = 'base';
var jarvisFilePath = '.jarvis';

var repo = JarvisService.GitRepository.fetch({ filter: Filter.eq('url', url).and().eq('packagesPath', packagesPath) }).objs[0];
repo.withJarvisFilePath(jarvisFilePath).merge();
C3 AI Release Management expects the jarvisFilePath to end in config/config.js, and will append it to the jarvisFilePath - you do not need to manually set it on the jarvisFilePath. No other JS files should be located in the jarvisFilePath except for the config.js file. For example, if the repository is structured like this:
myRepo/
  ├── packages/
      └── pkg1/
          └── pkg1.c3pkg.json
  └── .jarvis/
      └── steps/
          └── config/
              └── config.js
Then, run the following commands:
var url = 'https://github.com/myRepo';
var packagesPath = 'packages';
var jarvisFilePath = '.jarvis/steps';

var repo = JarvisService.GitRepository.fetch({ filter: Filter.eq('url', url).and().eq('packagesPath', packagesPath) }).objs[0];
repo.withJarvisFilePath(jarvisFilePath).merge();
If JarvisService.GitRepository.fetch(..) returns zero results, ensure that url and packagesPath match the Release Management branch configuration exactly, including leading or trailing / characters used when the branch was registered. You can also run c3Grid(JarvisService.GitRepository.fetch()) to confirm the exact url and packagesPath to use in the command.
Run builds
After creating your config.js file and setting up a jarvisFilePath, you can now run your builds!
Register your branch group and make sure that the associated JarvisService.GitRepository has the correct jarvisFilePath. The artifact resources are made during the "Discovering packages" step of the Jarvis build pipeline. If nothing is showing after this step completes, check that your config and paths are correct.
Change publisher
All artifact resources created by Jarvis builds default to being published by "LOCAL". To change the publisher for a resource:
Navigate to the static console in the
artifacthubserviceappFetch the appropriate
ArtifactHubService.Artifact.ResourceUpdate the publisher field as desired. You can find the resources you want by filtering on fields like
testPackageJavaScript// Set the following variable to the desired publisher name (e.g. 'C3 AI') var publisher = 'C3 AI'; var resource = ArtifactHubService.Artifact.Resource.fetch({ filter: Filter.eq('displayName', 'testPackage') }).objs[0]; resource.withPublisher(publisher).merge();