Working with Visual Notebooks Datasets
Visual Notebooks datasets are versioned, reusable, and shareable snapshot of your data. Use Visual Notebooks datasets to access your data across multiple visual notebooks and ML pipelines.
Creating an Visual Notebooks dataset
Datasets must be created within a visual notebook using the Save Dataset node.
When using the Save Dataset node, it is best to think of the Name field as the version name, and the Topic field as the overall name of the dataset. When creating a new dataset, make sure you select Create new after entering a name in the Topic field. The Run button appears grey until Create new is selected.
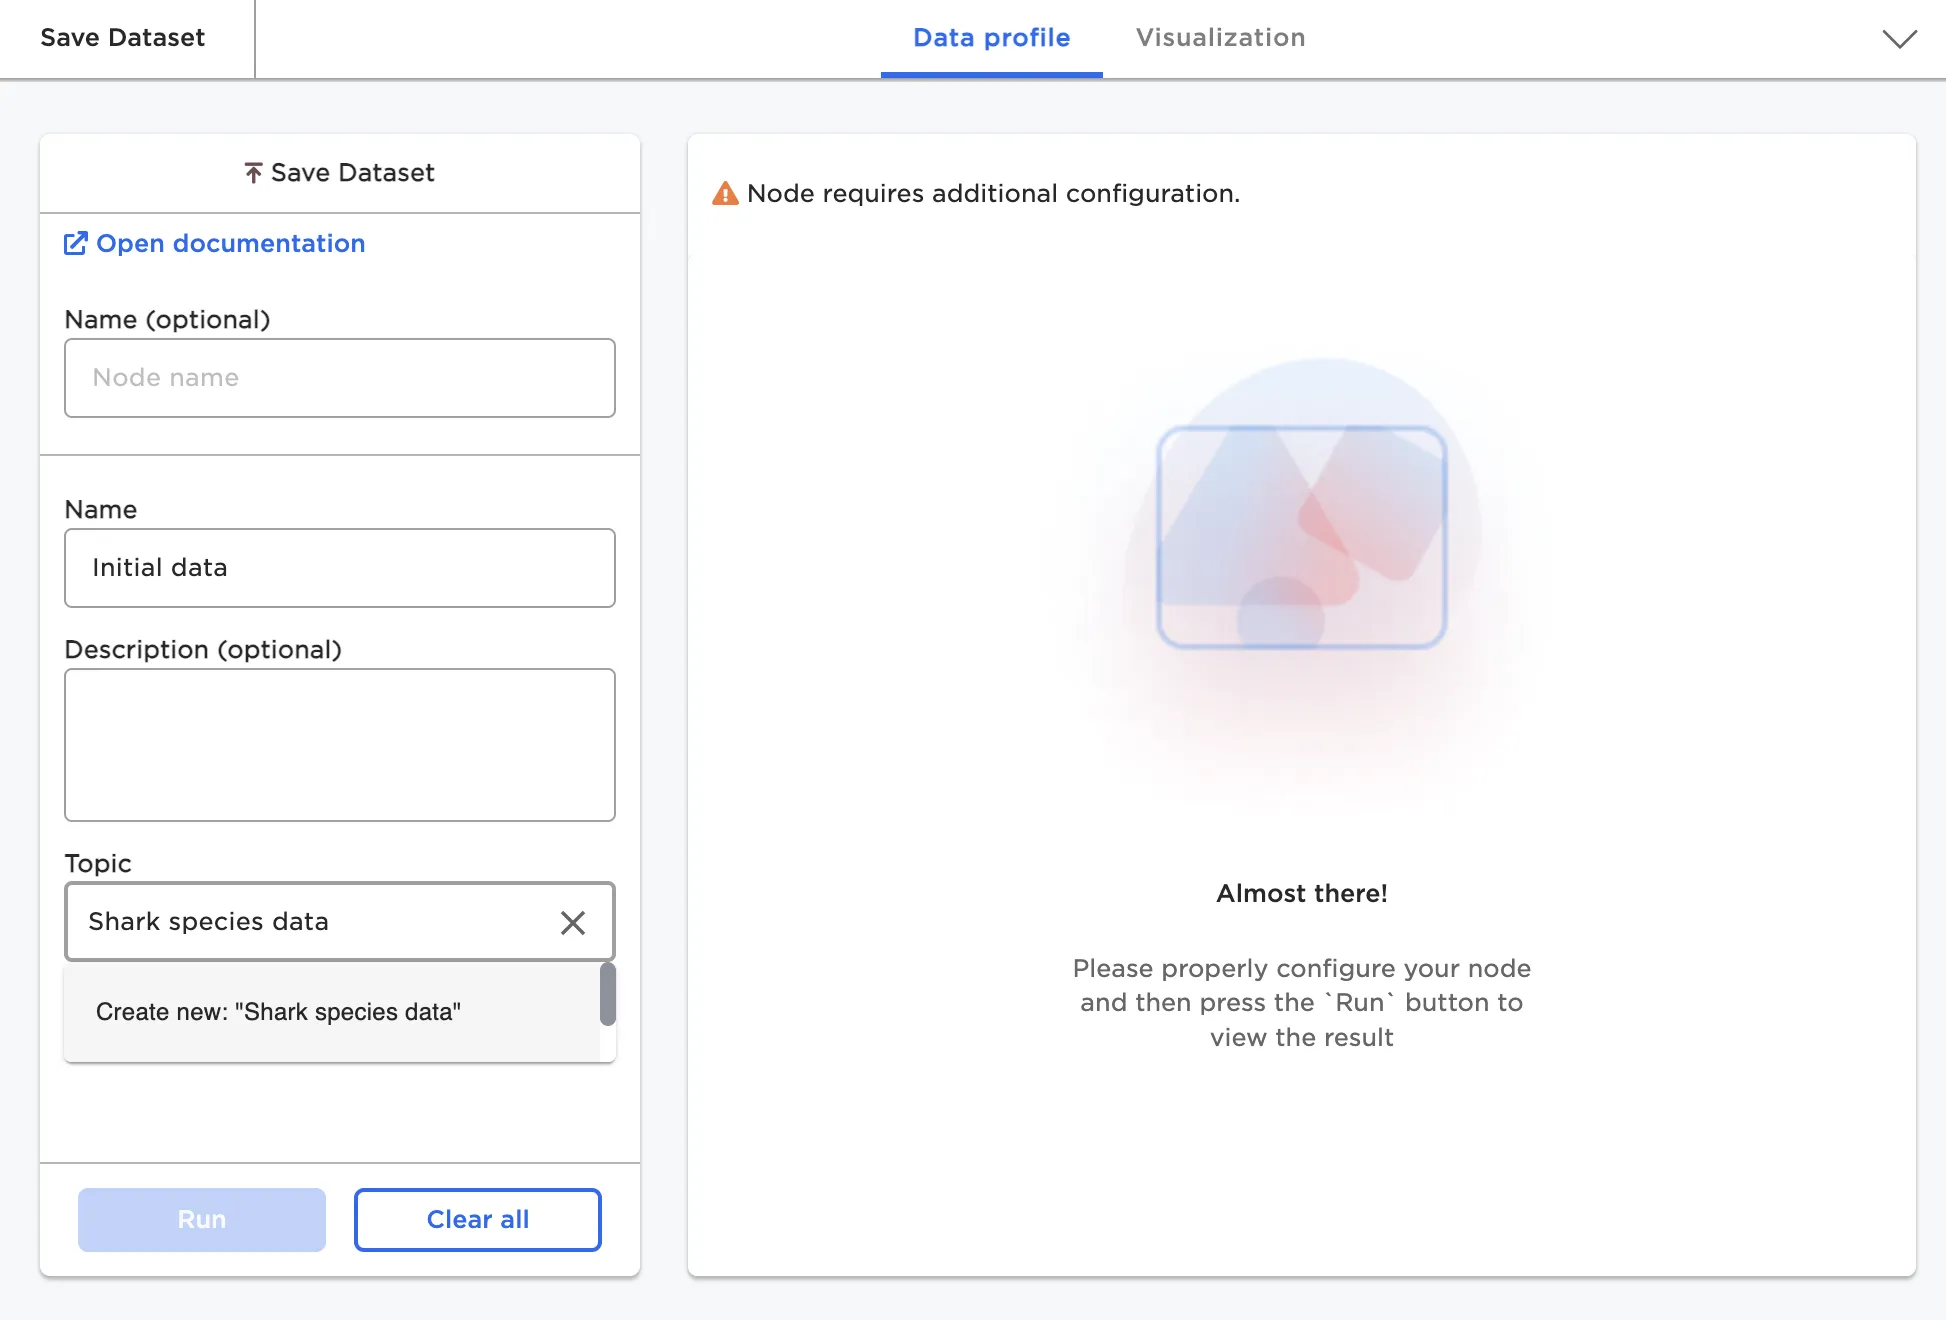
Figure 1: Save Dataset node
After pressing Run, your output may look different than what you'd expect. As long as your node looks similar to the image below, your dataset was saved successfully.
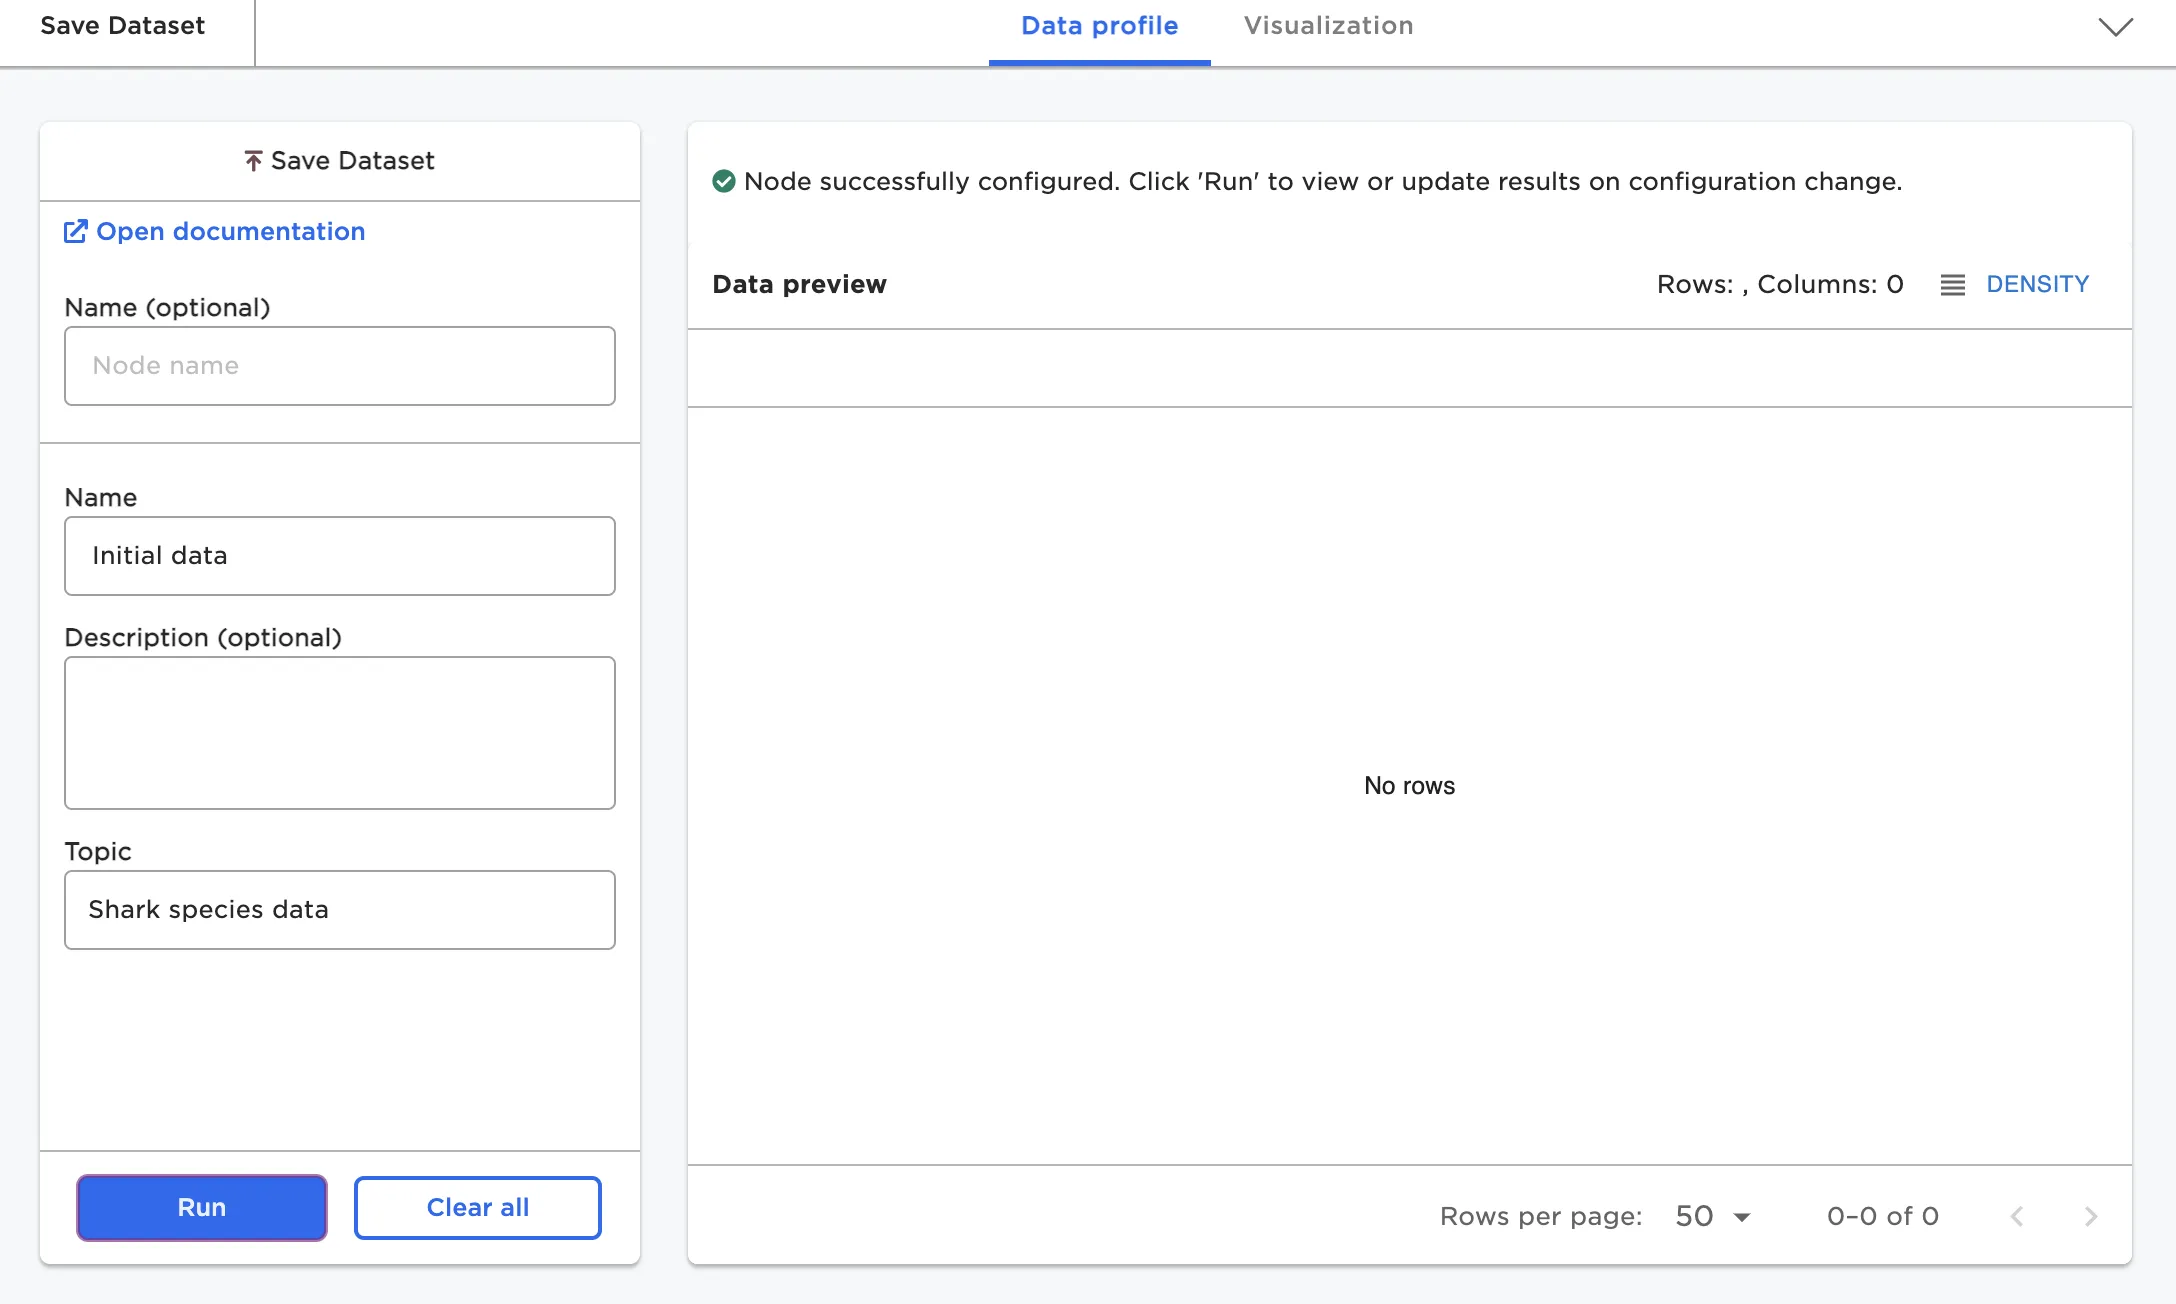
Figure 2: Output of the Save Dataset node
Accessing Visual Notebooks datasets
You can access datasets you've created within the canvas inside a visual notebook or ML pipeline. At the top of the node palette is an option to toggle between nodes and assets. Select Assets to switch to the assets panel. Once in the assets panel, expand the Datasets section and select Owned. The dataset you created should show up as the topic name you entered.
You can also select Shared to see datasets that have been shared with you, or Public to see publicly available datasets.
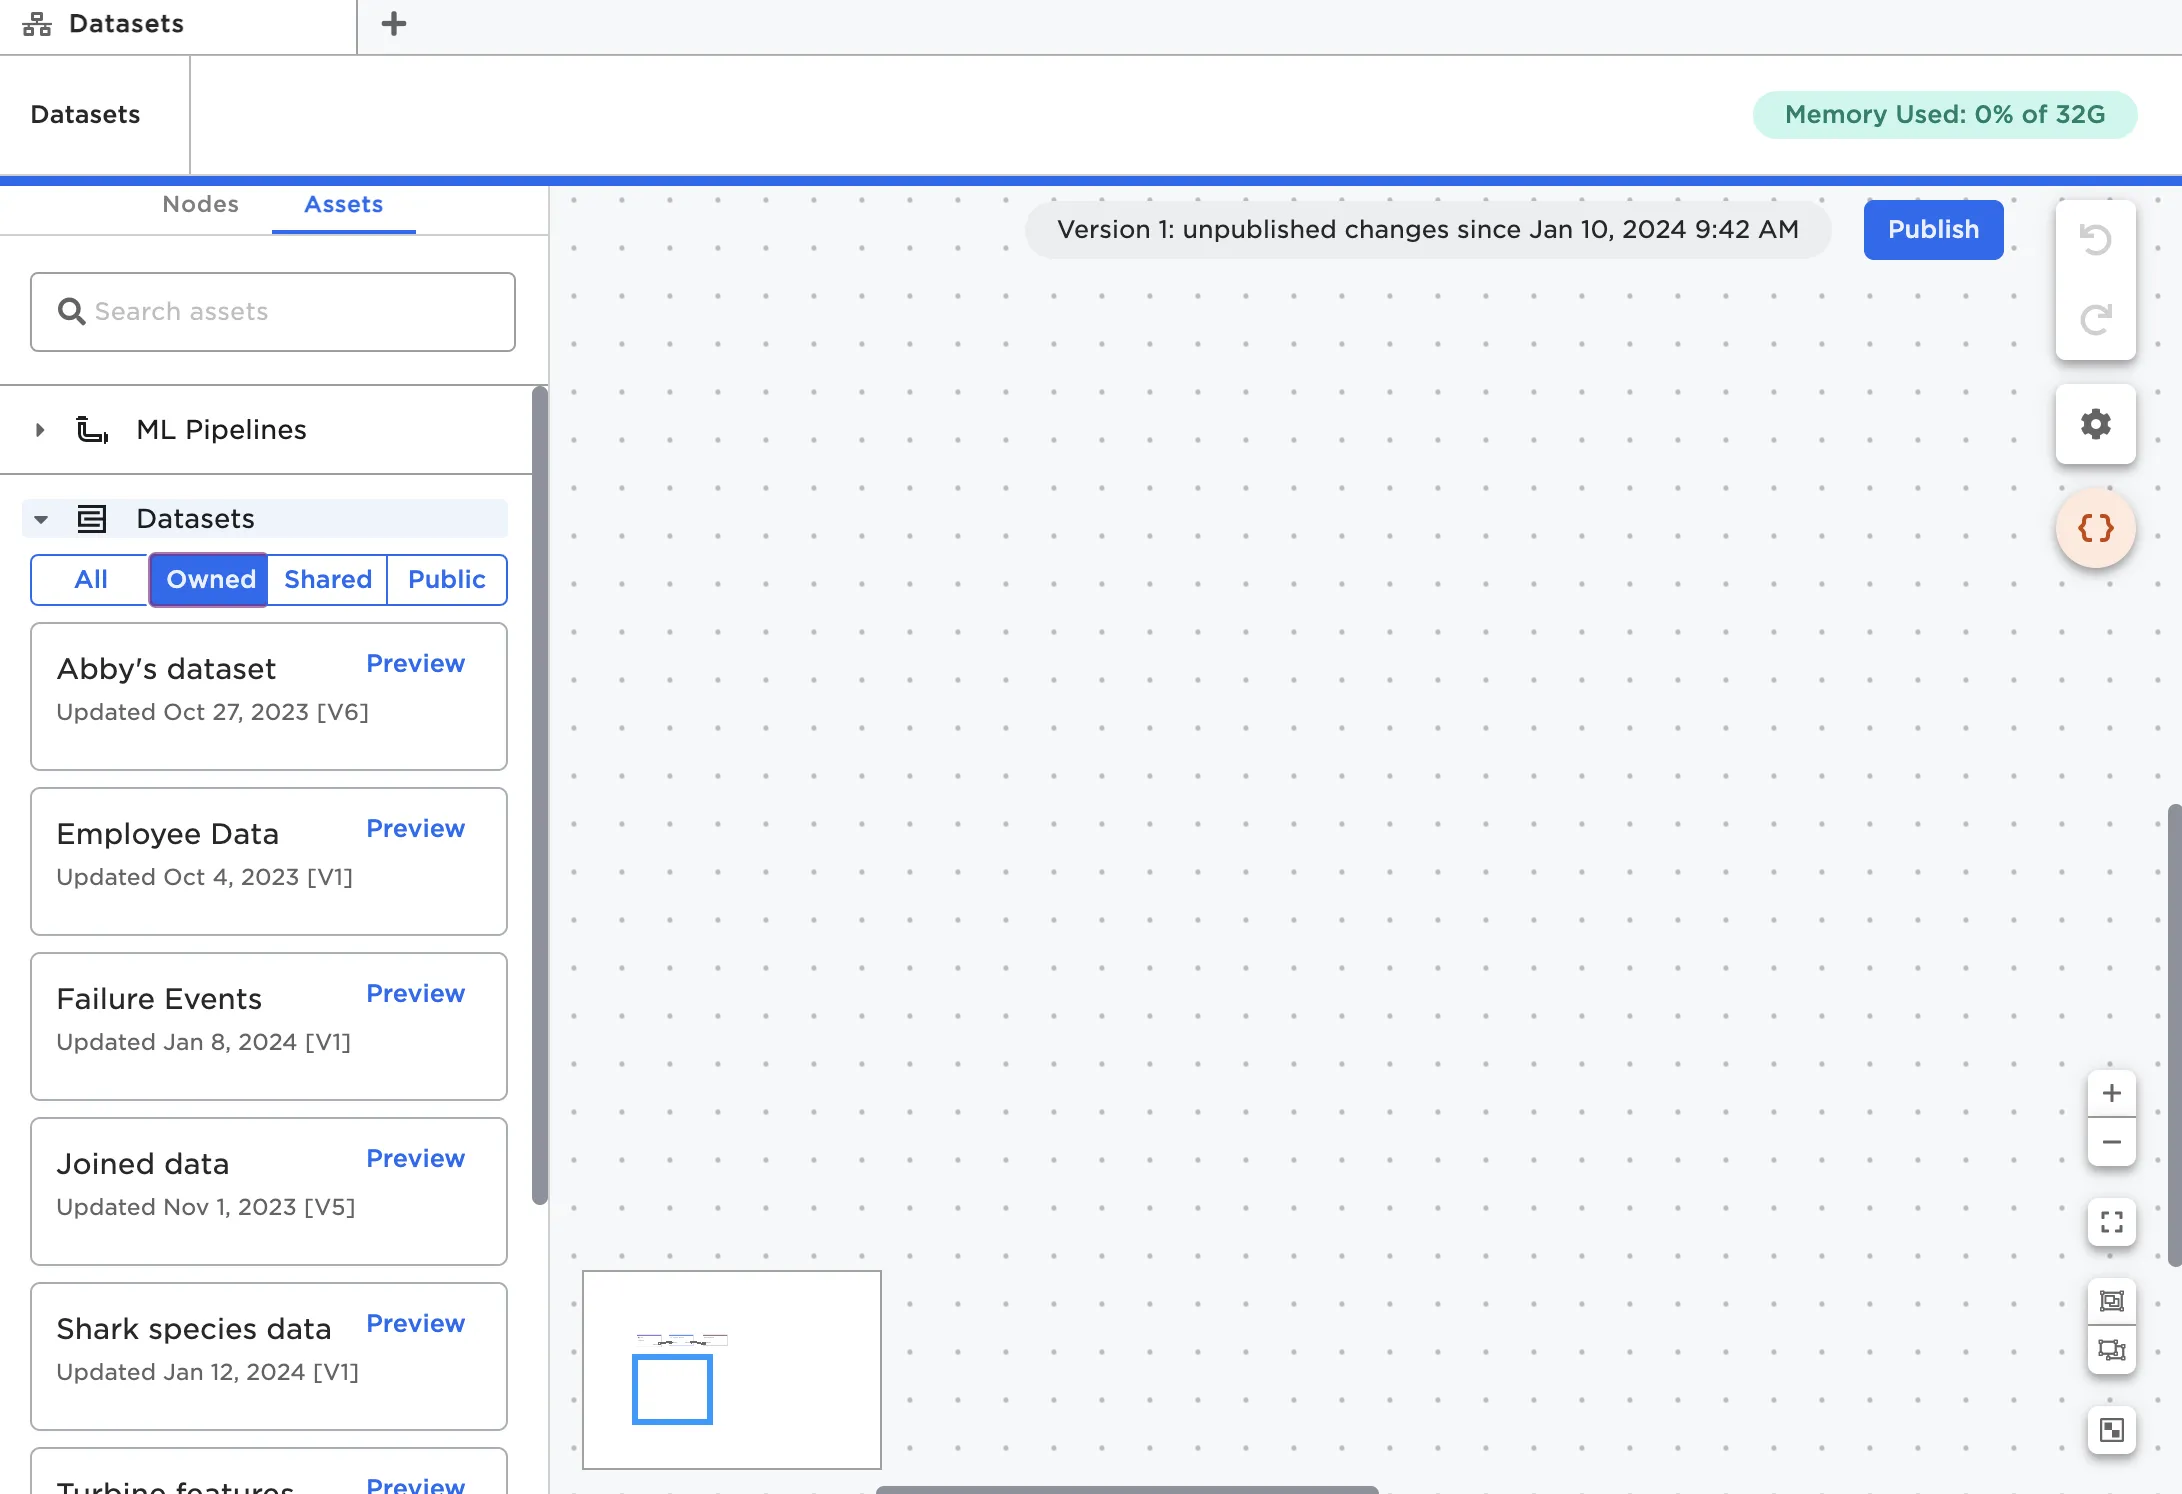
Figure 3: Datasets within the Assets panel
Select Preview to see the first five rows of the dataset and explore different versions.
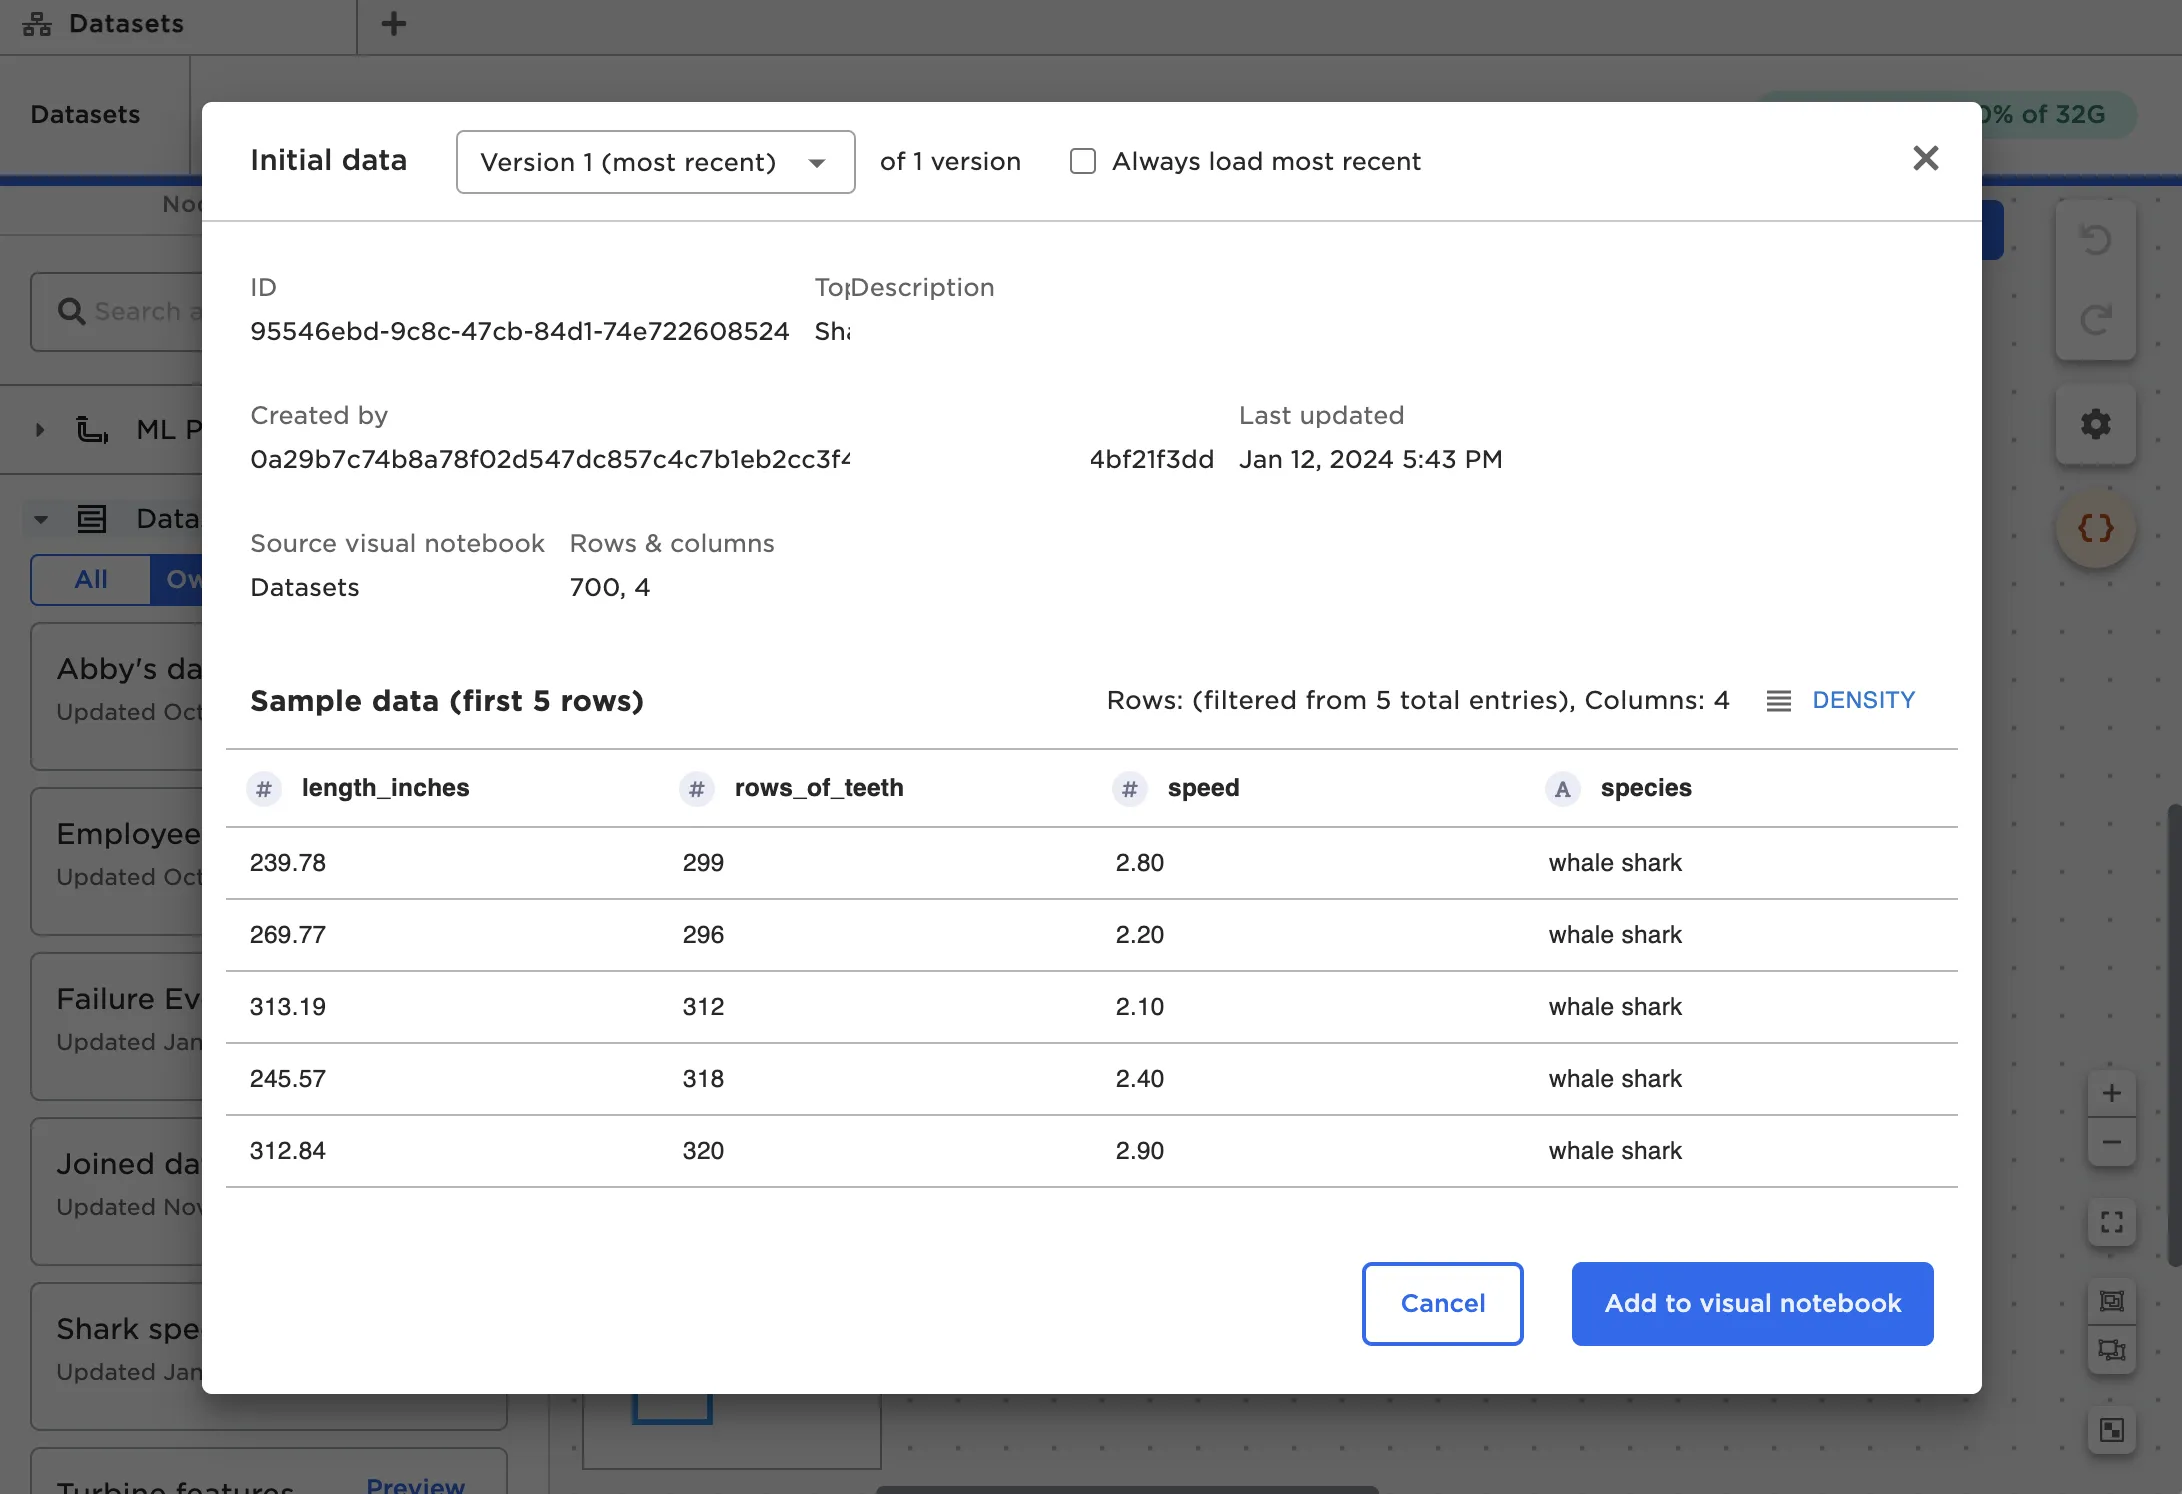
Figure 4: Dataset preview
You can also view a list of all Visual Notebooks datasets you have access to from the specific Datasets page.

Figure 5: Dataset page
Using Visual Notebooks datasets
After datasets are created, they can be used as a node in visual notebooks and ML pipelines. From a visual notebook or ML pipeline, switch to the assets panel and expand the Datasets section. Find the dataset you'd like to use and drag it onto the canvas in the same way you would a node.
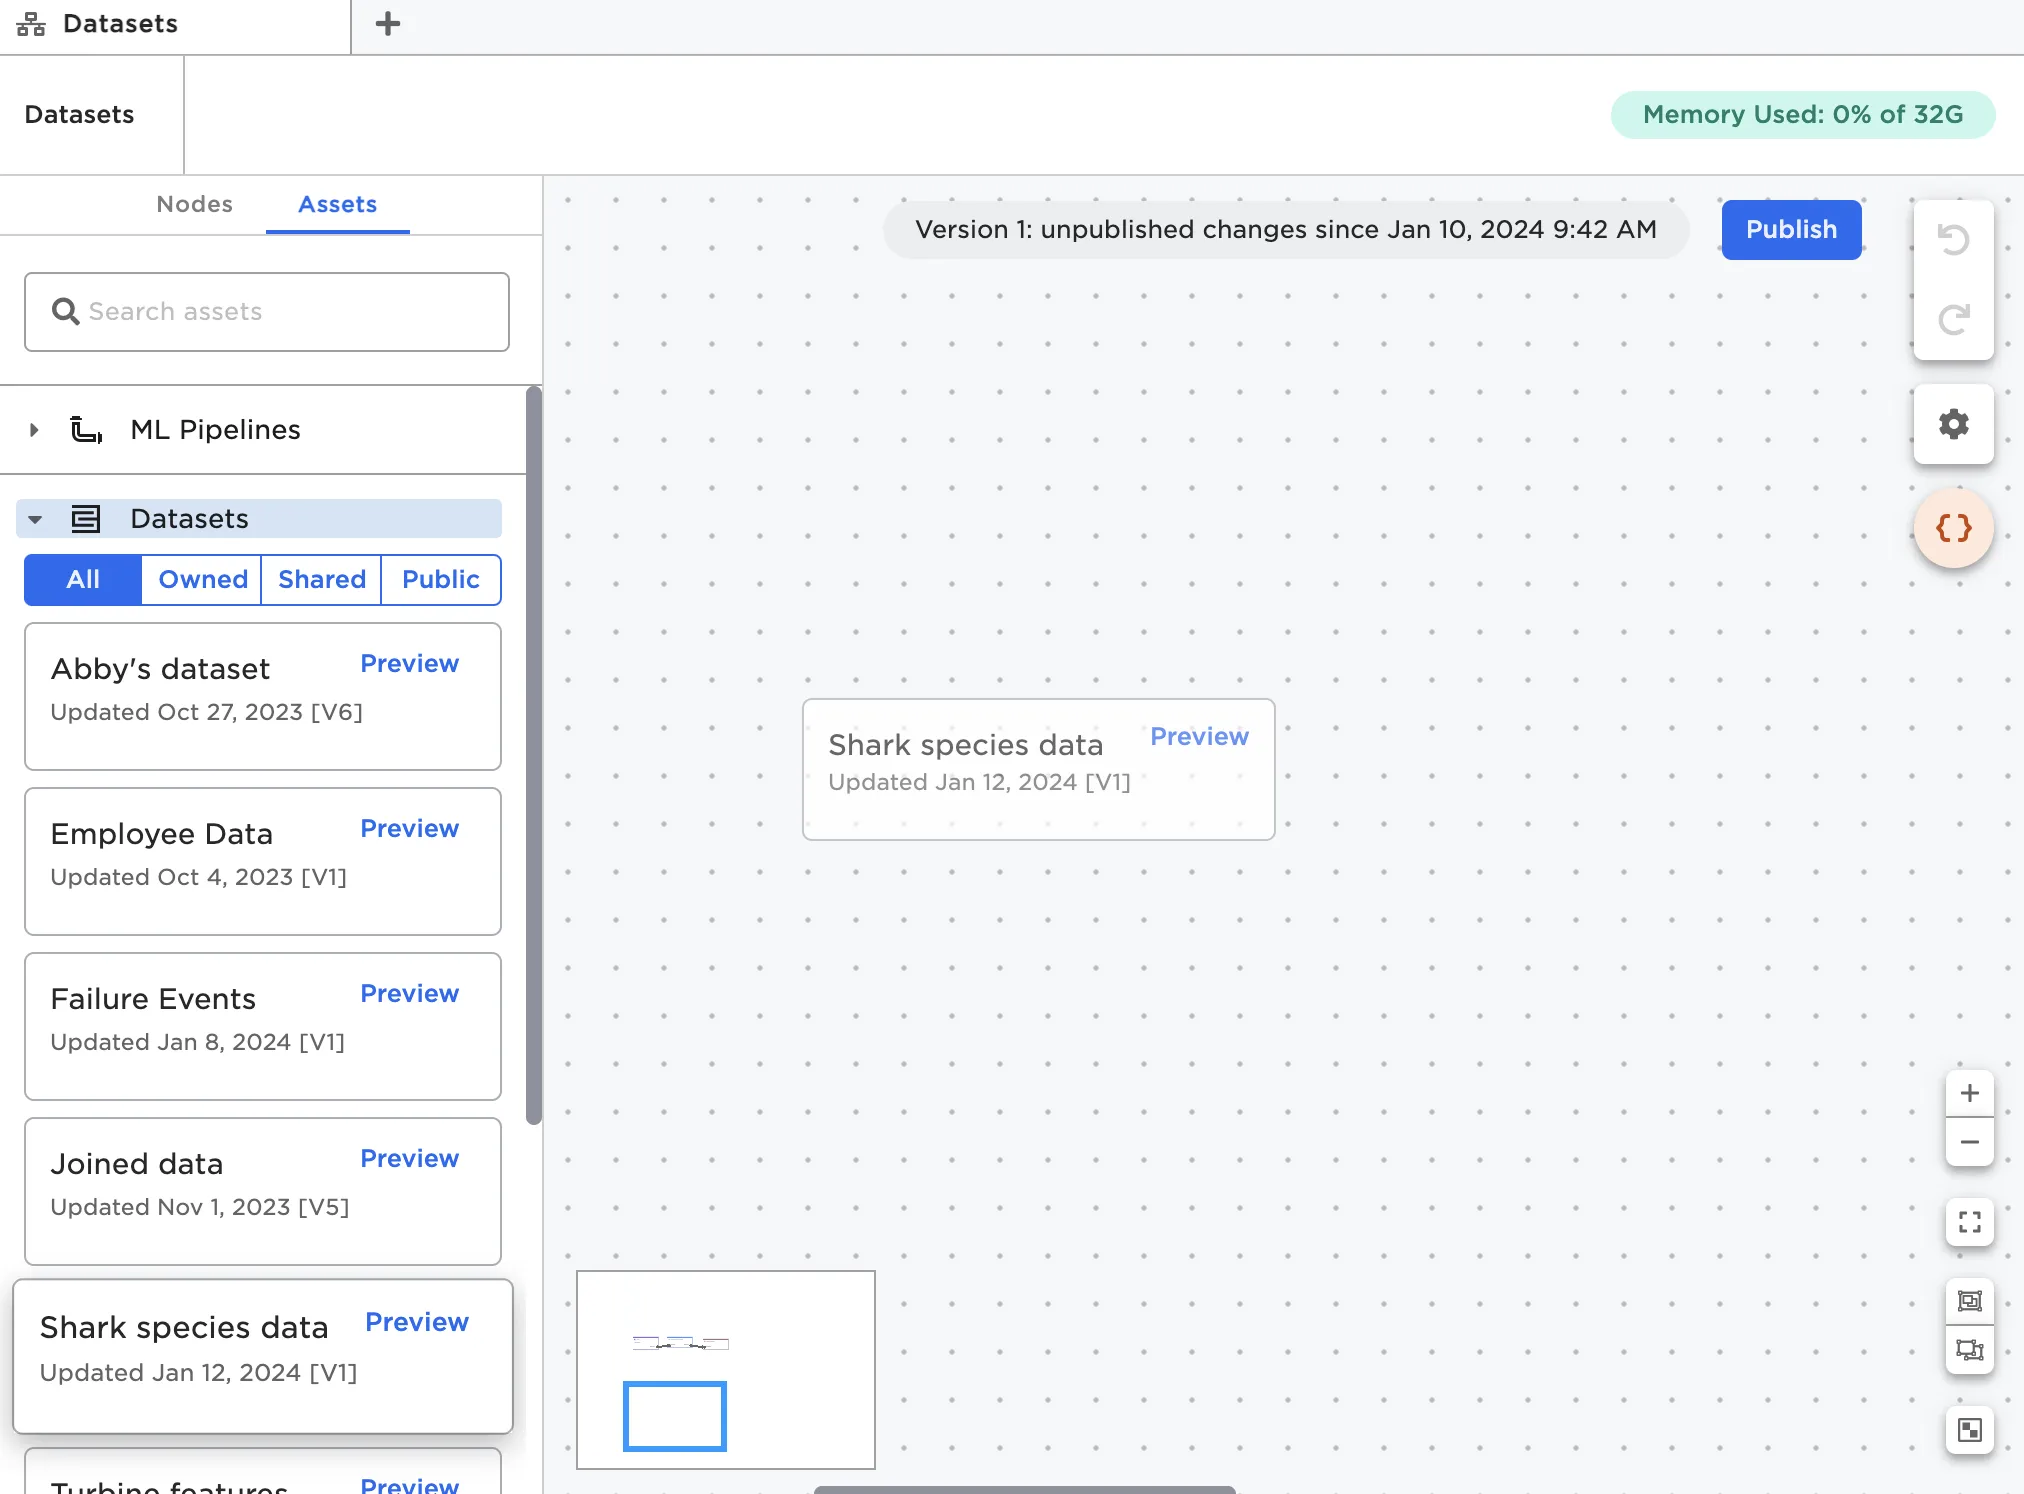
Figure 6: Using a saved dataset
Alternately, you can select Preview, then Add to visual notebook.
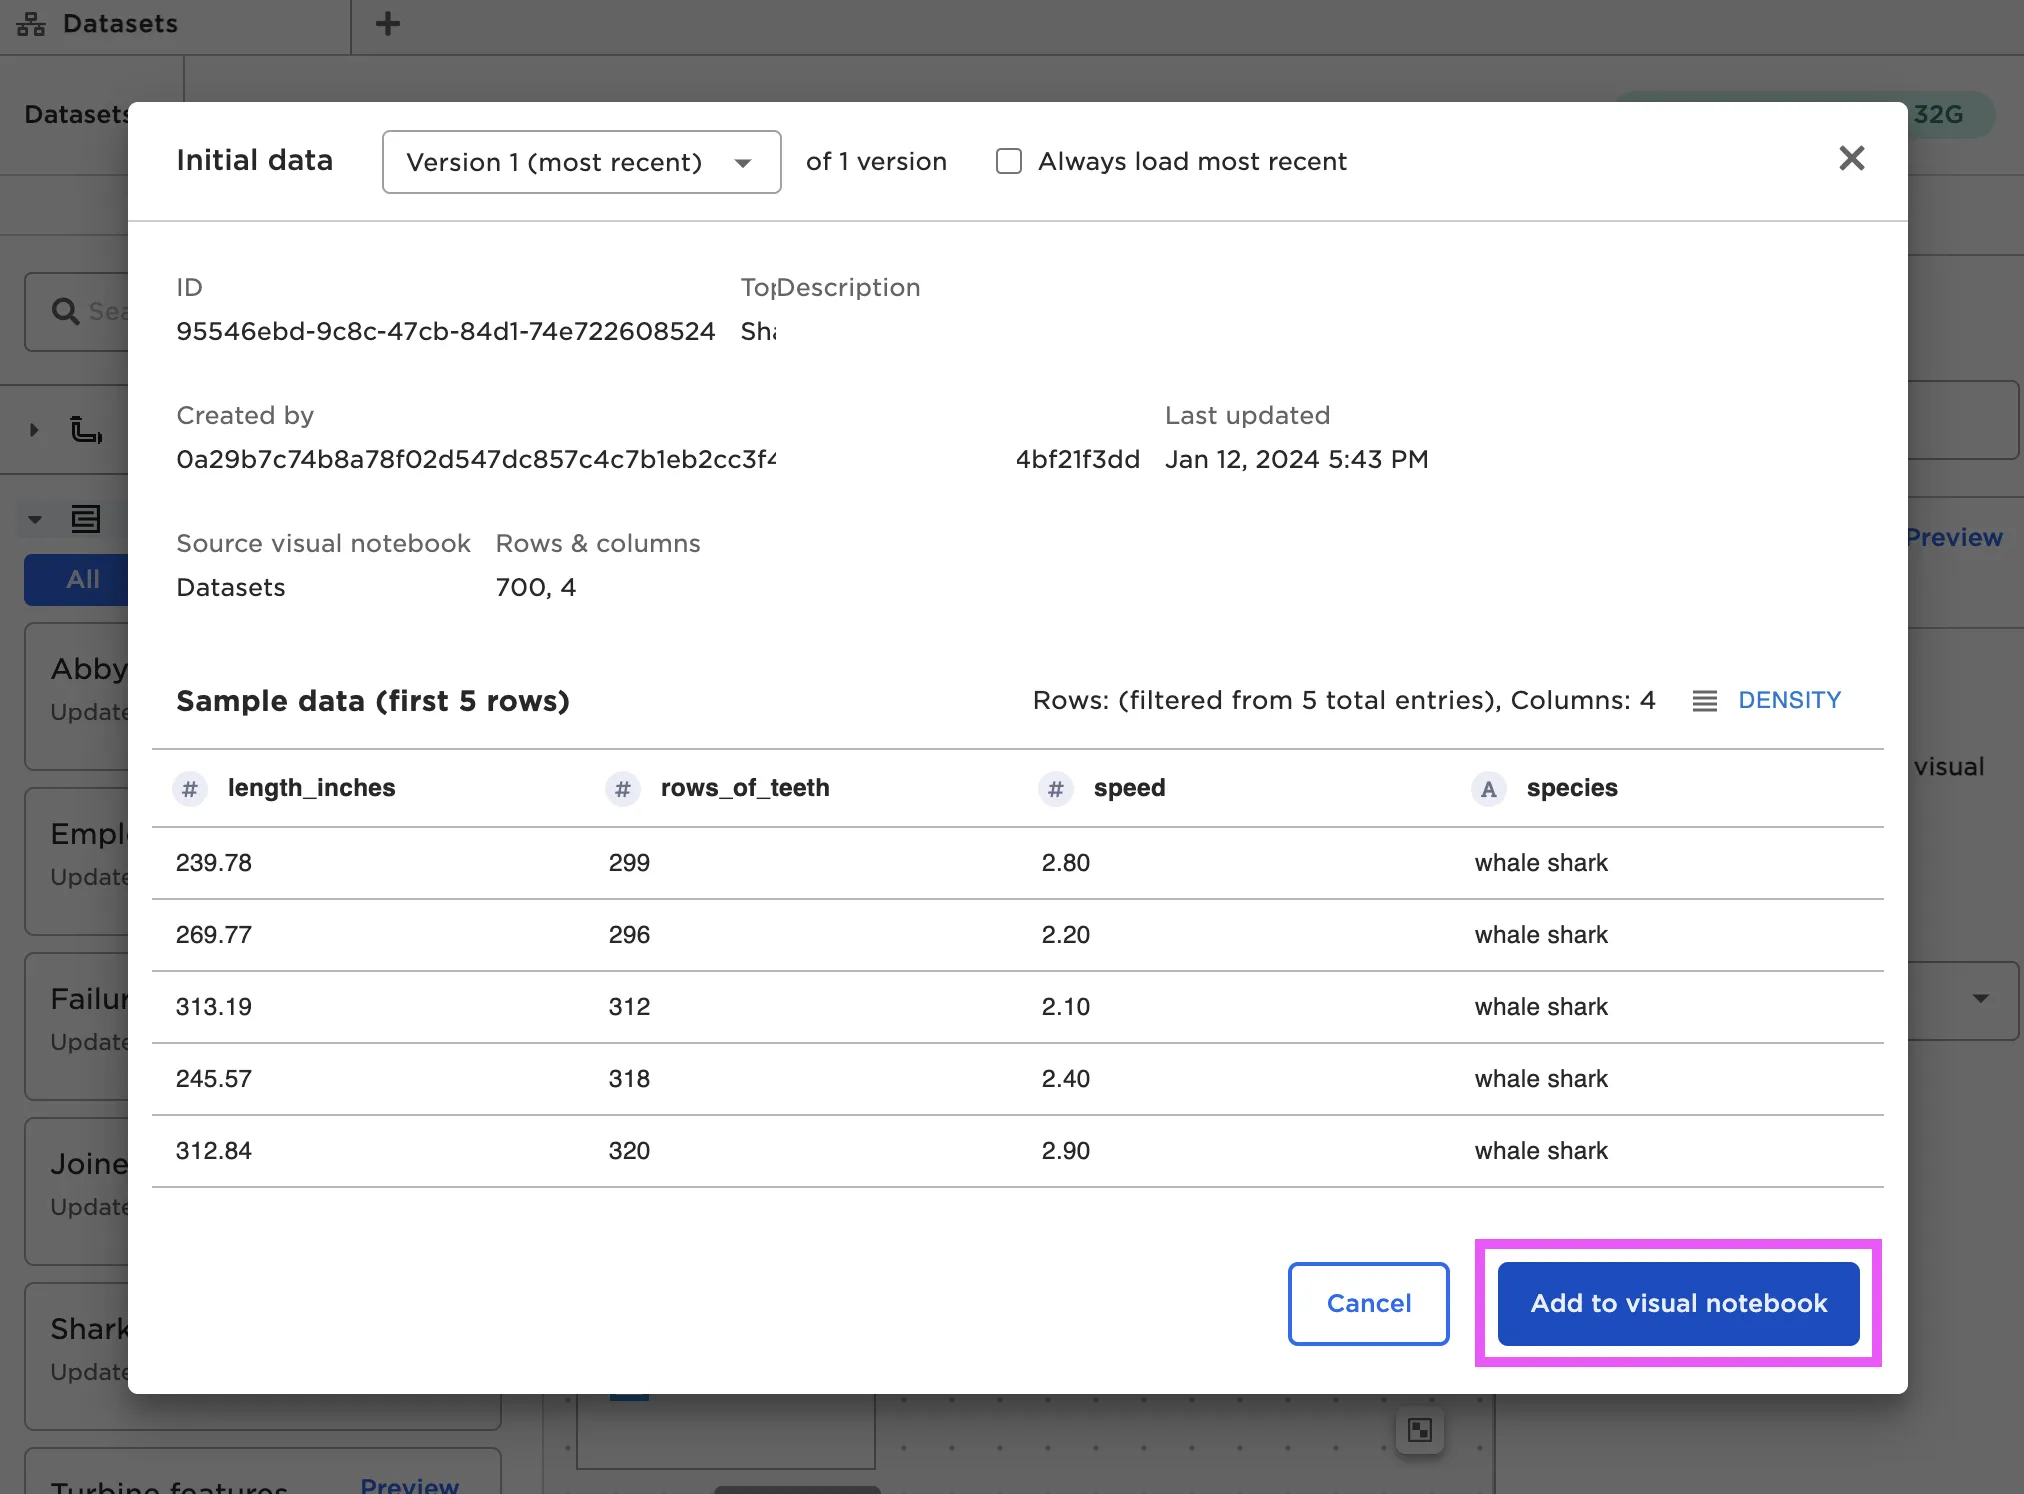
Figure 7: Using a saved dataset from the preview view
Updating Visual Notebooks datasets
If you ever want to create a new version of the dataset, run the same Save Dataset node again or use a new Save Dataset node somewhere else in your workflow. As long as you select the same topic name, the dataset should update versions correctly.
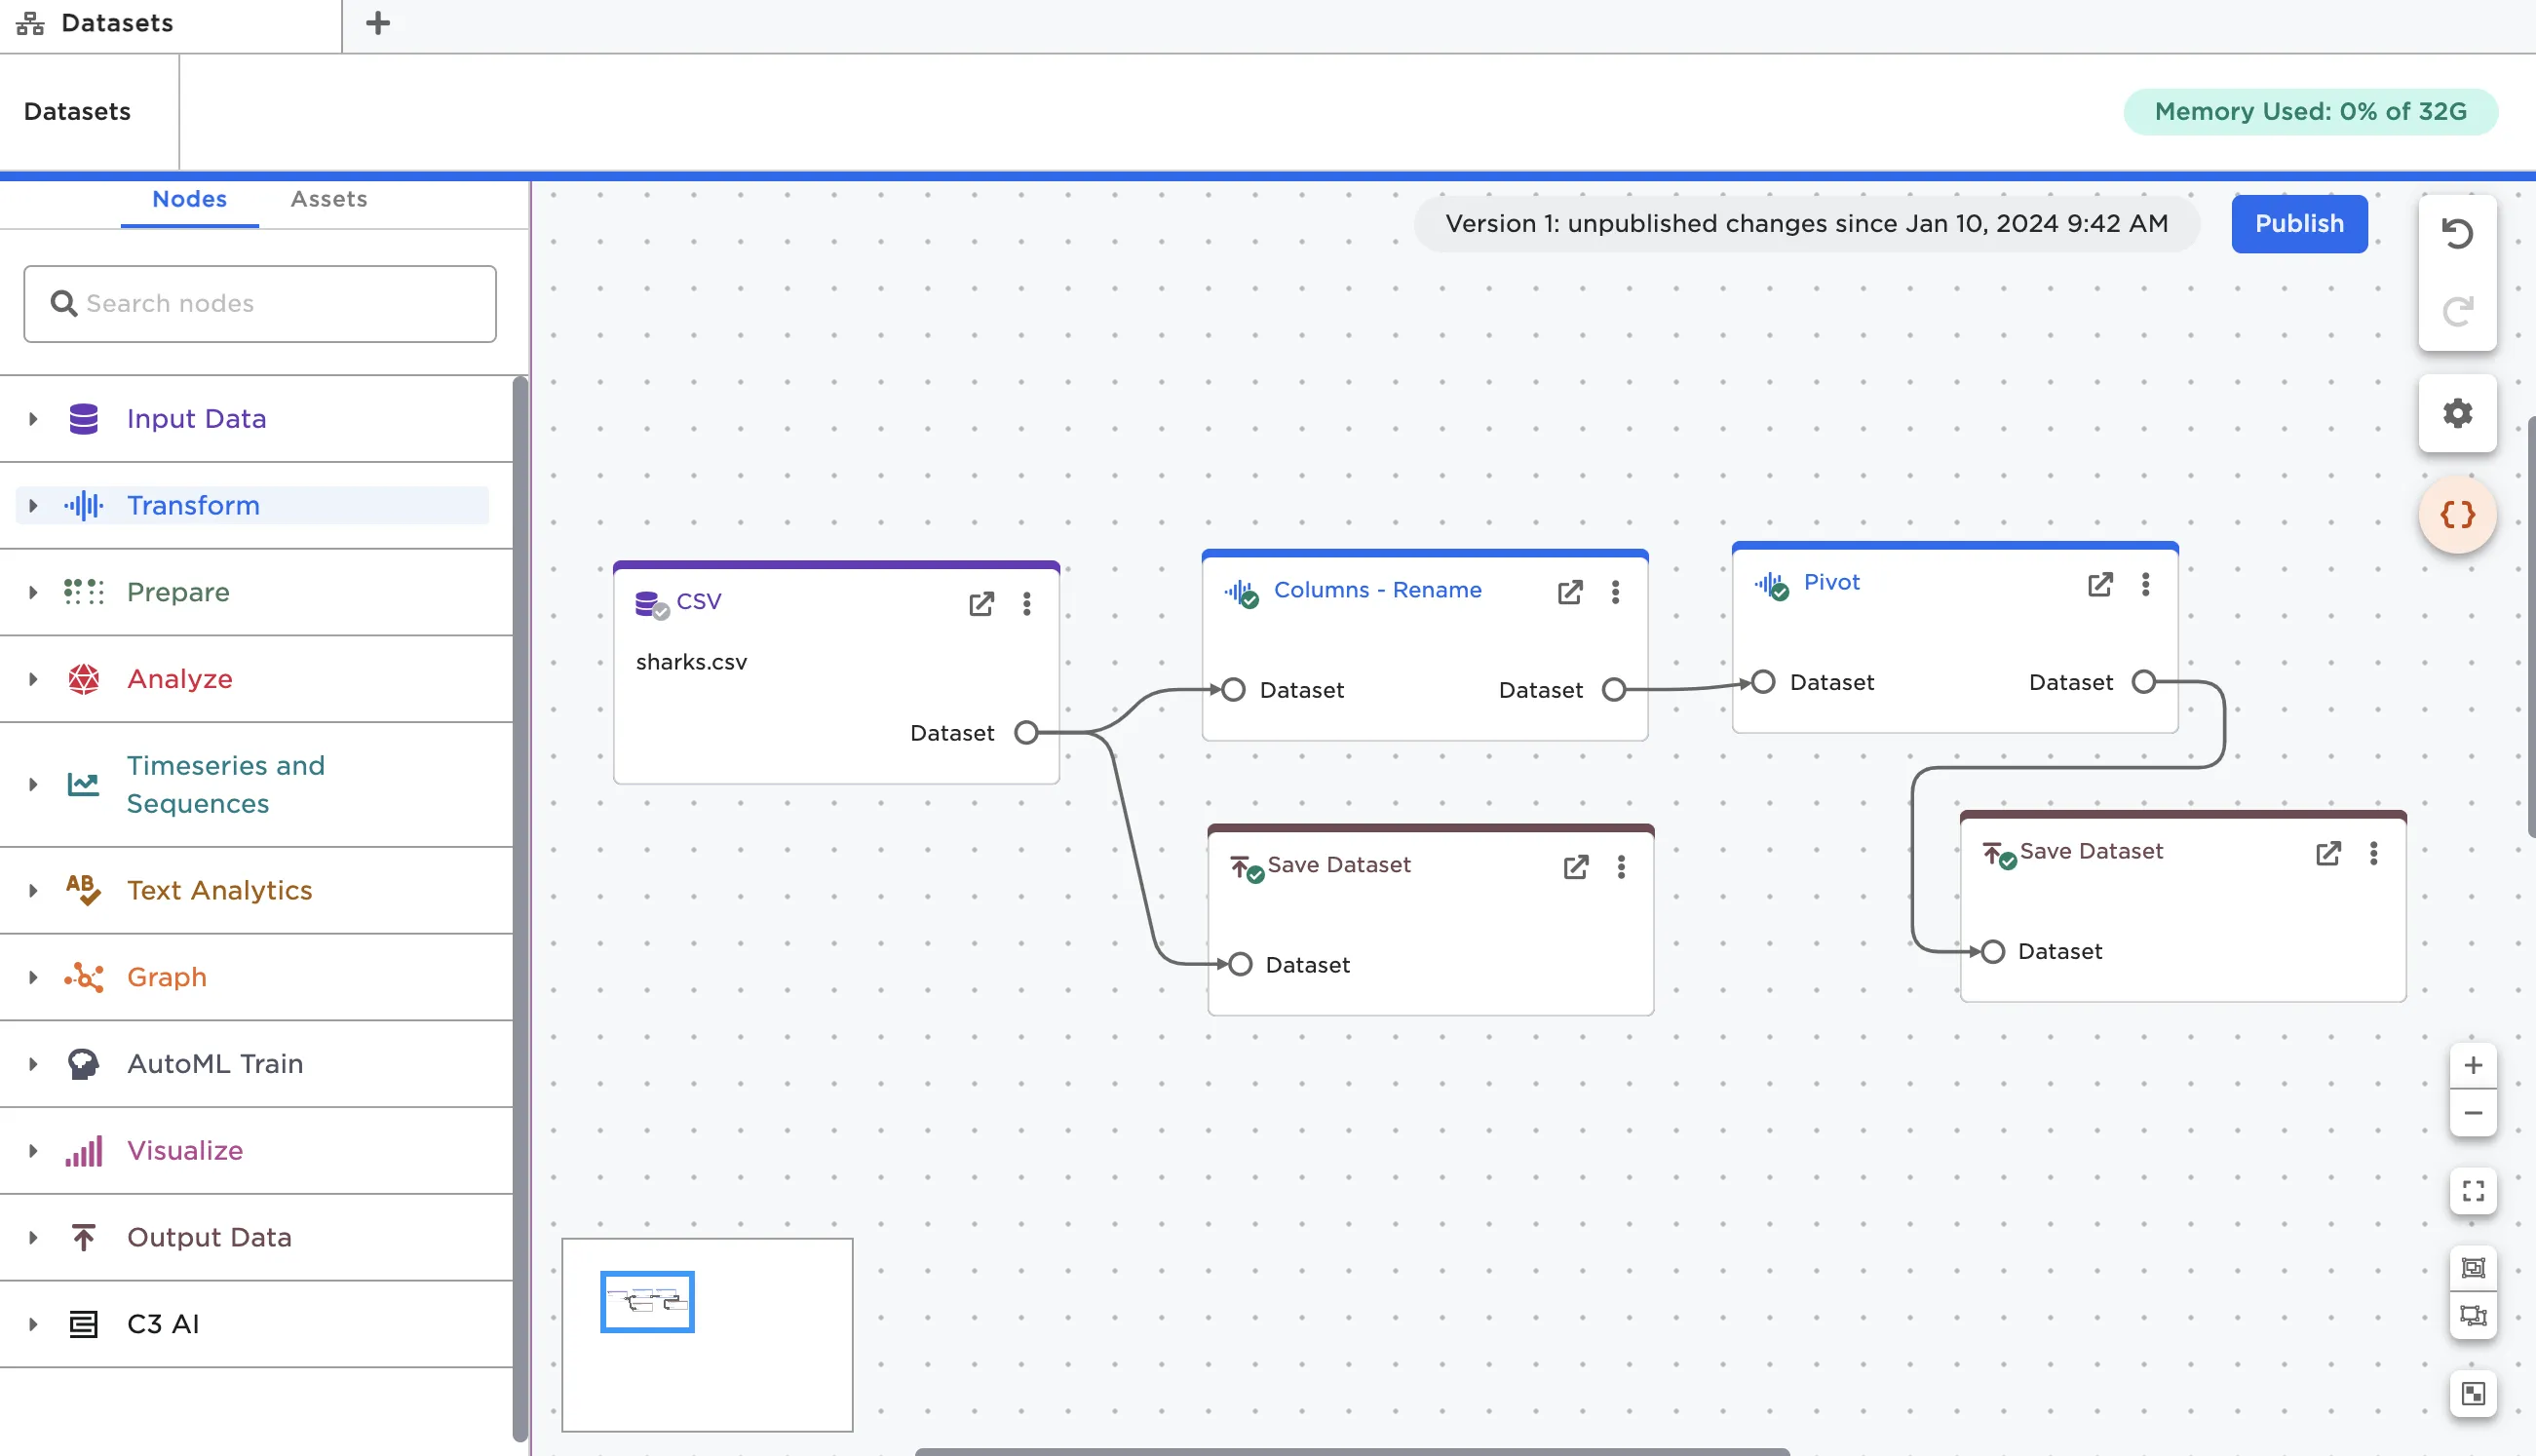
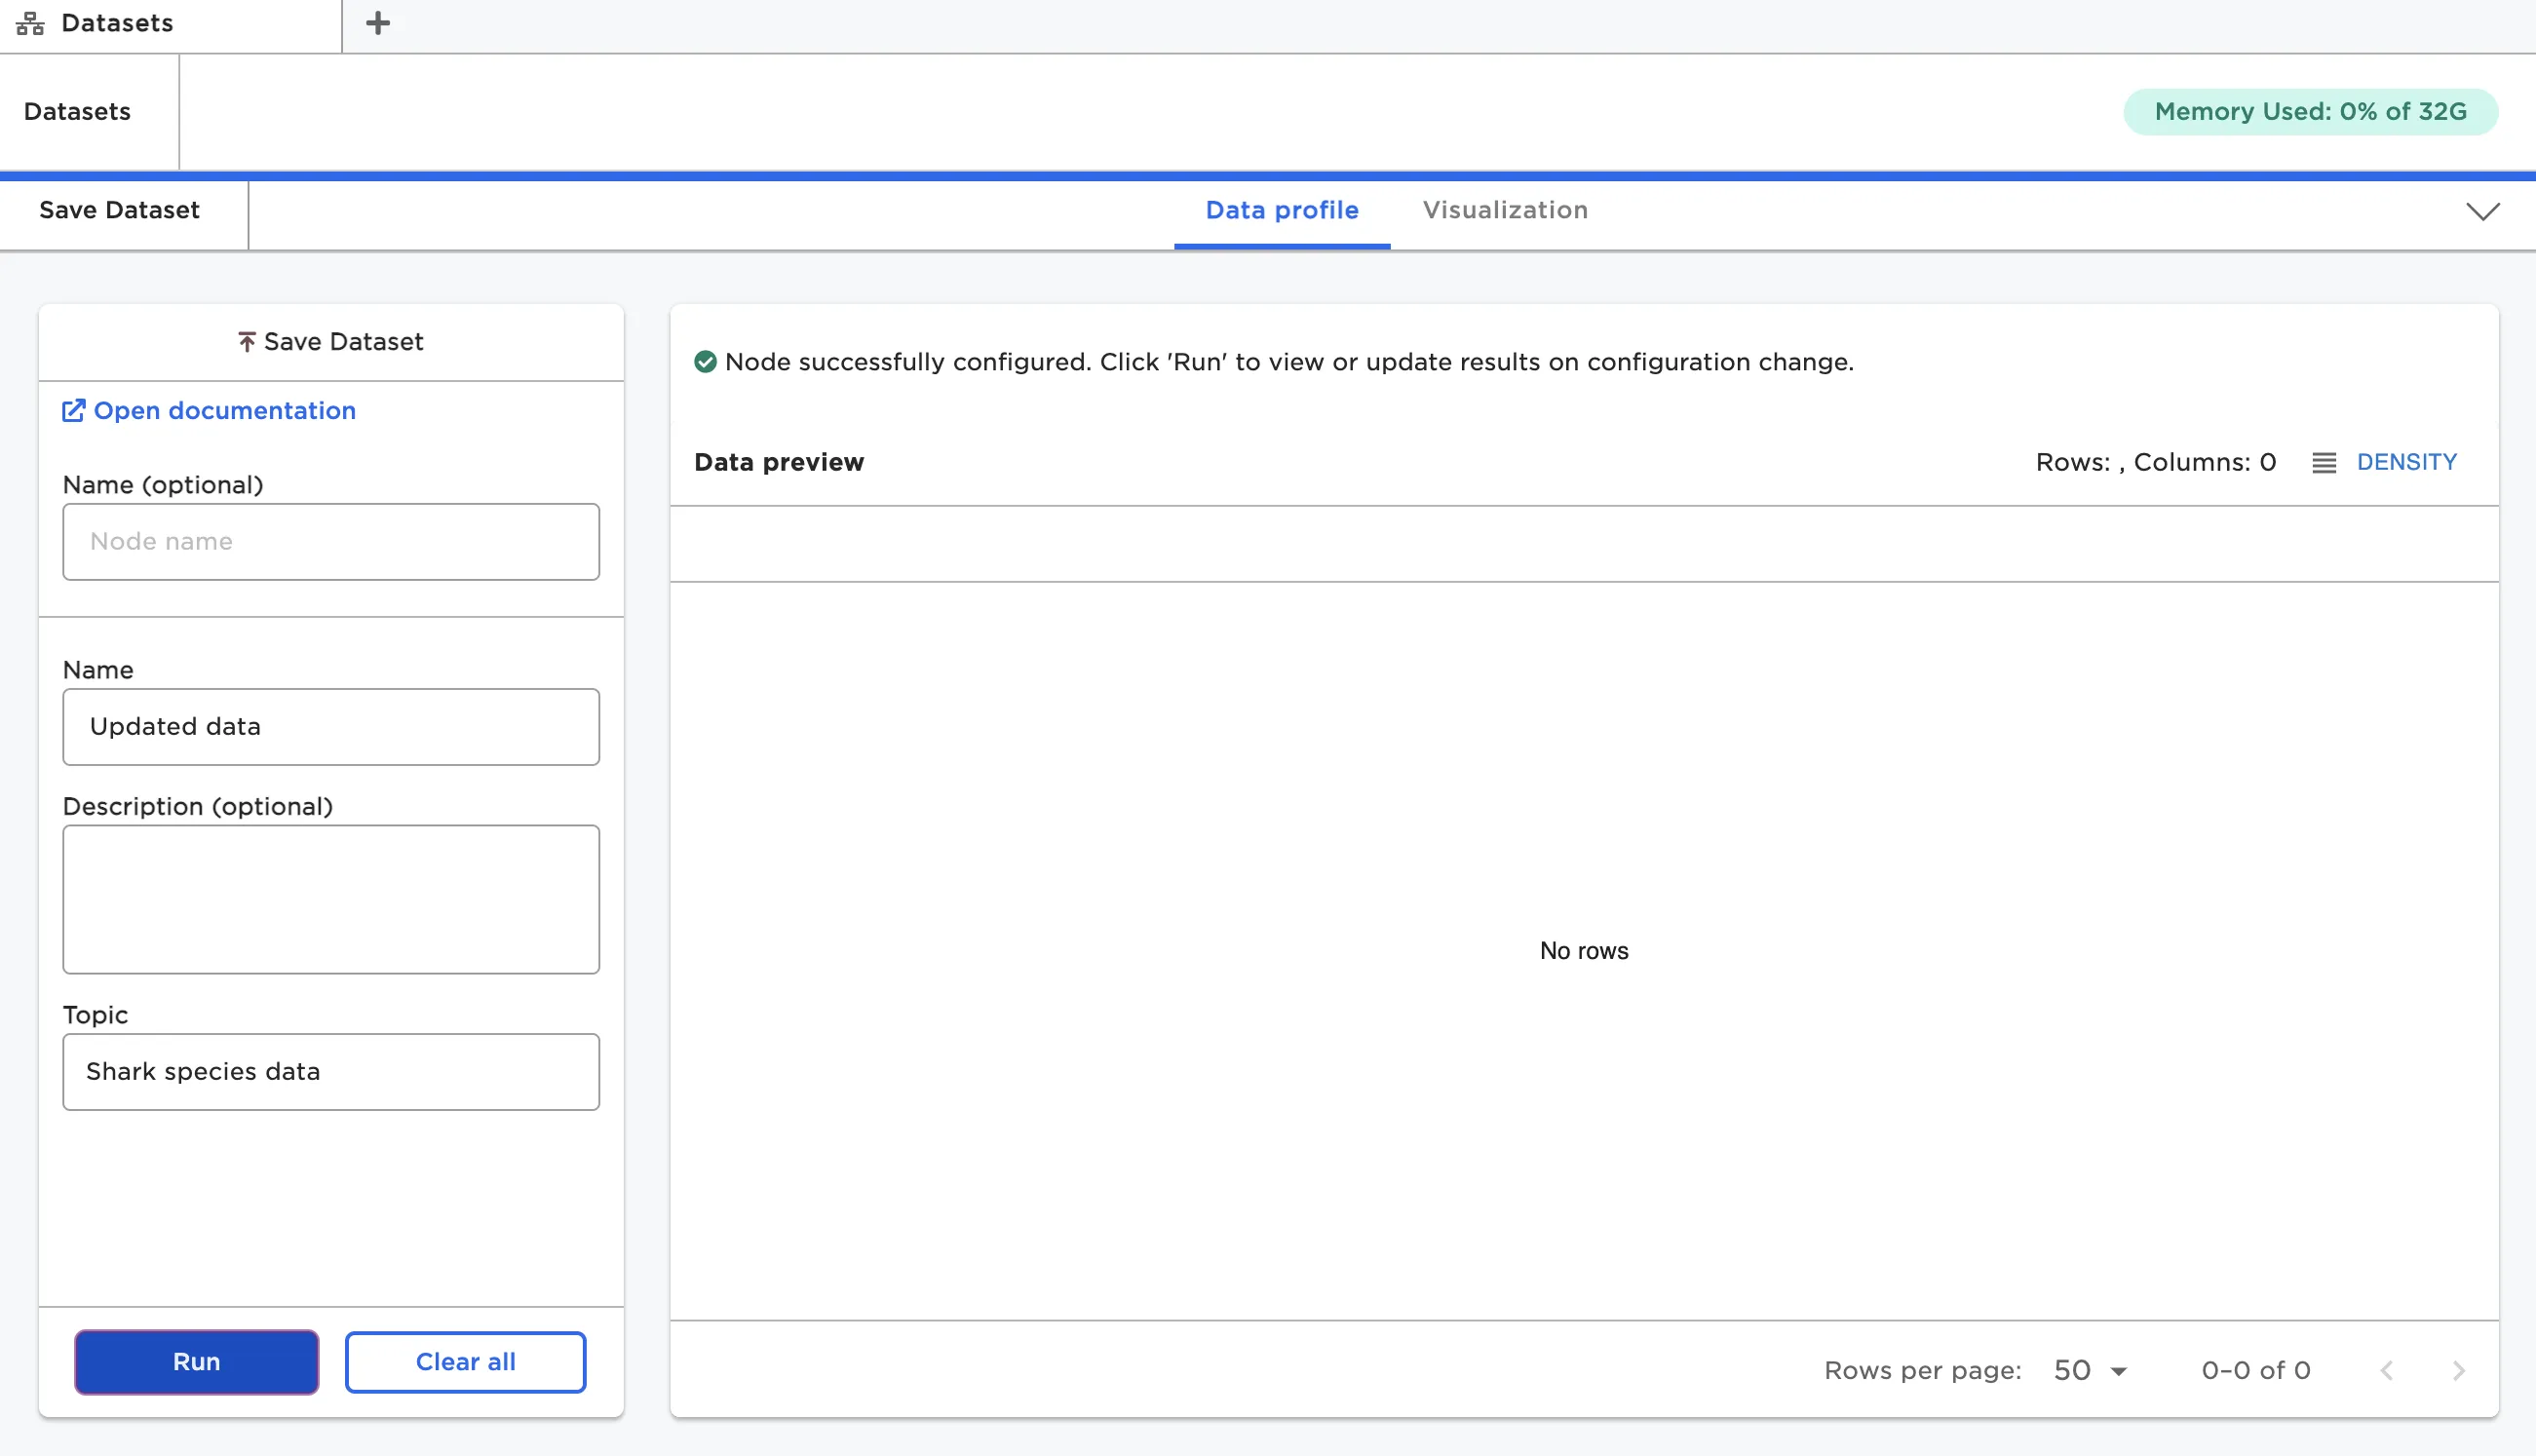
Figure 8: Updating an existing dataset
Sharing Visual Notebooks datasets
To share your dataset with others, expand the sidebar and navigate to the Datasets page. Select the arrow beside a dataset to share it.
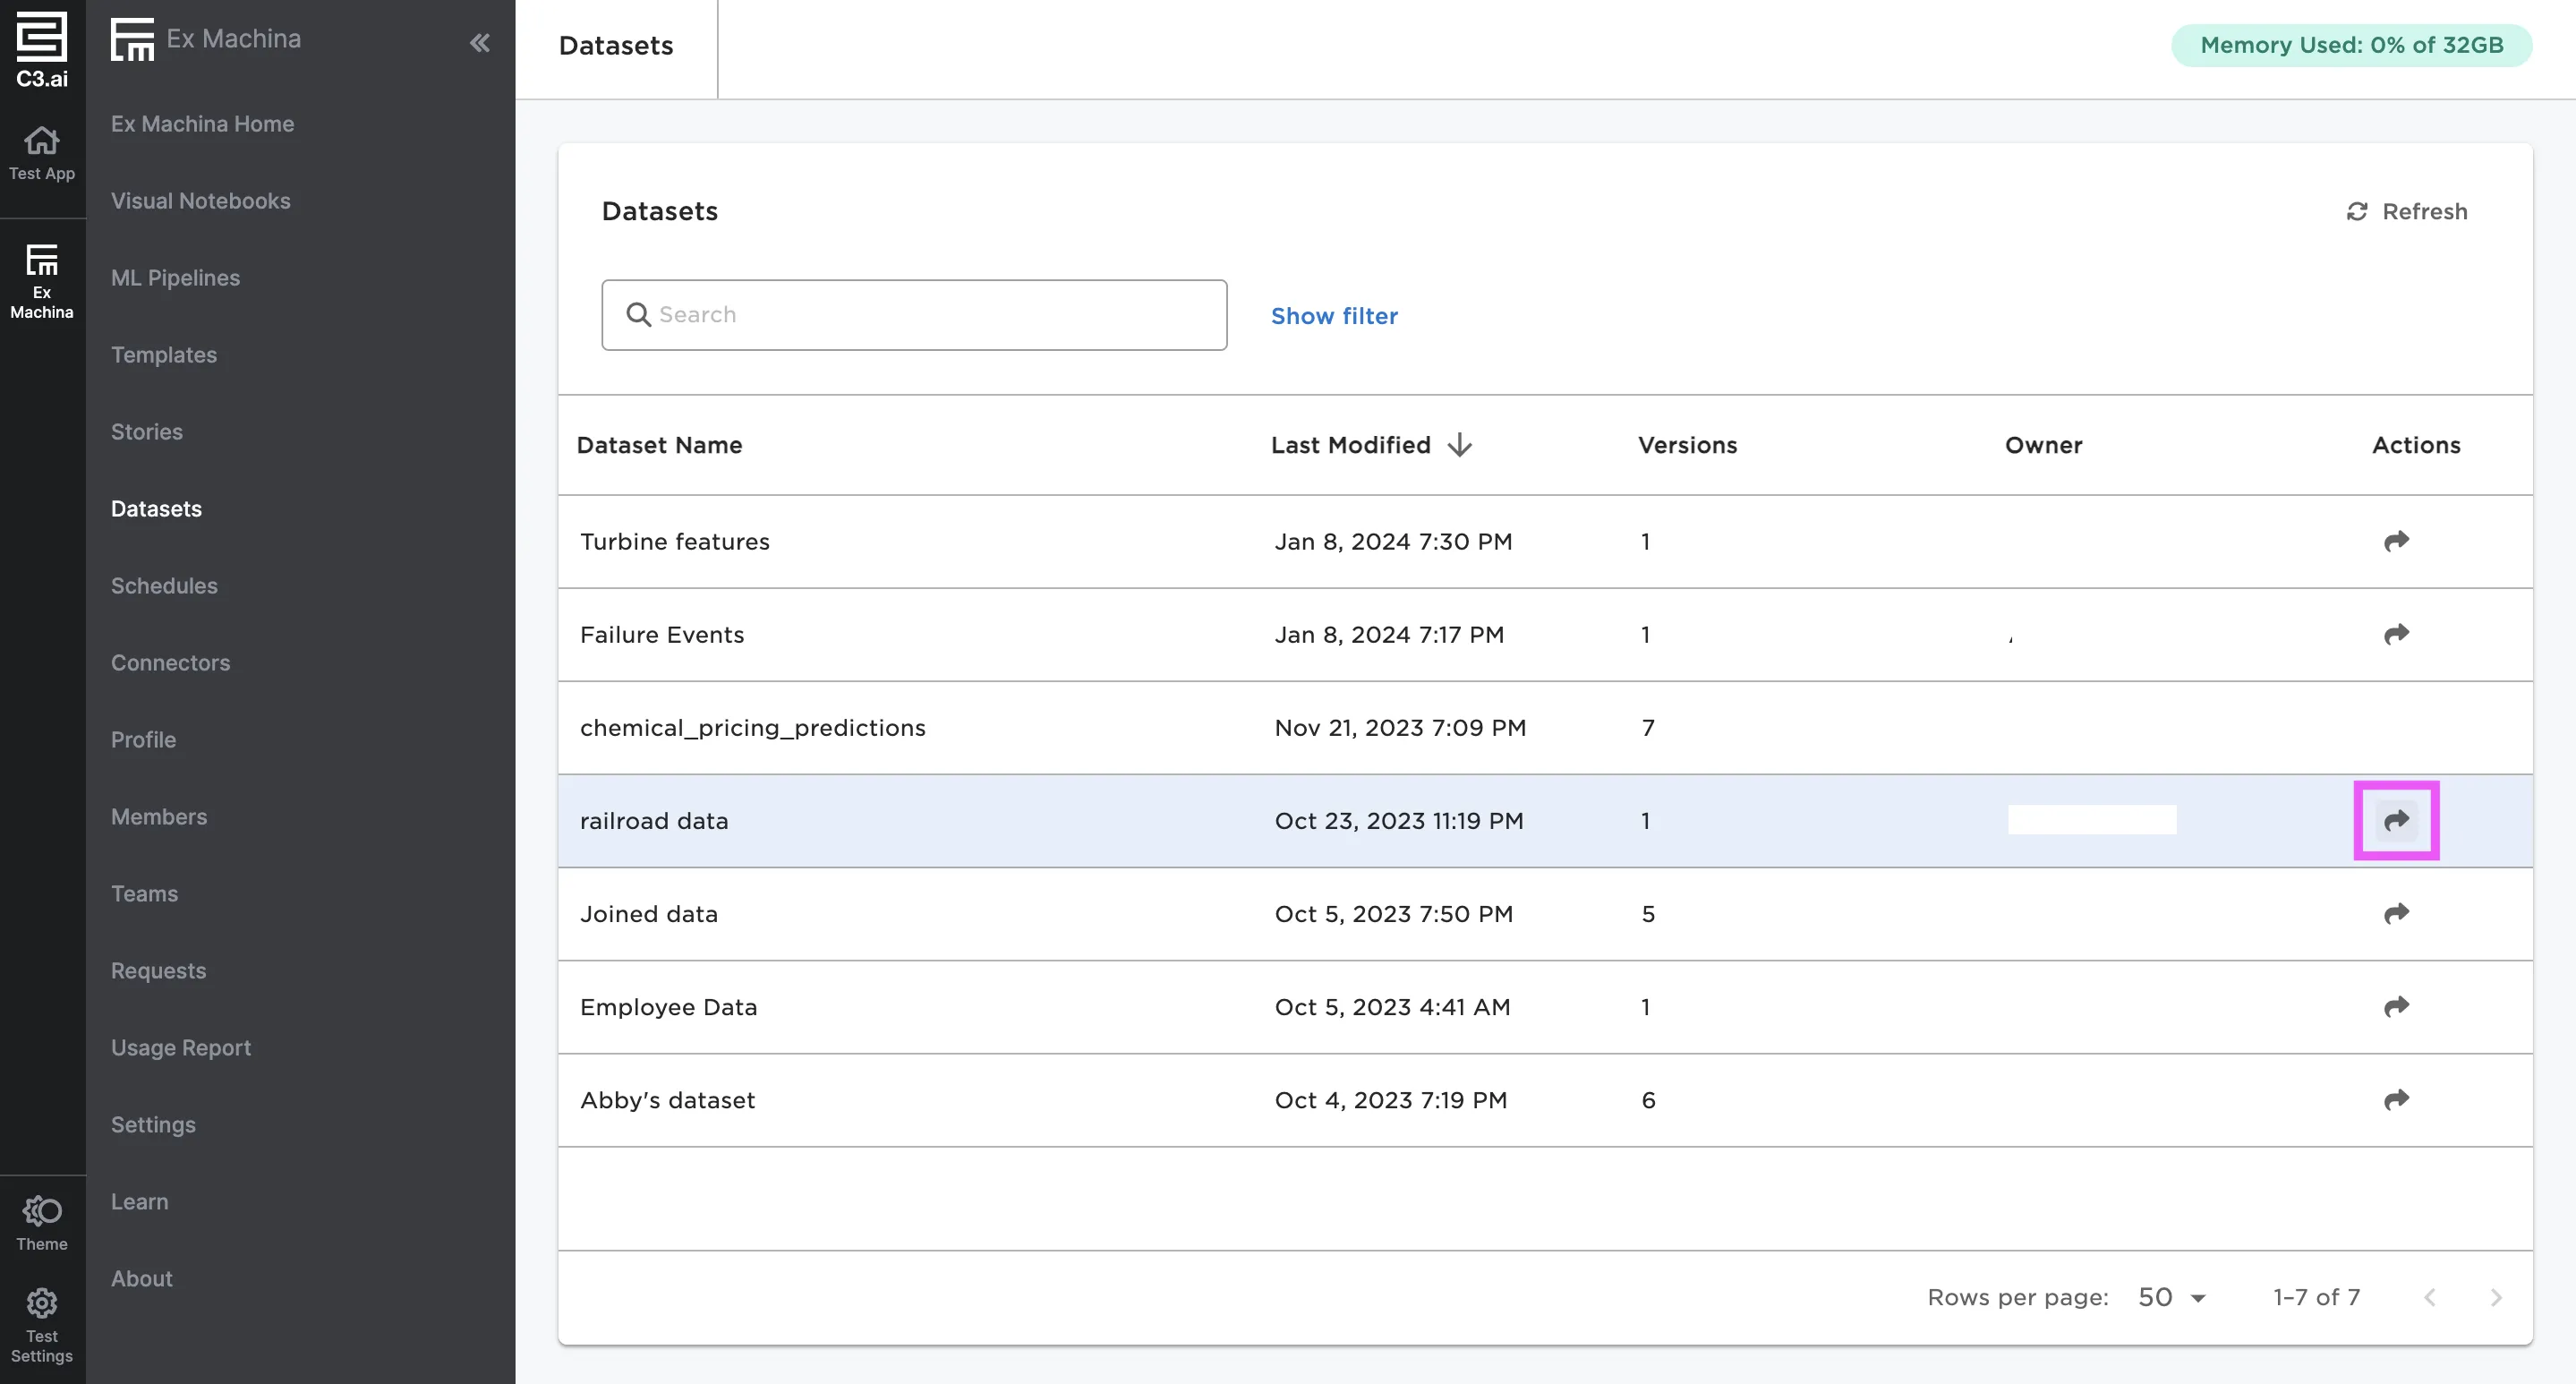
Figure 9: Share a specific dataset
Select a team to share the dataset with, then select Save. To create and manage teams, visit the Teams page.
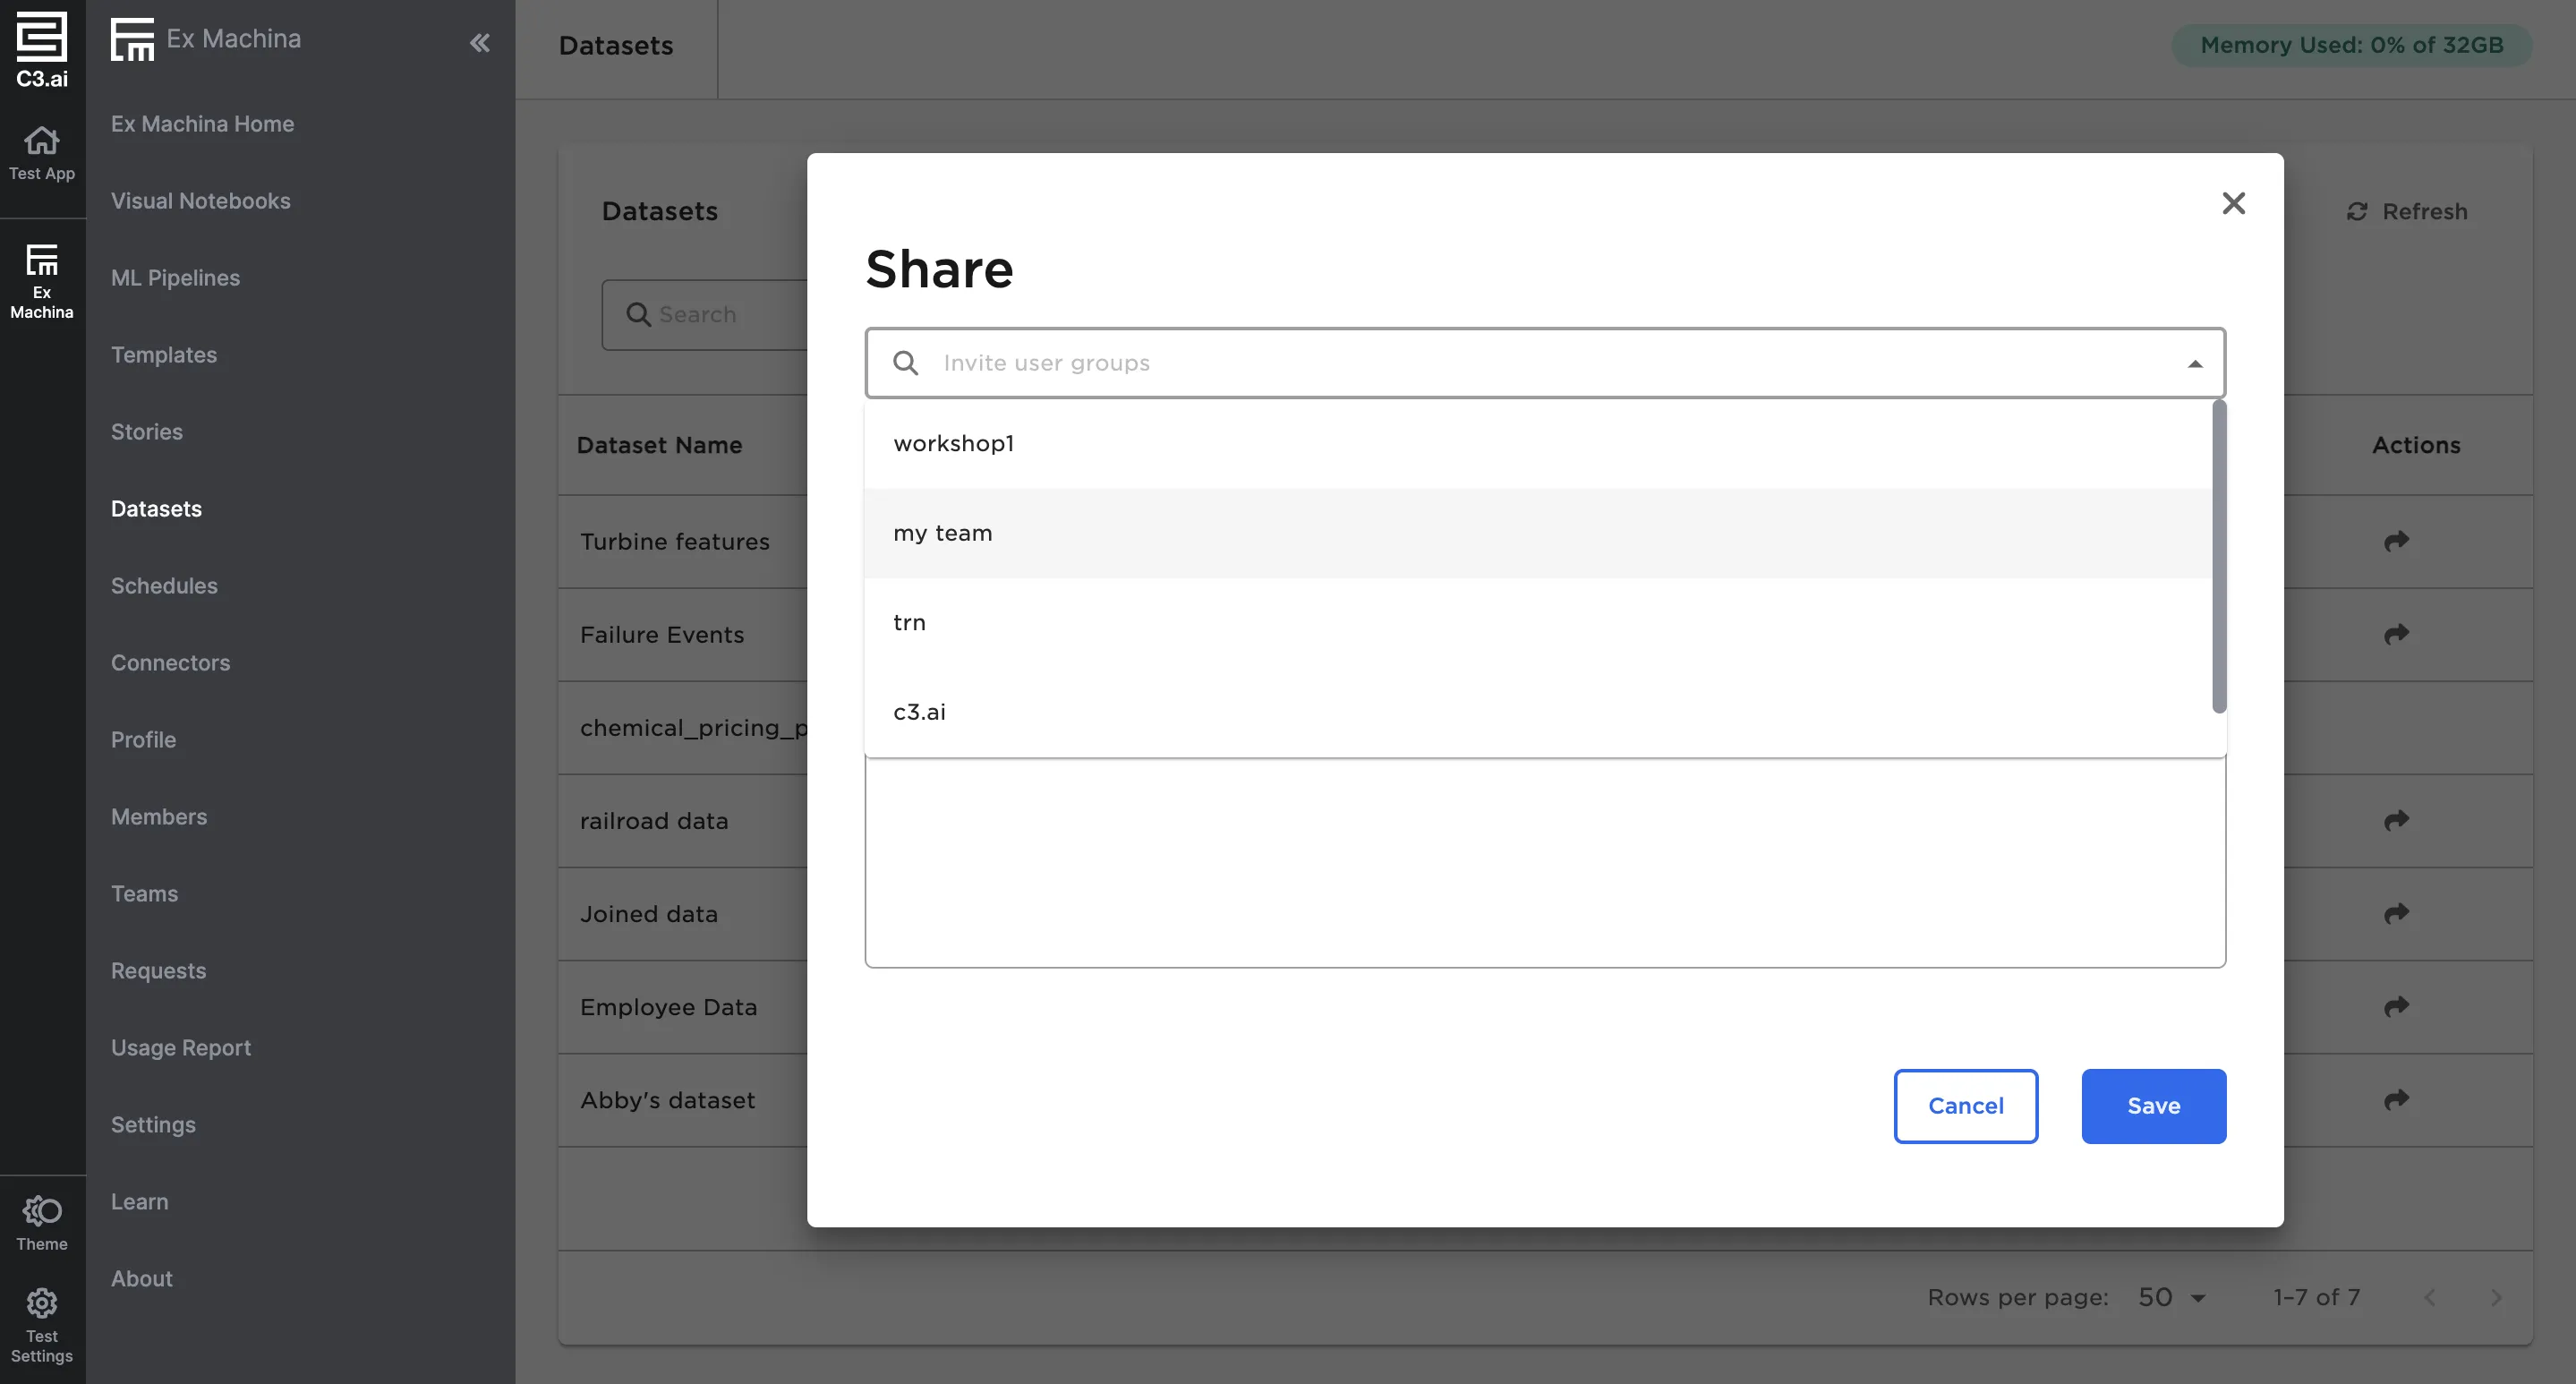
Figure 10: Share a dataset with a team