Using Output Connectors in Visual Notebooks
You can export data you have in Visual Notebooks to cloud storage, SQL sources, and NoSQL sources. Visual Notebooks supports exporting data to the following sources:
Note: In addition, you can always export your data as a CSV file on your local computer. To export data from a specific node, select the three dot menu in the right corner of the node when viewing the node on the canvas. When the dropdown menu appears, select Export to CSV.
Select a node
Data can be exported from existing visual notebooks and ML pipelines. To export data, find the node that corresponds to the source you want to export to. Relevant nodes are in the Output Data section, then one of the following subsections: Cloud Storage, SQL Targets, or NoSQL Targets.
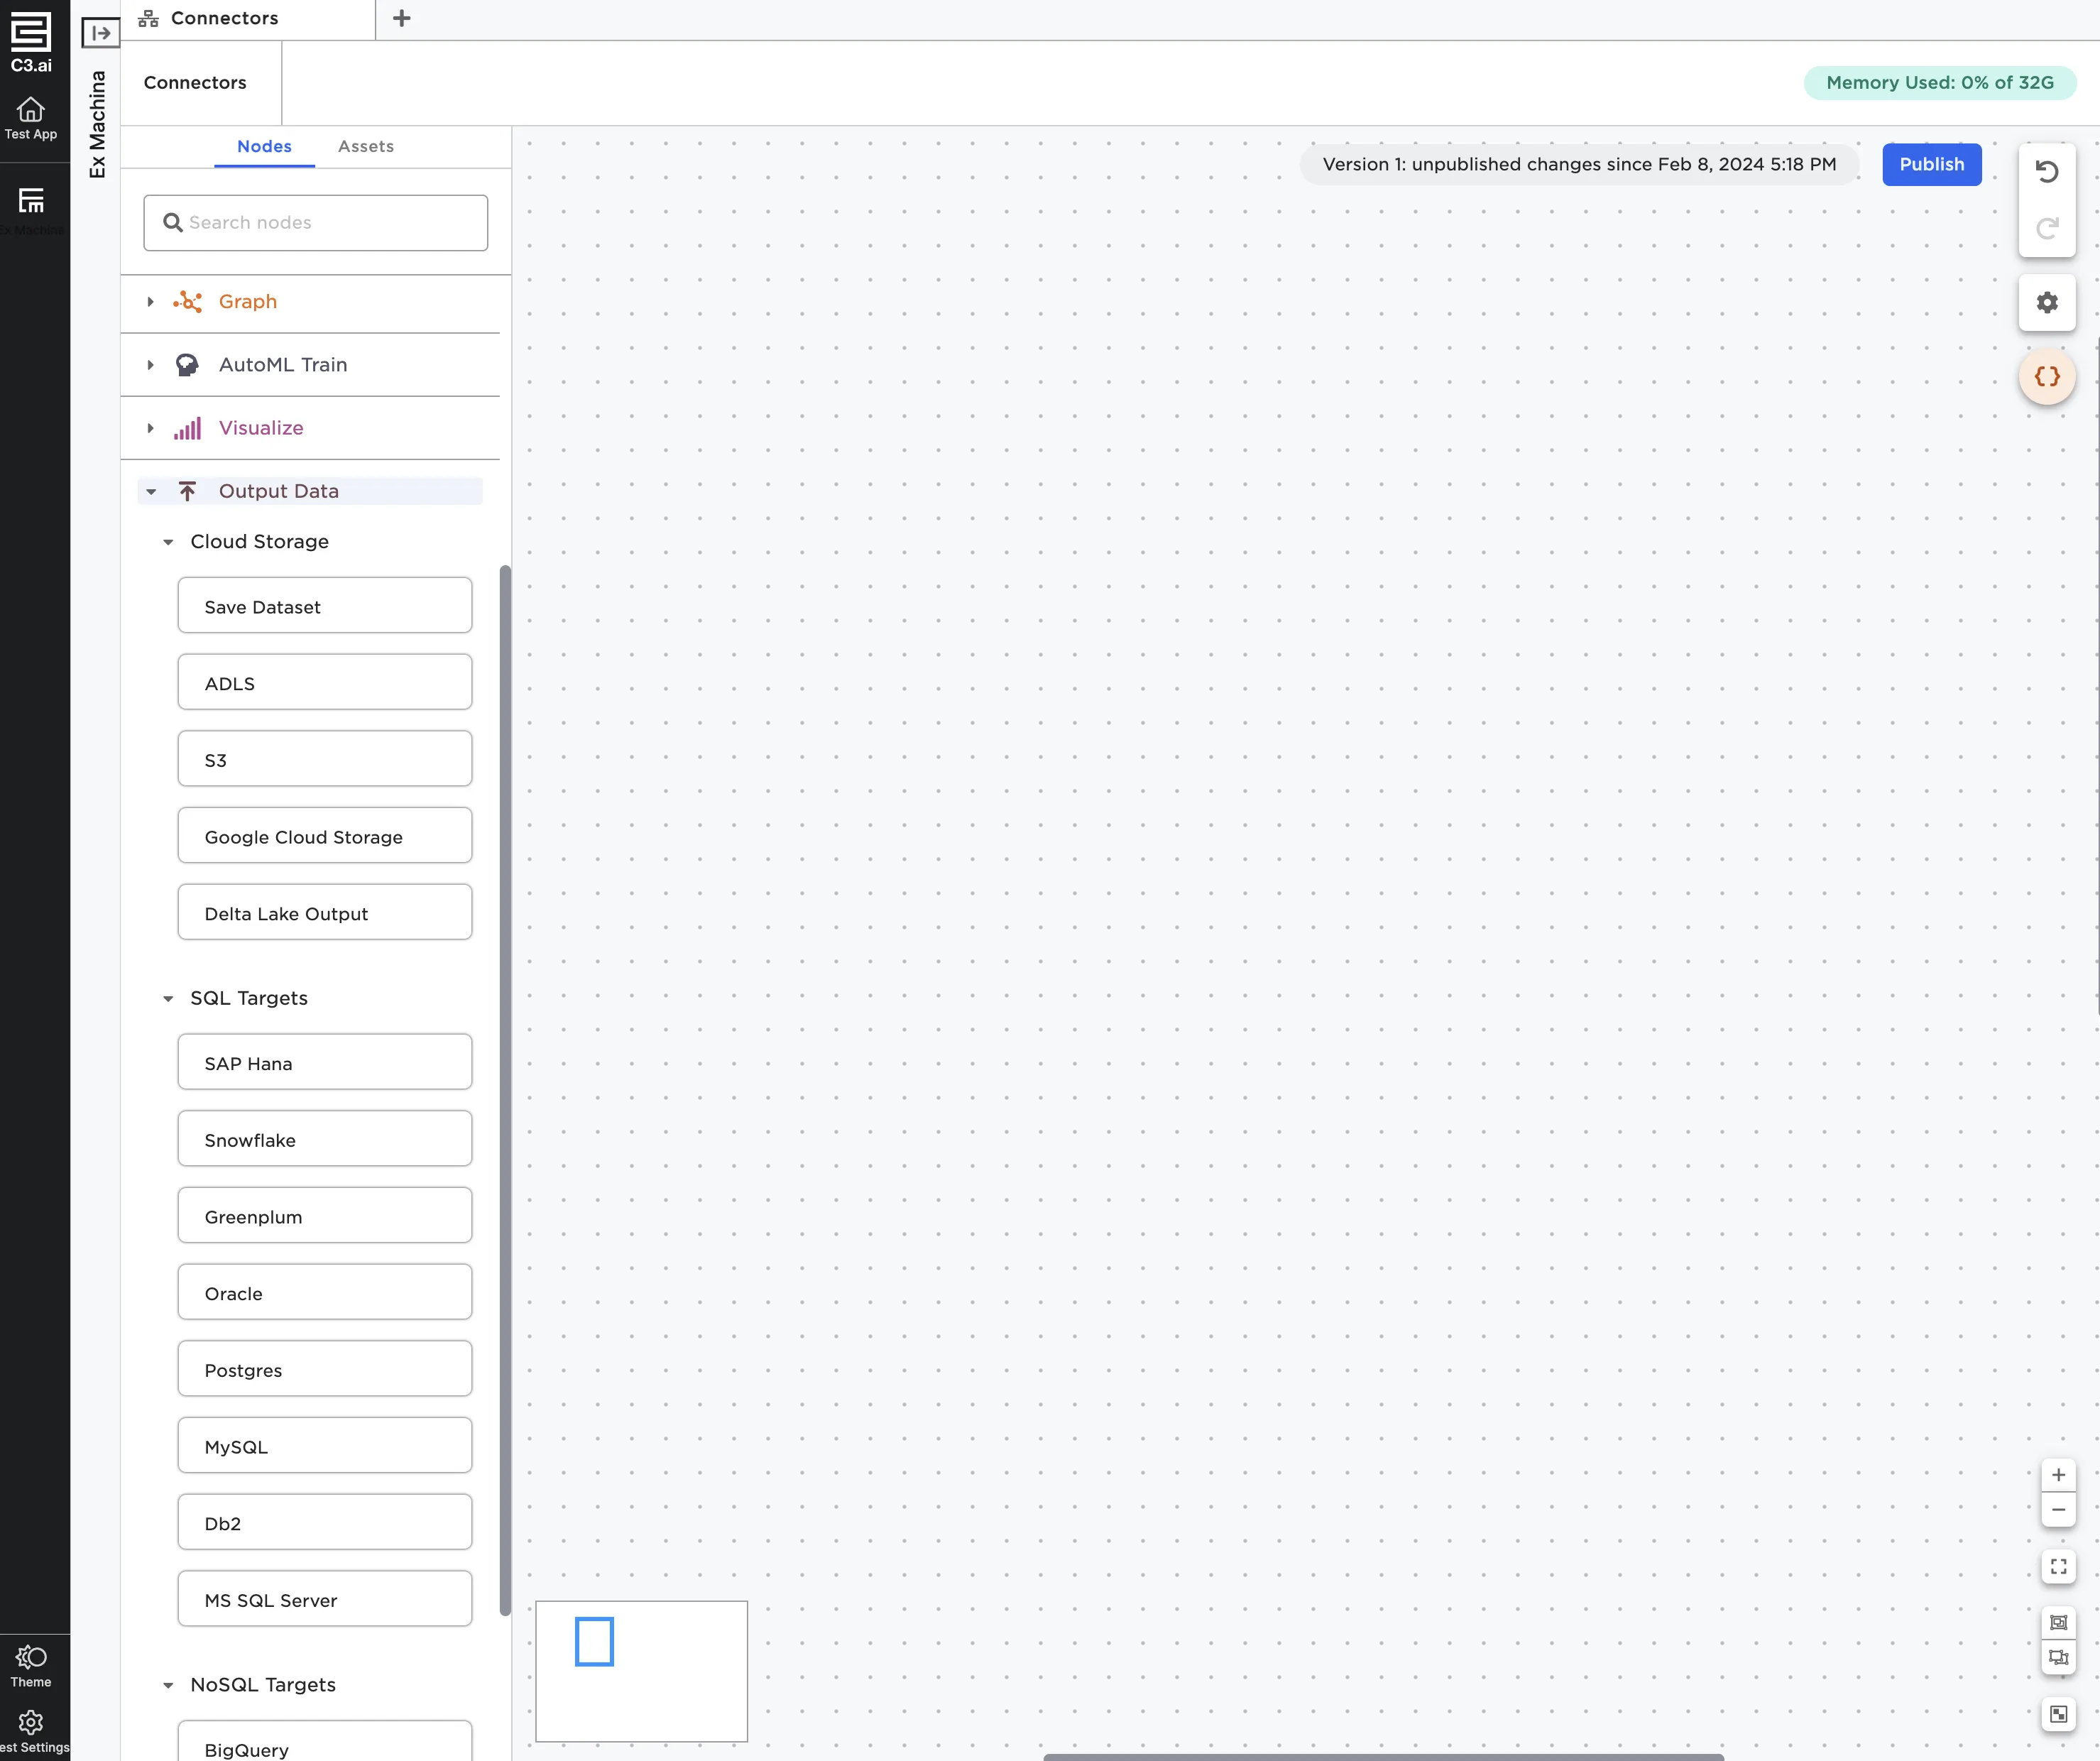
Figure 1: Relevant Output Data nodes
Once you've identified the node that corresponds to the source you'd like to export to, drag the node onto the canvas. For example, if you wanted to export data to Snowflake, drag a Snowflake node onto the canvas. Connect the output node to an existing node, then configure the node using the sidebar or double click on the node to open it in a full-screen view.
Caution: Some of the input and output nodes have the same name. Make sure you select a node from the Output Data section.
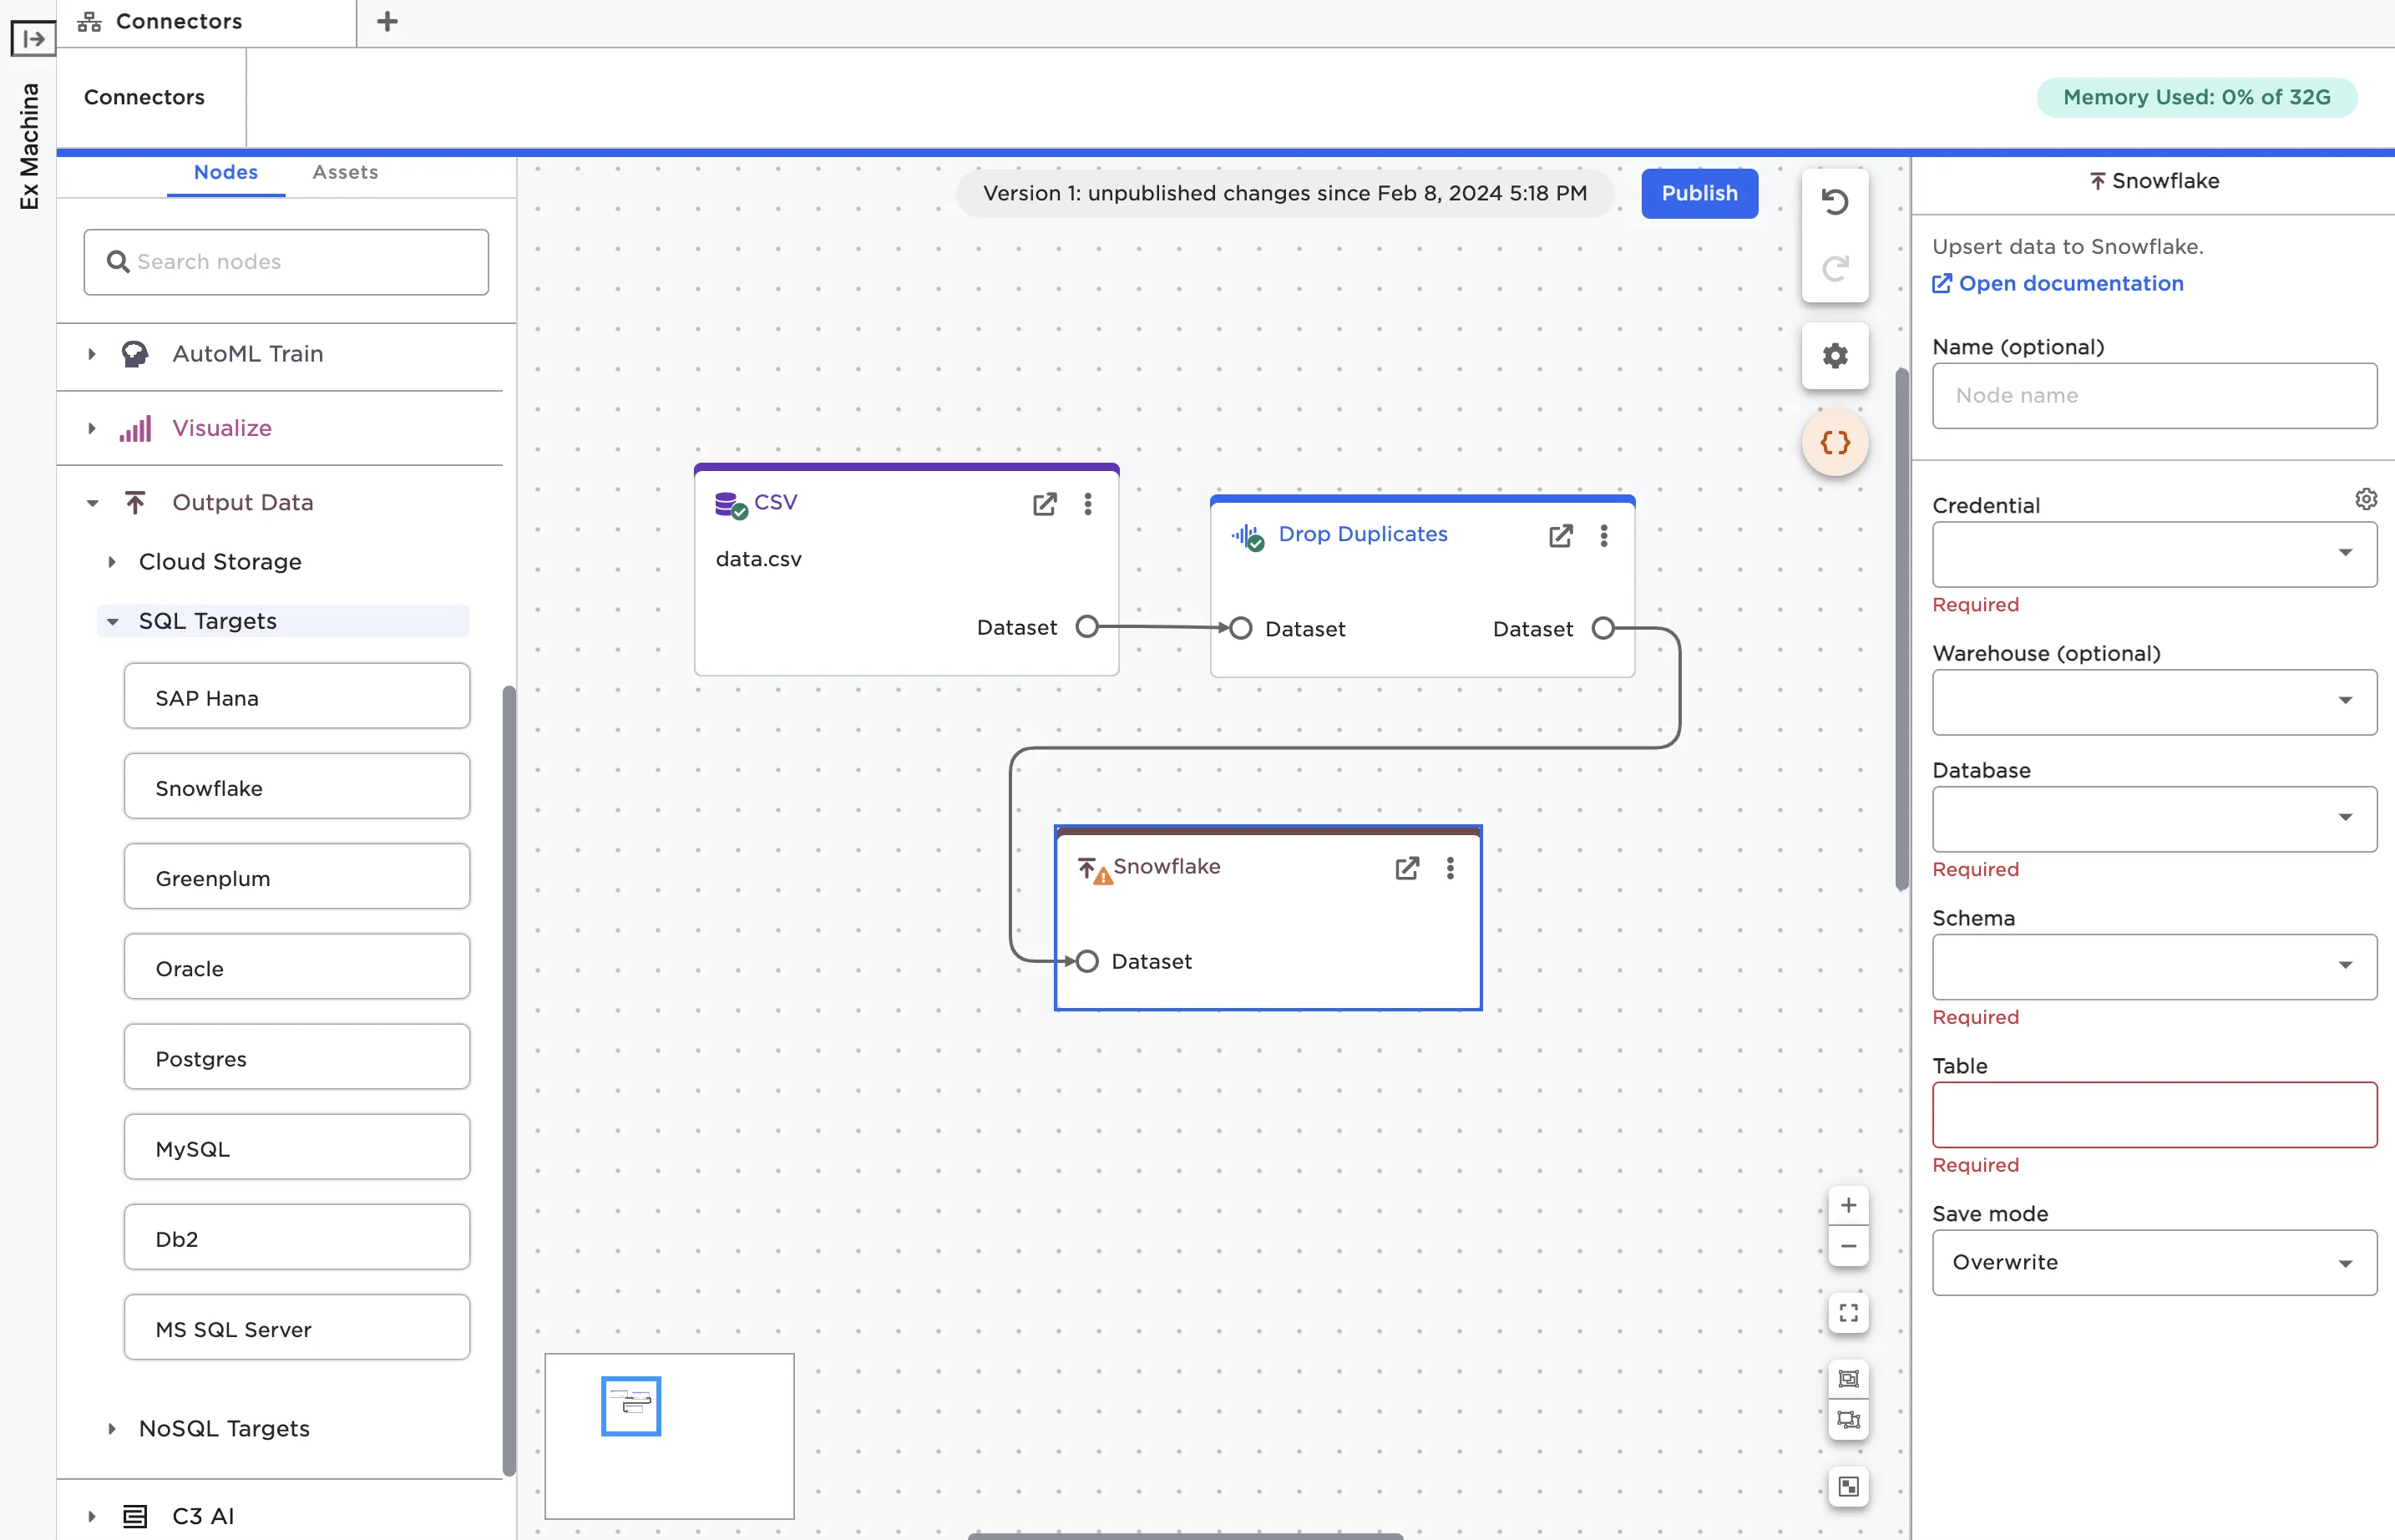
Figure 2: A Snowflake output node on the canvas
Enter credentials
In order to establish a connection to the target system, you have to provide credentials within Visual Notebooks. From the node configuration panel, select the gear icon beside the Credential field. When the popup modal appears, select the plus sign to add a new credential.
If you've already used the corresponding input connector for a particular system, you may not need to re-enter credentials.
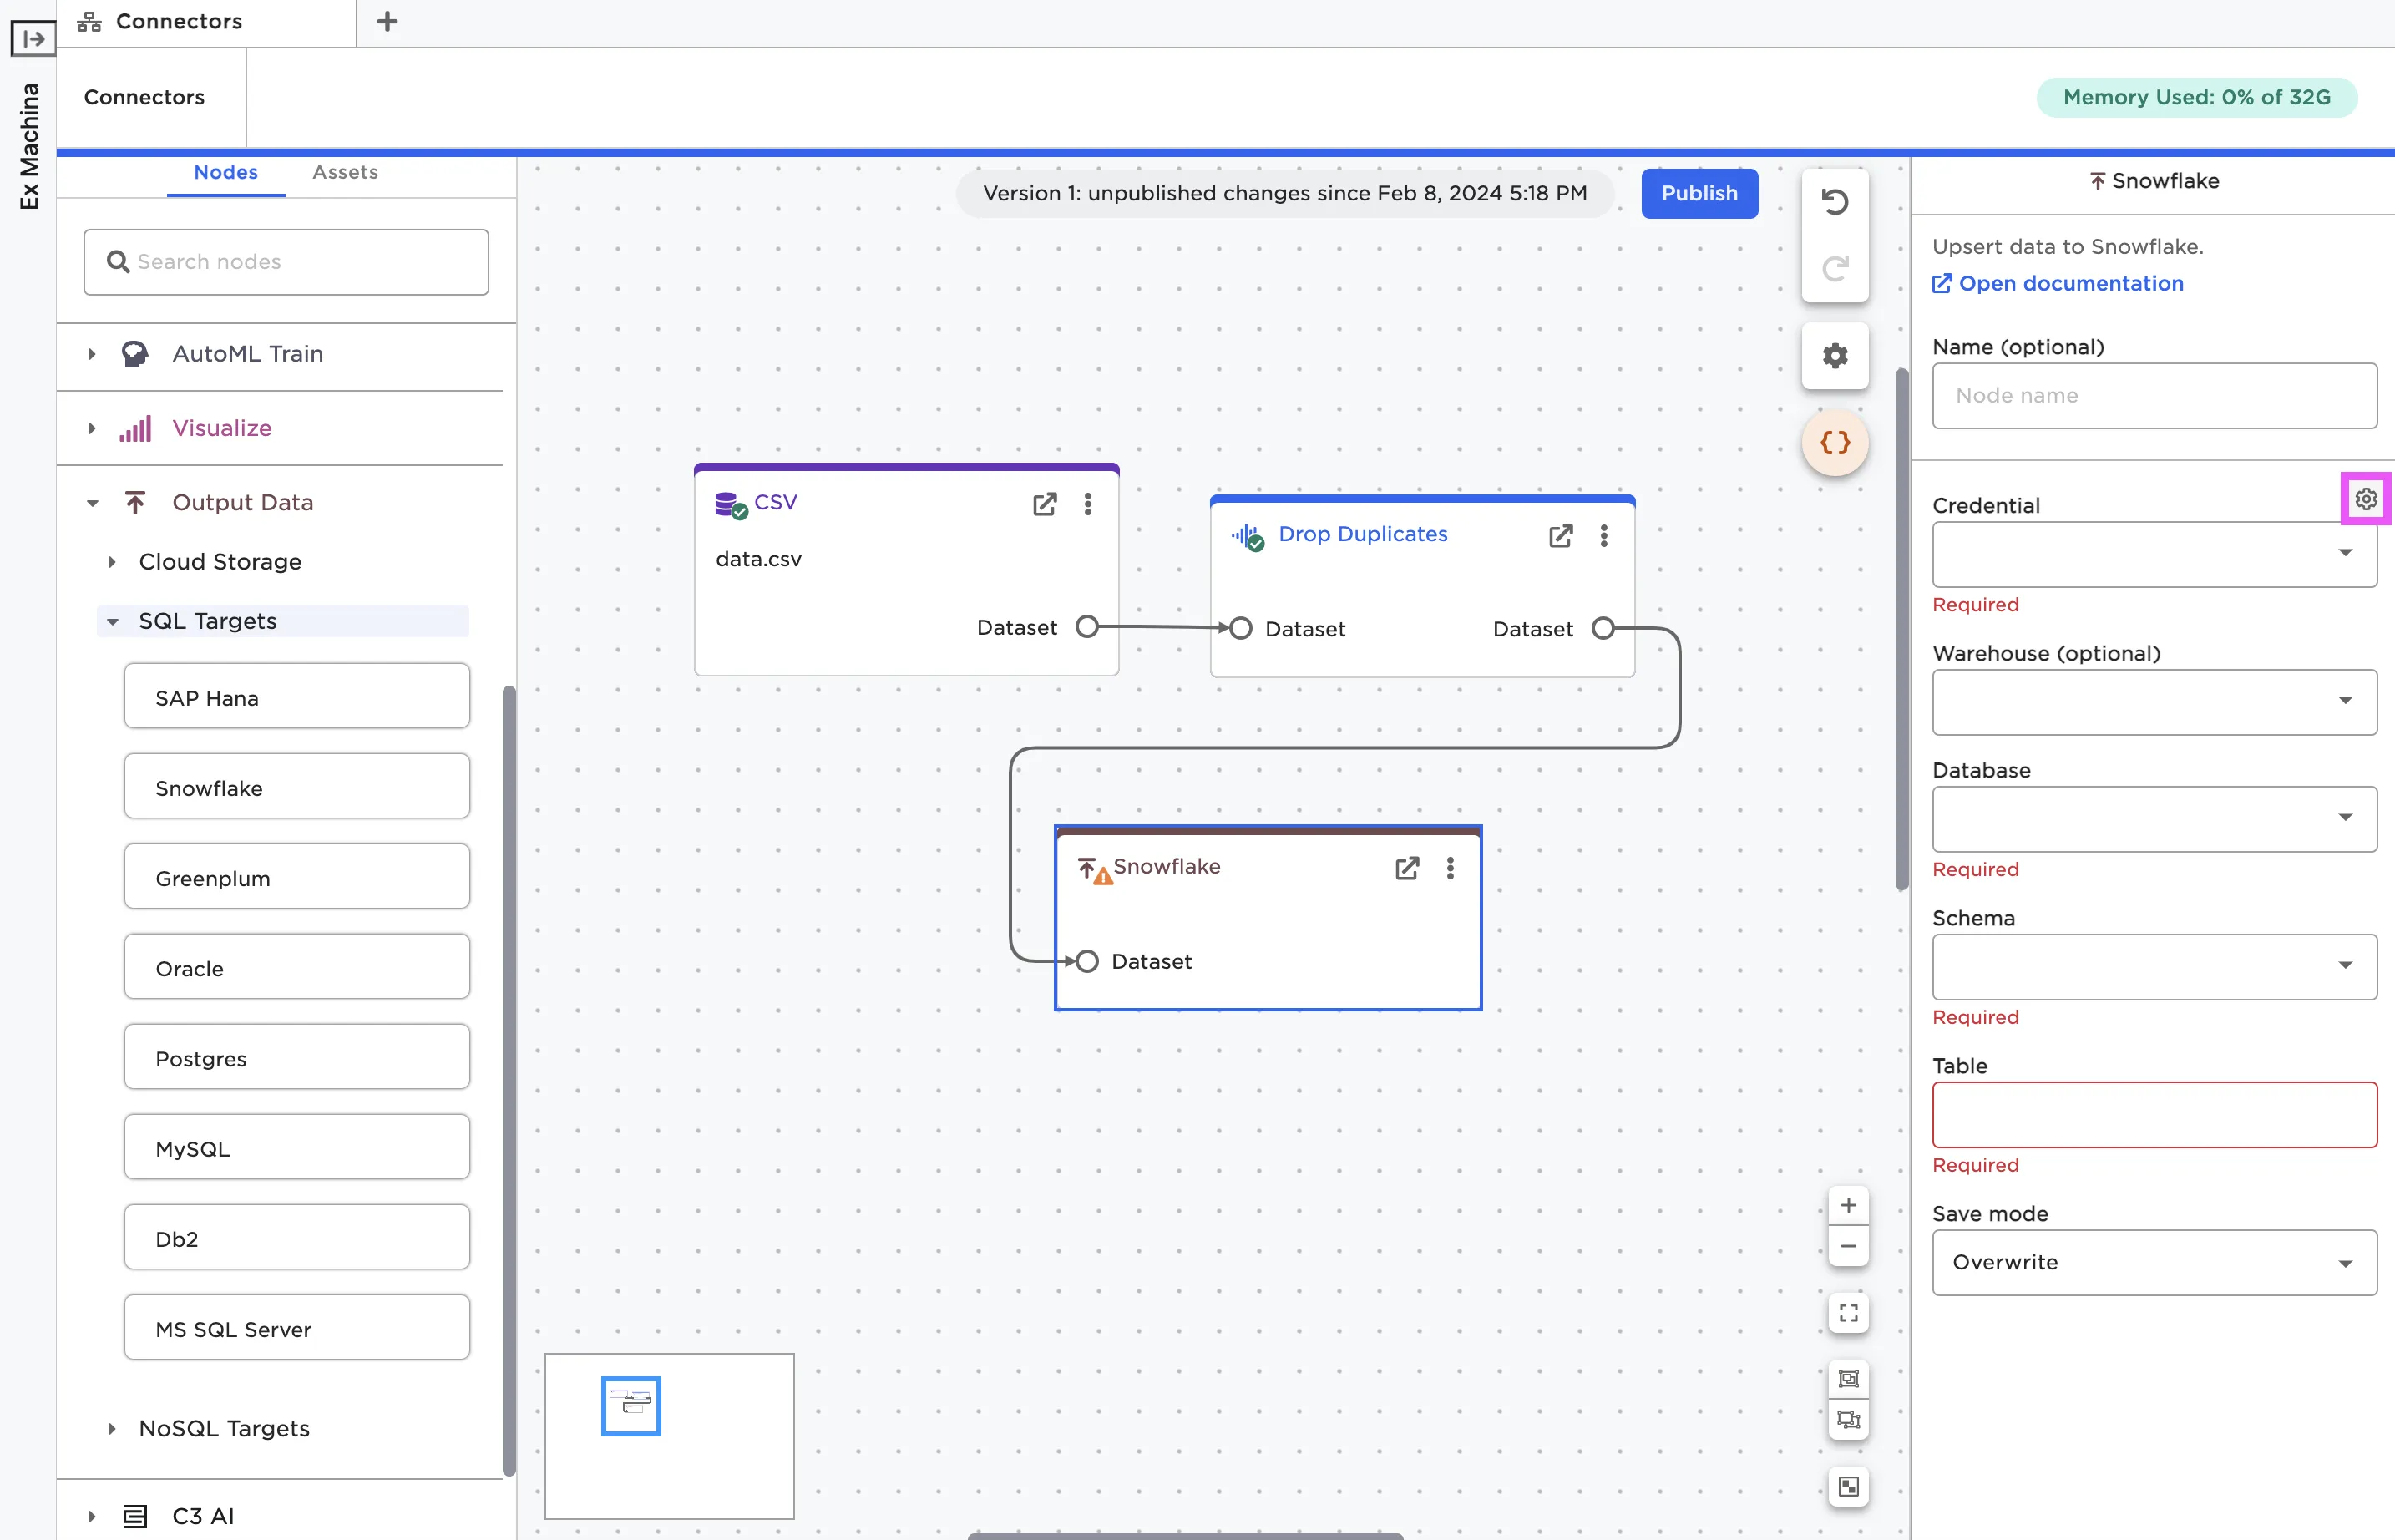
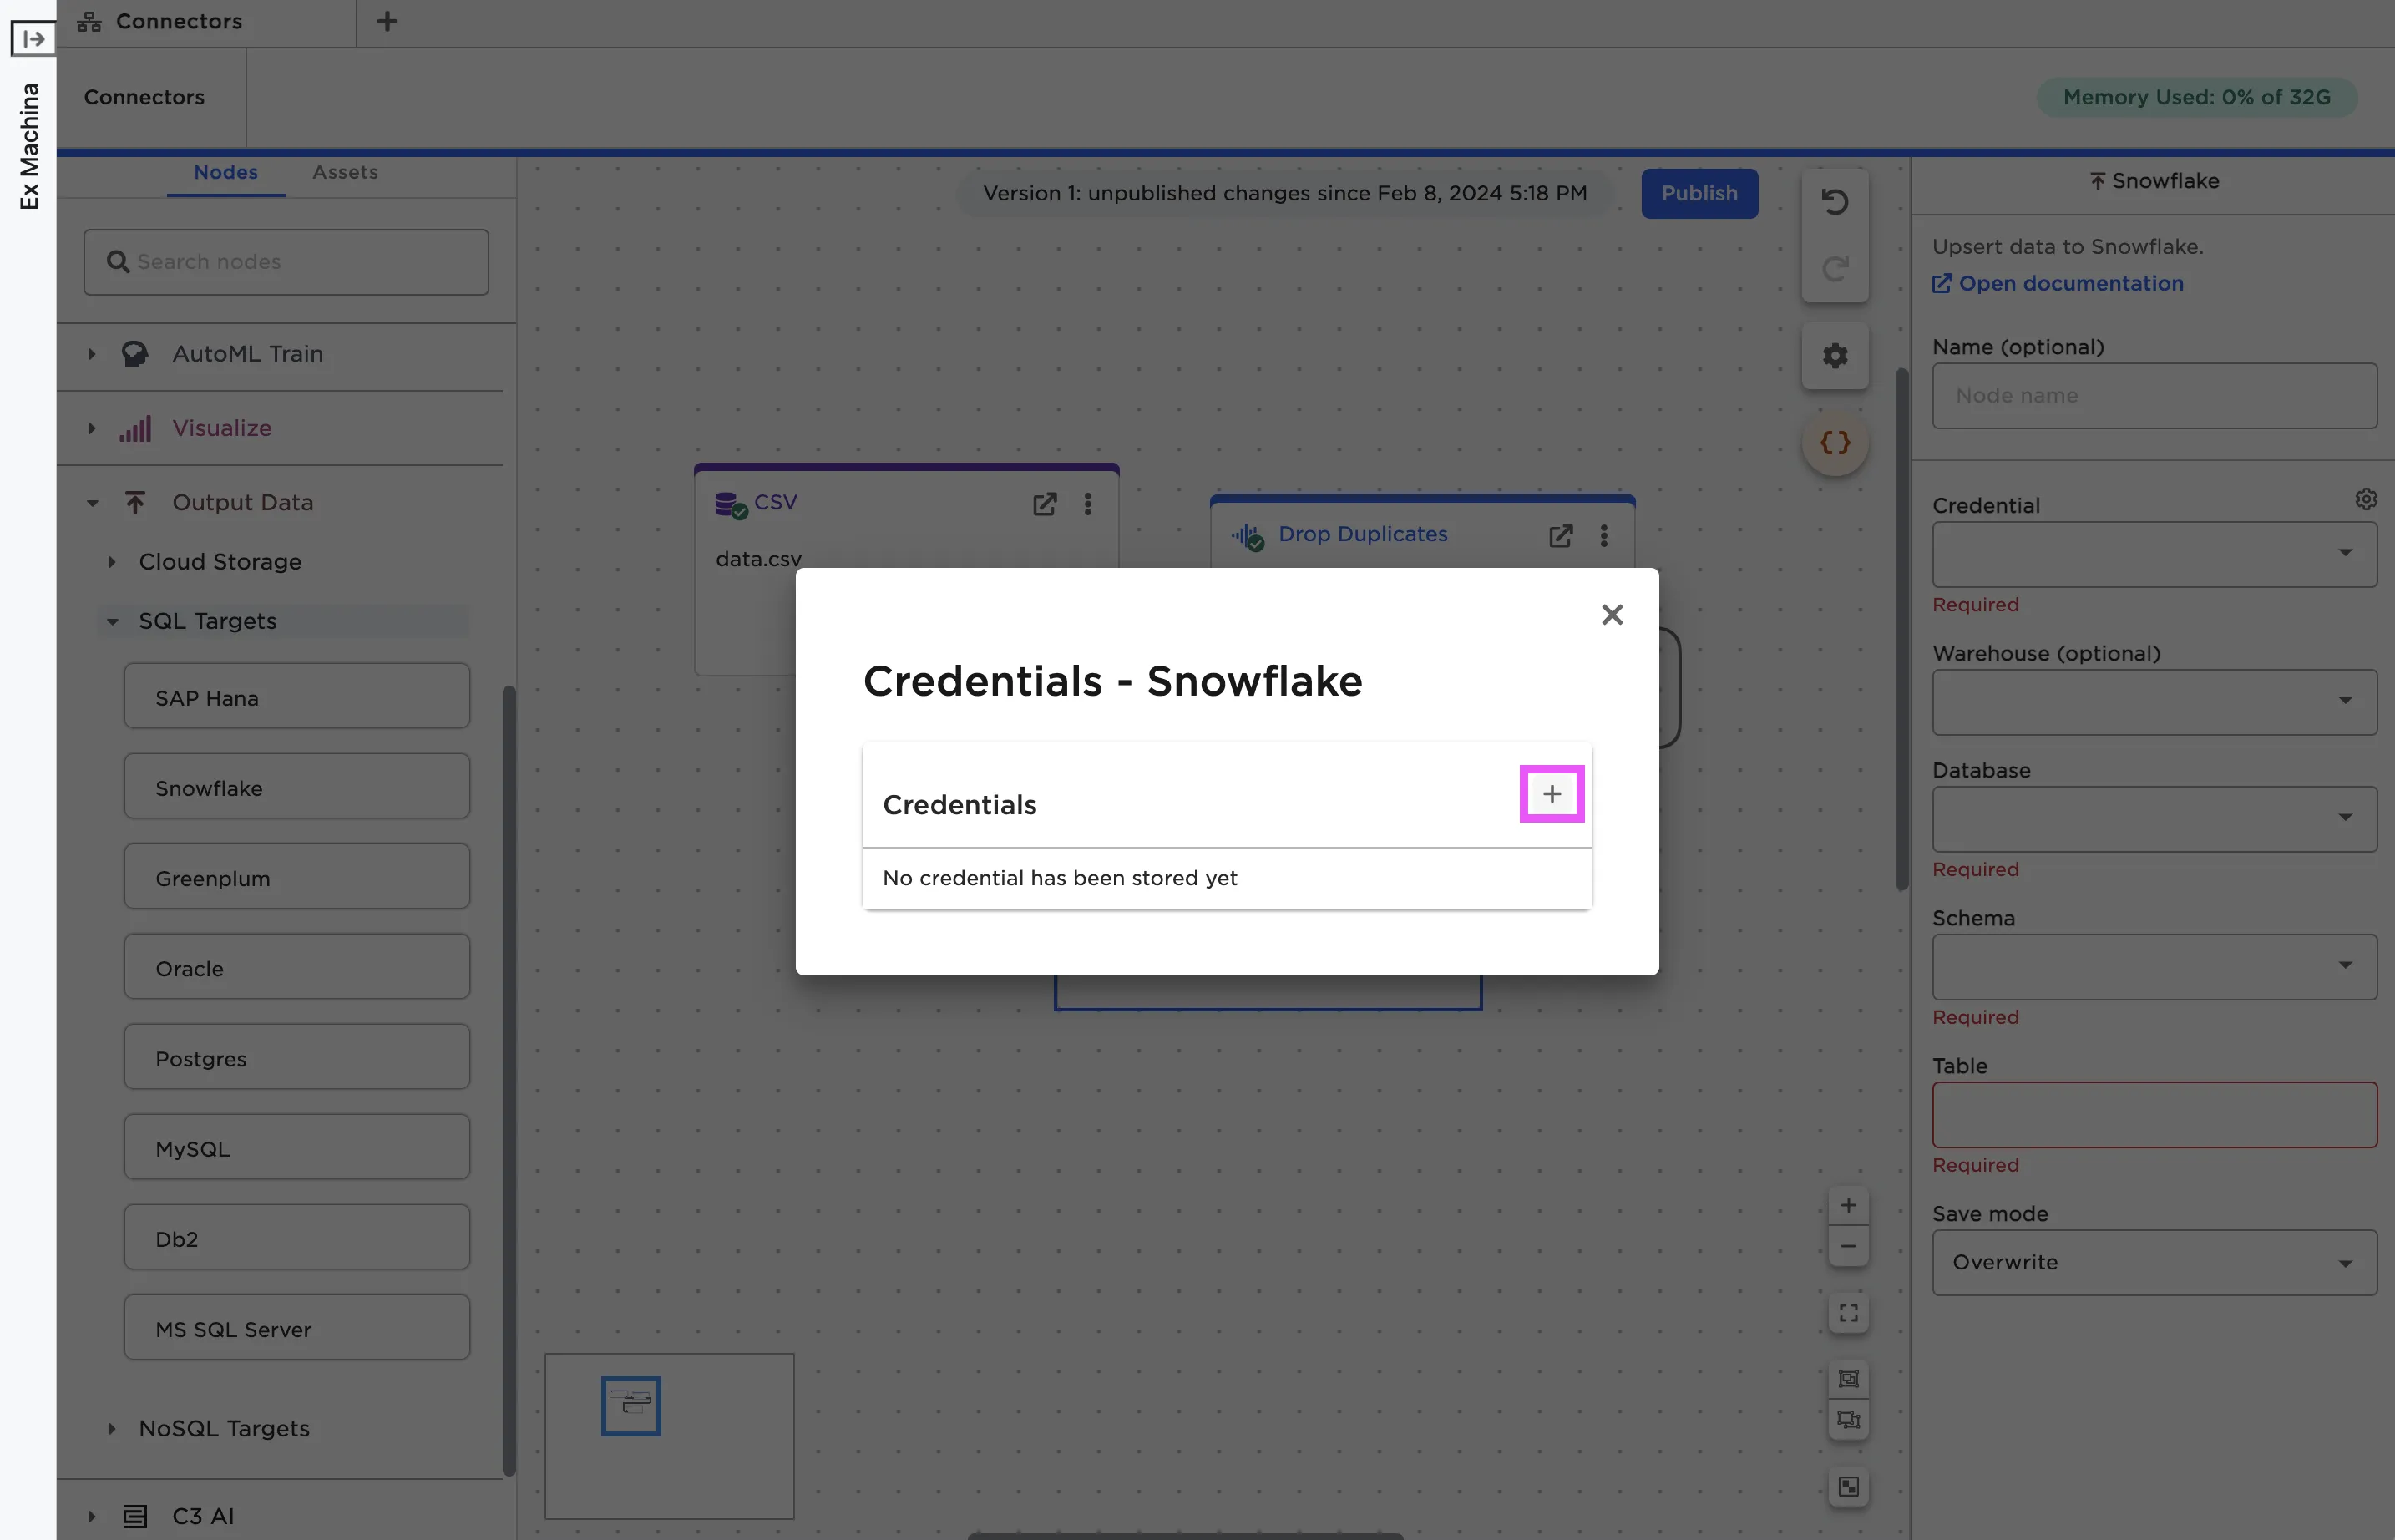
Figure 3: Open the modal to enter new credentials
Each node requires slightly different information. For details about the fields required for the specific node you're using, see the documentation for that node.
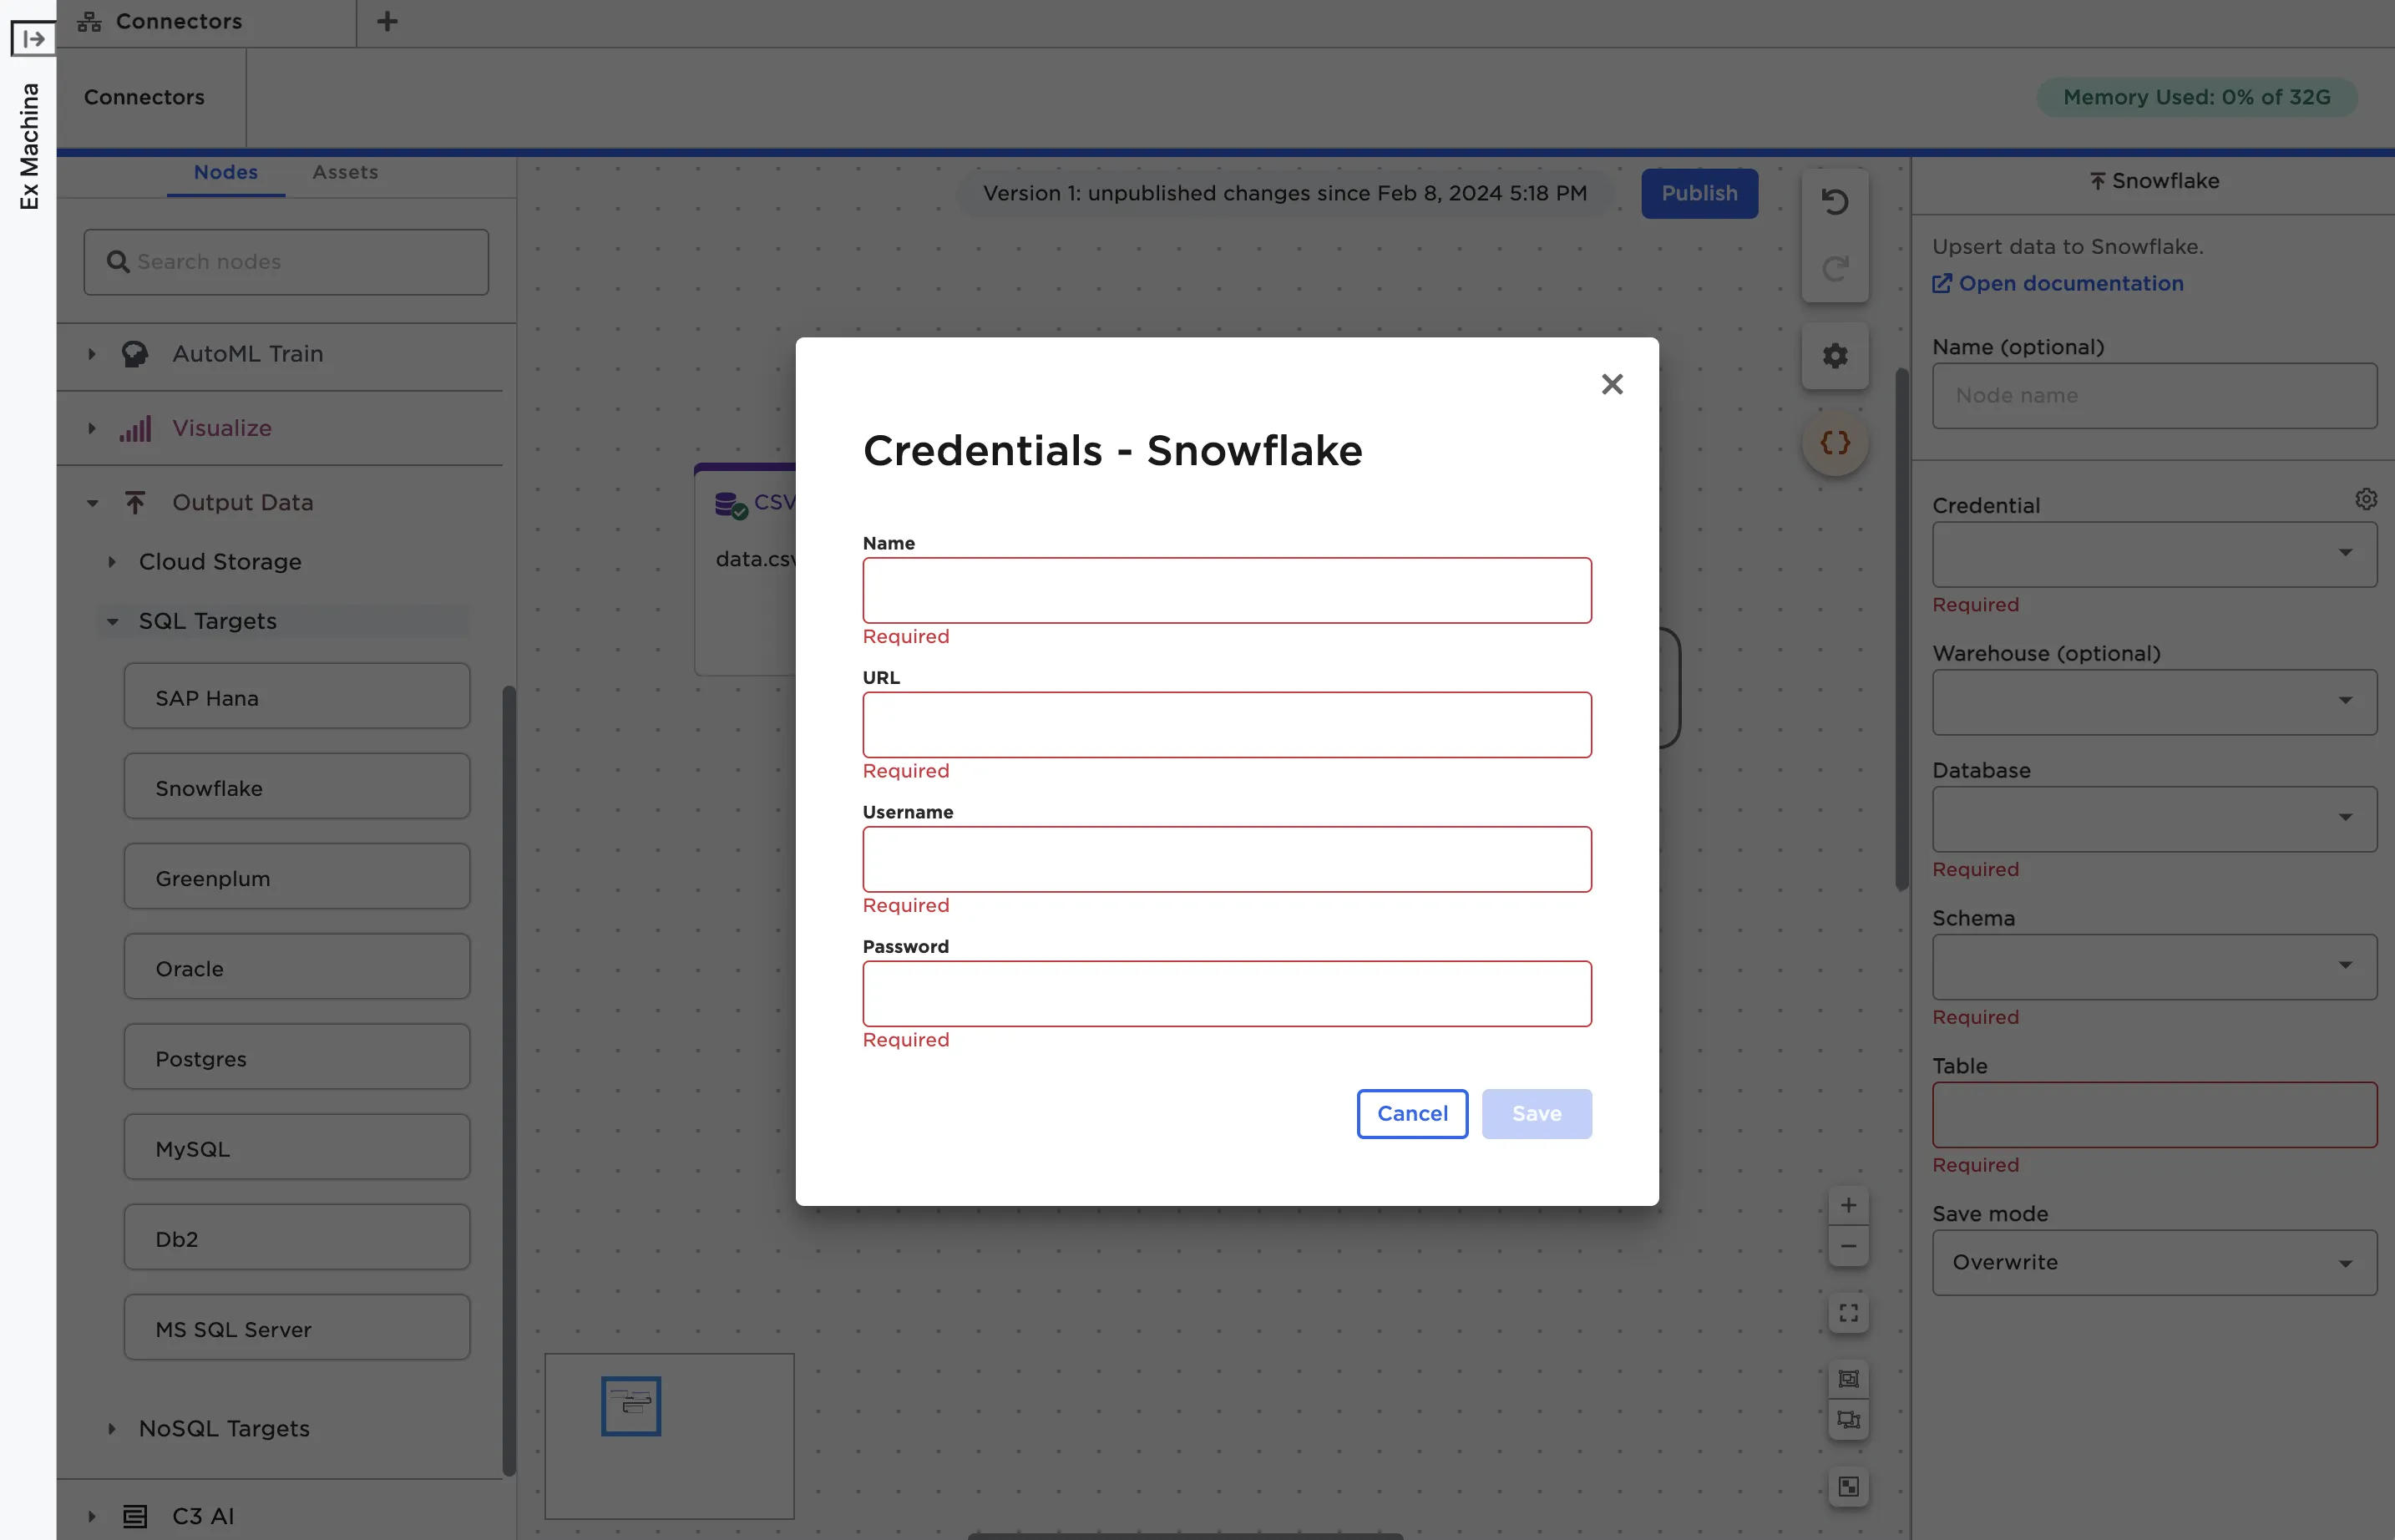
Figure 4: The fields required to establish a connection with Snowflake
Once you've entered credentials, select Test connection to make sure Visual Notebooks can establish a connection to the target system using the given credentials. Once you've verified the credentials work, select Save.
Export data
Once you've entered credentials and saved them, you can export data to the target system. Output nodes require you to specify the exact place you'd like to export the data within the target system. For more information about the fields required for a specific node, see that node's documentation.
In the full-screen view, select the blue Run button at the bottom of the configuration panel to export the data. Unlike other nodes, the dataframe isn't displayed after running the node. As long as your node runs successfully without errors, your data should be saved to the target system.
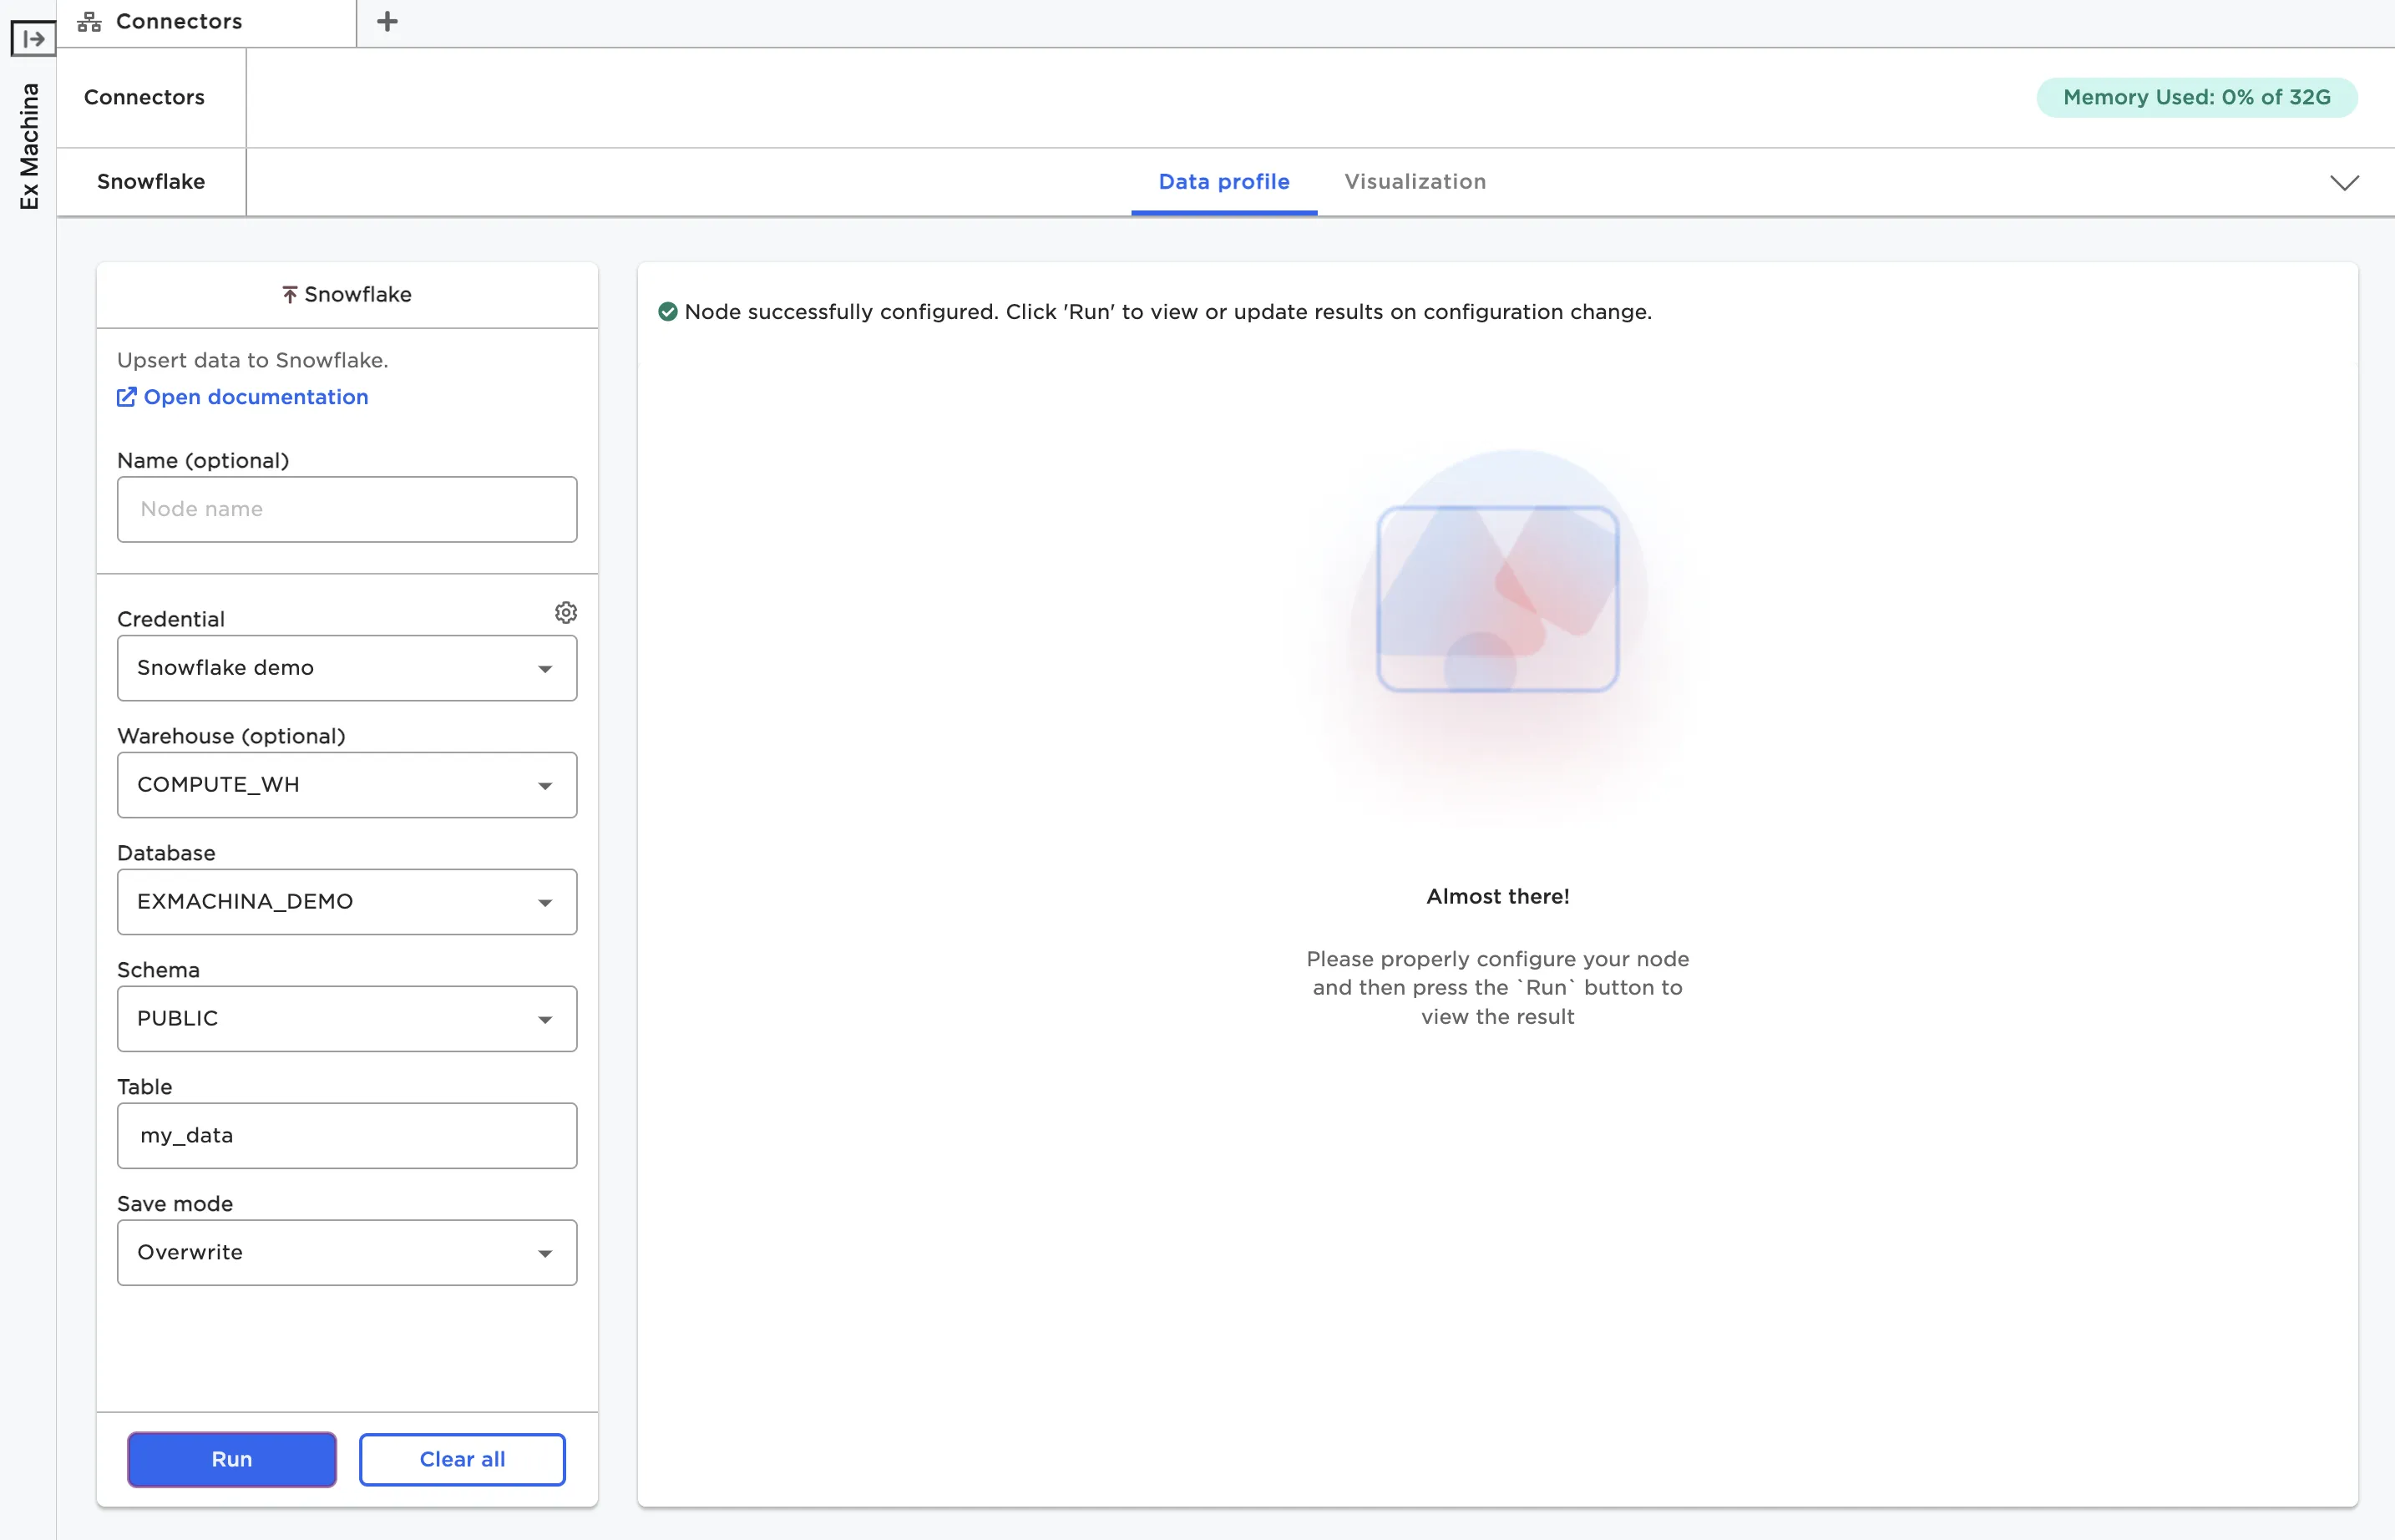
Figure 5: Exporting data to Snowflake