ML Pipelines
An ML pipeline in Visual Notebooks is a special type of visual notebook that is designed for machine learning.
ML pipelines let you save a specific series of nodes with defined inputs and outputs as one object that can be reused across projects. Although you can use any node in a pipeline, pipelines are designed specifically for estimator nodes. The structure enforced by pipelines encourages you to follow data science best practices when using estimators. For more information on estimators, see the working with nodes section
Most importantly, ML pipelines allow you to save trained models and create a model registry. Published pipelines appear in the assets panel of the node palette where they can be used across projects. Pipelines are versioned and linked to the specific dataset used to create the pipeline.
Although you can train models using AutoML nodes in a visual notebook, the only way to save models is through a pipeline.
Creating a pipeline
There are two ways to create a new ML pipeline.
You can visit the dedicated ML pipelines page and select the Create new button in the top right.
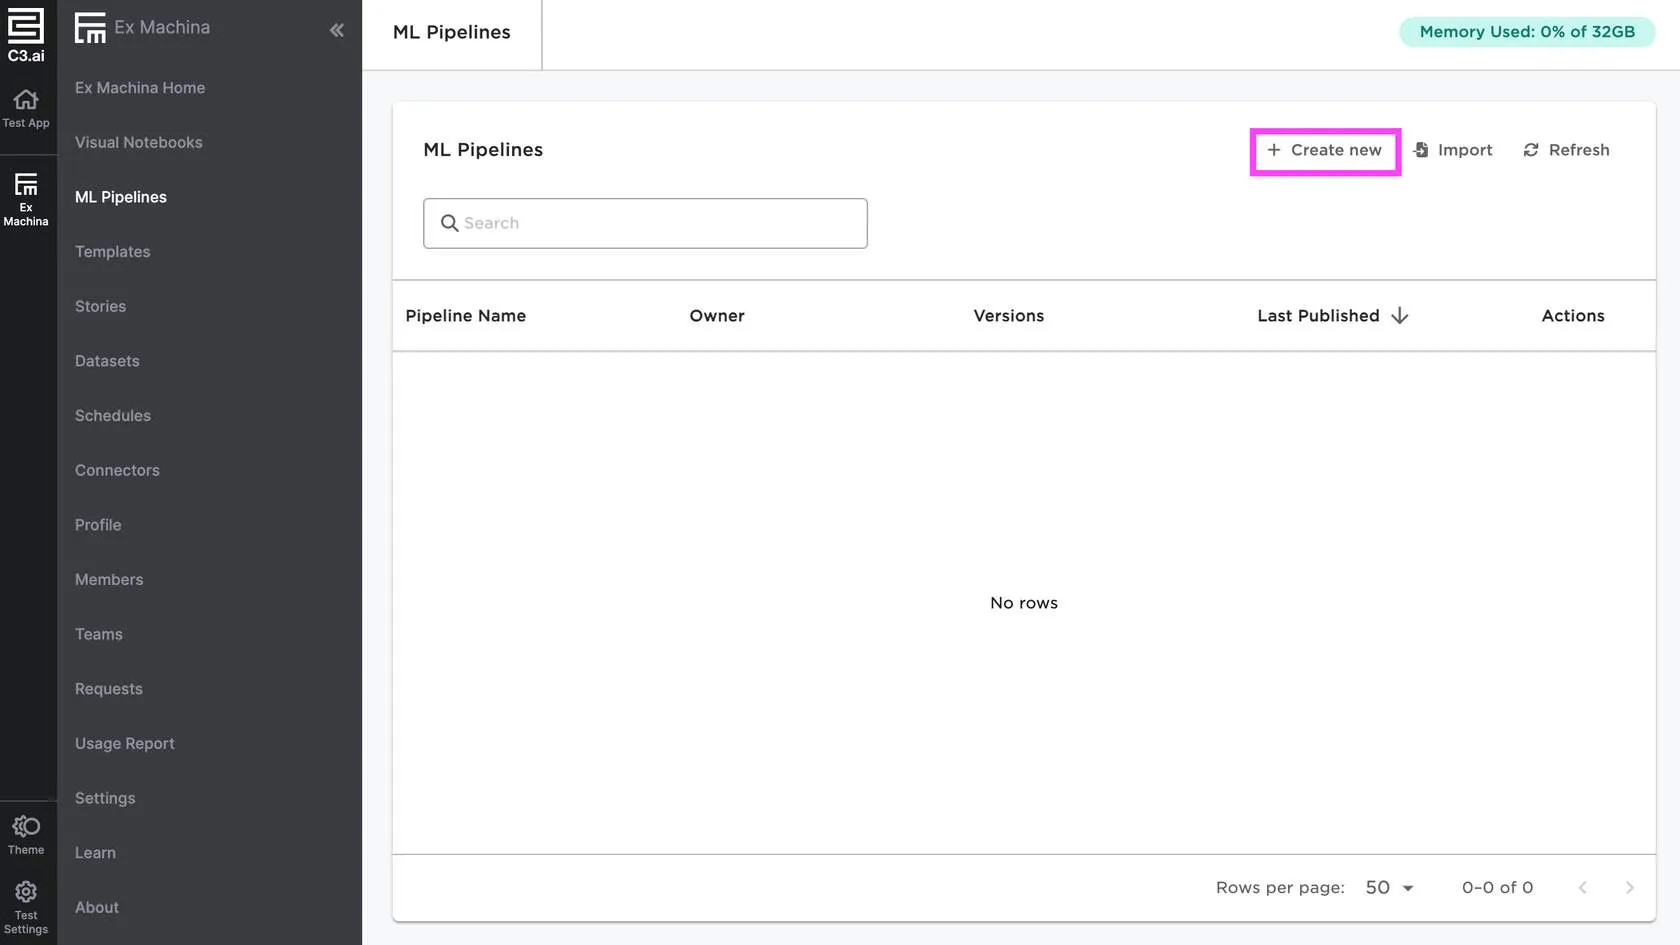
Figure 1: Create a new pipeline from the ML pipelines page
If you're in the canvas, you can select the plus sign next to the tabs then chose Create new ML pipeline.

Figure 2: Create a new pipeline from the canvas
Data input
The ML pipeline interface is mostly the same as that of a visual notebook, but with the addition of two colored rectangles—one for data input, and the other for nodes that comprise the bulk of your pipeline.
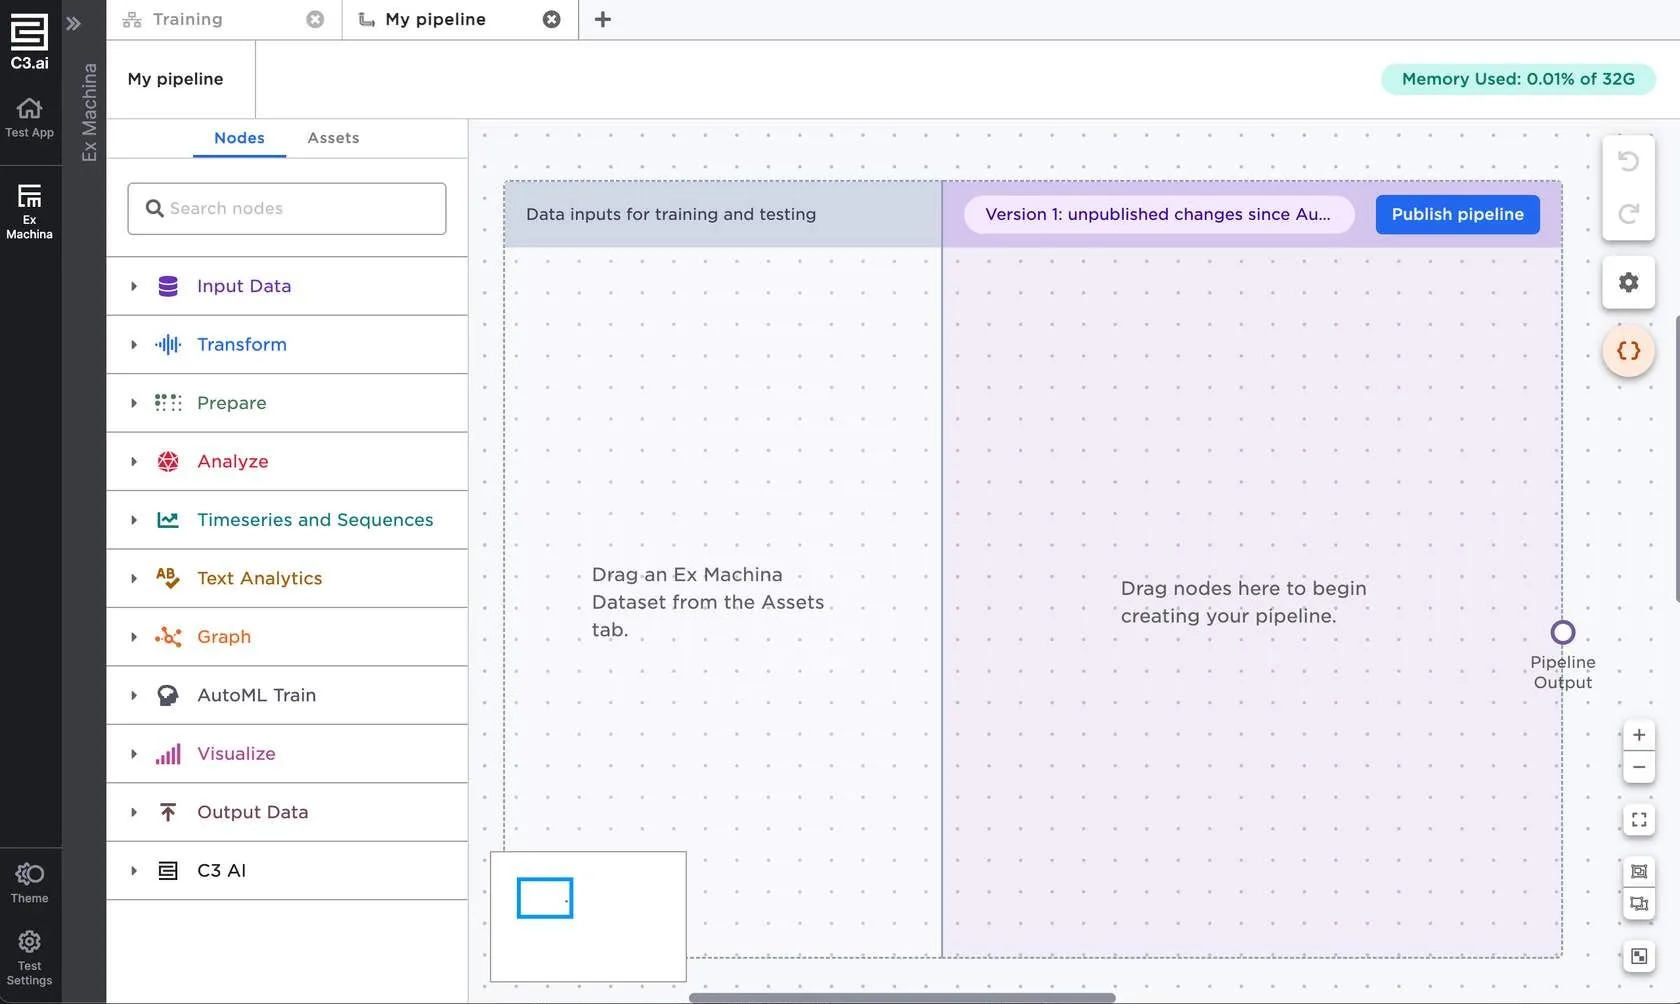
Figure 3: The ML pipeline interface
You must use one or more Visual Notebooks datasets for the data input section of an ML pipeline. Each dataset you add to the Data inputs for training and testing section represents a pipeline input.
Visual Notebooks datasets must be used in pipelines for the following reasons:
Estimators rely on the value of data at a specific moment in time. Since datasets are snapshots, they provide a static version of the data that estimators can "fit" onto.
Datasets have a defined schema that new pipeline inputs are validated against. Pipelines can't be run on data with a different schema to prevent mysterious schema mismatch errors.
Datasets are versioned, so you can see exactly which version of your data you used to train each version of the pipeline. This makes it easier to understand why a pipeline behaves the way it does.
Once your pipeline is created and saved, you aren't restricted to Visual Notebooks datasets, so you can run the trained pipeline on any data input you want.
Building an ML pipeline
To start building a pipeline, drag nodes into the purple section of the pipeline and connect them to the pipeline input ports.
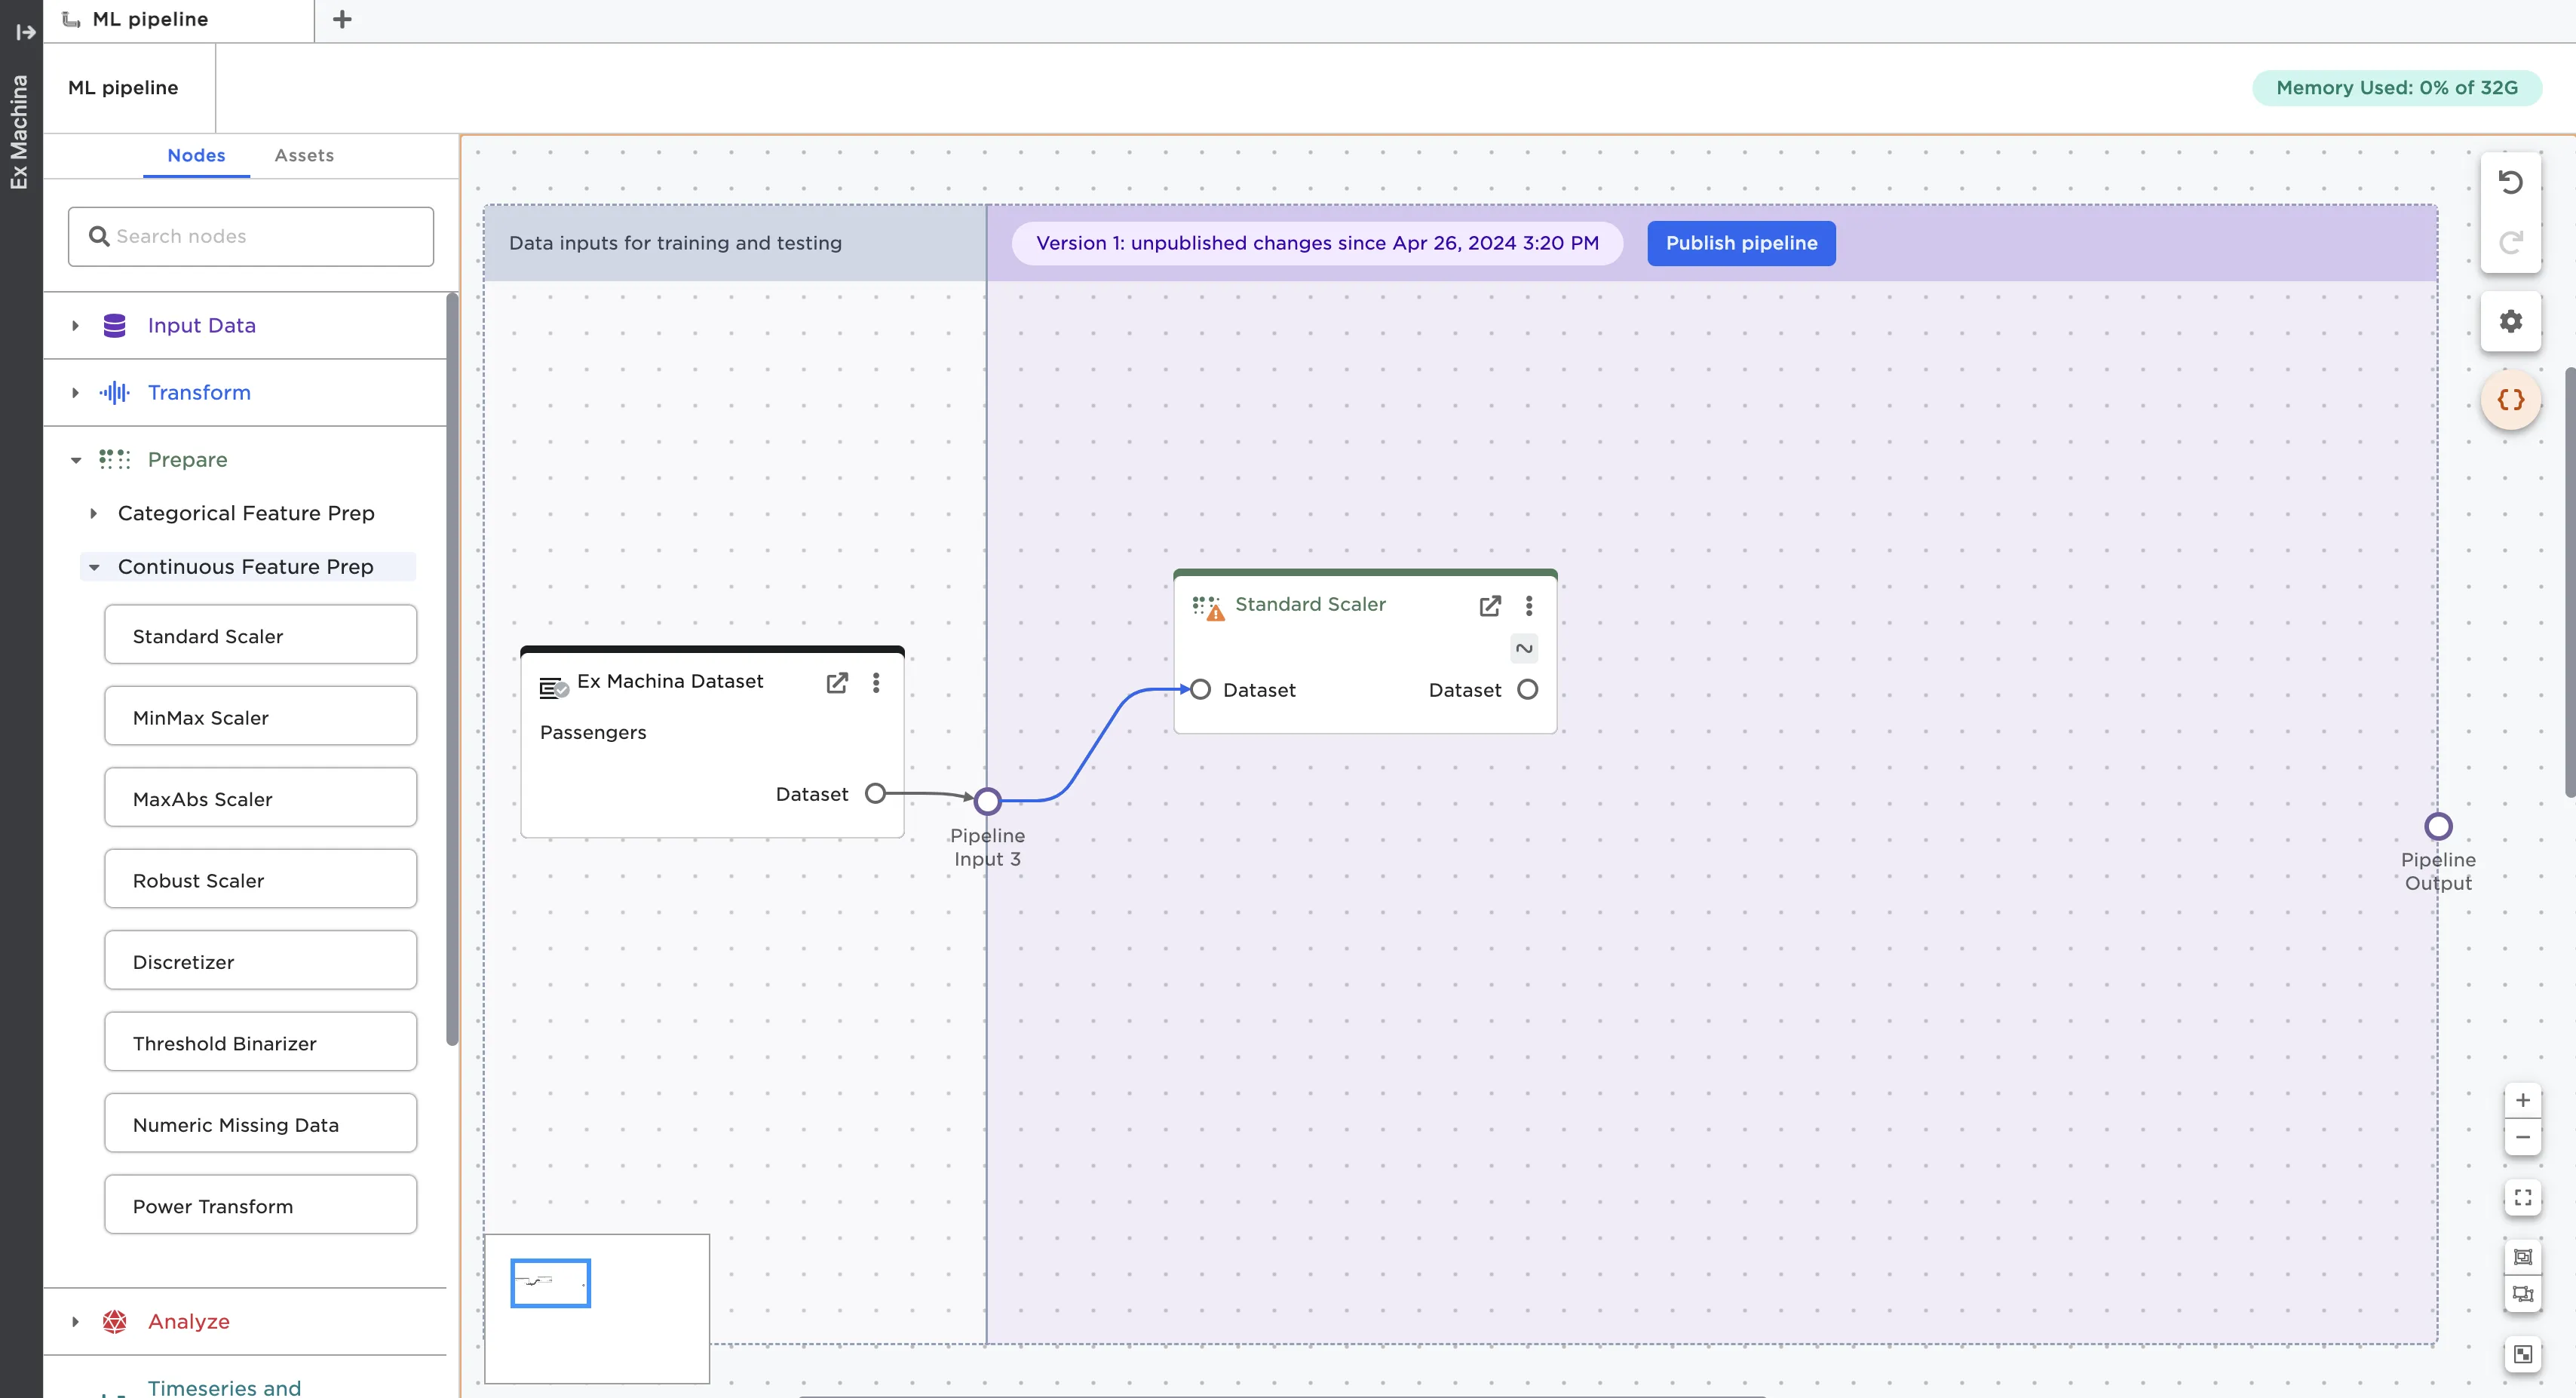
Figure 4: Drag nodes into the purple section of the ML pipeline
Once you've created your pipeline, connect the last node to the Pipeline Output port.
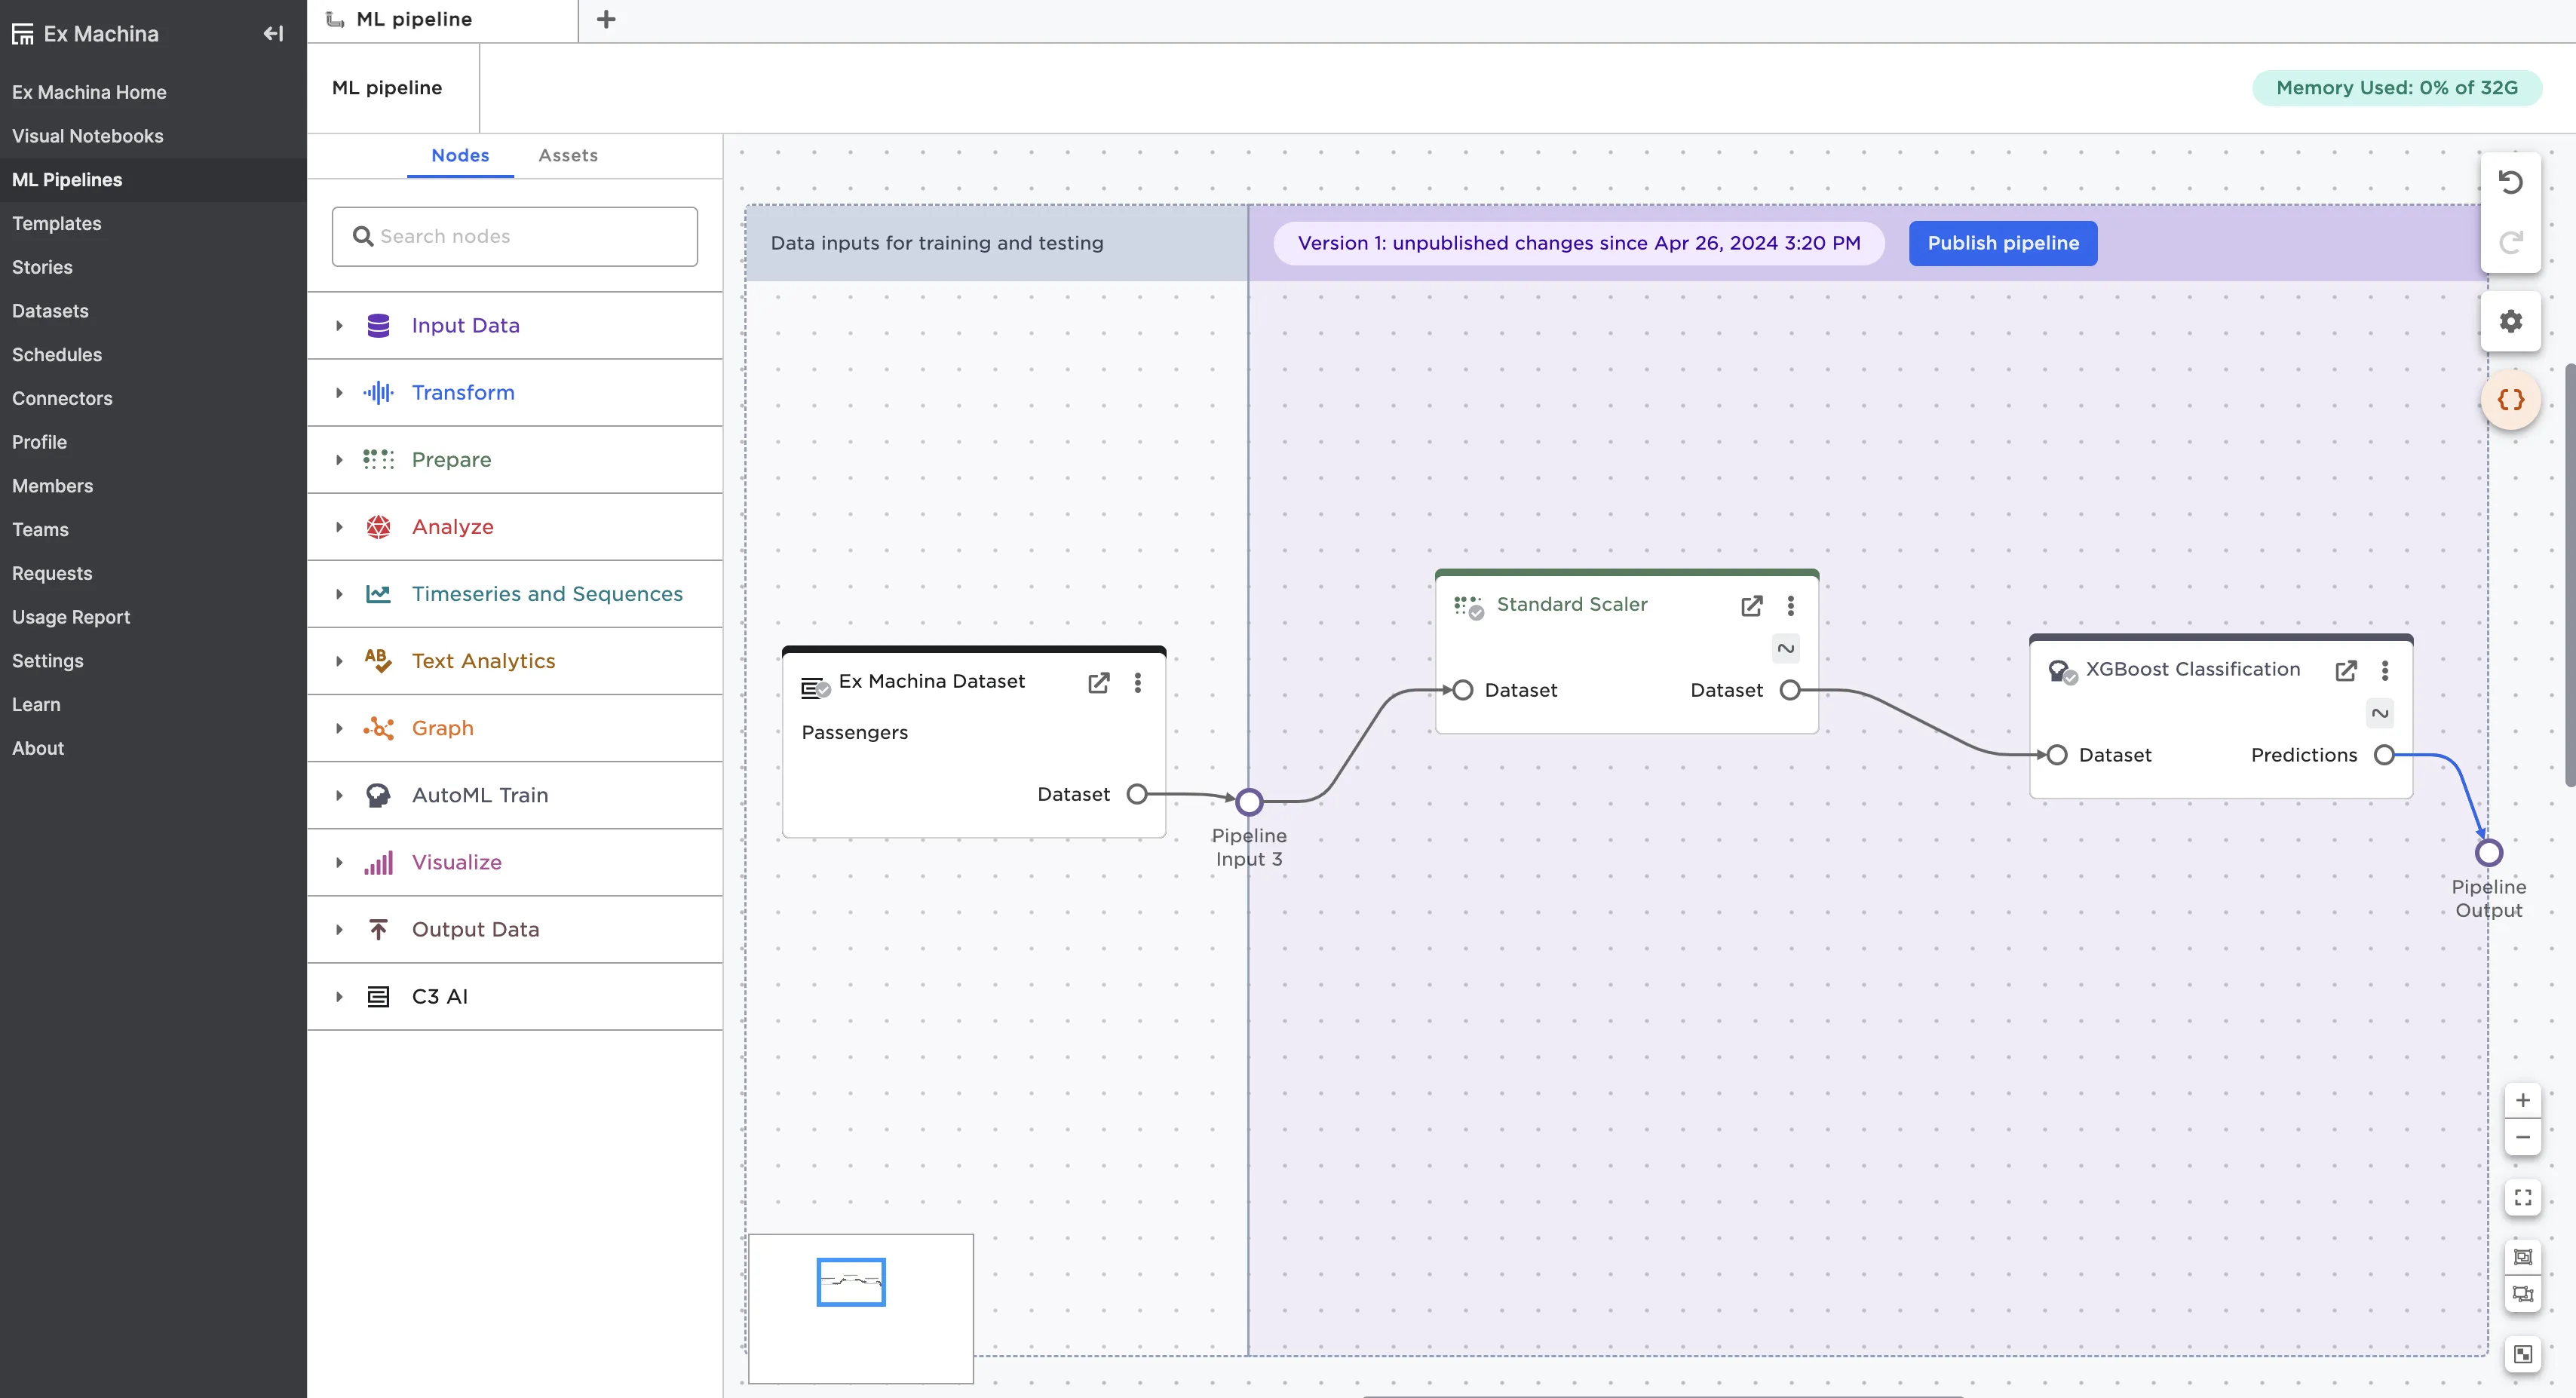
Figure 5: Complete the pipeline by connecting the last node to the Pipeline Output port
Use the Publish pipeline button in the top right corner of the pipeline to publish the pipeline so you can use it in visual notebooks. For more information about using pipelines, see the ML pipeline node documentation
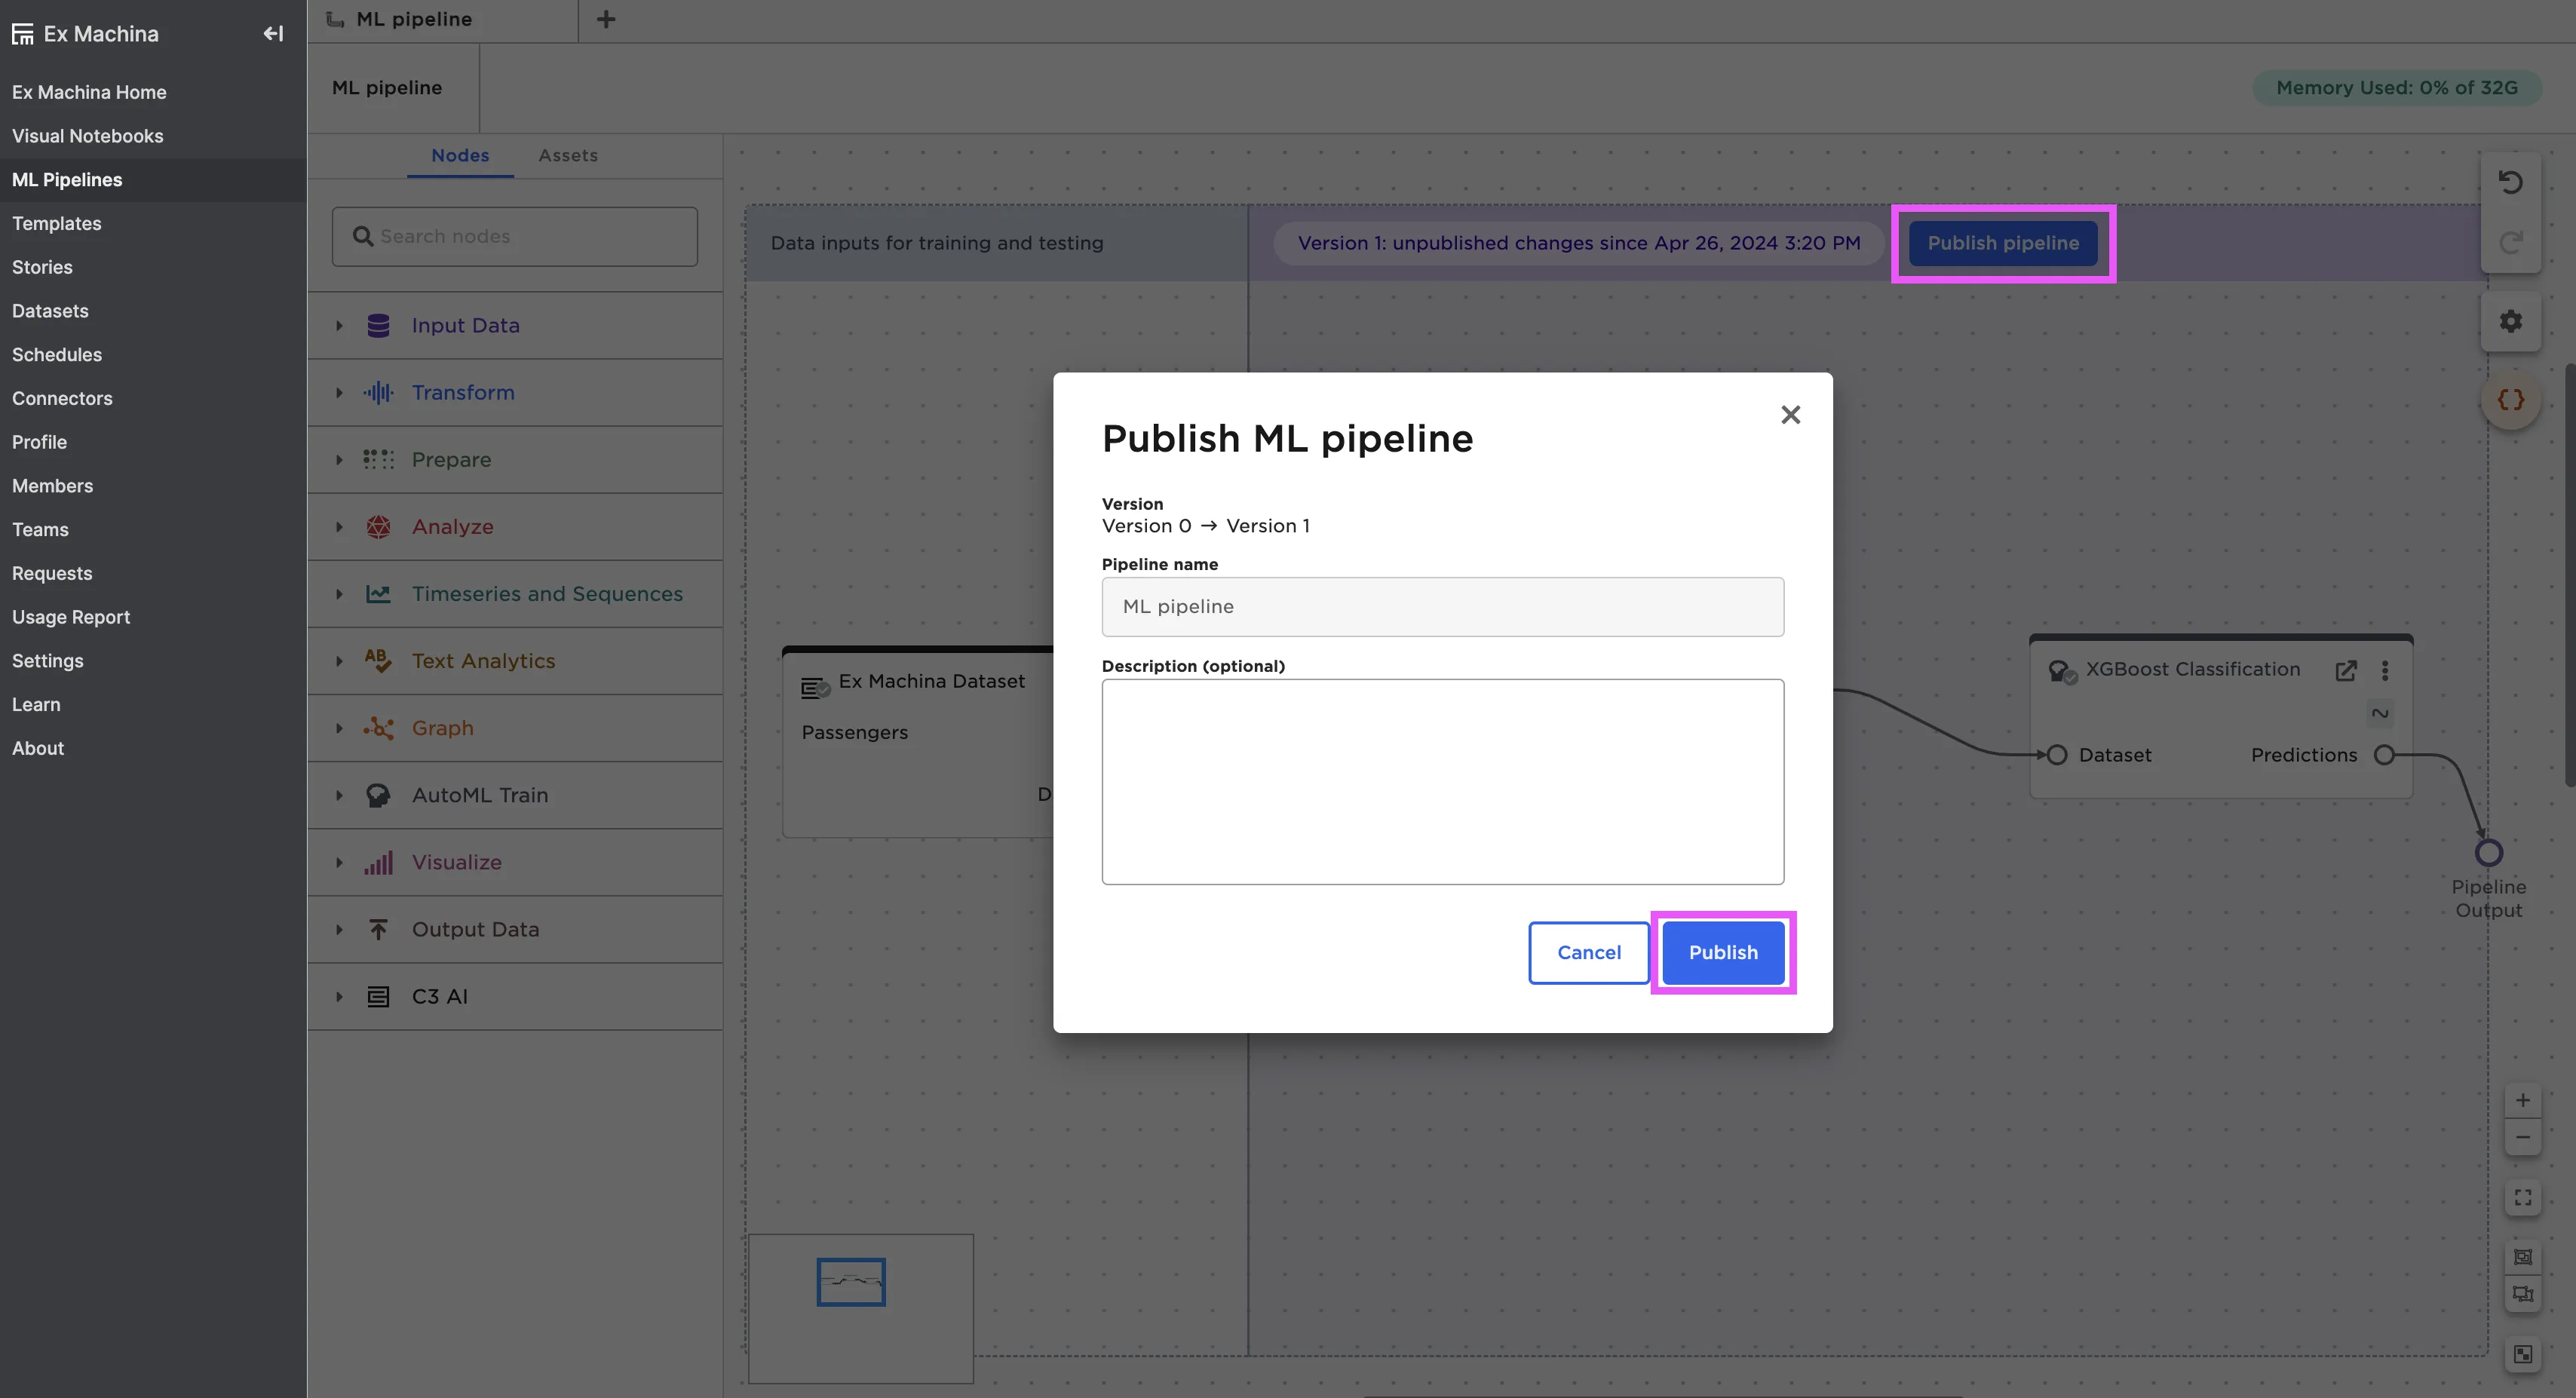
Figure 6: Publish your ML pipeline
Note: If you have any AutoML nodes in your pipeline, make sure that you explicitly select the model you want to save before publishing the pipeline. To learn more about selecting a model, read the chapter on AutoML.