Application Initialization
This guide describes how to deploy the C3 Generative AI Application in a C3 AI Studio environment. Complete these steps to initialize the application without editing code or creating artifacts manually.
Initialization overview
Complete the following tasks:
- Create environment
- Enter environment details
- Deploy application from Environment C3 AI Console
- Initialize application from Application C3 AI Console
Complete this setup before ingesting data or issuing queries.
You must have access to a customer-specific cluster and use a delivery-managed deployment package. Don't create artifacts manually.
Before starting, review the Application Prerequisites topic to confirm prerequisites.
Create environment
After you sign in to your cluster, you land on the homepage of your C3 AI Studio. This is where you manage your environments and applications.
If you don't have any environments, create one before continuing.
To create an environment:
Select Create environment near the top of the page.
The system prompts you to choose between two types of environments:
- Single Node Environment (SNE): Supports lightweight development or testing. All applications in the environment share the same resources.
- Shared Environment: Supports production use. This option provides better resource isolation and scalability across applications.
Select Shared Environment to proceed with deploying the Genai.QuickStart application.
To monitor your environment or application in C3 AI Studio, see Monitor Environments and Applications.
For SNE development workflows, use the C3 AI VS Code Extension setup and overview guidance in platform documentation.
Enter environment details
After choosing Shared Environment, you see a form where you enter basic information about the environment.
The environment is a workspace that includes memory, storage, and compute resources required to run your application.
You can't build or deploy anything until you complete this step.
The form includes the following fields:
Name (required):
- Use only lowercase letters and numbers.
- Don't include spaces or non-alphanumeric characters.
- Choose a short and clear name that's memorable.
- This name appears in the app address later, so avoid random strings.
Server version:
- Leave this field empty unless you want your application to use a specific server version.
- In most cases, the correct version is handled automatically.
After completing the fields, select Submit.
The system returns you to the homepage, and your new environment appears in the list.
[!NOTE] > Hibernation: The platform automatically hibernates environments when inactive (multi-node apps at 9:00 PM PST; single-node apps after 4 hours). See Hibernate Environments and Applications for details.
Deploy application from C3 AI Studio
For production deployments of C3 Generative AI Search, you should deploy your application on a shared environment. Follow these steps to deploy Generative AI Search on a shared environment:
- Select an application package
- Configure application deployment
- Configure application compute
- Review your selection
Step 1: Select an application package
Select Use existing package:
Select Download from Artifact Hub: Use the Package and Package version fields to find an artifact that was deployed through C3 AI Release Management. To learn more about Artifact Hub, see Register an Artifact to a Cluster
- Select Continue.
Step 2: Configure application deployment
- Enter the Application name.
Your application name must be unique within your environment. Do not reuse the name of a deleted application.
- Select an Application mode: Production or Test. This selection affects testing and automatic schema migration, as production apps cannot have their metadata modified.
- Production: A customer-facing application with automatic schema migration enabled. Test running is disabled.
- Test: A QA, CI, or staging application with test-running enabled. Automatic schema migration is disabled.
- To compare modes, select Expand details. To specify a platform version, select Advanced.
- Select Continue.
Step 3: Configure application compute
- Choose a compute setting: Small, Medium, Large, or Custom. Only users with the
StudioAdminrole can customize compute settings. Contact your studio administrator if you need this option but it is unavailable. - Select Continue.
Step 4: Review your selection
Review your entries. To edit, select Back or the checkmark (✓) beside any step title.
When you are satisfied with your entries, select Create.
Deploy application from Environment C3 AI Console
You must use the Environment C3 AI Console to deploy the application. Run a script that starts the application with the pre-built genAiSearch package.
Start the application in trial mode because production mode does not support structured data sources.
1. Open the Environment C3 AI Console
To open the Environment C3 AI Console:
- On the C3 AI Studio homepage, find your environment under Environments.
- Alternatively, select the Environment tab in the left sidebar to view all environments.
- Find your current running environment in the list.
- Select the three-dot menu (⋮) next to the environment name.
- Select Open Console.
2. Open the browser developer tools
To open the browser developer tools:
- In the new tab, open the context menu and select Inspect.
- In the developer tools panel, go to the Console tab.
3. Deploy the C3 Generative AI Application
Paste the following script into the browser developer console:
let appVersion = '<your_version_string>'; // Use the full version string from Artifact Hub
let rootPkg = '<your_package_name>';
let appName = '<your_app_name>';

// Create trial mode app with bundled UI
Pkg.Store.configureDevStore(true);

Pkg.Store.createPkg(
  Pkg.Decl.make({
    name: rootPkg,
    dependencies: { genAiSearch: appVersion },
    version: '1.0.0',
  }),
  Pkg.Store.WriteSpec.builder().dependenciesResolved(true).build()
);

Pkg.Store.configureNestedFromArtifactHub('genAiSearch', appVersion);

C3.env().startApp({
  name: appName,
  rootPkg: rootPkg,
  mode: 'trial', // Enables developer features in the C3 AI Console
  waitForReady: true,
});
Replace the following placeholders with your values:
- App version: Use the version string corresponding to the artifact build uploaded to your Artifact Hub. You can locate the version string by navigating to the Release section in Artifact Hub, selecting Artifacts, and searching for
genAiSearch. Copy the version string displayed next to the package. - Root package: Package names must be unique. Each application requires a distinct package name.
- App name: A unique, lowercase name for the app (no spaces or non-alphanumeric characters).
- mode: "trial" enables internal C3 AI Console based access.
Setup takes a few minutes, depending on system load. After setup completes, the application appears in the Running state in your C3 AI Studio workspace environment.
Initialize application from Application C3 AI Console
After deploying the application, complete the following setup tasks to prepare the app for data ingestion, retrieval, and query execution.
Complete the following steps:
- Open the Application C3 AI Console
- Set API keys for supported LLM providers
- Run the quickstart script to initialize the app
- Verify node status
- Enable multimodal parsing for rich PDF files (optional)
The C3 Generative AI Application package includes a Dynamic assistant canvas preconfigured to handle natural language queries.
1. Open the Application C3 AI Console
This step uses a different C3 AI Console than the one used earlier. Previously, you accessed the Environment C3 AI Console to deploy the application. Now, you open the Application C3 AI Console to configure and initialize the application.
You can close the Environment C3 AI Console if it is still open.
To open the Application C3 AI Console:
- From the C3 AI Studio homepage, locate your application directly under Applications.
- Hover over the application card and select the Open Console icon.
Alternatively, you can open the application console by first opening the environment, then selecting the application from there.
This opens the Application C3 AI Console. Run all setup and configuration commands in this console.
2. Open the browser developer console
In the Application C3 AI Console tab you just opened:
- Open the context menu and select Inspect.
- In the developer tools panel, select the Console tab.
3. Set API keys
To complete your setup, configure access to a large language model. The application uses the model to generate answers, summaries, and completions.
Set API keys for one of the following model providers:
- OpenAI (Azure-hosted): use Genai.Llm.OpenAI.Config.
- Claude (AWS-Hosted): use Genai.Llm.AwsBedrock.Config.
- Google Vertex AI / GCP: use Genai.Llm.Gcp.Config.
You can configure multiple providers, but only one is required to start.
If you don't have a valid endpoint, API key, and model deployment, contact your administrator.
Run the appropriate command in the console based on your selected provider. Replace placeholder values with actual API keys or service account JSON.
You can see the authorization-level configurations with these commands:
GenaiCore.Llm.AzureOpenAi.Auth.listConfigs().collect();

GenaiCore.Llm.VertexAi.Auth.listConfigs().collect();

GenaiCore.Llm.Bedrock.Auth.listConfigs().collect();OpenAI (Azure-hosted)
function setOpenAiApiKey() {
  var credentialName = '<auth_configuration_name>';
  var clusterSecret = GenaiCore.Llm.AzureOpenAi.Auth.forConfigKey(credentialName).getSecret();
  var clusterConfig = GenaiCore.Llm.AzureOpenAi.Auth.forConfigKey(credentialName).getConfig();

  Genai.Llm.OpenAI.Config.inst().setSecretValue('apiKey', clusterSecret.apiKey, ConfigOverride.APP);
  Genai.Llm.OpenAI.Config.inst().setConfigValue('apiBase', clusterConfig.azureEndpoint, ConfigOverride.APP);
  Genai.Llm.OpenAI.Config.inst().setConfigValue('apiVersion', clusterConfig.apiVersion, ConfigOverride.APP);
}

setOpenAiApiKey();
Genai.QuickStart.migrateAzureCredentialsToGenaiCore();Claude (AWS-hosted)
function setAwsBedrockKeys() {
  var secretAccessKey = '...';
  var accessKeyId = '...';
  Genai.Llm.AwsBedrock.Config.inst().setSecretValue('secretAccessKey', secretAccessKey, ConfigOverride.APP);
  Genai.Llm.AwsBedrock.Config.inst().setSecretValue('accessKeyId', accessKeyId, ConfigOverride.APP);
  Genai.Llm.AwsBedrock.Config.inst().setConfigValue('region', 'us-west-2', ConfigOverride.APP);
  Genai.Llm.AwsBedrock.Config.inst().setConfigValue(
    'endpoint',
    'https://bedrock-runtime.us-west-2.amazonaws.com',
    ConfigOverride.APP
  );
}
setAwsBedrockKeys();
Genai.QuickStart.migrateAwsCredentialsToGenaiCore();Google Vertex AI / GCP
function setGcpKeyForApps() {
  var serviceAccountInfo = JSON.stringify({
    type: 'service_account',
    project_id: '<your-project-id>',
    private_key_id: '...',
    private_key: '-----BEGIN PRIVATE KEY-----\n...',
    client_email: '...',
    client_id: '...',
    token_uri: 'https://oauth2.googleapis.com/token',
  });
  Genai.Llm.Gcp.Config.inst().setSecretValue('serviceAccountInfo', serviceAccountInfo, ConfigOverride.APP);
  Genai.Llm.Gcp.Config.inst().setConfigValue('project', '<your-project-id>', ConfigOverride.APP);
  Genai.Llm.Gcp.Config.inst().setConfigValue('location', 'us-central1', ConfigOverride.APP);
}
setGcpKeyForApps();
Genai.QuickStart.migrateGcpCredentialsToGenaiCore();
After you post this, wait for the Application C3 AI Console output and run the following command to reset the interpreter state and ensure the updated configuration is active:
Py.closeAllPy4jInterpreters();4. Run the quickstart setup
The quickstart script prepares the application for document ingestion, retrieval, and query execution.
As part of the setup, the following hardware profiles are configured automatically:
- Leader Node: 5 CPU cores, 30,000 MB memory, 120 GB disk
- Task Node: Auto selected or manually specified based on similar resource profiles
This is the recommended minimal configuration for deploying the application. The quickstart script automatically provisions these settings to ensure optimal performance for document ingestion, structured data retrieval, and agent workflows.
To learn more about node pool configuration, see Environment Sizing.
You must run the quickstart setup before attempting to upload documents, ingest structured data, or issue queries.
Run the following command in the Application C3 AI Console to see all of the LLM model configurations available within your environment:
GenaiCore.Llm.Completion.Client.listConfigKeys().collect();The following image shows example output of the above command:
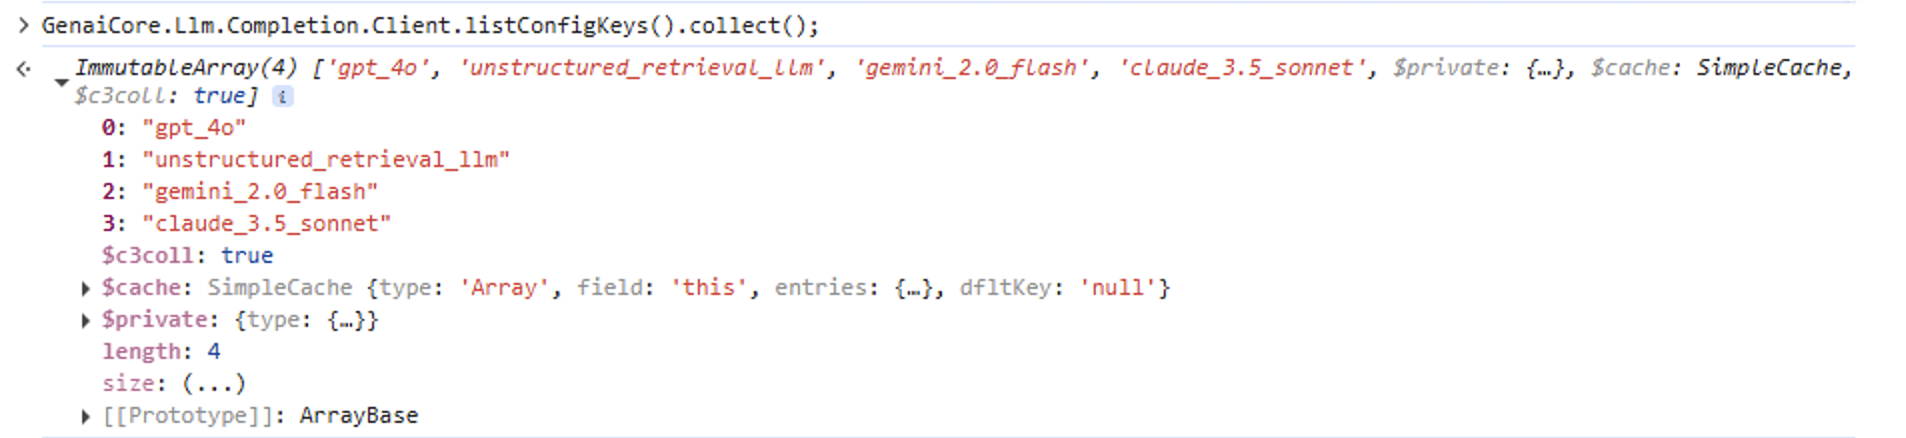
You can run the quickstart using any of the listed models in LLM configuration that have a corresponding API key per step 3. For example, set the llmClientConfigName to claude_3.5_sonnet to configure Claude.
For initial deployment, keep it set to gpt_4o, which is linked to the default model configuration provided with the genAiSearch package.
Genai.QuickStart.setup({ llmClientConfigName: 'gpt_4o' });For SNE setup, use the setupApp function. This function performs the same setup steps as setup, but skips infrastructure configuration.
Genai.QuickStart.setupApp({ llmClientConfigName: 'gpt_4o' });
Genai.SourceFile.Chunker.UniversalChunker.Config.setConfigValue('mapReduceOptions', {
  batchSize: 1,
  maxConcurrencyPerNode: 1,
  include: 'id, originalFile.contentLength',
  order: 'descending(originalFile.contentLength)',
});
The console displays output that confirms the app is active and both nodes are in the Running state. The confirmation message appears as:
Setup complete! Warning: leader node may restart.
5. Verify node status
To check whether the leader node and task node are running correctly, run this command in the Application C3 AI Console:
c3Grid(C3.app().nodes());The console displays output that confirms the app is active, with both nodes in the Running state.

6. Multimodal parsing
Multimodal parsing extracts structured elements such as images, tables, and text from supported file types including PDF files, PPTX, and DOCX.
When you run the Quick Start script, the system automatically enables the following default chunking components:
- PDF files: Genai.SourceFile.Chunker.Mew3
- PPTX/DOCX: Genai.SourceFile.Chunker.MsftX.Config
For multimodal parsing, GPT-4o is automatically selected as the default large language model to ensure optimal accuracy. This setting is not overridden by the Quick Start configuration.
To customize the model or chunking configuration, refer to:
- Configure Mew3 for PDF parsing
- Genai.SourceFile.Chunker.MsftX.Config for PPTX and DOCX parsing
For details about multimodal parsing capabilities and best practices, see Multimodal parsing.
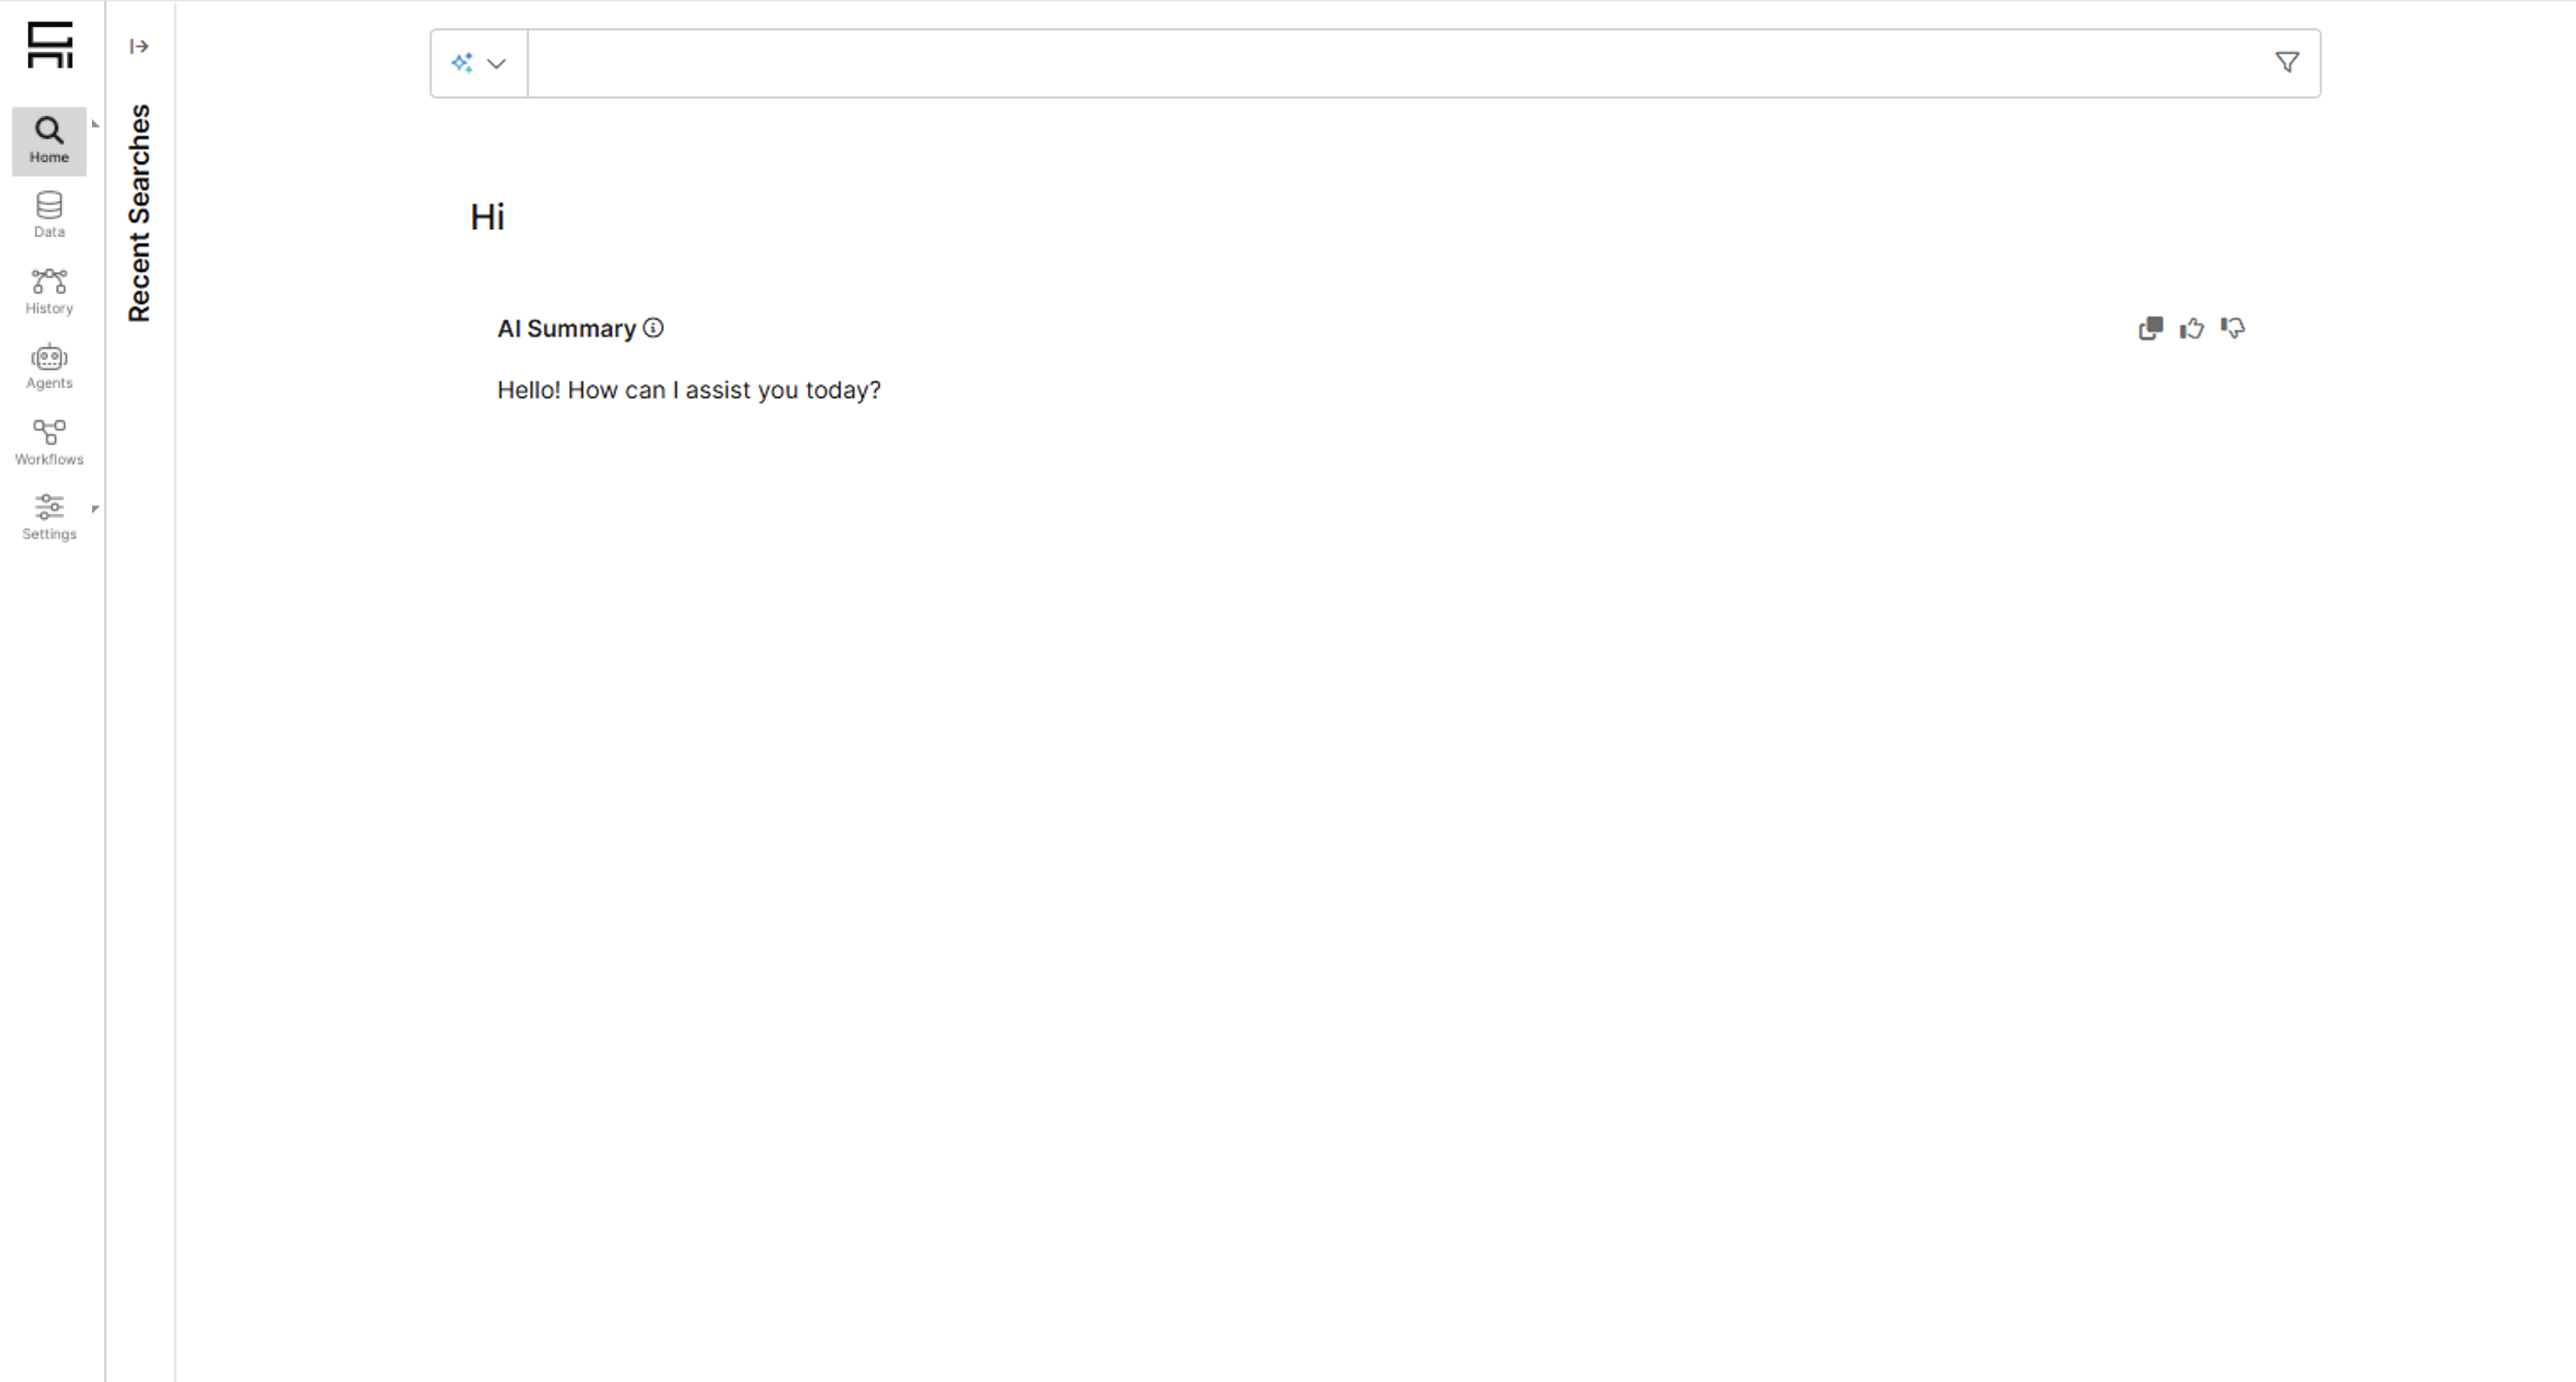
Open the C3 Generative AI Application UI
After completing setup:
- Go back to the C3 AI Studio homepage.
- Find your app again in the environment list.
- Select Open Application.
This launches the full C3 Generative AI Application UI, where you can start uploading data, running queries, and customizing your workspace.
Upgrade application
You can upgrade the version of the genAiSearch dependency used by your application package by running the following command in the Environment C3 AI Console.
You can upgrade the app using this command only if you initialized the application in trial mode.
let upgradeVersion = '<your_version_string>';

function upgradeApp() {
  Pkg.Store.configureNestedFromArtifactHub('genAiSearch', upgradeVersion);

  var pkgDeclString = JSON.stringify(
    Pkg.Decl.make({
      author: '<author_name>', // Can be any string, e.g. "QA Team"
      name: '<your_package_name>', // The name of the app package you want to upgrade
      description: 'updatable genAiSearch',
      dependencies: { genAiSearch: upgradeVersion },
      version: '1.0.0',
    })
  );

  Pkg.Store.writeEncodedContent(
    '/<your_package_name>/<your_package_name>.c3pkg.json', // Must match the name above
    Base64.encodeString(pkgDeclString),
    Pkg.Store.WriteSpec.builder().dependenciesResolved(true).build()
  );
}Placeholder reference
your_version_string: Enter the version you want to upgrade to. This should be the full version string of thegenAiSearchpackage as listed in Artifact Hub.author_name: Enter any descriptive label for traceability or internal documentation.your_package_name: Enter the current package name of the app you want to upgrade. Use only lowercase letters, no spaces or special characters. For example,"qaGenAiSearch""/<your_package_name>/<your_package_name>.c3pkg.json": Enter the full metadata file path, repeating the package name in both segments. For example:"/qaGenAiSearch/qaGenAiSearch.c3pkg.json"
Restart your app and environment to complete the upgrade process.