Connect MCPs
Your workspace does not hold everything the agent might need. An MCP server closes that gap, connecting the agent to an outside system through Model Context Protocol (MCP). The agent can then pull live records from a tool your team runs, look up current information online, or send a result into another tool, all as it builds.
Adding an MCP server in your settings makes that server available to every workspace you own.
Add an MCP server
Ask the server's owner for two details: the web address, and a token if the server needs one. A token is a password for programs, and the owner of the server issues the token to you.
C3 Code connects to any MCP server that runs on the web and has an address of its own. A server that runs on your own laptop, and a server that signs you in through a browser, cannot be registered here.
Fill in one form with those details:
- Open Settings from your profile menu.
- Under MCP Servers, select Add MCP Server.
- Enter a Name. You use this name when you write a prompt, so keep it short and give each server a name of its own.
- Enter the URL you were given.
- Set Authorization if you have a token. Select the scheme the owner specified, then paste the token.
- Select Save.
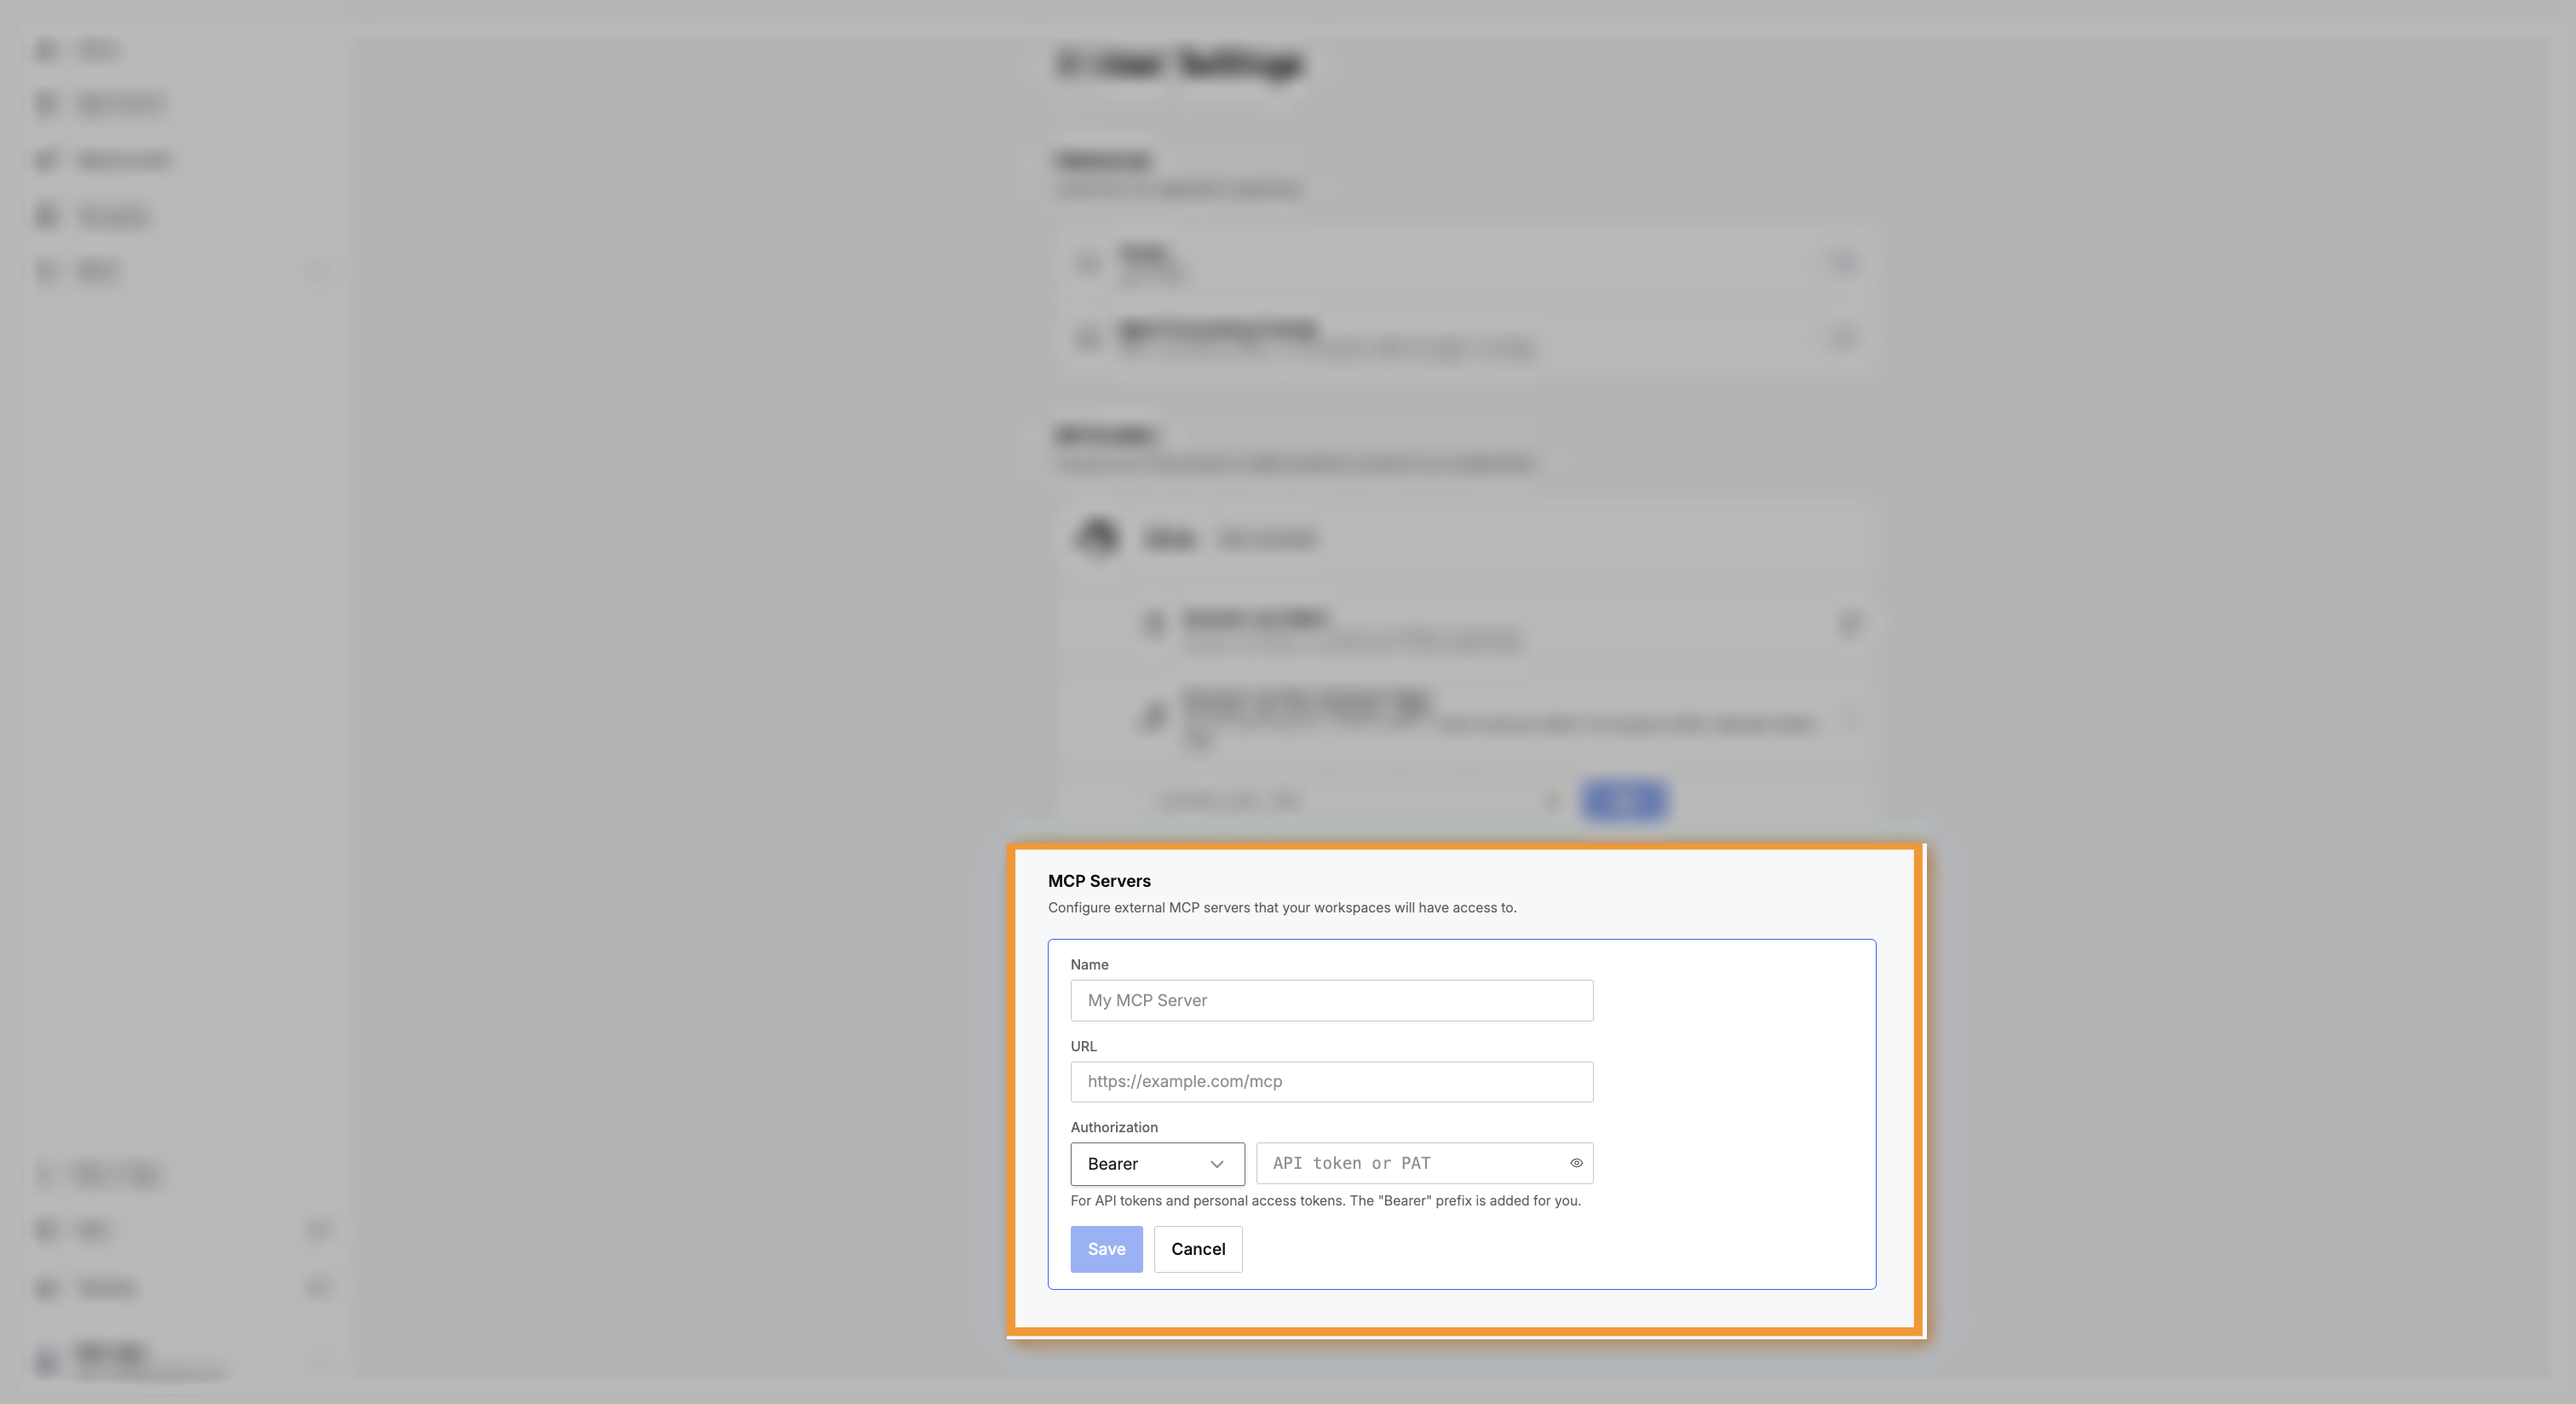
Every workspace you own can use that server's tools.
A workspace that is already running does not pick up the new server until that workspace restarts. Stop and resume the workspace, or open a new one.
Check that the MCP server works
Each MCP server you add shows a status and the tools that server offers. Open a row to see the whole list.
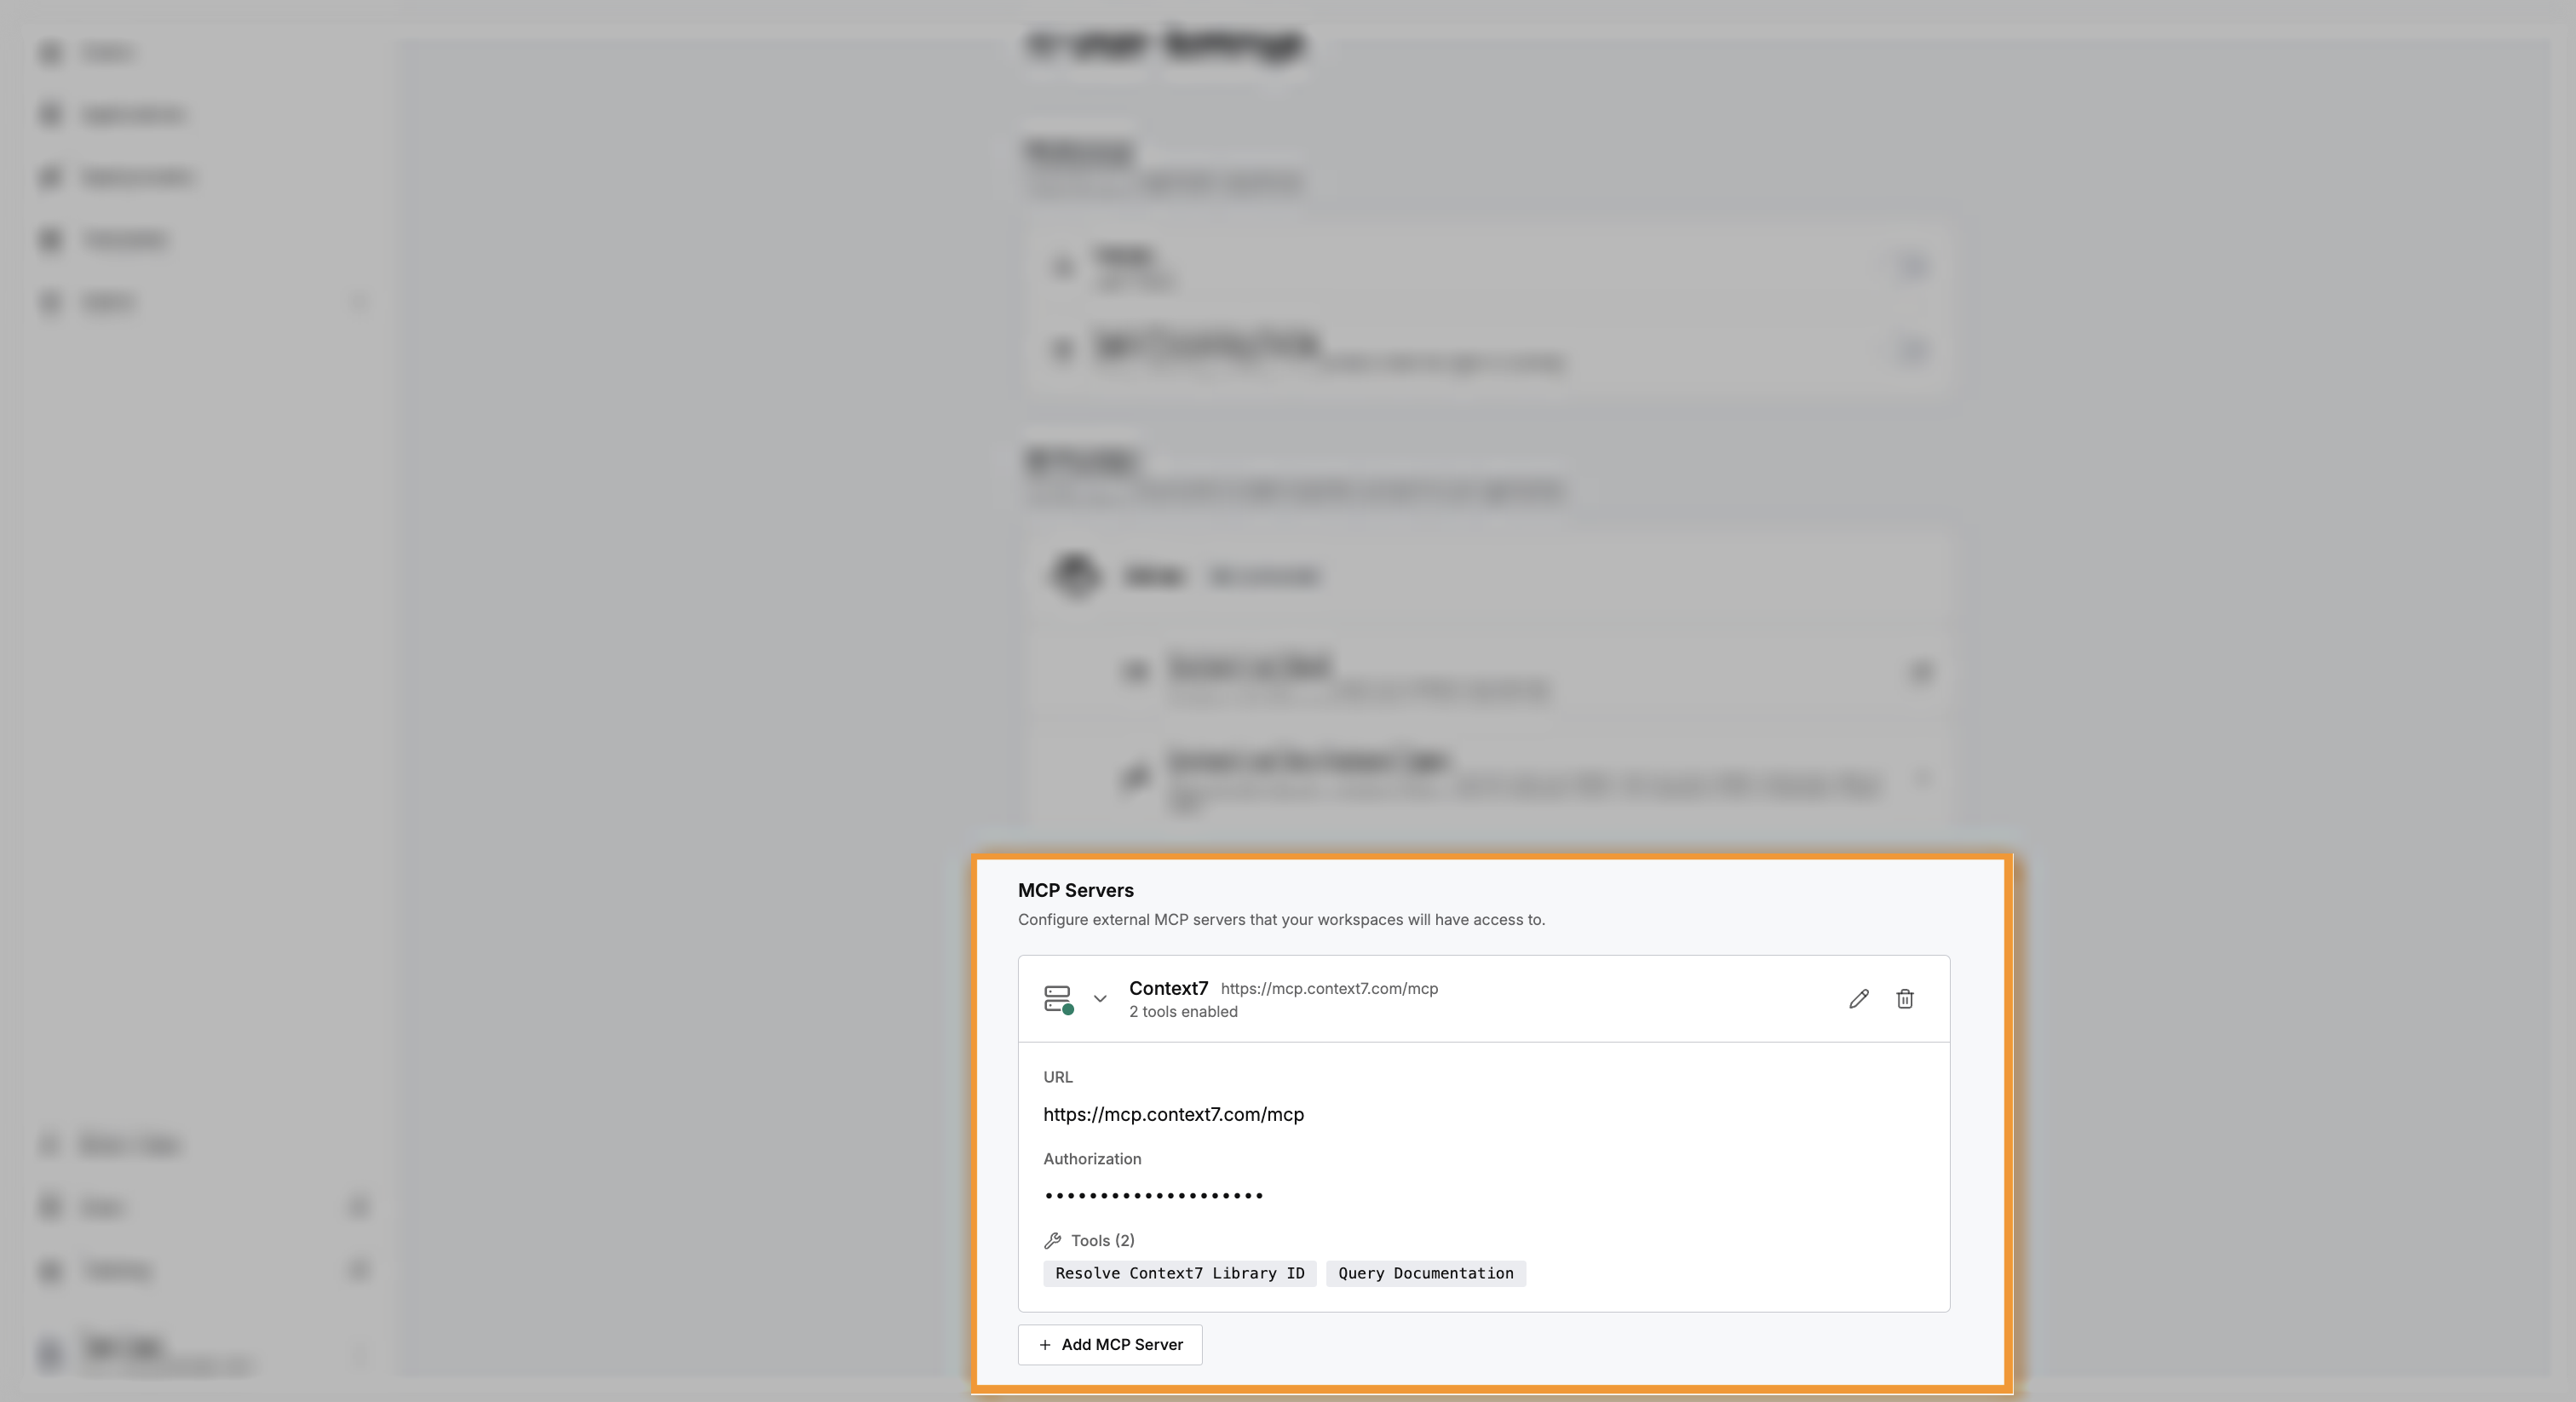
The tool list tells you what the agent gained. A connected status means the server answered, and nothing more. A server that accepts a weak token, or no token at all, also answers, and offers fewer tools in return.
Any other status tells you what to check:
- Authentication failed: the server answered and refused your token. Check the token, then check the scheme you selected.
- Unreachable: nothing answered at that address. Check the address for a typo, then confirm the server is running and reachable on the web.
- Error: something answered, but not the server. The address usually points at a web page about the server rather than at the server itself.
Ask the agent to use the MCP server
Name the server in your prompt. The agent reports each call, so you can see which tool the agent used.
Your prompt takes the same form whatever the server does. Name the server, then state what you want.
Use Context7 to check the current TanStack Table documentation, then add column sorting
and a per-column filter row to the shared DataTable component, and enable both on the
Reorder table.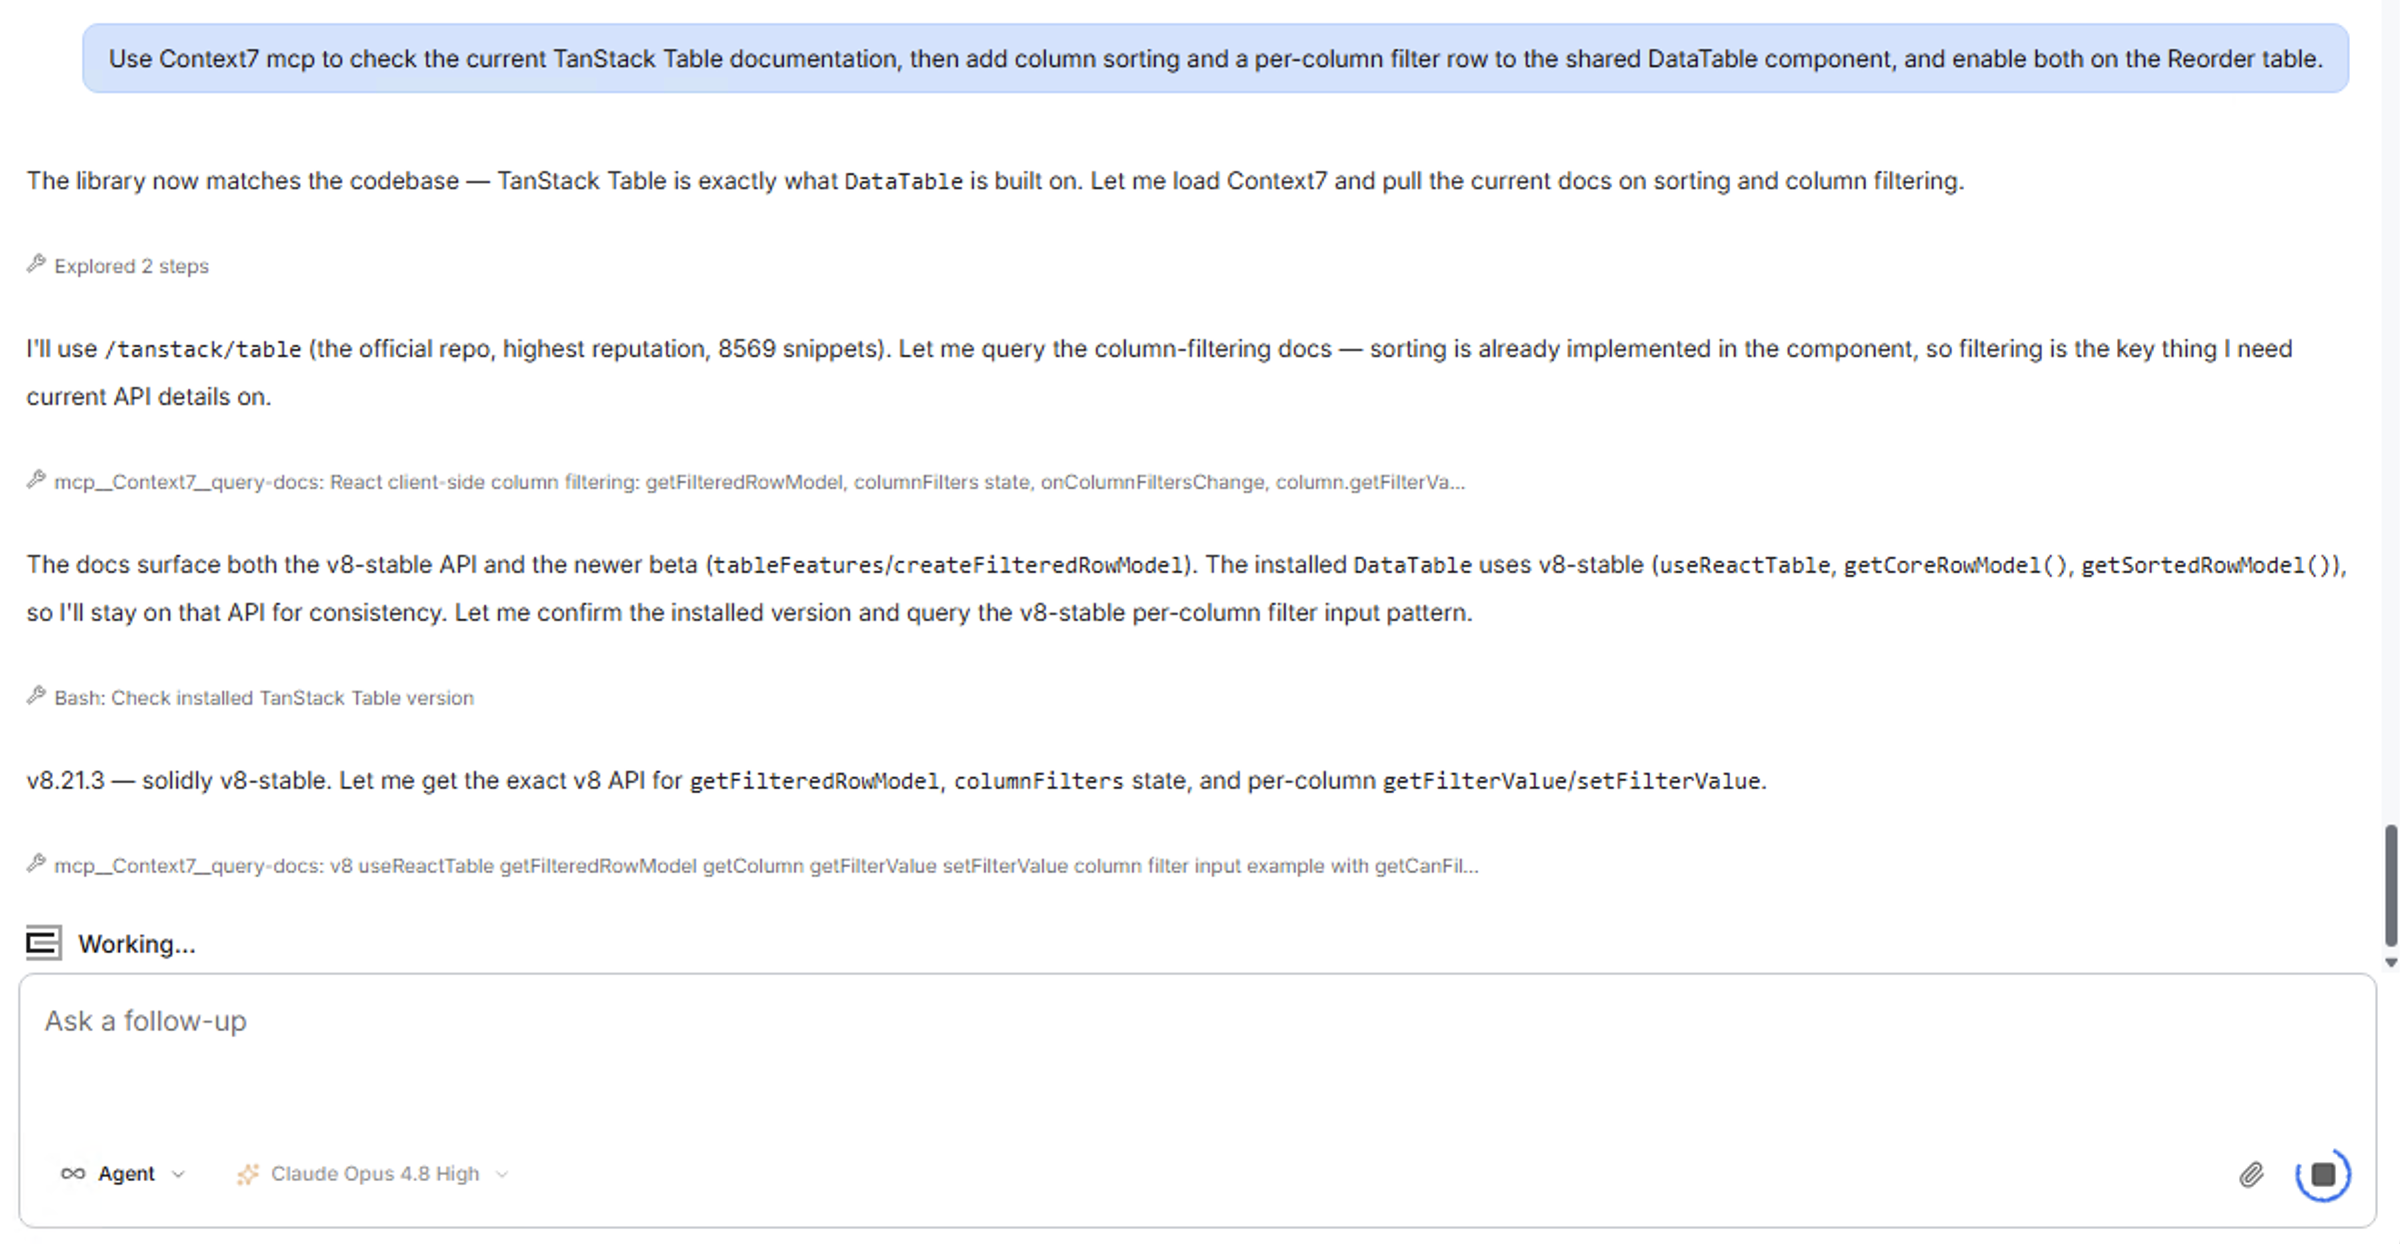
That prompt sent the agent to an MCP server holding library documentation. The agent found two versions of the same feature, checked which version the workspace had installed, and built against that version. The server settled the choice.
Change or remove an MCP server
Hover a server row to reveal three controls:
- Edit: opens the form, so you can change the name, the address, or the token.
- Remove: deletes the server after you confirm. Your workspaces lose that server's tools.
- Expand: shows the full setup and the list of tools.
Give a server a name already in use, and C3 Code reports the conflict.
Let other assistants use your application
The connection works in the other direction too. C3 Code can publish your own application as an MCP server, so assistants outside C3 Code can use what you built as a tool.
Five tabs in Configure cover that setup:
- MCP Tools: publishes the tools other assistants can call.
- MCP Prompts: builds a library of prompts to accompany those tools.
- MCP Monitor: shows the calls arriving from outside.
- MCP Servers: runs more than one named server from the same application.
- MCP Access: grants access to assistants such as GitHub Copilot and Cursor.
Use these tabs when another team, or another assistant, needs to work with your application.
For what each tool in Configure does, see Use Configuration Tools.
Where to go next
These pages cover building with the tools your MCP server added: