Start from Scratch
You describe the application you want, and the agent builds that application.
You do not have to write the description from scratch. Attach a document you already have, such as a product requirements document, a specification, or a page of notes, and the agent builds from it. A requirements document works best, because it already names the data it stores, the logic it runs, and the pages people open.
Two factors decide how far the first pass gets you: how completely the description covers the application, and where your data comes from. A spreadsheet produces a running application in minutes. A connection to a source system pulls new data as that system changes.
The example on this page tracks stock across warehouses, from a plan written in Ask mode to a running application connected to real data. The first prompt asks the agent to generate its own starting data, so you can follow the example without a file of your own. Build, Share, and Deploy Your First Application builds the same example from a single prompt.
Create the application
Everything on this page happens inside a workspace, so create one first. Start from a blank application, so you begin with nothing and describe what you want:
- On the C3 Code home page, select Create Application.
- Choose to start from a blank application.
- Enter a name for your application, then select Create.
C3 Code opens a new workspace with an empty preview and the chat panel. Everything that follows happens there. For the other ways to start an application, see Choose How to Start Your Application.
Plan in Ask mode before you build
Two modes appear in the chat panel footer, and the mode decides whether the agent changes anything:
- Agent mode reads your workspace, writes files, and runs commands.
- Ask mode answers questions and changes nothing.
Use Ask mode to settle the specification before the build starts. Describe what you intend to build. The agent answers with a plan that names the records to add, the pages to build, and the order of the work. Correct that plan, add what the plan missed, and ask for alternatives where you are unsure.
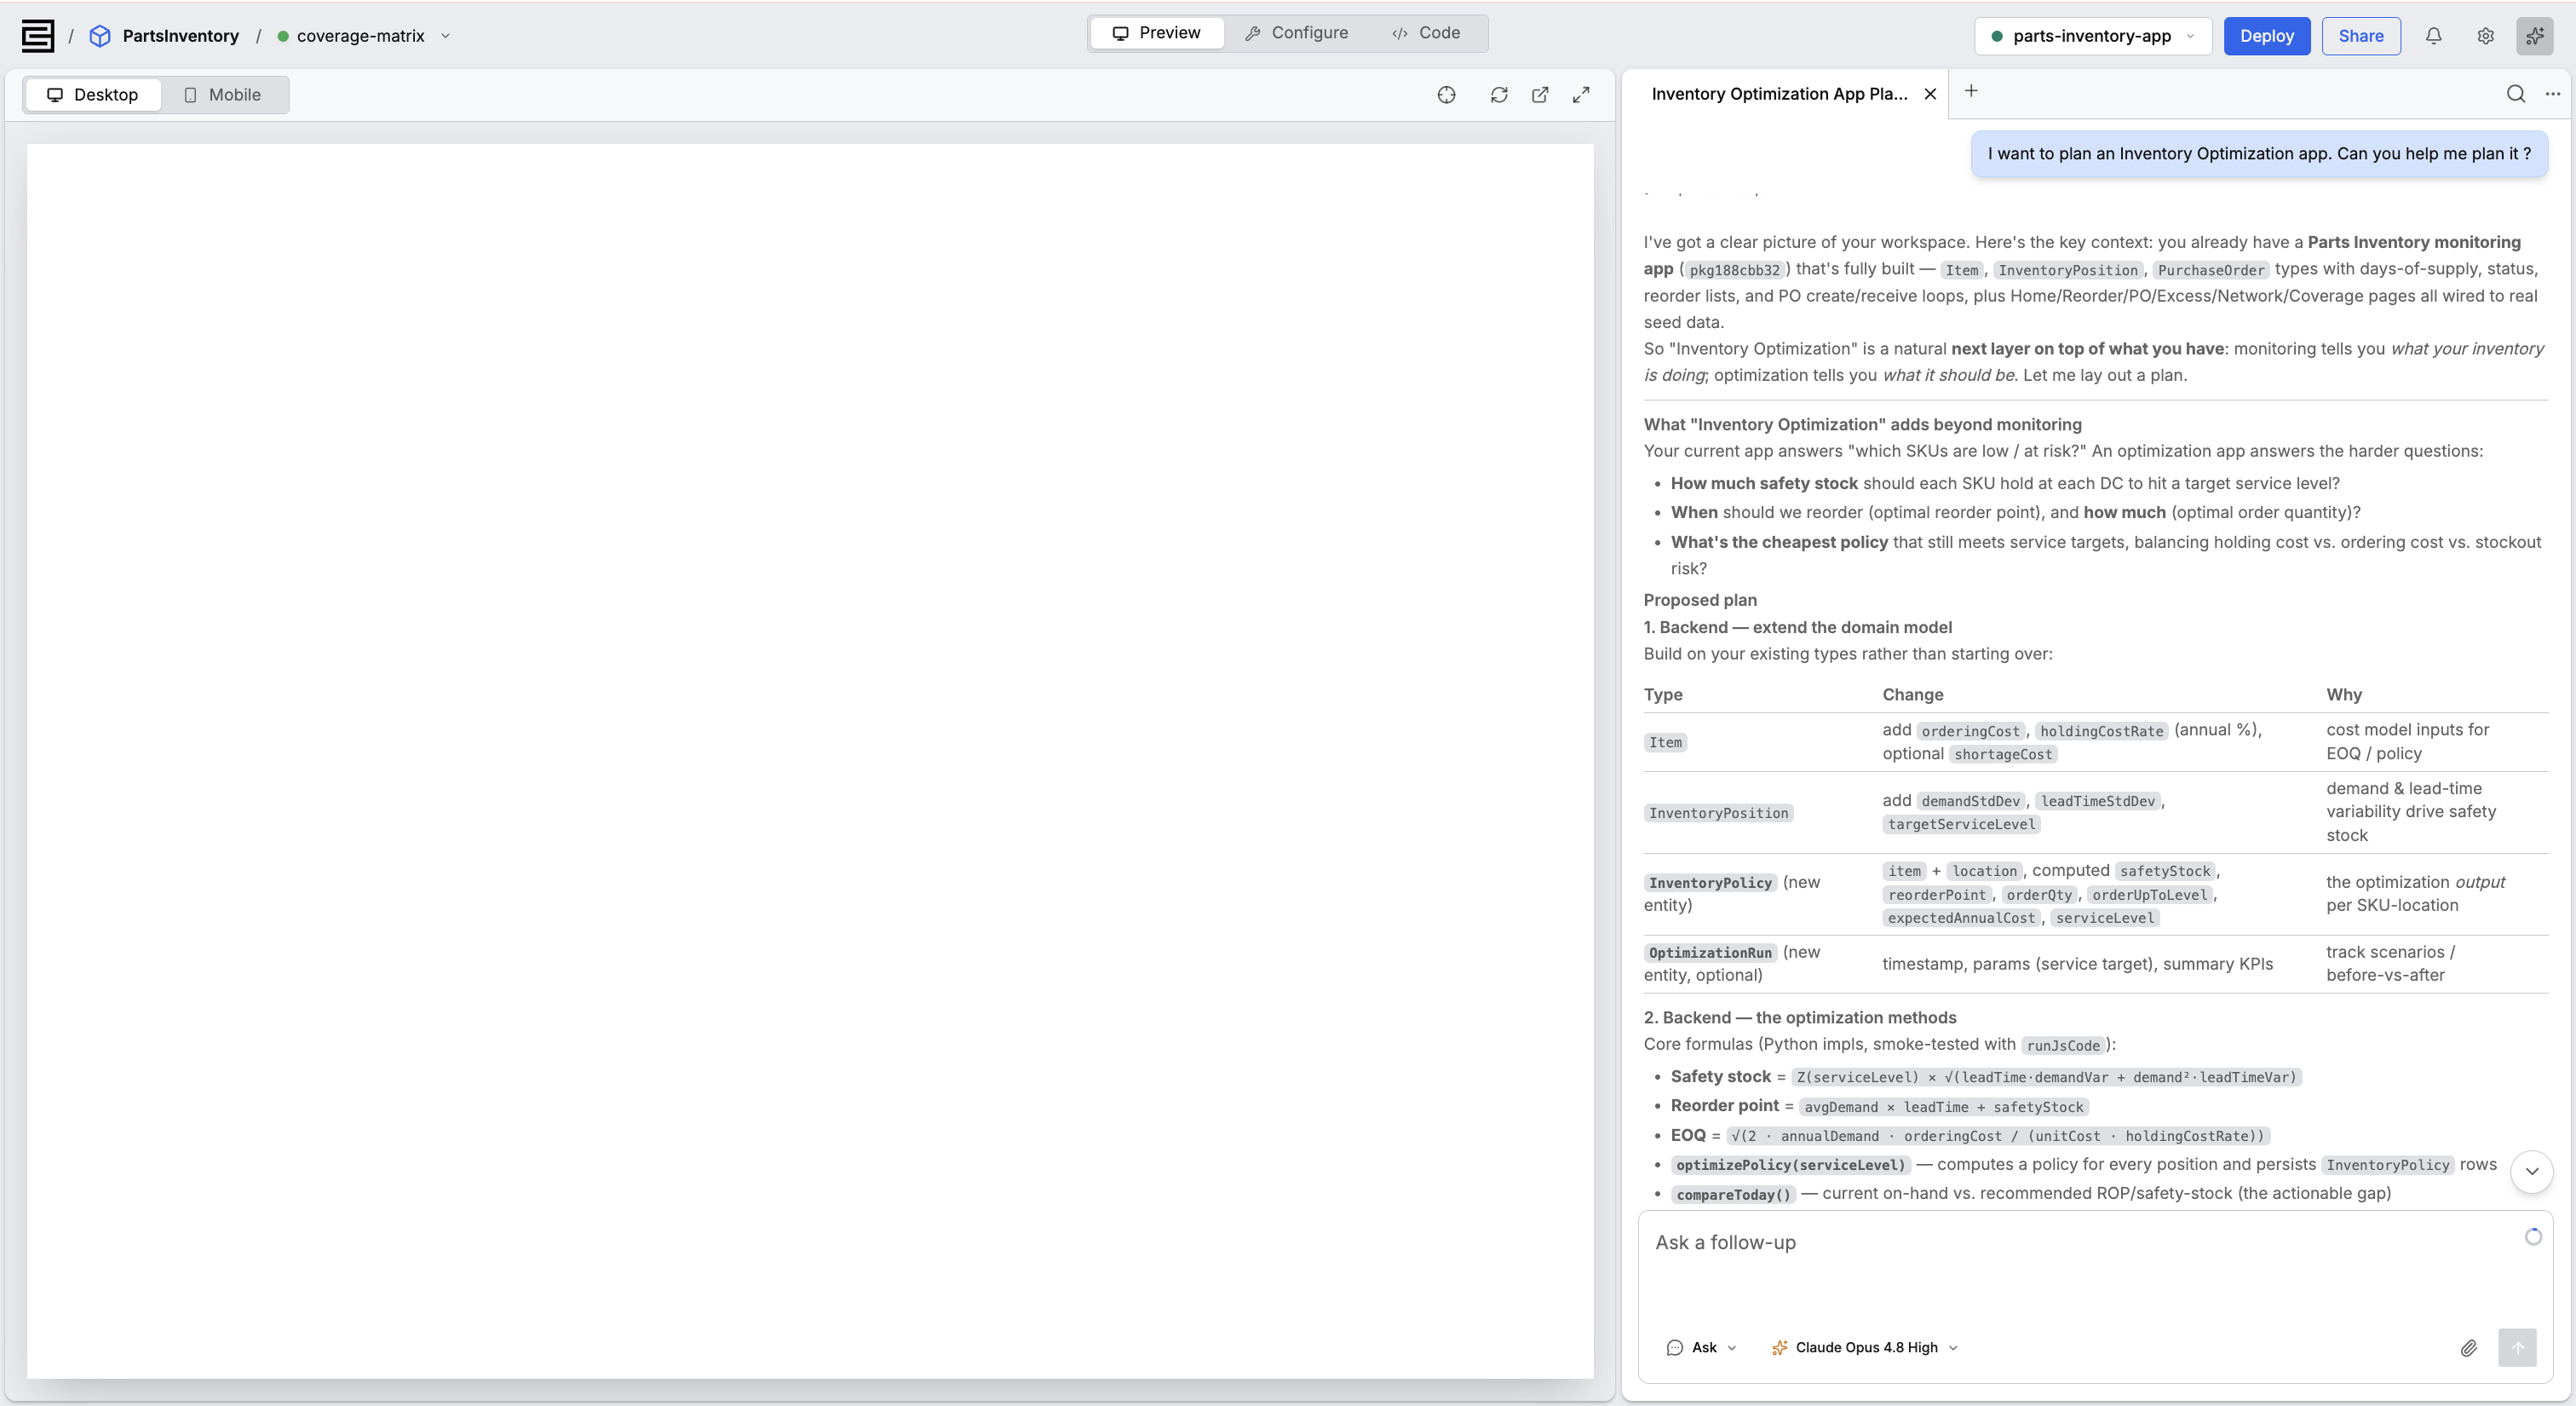
Although this step is optional, taking it keeps your application clean and gets the first build right. Correcting a plan costs one sentence. Correcting a built application costs a set of changes, and leaves the remains of the first attempt in your code.
Ask mode is how you arrive at the right prompt. When the plan is correct, switch to Agent mode and send the plan as your prompt.
Write your first prompt
A complete description produces a working application in one pass. A vague prompt produces a sketch, and you spend the next several requests correcting that sketch.
Cover four points:
- What the application stores: each kind of record, and the fields on each record.
- What the application works out: the values it derives from your records, and the logic that produces them.
- The pages and the navigation: page titles, navigation labels, and what appears on each page.
- The display rules: sort order, thresholds, and conditional formatting.
This prompt covers all four points in plain language, and asks the agent to generate the starting data:
Build an inventory monitoring application. Create the records, generate some starting
data, and build all the pages in one pass.

Store two kinds of record. An Item has a part number, a description, a product family, a unit
cost, and an ABC class. An Inventory Position has an item, a location, a region, a supplier,
units on hand, units in transit, average weekly demand, and a lead time in days.

For each position, work out days of supply: units on hand plus units in transit, divided by
average weekly demand per day. Treat any position with fewer than 14 days of supply as needing
reorder.

Build two pages. Home shows cards for total inventory value, the number of stockouts, and
average days of supply, with a bar chart of inventory value by region. Reorder lists every
position needing reorder, sorted by days of supply, with anything under 7 days in red.
Describe each rule in your own words, and the agent writes the code for that rule. Naming a programming language or a technique is optional.
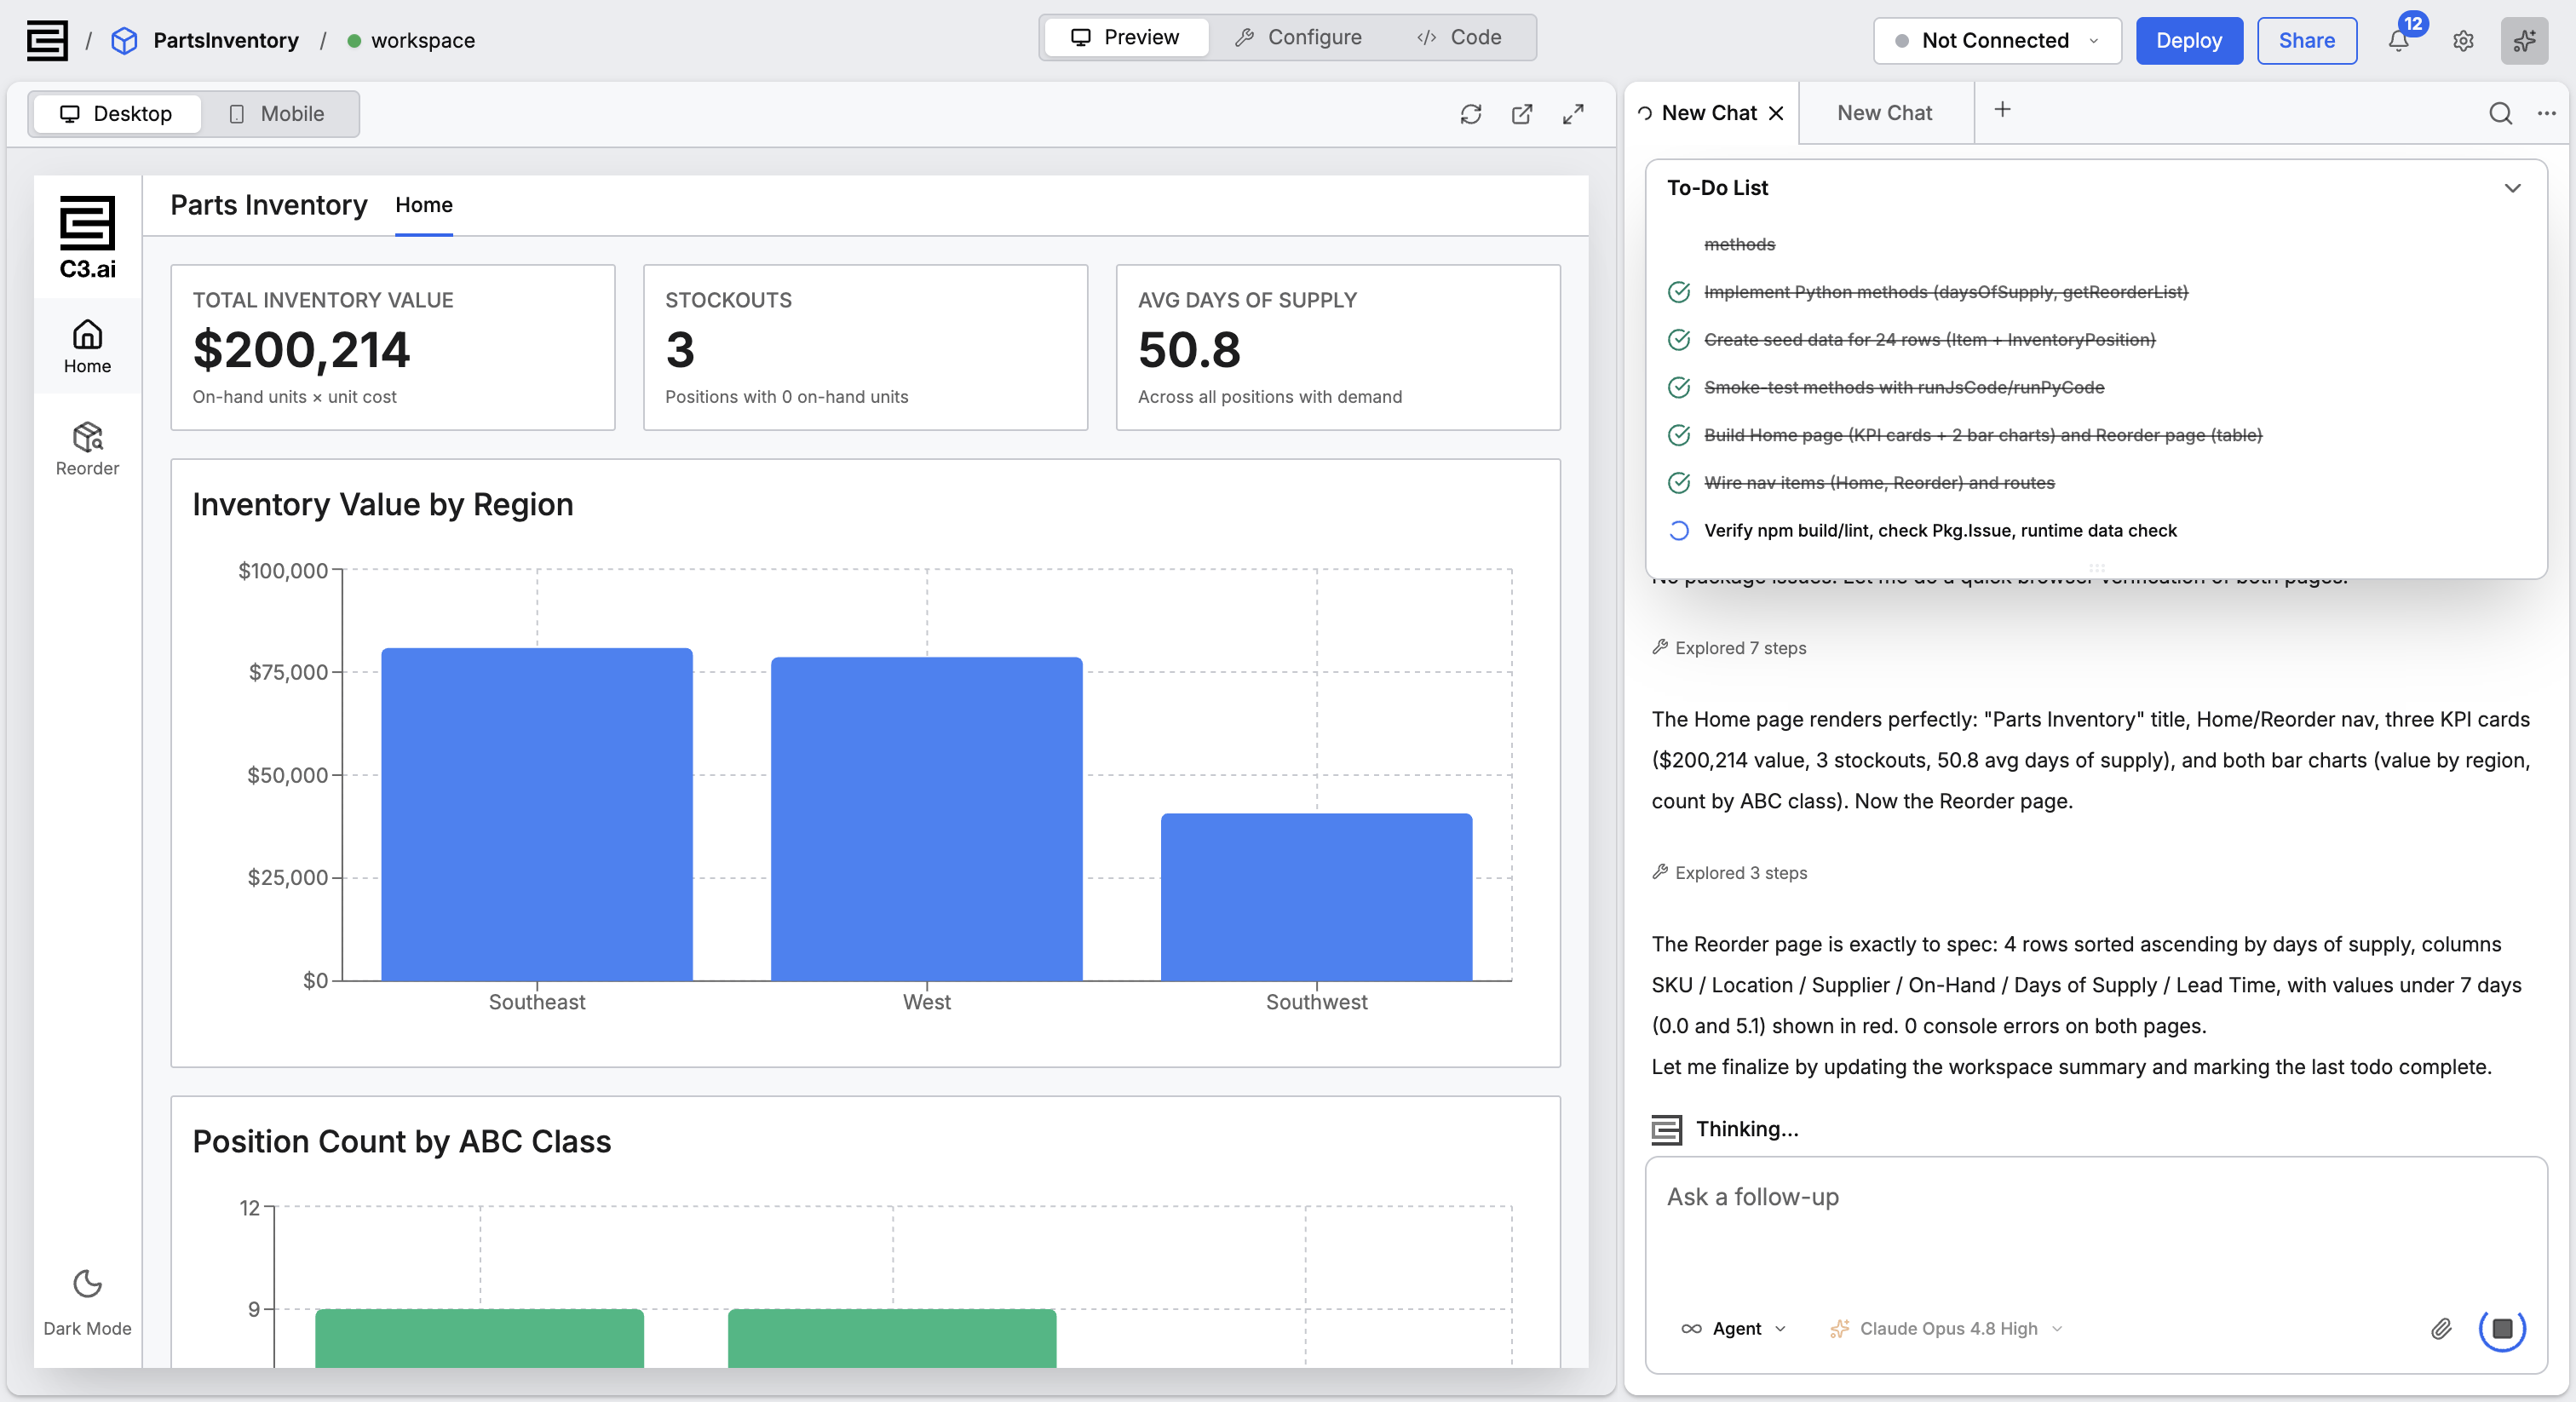
The agent reads a prompt of this kind as a full description, and builds without stopping to ask. One pass produced two kinds of record, the days-of-supply value and the reorder flag, 24 rows of data, and both pages.
Attach the files the agent needs
Select the attachment icon in the prompt input to add files. Each kind of file serves a different purpose:
- CSV and spreadsheet files shape your records. The agent reads the column names and the kinds of value in each column, then builds records around those columns.
- Images act as design references for layout and styling.
- PDF, DOCX, TXT, and MD files carry requirements the agent follows. A product requirements document, a specification, or a design brief all work. The agent reads the document and builds against it, so a document you already wrote can stand in for the whole first prompt.
The limits are 20 MB for one file, 10 files in one chat, and 100 MB in total.
Bring in your real data
Your starting data is a snapshot, whether the agent generated it or you attached a file. The application holds those values as they were, and they stay as they are. Two routes replace that snapshot with current data, and both begin in the same place. Select Configure in the workspace header, then open Data Fusion, which is the tool that brings data into an application from files and from source systems.
Add a file: upload your file in Data Fusion, then ask the agent to bring the file in. The agent determines which records each row feeds, and builds the pipeline. The next file you add then loads the same way, with no new prompt.
Connect the system that holds your records: add your source system in Data Fusion, entering and testing the sign-in details for that system. The agent handles everything after that: the source definitions, the transformations, the load, and the check that the data arrived. The pipeline then pulls new data as that system changes, whether the system is Snowflake, Databricks, SAP HANA, Salesforce, Kafka, or another of the systems in the connector reference. Obtaining the sign-in details usually means asking the team that runs that system.
The Object Model tab shows the data model both routes produce. Open that tab to confirm the records carry your own field names, rather than names the agent invented.
Build, Share, and Deploy Your First Application covers building one application from a prompt to production, and Use Configuration Tools covers what each tool in Configure does.
Keep asking for changes
Each prompt builds on the application you already have, so you never start over. Group related changes into one request, rather than sending the changes one at a time.
State the test inside the prompt. Naming what should change gives the agent something to verify, and gives you something to check:
Create a purchase order for GKT-6620 Central, receive that purchase order, and the stockout count and days-of-supply figures on Home should both change.Request by request, this application gained purchase orders, a status based on days of supply, an overstock page, and a coverage matrix. Each addition was one themed prompt.
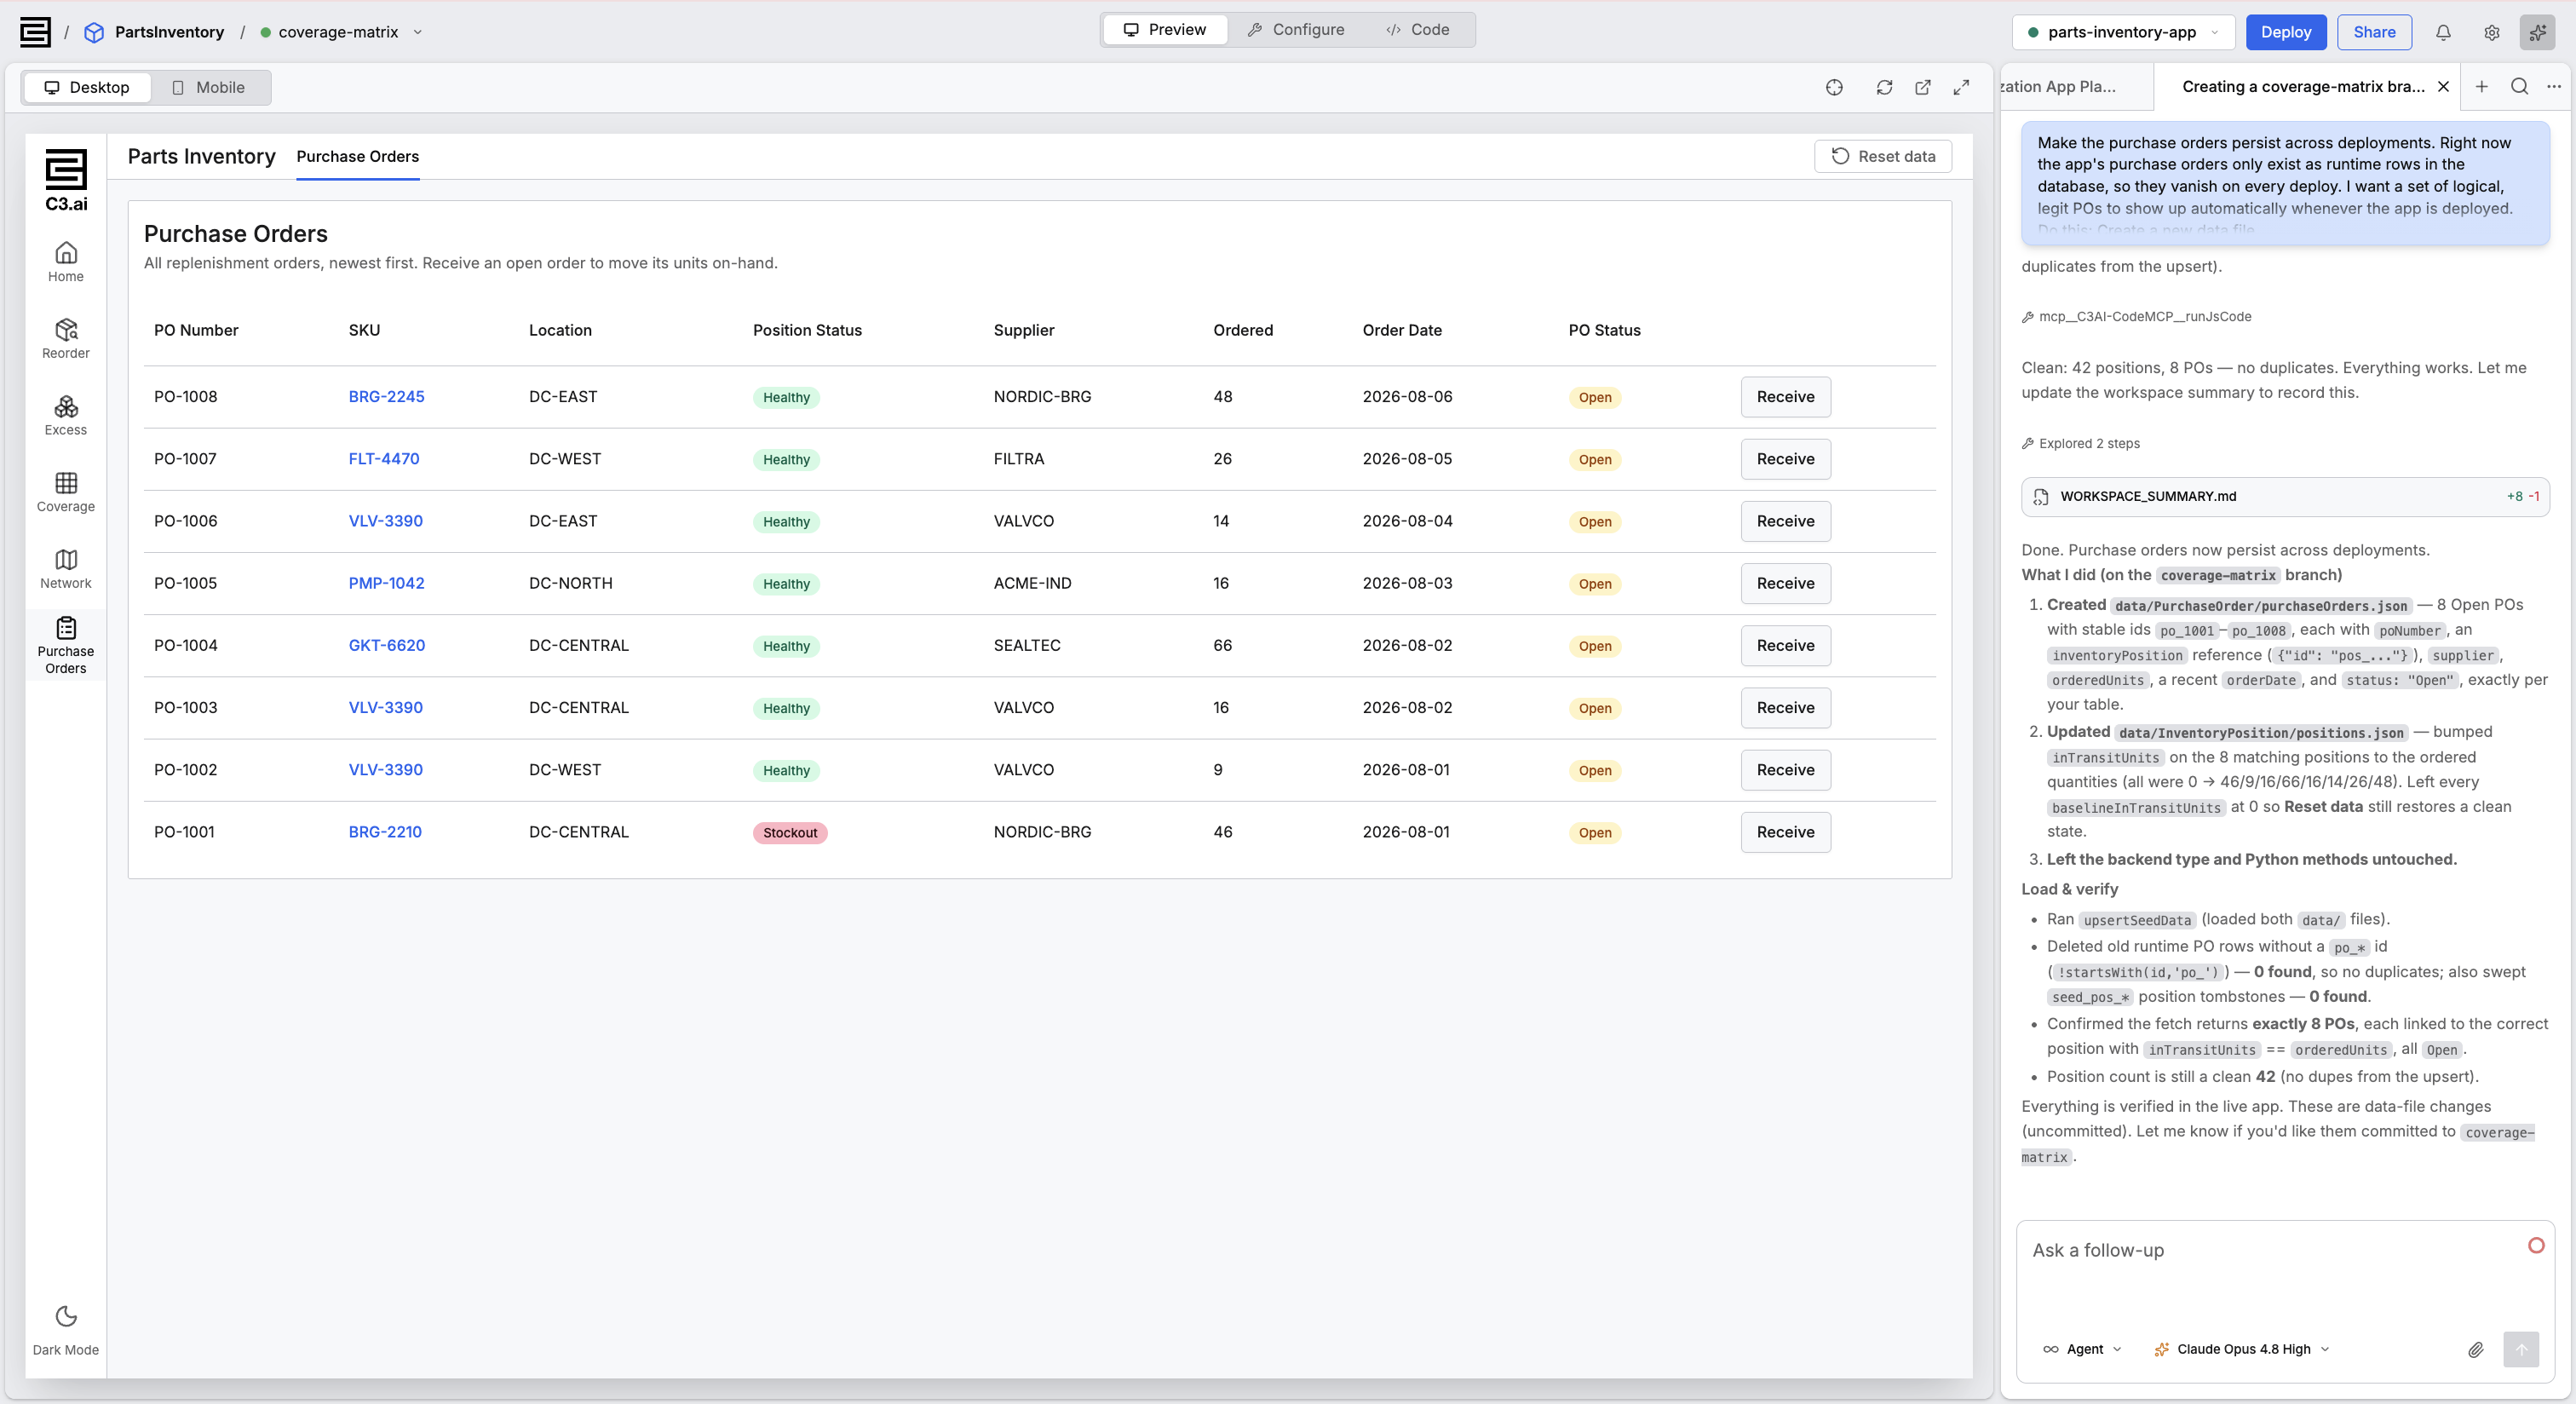
A request that replaces the data updates every page that reads the data. Attaching a larger file and asking the agent to replace the existing data grew this application from 8 items to 12, and added a fourth location. Every page updated accordingly, with no separate prompt.
For a contained change, name the page, the component, and the behavior, then state what to leave unchanged:
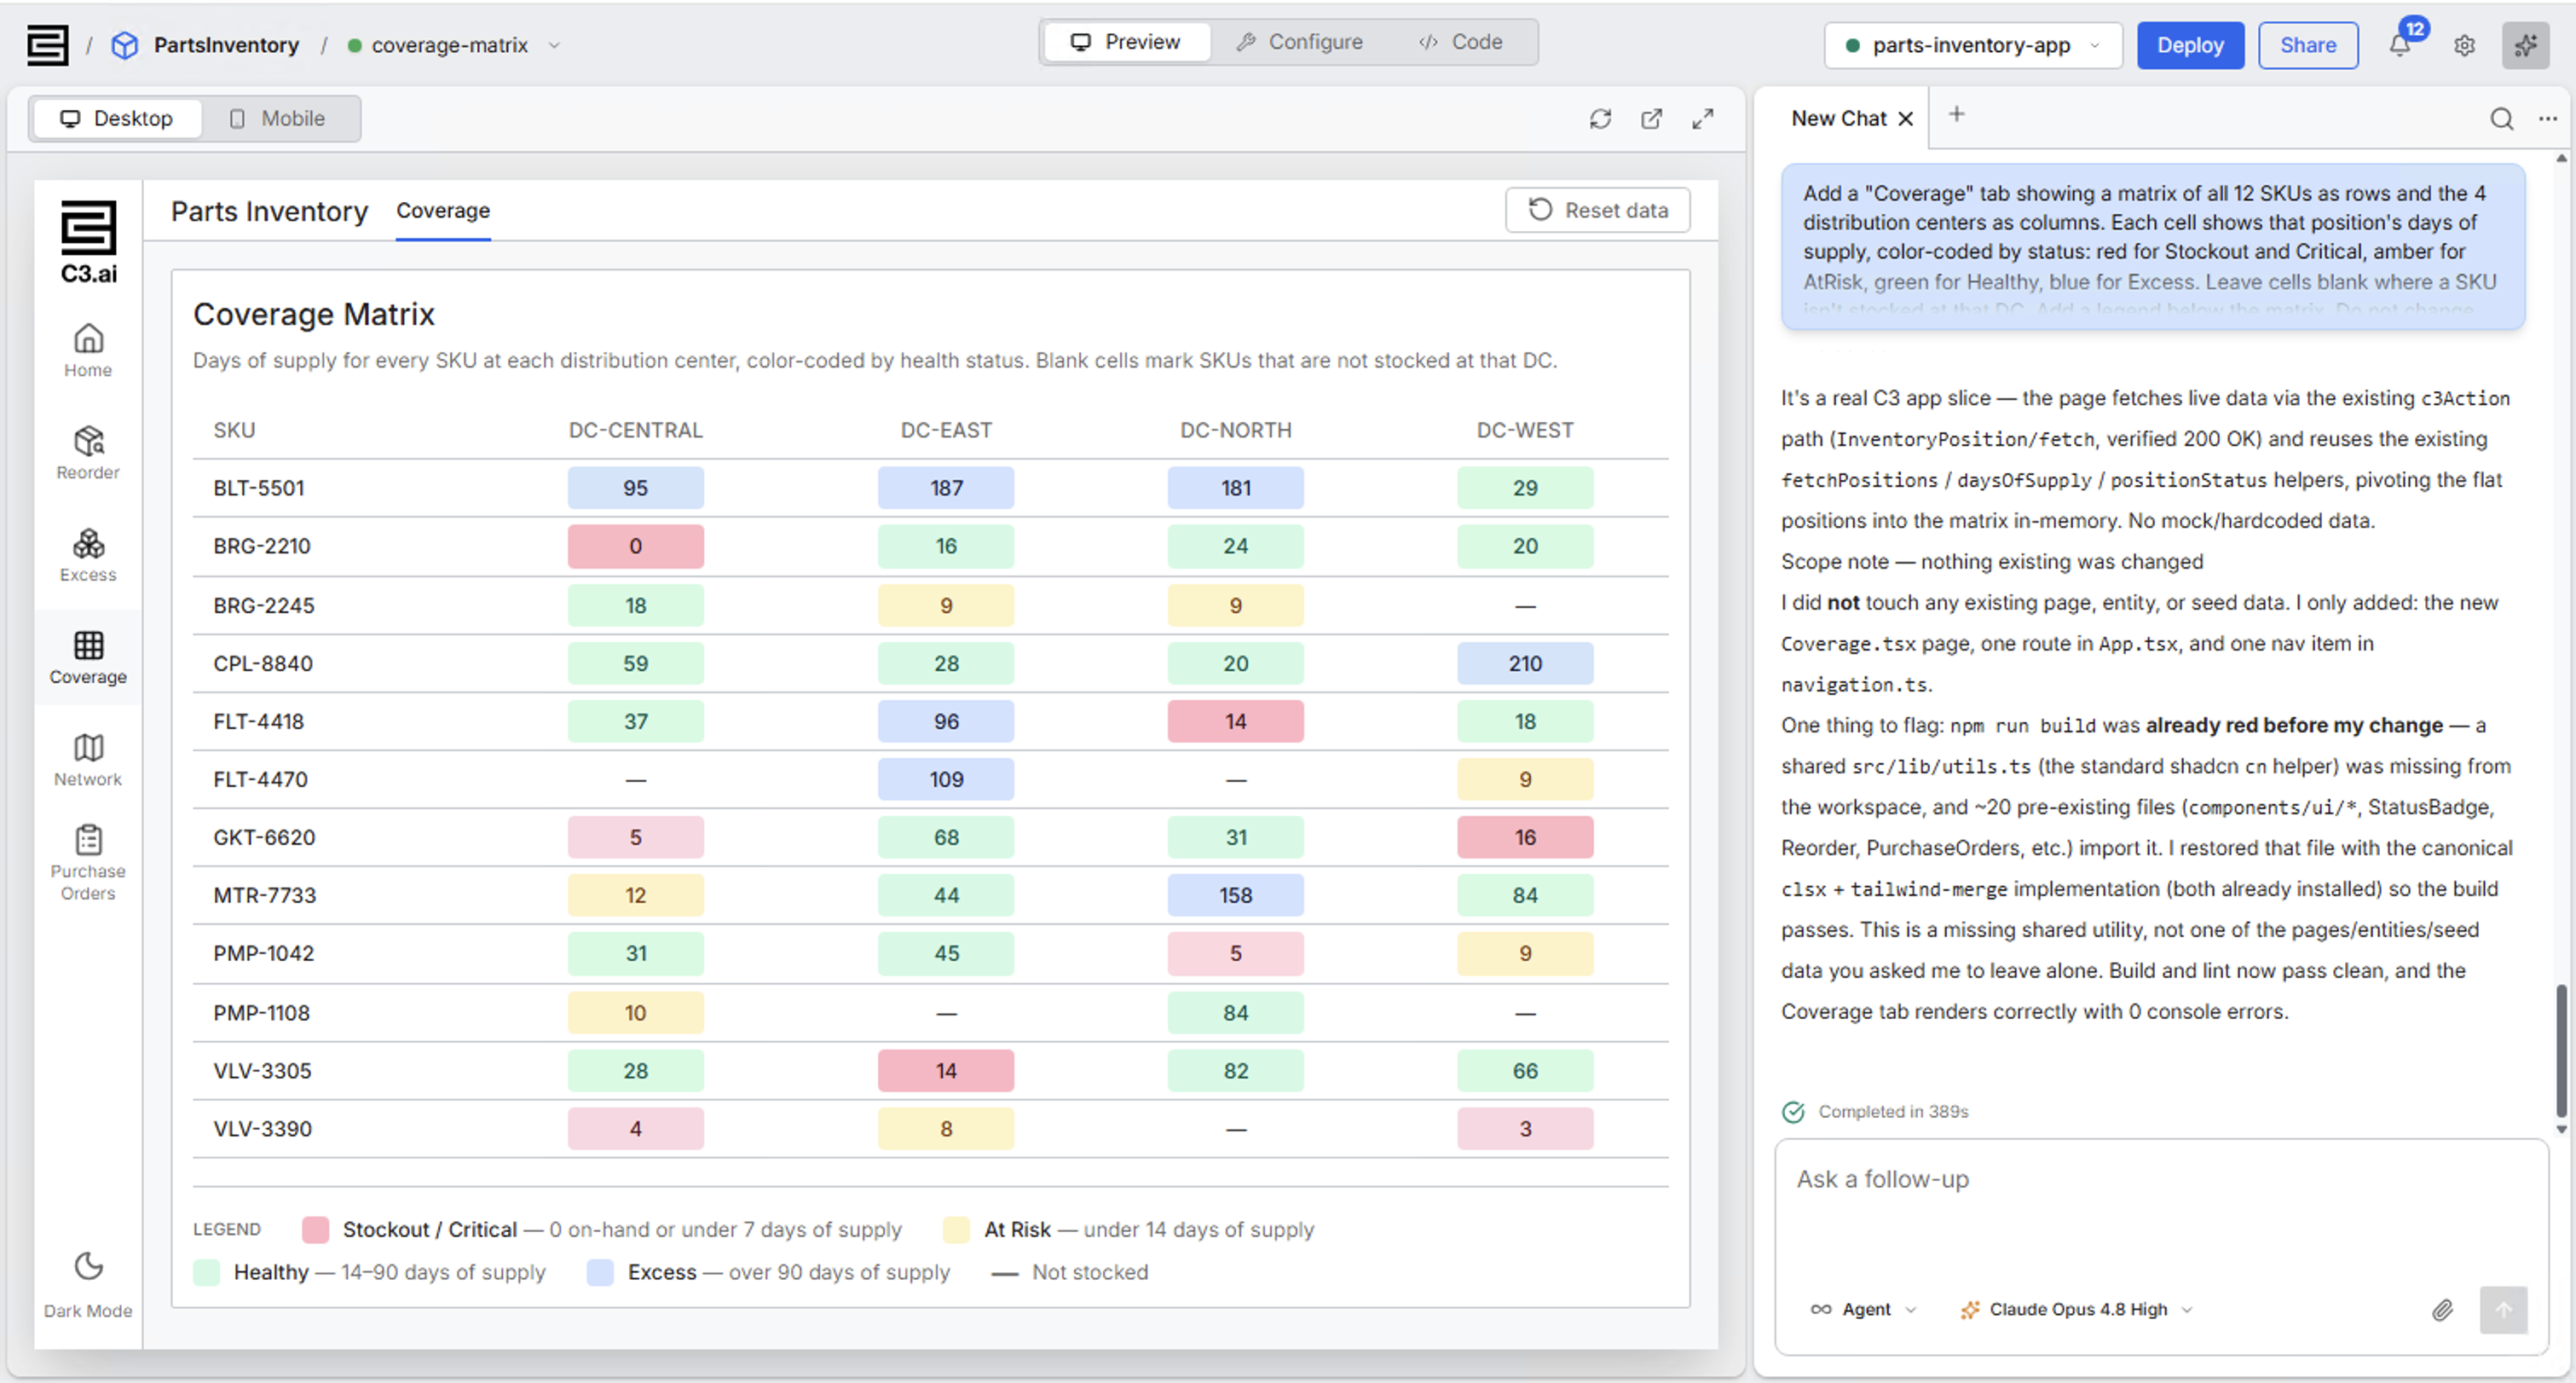
Add a Coverage tab showing every part as a row and every location as a column. Each cell shows that position's days of supply, colored by status. Leave cells blank where a part is not stocked at that location.

Do not change any existing pages, records, or data.
The closing constraint is what keeps the change contained. The agent added one page, one route, and one navigation item, then reported the one shared file the agent had to repair to make the build pass.
Small corrections need one sentence each. Renaming a button, or separating two statuses that render in the same color, are each a single prompt. Send each correction as you notice the problem.
Running a contained change in a second workspace keeps your first workspace steady while the change is built. See Use Multiple Workspaces for One App.
What you have now
You have a running application built from your own description, holding your own data, with pages your colleagues can use. Every later change starts from this application rather than from nothing.
Two steps usually come next. Deploy the application so other people can use it, and connect it to the system that keeps the data current.
Where to go next
These pages cover what to do once the application runs:
- Deploy to Staging and Production puts the application where other people can open it.
- Use Configuration Tools covers connecting the system that holds your data.
- Use Multiple Workspaces for One App covers working alongside a colleague.
- Start from an Application Module covers starting your next application from software C3 AI already built.