Use Multiple Workspaces for One App
A workspace is a private copy of the application for you to work in. Your workspace stays private until you share the work, and one application can have several workspaces.
You add a second workspace when one workspace is not enough: two people building at the same time, or one person making a large change that should not disturb what already works.
With a colleague on the same application, you keep working on the reorder rules while they build the supplier pages. Neither of you waits for the other, and neither overwrites the other's work. Three steps complete the process: connect a GitHub repository, create the second workspace, then send the finished work back.
What you do in a workspace
You build, preview, share, and deploy from a workspace. Each has its own control:
- Build: describe what you want in the chat panel, and the agent builds what you described. Keep prompting until the application matches the way the work is done.
- Preview: your application runs at an address of its own, so you can navigate the pages the way your colleagues will.
- Share: a link to your running workspace reaches any colleague who needs to see the work so far.
- Deploy: your application moves to staging or production, where the application keeps running whether or not your workspace does.
Share with Collaborators covers adding people and sharing a preview link, and Deploy to Staging and Production covers the deploy procedure itself.
Step 1: Connect a GitHub repository
A repository is what lets finished work move from one workspace into another. C3 Code asks for a repository before you can add a second workspace, so Create Workspace stays disabled until a repository is connected.
Connect a repository once, for the whole application:
- In your first workspace, select the Git status control in the workspace header.
- Select Create Repository and enter a name, or select Select Existing Repository to reuse a repository you already have.
- Select Create Repository to confirm.
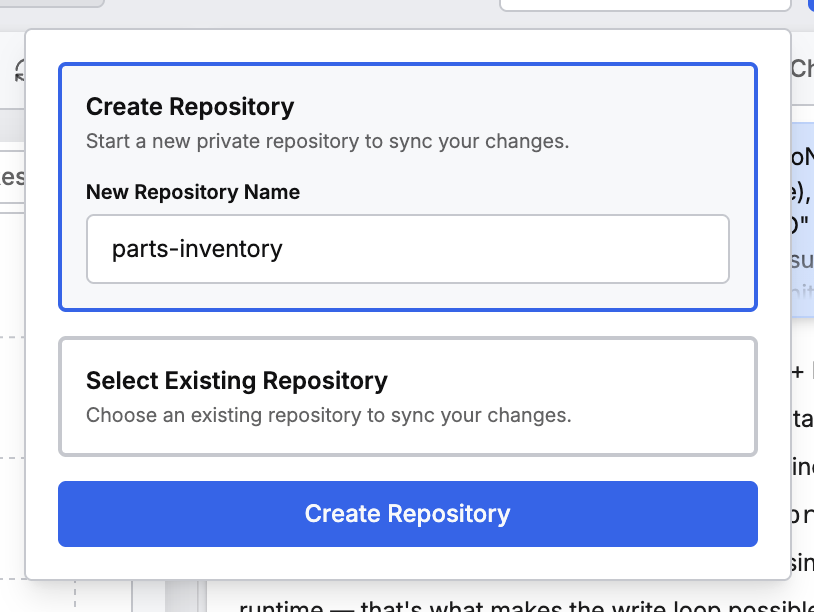
C3 Code creates the repository, copies your workspace into the repository, and starts tracking your changes. Every workspace you create afterward uses that same repository, and each workspace holds a copy of the code until you push.
Connecting is per person. A repository your colleague set up still needs your own account connected, so Create Workspace stays disabled until you connect. C3 Code reports that your provider is not configured, and links you to Settings.
For connecting your account and linking a repository, see Connect GitHub.
Step 2: Create the new workspace
Creating a workspace sets up a database, services, and an address for that workspace, which is why creation takes a few minutes. A new workspace also counts against your quota, so check My Usage and Cost first.
Create the workspace from your application's Workspaces tab:
- Open your application and select the Workspaces tab.
- Select Create Workspace.
- Enter a Workspace Name.
- Leave Branch as it is. To continue work a colleague started, choose your colleague's branch instead.
- Enter an Initial Prompt saying what you want built. C3 Code sends that prompt to the agent the moment the workspace starts.
- Select Create.
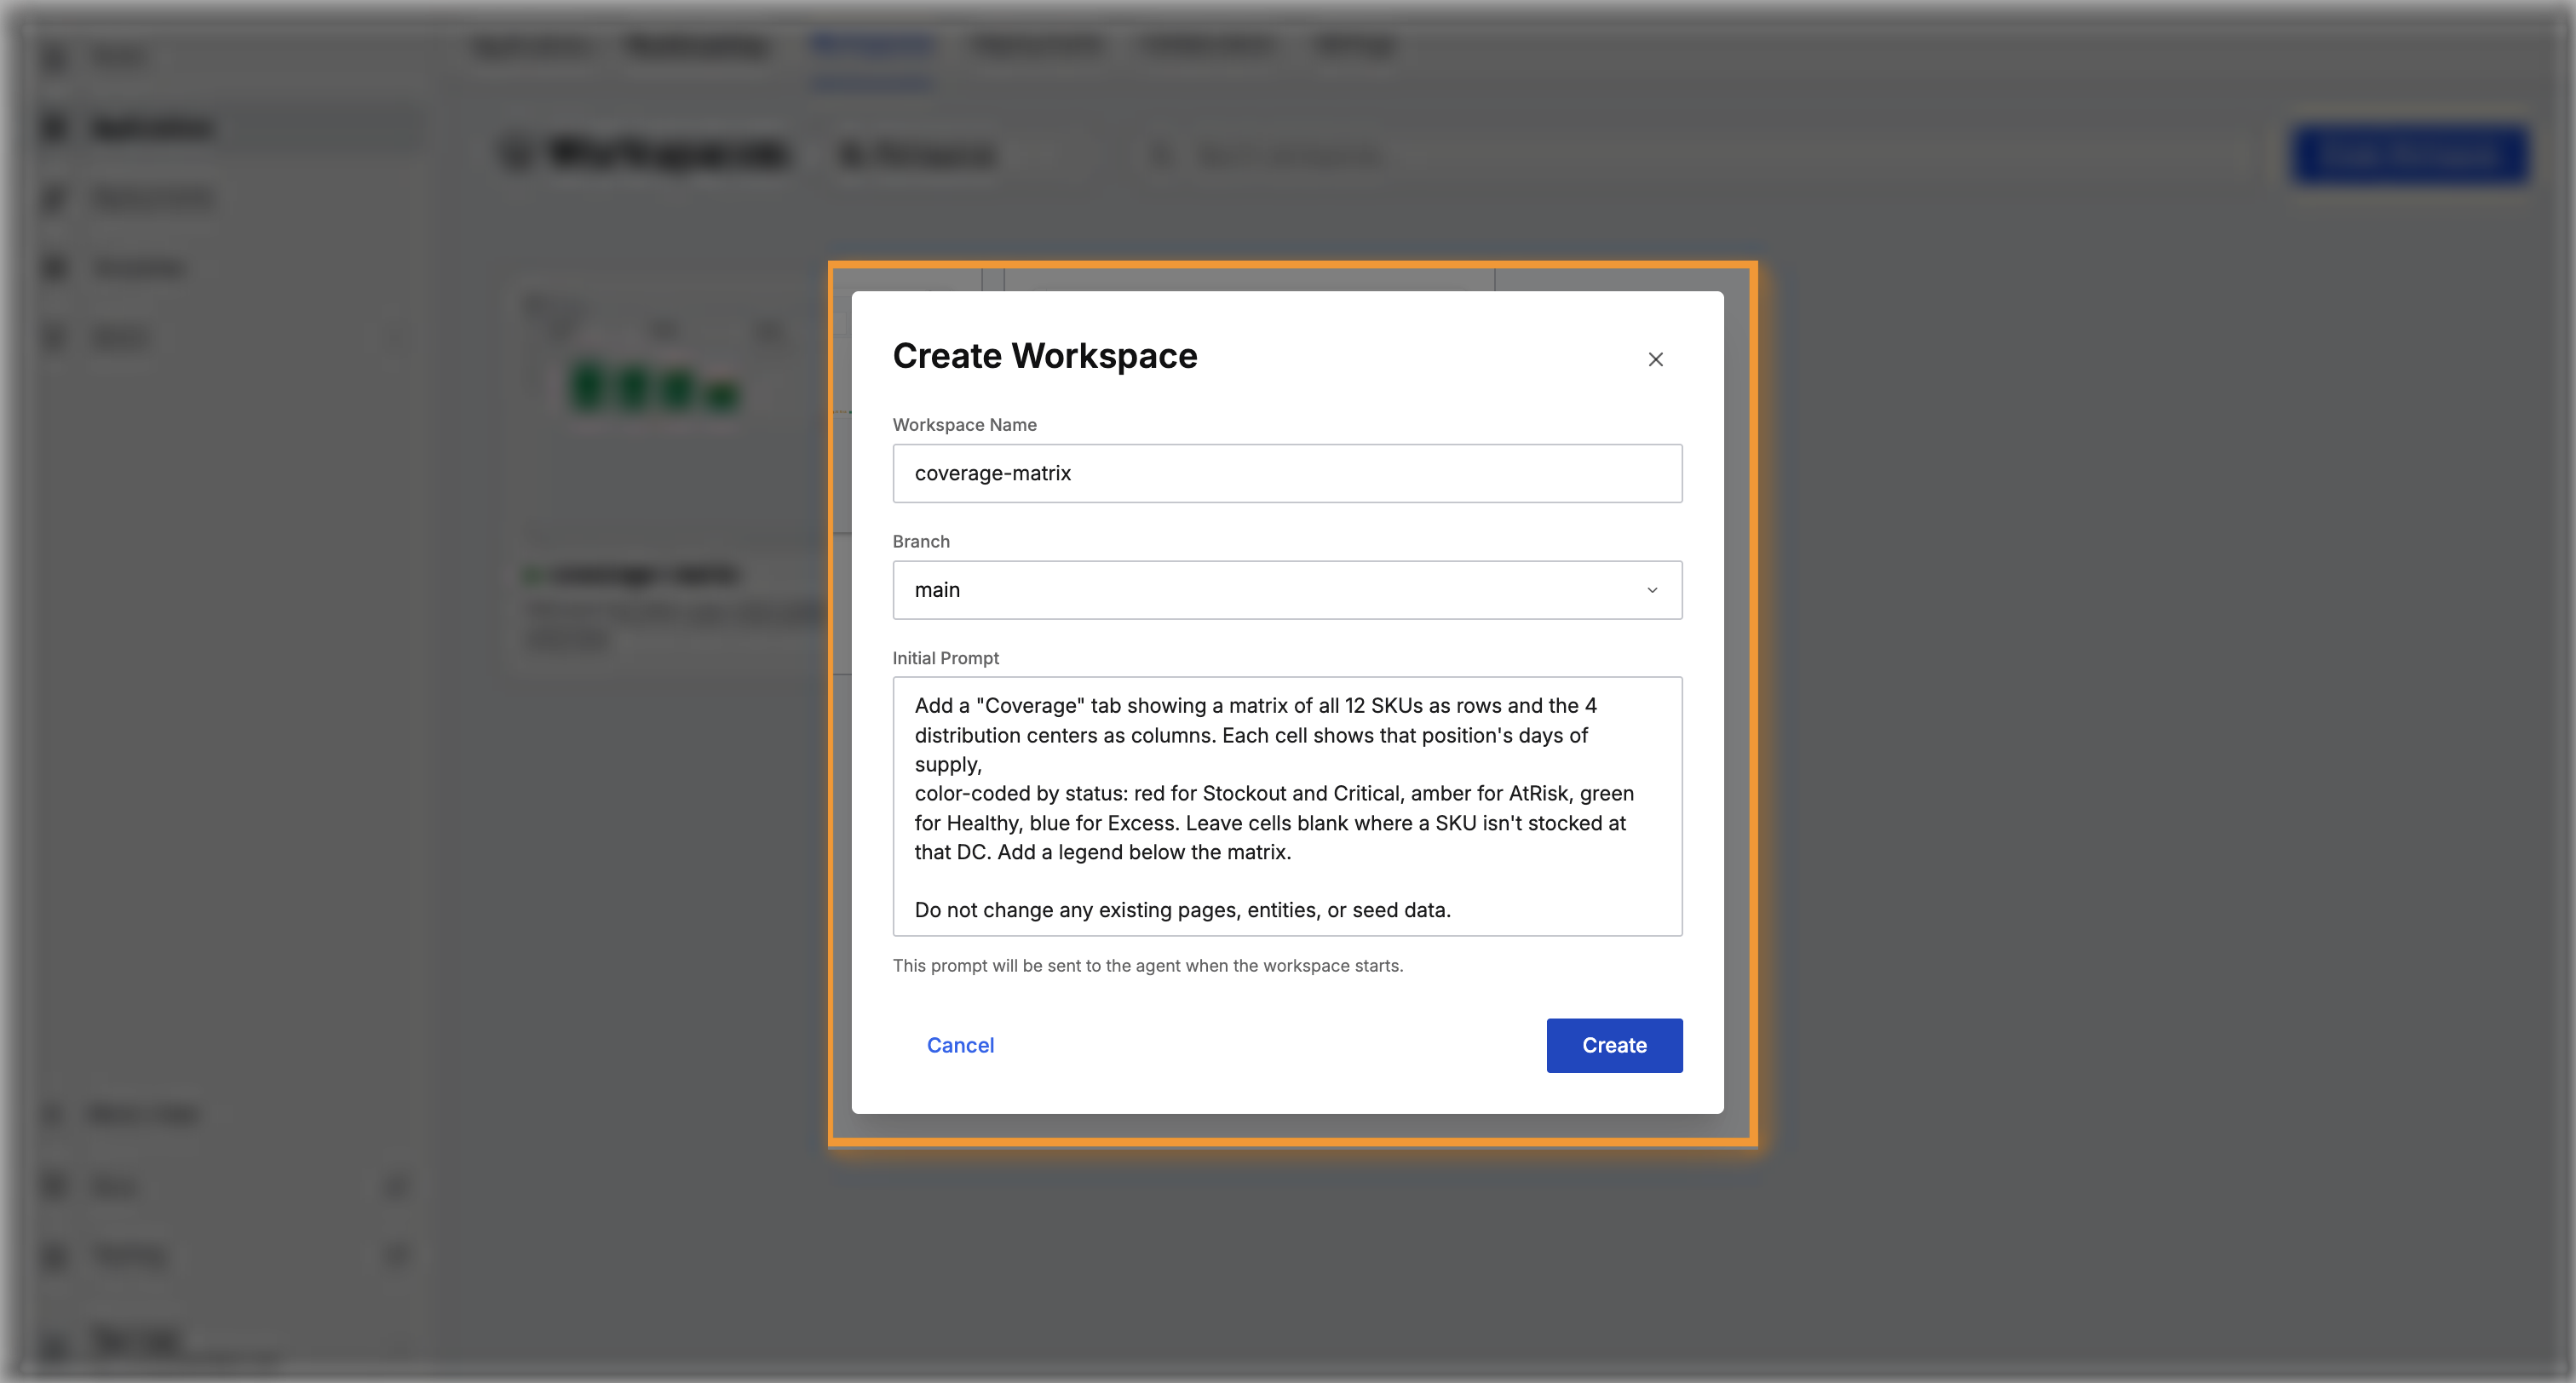
The initial prompt starts the workspace and the agent together, so the agent is already building when the workspace opens.
The Workspaces tab lists every workspace with a status. Read that list to see which workspaces are running before you open one.
For requesting more quota from an administrator, see Request Access and Resources.
Step 3: Send your finished work back
Nothing you build in the second workspace reaches the first workspace until you send the work. Use the Git status control in each workspace:
- Check the feature works in the second workspace.
- Write a short summary of what changed, select Commit to save the change, then select Push to send the change to the repository.
- Open a pull request. A pull request asks a colleague to review your change before the change joins the main branch. Merge the pull request once your colleague approves.
- Go back to your first workspace and select Pull to bring the merged work in.
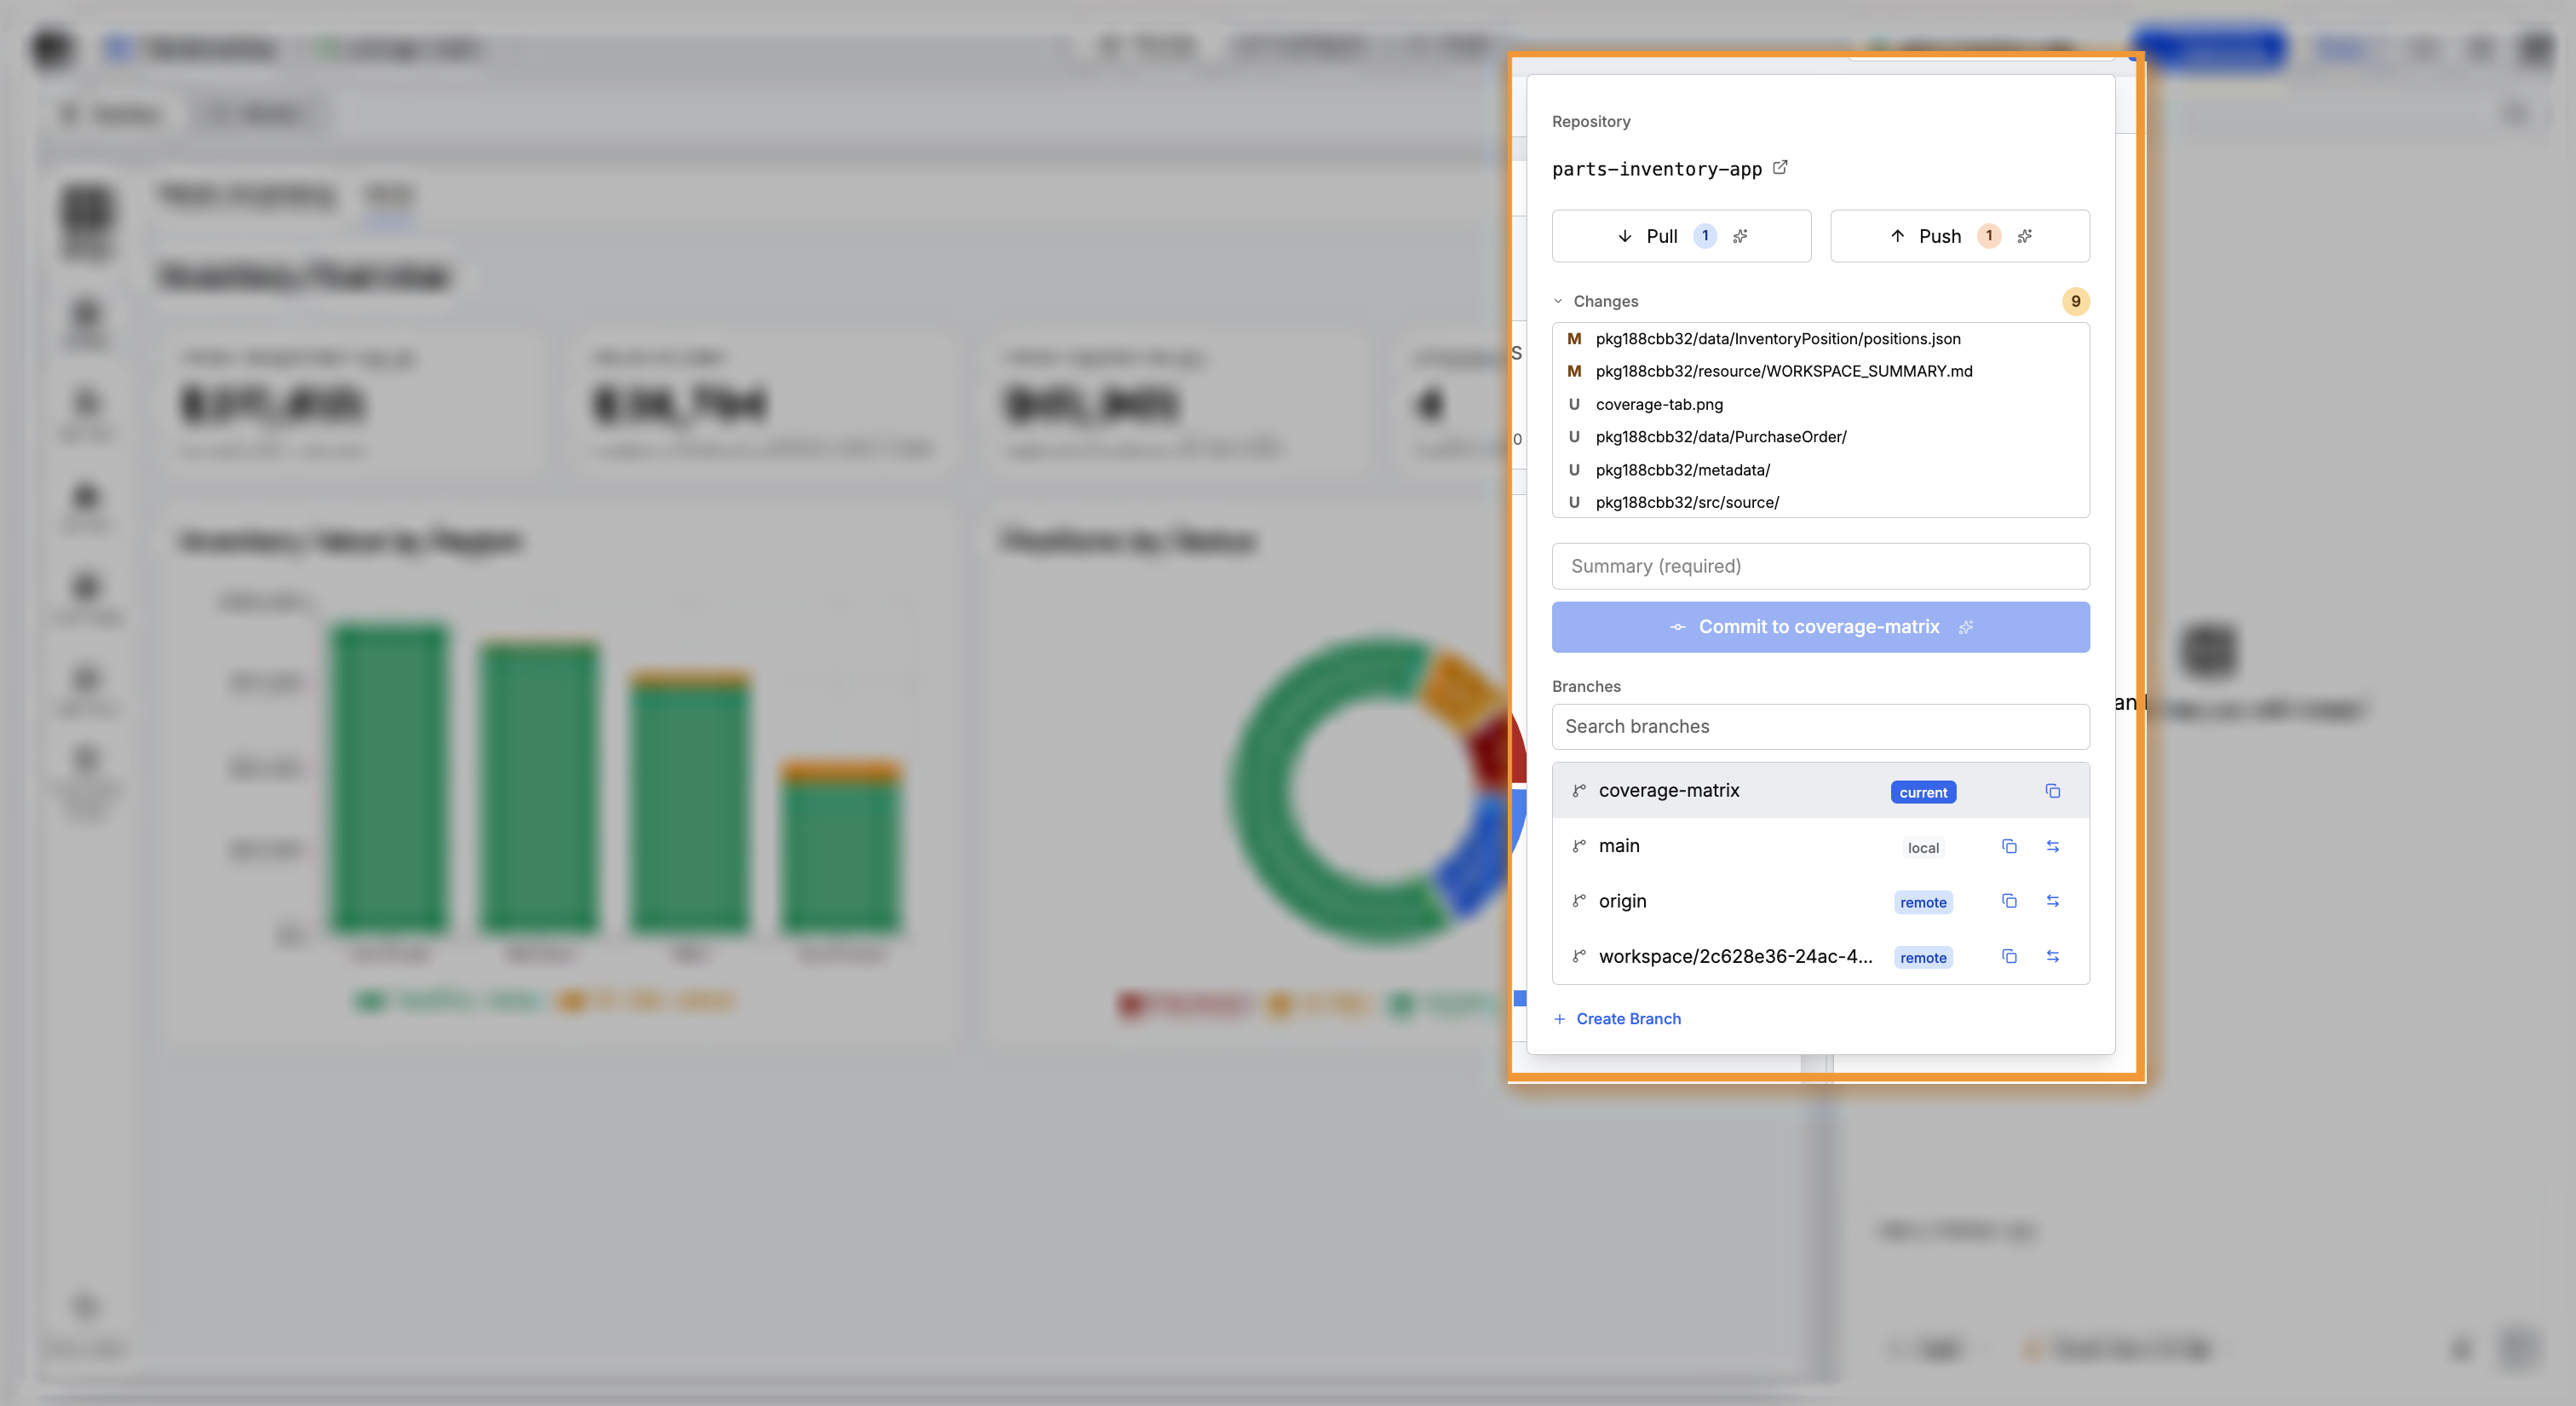
Your first workspace gets the feature at step 4, and not before. Until you pull, the two workspaces hold different versions of the application.
Ask the agent to run all four steps for you:
Commit and push my coverage matrix feature, open a pull request against the main branch, and tell
me the link.
The same control lists every branch, marks the branch you are working on, and creates new branches. Use the control directly when you want to choose which changes go into each commit, and which branch receives those changes.
For saving, branching, and reviewing your code, see Review Code and Manage Branches.
Move records you typed in yourself
The agent writes everything it builds into files. Your records, your pages, and the data the agent loads are all stored in files, and files reach every workspace and every deployment.
Records you typed in yourself do not move that way. Records typed by hand remain in one workspace's database, so a new workspace opens without those records, and a deployment starts without them. Save those records into your application's data files to make them available elsewhere.
Ask the agent to save them:
Save the purchase orders I created by hand into the application's data files, so a new workspace
and a deployment both load them.
The agent writes each record into the right place, gives each record a readable name, and reloads the data.
Where to go next
These pages cover working across branches and sharing the result: