Build, Share, and Deploy Your First Application
In this tutorial, you build an enterprise application and deploy it to production. The end result is an example application that is backed by a real data pipeline. You build the application from a single prompt, review and refine it, check the data pipeline and model the agent built, then share and deploy it.
The example is a spare-parts inventory application. The application tracks how much of each part is in stock and flags any part running low, so you can reorder it before it runs out. The pages show where those shortages sit across your locations.
Before you begin
Confirm all three of the following before you start:
- You can open C3 Code in your C3 Agentic AI Platform cluster.
- Your quota allows you to create at least one application and one workspace. The My Usage and Cost page shows both counts, and an administrator can raise either count. See Request Access and Resources.
Step 1: Describe the application you want
The C3 Code home page opens on a single prompt input:
- Describe the application. Name the records it stores, the logic it runs, and the pages you expect. To use a requirements document you already have, attach the document instead of typing the description. You can also attach data files, or ask C3 Code to generate sample data to get started quickly.
- Select the arrow icon to submit. In the modal that opens, enter your application name and select Create.
One prompt builds the records and the pages and creates the data. Name what to store, the logic to run, and the pages you want, then ask the agent to generate sample data to start with:
Build an inventory monitoring application called PartsInventory. Create the records, some
starting data, and all the pages in one pass.

Store an Item with a part number, description, product family, unit cost, and ABC class. Store
an Inventory Position with an item, location, region, supplier, units on hand, units in
transit, average weekly demand, and lead time in days.

Work out days of supply for each position, and flag anything under 14 days as needing reorder.

Build a Home page with summary cards and a chart of value by region, and a Reorder page listing
everything that needs reordering.

Also generate 24 rows of sample data representing industrial spare parts inventory, using the
fields above:

SKU, Description, ProductFamily, AbcClass, Location, Region, Supplier, OnHandUnits,
InTransitUnits, AvgWeeklyDemand, LeadTimeDays, UnitCost

Use 8 distinct SKUs across 3 distribution centers named DC-EAST, DC-CENTRAL, and DC-WEST, so
each SKU appears once per location. Vary the numbers so the data tells a story: 2 or 3 rows
with OnHandUnits of 0, several rows where on-hand covers less than two weeks of demand, and at
least one row holding thousands of units of a part costing a few dollars. Use AbcClass values
of A, B, or C, and lead times between 7 and 45 days. Integrate the data through Data Fusion
Pipeline.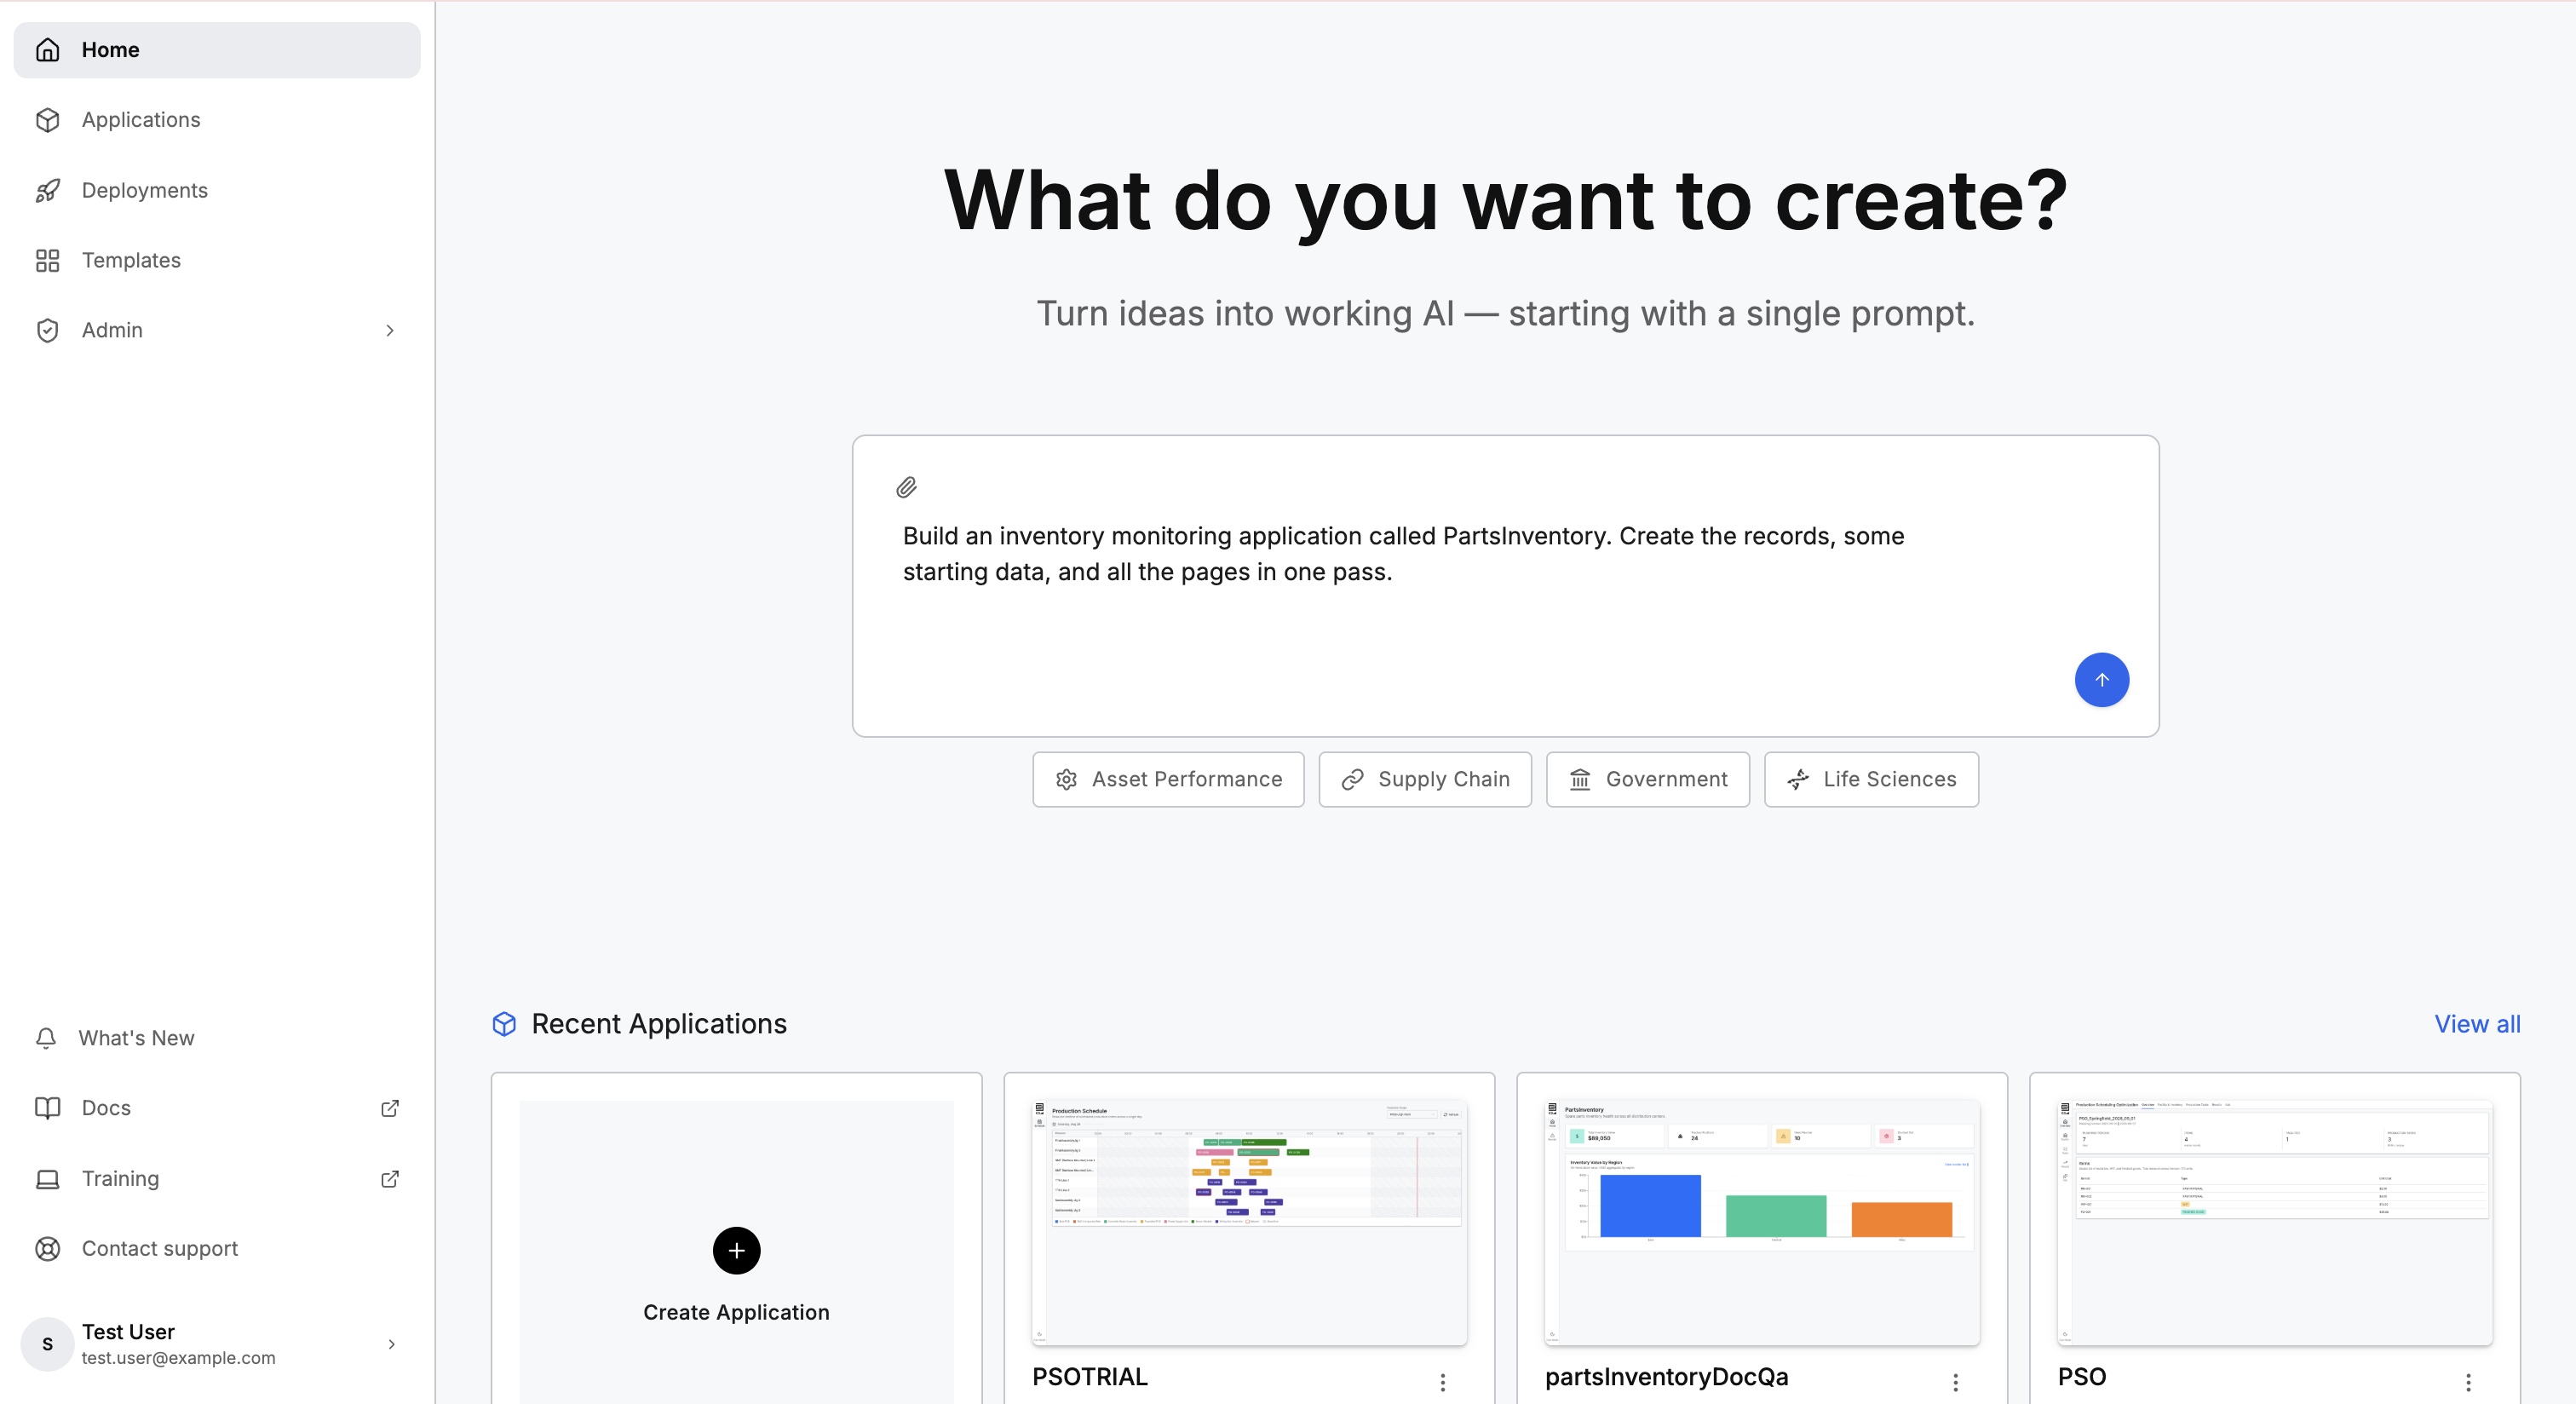
C3 Code creates the application, opens the workspace in Preview, and sends your prompt to the agent. Before the agent's work begins, C3 Code starts executing the following steps: Spin up Environment, Initialize Application, Load Code Services, and Start Agents.
After setup is complete, the agent reports the task backlog, with one entry per piece of work, and each entry gains a checkmark as the agent finishes each task.
From the example prompt, the agent builds the following plan:
- Create
ItemandInventoryPositionC3 entity types withdaysOfSupply()andgetReorderList()methods. - Implement Python methods (
daysOfSupply,getReorderList). - Create seed data for 24 rows (
Item+InventoryPosition). - Smoke-test methods with
runJsCode/runPyCode. - Build Home page (KPI cards + 2 bar charts) and Reorder page (table).
- Wire nav items (Home, Reorder) and routes.
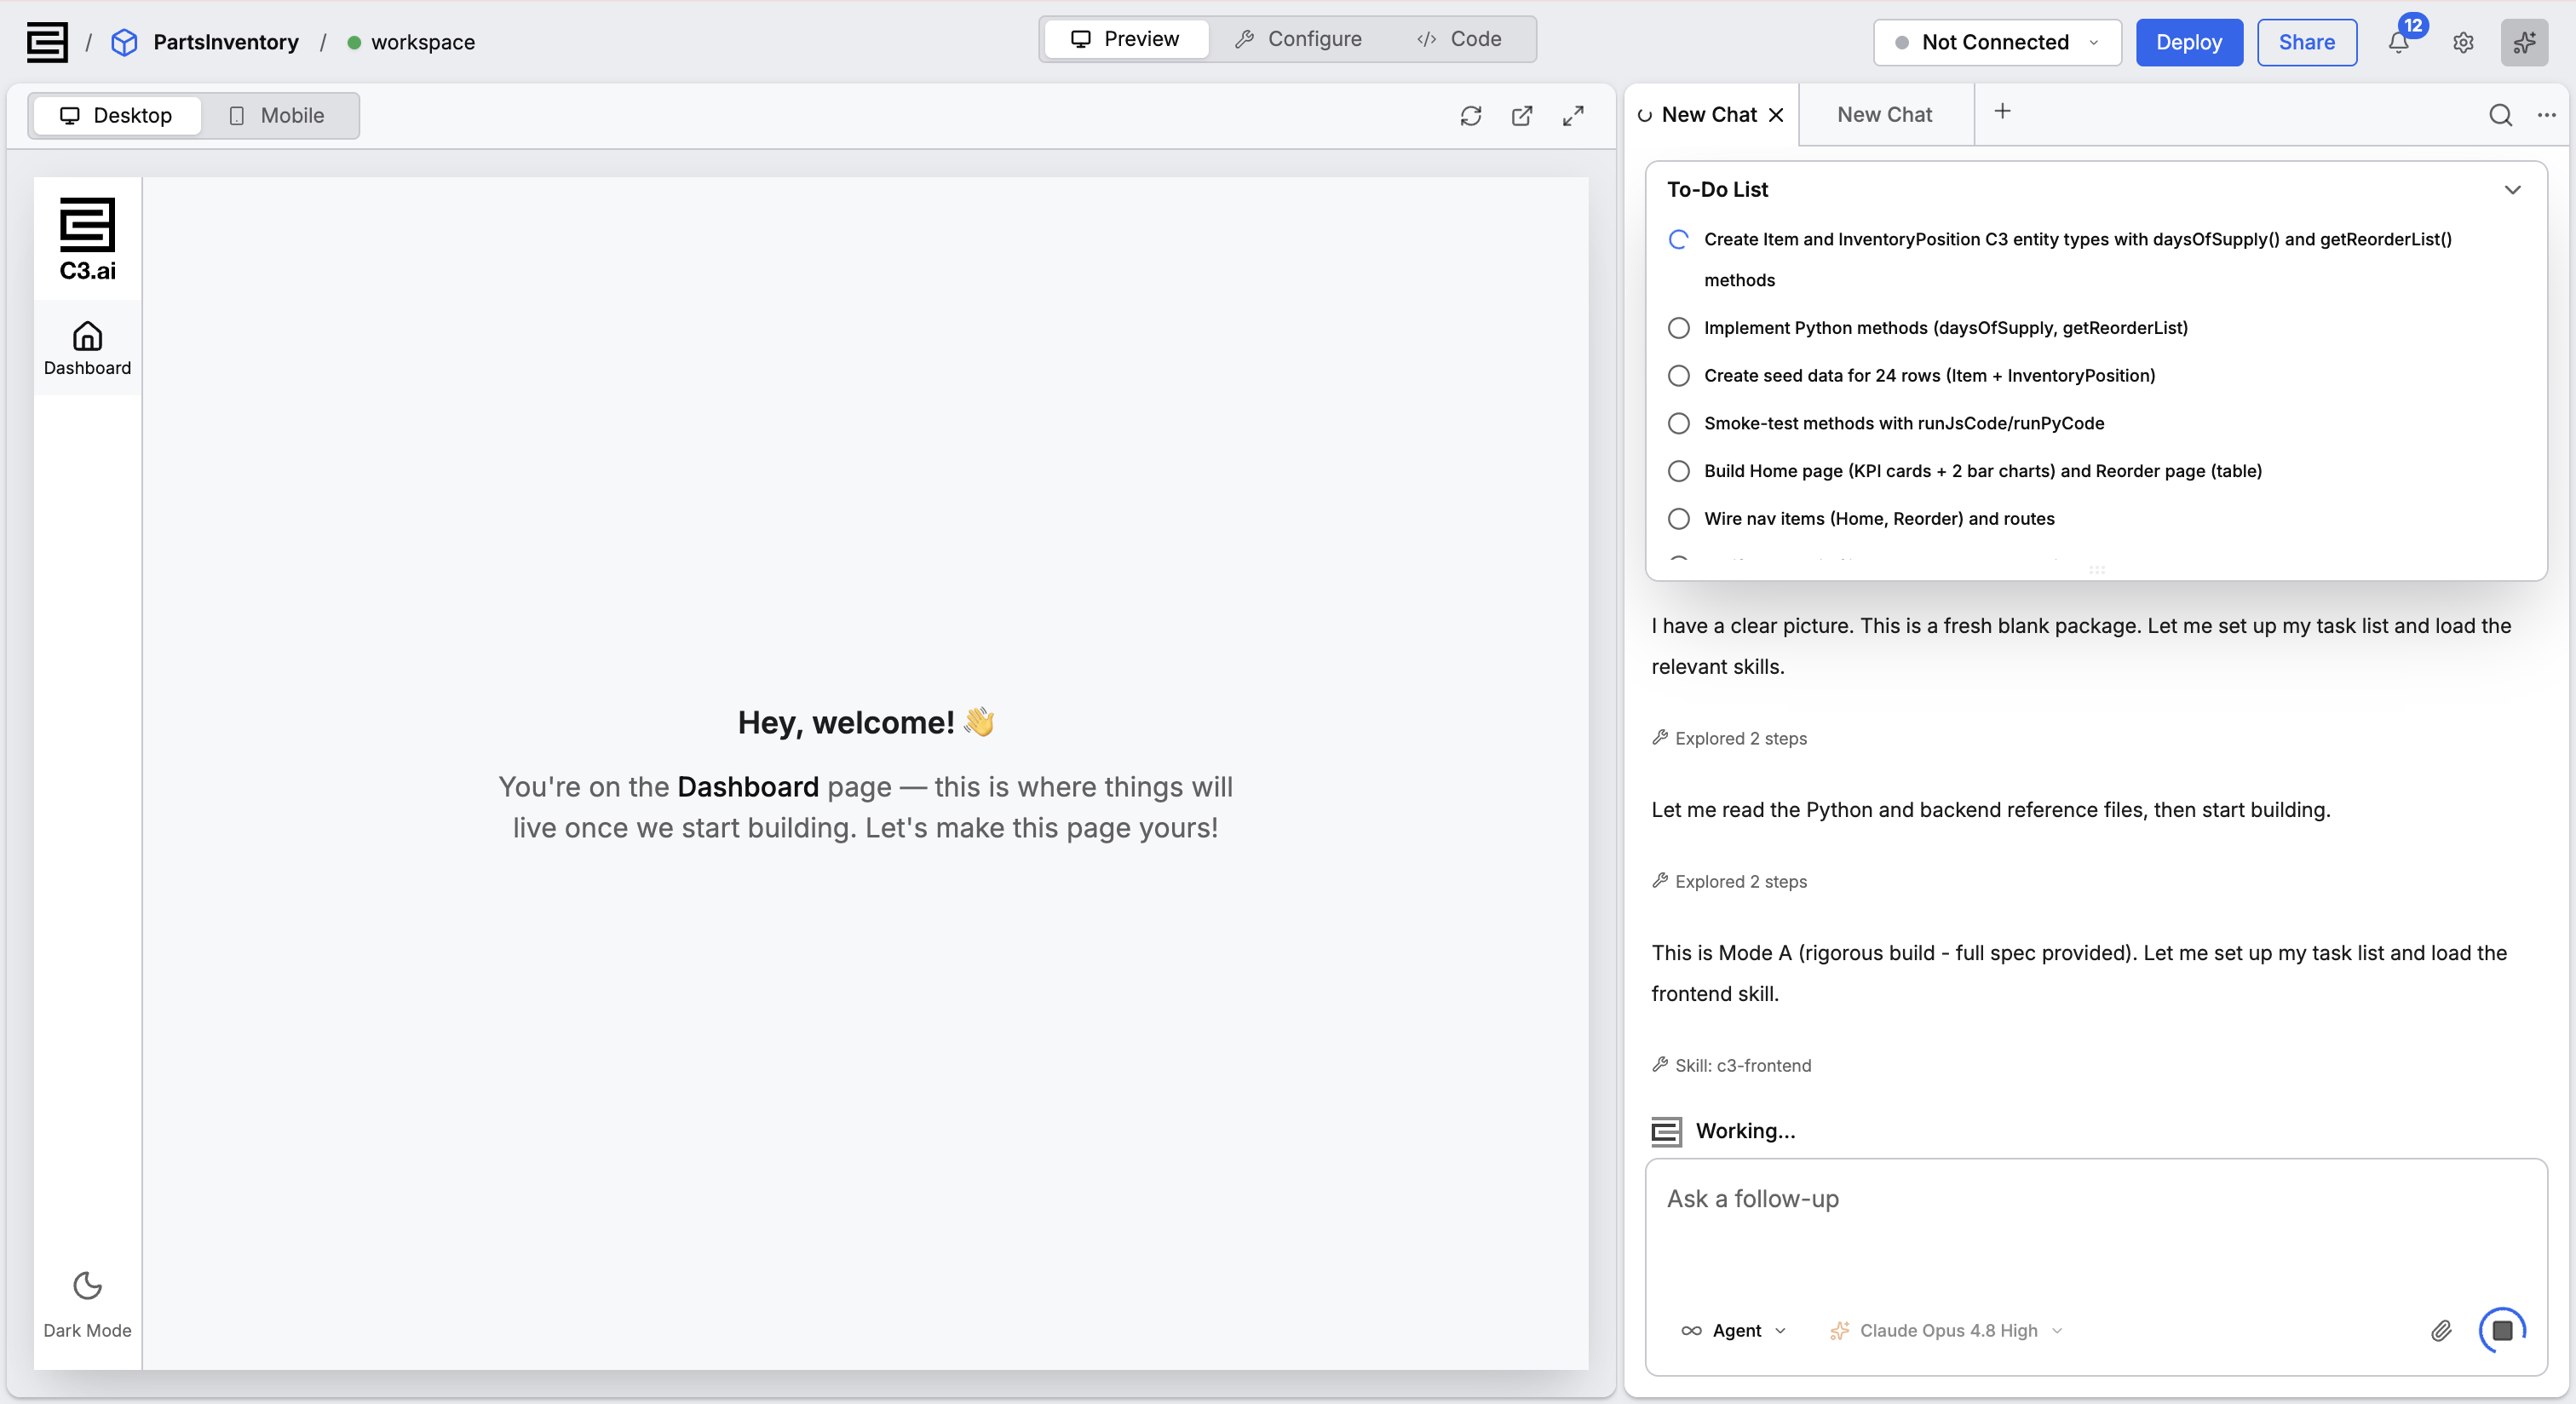
The workspace header carries the controls you use for the rest of this tutorial: Preview, Configure, and Code, and the Git status control, Deploy, and Share buttons.
Building an application of this size takes several minutes. You can type a follow-up prompt while the agent works.
Step 2: Review and refine
When the agent finishes, the preview shows the running application on the starting data the agent generated. Ensure the following:
- The pages and the navigation match what you asked for.
- Every page renders with real data, rather than an empty screen.
- The tables and charts carry the field names you asked for.
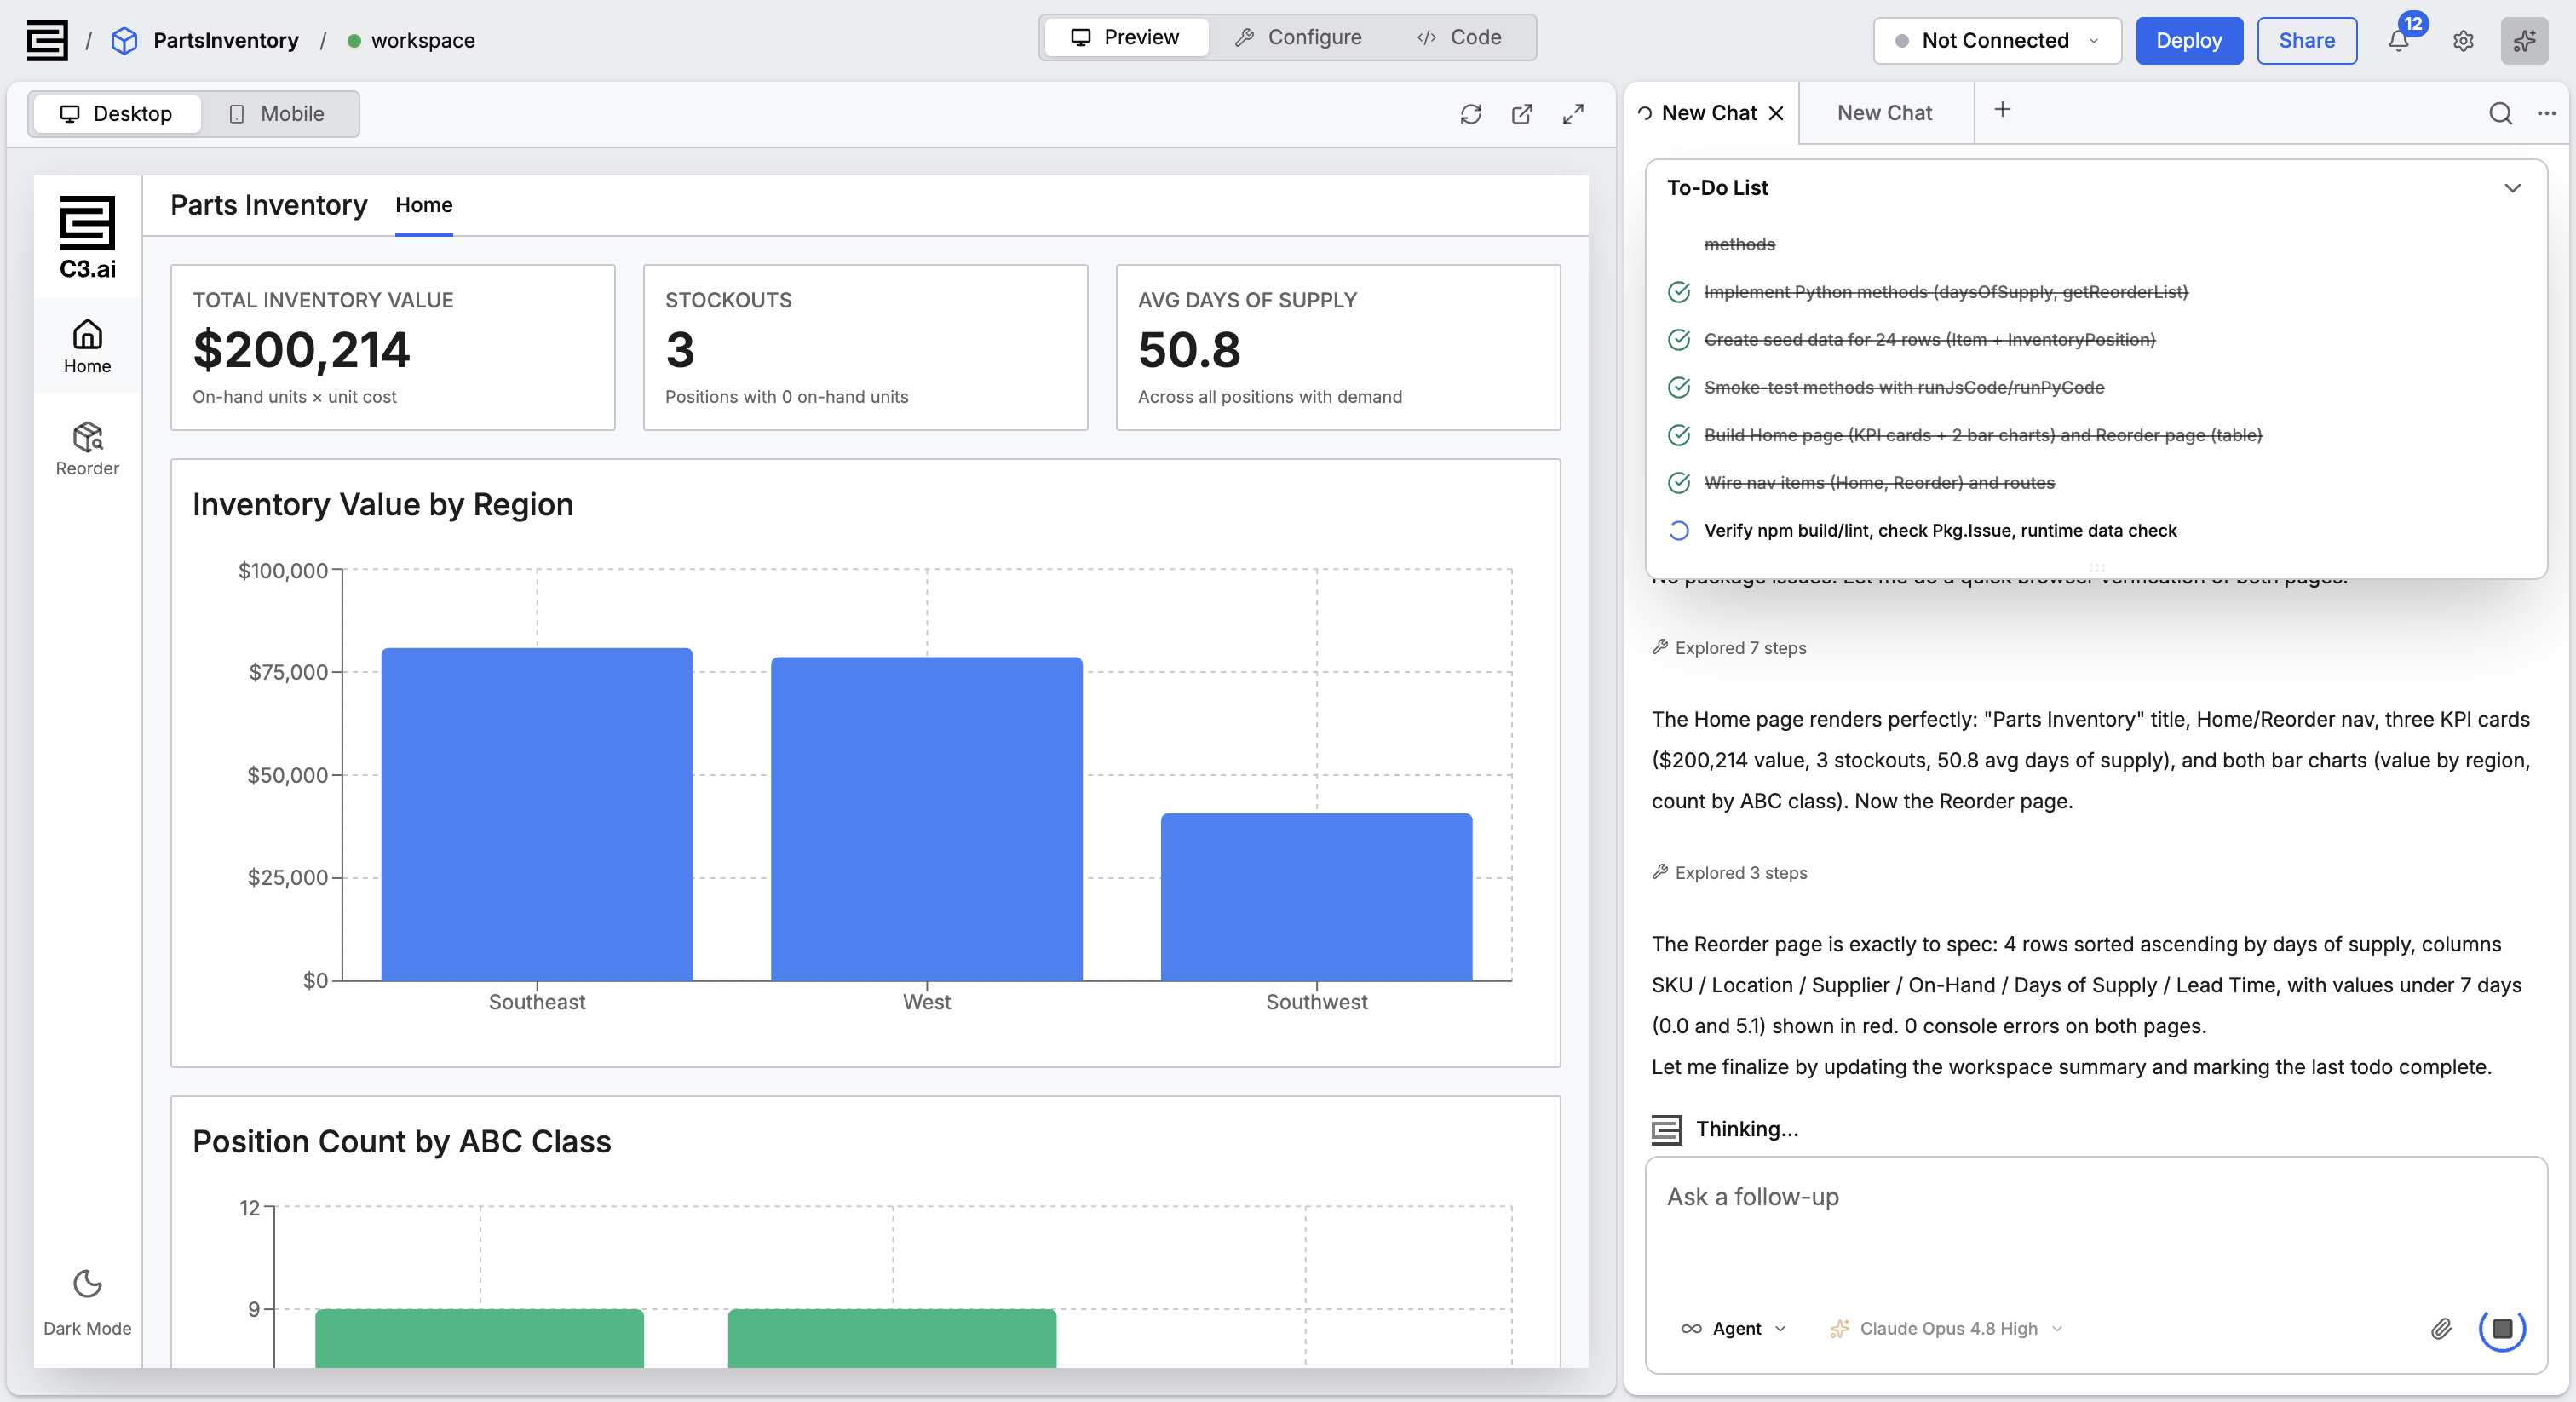
Each follow-up prompt builds on what already exists, so you never start over. Enter one change in the chat panel, such as a new field, a filter, or a page, then review the result in Preview.
For writing a first prompt and refining what comes back, see Start from Scratch.
Step 3: Check the data pipeline and model
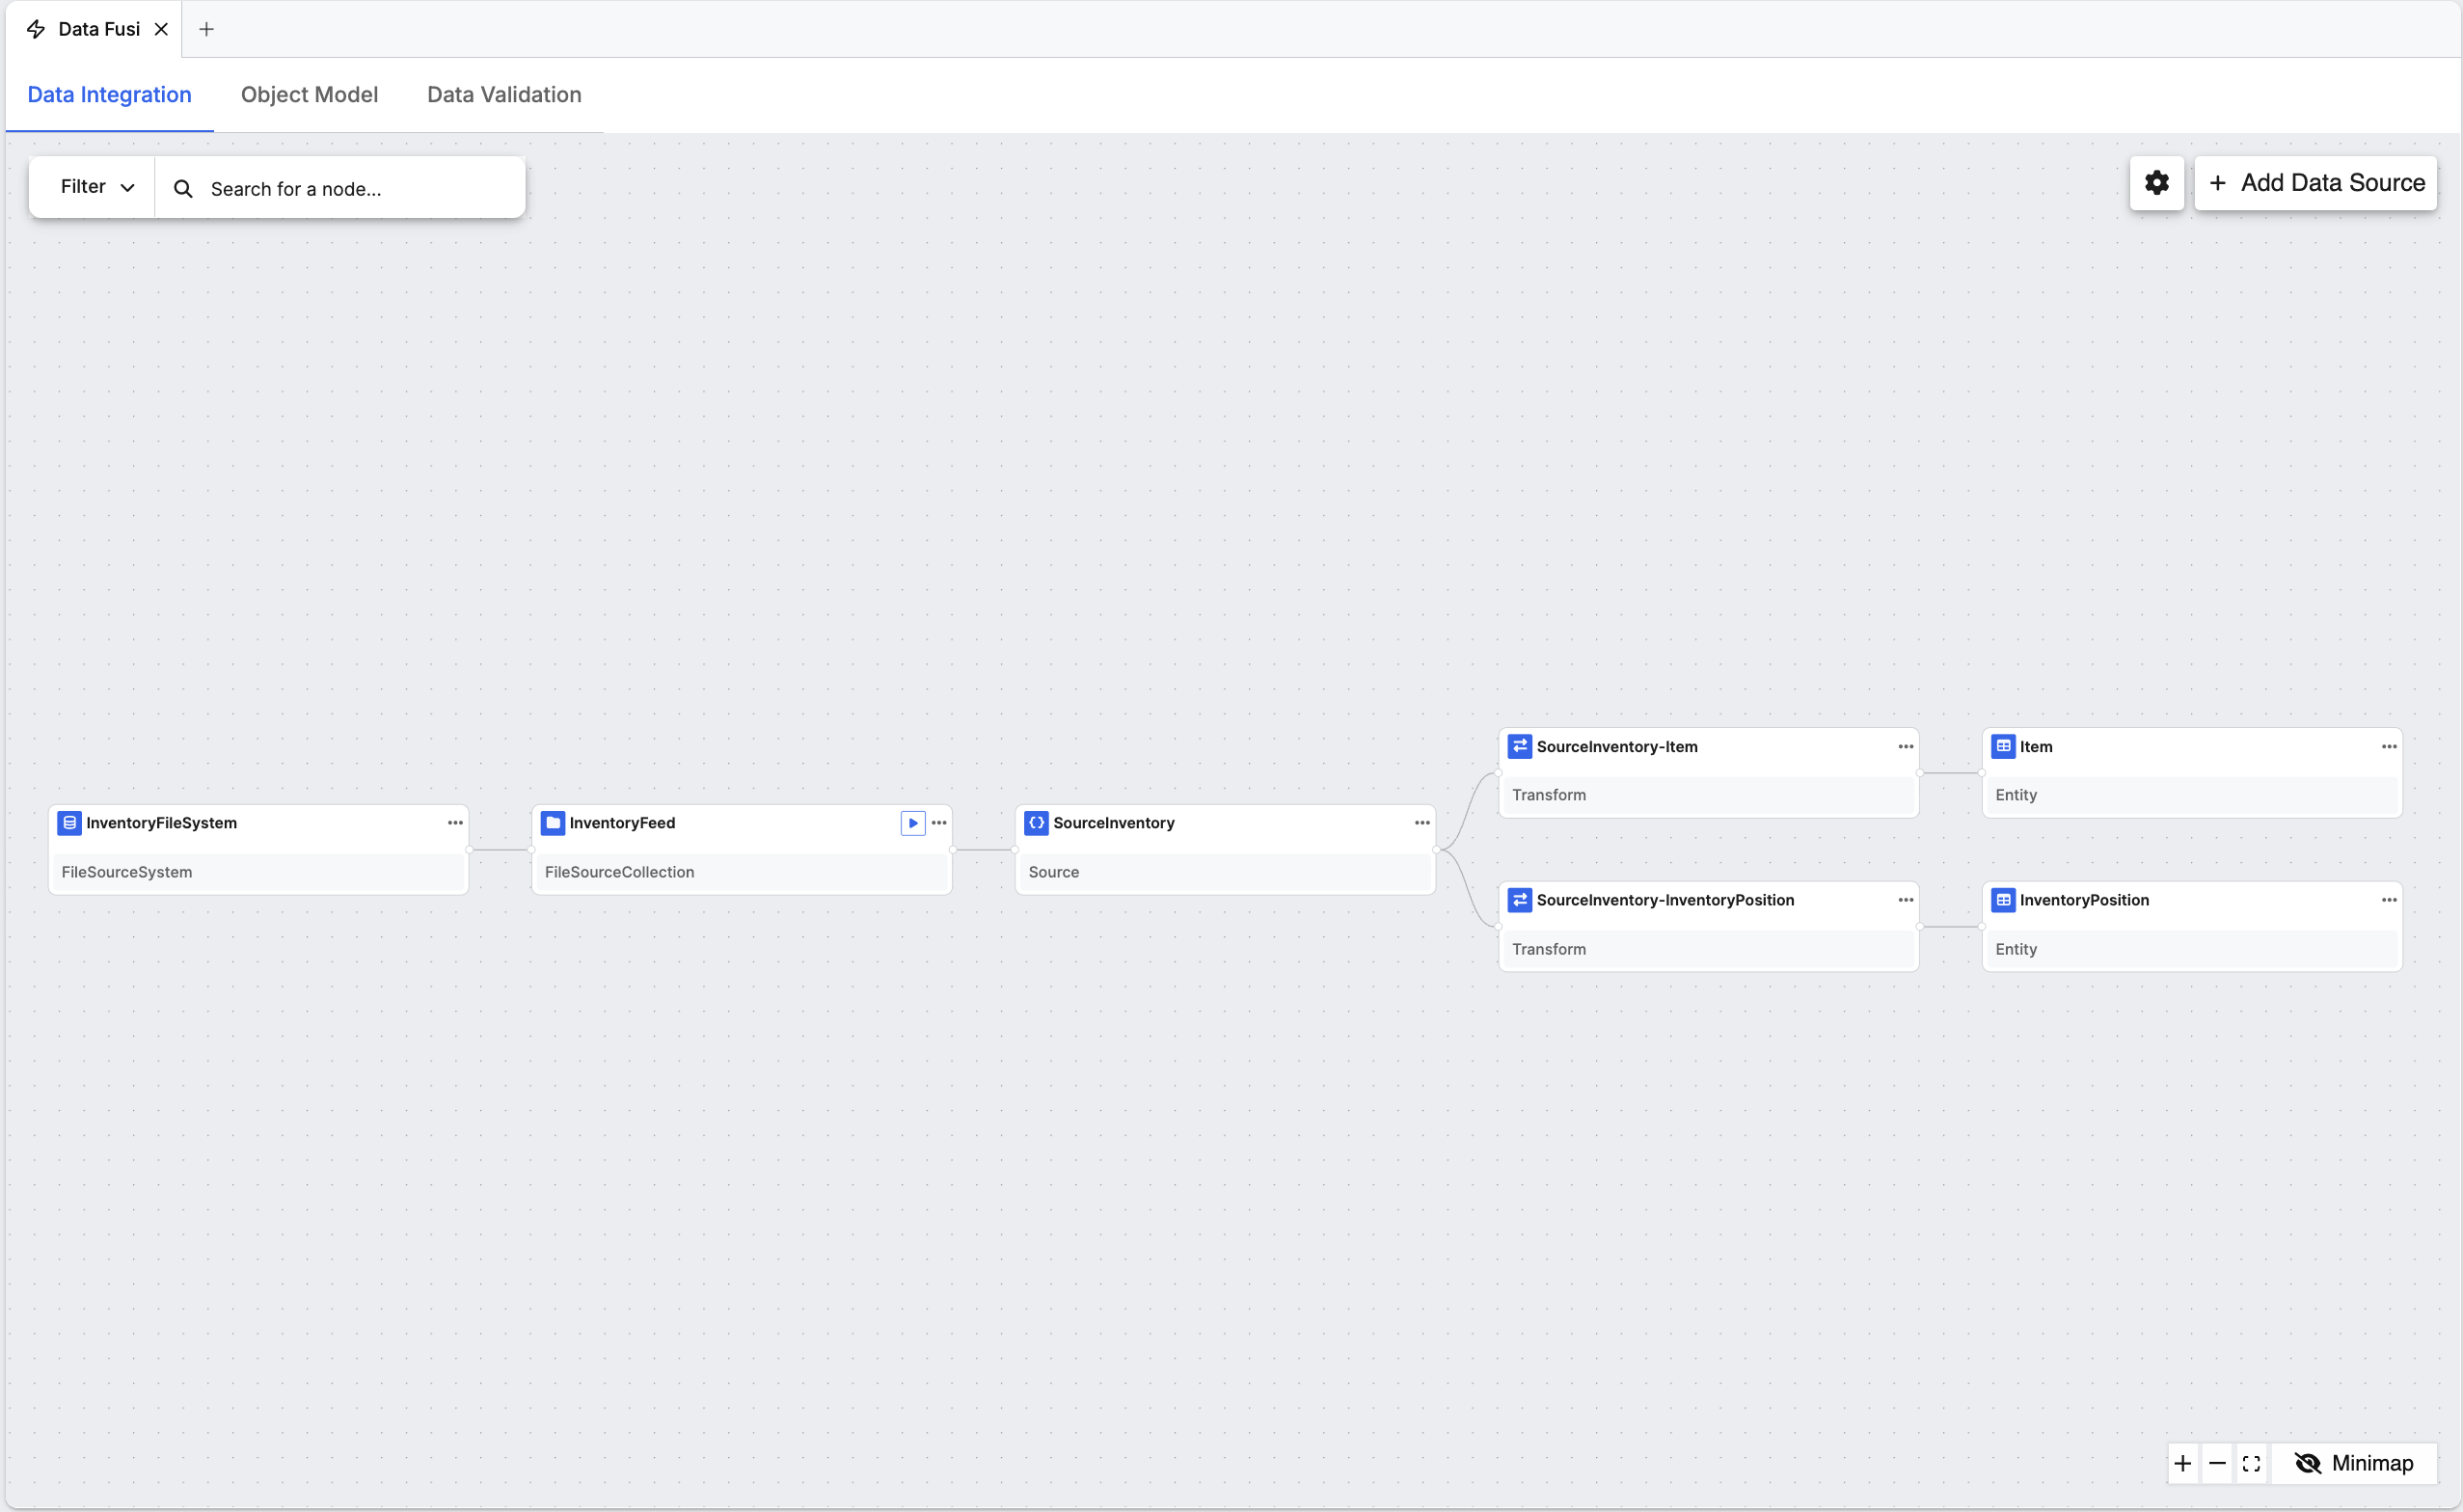
The agent did more than fill the screens with numbers. It generated the sample data you asked for and loaded it through a real pipeline built in C3 Data Fusion, the same kind of pipeline that carries data from a file or from a system your company runs. Open both to see what the agent built for you.
Both live under Configure. On the Data Integration tab, the pipeline runs from the generated file, through your file source system and a transform for each kind of record, into the records themselves:
The Object Model tab shows the data model, so you can confirm the agent built real records with the fields and logic you asked for:
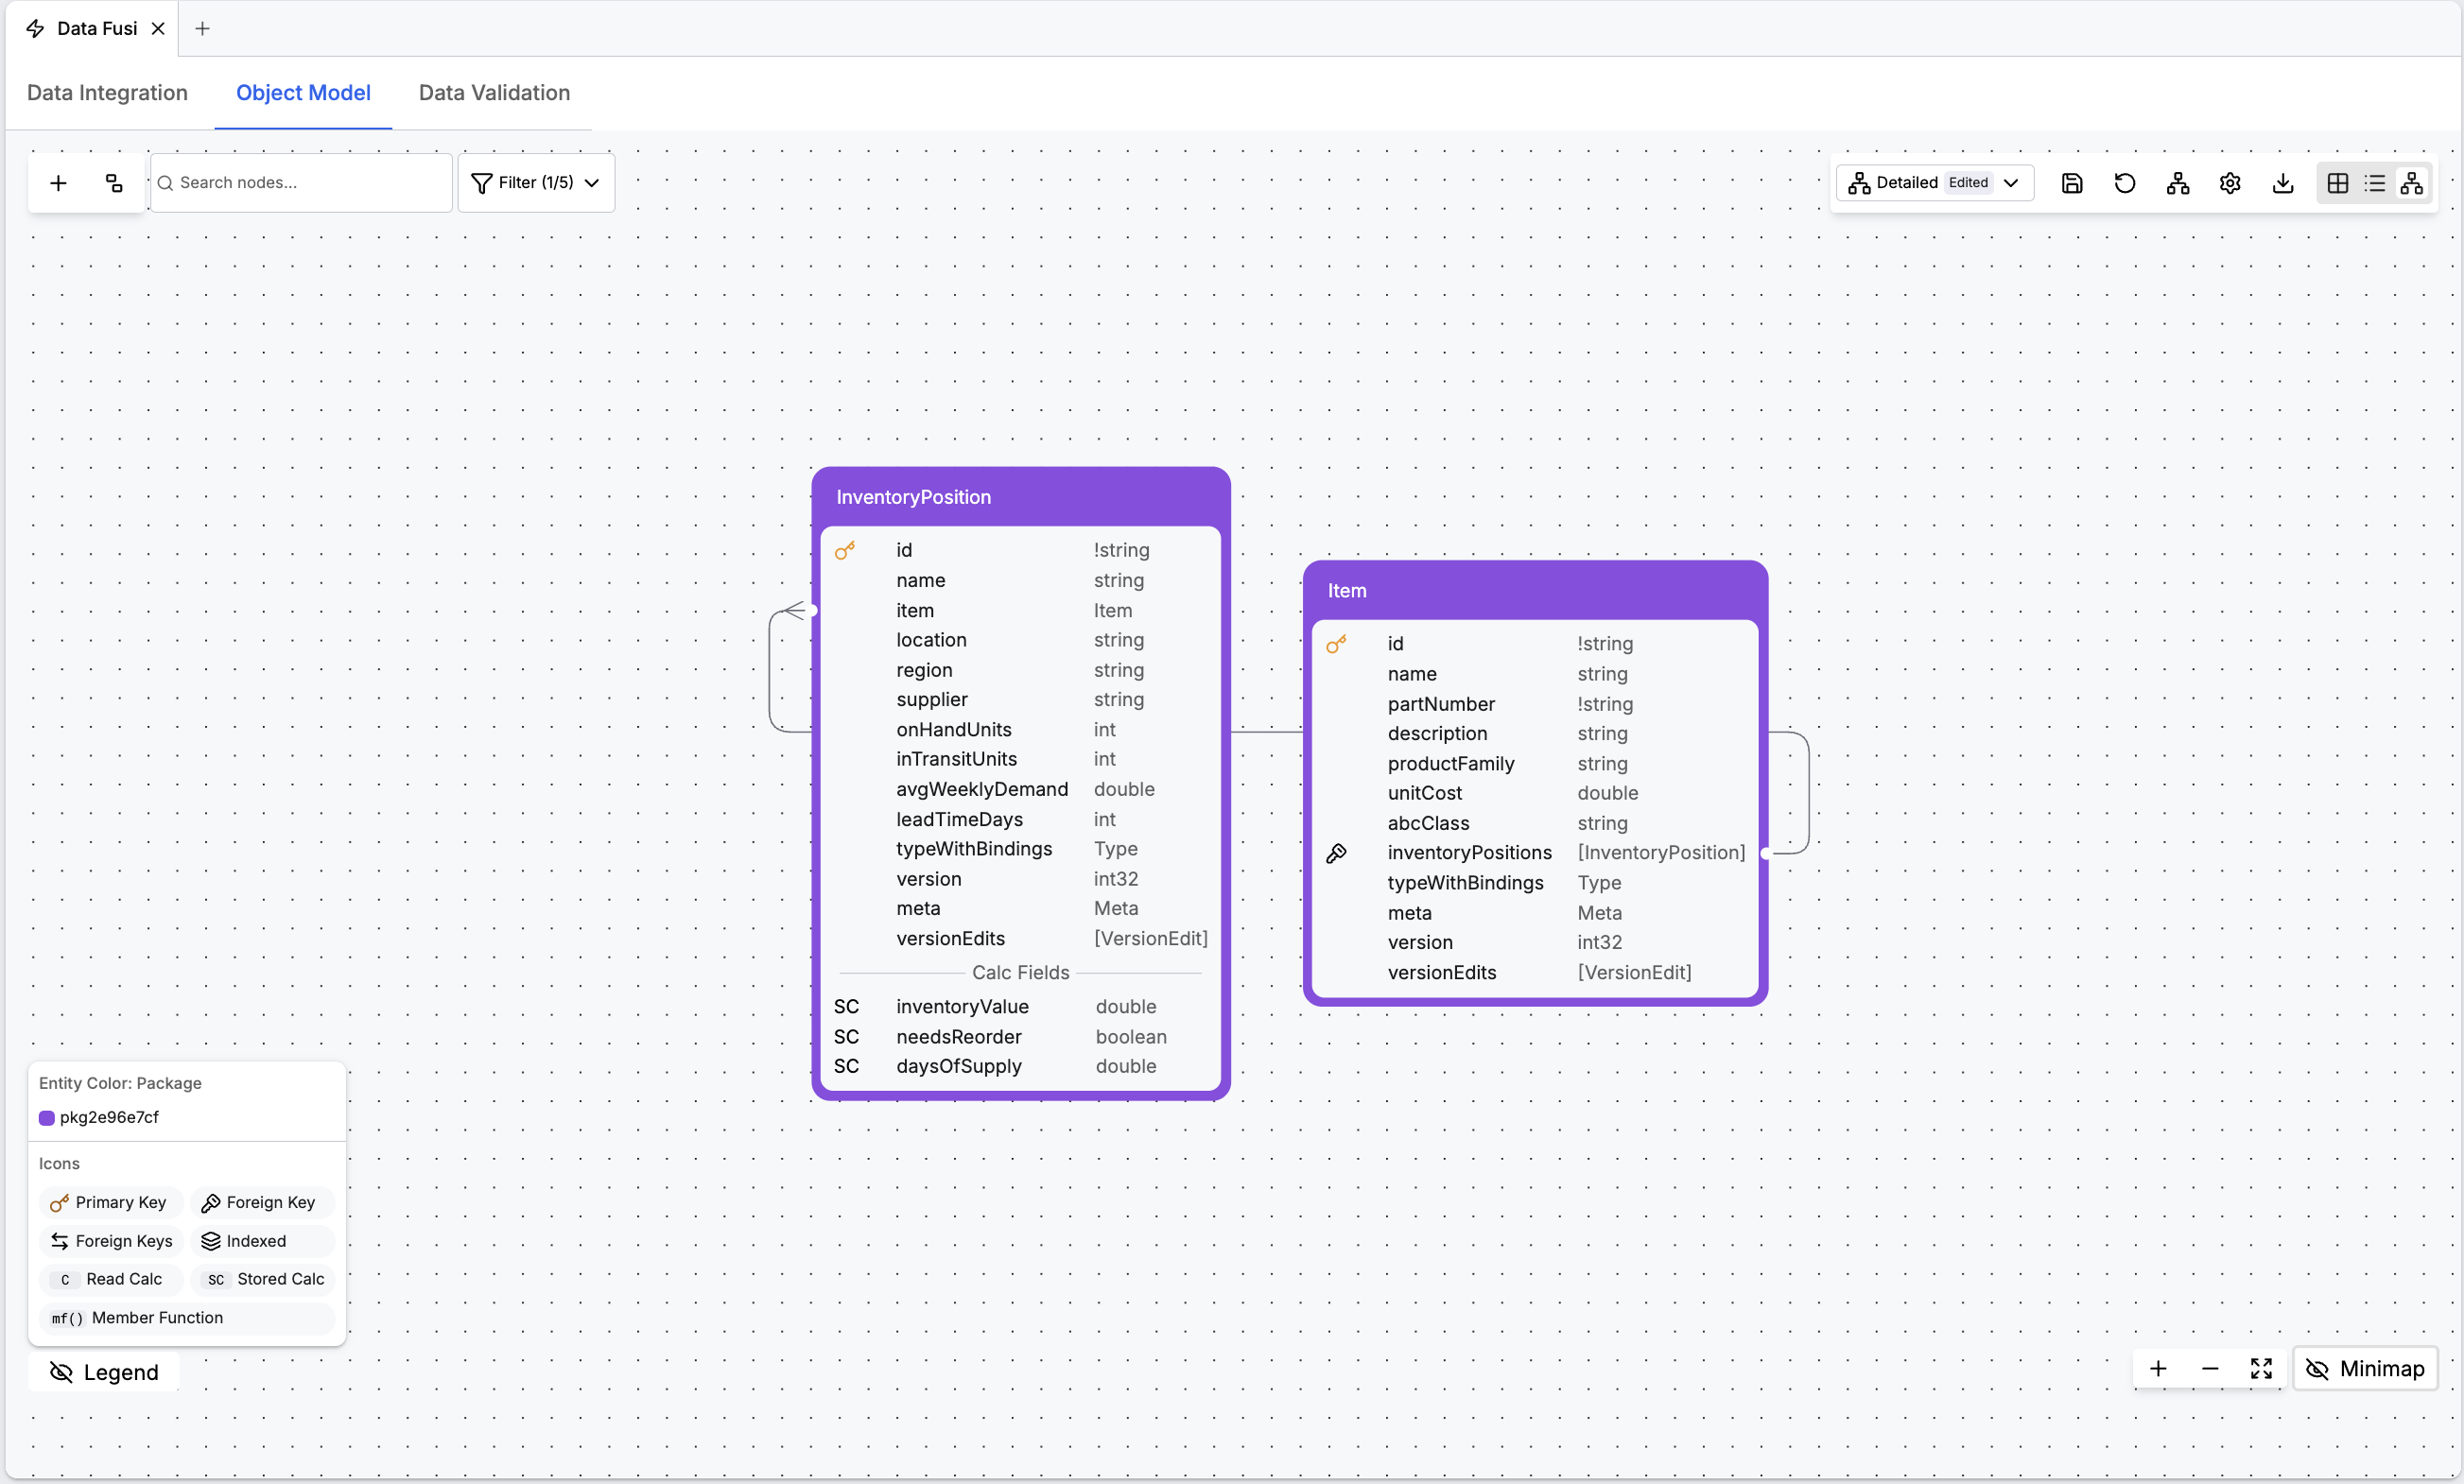
Together, these confirm the application holds real records behind the pages, not placeholder screens. When you are ready to run it on your own data, connect the system that holds your records in Data Fusion, or attach a file to a prompt. To find relevant tutorials, see Use Configuration Tools.
Step 4: Share the application with a colleague
Sharing works at two levels. Application collaborators contribute to the application, and preview recipients only view a running workspace.
To add an application collaborator:
- Select Applications, then select your application.
- Select Collaborators > Add collaborator.
- Enter your colleague's email address. The picker takes an existing user, or an address you type.
- Set the role. User creates workspaces and contributes. Admin additionally manages all workspaces in the application, deploys, and adds other administrators.
- Select the add button to confirm.
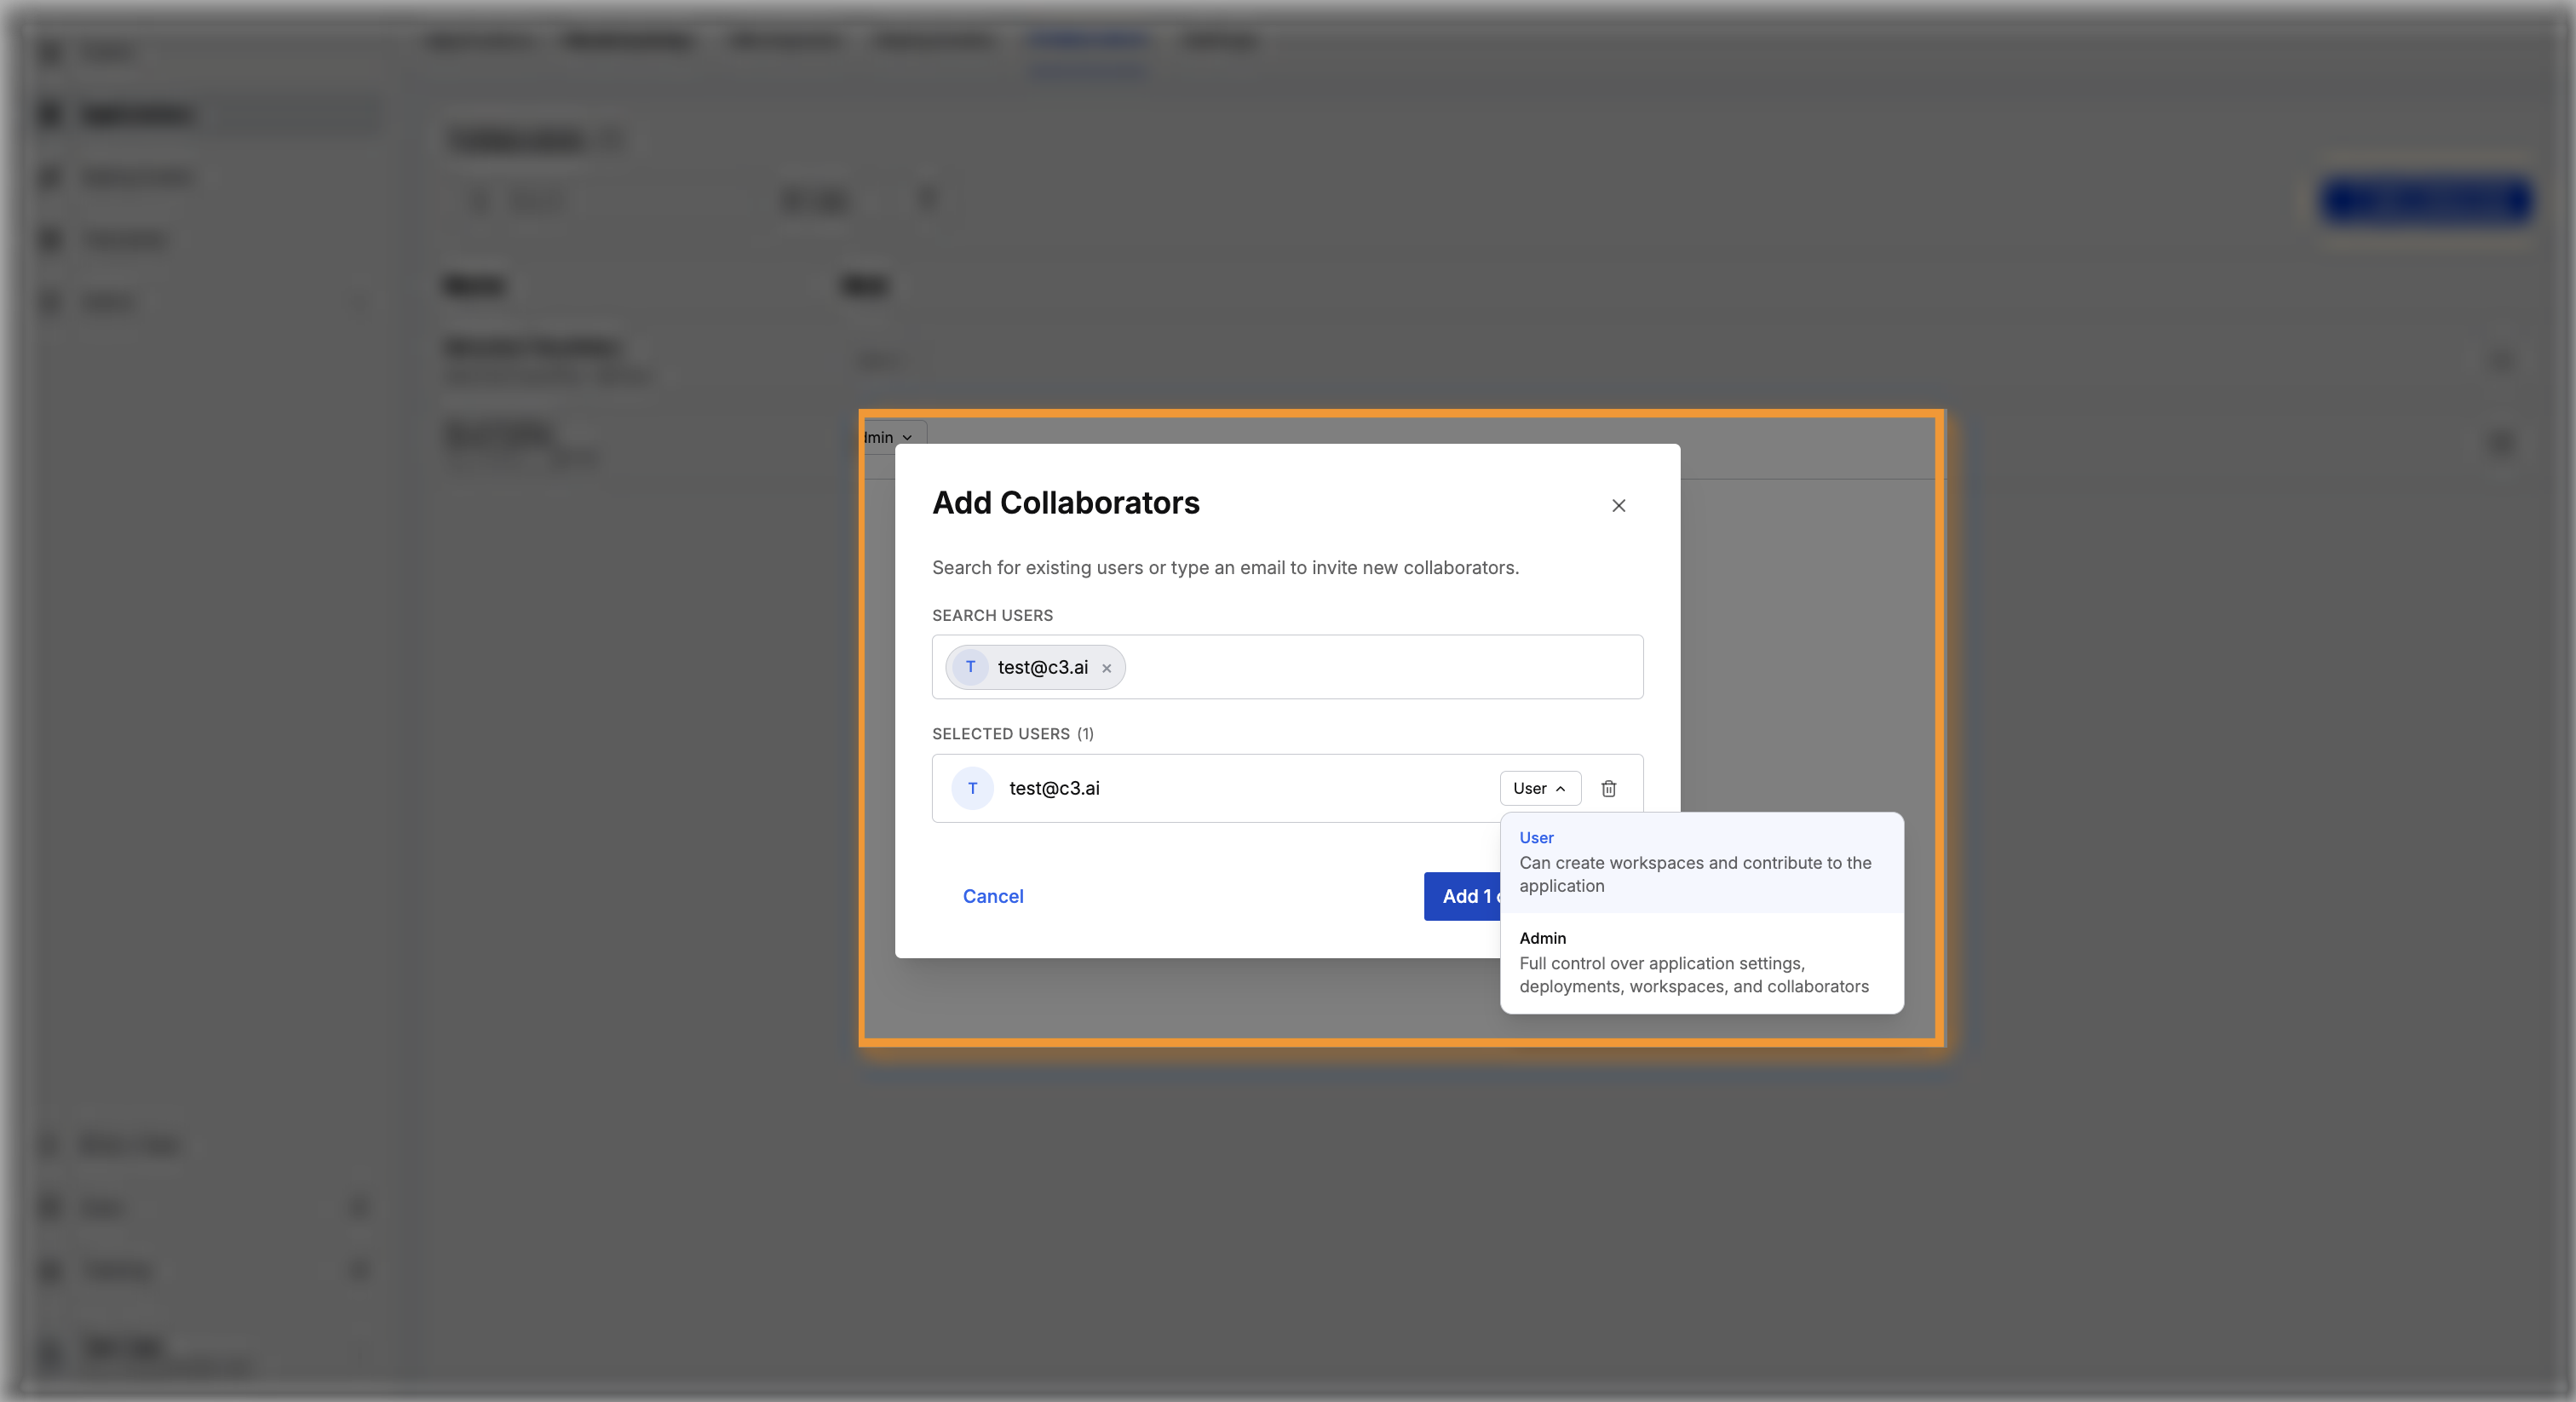
Your colleague appears in the Collaborators table with the role you assigned.
To send a link to the running workspace instead:
- Select Share in the workspace header.
- Copy the preview URL, or enter an email address and select Share.
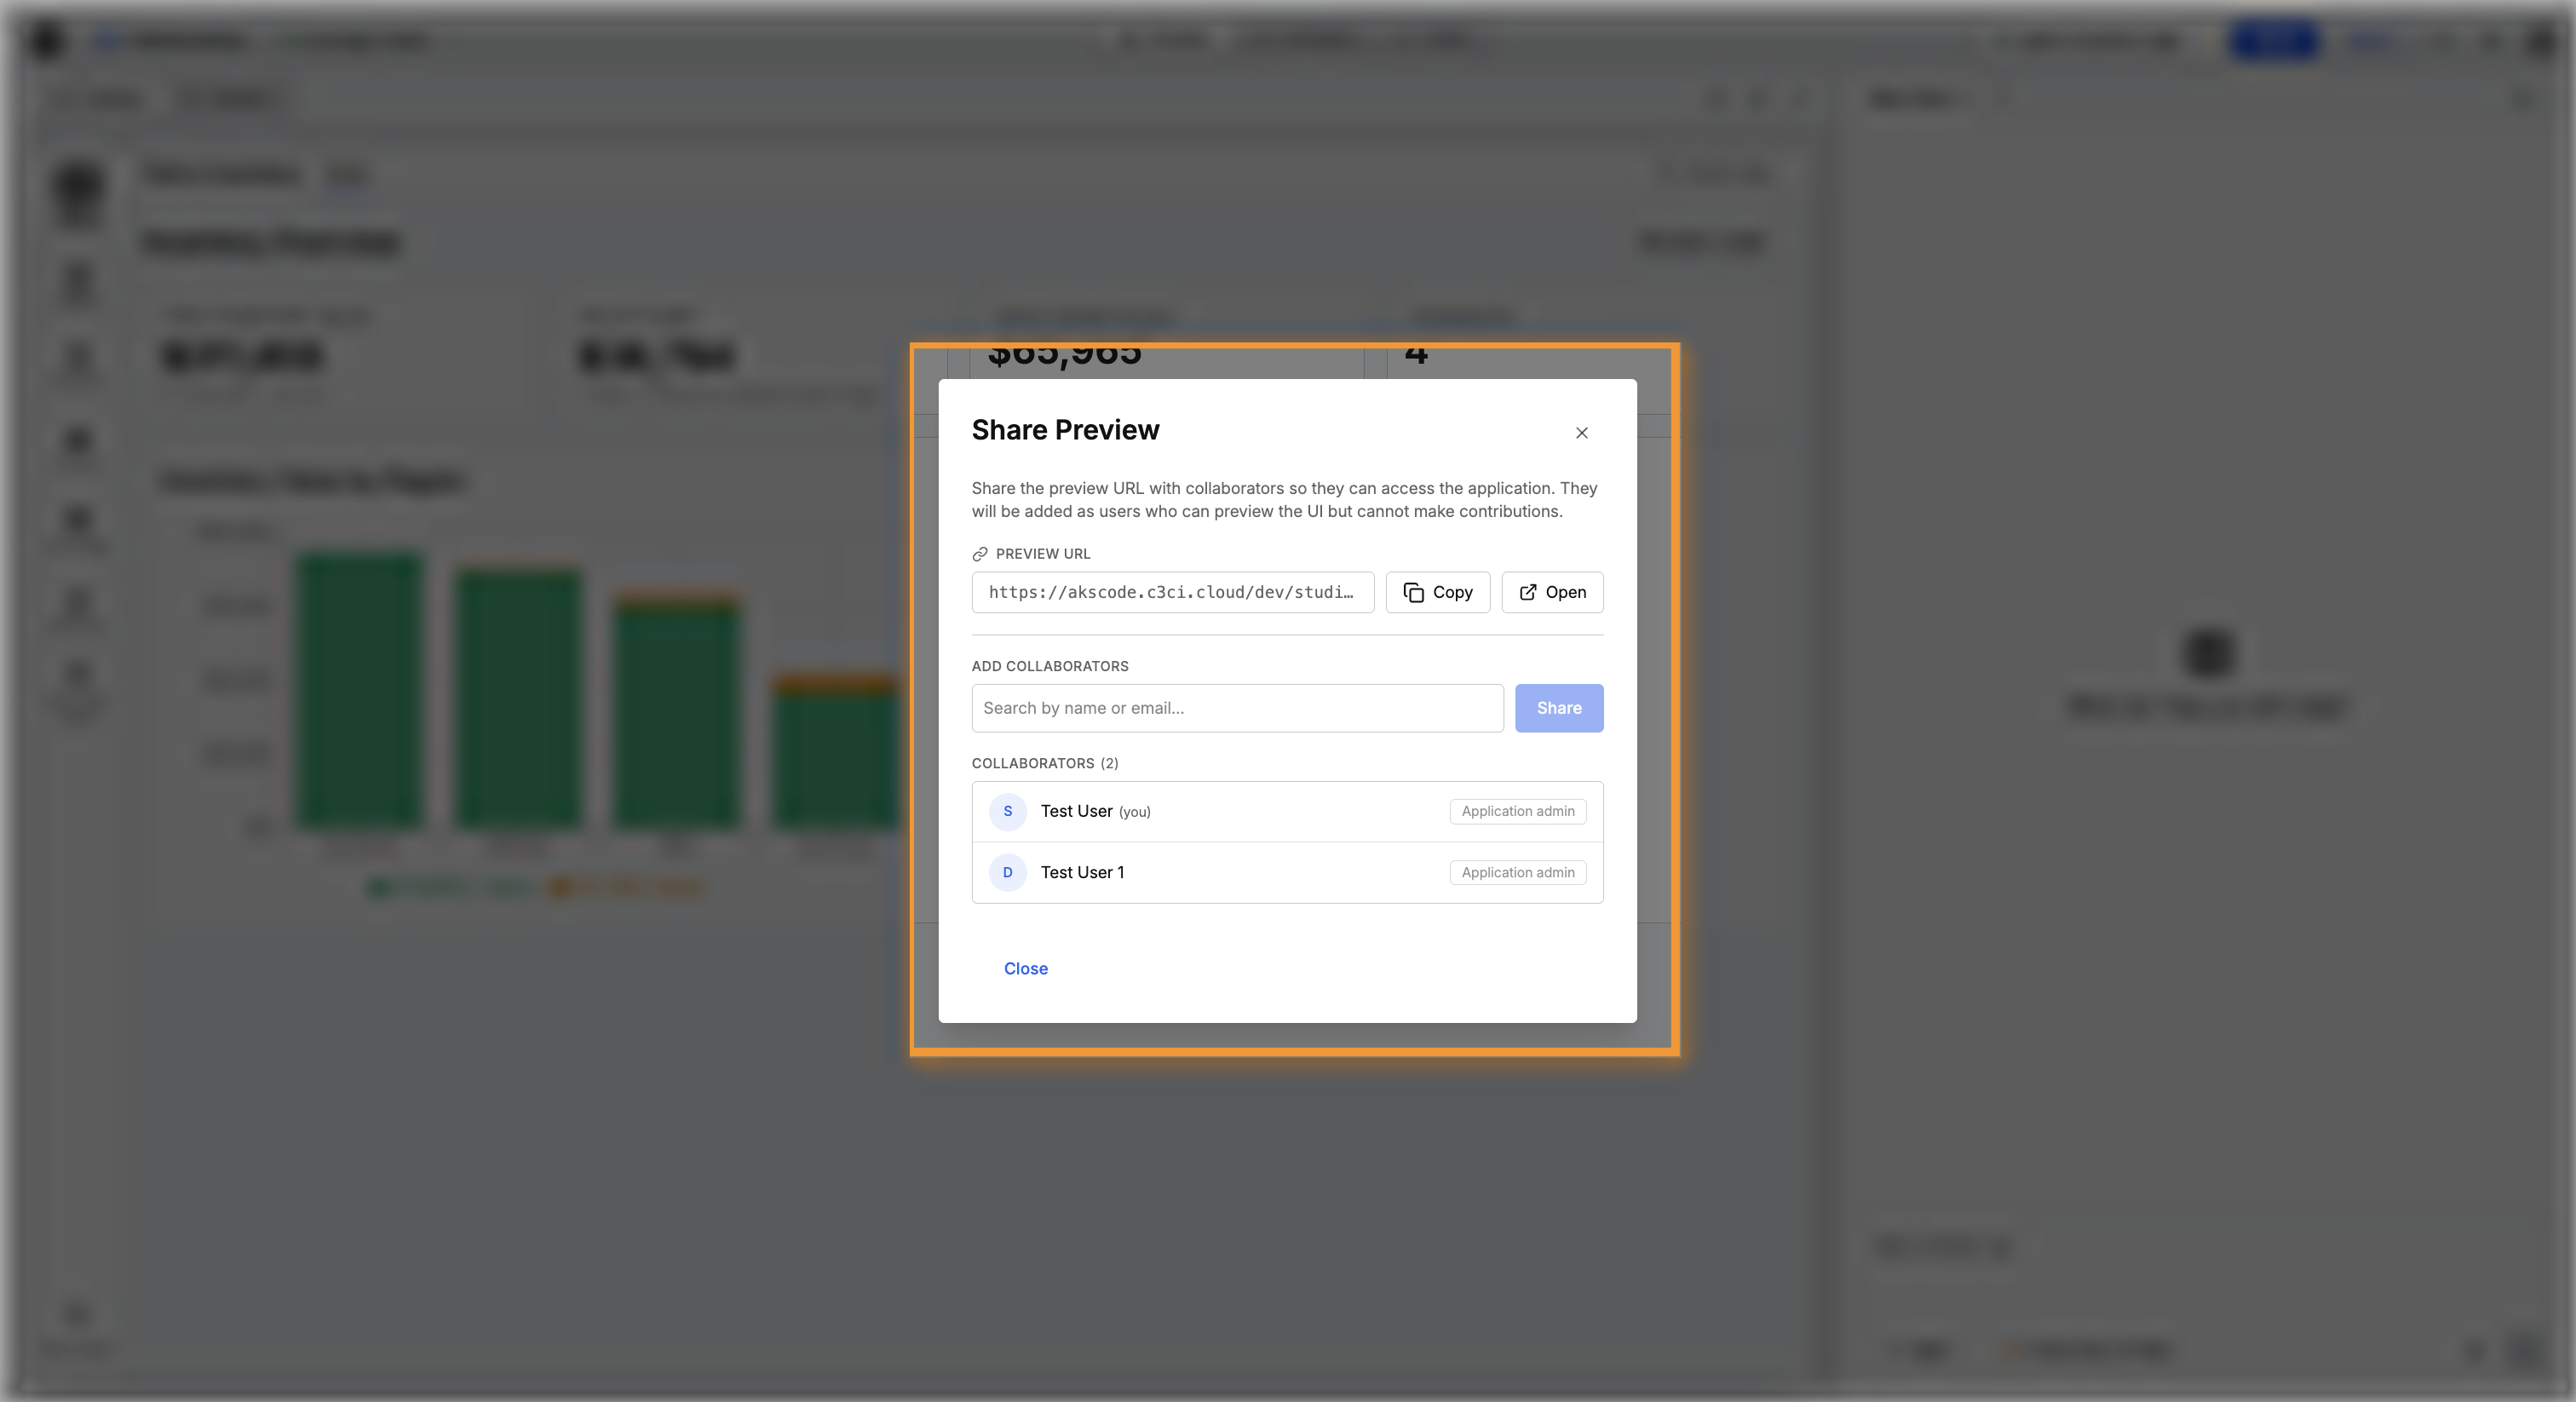
The person you add becomes a workspace user who can view but not contribute. The link serves the running workspace, so the link stops working while that workspace is stopped.
For a detailed tutorial on adding people and sharing a preview link, see Share with Collaborators.
Step 5: Deploy to staging
A deployment runs on its own, so your colleagues reach the application whether or not your workspace is running. Staging is where you and your colleagues can iterate and refine features without affecting your users' experiences, production is a separate environment you often expose to users and it holds the most stable copy of your application. For a new change, a best practice is to first deploy to staging, test and interact with the feature in Preview, then promote the deployment to the production environment.
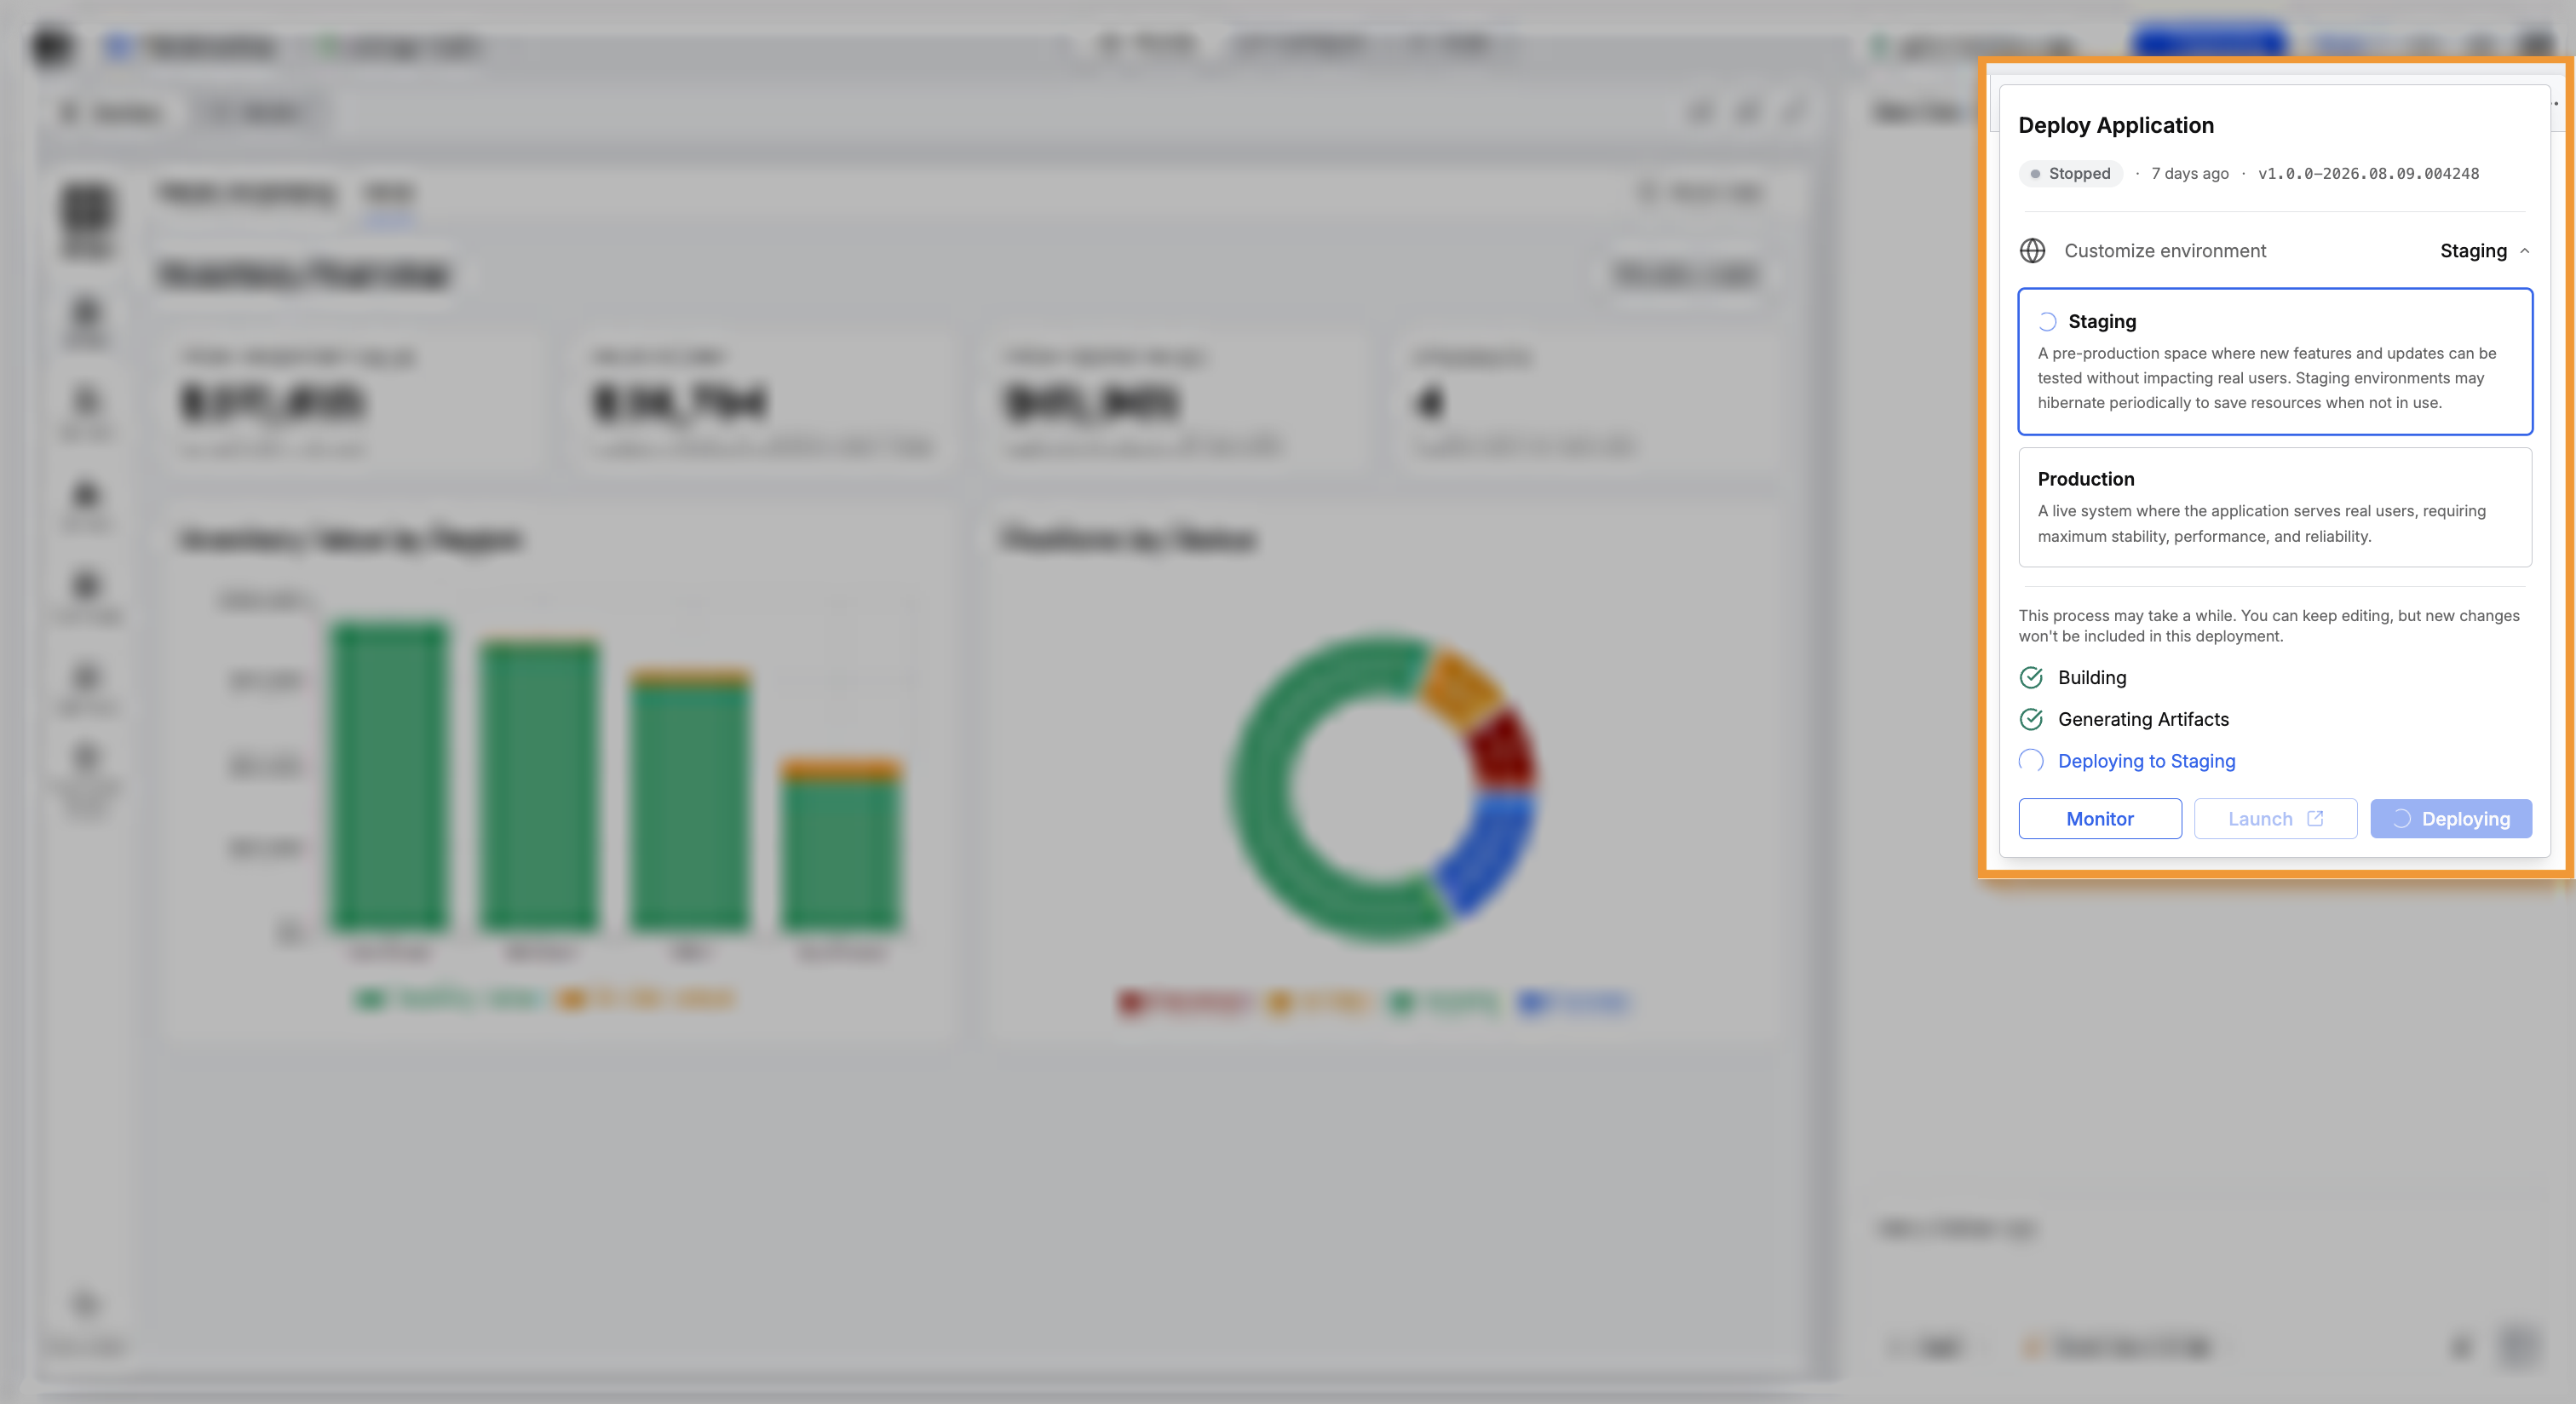
- Select Deploy in the workspace header. The Deploy Application modal opens with Staging already selected.
- Confirm Staging is selected.
- Select Deploy.
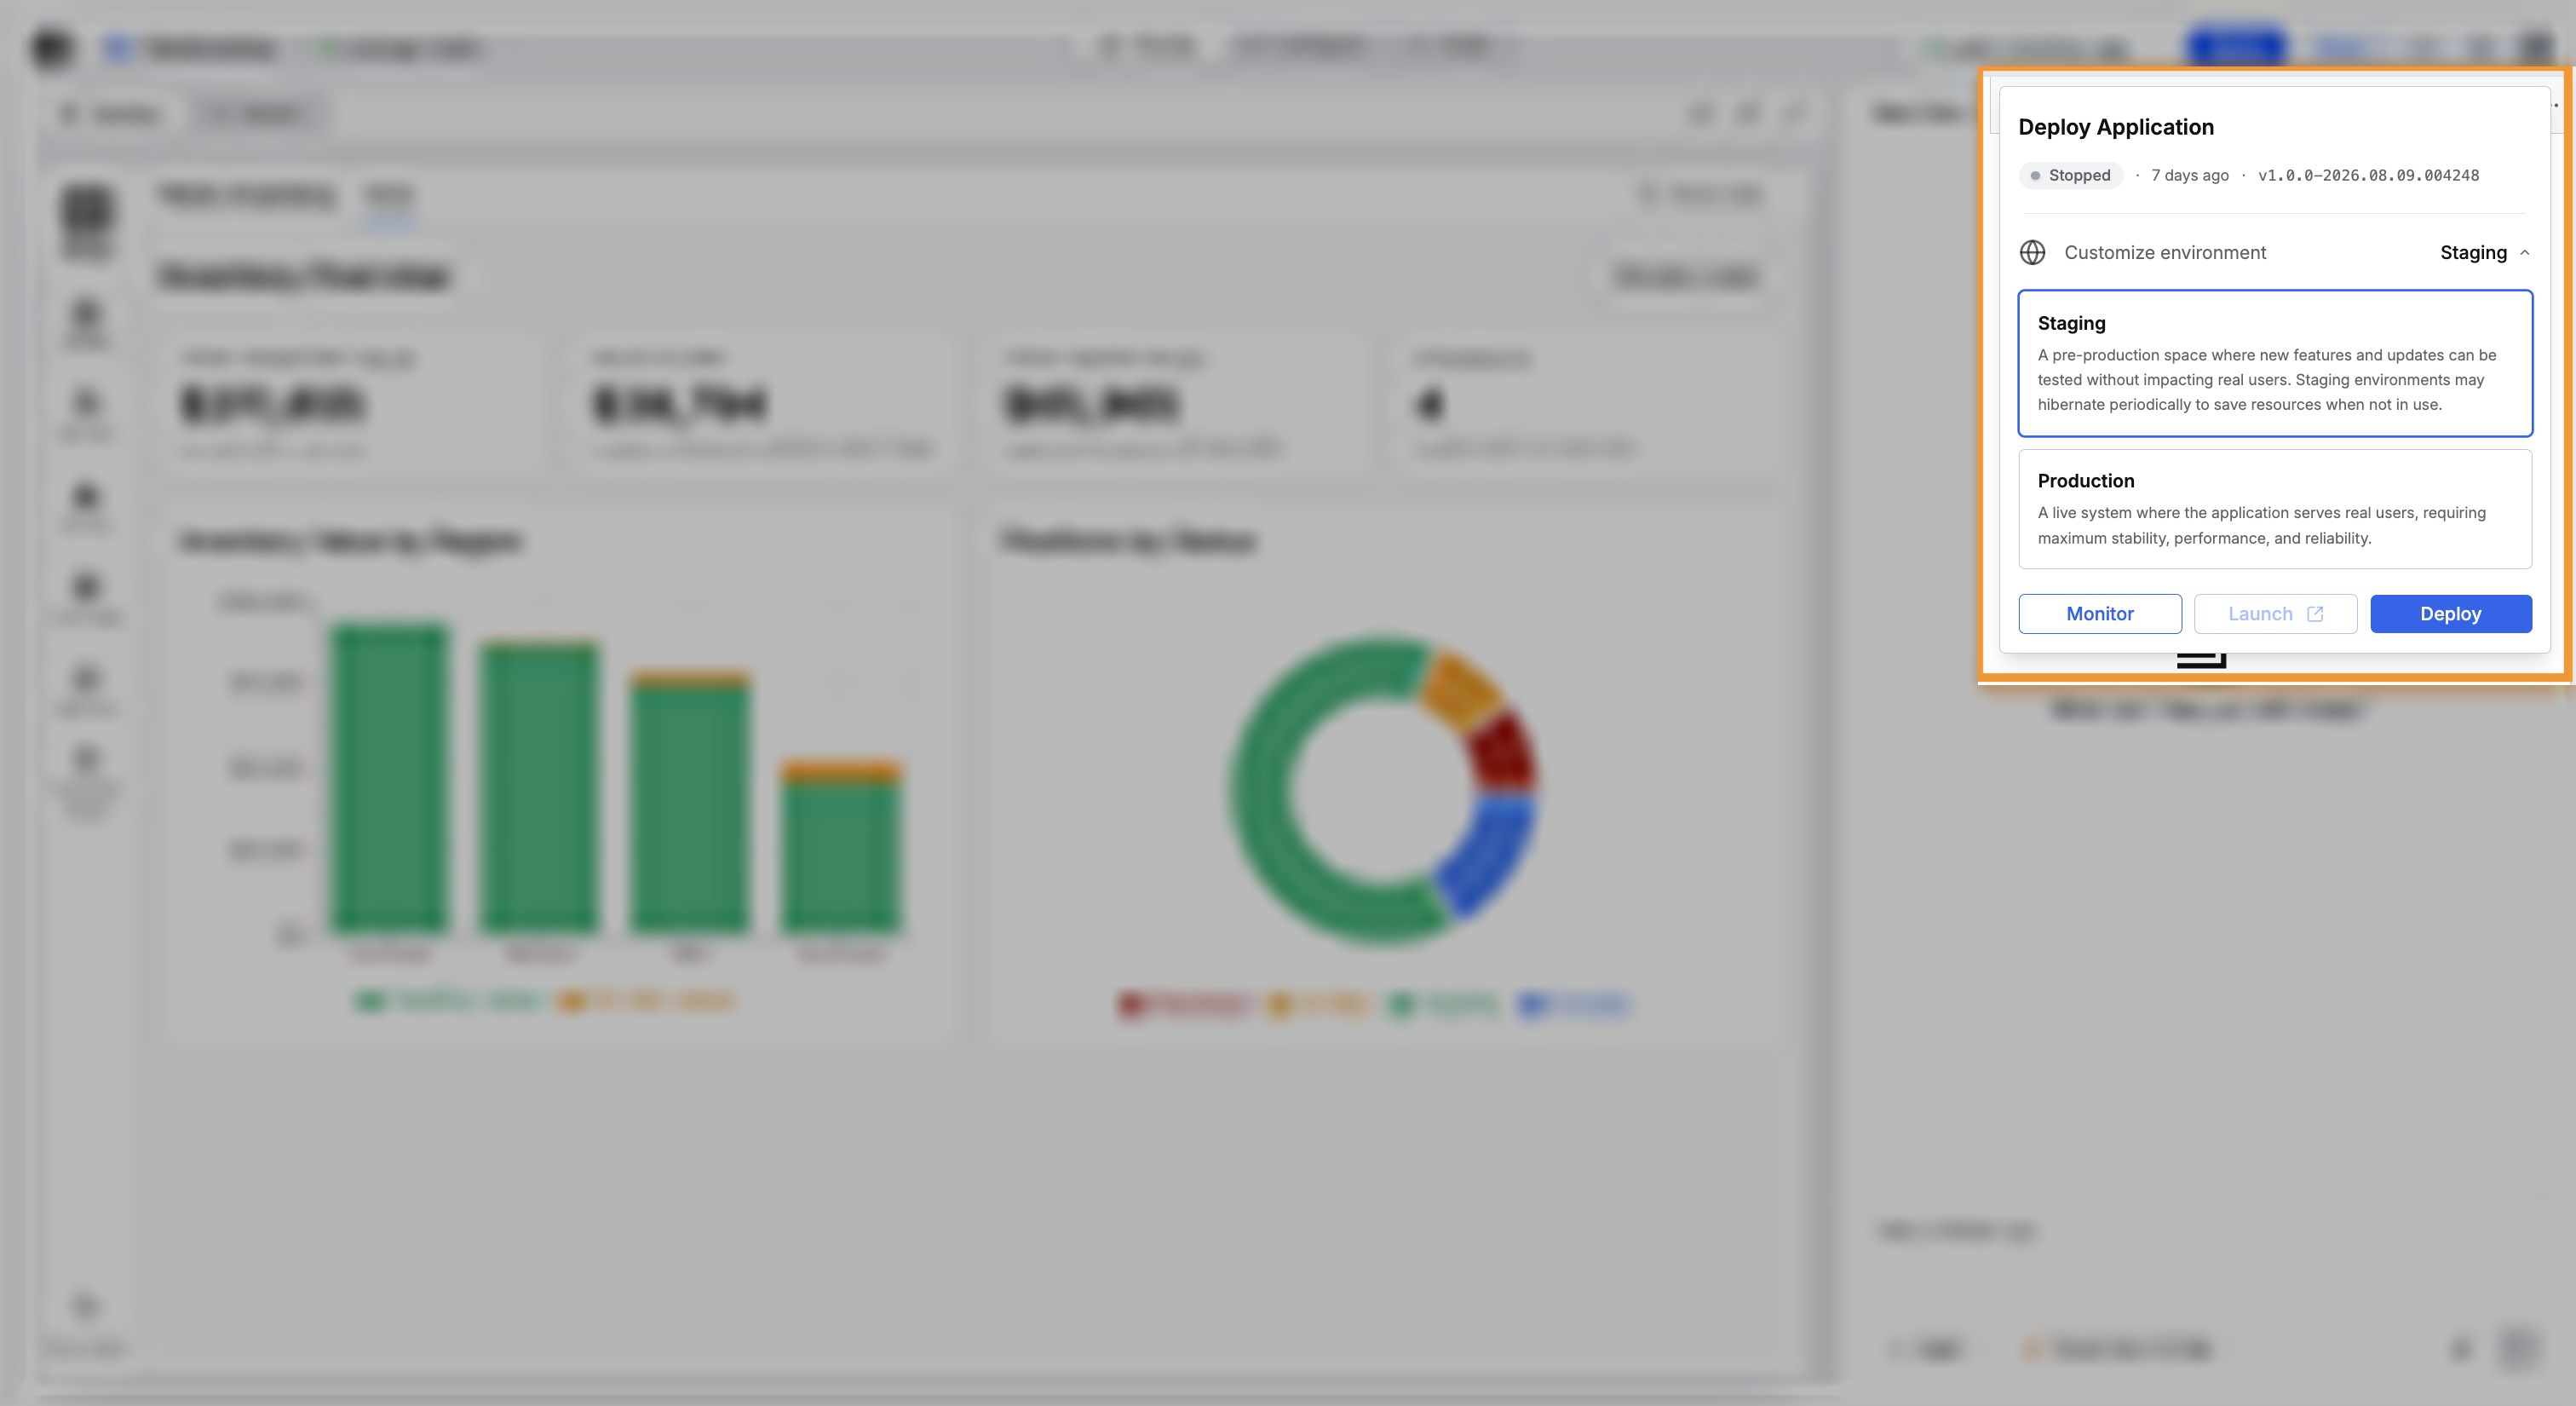
C3 Code automatically validates your application before deploying. When it finds problems, the Package Issues Detected modal groups those problems by file. Select Fix with C3 AI Assistant to pass the problems to the agent, or continue when only warnings remain.
The modal then tracks three phases in order: Building, Generating Artifacts, and Deploying to Staging. A version stamp appears alongside.
C3 Code packages the files exactly as those files stand in your workspace. You can keep working while the deploy runs, and changes you make afterward stay in your workspace.
Select Monitor to watch the deployment's progress. Select Launch to open the running application once the deploy finishes.
Step 6: Deploy to production
Deploying to production follows the same steps as deploying to staging.
- Confirm staging runs the version you want your users to have.
- Select Deploy in the workspace header.
- Select Production.
- Select Deploy, then clear any package issues the check reports.
Each application has one staging deployment and one production deployment, so deploying again to the same deployment replaces the running version. Confirm which deployment you selected before continuing.
For further details, see Deploy to Staging and Production.
Check the result
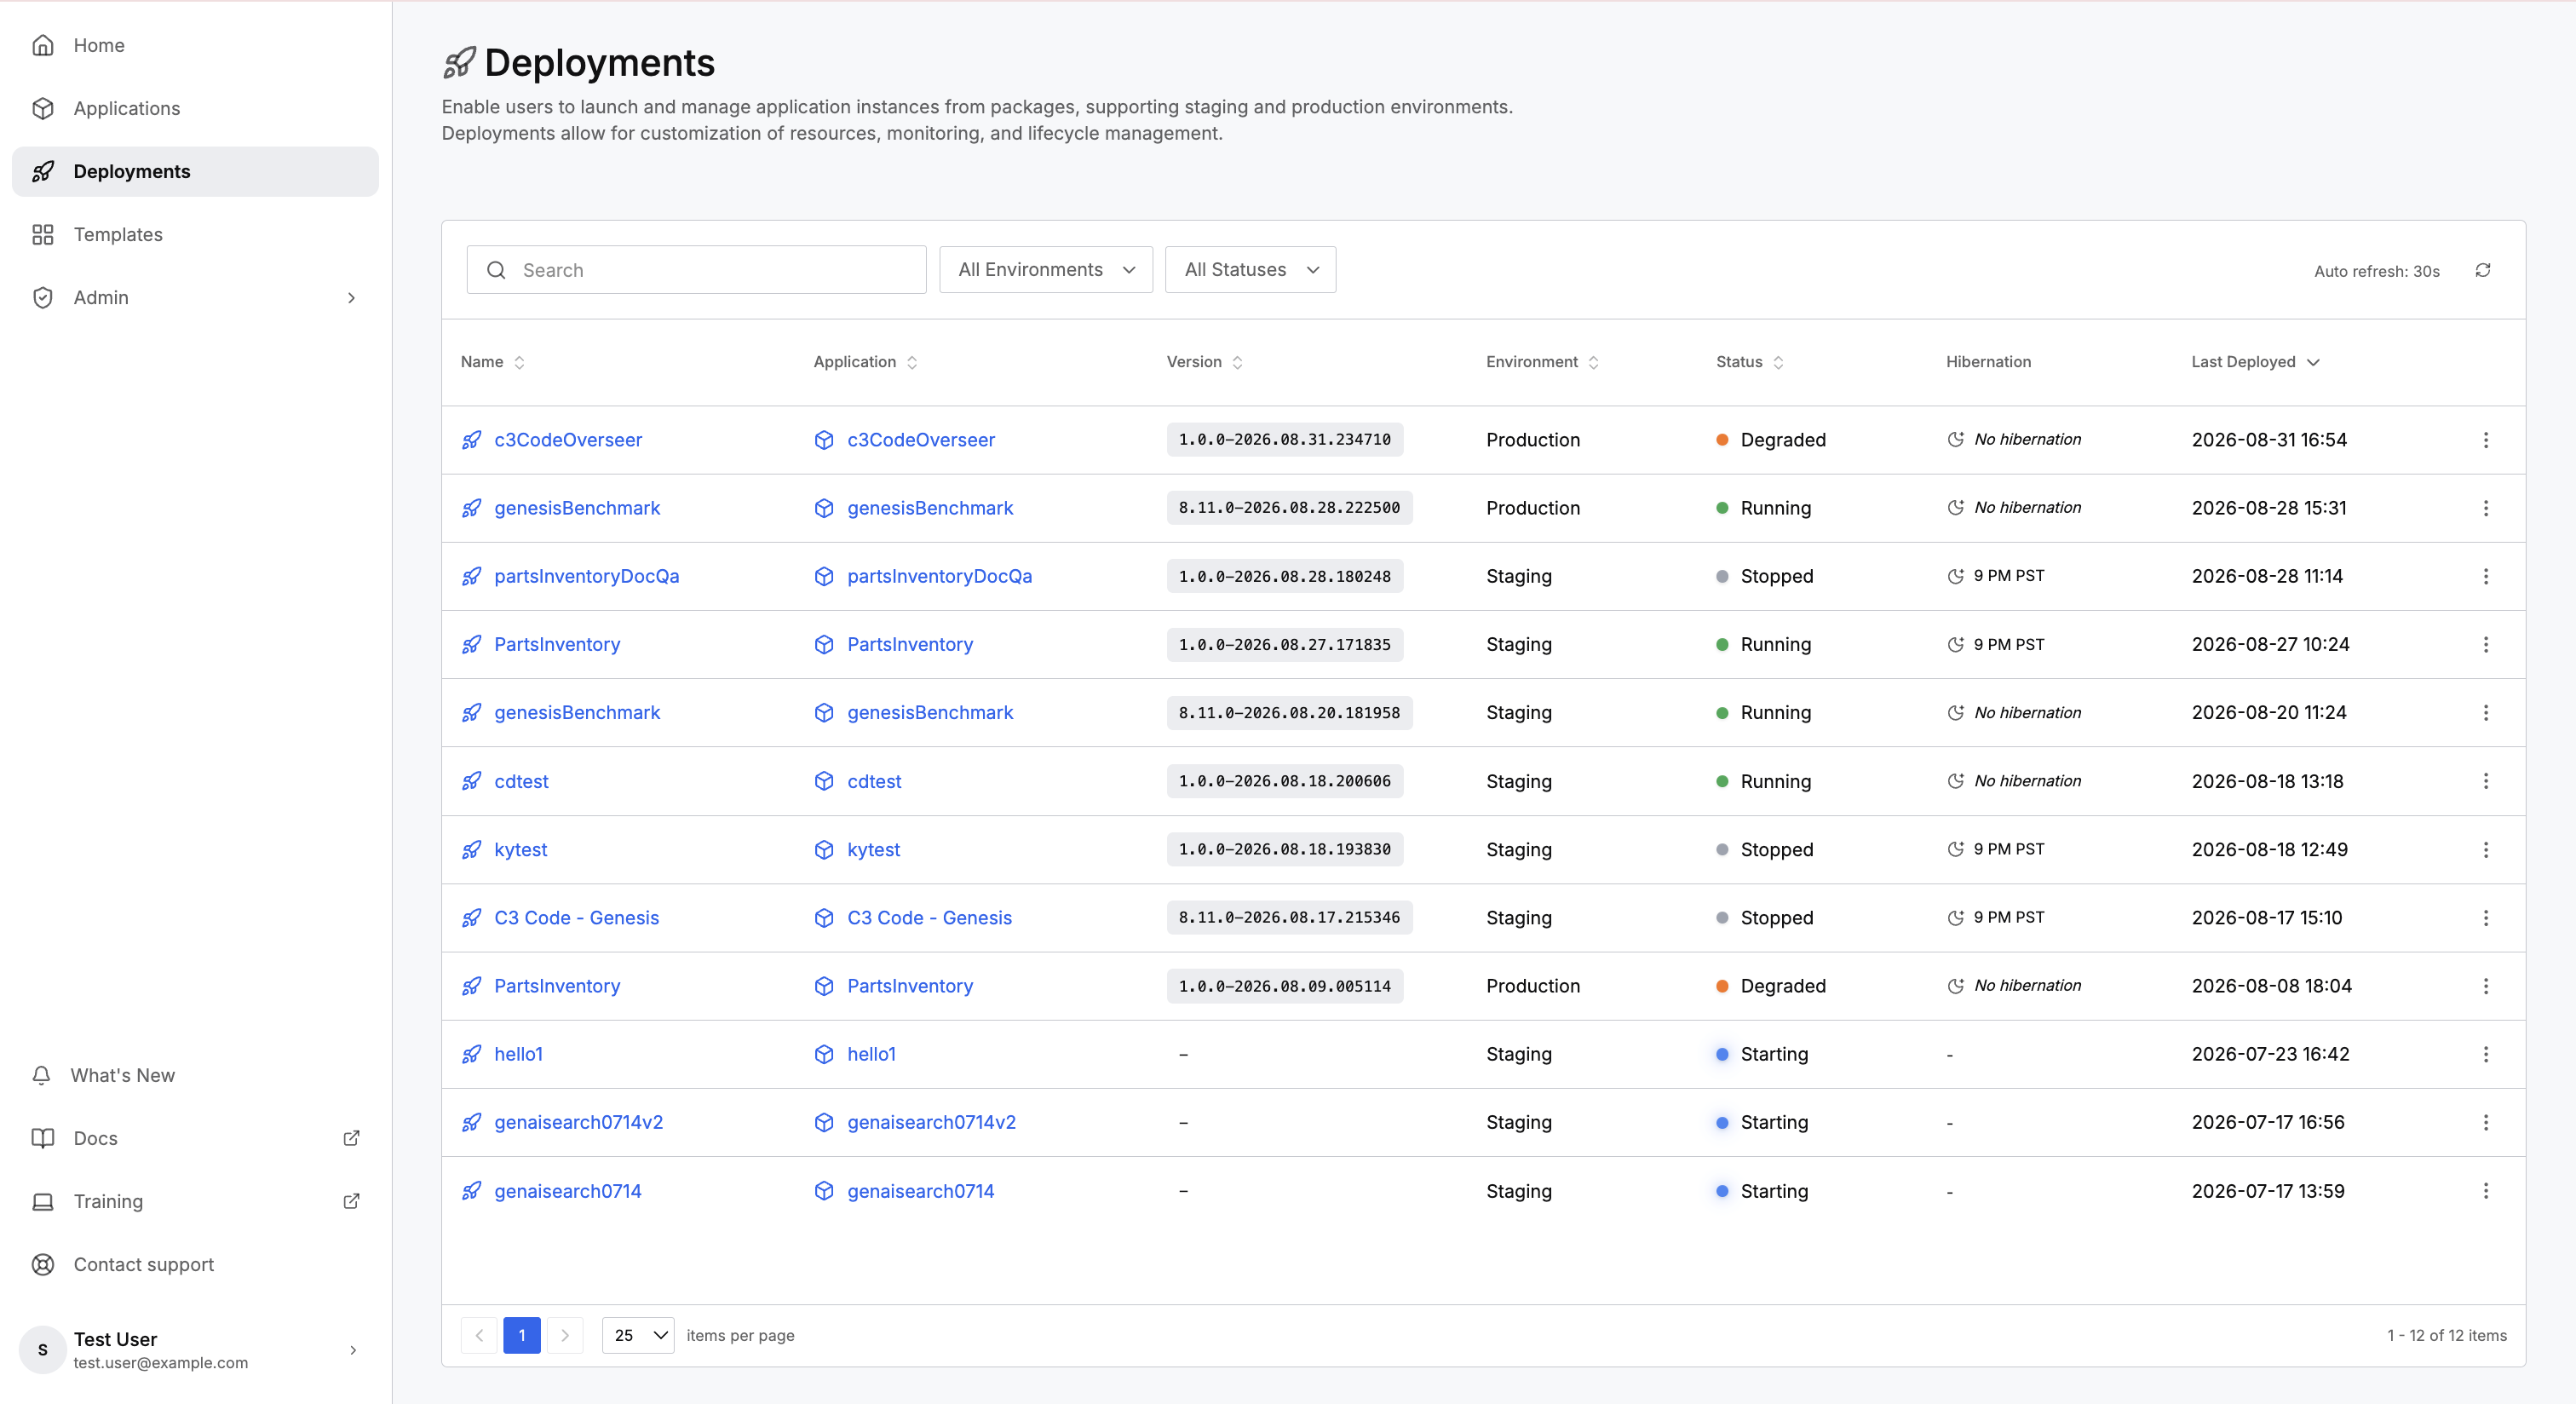
Select Deployments in the navigation pane. The list shows one row per deployment, with the application, the version, the environment, the status, the hibernation schedule, and the last deployed time.
Confirm all four outcomes:
- Your application appears with a Staging row and a Production row.
- Each row carries a version stamp.
- Your colleague appears in the Collaborators tab of the application.
- Opening a deployment shows your data rather than placeholder values.
When a deployment reports a status other than running, open the deployment to read the reason before deploying again.
Where to go next
These pages take each stage of the quick start further: