Configure the Load Destination
The Load Destination node is optional and is relevant only when your pipeline includes an Entity Extractor. The Load Destination decides where extracted entity records end up.
Open the Load configuration
On the canvas, select the Load node. The Configure Load panel opens. The panel offers two destination options as tabs at the top: Load to External Source (default) and Load to Application Data Model. The platform picks Load to External Source when it auto-creates the Load node on Entity Extractor save.
Name the Load
At the top of the panel, the Name field is prepopulated with <source-collection-name> Load. The platform pre-creates the Load node with this name as soon as you save the Entity Extractor, so the Name field in this panel matches the canvas title by default. Keep the default or enter a different name.
Select a load destination
Use Load to Application Data Model when:
- You want extracted entities to become records in your C3 application's data model.
- Downstream services, such as UI components, business logic, or other pipelines, must query the records through the data model.
- You want automatic cleanup. When the source file is deleted, the platform removes the associated vector-store passages and the entity records loaded through this destination.
- The extracted entity schema matches, or will match, a Type in your application.
Use Load to External Source when:
- You want to send extracted entities to a destination outside the platform, such as a downstream pipeline, a third-party system, or an audit archive.
- Your team consumes extraction results from a cloud bucket or file destination.
- You don't need the platform to manage the record lifecycle.
Configure Load to External Source
Select Load to External Source to dump extracted entities to an external file destination.
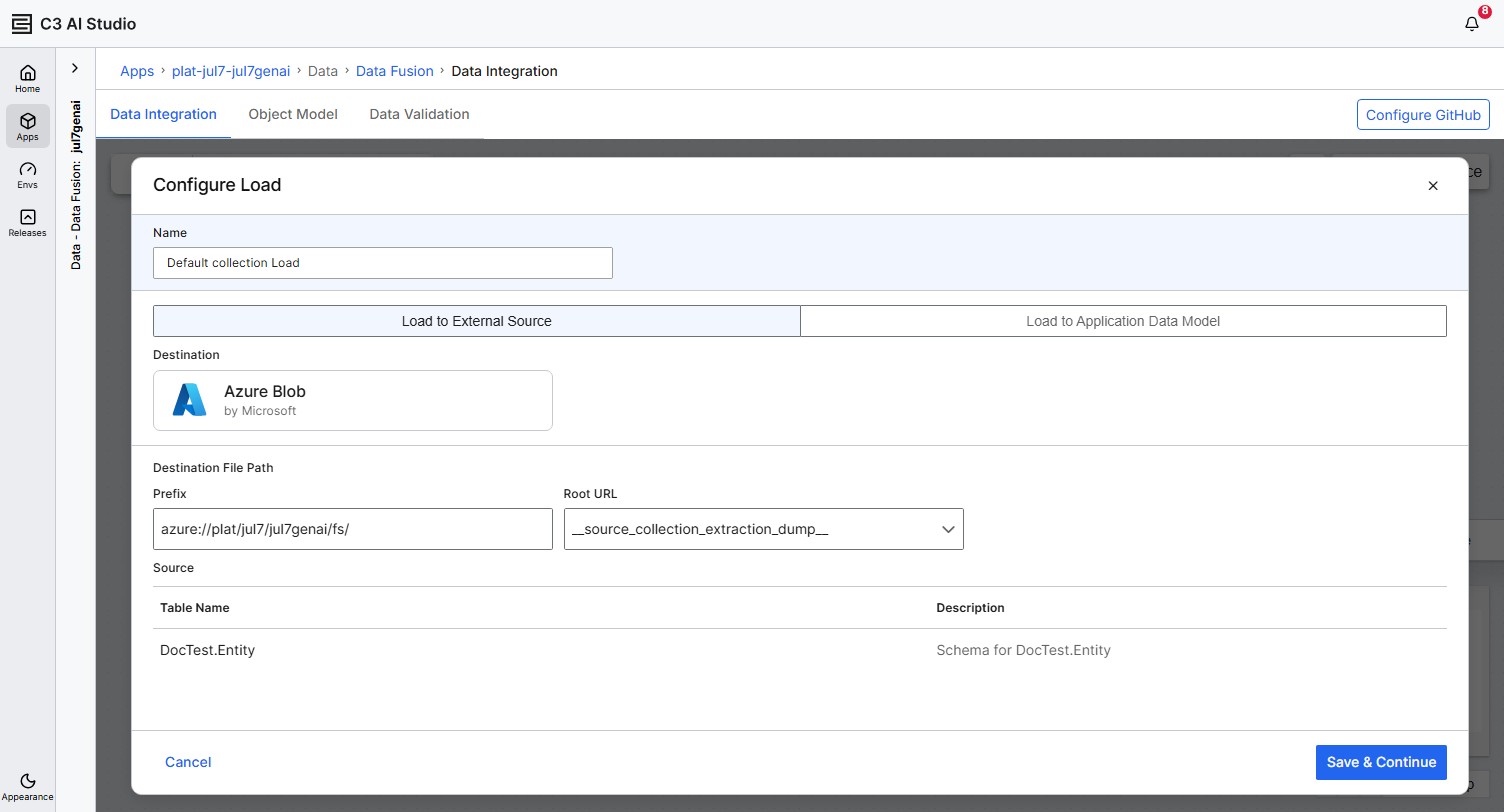
- Destination: Select the file connector to dump to. The dropdown defaults to the same file connector that backs your source system. You can pick any registered file-systems connector.
- Destination File Path: The path where records are written. The path splits into two fields:
- Prefix: A system-generated URL under the connector's root. For example,
azure://plat/<env>/<app>/fs/. - Root URL: A dropdown that appends a folder name to the prefix. The default is
__source_collection_extraction_dump__. Pick a different Root URL to point at a specific folder.
- Prefix: A system-generated URL under the connector's root. For example,
- Source: A table that lists each entity attached to Load, with columns Table Name and Description. The Table Name is auto-populated from the entity name and maps the extracted entity to a logical table name in the destination.
Load to External Source writes CSV files. Entity records land under an entities/ folder and their source-file mappings land under a maps/ folder, both beneath the destination path prefix.
Configure Load to Application Data Model
Select Load to Application Data Model to write extracted entities as records in your application's data model.
The Source table lists each entity attached to Load, with columns Table Name and Description. Entities that don't yet exist as a Type in the application data model show a New badge next to the Table Name. If the target entity Type doesn't already exist, the platform creates it during pipeline execution.
Switching to Application Data Model changes each entity child node's context menu. See the next section.
Save the configuration
Select Save & Continue.
Interact with entity child nodes
After you save the Load, each entity attached to Load appears as its own node on the canvas with an Open menu kebab. The available actions depend on the Load's current mode.
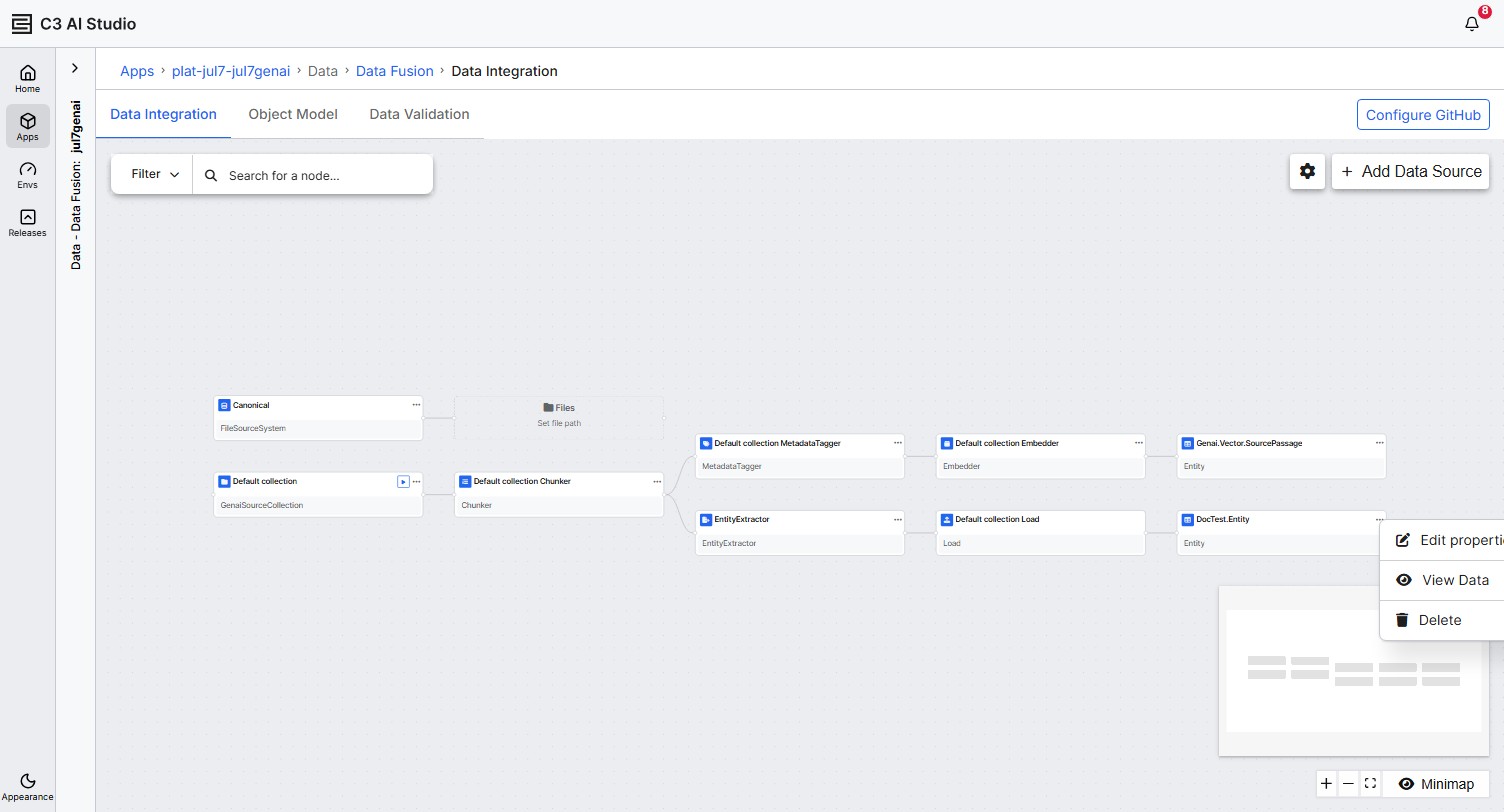
Load to External Source — the kebab has one action:
- Browse opens the file browser at the entity's destination path.
Load to Application Data Model — the kebab has three actions:
- Edit properties opens the Edit Properties modal for the entity.
- View Data opens a query grid to inspect the persisted entity records.
- Delete opens a type-to-confirm dialog and cascades the removal.
Edit Properties
Select Edit properties from the entity node's kebab to configure how the pipeline persists records for this entity.
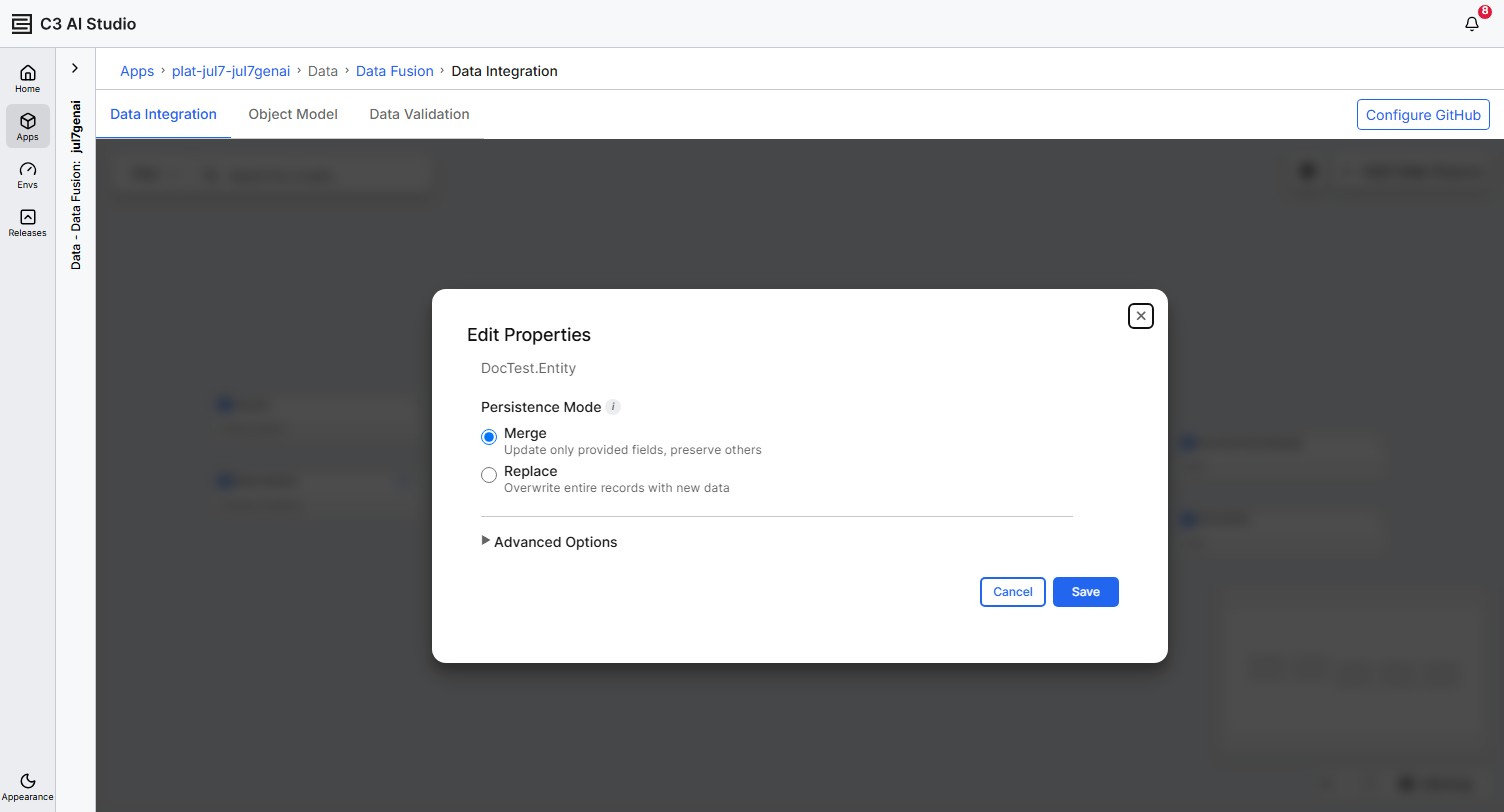
- Persistence Mode:
- Merge (default): Updates only provided fields on matching records and preserves other fields.
- Replace: Overwrites the entire record with the new data.
- Advanced Options (collapsible): Additional persistence knobs.
Select Save in the Edit Properties modal to apply the changes.
View Data
Select View Data from the entity node's kebab to inspect the records the pipeline has written for this entity. The grid has query controls at the top — Filter, Include, Order by, and a sort direction dropdown — plus an Apply button that re-runs the query.
If the target C3 Type hasn't been created yet, the grid shows a Missing TypeMeta error. Run the pipeline once so the platform auto-creates the Type, or run Rebuild App Dependencies from the app admin page, then reopen View Data.
Delete
Select Delete from the entity node's kebab to remove the entity. The action opens a type-to-confirm dialog:
Delete
<EntityName>? This action is permanent. Deleting this Entity will remove the node and all of its connections. This cannot be undone.
You must type the entity name into the confirmation field before the red Delete button activates.
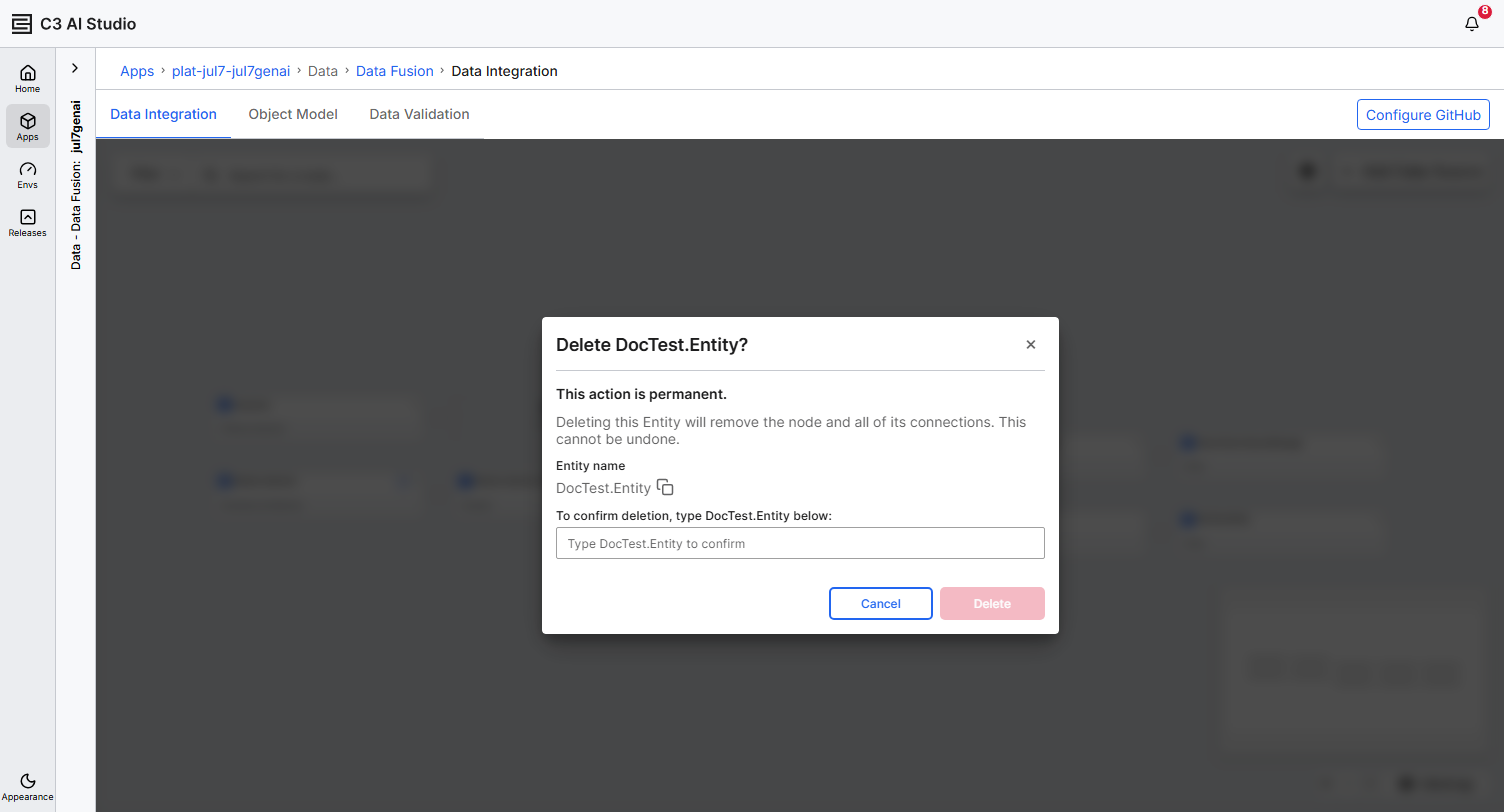
Delete cascades:
- The entity node is removed from the canvas.
- If the deleted entity was the Load node's only entity, the Load node is also removed.
- The upstream Entity Extractor node is reset to a placeholder when it no longer has any entities.
- If a matching entity exists in a paired structured Transform-child pipeline, it is removed there too.
Sync fields between the Entity Extractor and the entity node
The Entity Extractor and the entity child on Load share a single source of truth. Editing a field's name, type, description, or required flag in one place updates the other. For example, renaming a field in the Entity Extractor modal changes the field name on the entity child; editing the entity child's fields updates the Entity Extractor.