Configure Unstructured Data Integration Pipeline
This topic walks you through building a complete Unstructured Data Integration (UDI) pipeline in C3 AI Data Fusion. The first section is a Quickstart that uses the platform's built-in Canonical source system, so you can index a sample document without setting up cloud credentials. The remaining sections cover each pipeline node in depth so you can adapt the Quickstart to your own data.
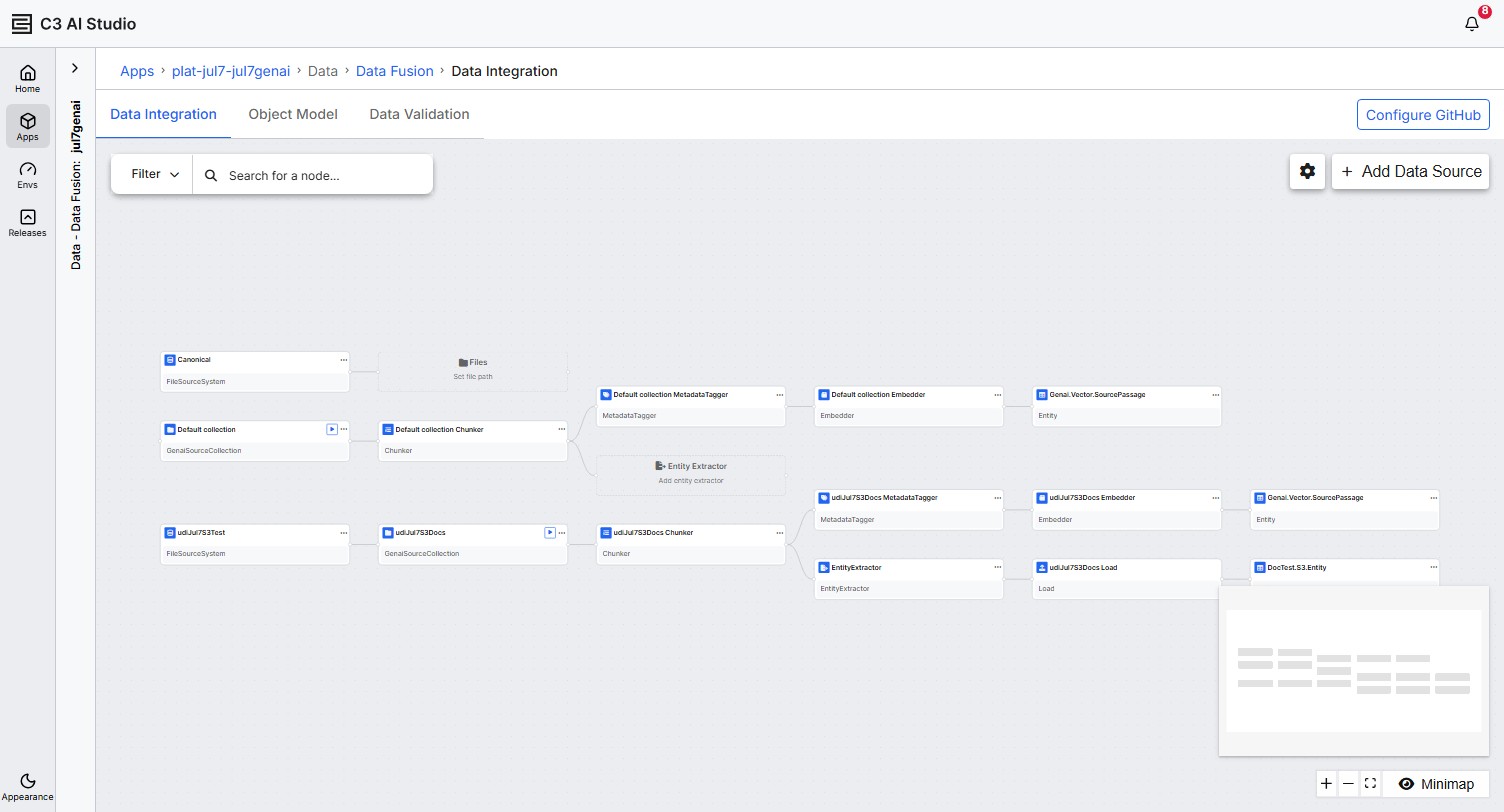
A UDI canvas can host multiple pipelines side by side. Each pipeline is independent and runs on its own schedule.
Quickstart: index your first document
This Quickstart creates a UDI pipeline that indexes one sample PDF. It uses the FileSourceSystem instance named Canonical, so you don't need cloud credentials.
Prerequisites
- A C3 Agentic AI Platform application with Data Fusion enabled.
C3.AppAdmin(orC3.EnvAdmin) andC3.StudioUser. For more details, see Prerequisites for Unstructured Data Integration.- A small sample PDF to index.
Step 1: Open the Data Fusion canvas
In C3 AI Studio, navigate to Data > Data Fusion. The canvas shows existing pipelines, if any, and source systems.
Step 2: Create an unstructured source collection on Canonical
This Quickstart uses the Canonical source system to skip cloud-credential setup. To pick a different source system, such as Amazon S3 or Azure Blob Storage, and to configure authentication, see Create an Unstructured Source Collection.
Locate the
CanonicalFileSourceSystem node on the canvas.Select the Files / Set file path sub-node attached to
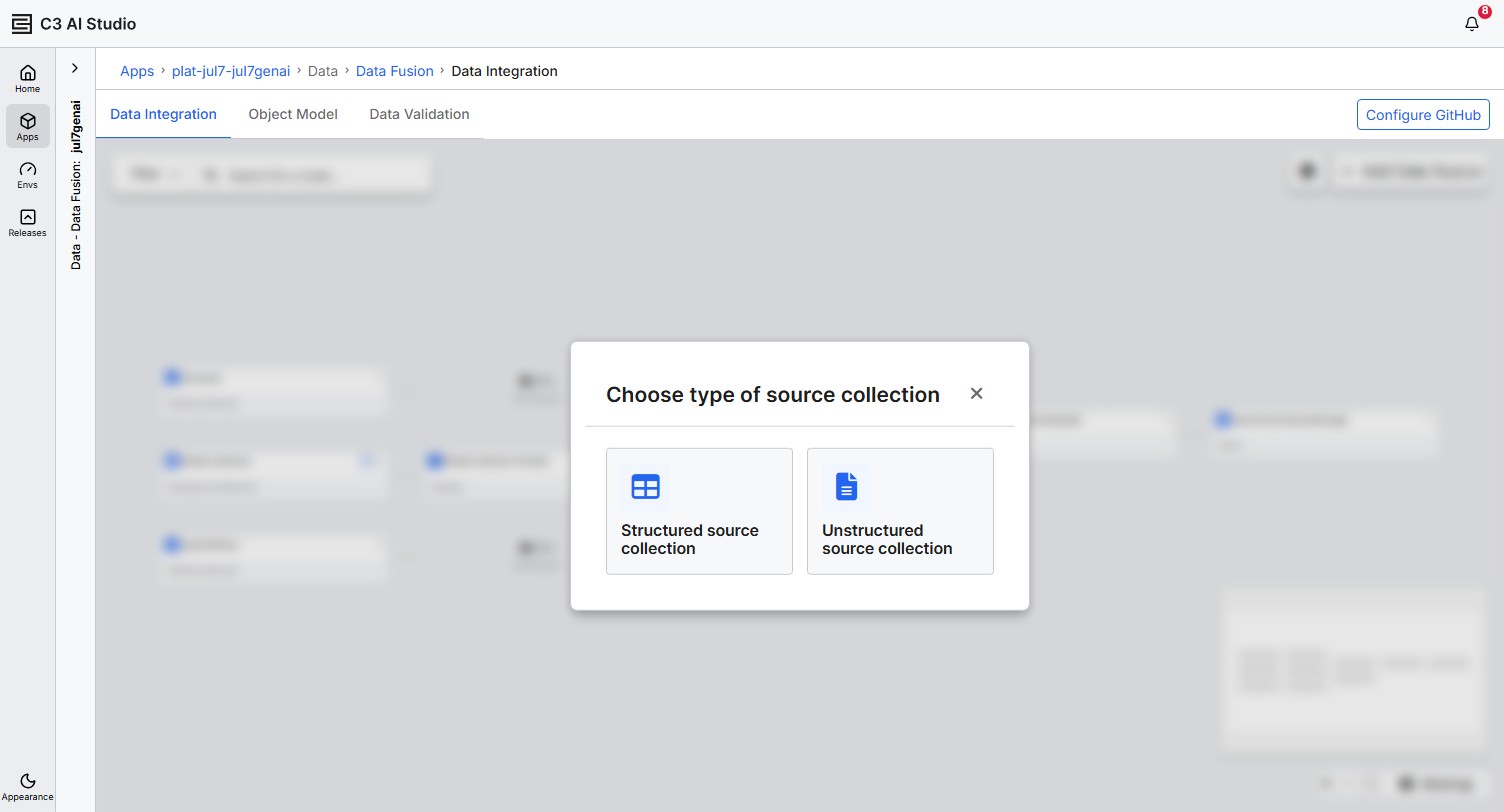
Canonical.In the Choose type of source collection dialog, select Unstructured source collection.
In the Set Source File Path dialog, leave Create new File Source Collection selected and enter a Name. For example,
my_first_udi_pipeline.Select Upload Files and select your sample PDF.
Select the checkbox next to the file in the table, then select Save.
The canvas adds your new source collection and a placeholder Chunker node.
Step 3: Configure the Chunker
- Select the Chunker (Add chunker) placeholder.
- The Configure Chunker panel opens with the Balanced preset selected and a prepopulated Name field.
- Leave the defaults and select Save.
Leave the Balanced preset for the Quickstart. To learn about the Text-Focused and Table-Focused presets, the LLM Model dropdown, layout-detection thresholds, and verbalization prompts, see Configure the Chunker.
The canvas adds three downstream placeholders: Entity Extractor, Metadata Tagger, and Embedder. The Quickstart skips the optional Entity Extractor and Metadata Tagger. To learn when and how to add them, see Configure Metadata Tagging and Configure Entity Extraction.
Step 4: Configure the Embedder
- Select the Embedder (Add embedder) placeholder.
- Leave Embedding Model set to Multilingual E5 Large.
- Enter a Retriever ID. For example,
my_first_udi_retriever. - Leave the prepopulated Name field at its default.
- Select Save.
Leave Multilingual E5 Large selected for the Quickstart. To learn about the other embedding-model options, the Include Metadata in Embeddings toggle, and the Retriever ID naming convention, see Configure the Embedder.
The canvas creates the vector-store entity node automatically. The pipeline now has all the required nodes.
Step 5: Run the pipeline
Select the green Execute button on the source collection node.
In the Configure Runtime Parameters dialog, select Sync Source Collection.
Switch to the Select files tab and select the checkbox next to your sample PDF.
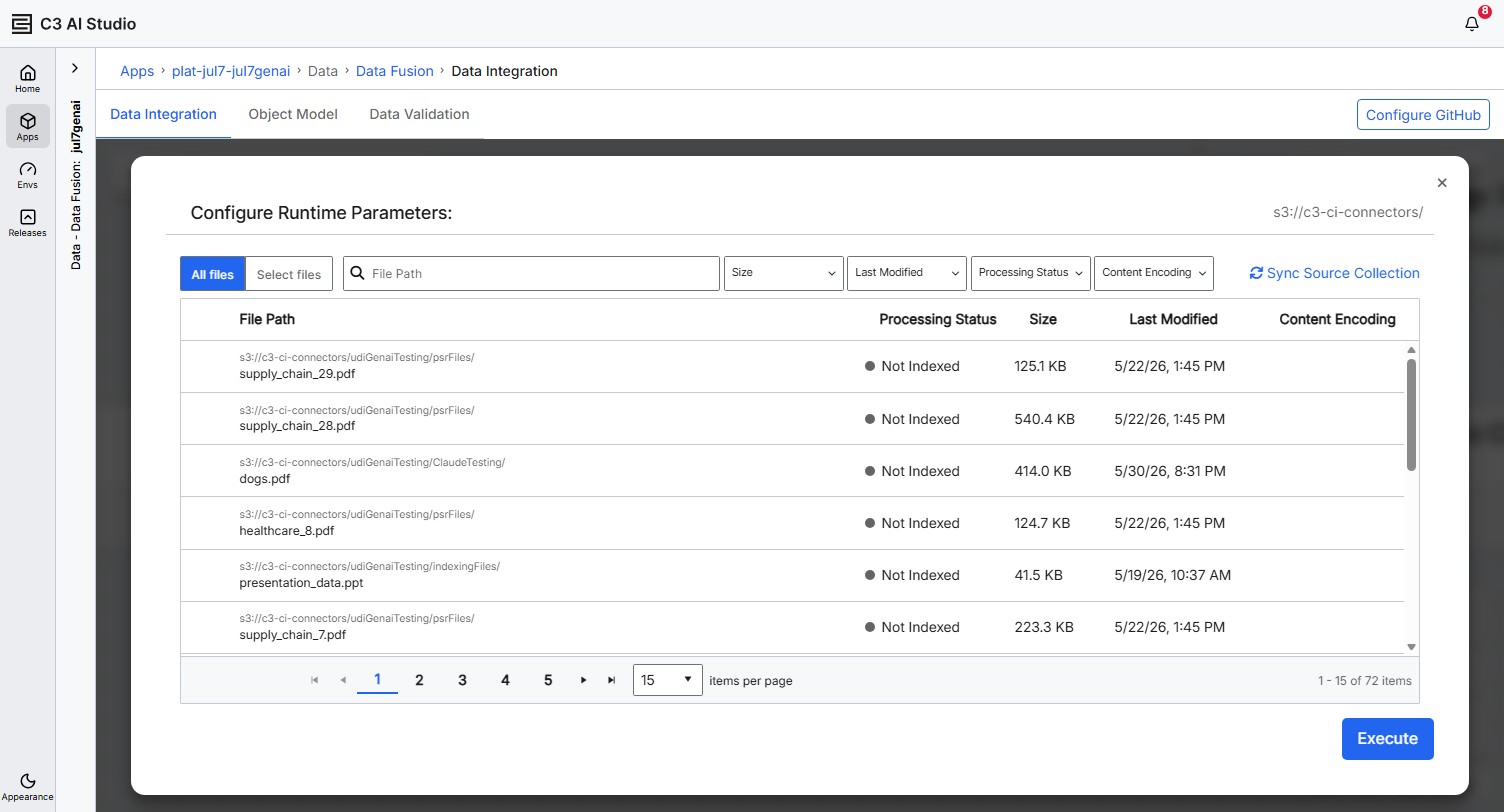
Select Execute at the bottom of the dialog.
The platform submits a batch job. Watch the file's Processing Status column transition through Syncing → Chunking → Chunked → Indexing → Indexed. To learn about the other status values and how to troubleshoot failures, see Monitor Pipeline Execution.
Step 6: Verify the run
Open the source collection's Open menu kebab and select View run status. In the File Processing Status section, watch your sample PDF transition through the pipeline-stage tiles. When the INDEXED tile shows 1, the file is ready for retrieval.
For the underlying batch job, follow the View Batch Job link in the modal. See Monitor Pipeline Execution for the full modal walkthrough.
Next steps
You now have a working UDI pipeline. To adapt the pipeline for production use:
- Swap
Canonicalfor an external source system. See Create an Unstructured Source Collection. - Add metadata tagging or entity extraction. See Configure Metadata Tagging and Configure Entity Extraction.
- Route extracted entities to your application's data model. See Configure the Load Destination.
- Tune the Chunker and Embedder for your corpus. See Configure the Chunker and Configure the Embedder.
Build your own UDI pipeline (reference)
The Quickstart uses default settings and skips the optional nodes. The sections below provide the full reference for each pipeline node and decision point.
1. Choose a source for your documents
Connect the pipeline to a supported source: the platform's built-in Canonical storage or an external connector for Amazon S3, Google Cloud Storage, Azure Blob Storage, OneDrive or SharePoint, or Google Drive. Choose the source system, select an authentication method, and create a source collection.
For details, see Create an Unstructured Source Collection.
2. Configure the Chunker
Pick a parsing preset (Balanced, Text-Focused, or Table-Focused), choose an LLM client, and tune layout detection or verbalization prompts.
For details, see Configure the Chunker.
3. Configure downstream processing
After you save the Chunker, the canvas exposes three downstream nodes that run in parallel paths off the Chunker output:
- Metadata Tagger (optional): Adds LLM-generated tags to each chunk. For details, see Configure Metadata Tagging.
- Entity Extractor (optional): Extracts structured entities from chunks. For details, see Configure Entity Extraction.
- Embedder (required): Generates the vectors that downstream search reads. For details, see Configure the Embedder.
You can add the optional nodes later. They aren't required to ship the first version of your pipeline.
4. Configure the Load Destination
If your pipeline includes an Entity Extractor, decide where extracted entities land: in your application's data model or in an external file destination.
For details, see Configure the Load Destination.
5. Execute the pipeline
Sync the source collection, pick All files or Select files, and run.
For details, see Execute the Pipeline.
6. Monitor processing status
Track per-file status and troubleshoot failures or unexpected Not Indexed results.
For details, see Monitor Pipeline Execution.
7. Sync and save
For incremental indexing, sync the source collection regularly. The platform processes new files on the next execute. Save the pipeline configuration so it persists across application restarts.