Create an Unstructured Source Collection
The first step in building a Unstructured Data Integration (UDI) pipeline is to connect the canvas to a location that holds your documents. UDI uses a two-layer model:
- A FileSourceSystem is the storage connection: an Amazon S3 bucket, an Azure Blob container, a Google Drive folder, the platform's built-in
Canonicalinbox, and so on. - A source collection is a UDI-specific wrapper. It points at a path inside the source system and feeds files into the pipeline.
You need one source system and one source collection for each UDI pipeline.
Select a source system
UDI consumes documents from any file-based source. Choose between the platform's built-in Canonical source system and an external connector.
Use the Canonical source system when you must:
- Test the UDI pipeline without provisioning external storage.
- Upload a small set of documents directly through the C3 AI Studio UI.
- Build a Quickstart or a proof of concept that does not need to scale.
- Avoid managing cloud credentials in the platform.
The Canonical source system uses the application's default object store. It is not suitable for production document volumes or organization-wide document libraries.
Use an external file source system (Amazon S3, Azure Blob Storage, Google Cloud Storage, OneDrive or SharePoint, or Google Drive) when you must:
- Index documents that already live in a cloud bucket or document repository.
- Process production-scale document libraries that have their own access controls.
- Reuse existing data-engineering pipelines that land documents in a known cloud location.
- Keep document ownership and lifecycle outside of the platform.
Add an external file source system
If you choose an external source system, configure the connection through the Configure Connector wizard. After you pick a connector, the wizard title updates to the connector you selected (for example, Configure S3 Connector). The wizard has four steps for most connectors — Connector, Destination, Authentication, and Review. Some connectors that expose extra parameters add an optional Advanced step between Authentication and Review.
On the Data Fusion canvas, select + Add Data Source at the top right. The Configure Connector wizard opens with a setup progress indicator on the left.
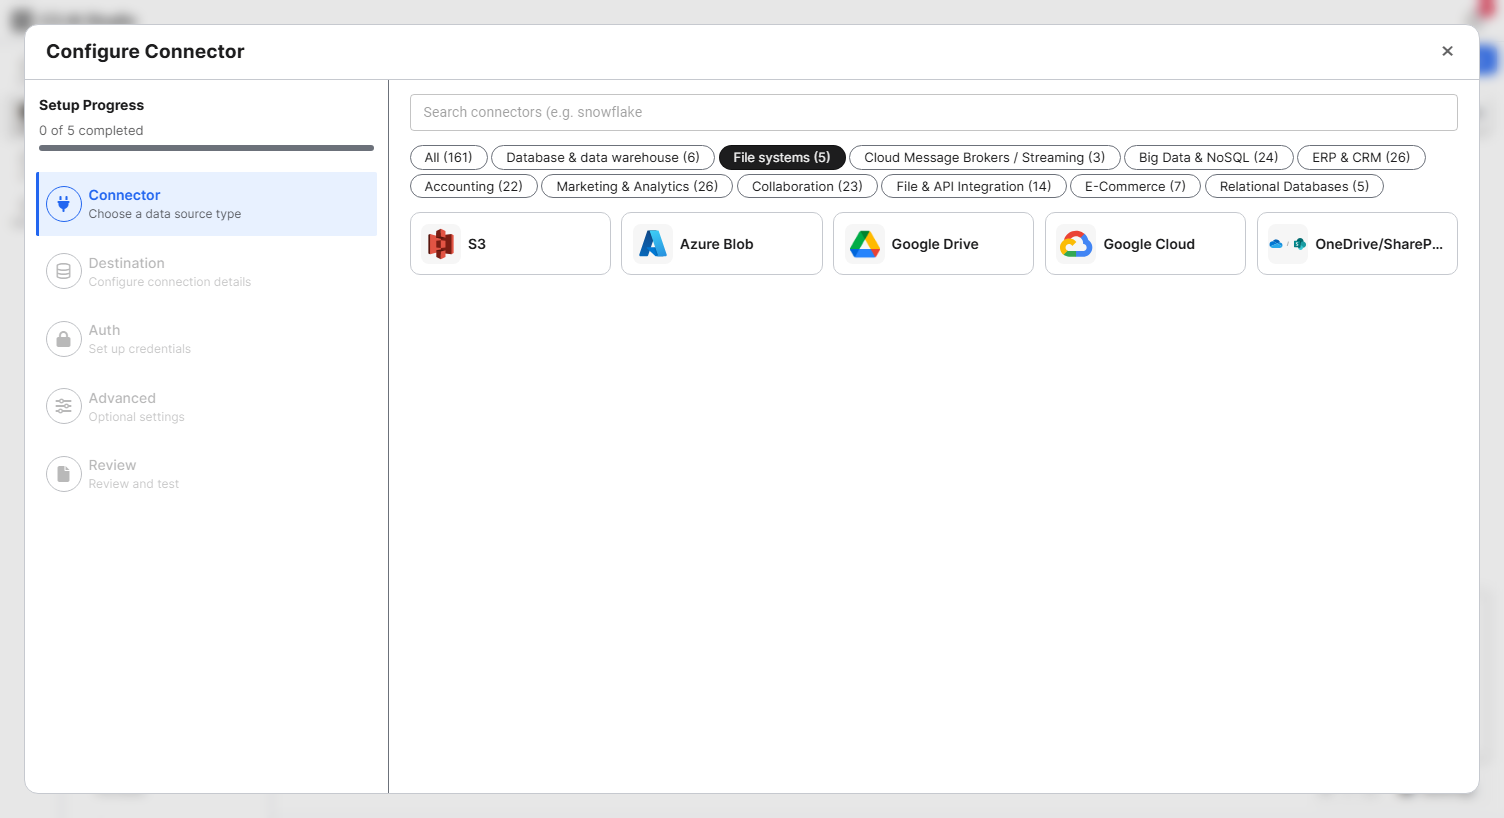
Step 1: Connector. Browse or filter the connector catalog by category (for example, Database & data warehouse, File systems, Cloud Message Brokers / Streaming). For UDI, expand File systems and select S3, Azure Blob, Google Drive, Google Cloud, or OneDrive/SharePoint.
Step 2: Destination. Configure the connection details.
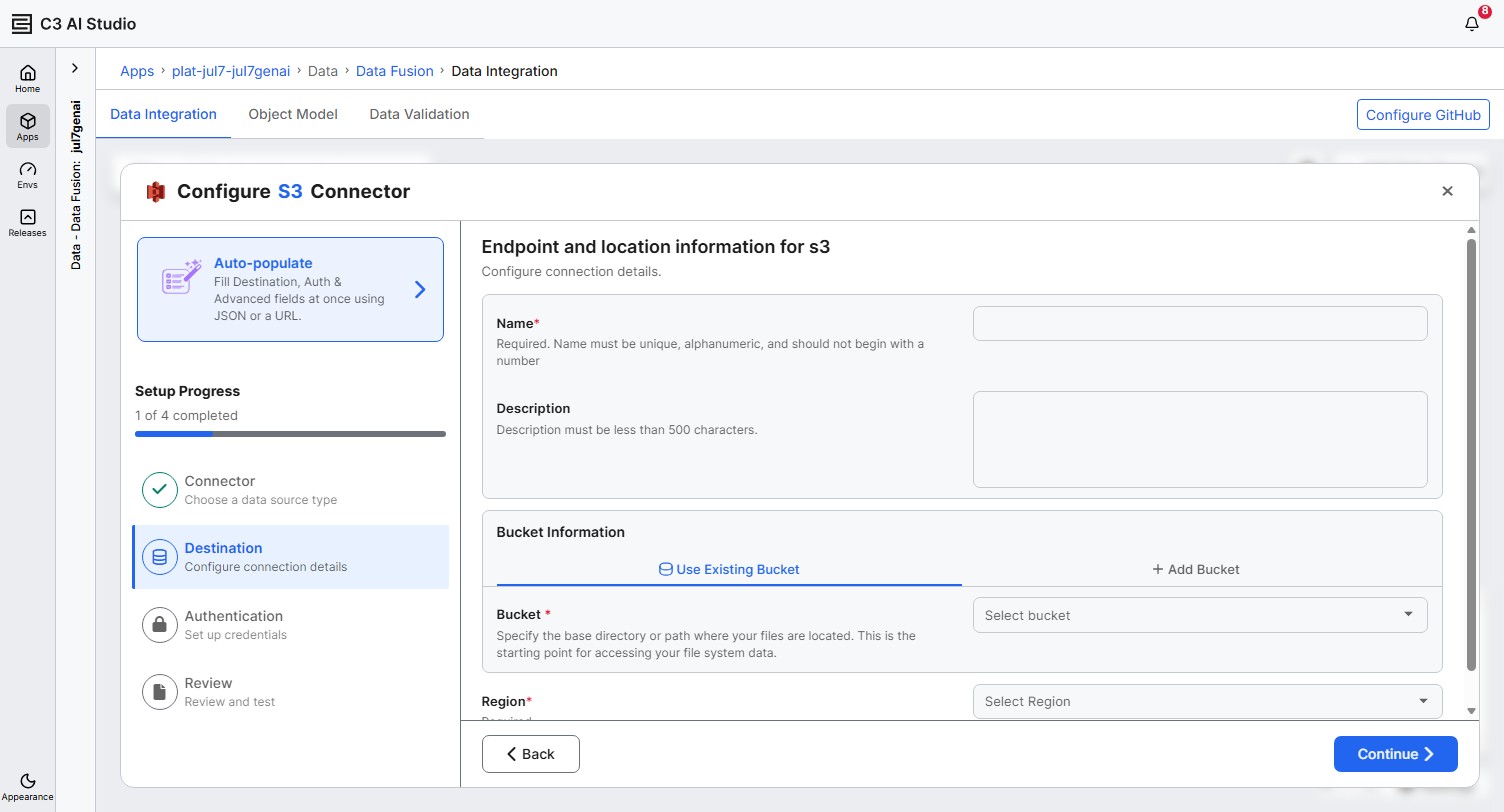
For Amazon S3, the wizard prompts for:
- name: A unique, alphanumeric name. The name must not begin with a number. For example,
my_s3_documents. - description (optional): Up to 500 characters.
- Bucket Information: Choose Use Existing Bucket to pick from buckets that are already registered on the cluster, or Add Bucket to enter a bucket and folder path manually. The placeholder for the manual path is
my-bucket/. Don't include a URL prefix such ass3://. - region: A required dropdown. Type to filter, or select a region.
To skip manual entry, select the Auto-populate panel at the top of the wizard and paste a JSON object or a connector URL. The wizard fills the Destination, Auth, and Advanced fields from the input.
- name: A unique, alphanumeric name. The name must not begin with a number. For example,
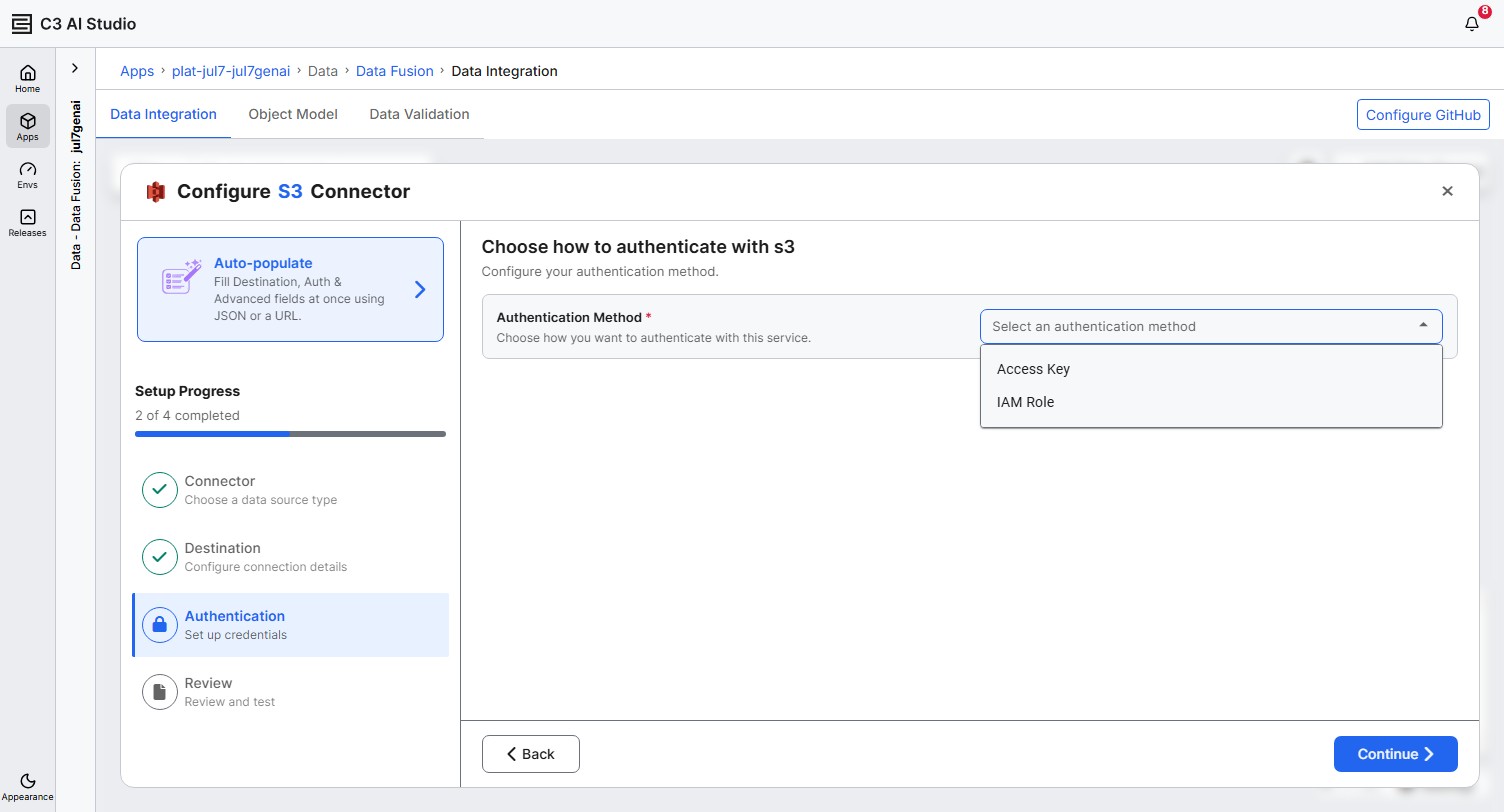
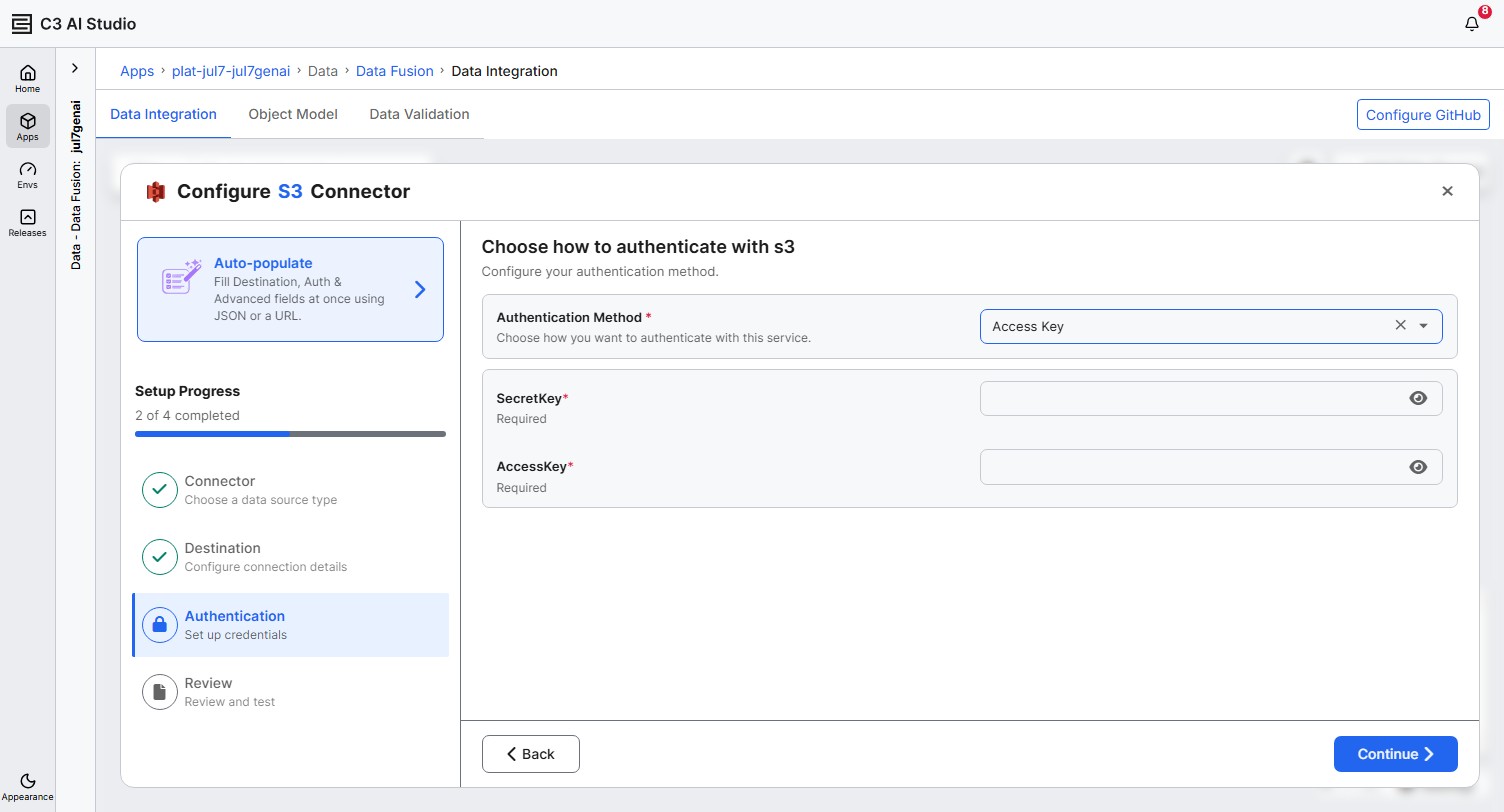
Step 3: Authentication. Pick the authentication method that your cluster supports. The wizard displays the credential fields for the method you select. See Select an authentication method.
Optional Advanced step (when present). Some connectors expose extra parameters on an Advanced step between Authentication and Review. Amazon S3 has no Advanced step. For most UDI source systems, accept the defaults.
Final step: Review. Confirm the configuration and select Save and Test to verify that the credentials reach the bucket. If the test fails, the wizard shows an AI Error Analysis message that suggests what to fix. After the wizard displays
Success, select Save and Close. The new source system appears on the canvas.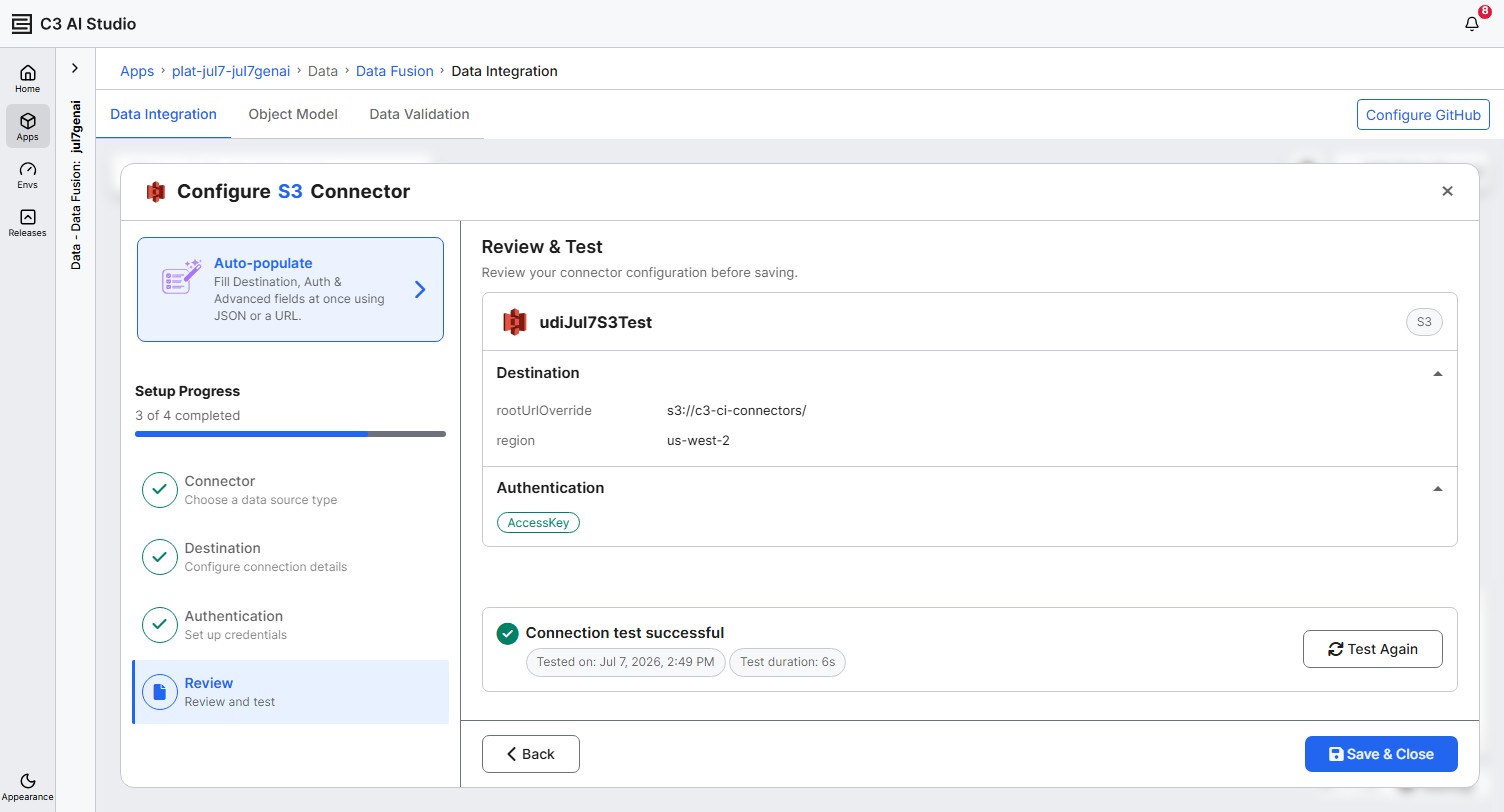
Select an authentication method
Amazon S3, Azure Blob, and Google Cloud each expose up to three authentication methods on the Authentication step. Pick the method that your cluster supports.
Use EKS Pod Identity or IRSA for Amazon S3, Workload Identity for Google Cloud Storage, or Managed Identity for Azure when:
- Your C3 Agentic AI Platform cluster runs on the same cloud as your bucket.
- You don't want to manage static credentials.
- Your security policy forbids long-lived access keys.
Use IAM Role for Amazon S3 or the equivalent role-assumption method for Google Cloud Storage or Azure when:
- Your cluster must assume a cross-account role to reach the bucket.
- The bucket lives in a different cloud account than the cluster.
- You manage access through your organization's role-based identity service.
Use IAM Access Keys for Amazon S3, a Service Account Key for Google Cloud Storage, or a Storage Account Key for Azure when:
- The cluster can't use its own identity to reach the bucket.
- You're testing in a sandbox environment.
- The bucket owner has issued explicit static credentials to you.
After you select an authentication method, additional credential fields appear on the Authentication step. For example, AccessKey and SecretKey appear for IAM Access Keys.
Create the source collection
After a file source system exists on the canvas, you create a source collection on top of it.
On the canvas, select the Files / Set file path sub-node attached to your file source system.
The Choose type of source collection dialog opens with two options: Unstructured source collection and Structured source collection. This guide uses Unstructured; for tabular data pipelines, choose Structured and follow the Structured Data Integration docs.
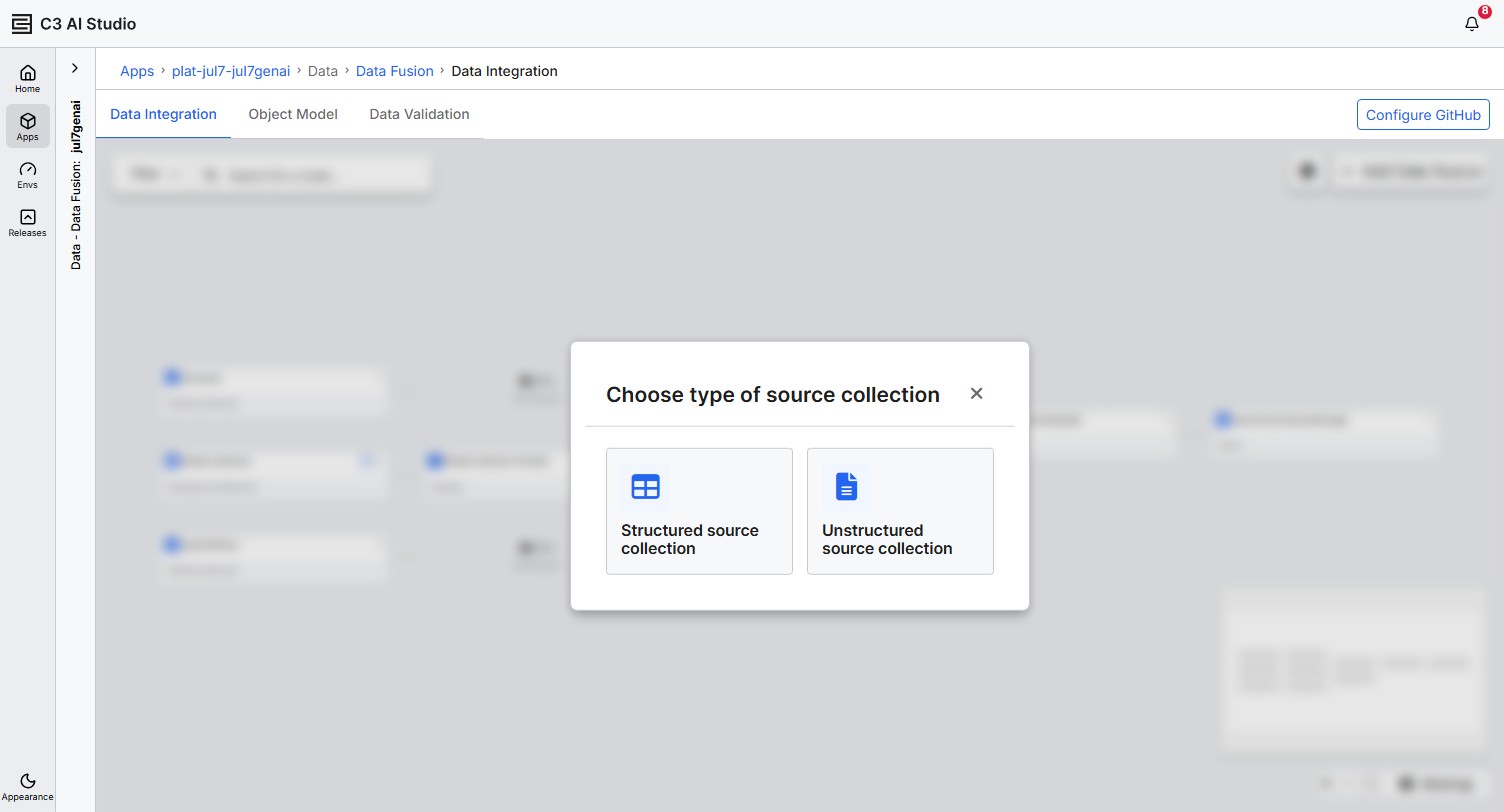
Select Unstructured source collection. The Set Source File Path dialog opens.
Choose a source-collection mode
The Set Source File Path dialog offers two modes.
Use Create new File Source Collection when:
- You're starting a new UDI pipeline.
- You want a dedicated inbox path for the pipeline's documents.
Use an existing File Source Collection when:
- A collection already points at the path you want.
- Multiple UDI pipelines must share the same set of source documents.
To create a new collection, enter:
- Name: A unique alphanumeric name for the collection.
- Description: Optional context for downstream users.
Add documents to the collection
The dialog shows the Current inbox URL as a breadcrumb. For the Canonical source system, the URL looks like azure://plat/<env>/<app>/fs/<CollectionName>/files/. For Amazon S3, the URL looks like s3://<bucket>/.
- Select New Folder to organize files under a sub-path.
- Select Upload Files to upload documents directly from your computer. The button opens your operating system's file picker; select one or more documents.
- After upload, files appear in the table with Name, Last Modified, Size, and Kind columns.
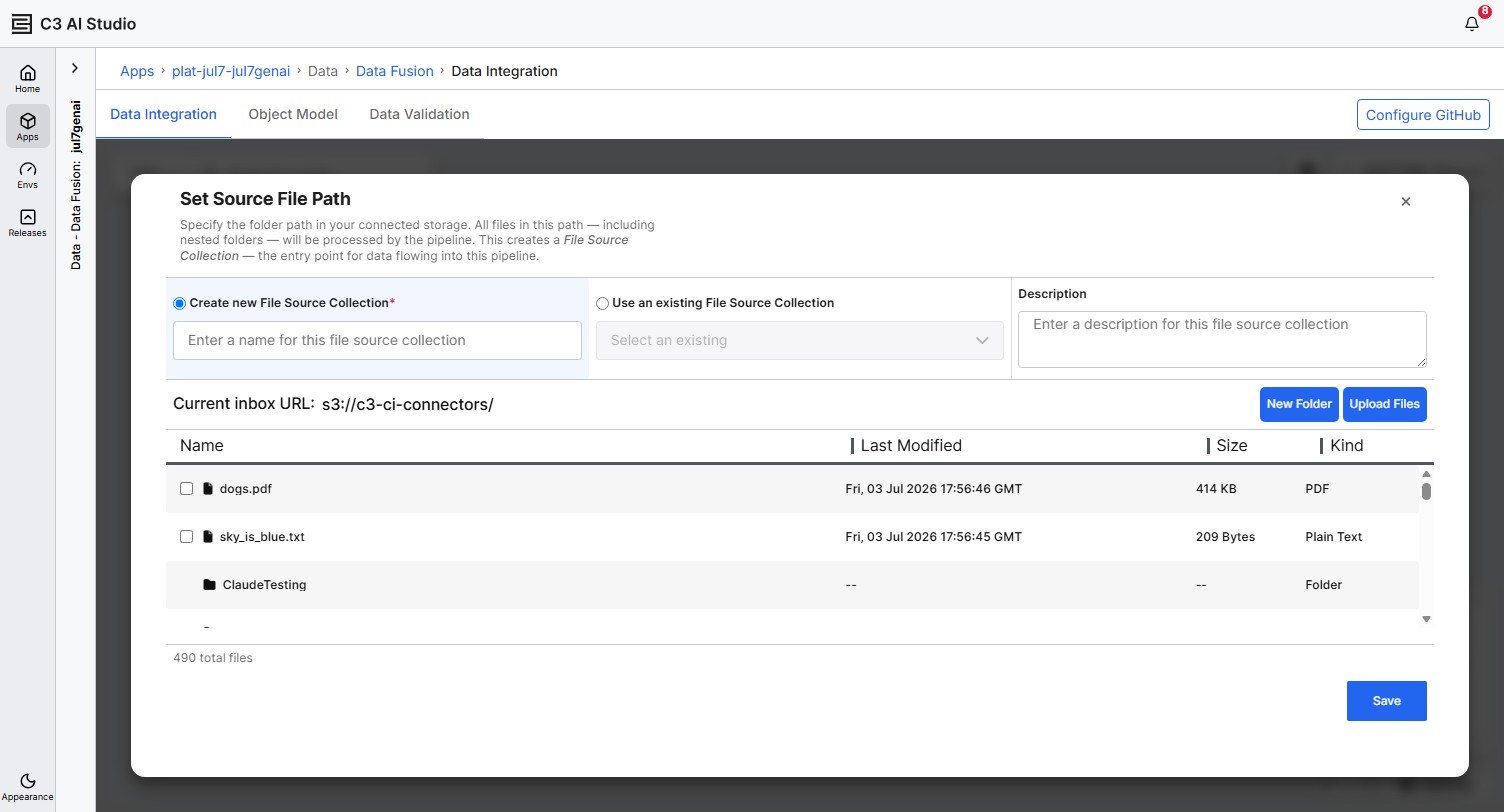
To restrict the collection to specific files, select the Select file checkbox next to each file. Leave the checkboxes unselected to include every file in the inbox.
Save the source collection
Select Save at the top of the dialog. The canvas adds three nodes to your new pipeline:
- The source collection node, with the name you provided.
- A Files / Set file path sub-node.
- A Chunker (Add chunker) placeholder.