Manage ERD Node Groups
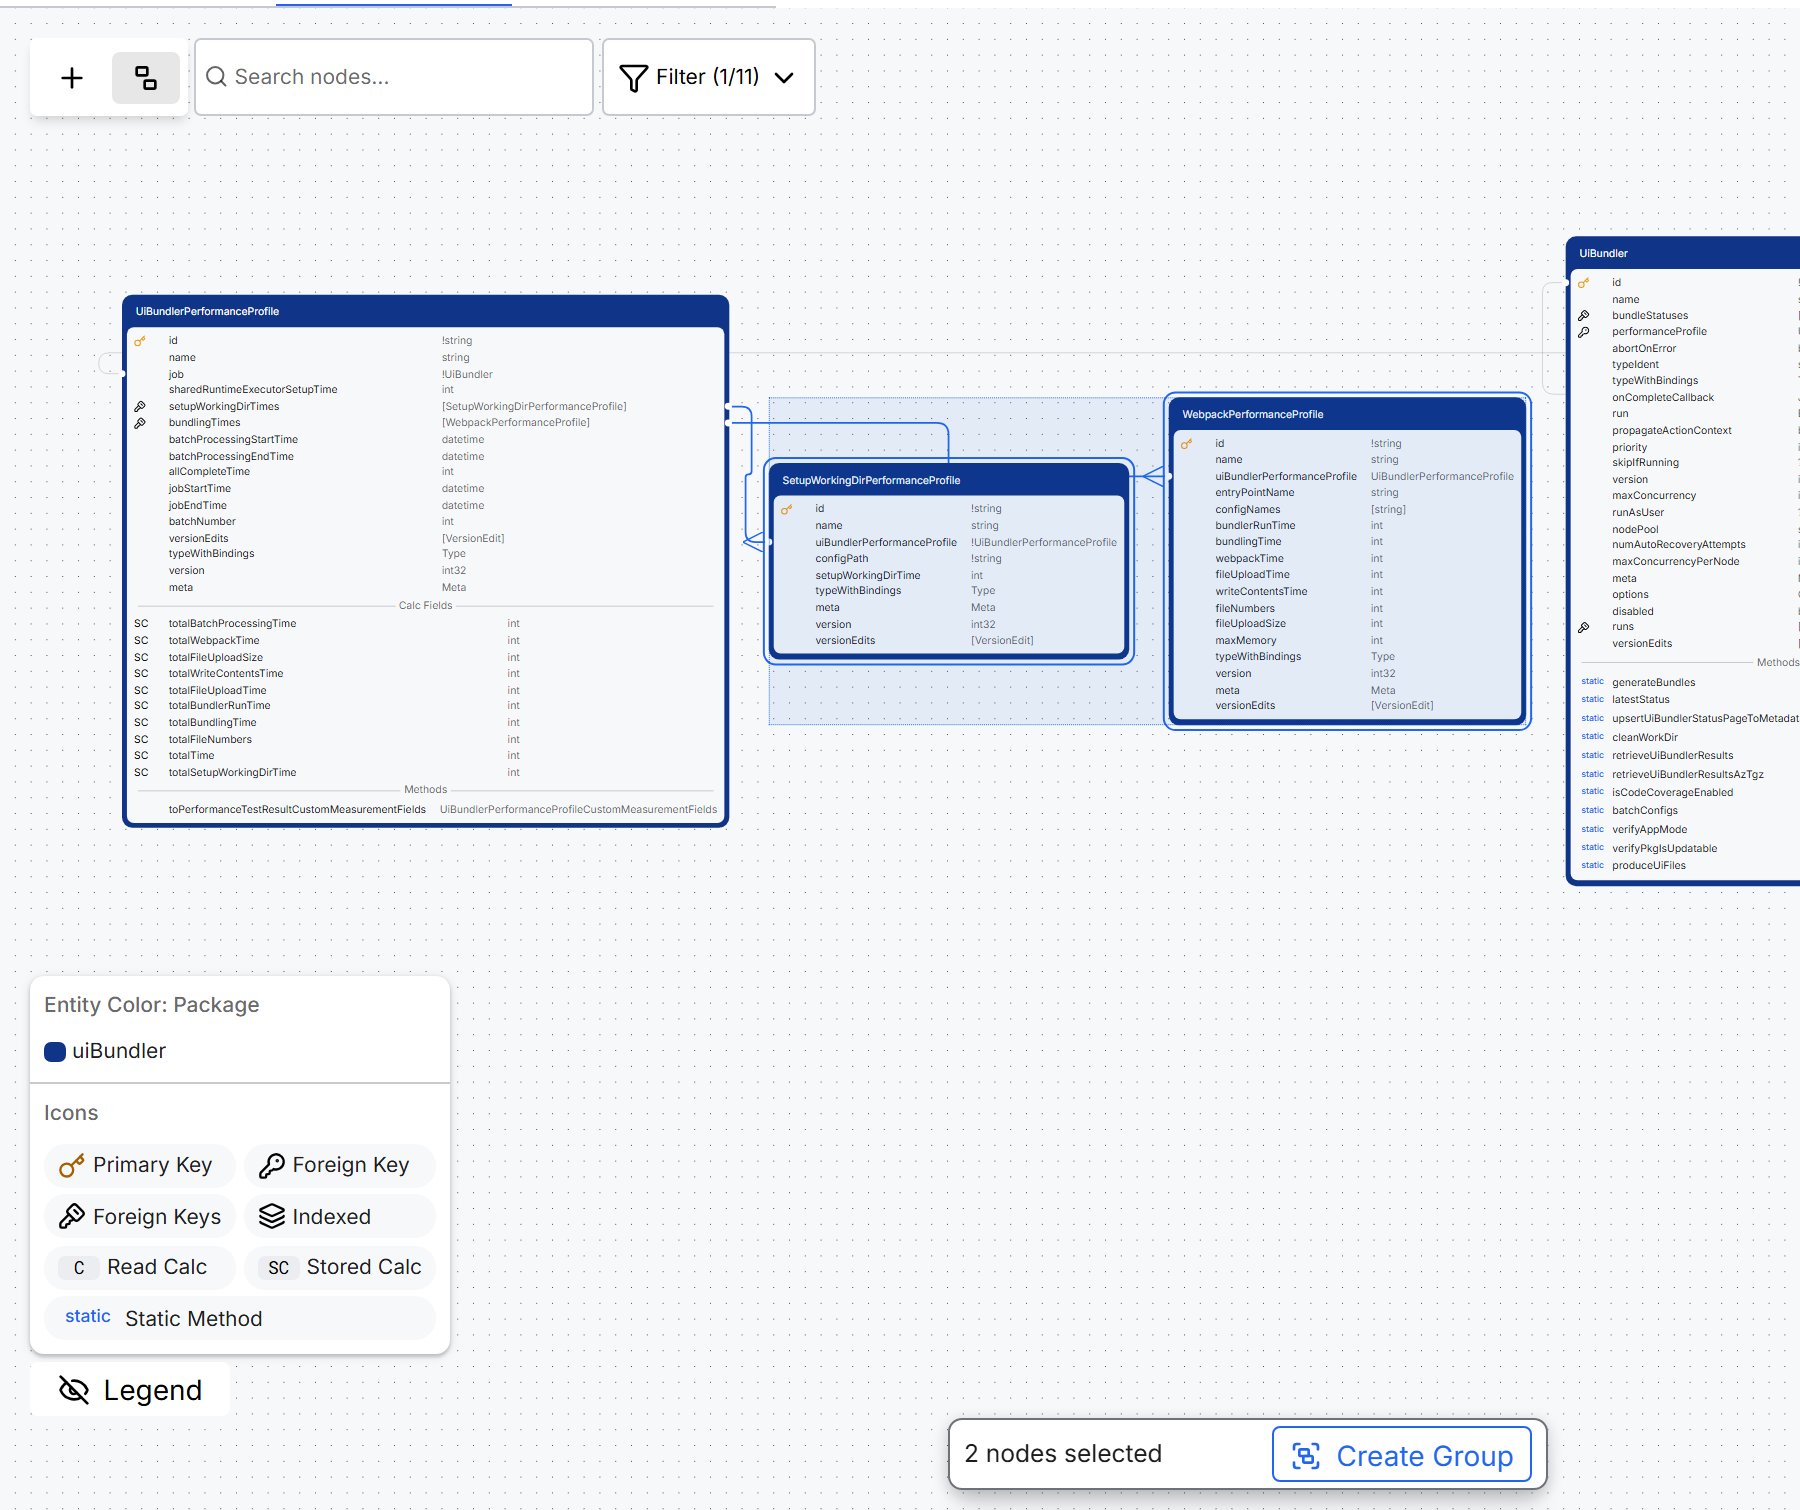
The Diagram view of the Object Model tab in Data Fusion shows your data model as an entity relationship diagram (ERD). Each entity Type appears as a box, called a node. Node groups are named containers that hold related nodes.
Group changes stay in your browser until you save the view; see "Save your groups" in this topic. For when to group nodes, see Overview of ERD Node Grouping.
Create a group
Create a group from two or more nodes that are not in a group yet. A group holds nodes only, not other groups. To create a group:
In C3 AI Studio, open your application, select Data > Data Fusion, select the Object Model tab, and then select Diagram view.
Select two or more nodes in one of these ways:
- Hold Ctrl on Windows or Linux, or Command on macOS, and select each node.
- In the entity toolbox, select Toggle multi-select mode, and then select each node or drag across the nodes.
In the selection bar, select Create Group.
Create Group is unavailable when a selected node is already in a group or the selection includes a group. The tooltip on Create Group says why.
Type a name for the group, and then press Enter. Choose a name that tells your team what the group holds.
If you press Enter or select outside the title without typing a name, the group gets a generated ID as its name, such as
GROUP_bd1b6c.
The group appears as a container around the selected nodes, with its title on its edge.
Rename a group
Rename a group when its generated ID or its old name no longer describes its nodes. To rename a group:
- Double-click the group title.
- Type the new name.
- Press Enter, or select outside the title, to keep the name. To cancel, press Escape.
Move a group
Move a group to rearrange the diagram. The group's nodes move with the group. To move a group:
- Select the group container, not a node inside it.
- Drag the group to a new location, and then release it.
Arrange nodes in a group
Reposition a node inside its group without moving the rest of the group. To arrange nodes in a group:
- Select a node inside the group.
- Drag the node to a new position in the group, and then release it.
A group sizes itself to fit its nodes and has no resize handle. When you drag a node toward the group's edge, the group grows to fit it. When nodes move closer together, the group shrinks.
Add a node to a group
Add a node that is not in any group to an existing group. To add a node to a group:
- Drag the node over the group.
- Release the node inside the group.
The node joins the group, and the group grows to fit it if needed. A node that is already in a group cannot join another group.
Remove a node from a group
Remove a node from its group with the node's context menu. Dragging a node does not take it out of its group. To remove a node from a group:
- Right-click the node, or hover over it and select Actions.
- Select Remove from Group.
The node leaves the group and stays at the same position in the diagram. The group resizes to fit its remaining nodes.
Use the group toolbar
The group toolbar holds the controls that act on the whole group. The group toolbar appears when you select a group and has three controls:
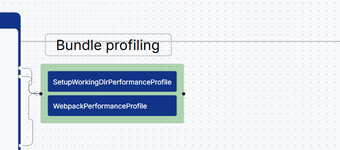
- Collapse or Expand: Collapses the group to a compact container that lists its entity Type names, or expands it to show every node.
- Ungroup: Removes the group. The group's nodes stay in the diagram where they were.
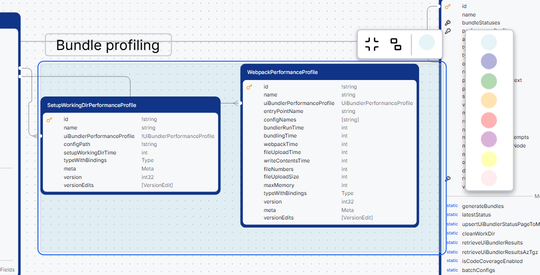
- The color control: Opens a list of eight colors for the group's background, including the color the group uses now.
Collapse or expand a group
Collapse the groups you are not working on to focus on the rest of the diagram. To collapse or expand a group:
- Select the group.
- In the group toolbar, select Collapse or Expand.
Change a group's color
Use colors to tell groups apart at a glance. To change a group's color:
- Select the group.
- In the group toolbar, select the color control, and then select a color.
Ungroup nodes
Ungroup a group when you no longer need it. No confirmation dialog appears. To ungroup nodes:
- Select the group.
- In the group toolbar, select Ungroup.
The group container disappears, and its nodes stay in the diagram.
Save your groups
Groups are saved as part of a view. After you create or change a group, the views list shows an Edited badge until you save the view. To save your groups:
- In the view toolbox, select Save view.
- In the Save View dialog, select Save.
The saved view keeps each group's nodes, name, color, and collapsed or expanded state. When anyone reloads the diagram, the groups appear as saved. Saved views belong to the application, so everyone who opens the view sees the same groups.
To discard unsaved group changes, select Reset view, and then select Reset. For more about views, see Manipulate ERD Views with Object Model.