Configure and Use C3 AI-Managed JupyterLab Notebooks
C3 AI-managed JupyterLab is an on-demand service that helps teams quickly and securely spin up managed JupyterLab notebook instances for their data and AI/ML needs.
C3 AI-managed JupyterLab notebooks are customized with rich productivity extensions and features uniquely designed to increase data scientist productivity, including the following:
One-click startup from C3 AI Studio or one API call in the C3 AI Console.
Automatic user authentication to the C3 AI application environment.
Data and services are available using the Python SDK with no additional configuration.
Notebooks are hosted on dedicated compute infrastructure with selectable resource sizing dedicated to the user, so performance is never compromised. See the Configure JupyterLab notebook service section of this topic.
Collaborative file sharing across all users in the application environment is enabled by an automated file syncing and backup mechanism. See the Save and share files in JupyterLab section of this topic.
Open-source libraries from Conda and PIP are managed through a built-in GUI for authoring and installing runtimes. See the Manage open-source libraries and runtimes section of this topic.
Tutorial notebooks provide examples for developing and managing the end-to-end data science lifecycle. See the Access JupyterLab Tutorial notebooks section of this topic.
Note the difference between JupyterHub and JupyterLab:
- JupyterHub represents the "Jupyter service". Starting JupyterHub in an application allows all users in that App to spawn their own JupyterLab instances. An instance of JupyterHub belongs to an App. *JupyterLab represents the actual "Jupyter" container - it serves the JupyterLab UI and runs kernels. An instance of JupyterLab belongs to a user.
Start a managed notebook instance
You can start a C3 AI-managed notebook instance from C3 AI Studio or from the C3 AI Console of your application.
Start C3 Jupyter service from C3 AI Studio
While viewing your application on the home page or application details page, you'll see a clickable Jupyter icon. Select the Jupyter icon to initiate a C3 AI-managed Jupyter instance.
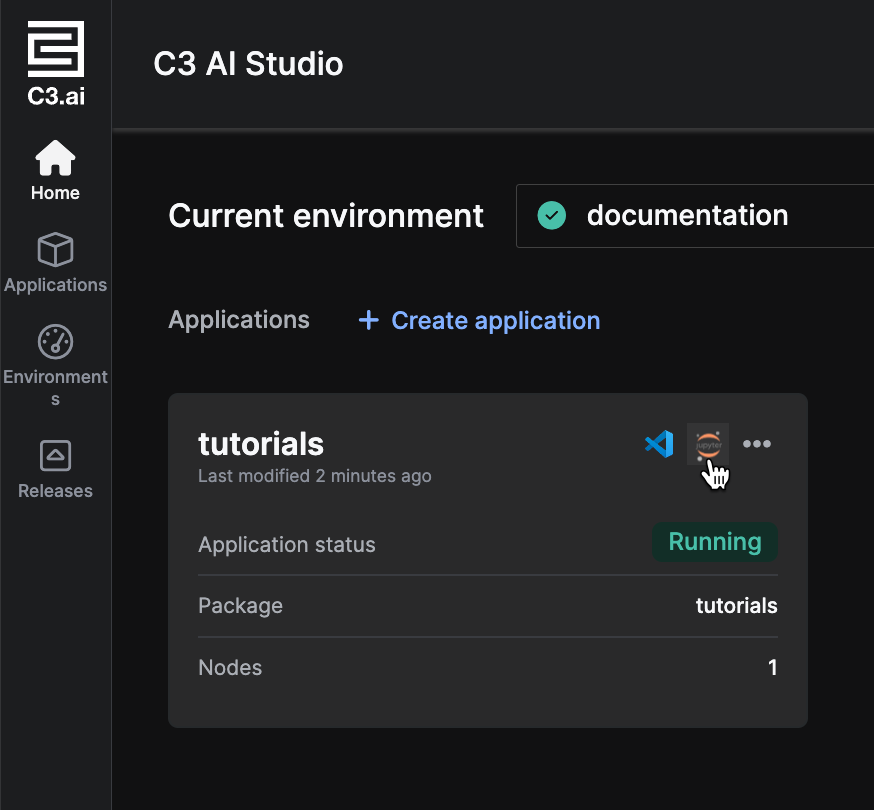
The C3 AI Jupyter experience launches in a new tab. You may need to wait a few minutes for the service to initialize.
Stop the service by logging out
Your JupyterLab server automatically stops when you leave it idle for a period of time. You can also manually stop the server by logging out of the Jupyter.
You can also set a custom idle time. See the Set custom JupyterHub idle time section of this topic.
Stop the service in console
Stopping an application or environment automatically stops the JupyterLab service.
To manually stop Jupyter without stopping your app or environment, navigate to console and run JupyterHub.stop().
This hibernates your JupyterLab notebook service, freeing up 2 GiB memory and 0.8 vCPU compute. The state of the service is maintained in a persistent volume, including configurations and files.
When you run JupyterHub.ensureService(), your service recovers its previous state.
All active Kernels in the notebook service stop automatically when the service stops. You cannot recover in-memory data when this happens.
Configure JupyterLab notebook service
This section describes common Jupyter service configurations carried out by an Application Administrator.
Configurations in this section are set at the application level by default. However, Cluster and Environment Administrators can also set these configuration at the cluster or environment level, respectively.
Add a new resource configuration
If your team needs a larger resource option in JupyterLab, you can add a new Jupyter.ResourceProfile for all users in the application.
Resource configurations are picked up when you start a new managed JupyterLab instance, so make sure you start a new instance if you add a new resource profile.
Create a new resource profile in the C3 AI Console
Create a new resource profile by running the following command in your application C3 AI Console:
JavaScriptJupyter.ResourceProfile.make({'name': 'Custom Profile', 'cpu':16, 'memoryMb': 24*1024}).setConfig()Verify your updated list of resource profiles:
JavaScriptc3Grid(Jupyter.ResourceProfile.listConfigs().collect())Navigate to JupyterLab and select the new profile.
a. Select the resource configuration menu, then select Change. If the resource configuration menu is already open, close and re-open this menu.
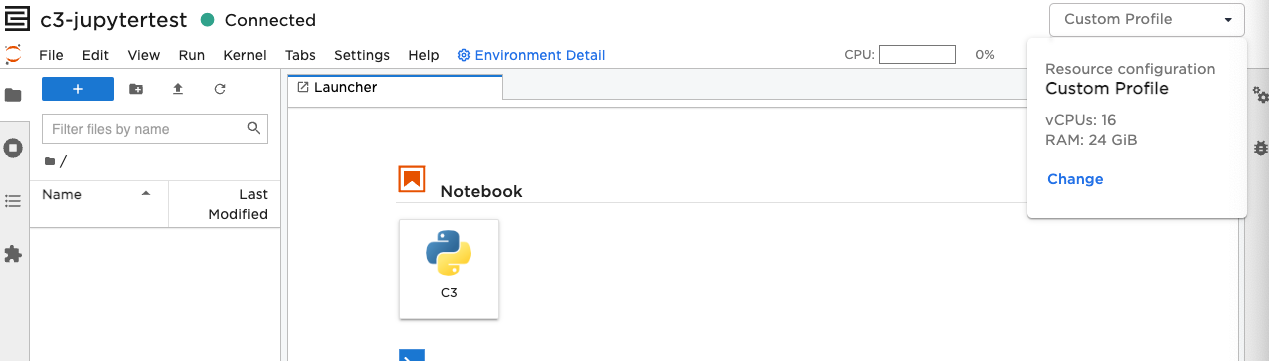
b. Select your new Resource Profile, and choose Confirm to use it.
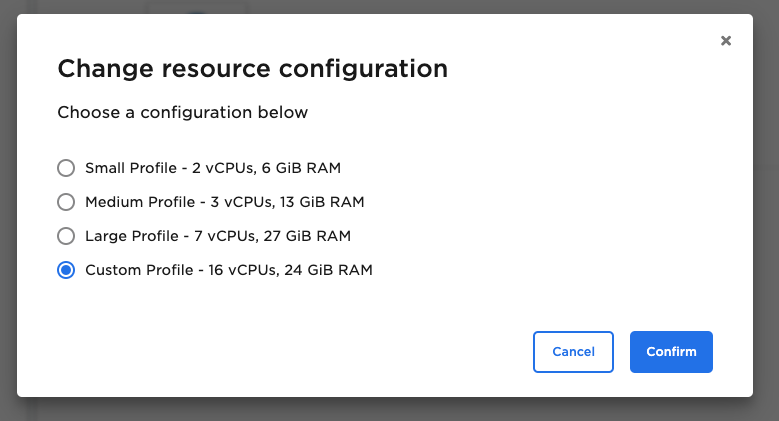
When creating a custom resource profile, confirm that your requirements are supported by the cluster. If they are not supported, your resource profile doesn't load.
Increase shared memory resources in JupyterHub
If you want to share memory between processes, you can update the JupyterHub config using the following command in console:
JupyterHub.config().setConfigValue("jupyterSingleUserSharedMemoryEnabled", true)You can also increase your shared memory size limit using the following command:
JupyterHub.config().setConfigValue("jupyterSingleUserSharedMemorySizeLimit", "<newSize>")Where <newSize> is the new value of the memory size limit. By default, the memory size limit is 2Gi. For more information about memory sizes, see Kubernetes' documentation, Memory resource units.
Save and share files in JupyterLab
File sharing across all users in the application environment is enabled by an automated file syncing and backup mechanism. Stopping JupyterLab servers and or hub service does not remove data from the JupyterLab server except for in-memory data.
Understand file management and icons
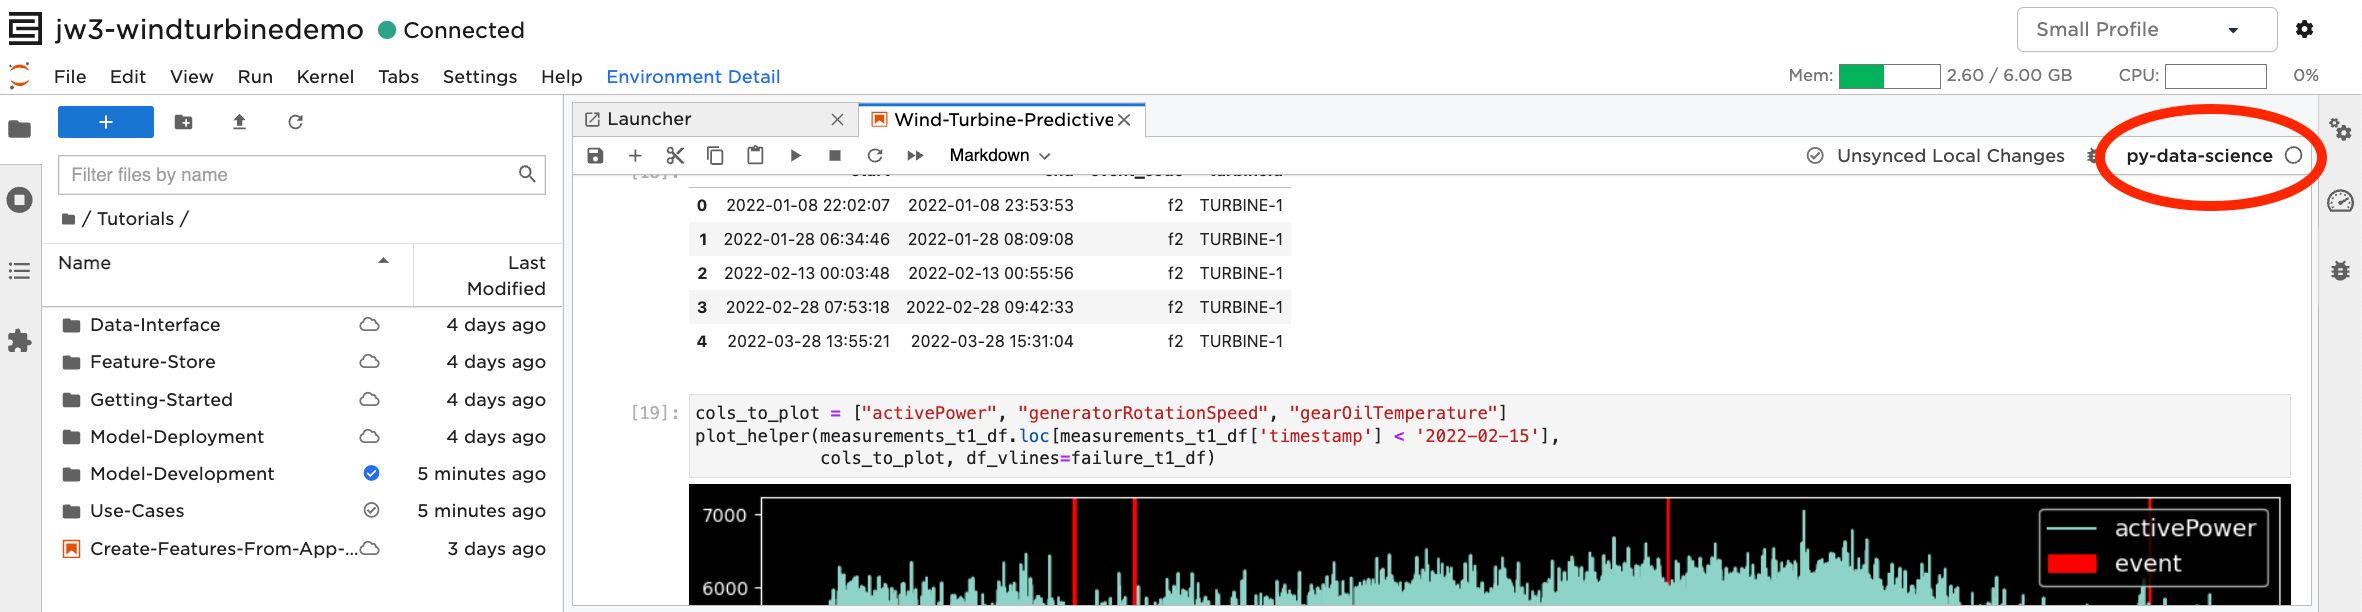
C3 AI-managed JupyterLab notebooks come with a file syncing feature to make notebooks and files sharable and reliably backed up. The latest version of all notebooks, files, and folders are available across every connected notebook that syncs the file.
Sync icons appear in the file directory and at the top of the notebook in JupyterLab, and indicate the sync status of the file or folder.
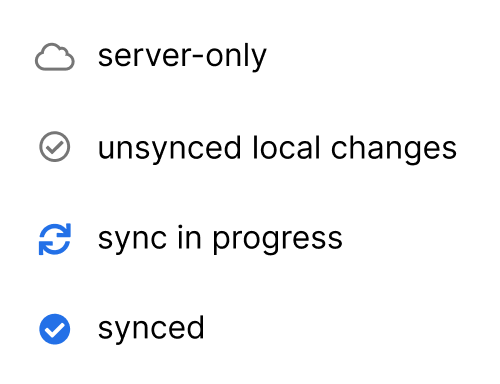
Server-only - A cloud icon indicates that the file is not yet downloaded to the JupyterLab instance.
Unsynced local changes - A gray and white check mark indicates that there is a newer version in your JupyterLab instance that is not yet synced. You can see this icon on folders that are not fully synced.
Sync in progress - Blue arrows going in a circle means your file is being synced. You can see this icon when you sync a version from your JupyterLab instance to the server, or when you sync a version from the server to your Jupyter instance.
Synced - A blue and white check mark means a version of the file was synced with the server at the timestamp shown. You can see this icon on folders where are all contents are synced.
Sync a notebook, file, or folder
Notebooks are synced automatically when opened, saved, or a 5-minute checkpoint is reached on an open notebook. All managed notebook instances in the same application environment show the latest synced files and notebooks.
Files and directories are synced manually to provide more control over what files are shared.
Manage open-source libraries and runtimes
C3 AI Runtime Management makes it easy to create, install, and share your own runtimes in a visual tool that is included in your managed JupyterLab instance.
JupyterLab instances come with one loaded runtime (py-data-science) and several pre-installed runtime definitions with popular libraries to help get teams up and running with their favorite libraries.
Runtime definitions are stored as metadata in the application package. For custom runtimes, include the runtime in your application code to create production-ready experiments.
Create a new runtime from open-source libraries
Creating and editing runtimes means changing the metadata of your application package. This is a development-time activity.
Do not alter runtimes for any production system.
Check application is in DEV mode
To create and edit runtimes, you need to start your application to DEV mode to make changes.
First, check that your application is in DEV mode. Run
c3.Pkg.isUpdatable; ifFalse, then your application is currently in PROD mode.If your application is in PROD mode, you need to restart your app in the DEV mode.
Create a new runtime
Select Runtime Management from the configuration menu.

Select Create Runtime.
Complete the form to choose a Language Version, choose Conda Channels, and add packages from your channels.
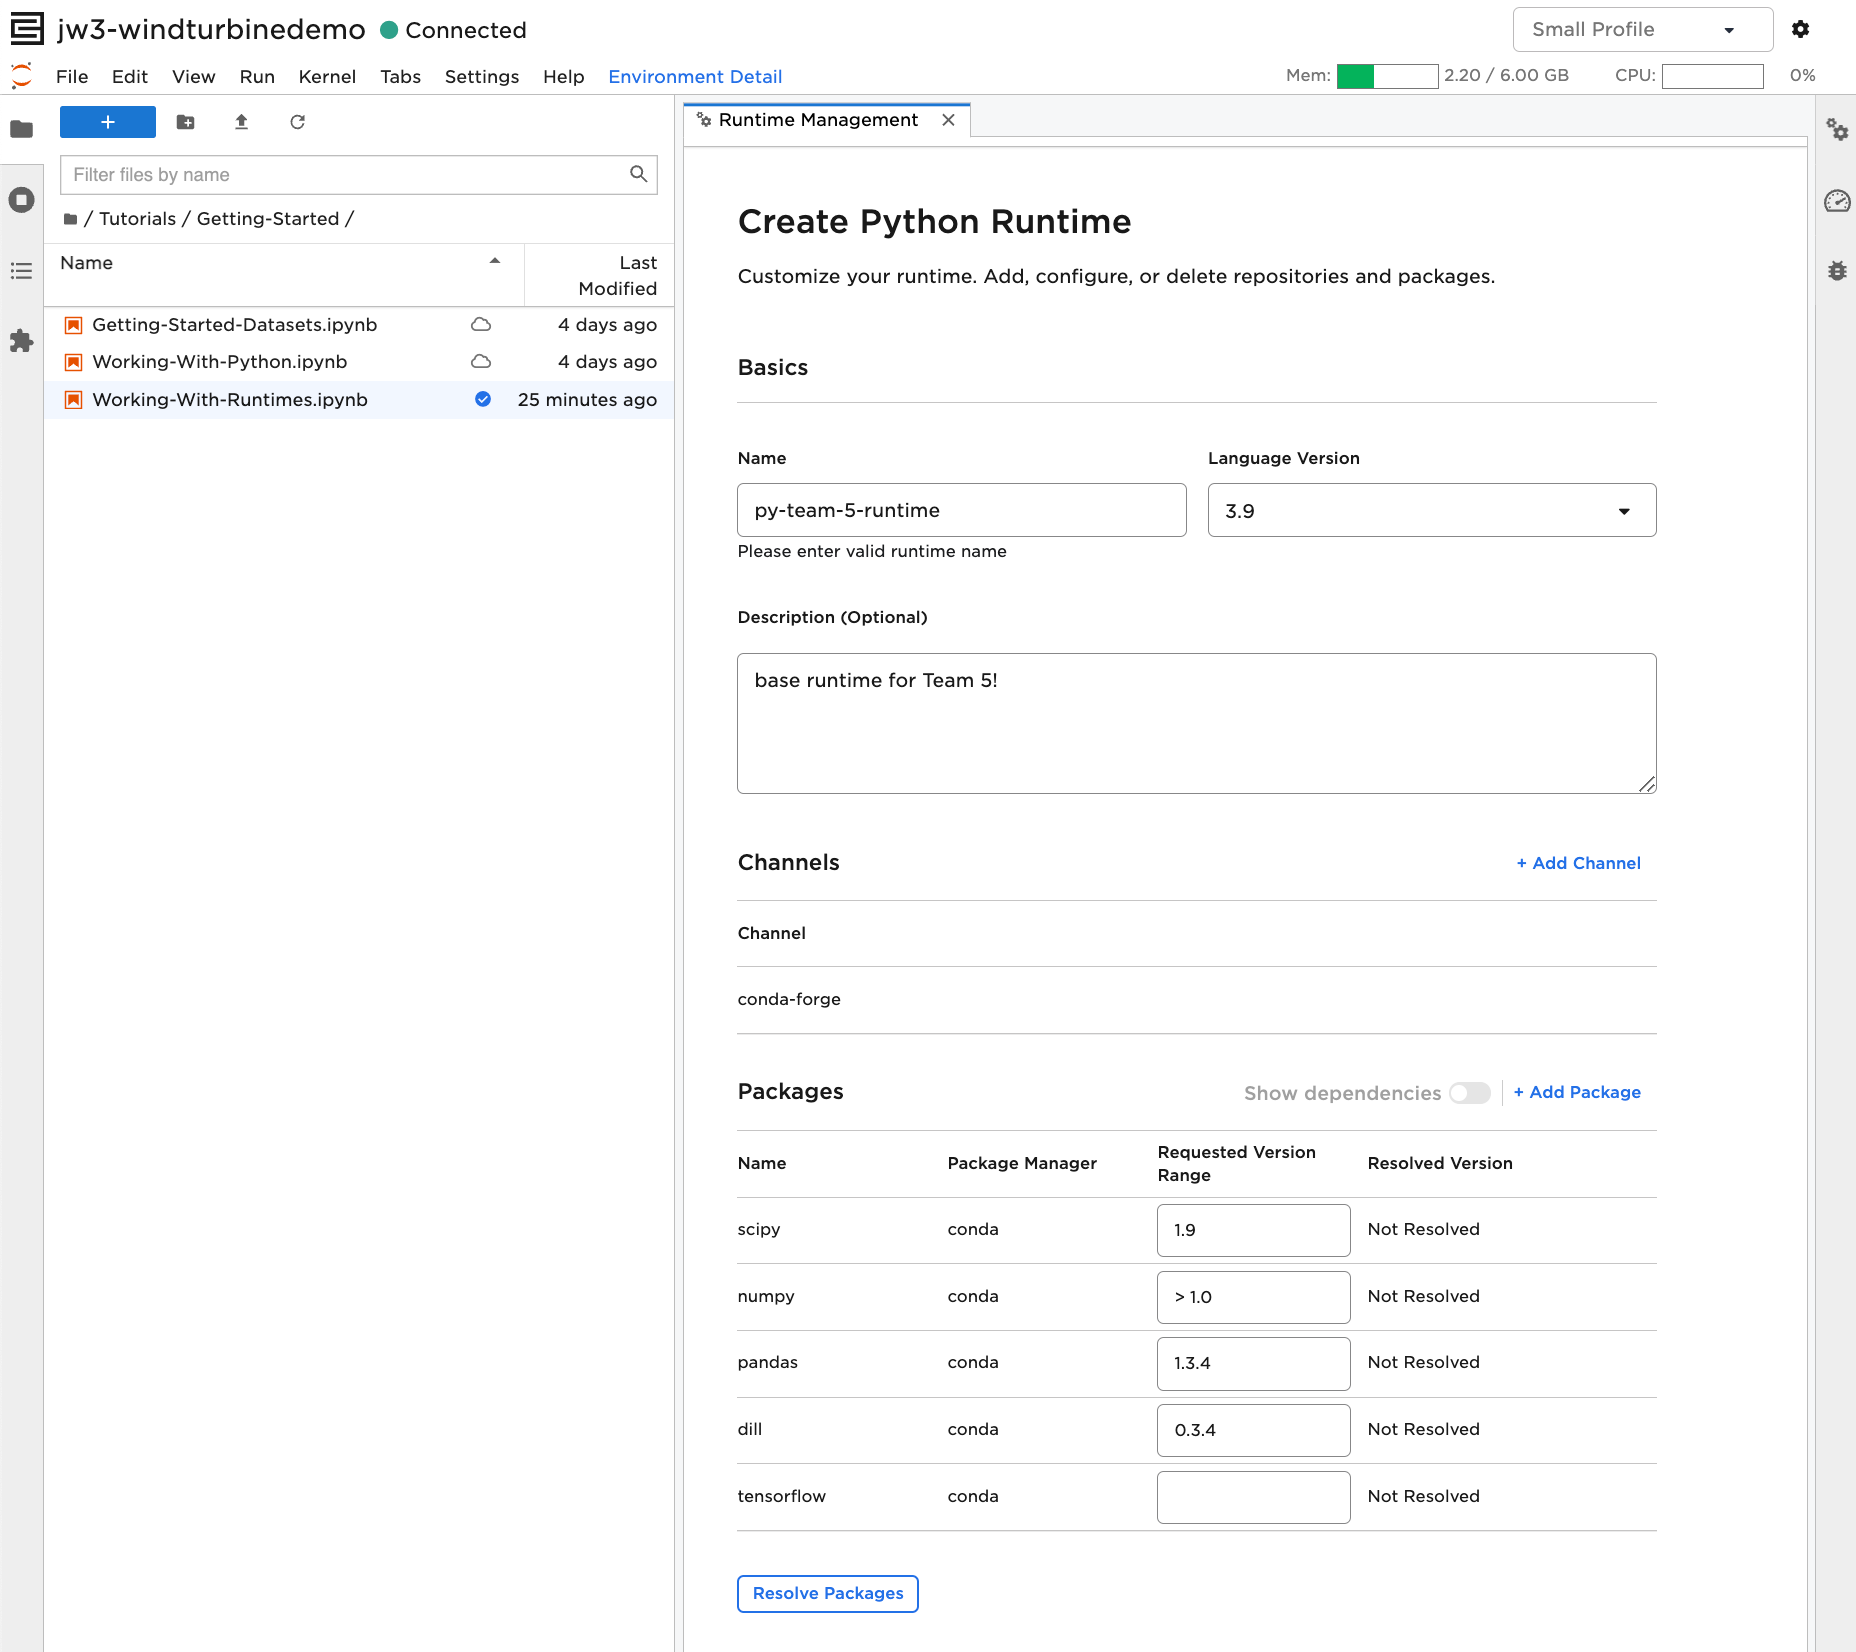
Select Resolve Packages to enable the system to identify the most suitable combination of library versions.
Install a runtime and use it in a notebook
Existing notebooks open with their previously installed runtime automatically selected, if the runtime is installed. If the runtime is not installed, the Select Kernel modal automatically appears.
For new notebooks, you can choose to install and select a runtime for your notebook from any pre-packaged or custom runtime.
Open a notebook and select the kernel selector.
Search by library or runtime name, then select Install on the appropriate option.
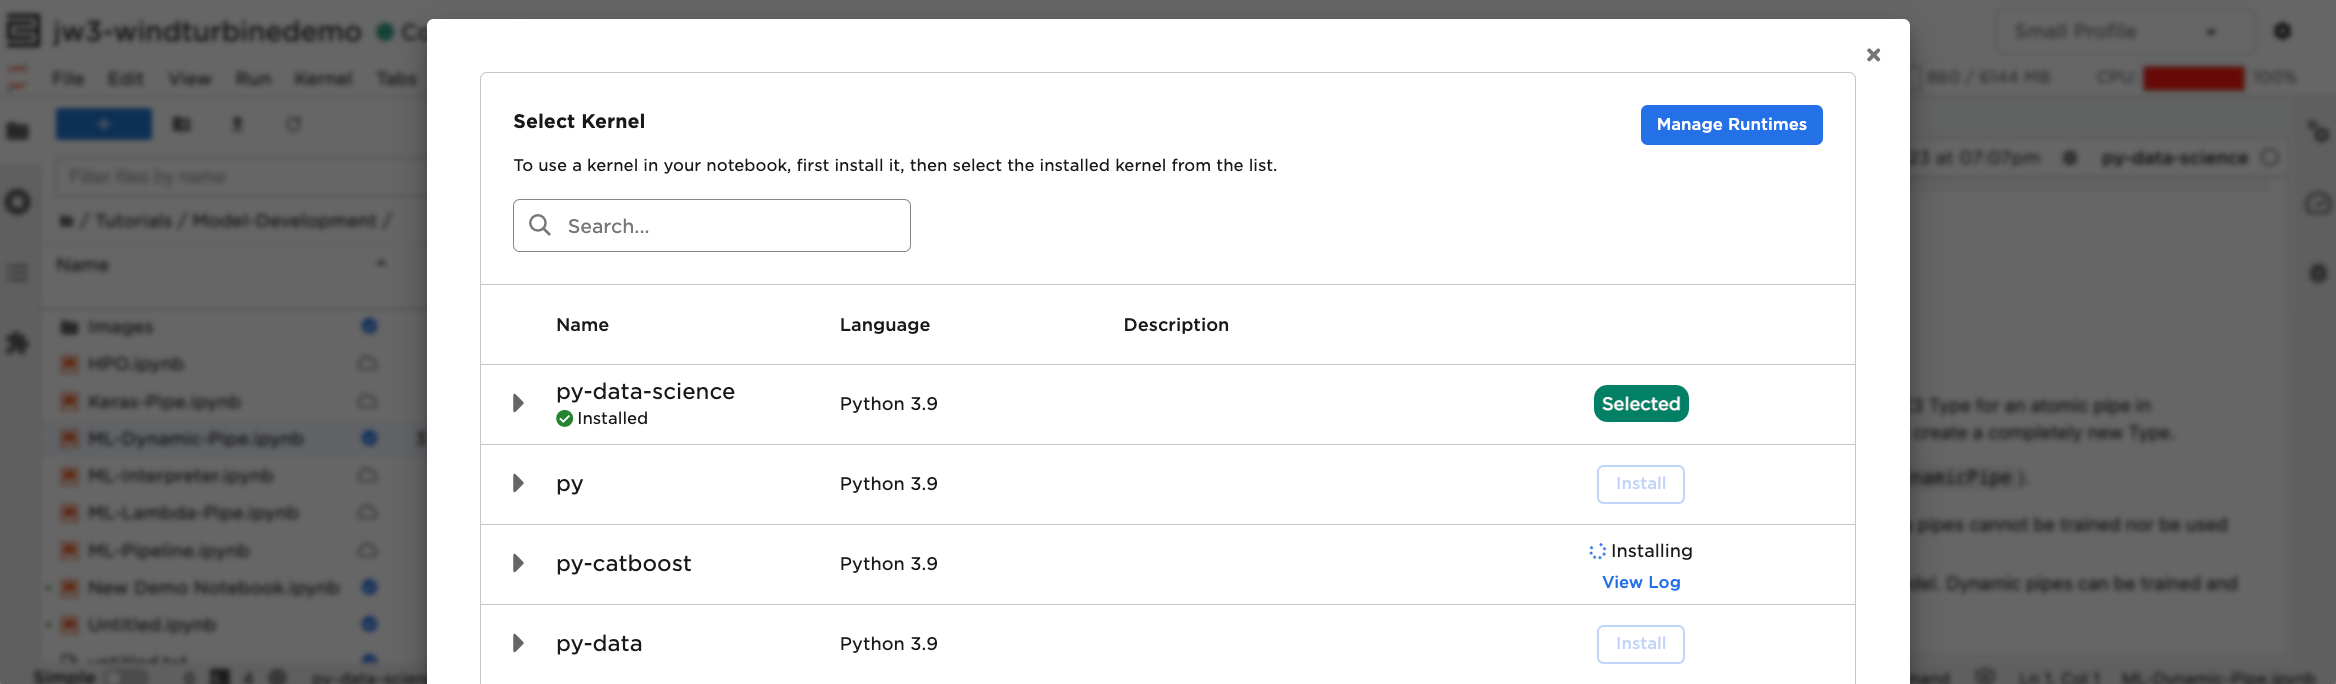
Choose Select on any installed runtime to use it as a kernel in your notebook.
Create and install runtimes using APIs
See the Work with Python SKD tutorial notebook for detailed examples on creating runtimes using the C3 AI Python SDK.
Access JupyterLab tutorial notebooks
You can access interactive tutorials covering the latest best practices along the data science lifecycle, from data access, visualization, feature engineering, model development, model deployment, and more.
To get the latest tutorial notebooks, add tutorials to your list of dependencies in {packageName}.c3pkg.json. For more information on getting started, see Get Started with a Data Science Development Environment.
Debug a managed JupyterHub instance
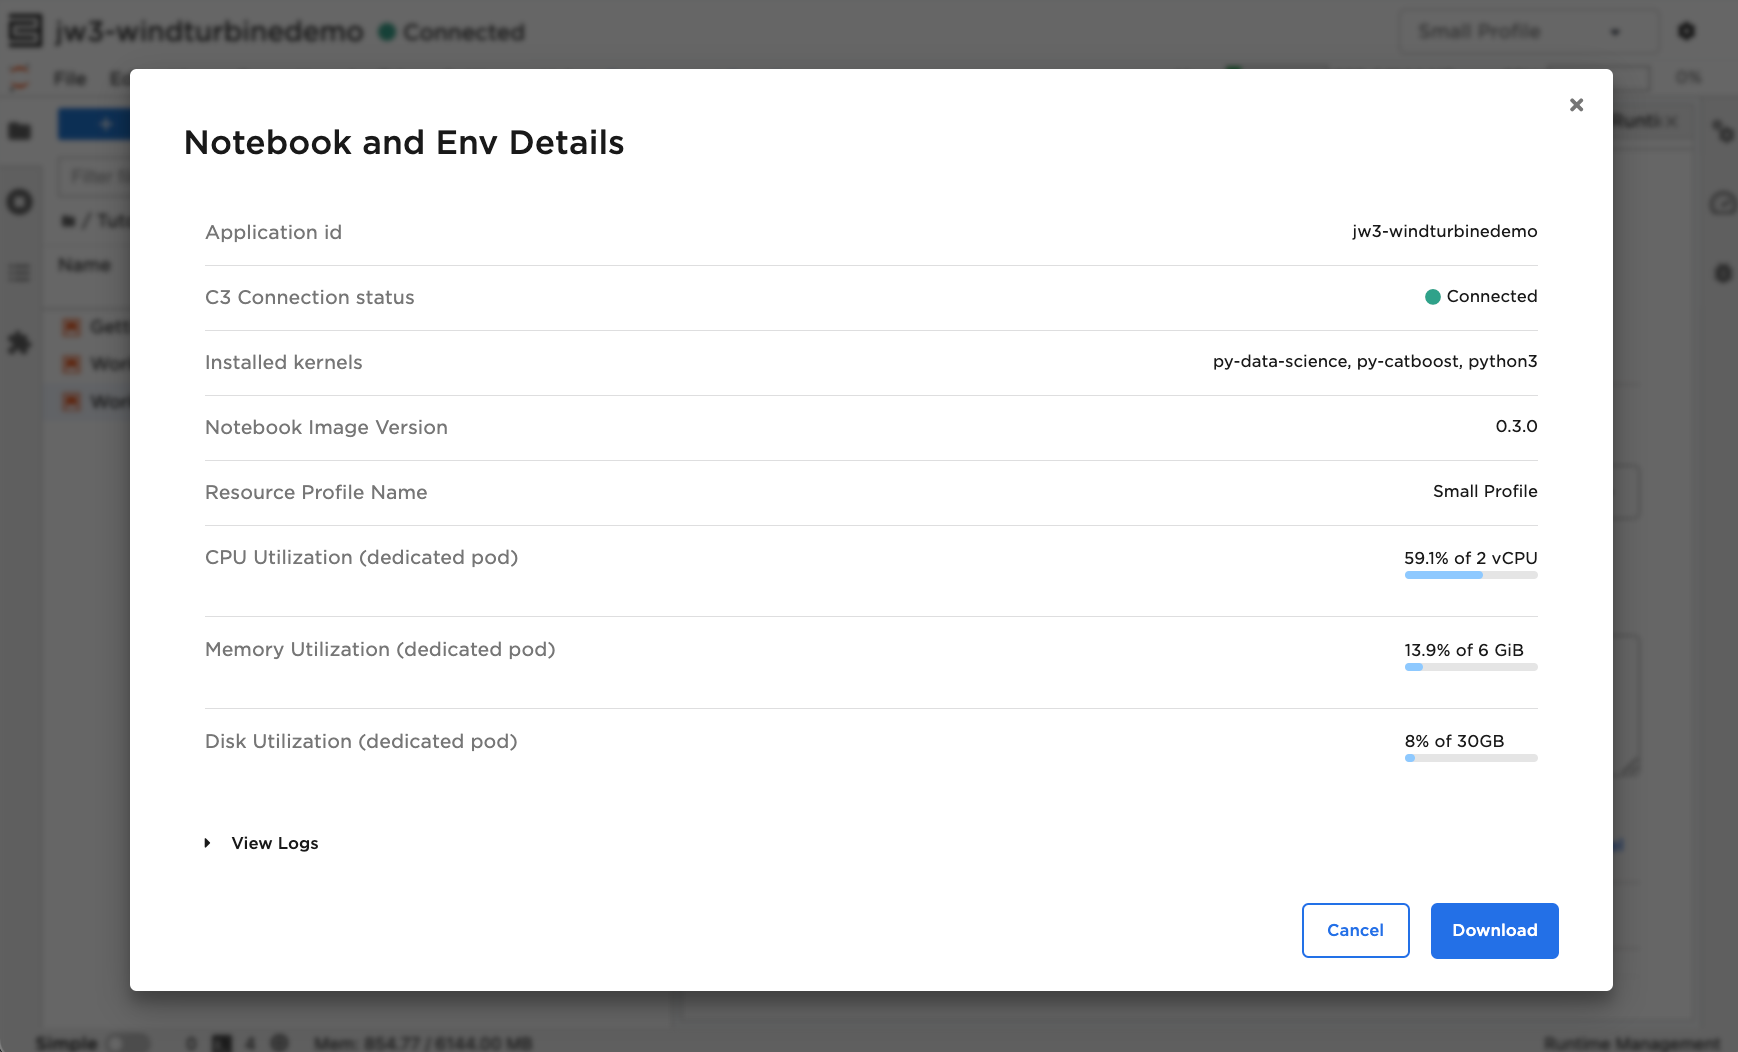
View your managed JupyterLab instance configuration, resources, and logs in one place, or download it all as a .zip file to help your Ops team triage any issue you might be facing.
To open the JupyterLab environment details modal, do the following:
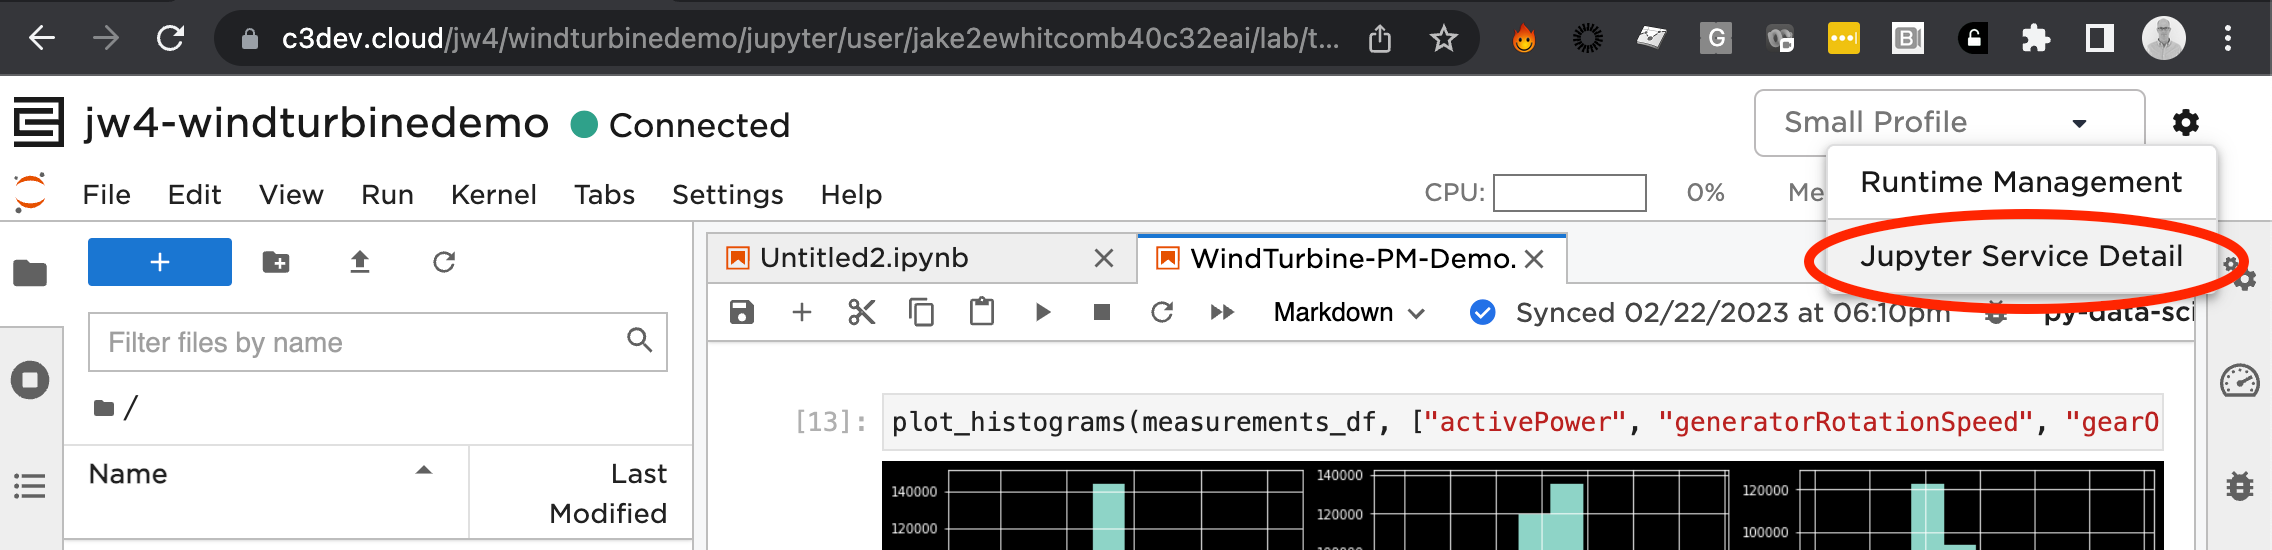
Select the gear icon, then select Jupyter Service Detail.
Select View Logs or select Download to download the report.
Debug JupyterHub after an application upgrade
After an upgrade, Python SDK connections become invalid. Restart your JupyterLab session after upgrades:
Run
C3.JupyterHub.stop()from the console.Open Jupyter from the application studio.
Set custom JupyterHub idle time
C3 AI Jupyter service automatically stops after a while to save resources. For longer working sessions, you may want to specify a longer idle time before your Jupyter service stops.
To do this, your application admin can change the configuration on Jupyter timeout and the interval of checking idle kernel.
JupyterHub.config().setConfigValue('jupyterSingleUserCullInterval', time_in_seconds)
JupyterHub.config().setConfigValue('jupyterCustomC3KernelIdleTimeout', time_in_seconds)